Go to the end of the article to find new, easy solution on how to solve WordPress Request FTP Credentials problem (Updated on 6.12.2019).
You decided to manually install wordpress (latest version) and just when everything seems to have gone according to plan, you realize that despite being able to log in to your wordpress admin area, you can not download or even update any plugins or themes because you are required FTP credentials to perform these tasks every single time. Continue reading the entire article because you will find out that there is another method besides the FTP credentials.
STEP 1
Please Support My work by Making a Donation.
STEP 2
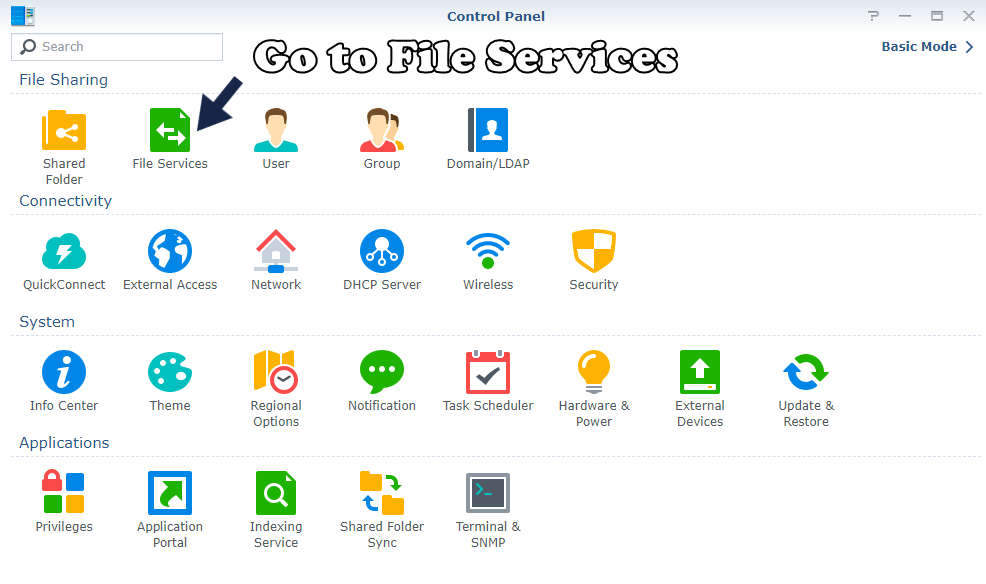
Go to Control Panel / File Services.
STEP 3
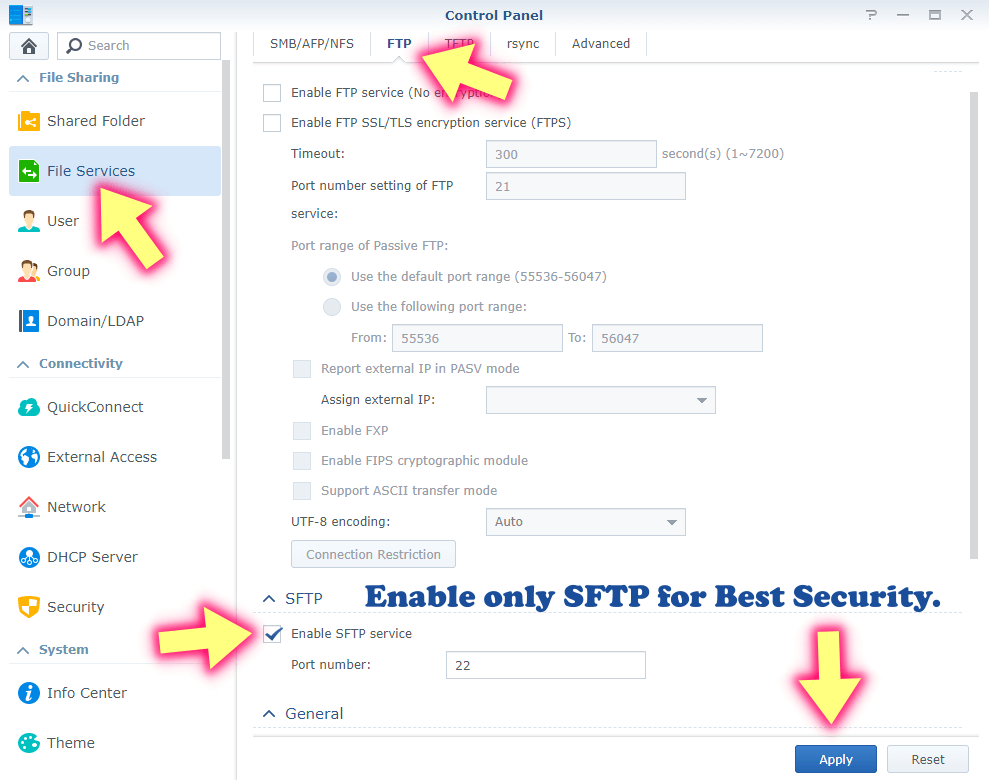
Go to File Services and Enable SFTP service on port 22. Follow the instructions in the image below.
STEP 4
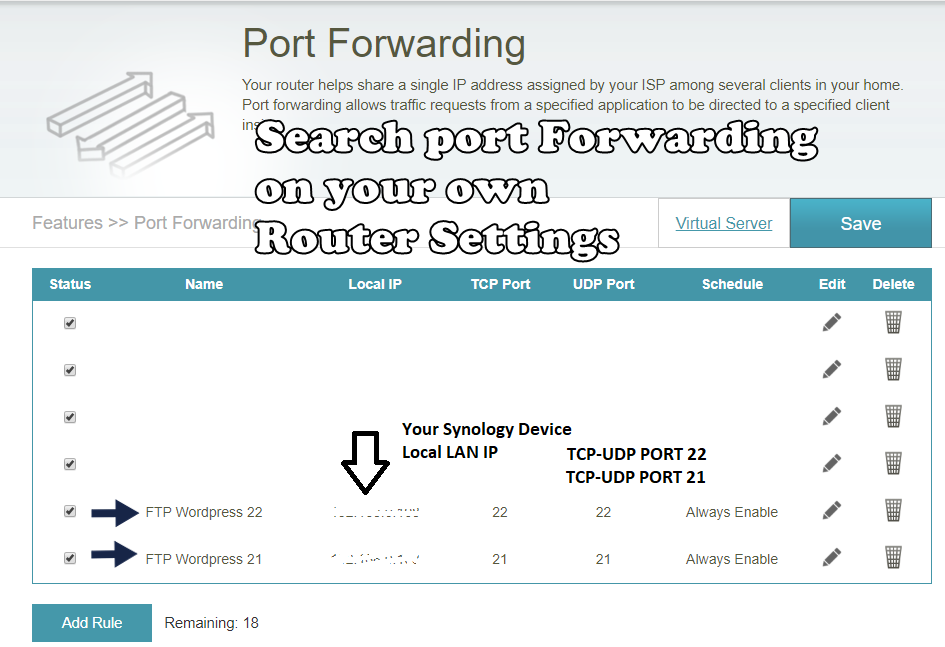
Most people forget to activate port forwarding in their router’s settings. If the ports that point to your synology device are not opened, all the services you have activated on those specific ports will not work. This is a step overlooked by many but essential for the perfect functioning of FTP. All you need to do is give your synology device permissions on the ftp ports, both TCP-UDP, both to port 21 and port 22. Follow the instructions in the image below and remember that each router has a different graphic than the one presented in this image.
STEP 5
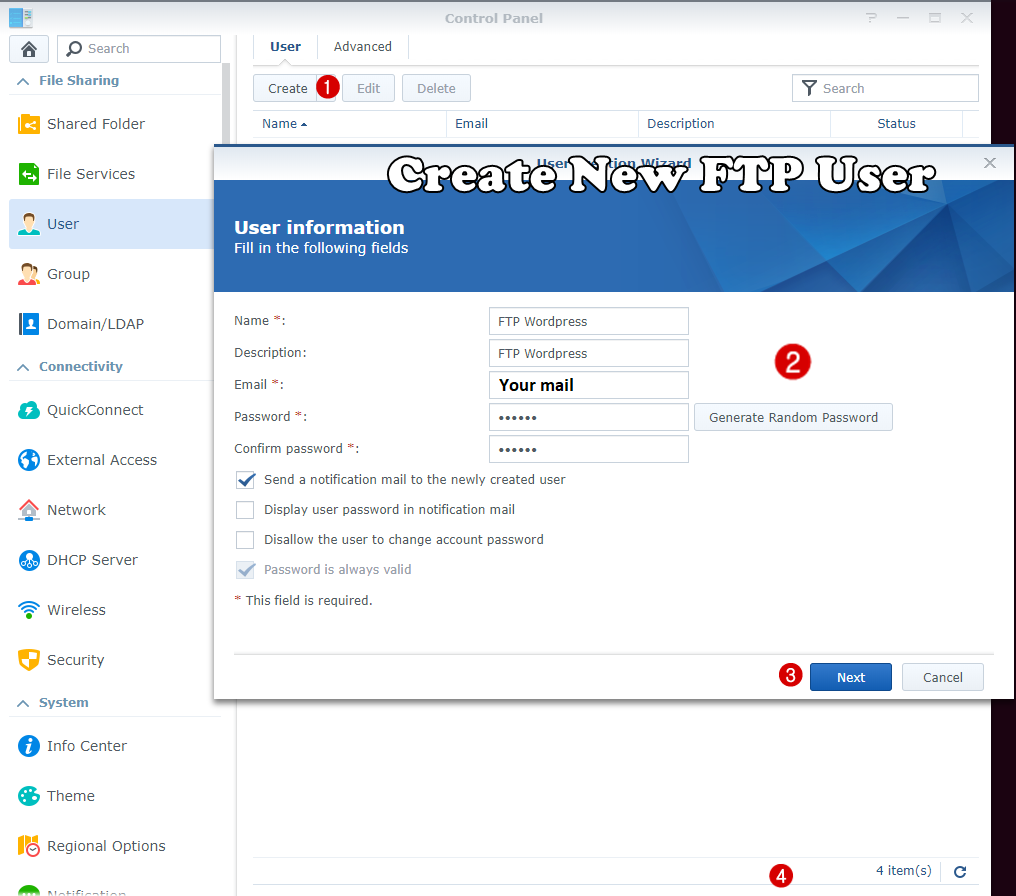
Click on Create. Add Name, Description, your Email and Password. Follow the instructions in the image below.
STEP 6
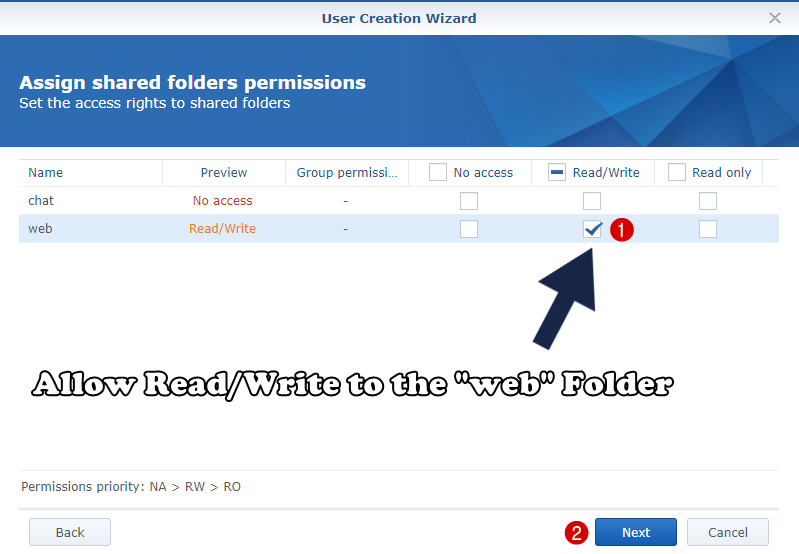
Set web folder permission to Read/Write. Follow the instructions in the image below.
STEP 7
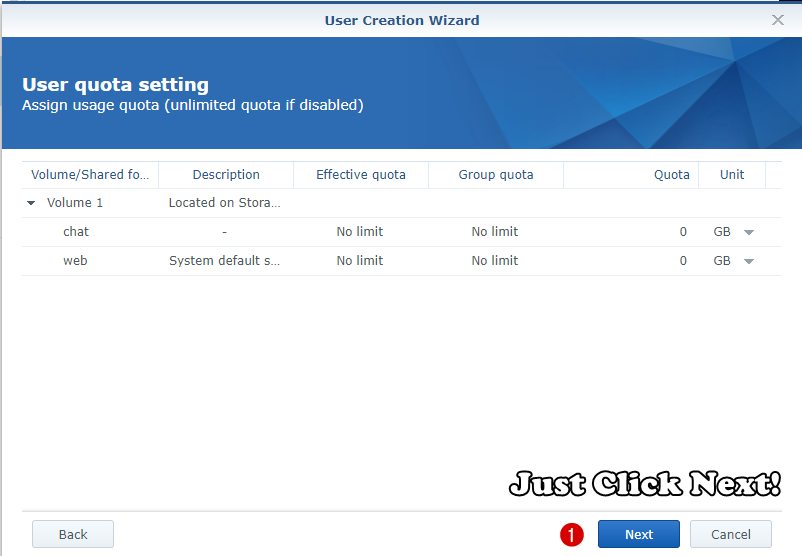
Now leave everything like that and click Next. Follow the instructions in the image below.
STEP 8
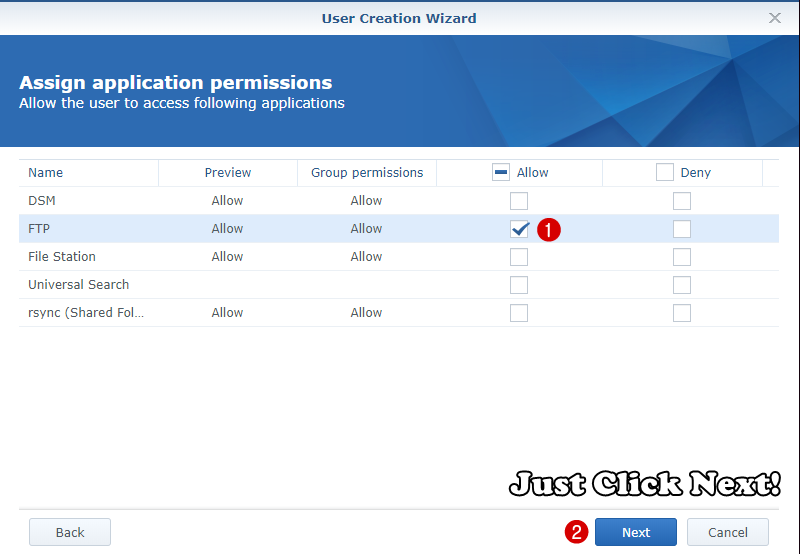
Check Allow FTP. Follow the instructions in the image below.
STEP 9
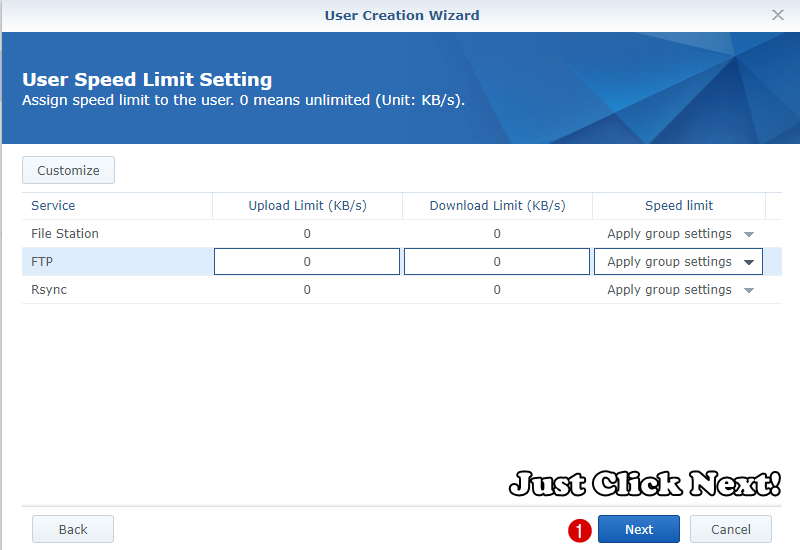
Now leave everything like that and click Next. Follow the instructions in the image below.
STEP 10
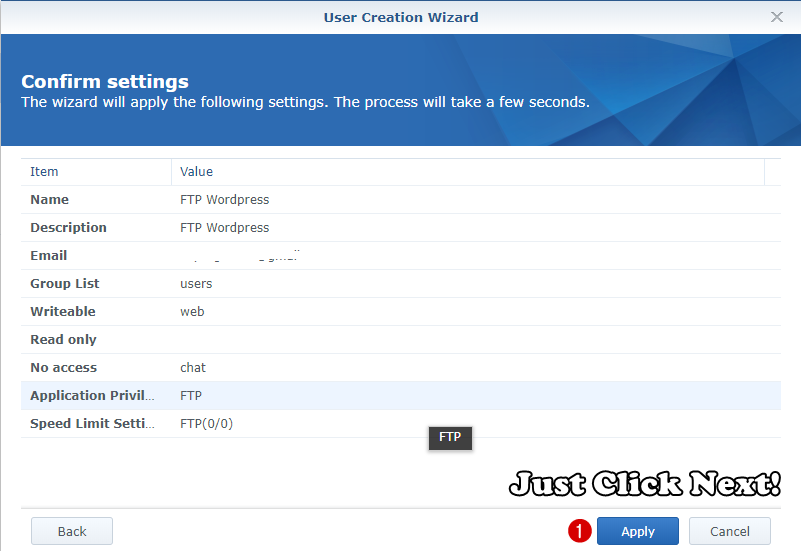
Now leave everything like that and click Apply. Follow the instructions in the image below.
STEP 11
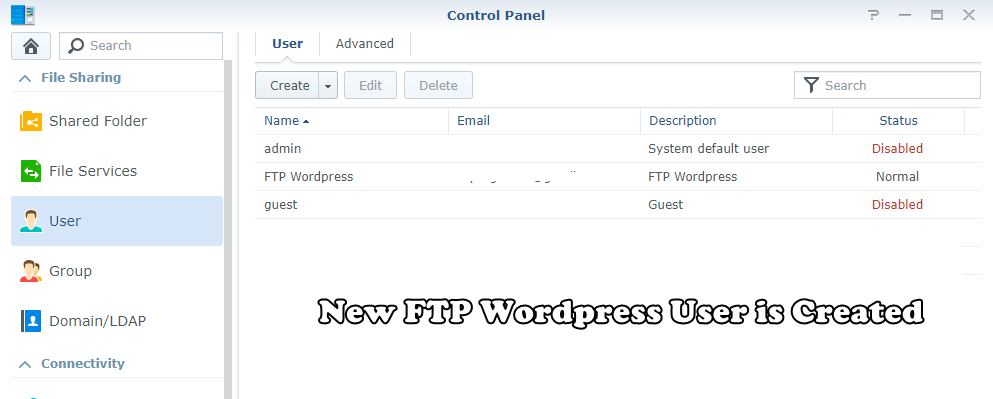
The FTP user has been created.
STEP 12
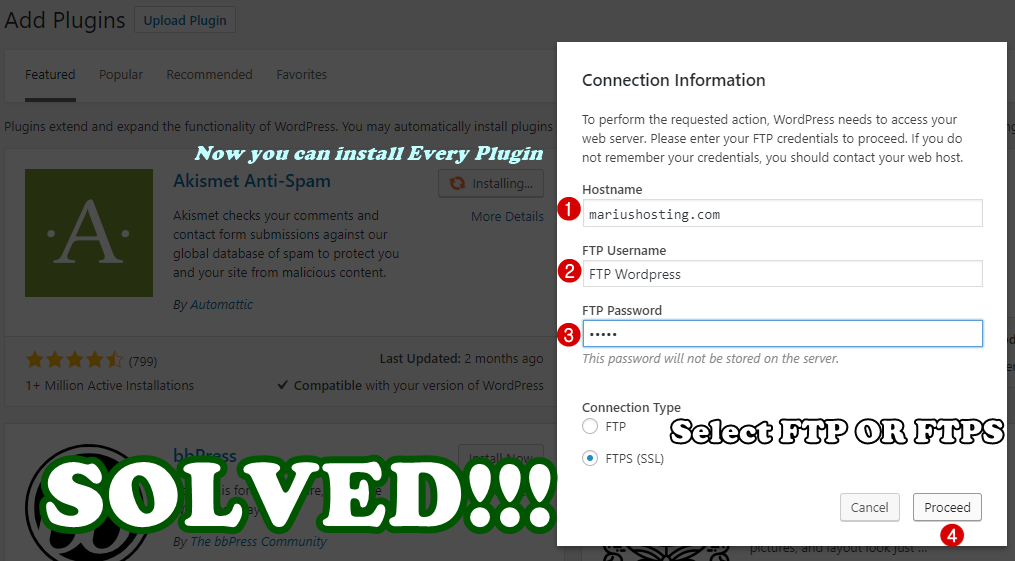
Now try to download wordpress plugins by entering the FTP user credentials you have created.
If you want to avoid inserting the FTP credentials every time you want to download/update plugins or themes, go to File Station – Web – WordPress – wp-config.php
Download the wp-config.php file, edit it in notepad and, at the end of the file, insert this code:
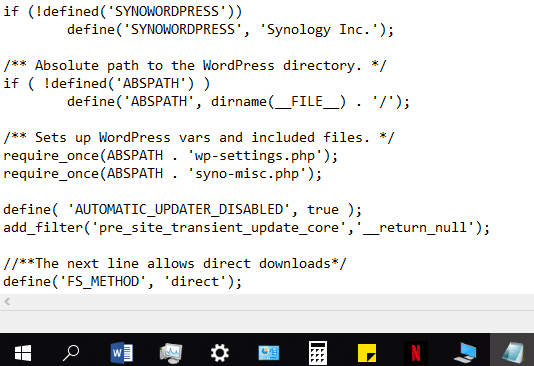
//**The next line allows direct downloads*/
define('FS_METHOD', 'direct');
It should look like this when you save the file:
After you do this, upload the file to File Station – Web – WordPress – and overwrite the existing wp-config.php file with the new one. Now you can try to install some plugins and no FTP credentials will be requested.
After a lot of searching, I hope that, here, you have found the solution to the WordPress problem that did not allow you to download plugins or themes because of a matter of permissions and credentials. If you have other problems or questions about the FTP operation, you can leave a comment below.
UPDATE 6.12.2019
Perform only these steps described below to solve the WordPress Request FTP Credentials problem.
- Create New FTP User
- Go to Control Panel / File Services and Enable only SFTP service on port 22.
- Port-forwarding port 22 and port 21 on your router.
- Above you can see screenshot about this step. If you want to avoid inserting the FTP credentials every time you want to download/update plugins or themes, go to File Station – Web – Your WordPress – wp-config.php
Download the wp-config.php file, edit it in notepad and, at the end of the file, insert this code://**The next line allows direct downloads*/ define('FS_METHOD', 'direct'); - Go to File Station / Web / Right Click on your WordPress Folder / Click on Properties / Permission / Create / Add Your FTP user previously created and give All Read and Write permission / Check Apply to this folder, sub-folders and files then click OK.
This post was updated on Monday / October 5th, 2020 at 7:30 AM