Did you know it is totally unnecessary to have all your computers, laptops or desktops, tablets or mobile phones ask your router to resolve domain names to an external DNS server whenever you click a link or enter a domain name? Why not have something that sits on your local network and forwards unknown DNS requests and then saves the cache so the next time those requests would take ≈ 1 ms instead of ≈ 50 ms (or even more if you use your ISP’s DNS service)? Read below this simple step by step guide. Mandatory Requirements: STATIC IP provided by your ISP provider. What is ISP? An Internet Service Provider is an organization that provides services for accessing, using, or participating in the Internet.
STEP 1
Please Support My work by Making a Donation.
STEP 2
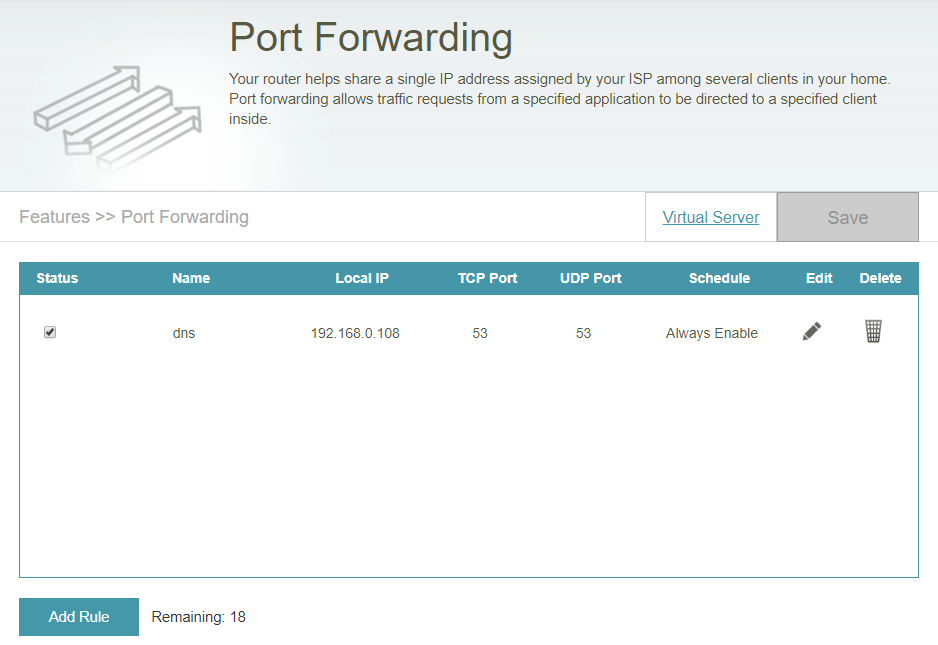
Most people forget to activate port forwarding in their router settings. If the ports that point to your Synology device are not opened, all the services you have activated on those specific ports will not work. This is a step overlooked by many but essential for the perfect functioning of a DNS Server. All you need to do is give your Synology device permission on port 53, both TCP and UDP. Follow the instructions in the image below and remember that each router has a different design than the one presented in this image below.
STEP 3
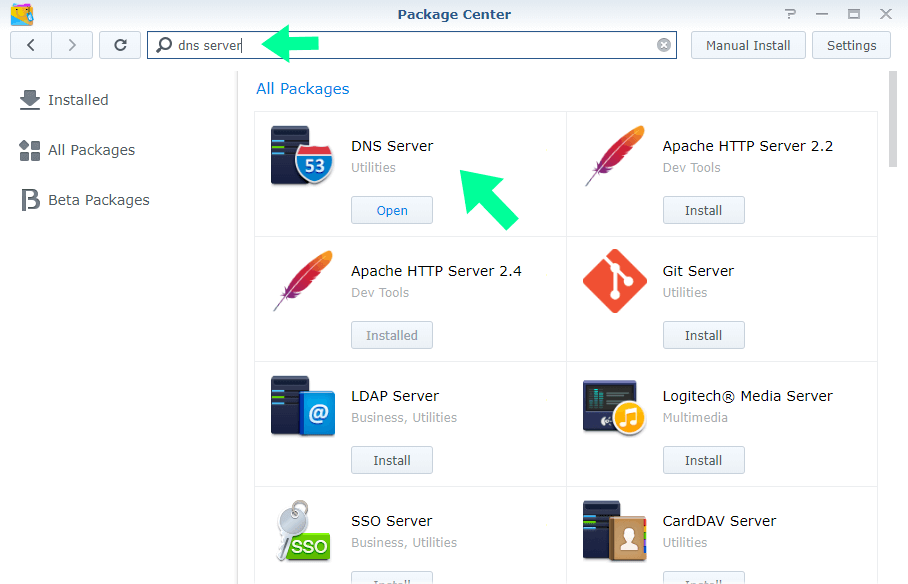
Go to Synology Package Center and install a package named “DNS server”.
STEP 4
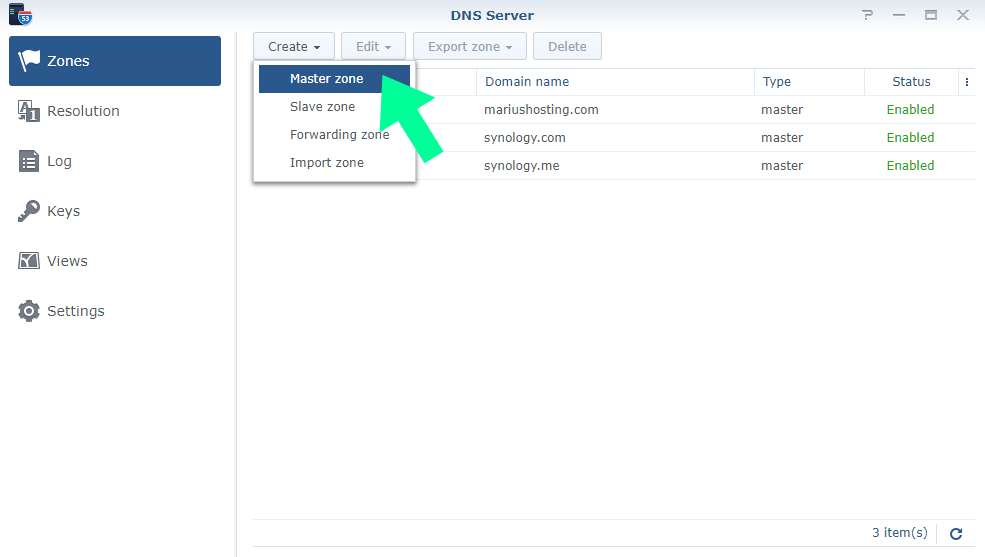
Open DNS Server and, at the top, click “Create” then “Master zone”.
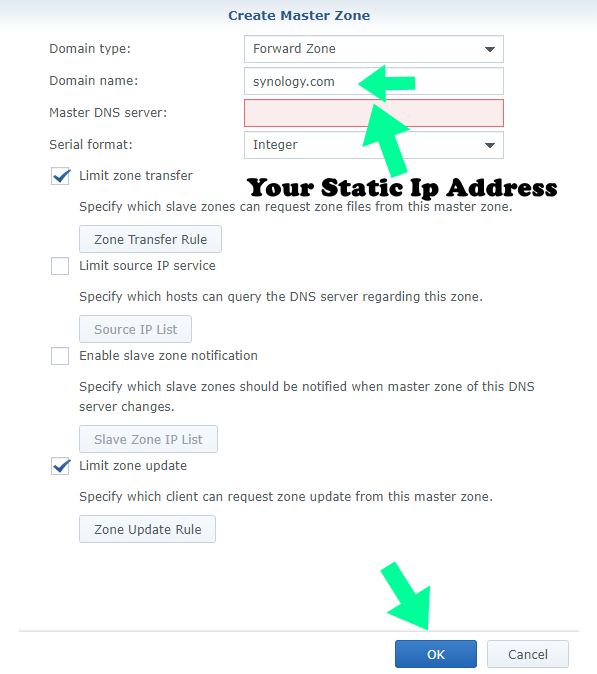
STEP 5
Add domain name synology.com and, on the Master DNS server, add your Static IP, then click OK. Follow the instructions in the image below.
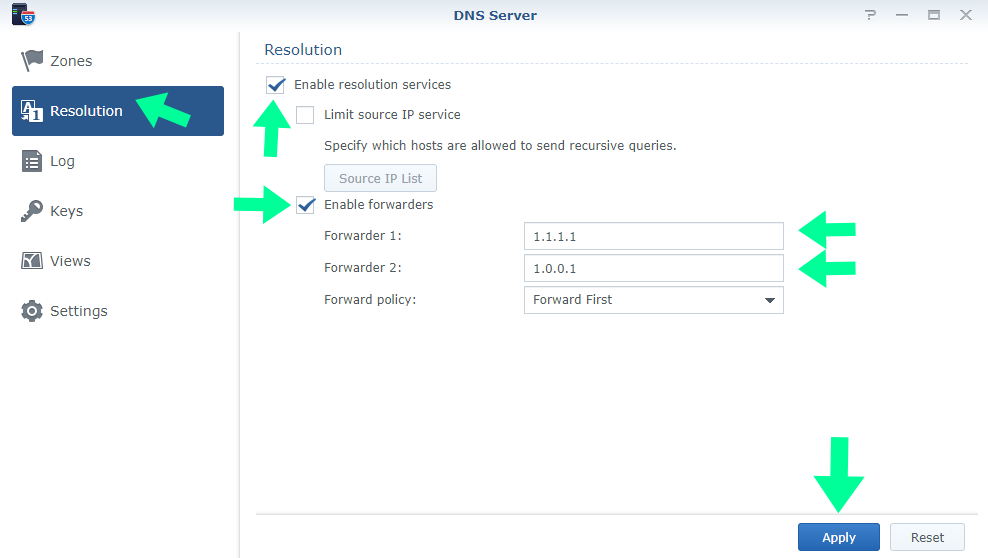
STEP 6
After that, go to Resolution. Enable resolution services and check Enable Forwarder 1 and Forwarder 2.
You can use Google DNS or CloudFlare. I find CloudFlare faster and more reliable compared to Google DNS. Follow the instructions in the image below.
You can also add your own domain name to the DNS server and make your WordPress website hosted on Synology Nas faster! That’s all there is to it. You now have a private DNS Server that will serve the requests locally. Not only is it faster, but it also has the added bonus that you can use the domain name for everything.
Note: Check firewall or port forwarding settings: DNS services require the use of TCP and UDP port 53. If your Synology NAS uses a firewall, this port must be opened. If the NAS connects to the Internet through a router, set up port forwarding rules and open TCP and UDP port 53.
Note: Obtain a fixed, public IP address: To set up a public DNS service, you need to acquire a fixed IP address for your Synology NAS. For more information, please contact your Internet service provider.
This post was updated on Friday / December 27th, 2019 at 8:17 AM