
Recently there has been a global Brute Force attack targeting Synology NAS devices. Fortunately, in just a few steps we can guarantee our Synology NAS is always safe, thanks to the powerful architectural structure of Linux Kernel that guarantees security. Synology strongly recommends all users check if the measures below are in place to secure their accounts.
STEP 1
Please Support My work by Making a Donation.
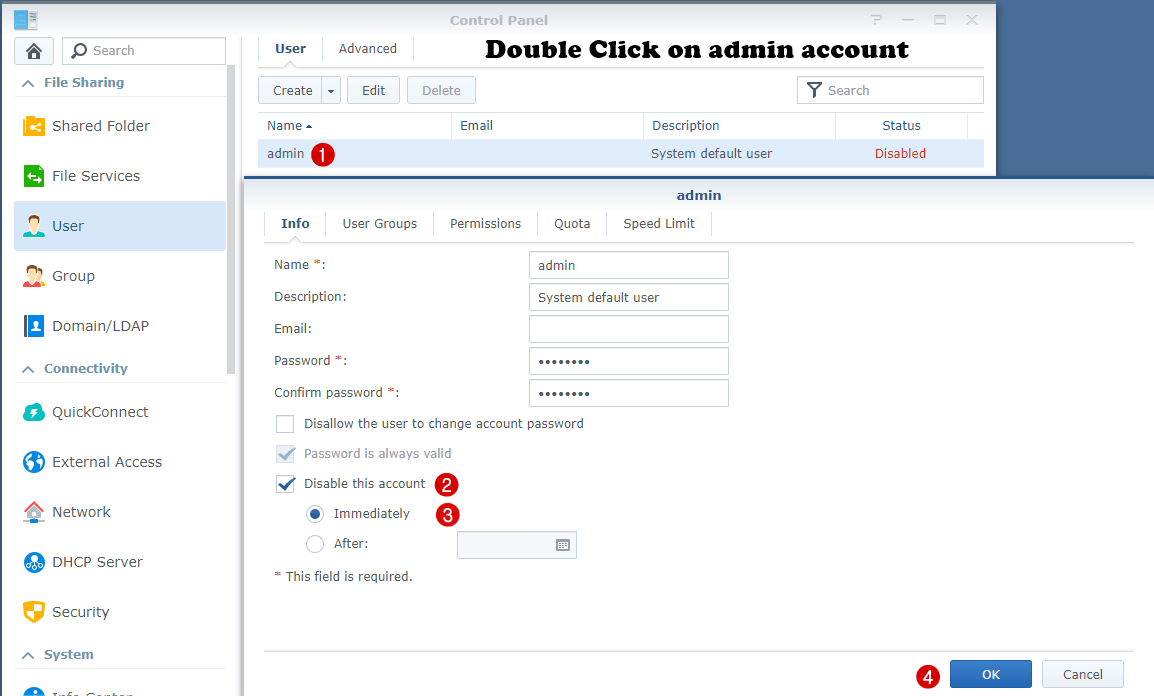
STEP 2 Create a new account in administrator group and disable the system default “admin” account.
(Learn how to disable admin on Synology NAS following the screenshot below.)

STEP 3 Use a complex and strong password, and apply password strength rules to all users.
What is a complex password? A complex password uses different types of characters in unique ways to increase security. Passwords must meet or exceed these criteria:
- Changed at least every 180 days.
- Between 8 and 128 characters long.
- Use at least 3 of the following types of characters: (a) uppercase letters, (b) lowercase letters, (c) numbers, and/or (d) special characters.
- Password must be unique and not be re-used.
STEP 4 Enable 2-step verification to add an extra security layer to your account.
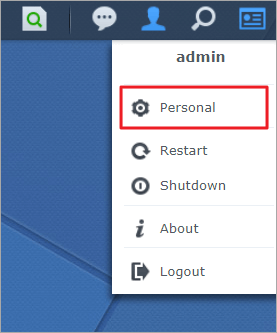
- In the Options menu, click Personal.
- Tick the Enable 2-step verification box to launch the 2-step verification setup wizard. Click Next.
- Enter an email address. Emergency verification codes can be sent to this email address in case your mobile device is lost. Click Next.
- On your mobile device, download and install an authenticator app, such as Google Authenticator (Android/iPhone/BlackBerry) or Authenticator (Windows Phone).
- Open your authenticator app and scan the QR code.
- Alternatively, you can click the link to manually enter a secret key. Click OK to close the window.
- Next, your authenticator app generates a 6-digit verification code. Enter this code into the wizard text field in order to confirm configurations are correct. If an error occurs, please make sure the system time of your mobile device is synchronized with the DSM system time. Also, verification codes are updated periodically, so make sure the code you enter has not expired. Click Next.
- Click Close to finish the setup.
- Once the setup wizard is finished, click OK to save settings.
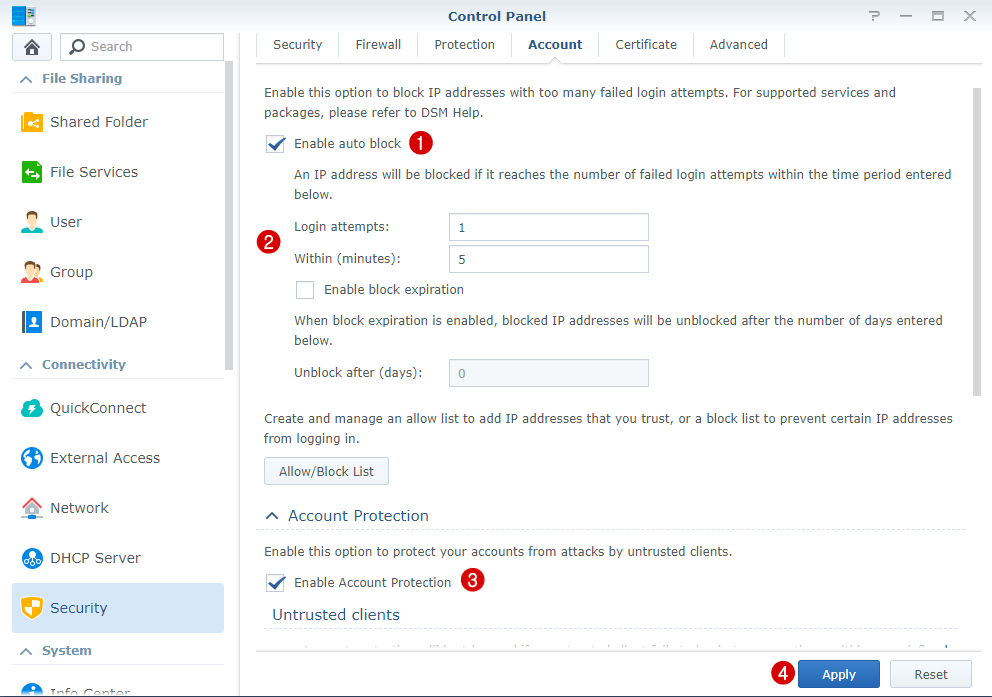
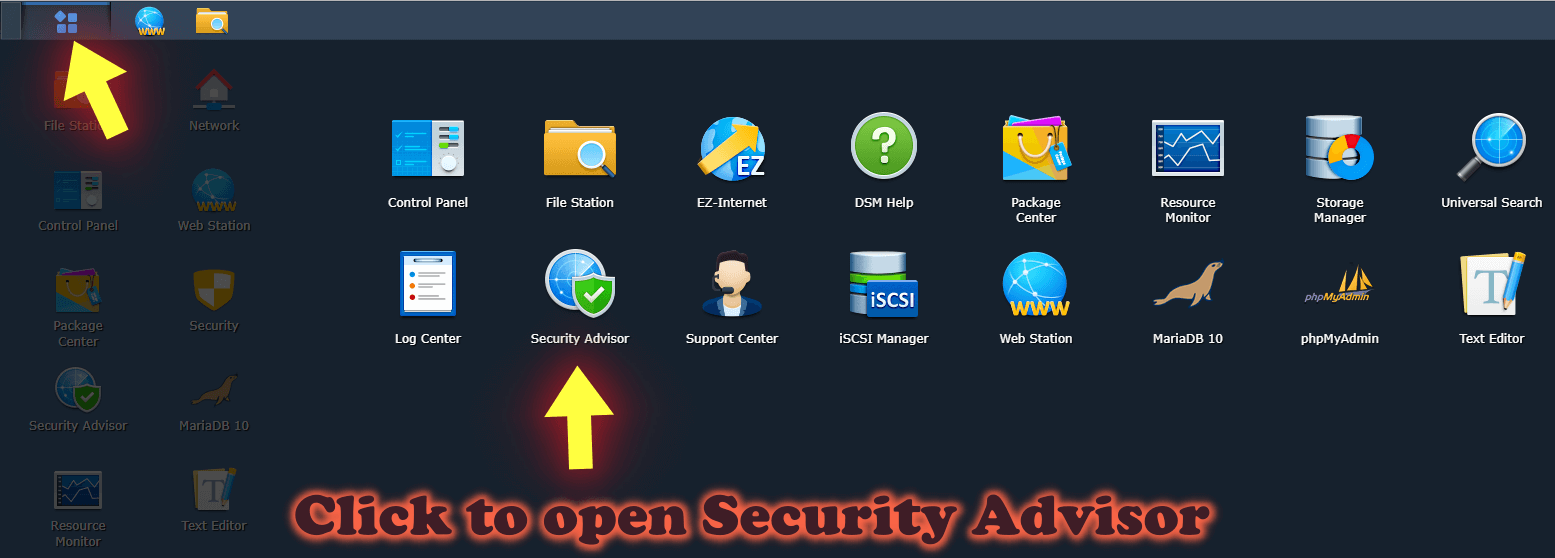
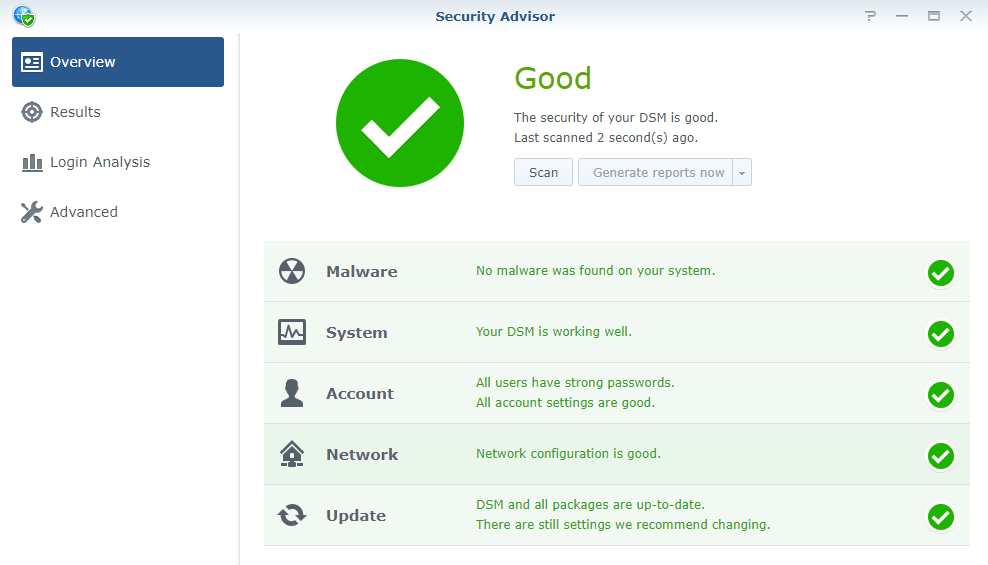
STEP 5 Enable Auto Block in Control Panel and ADD IP BLOCK LIST. After that, run Security Advisor and Scan your NAS to make sure there is no weak password in the system.
Where can I find the Security Advisor Application? Just follow the instructions in the image below.
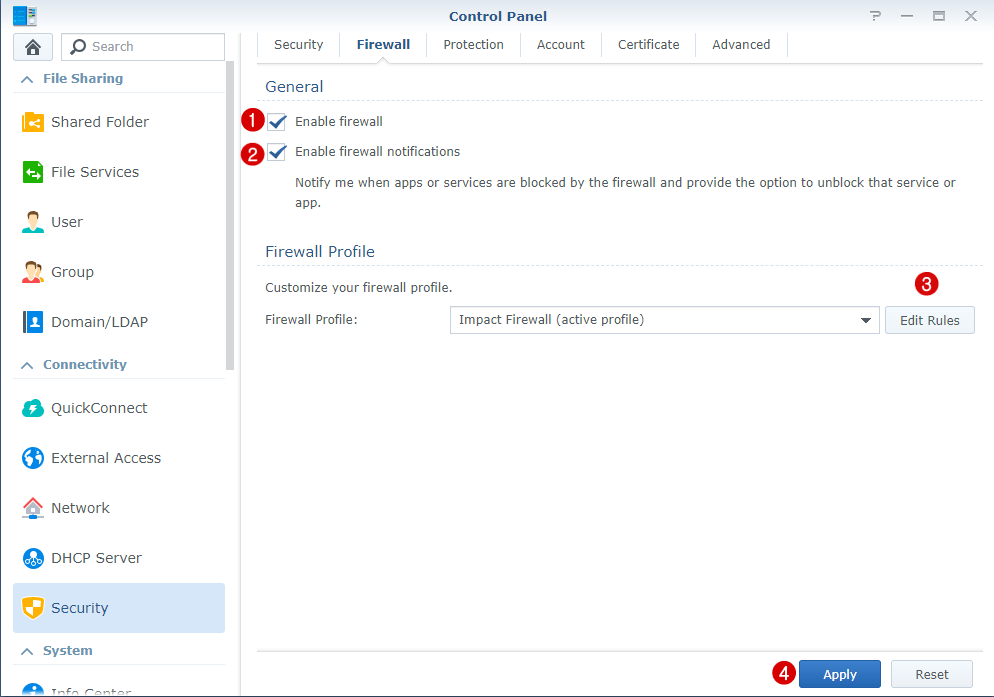
STEP 6 Enable Firewall in Control Panel, and only allow public ports for services that are necessary for you.
Learn how to correctly set up Synology Firewall GeoIP Blocking and trusted clients. You will find out the best Synology firewall settings for home users.
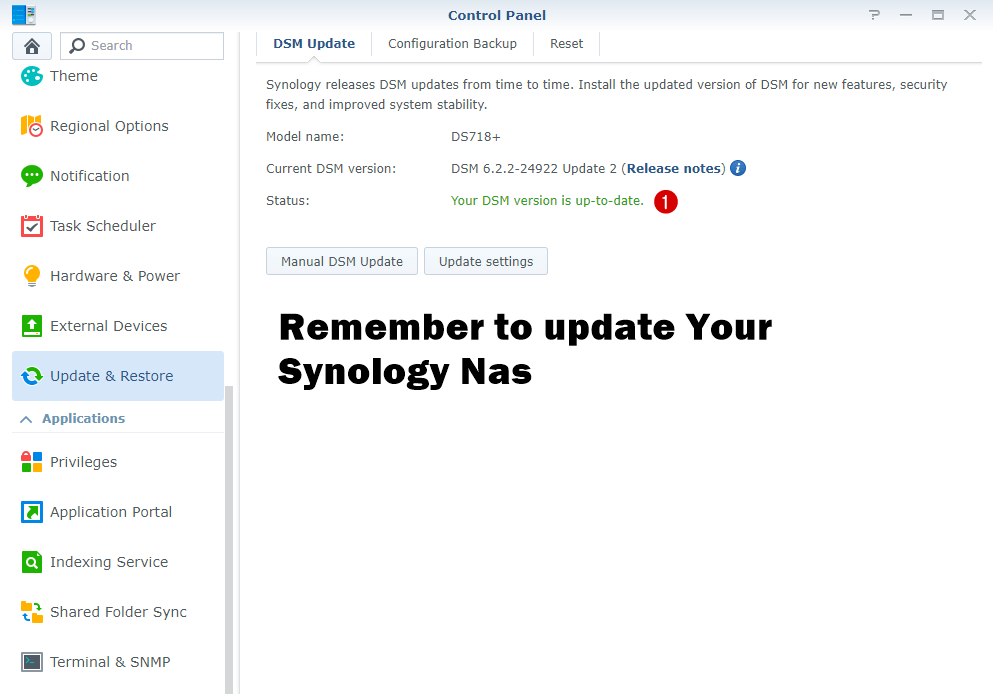
STEP 7 I also recommend you keep your DSM NAS up to date as well your application.
Remember to always install package updates that are sometimes released via the Package Center. Do not install dubious applications and do not open dubious emails from equally dubious recipients.
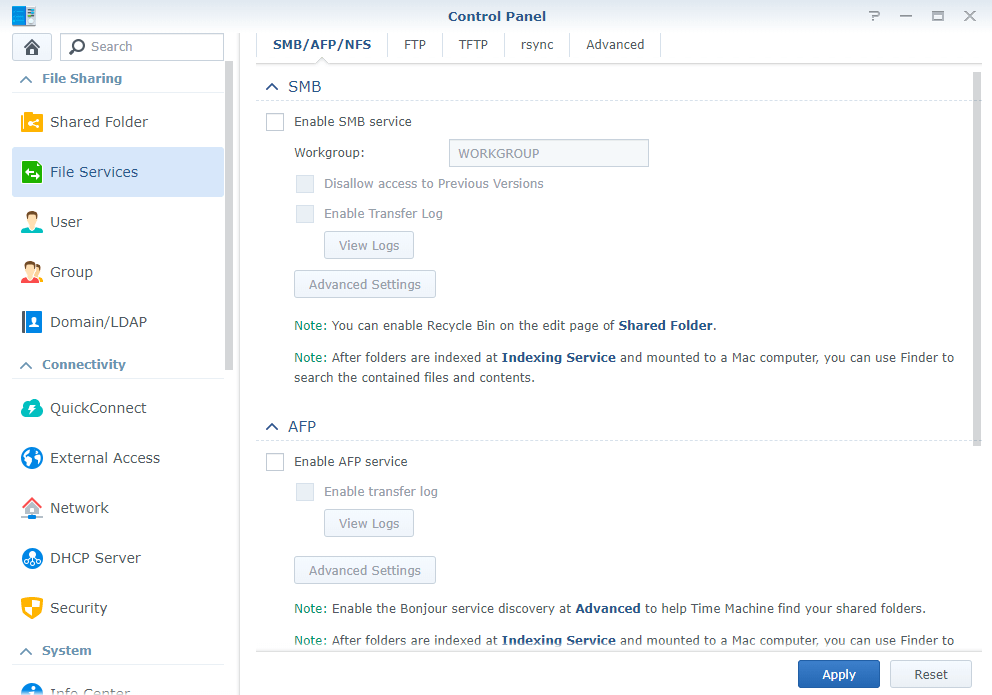
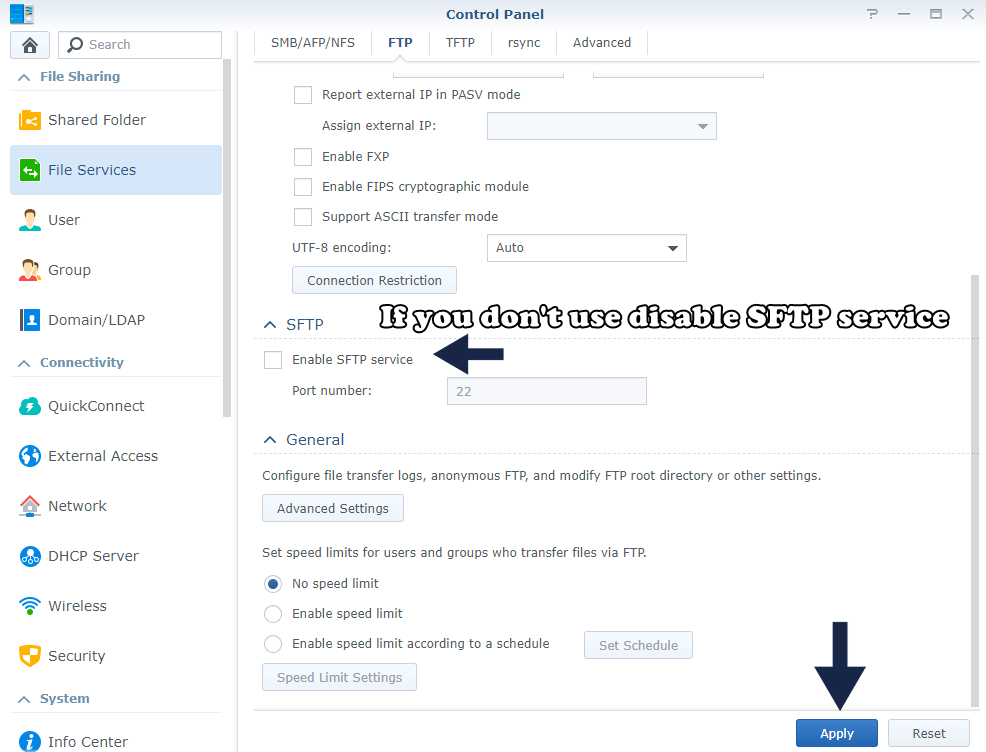
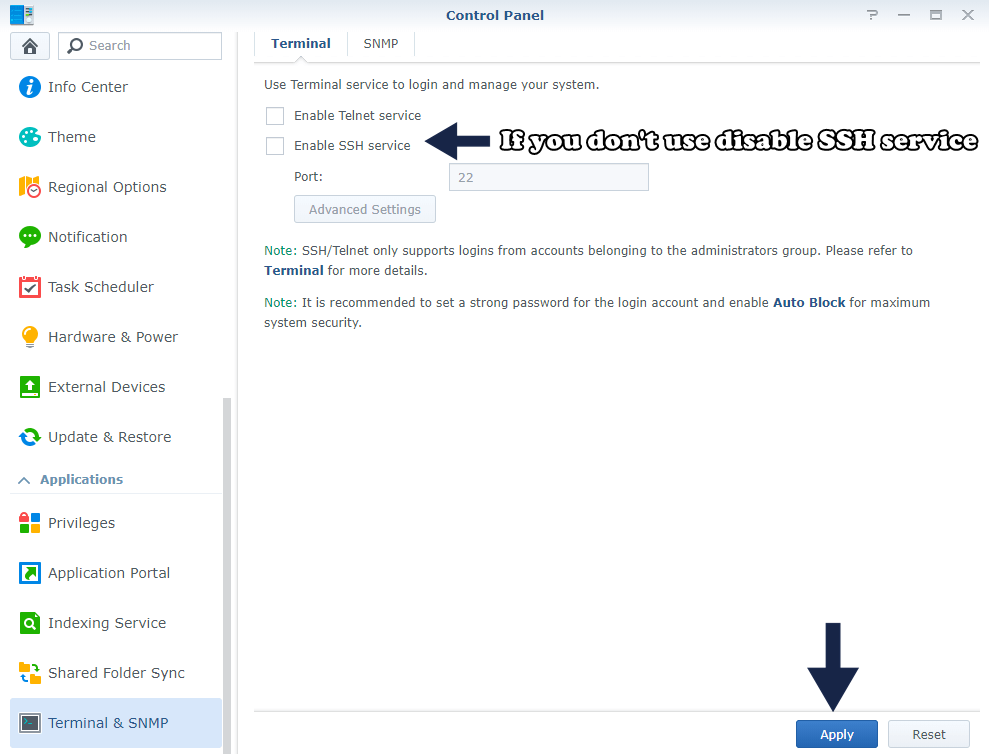
STEP 8 Deactivate all the services you don’t use. I personally don’t use the SMB service, AFP service, FTP, SFTP, SSH.
Follow the instructions in the image below to deactivate some services you don’t use.
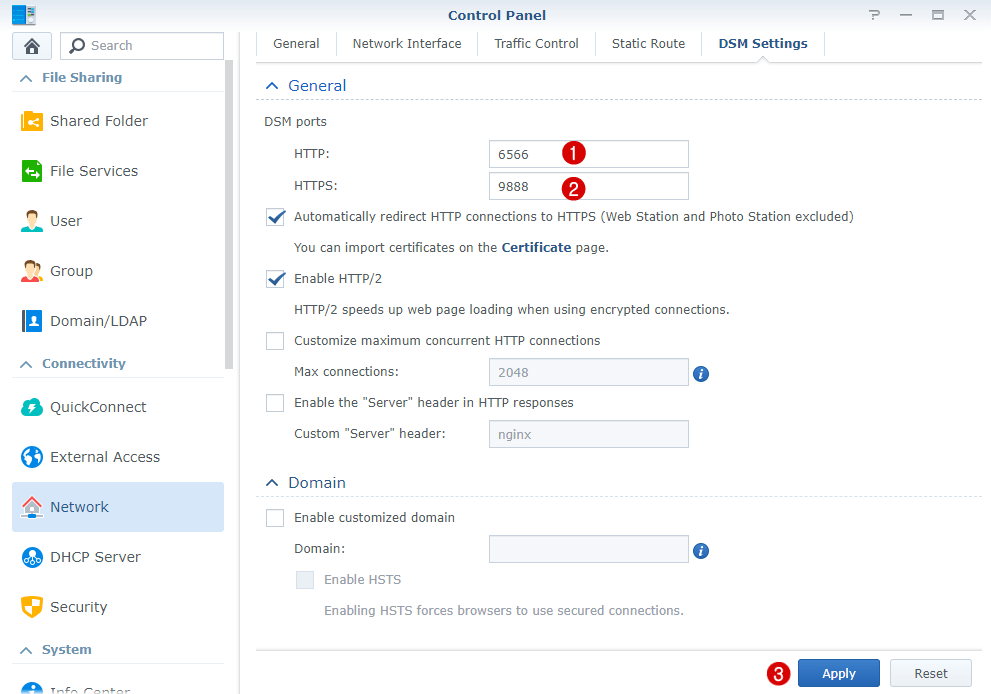
STEP 9 Change the default http (5000) and https (5001) ports of the DSM.
The port number must be between 1024 and 65535. Remember to port-forwarding new port on your Router settings. Follow the instructions in the screenshot below and read full step by step guide to change ports 5000 and 5001. Not really recommend.
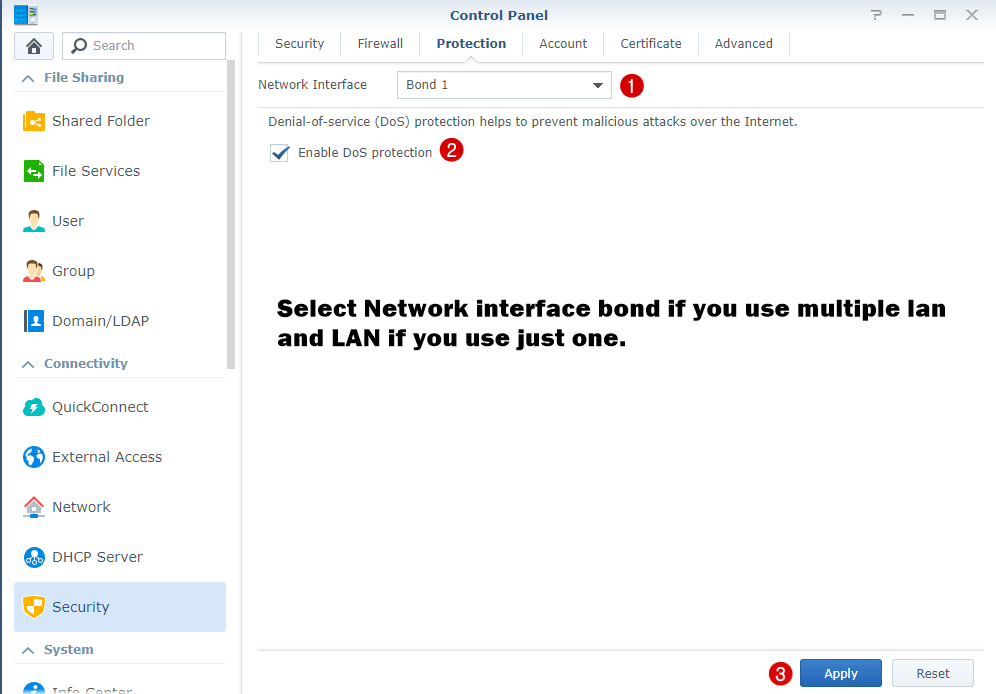
STEP 10 Enable Dos Protection.
Follow the instructions in the image below. Also read How to Enable DoS Protection on Synology NAS.
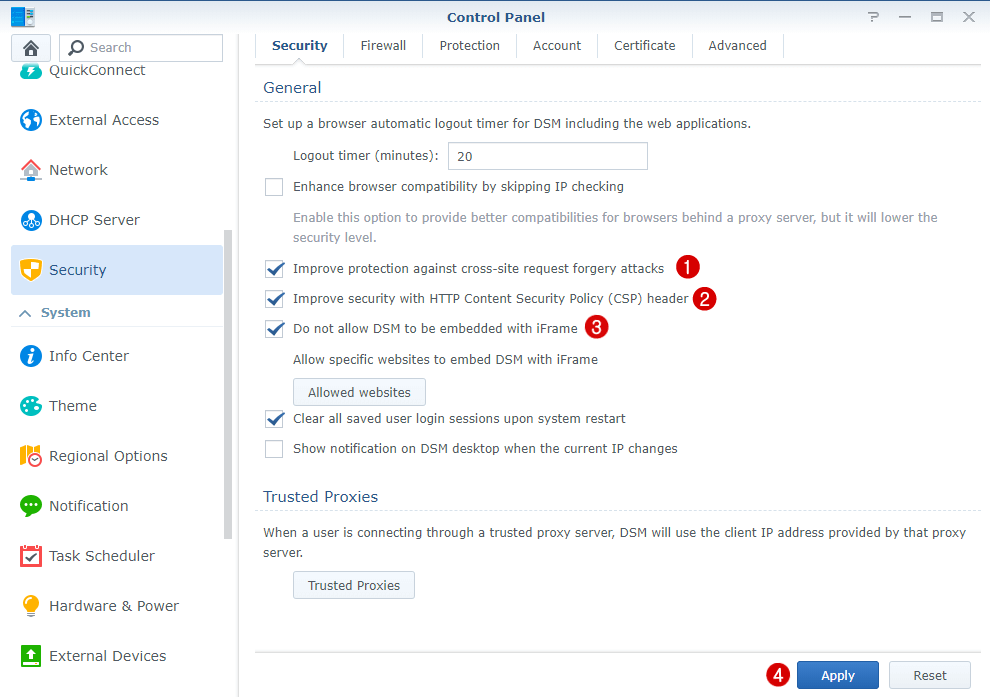
STEP 11 Select these options: Do not allow DSM to be embedded with iFrame, Improve protections against cross-site request forgery attacks, Improve security with HTTP Content Security Policy (CSP) header.
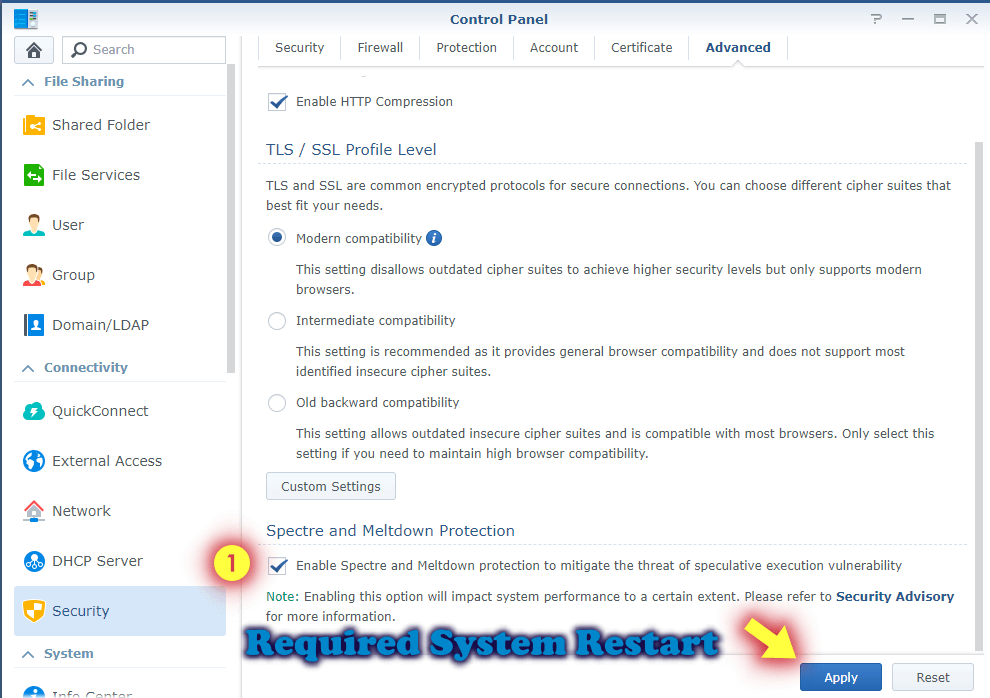
STEP 12 Spectre and Meltdown Protection.
Enable Spectre and Meltdown protection to mitigate the threat of speculative execution vulnerability. Synology Say: Enabling this option will impact system performance to a certain extent. After some tests, I can say I have not seen any performance issues by activating this option. My Synology NAS runs has fast as always and is more protected and secured. Activating this option will require a DSM system restart.
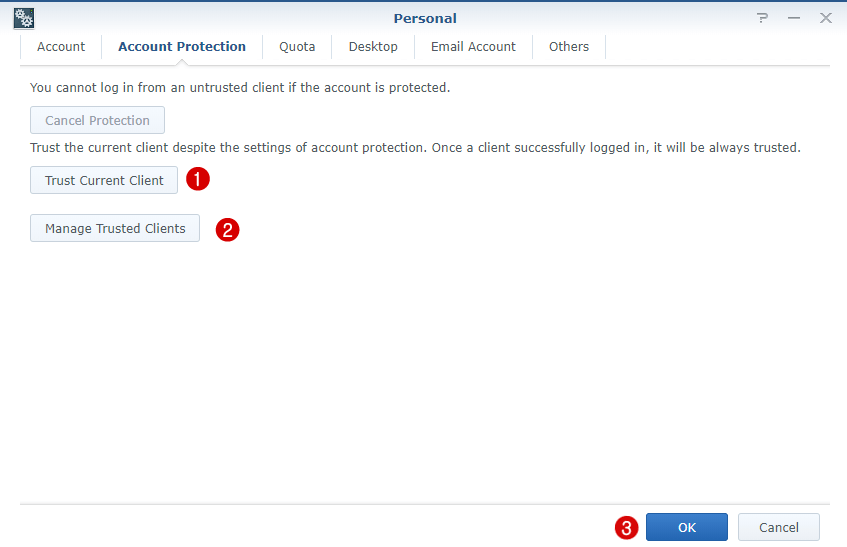
STEP 13 Trust current client.
Add your current PC as “Trust client”. Follow the instructions in the images below.
You must be aware that even when following all of the security recommendations in this article, all Synology services remain accessible via a simple web browser. This means that if one Synology application has some bugs that have not been discovered yet, these can be exploited through the Internet.
This post was updated on Monday / August 24th, 2020 at 1:13 AM