
Zoraxy is a lightweight, fast, and beginner-friendly reverse proxy written in Go, built for homelabs and self-hosters. It lets you easily expose web services, containers, and TCP/UDP traffic under custom domains with automatic Let’s Encrypt HTTPS, full HTTP/2 & WebSocket support, load balancing, flexible routing, and strong access controls (IP/country filtering, OAuth2, Basic Auth, Forward Auth). The clean web dashboard also includes real-time monitoring, traffic statistics, uptime checks, and handy built-in tools like mDNS/port scanners, traceroute, Wake-on-LAN, and a web-based SSH terminal. It runs as a single static binary on Linux, Windows, Raspberry Pi/ARM, NAS or Docker, with zero-downtime config changes and no complex files needed. Simple, powerful, and open-source. In this step by step guide I will show you how to install Zoraxy on your UGREEN NAS using Docker and Portainer.
💡Note: This guide works perfectly with the latest Zoraxy v3.3.5 release.
⚠️Important note
This Zoraxy guide is specifically intended for more experienced users. If you are less experienced or a beginner, I recommend continuing to use my Nginx Proxy Manager guide, which is very easy and intuitive. Nginx Proxy Manager is simple to use, even for newcomers, while Zoraxy requires greater familiarity with advanced configurations. Therefore, use this guide only if you already have a good level of technical knowledge.
STEP 1
Please Support My work by Making a Donation.
STEP 2
Install Portainer using my step by step guide. If you already have Portainer installed on your UGREEN NAS, skip this STEP. Attention: Make sure you have installed the latest Portainer version.
STEP 3
⚠️Mandatory: Make sure you have a domain name registered. Follow my How To Use Your Own Domain Name on Your UGREEN NAS guide from STEP 1 to STEP 9.
STEP 4
⚠️Mandatory: Stop the Nginx Proxy Manager container in Portainer or Dockhand. ⚠️Note: If you do not stop the Nginx Proxy Manager container, ports 80 and 443 will remain occupied and Zoraxy will not be able to start.
STEP 5
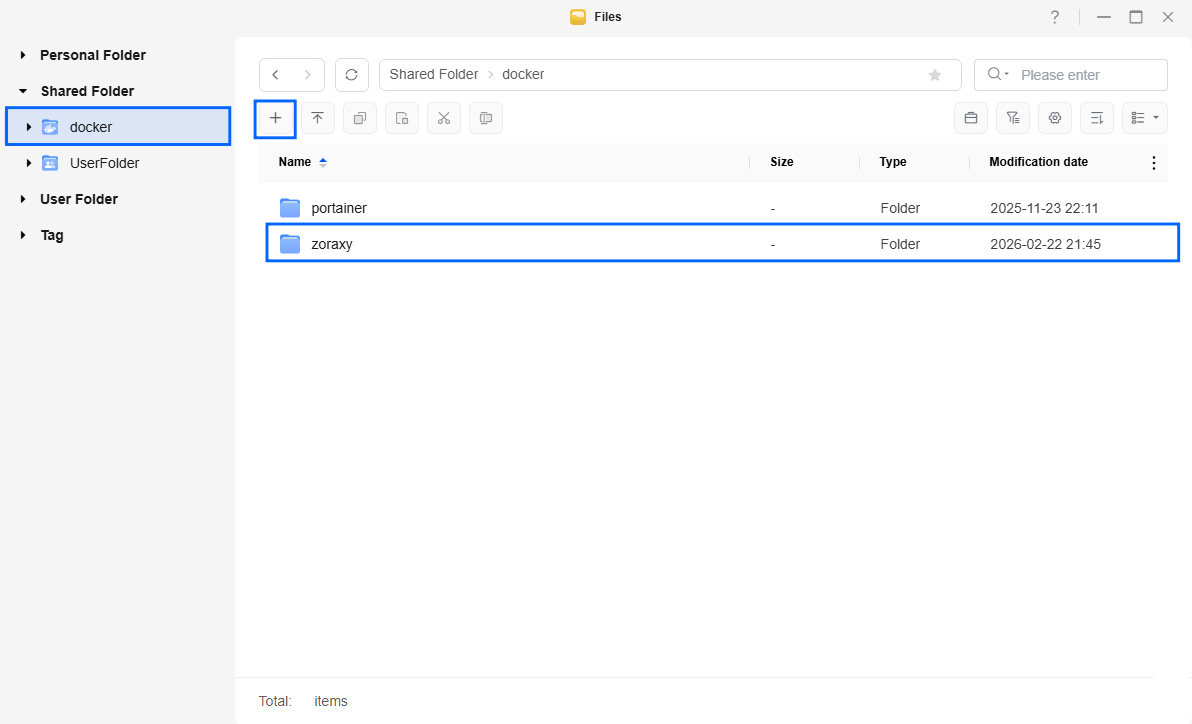
Go to Files and open the docker folder. Inside the docker folder, create one new folder and name it zoraxy. Follow the instructions in the image below.
Note: Be careful to enter only lowercase, not uppercase letters.
STEP 6
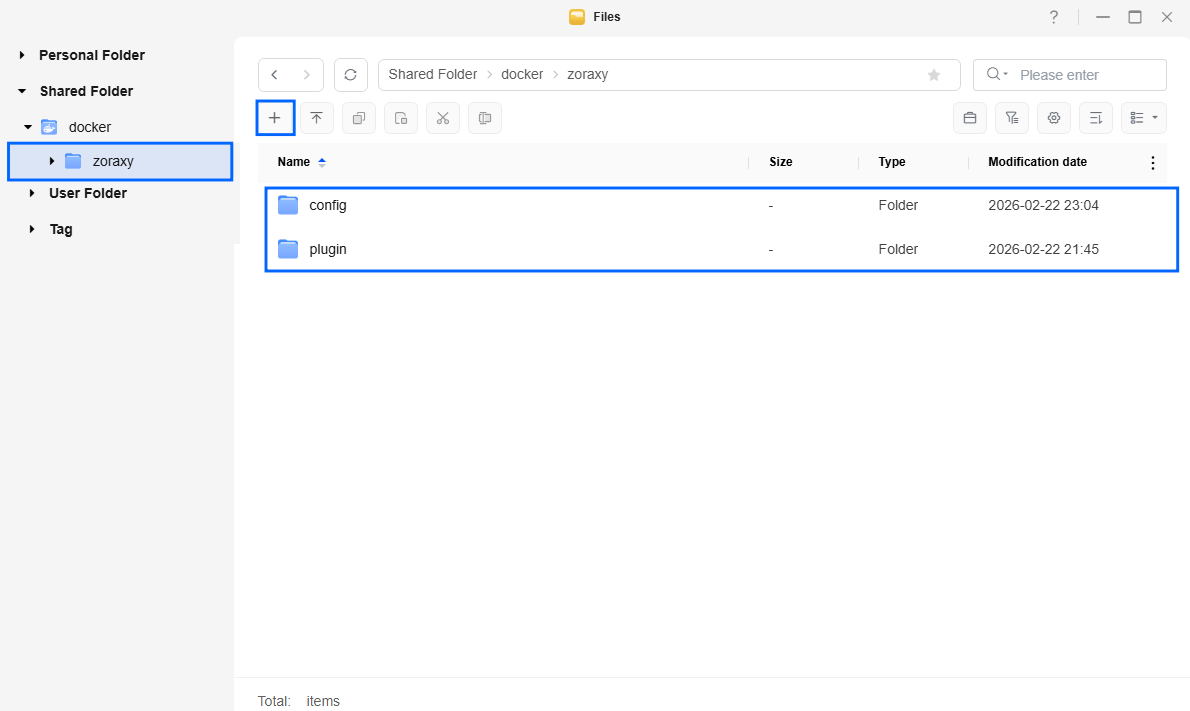
Now create two new folders inside the zoraxy folder that you have previously created at STEP 5 and name them config and plugin. Follow the instructions in the image below.
Note: Be careful to enter only lowercase, not uppercase letters
STEP 7
⚠️Mandatory: Add Read & Write Permissions to the Docker Folder.
STEP 8
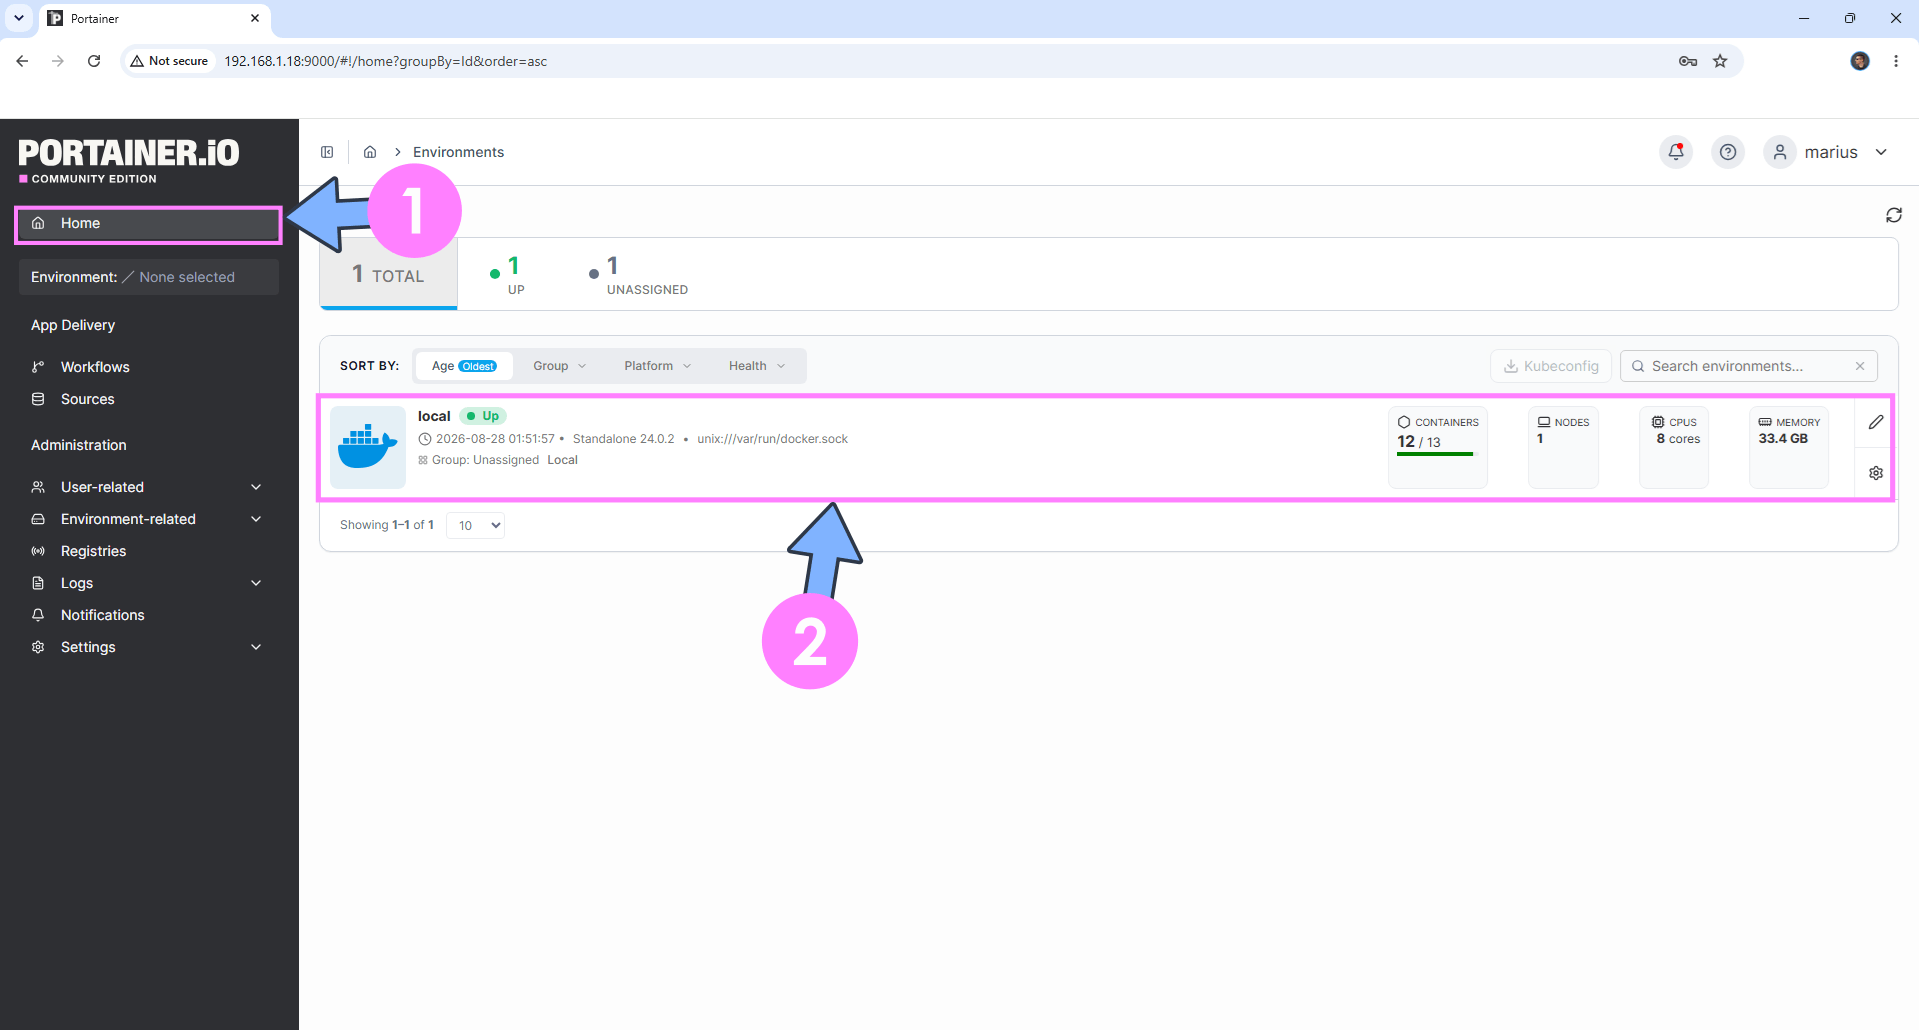
Log into Portainer using your username and password. On the left sidebar in Portainer, click on Home then click inside the local rectangle. Follow the instructions in the image below.
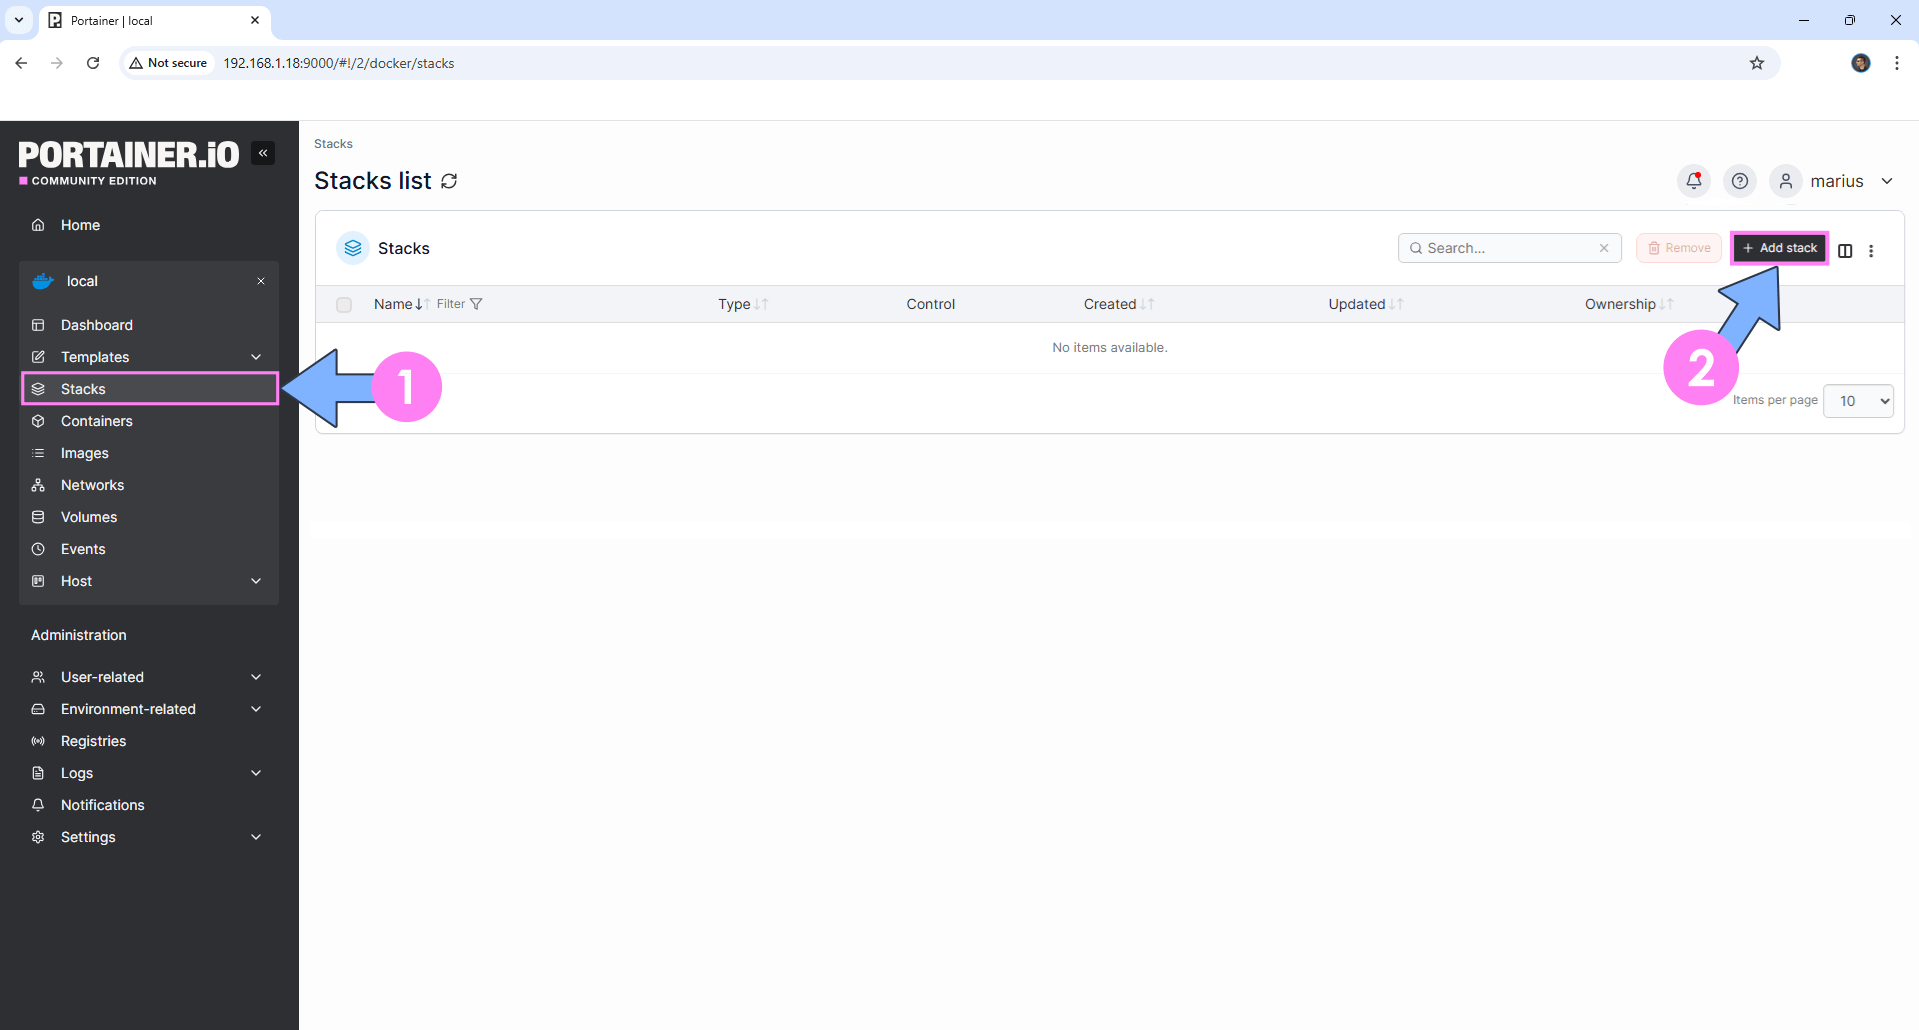
On the left sidebar in Portainer, click on Stacks then + Add stack. Follow the instructions in the image below.
STEP 9
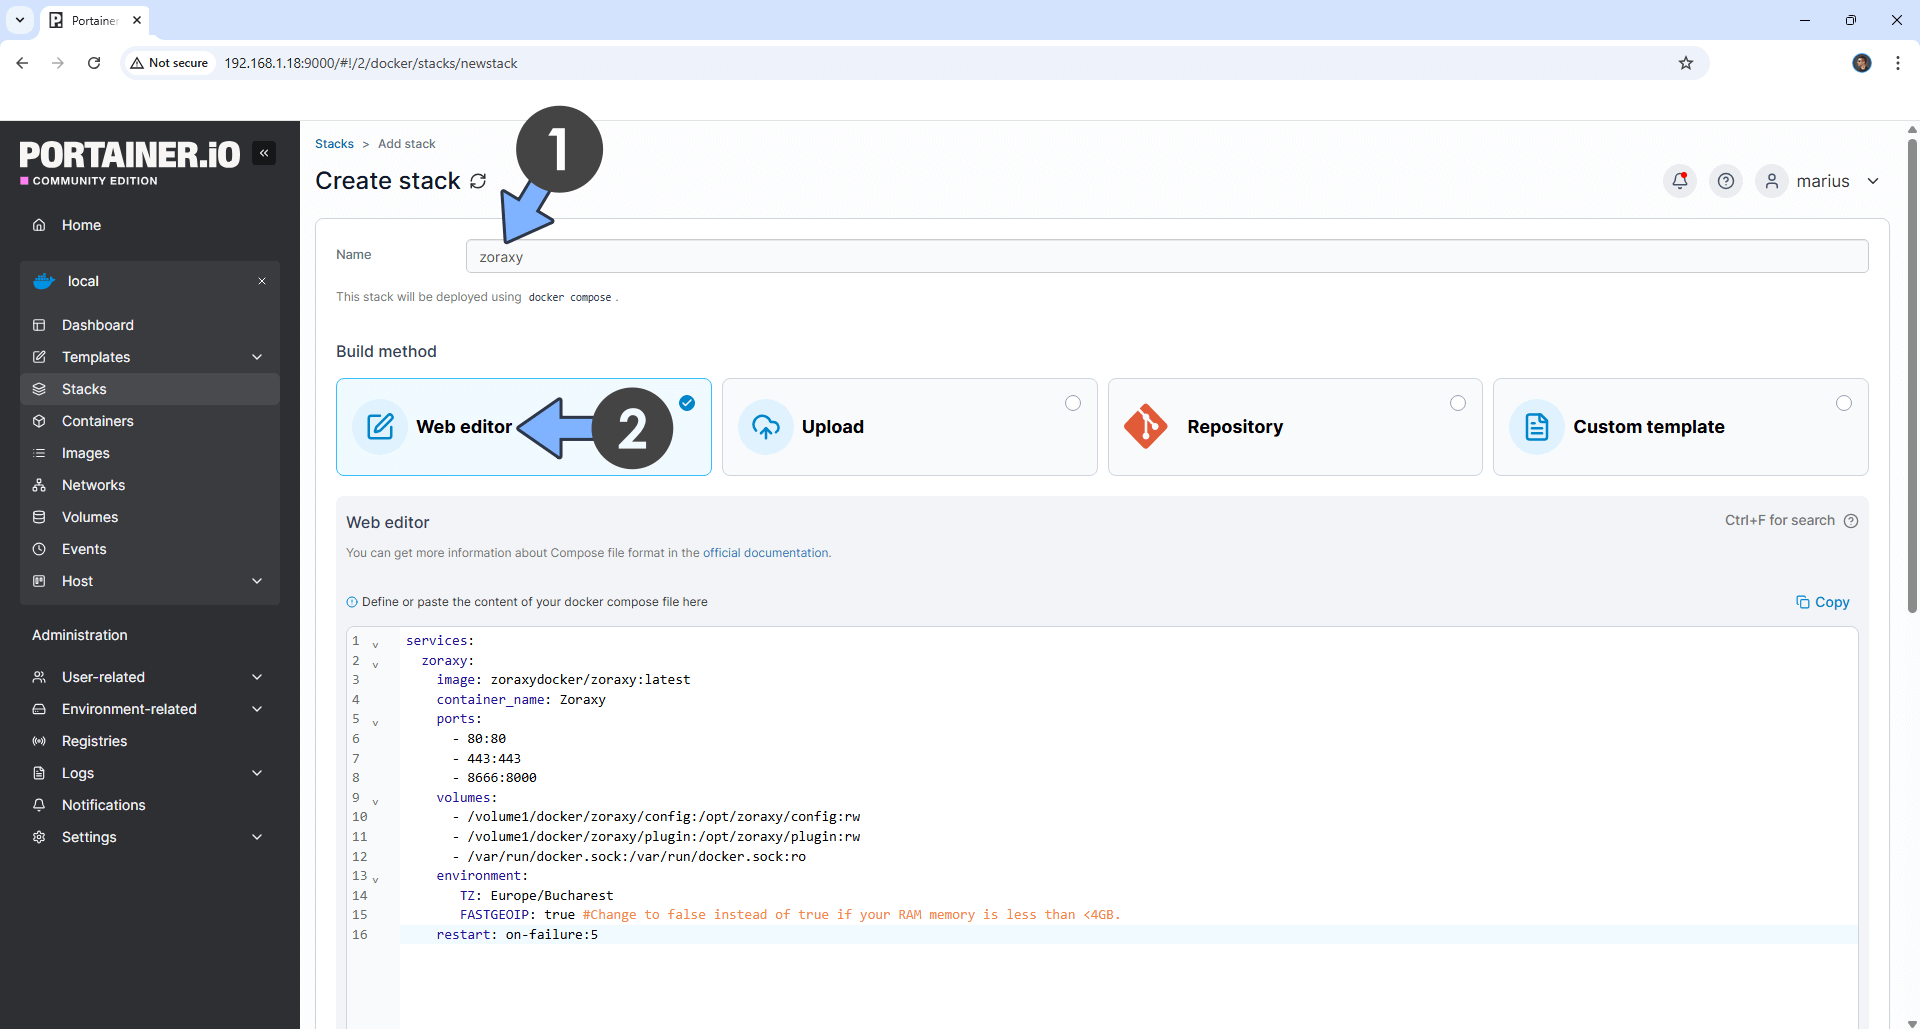
In the Name field type in zoraxy. Follow the instructions in the image below.
Note: Copy Paste the code below in the Portainer Stacks Web editor.
services:
  zoraxy:
    image: zoraxydocker/zoraxy:latest
    container_name: Zoraxy
    ports:
      - 80:80
      - 443:443
      - 8666:8000
    volumes:
      - /volume1/docker/zoraxy/config:/opt/zoraxy/config:rw
      - /volume1/docker/zoraxy/plugin:/opt/zoraxy/plugin:rw
      - /var/run/docker.sock:/var/run/docker.sock:ro
    environment:
       TZ: Europe/Bucharest
       FASTGEOIP: true #Change to false instead of true if your RAM memory is less than <4GB.
    restart: on-failure:5
Note: Before you paste the code above in the Web editor area below, change the value for TZ. (Select your current Time Zone from this list.)
STEP 10
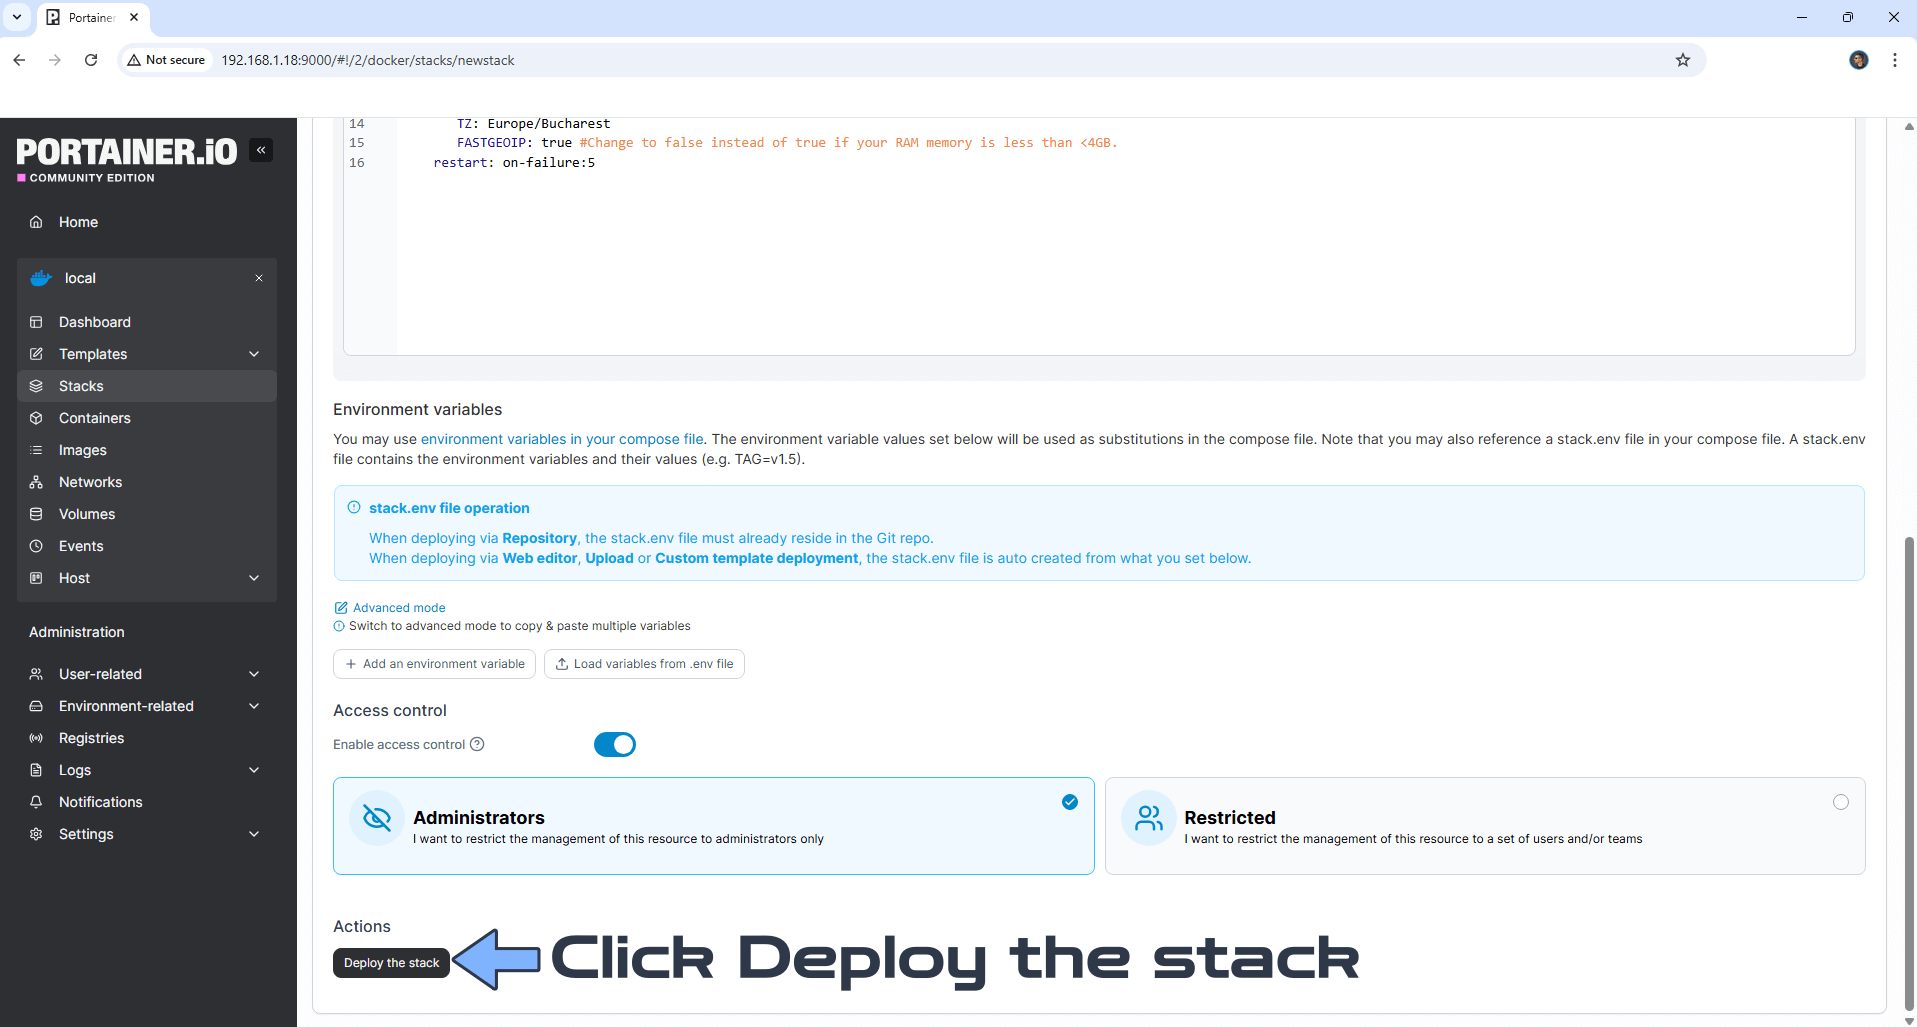
Scroll down on the page until you see a button named Deploy the stack. Click on it. Follow the instructions in the image below. The installation process can take up to a few minutes. It will depend on your Internet speed connection.
STEP 11
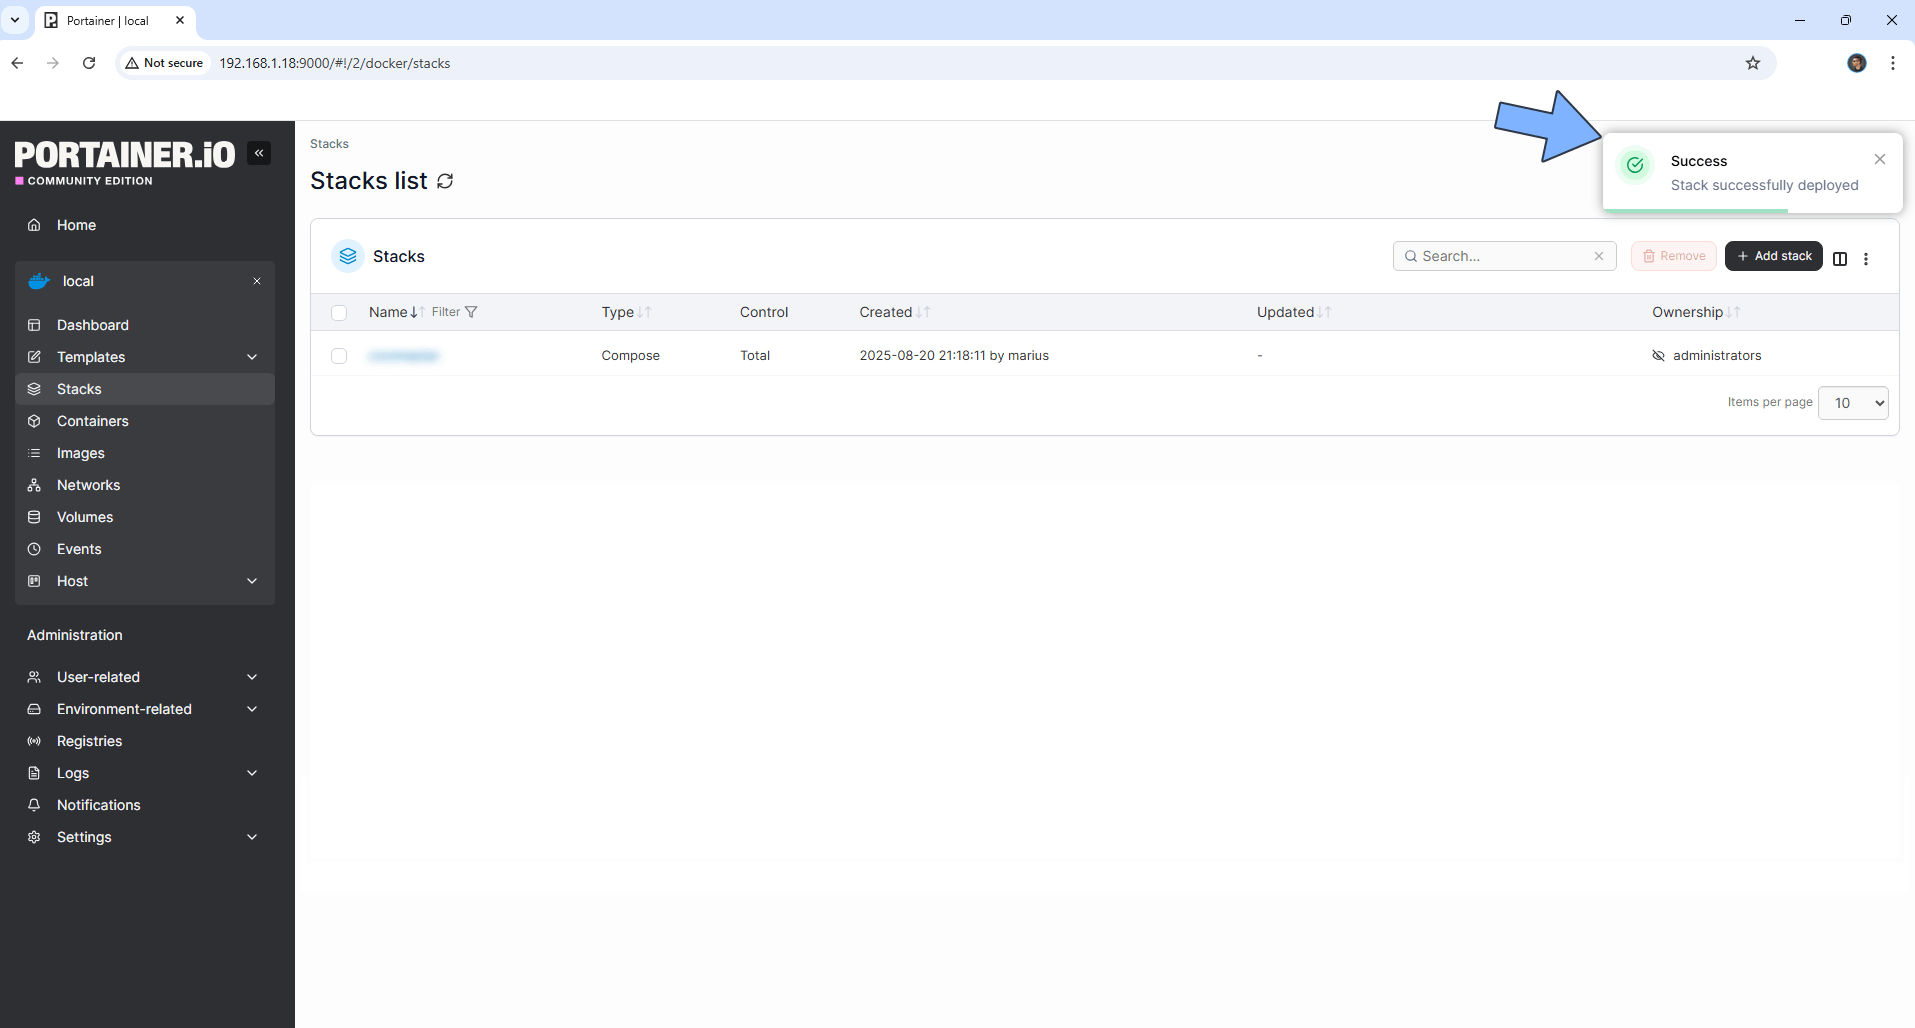
If everything goes right, you will see the following message at the top right of your screen: “Success Stack successfully deployed“.
STEP 12
🟢Please Support My work by Making a Donation. Almost 99,9% of the people that install something using my guides forget to support my work, or just ignore STEP 1. I’ve been very honest about this aspect of my work since the beginning: I don’t run any ADS, I don’t require subscriptions, paid or otherwise, I don’t collect IPs, emails, and I don’t have any referral links from Amazon or other merchants. I also don’t have any POP-UPs or COOKIES. I have repeatedly been told over the years how much I have contributed to the community. It’s something I love doing and have been honest about my passion since the beginning. But I also Need The Community to Support me Back to be able to continue doing this work.
STEP 13
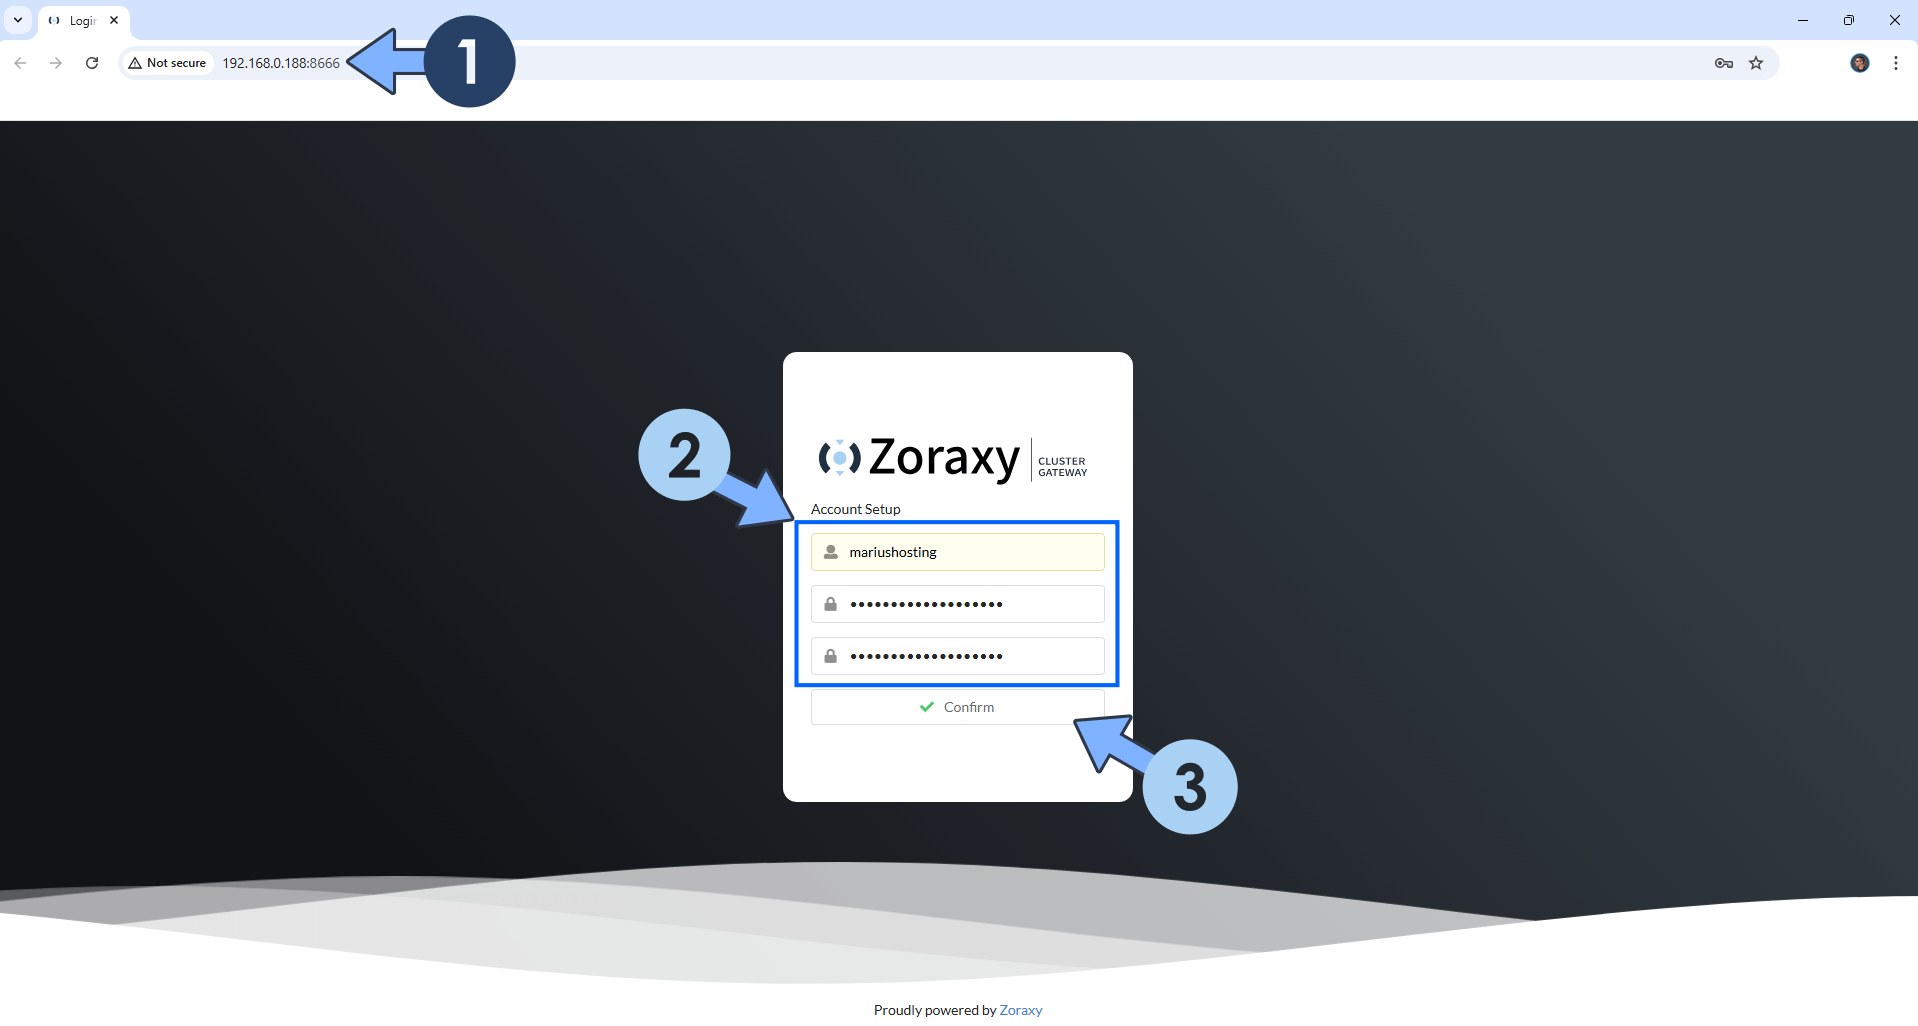
The installation process can take up to a few seconds/minutes. It will depend on your Internet speed connection. Now open your browser and type in http://ugreen-ip-address:8666 Create your Administrator user. Type in your own Username and Password. Click Confirm. Follow the instructions in the image below.
STEP 14
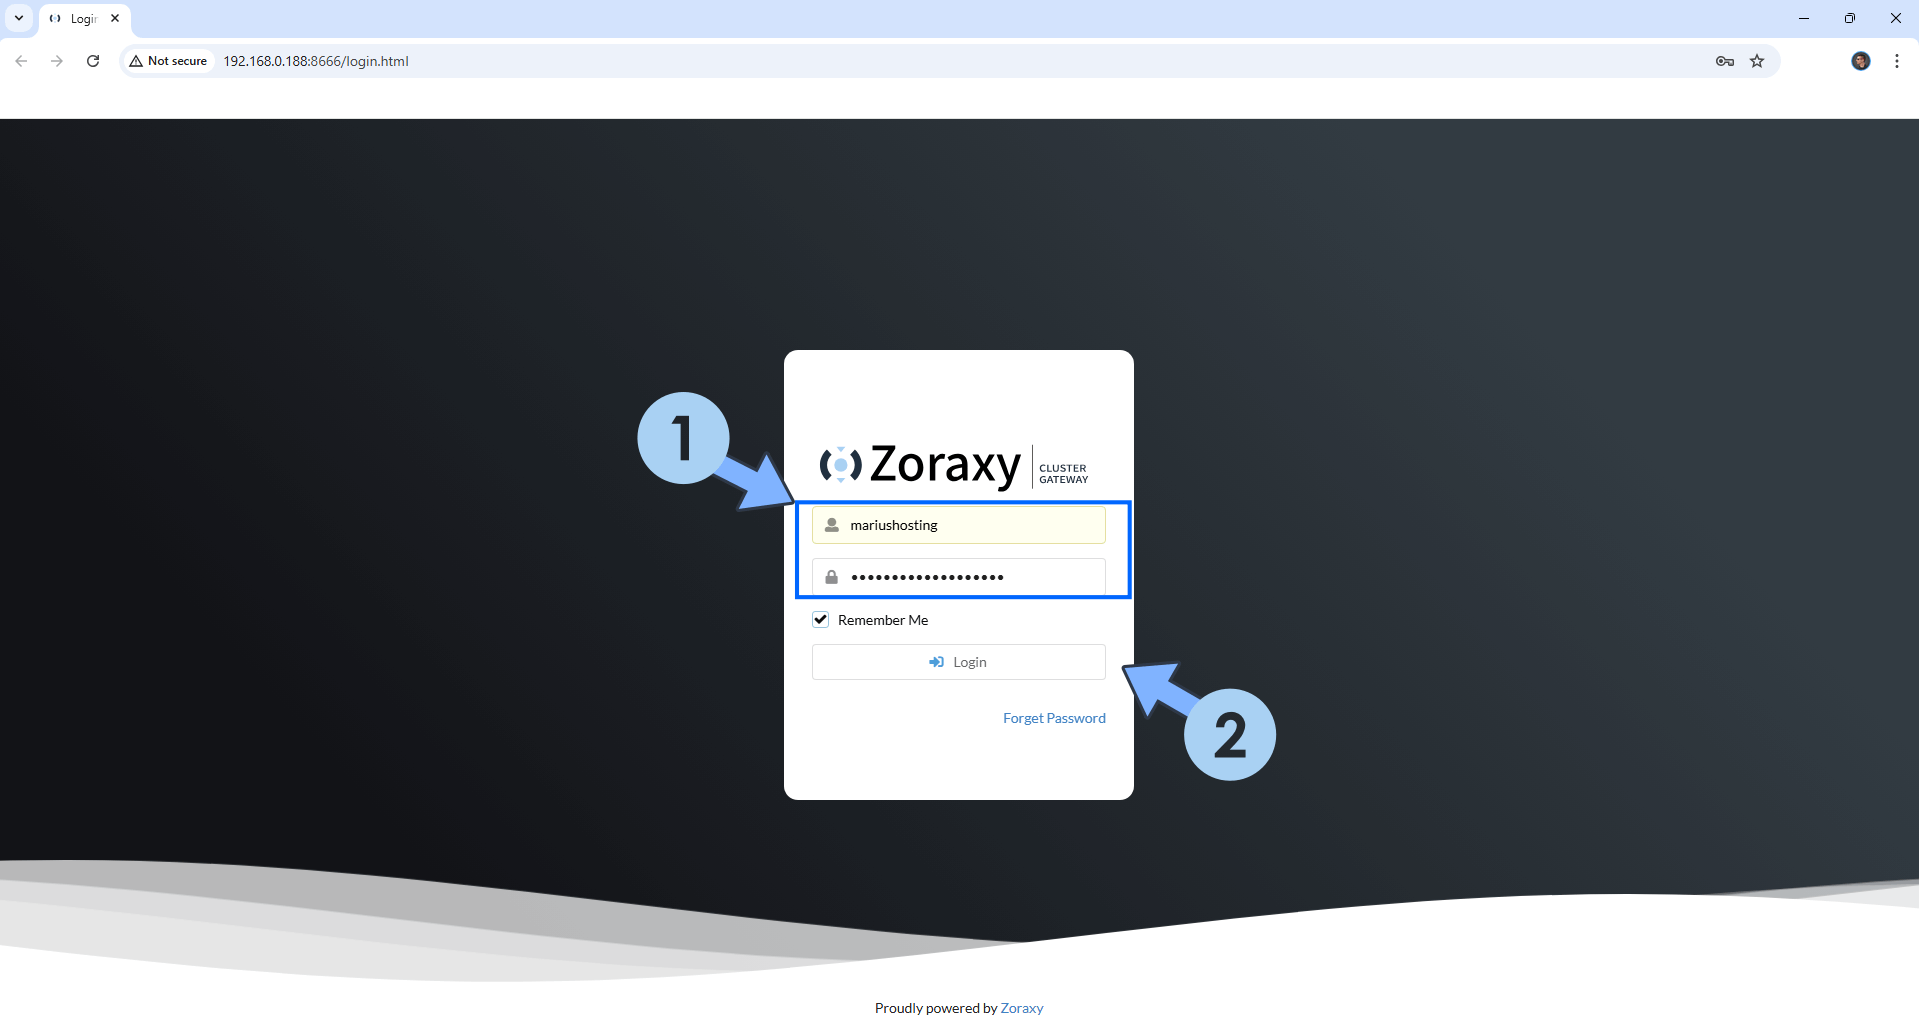
Type in your own Username and Password that you have previously added at STEP 13. Click Login. Follow the instructions in the image below.
STEP 15
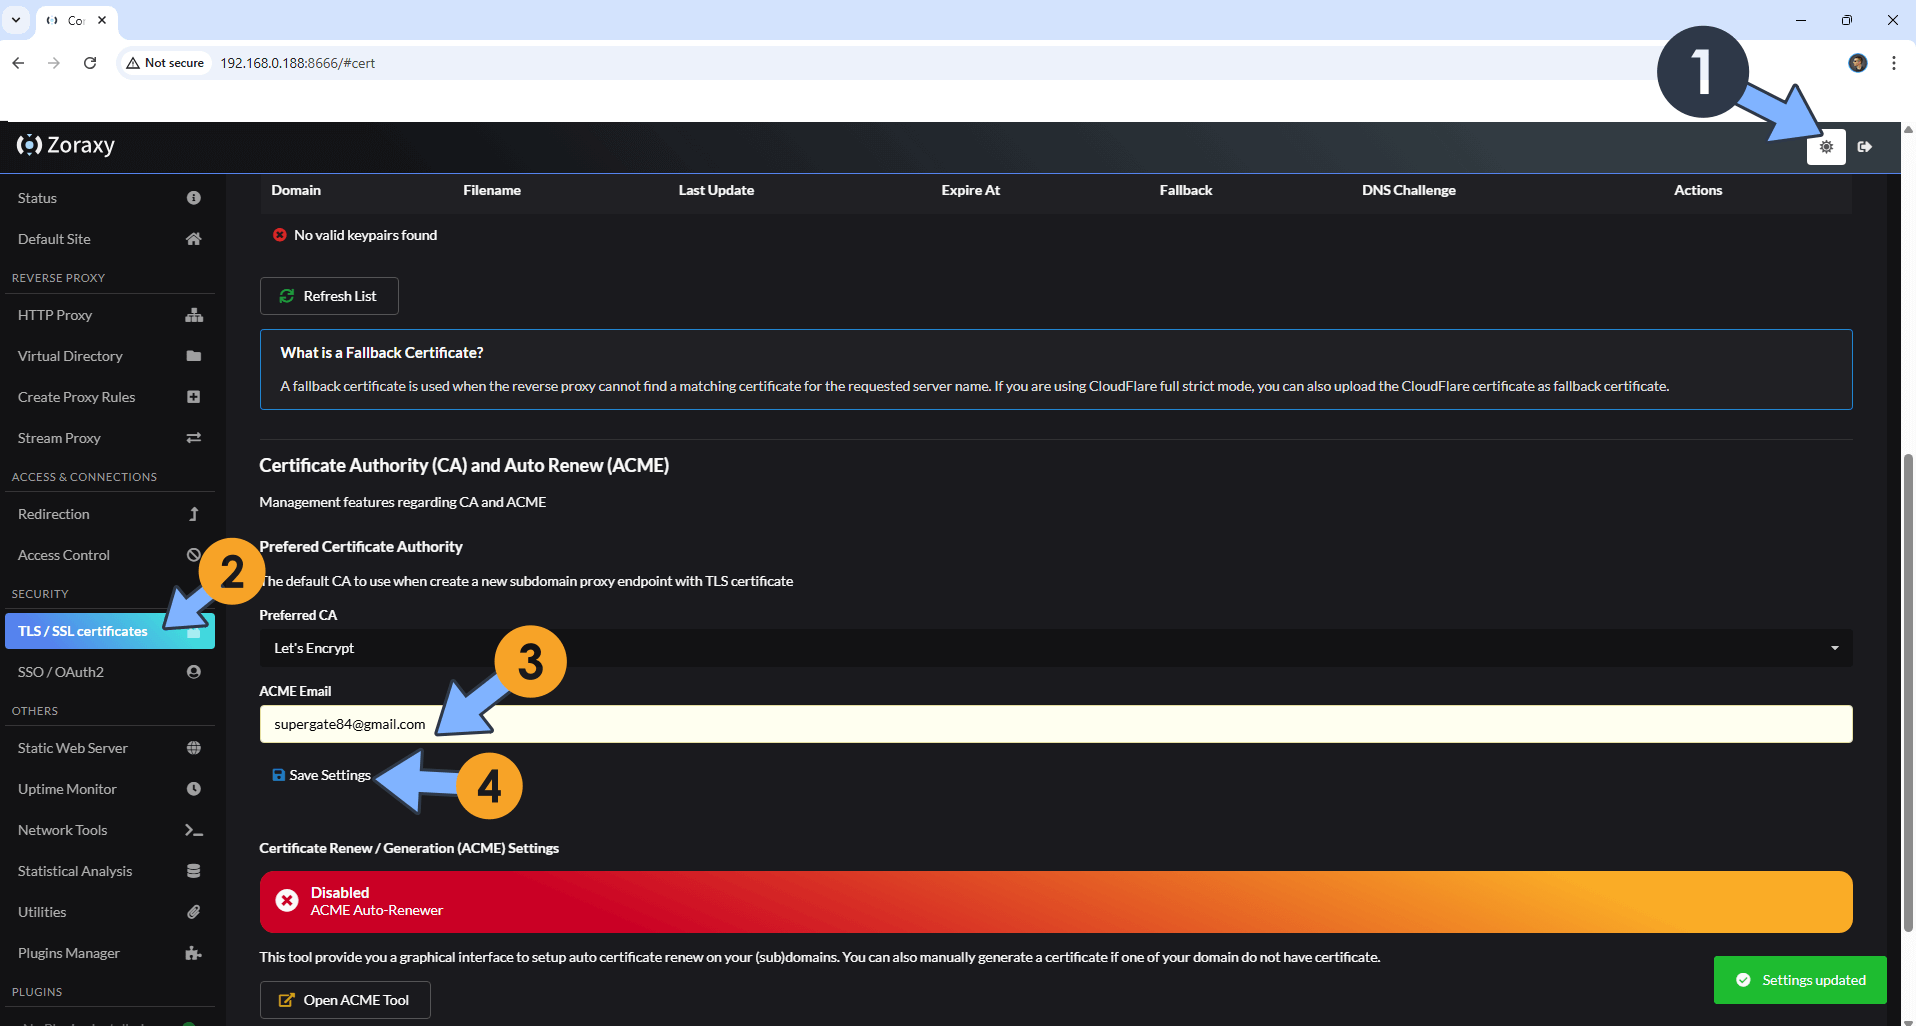
At the top right of the page, switch the theme to Dark. On the left sidebar, under Security, click TLS / SSL certificates. In the ACME Email filed, type in your own email address, then click Save Settings. ⚠️Note: Your Email is mandatory to retrieve the free Let’s Encrypt Certificate for your domains/subdomains. Follow the instructions in the image below.
STEP 16
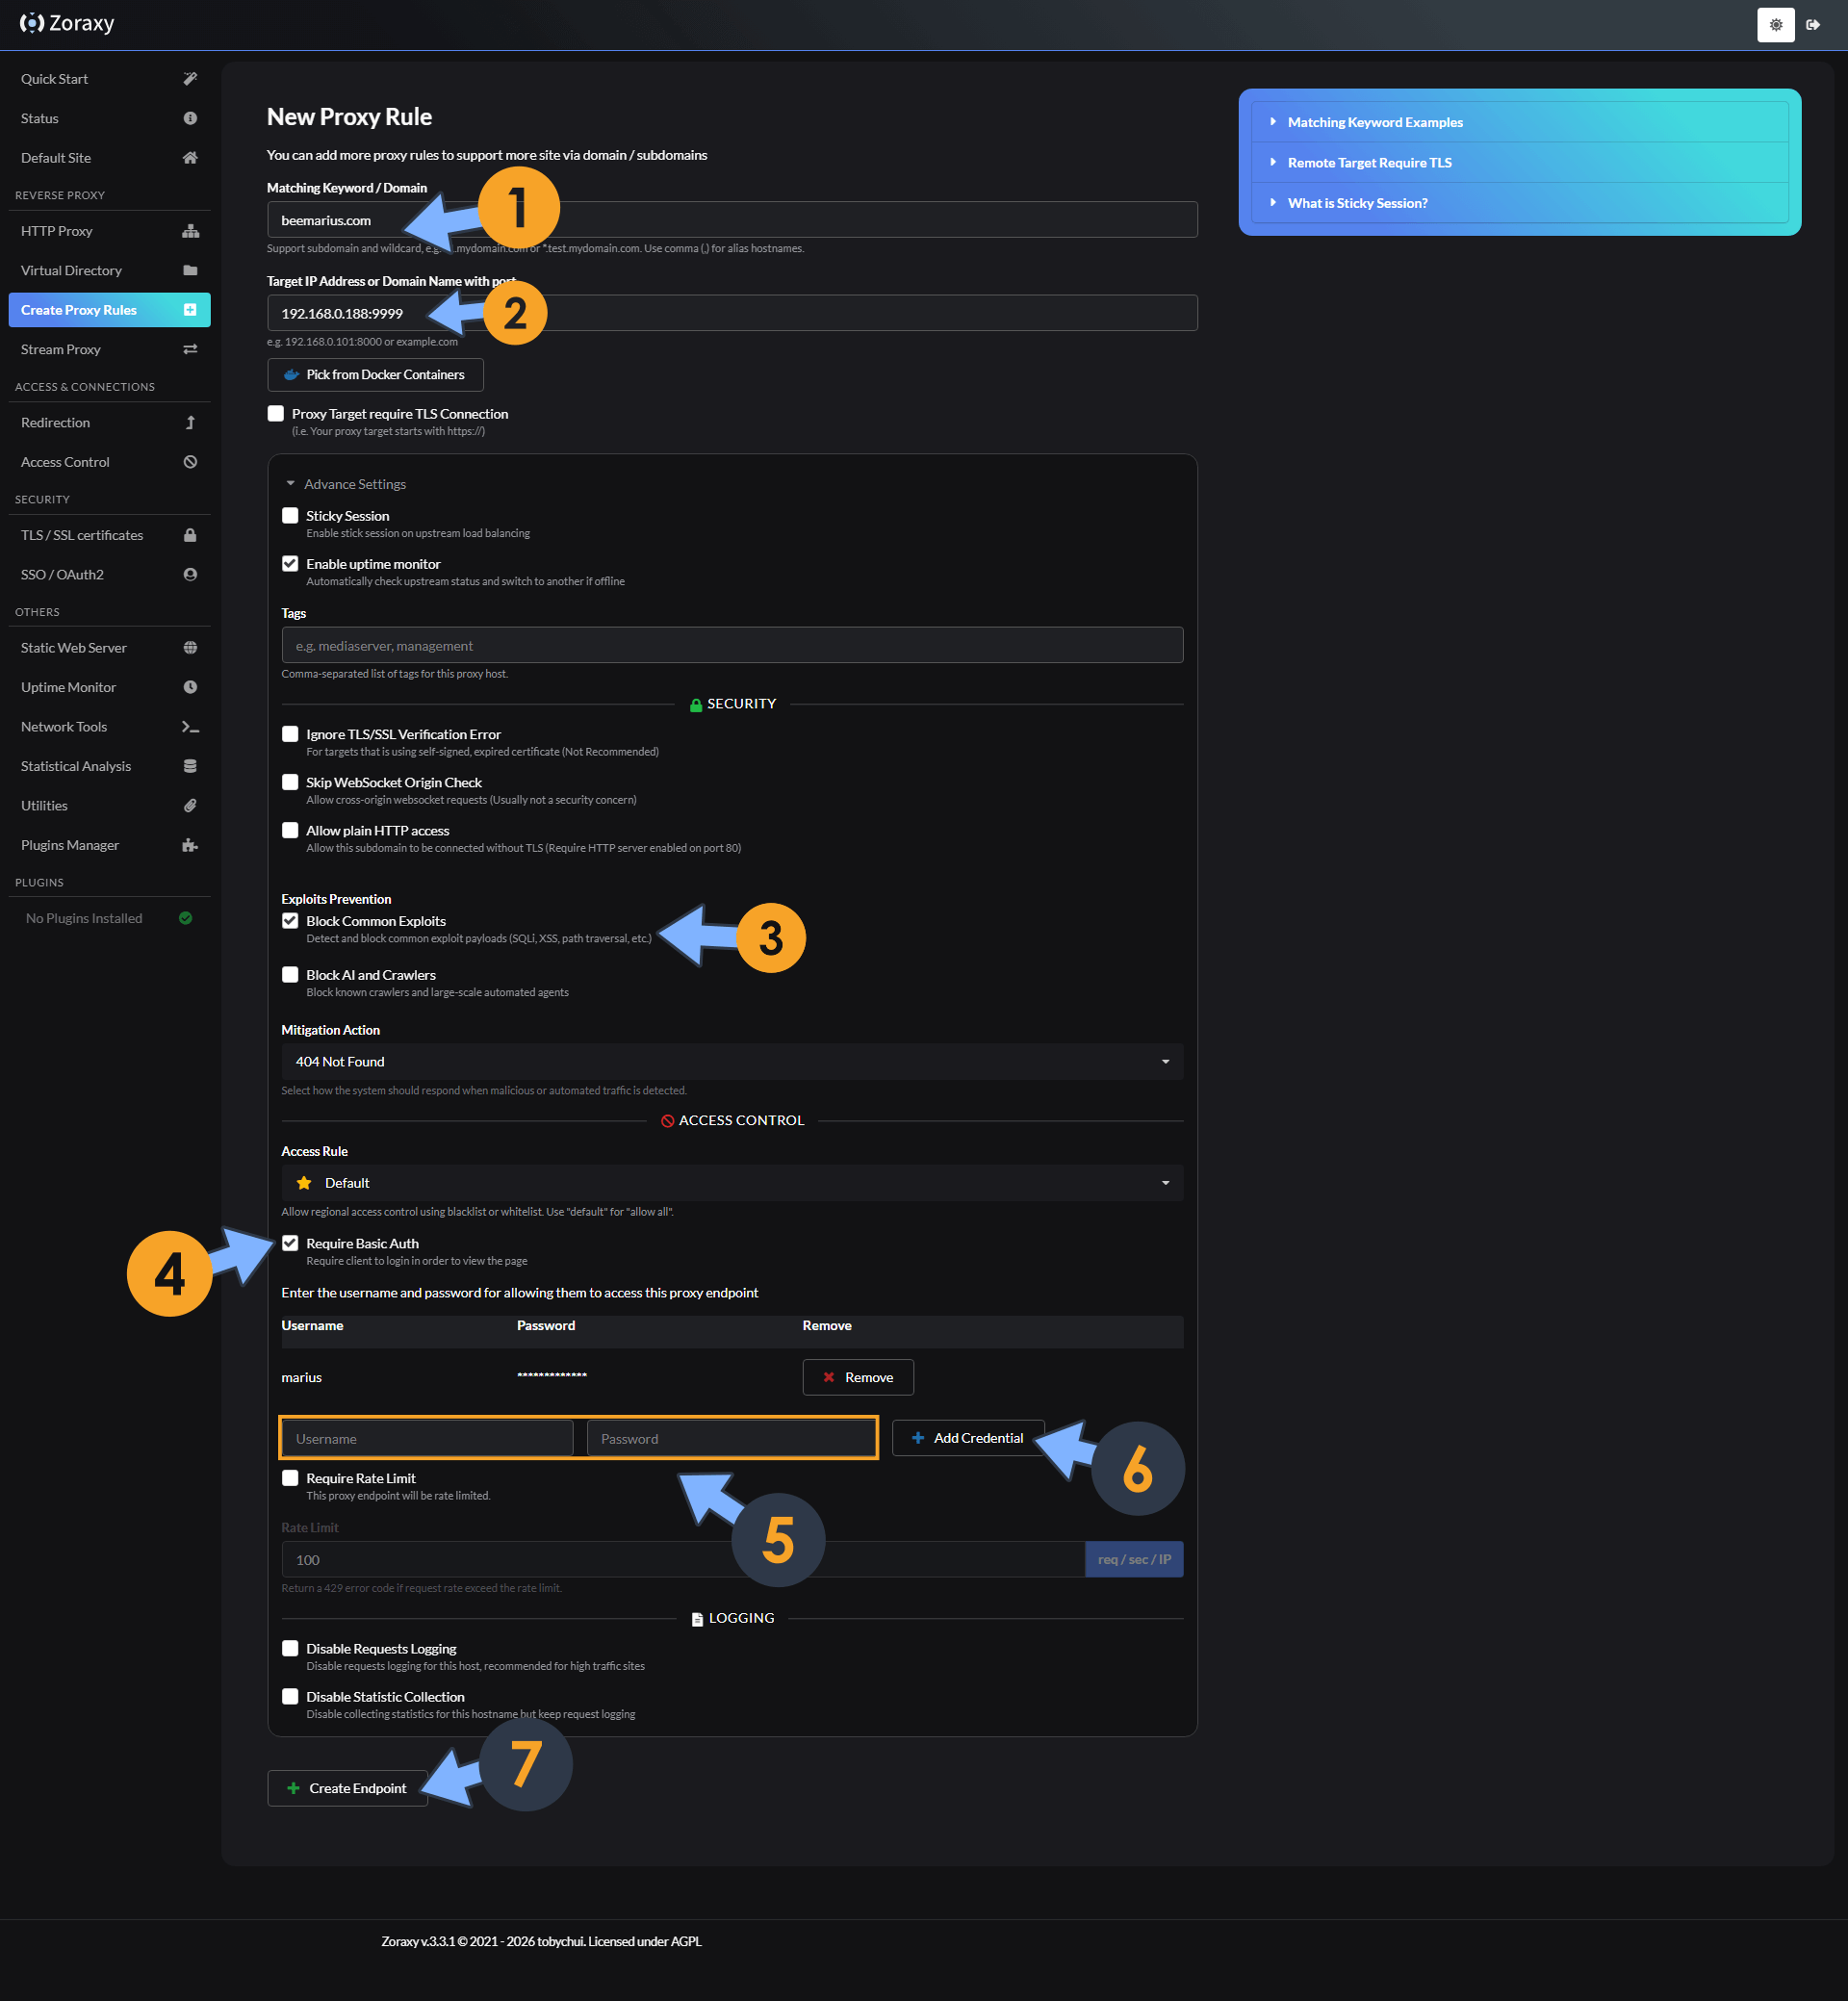
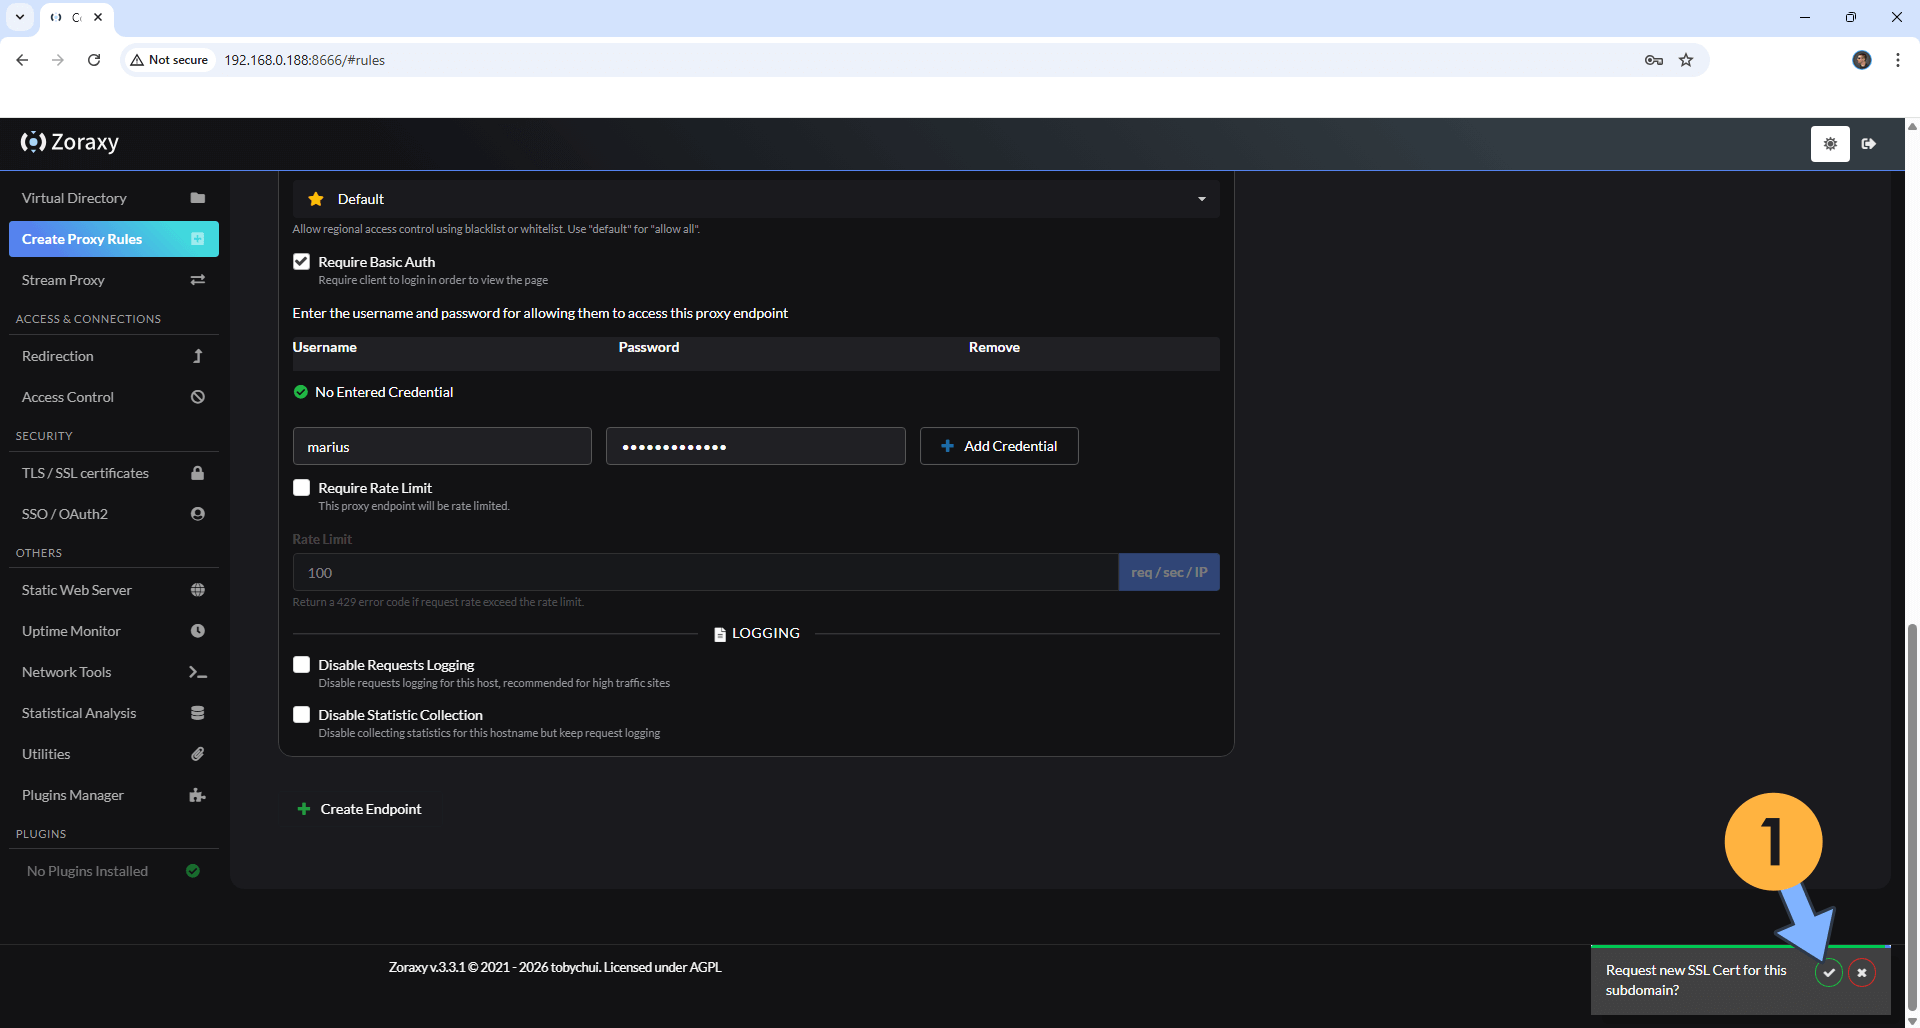
On the left sidebar, click Create Proxy Rules. Type in your own domain name without https:// at the beginning. You should already have your domain name set up as per the instructions at STEP 3. In the Target IP area, type in your own NAS IP followed by :9999 (🖼️Check out the example screenshot). Select Block Common Exploits. You can add different Access Rules. For example, block specific countries from accessing your domain name or an extra Basic Authorization. Add an extra Basic Authorization by adding a Username and Password. Click Add Credentials. Click Create Endpoint. Follow the instructions in the image below.
STEP 17
A new pop up window will open. Click Confirm to get your free Let’s Encrypt certificate. Follow the instructions in the image below.
STEP 18
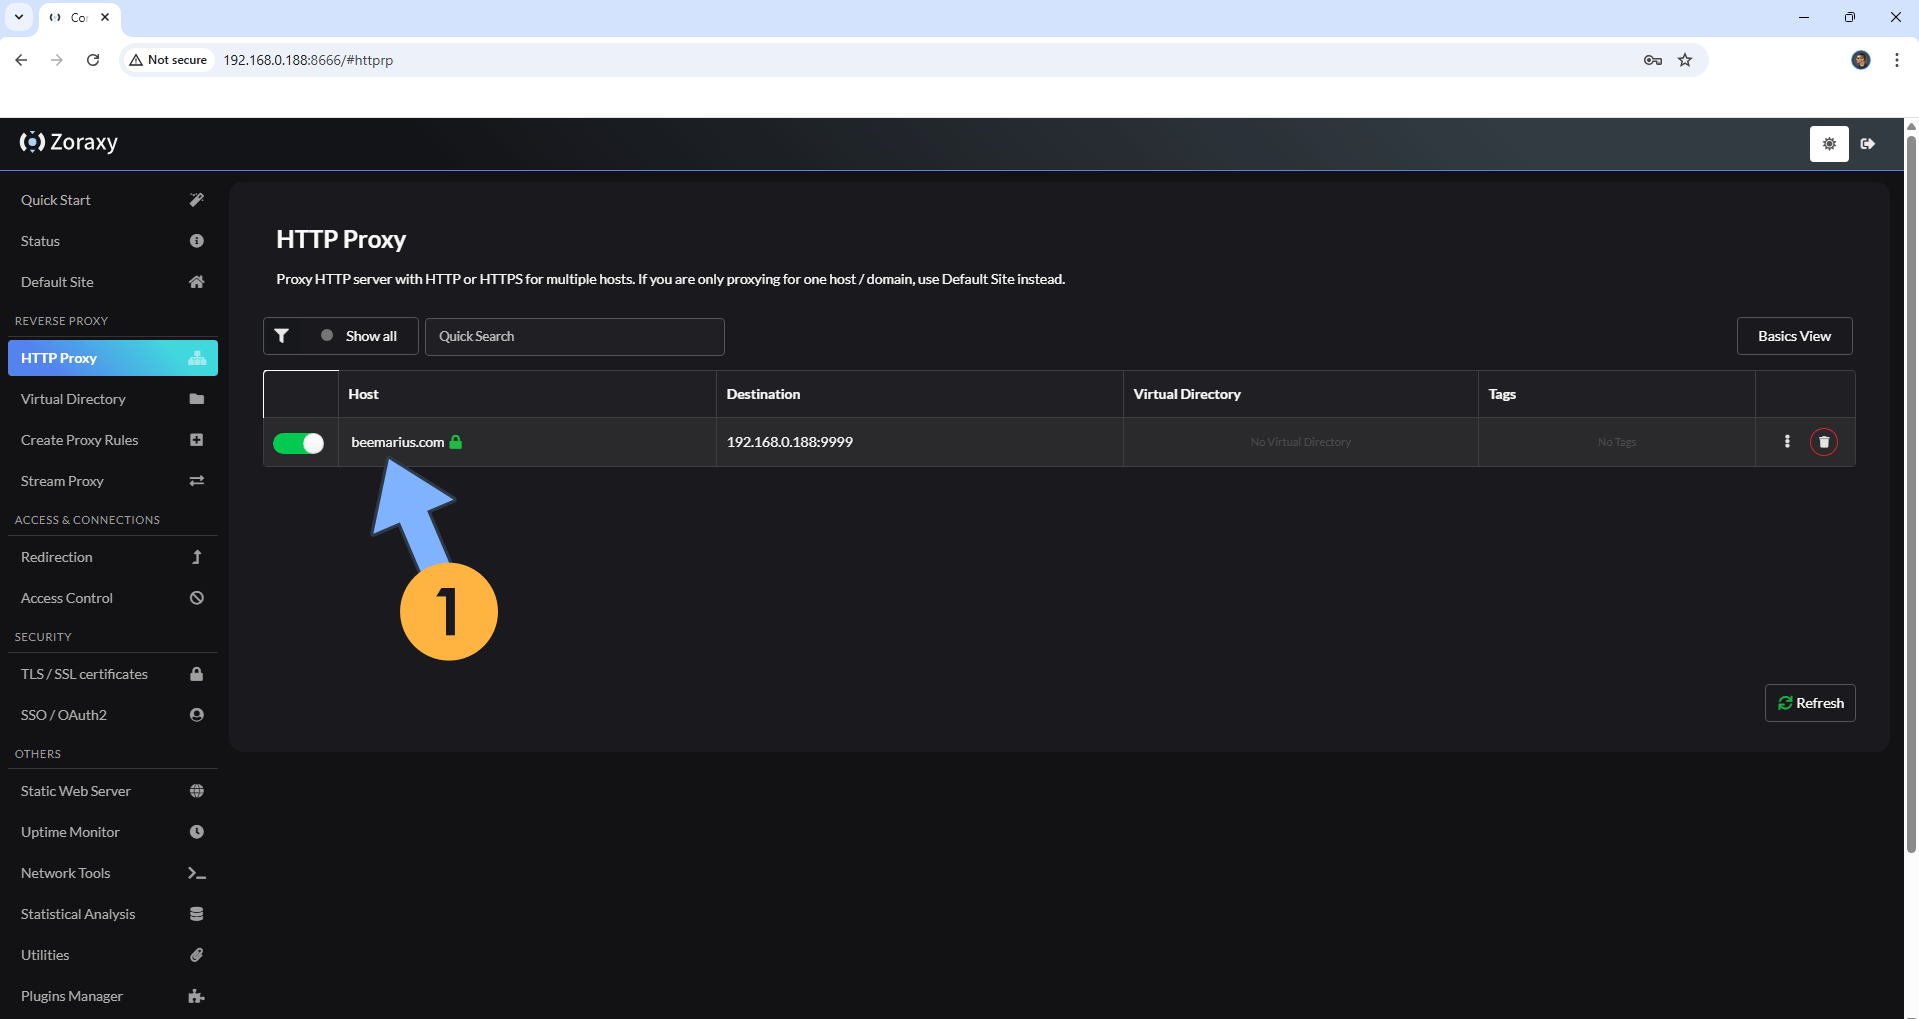
After the certificate is created, on the left sidebar, click HTTP Proxy. Click on your host/domain name that has been created. Follow the instructions in the image below.
STEP 19
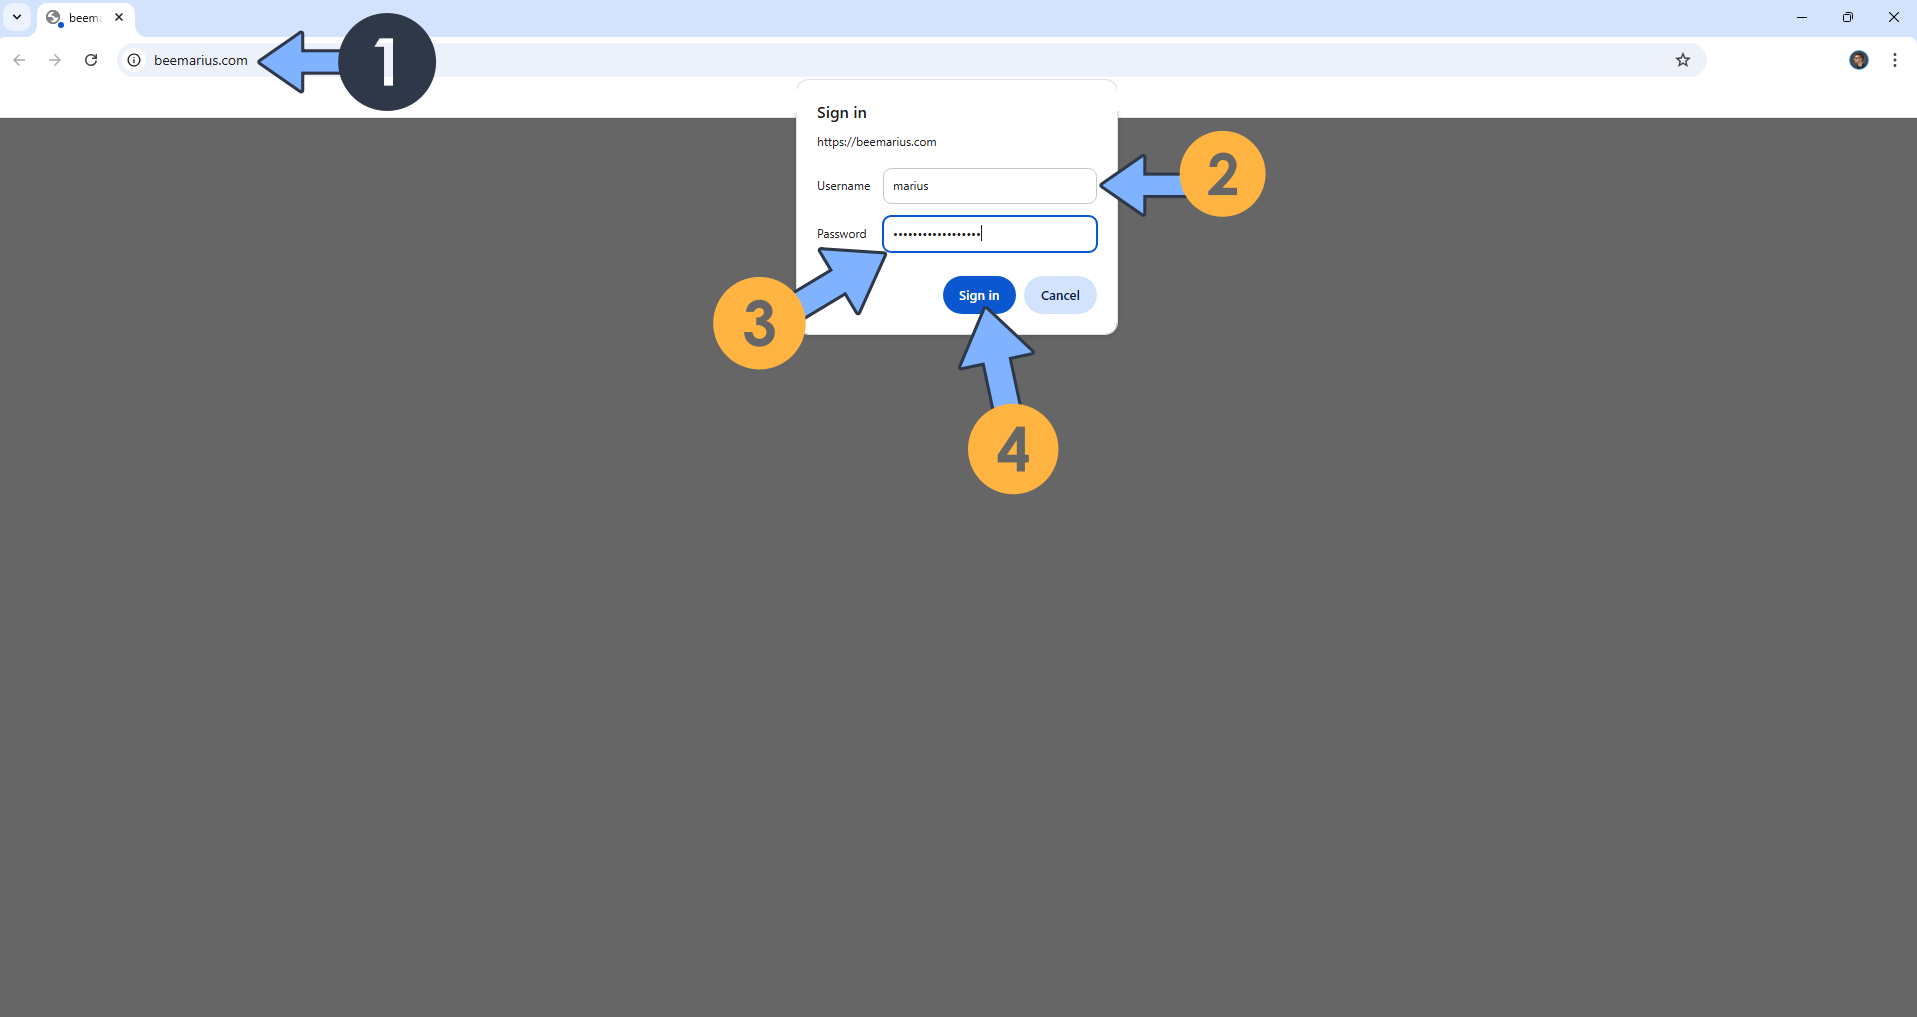
In your browser, type in your own domain name. You will notice that you will be asked for a Basic Authorization (Username and Password). This happens because you have added the option for Basich Auth at STEP 16. Type in your own Username and Password that you have previously added at STEP 16, then click Sign in. Follow the instructions in the image below.
STEP 20
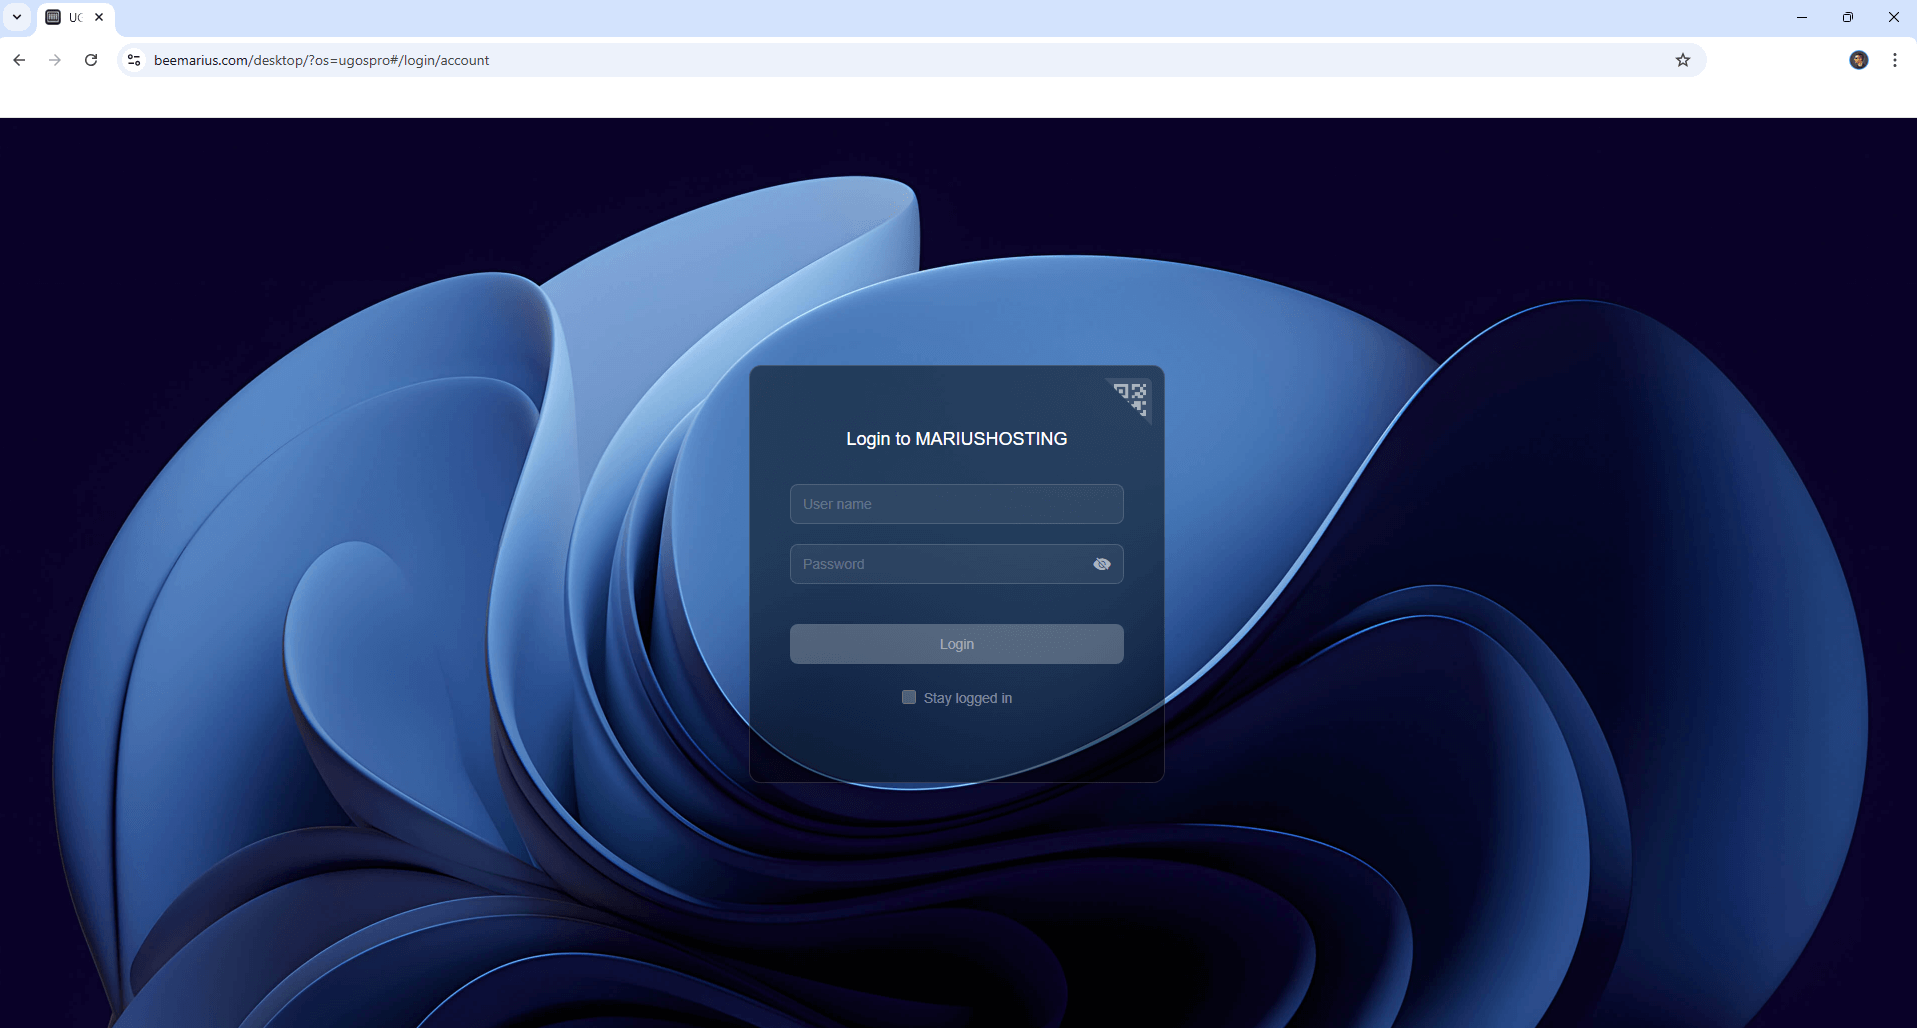
You can now access your UGREEN NAS via HTTPS / SSL Certificate and your own Domain Name from anywhere.
STEP 21
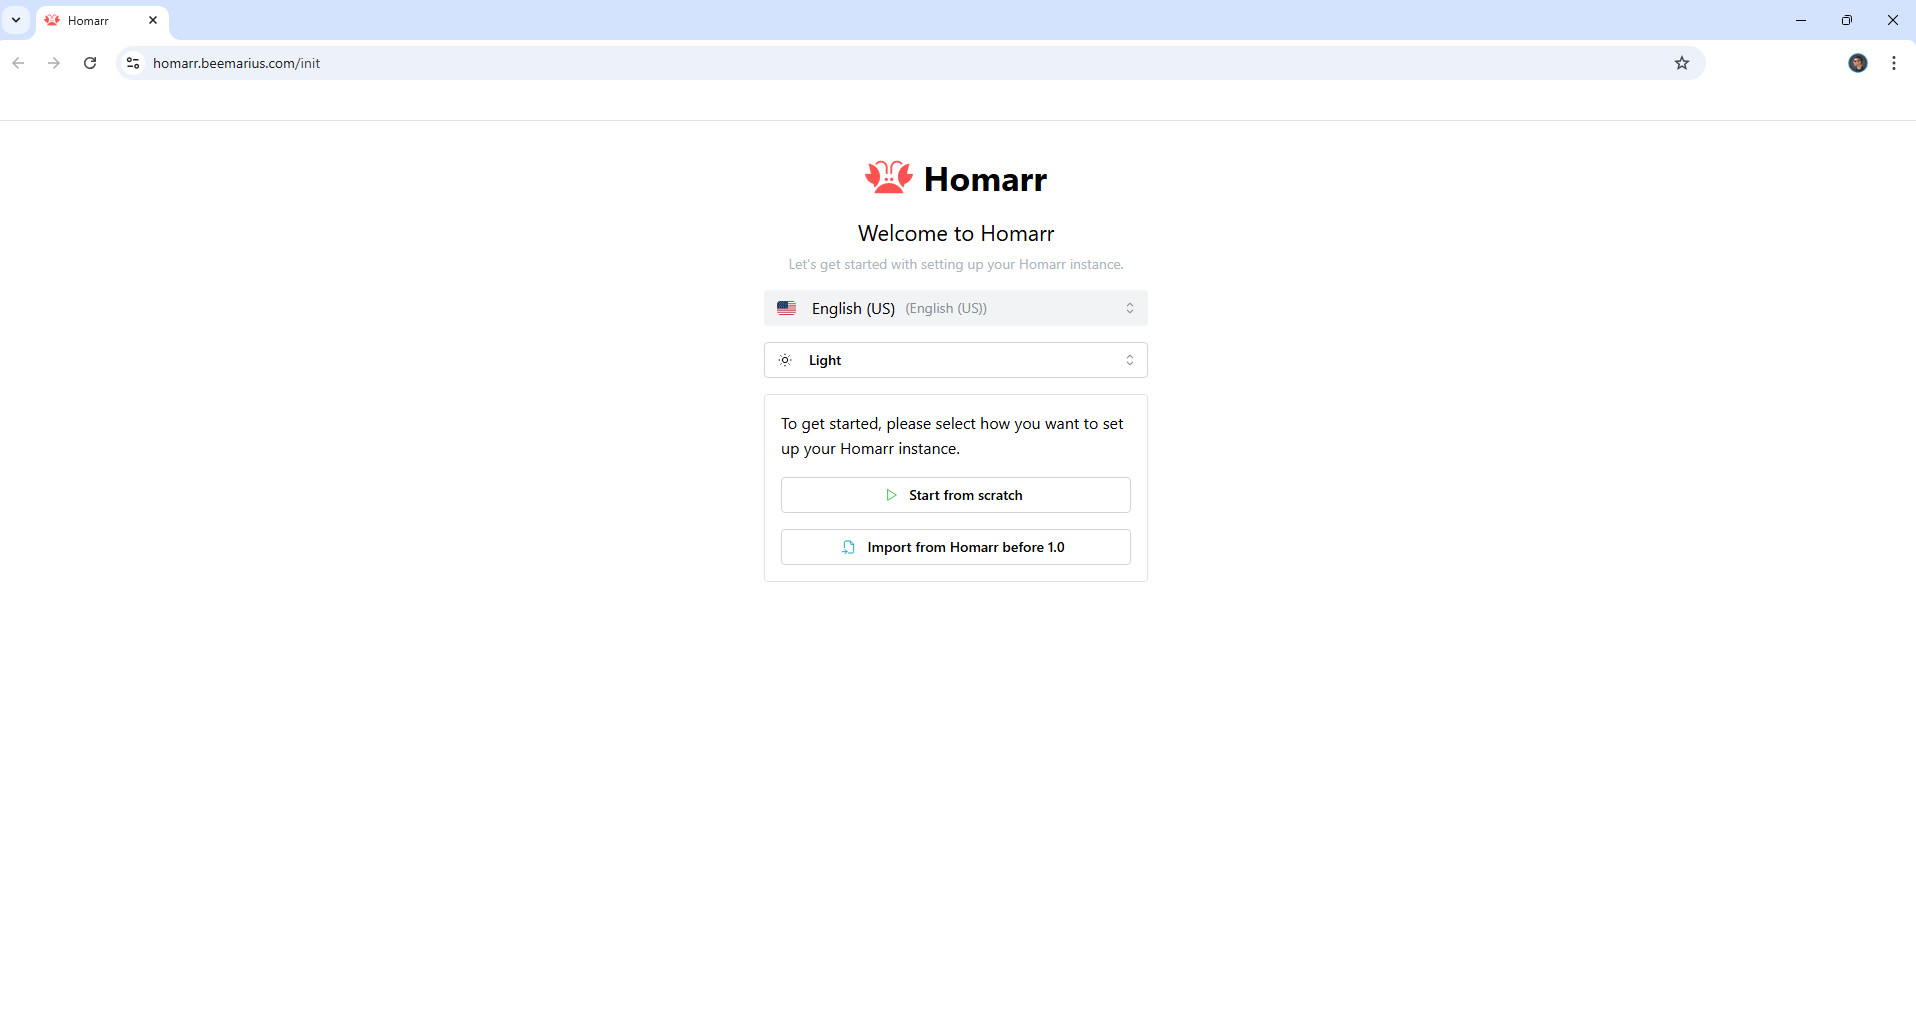
Now, I will show you how to add a new hostname to a specific Docker container. I will use Homarr as an example.
Install Homarr using my step by step guide. If you already have Homarr installed on your UGREEN NAS, skip this STEP. ⚠️Attention: Mandatory STEP.
⚠️Mandatory: Follow my How To Use Your Own Domain Name on Your UGREEN NAS guide from STEP 18 to STEP 20.
STEP 22
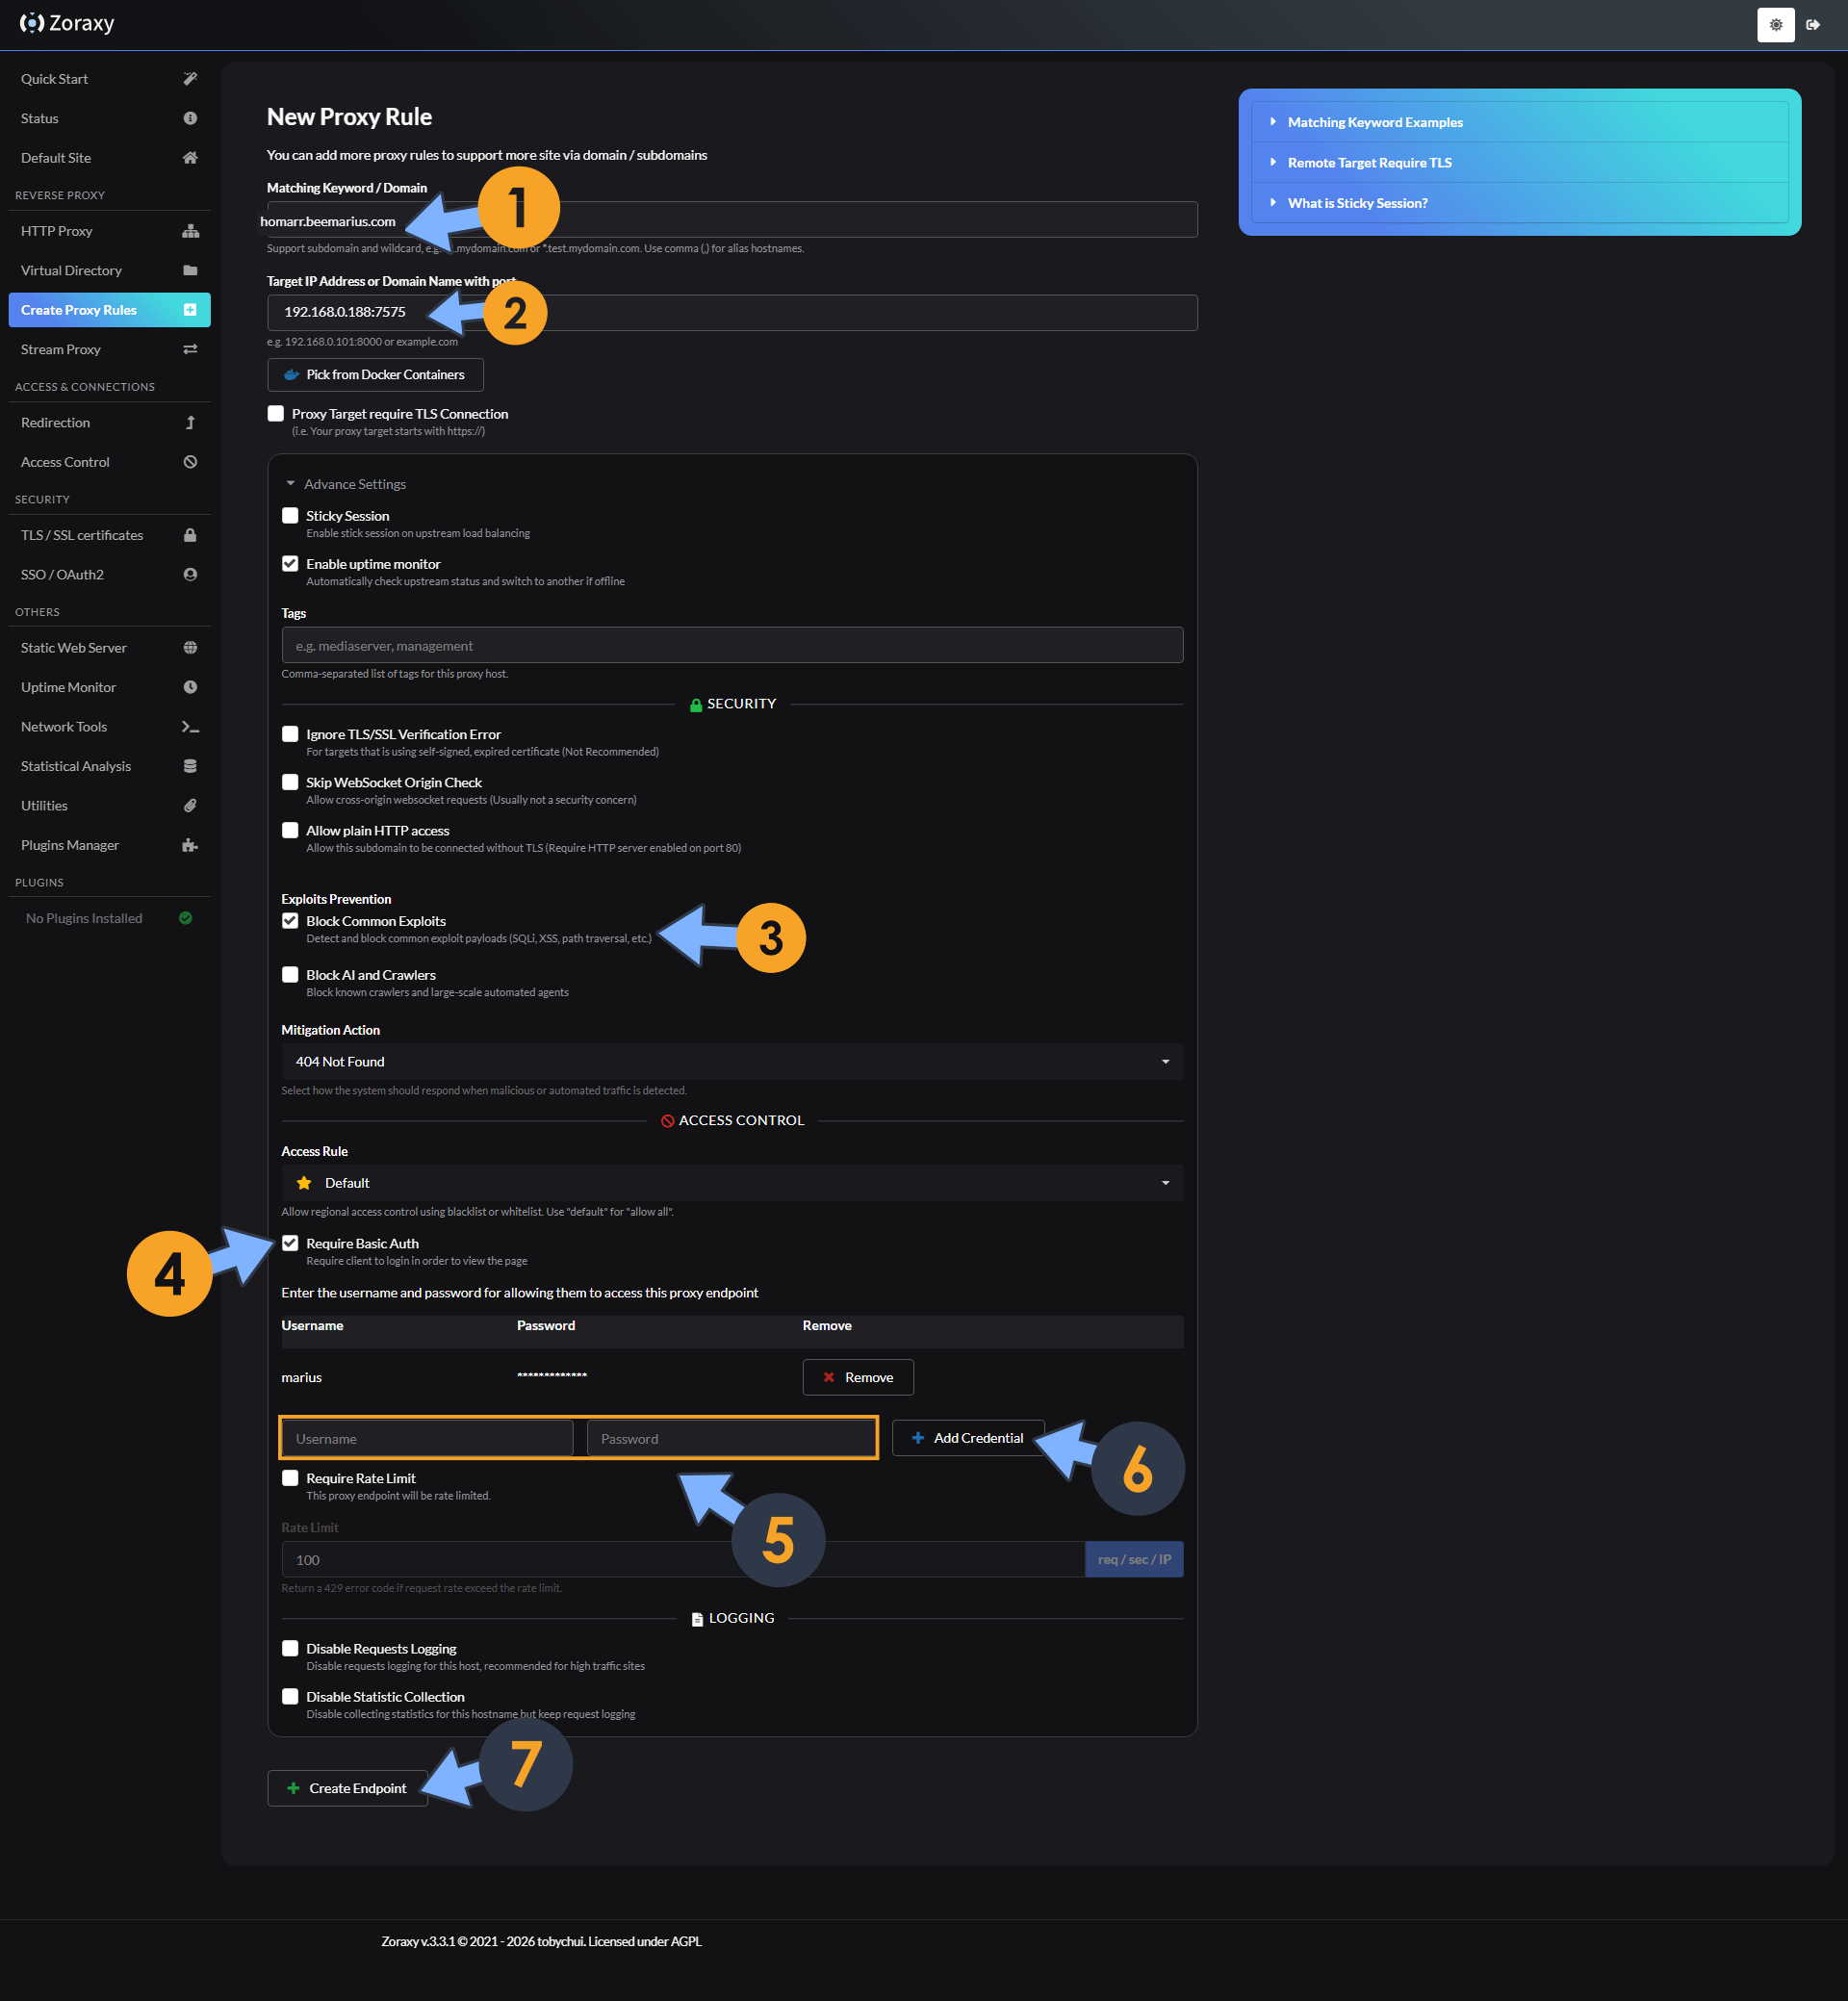
On the left sidebar, click Create Proxy Rules. Type in your own subdomain name without https:// at the beginning. You should already have your sub domain name set up as per the instructions at STEP 20 in my How To Use Your Own Domain Name on Your UGREEN NAS article. In my case, it’s homarr.beemarius.com – In the Target IP area, type in your own NAS IP followed by :7575 (⚠️7575 is the homarr localhost port). Select Block Common Exploits. You can add different Access Rules. For example, block specific countries from accessing your domain name or an extra Basic Authorization. Add an extra Basic Authorization by adding a Username and Password. Click Add Credentials. Click Create Endpoint. Follow the instructions in the image below.
STEP 23
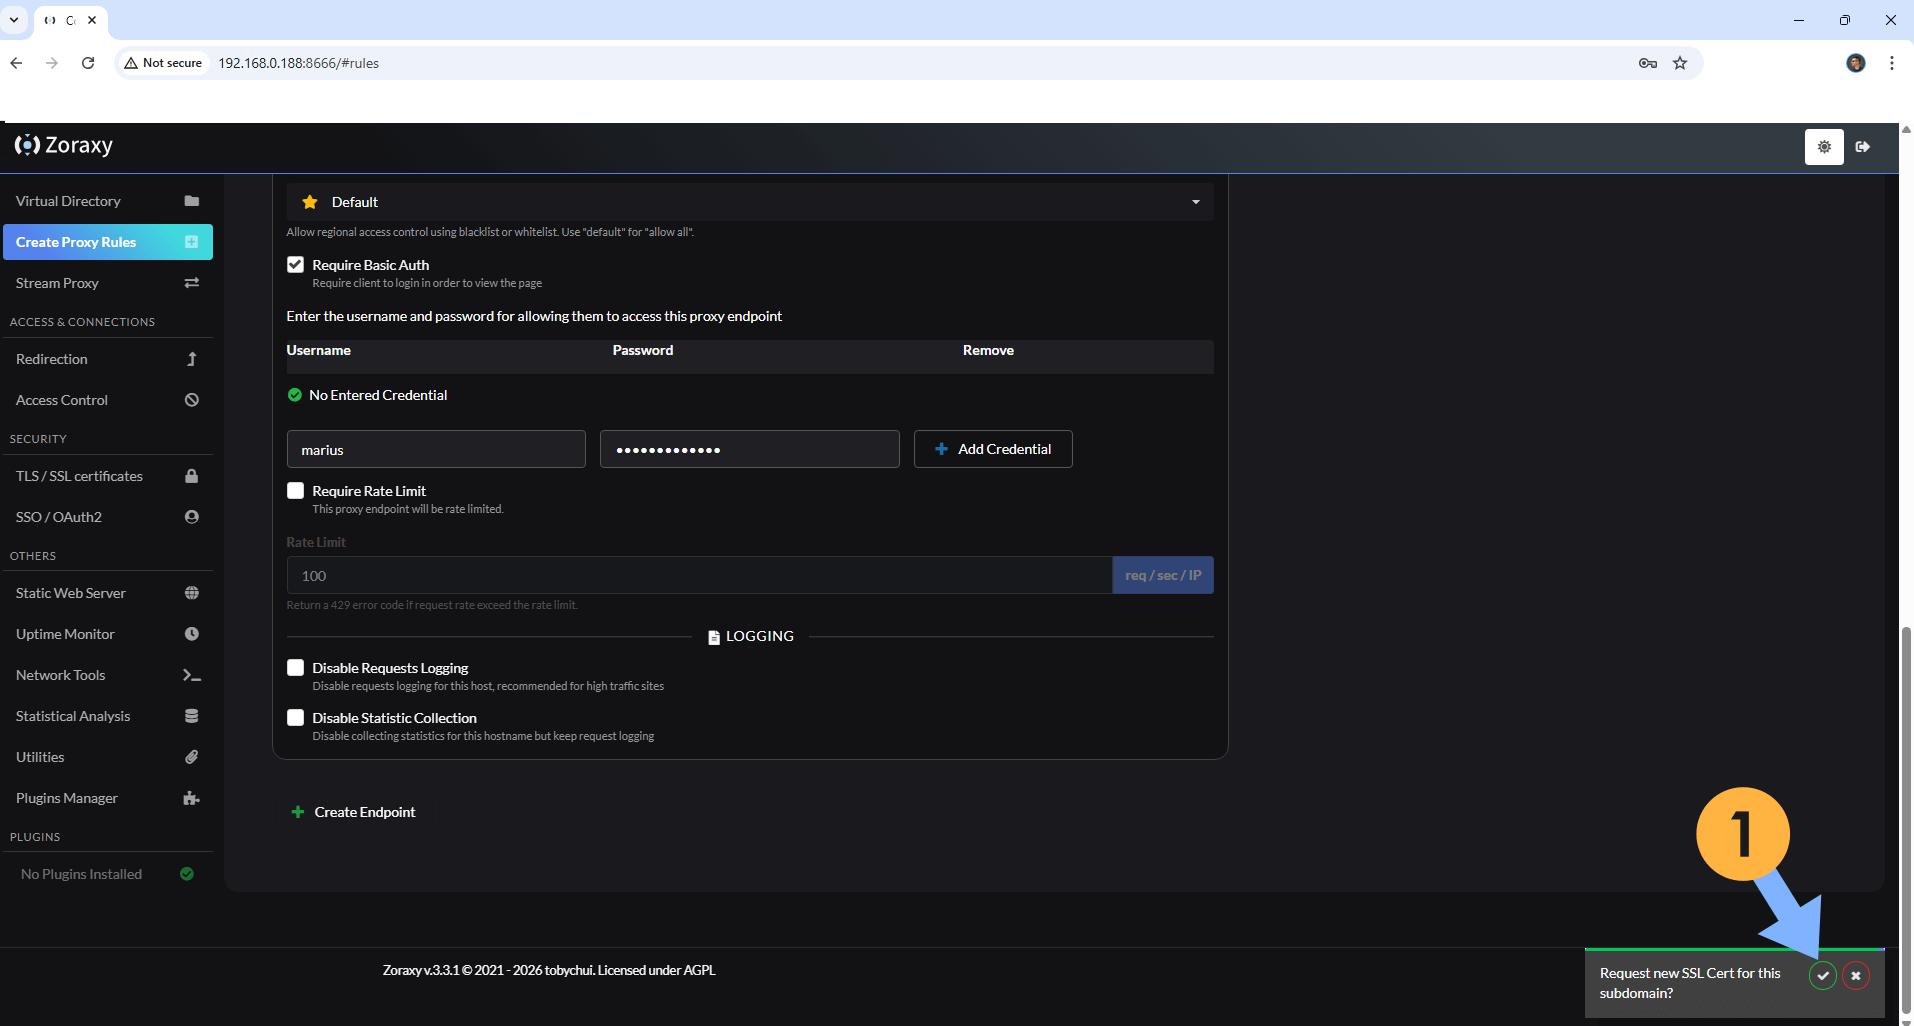
A new pop up window will open. Click Confirm to get your free Let’s Encrypt certificate. Follow the instructions in the image below.
STEP 24
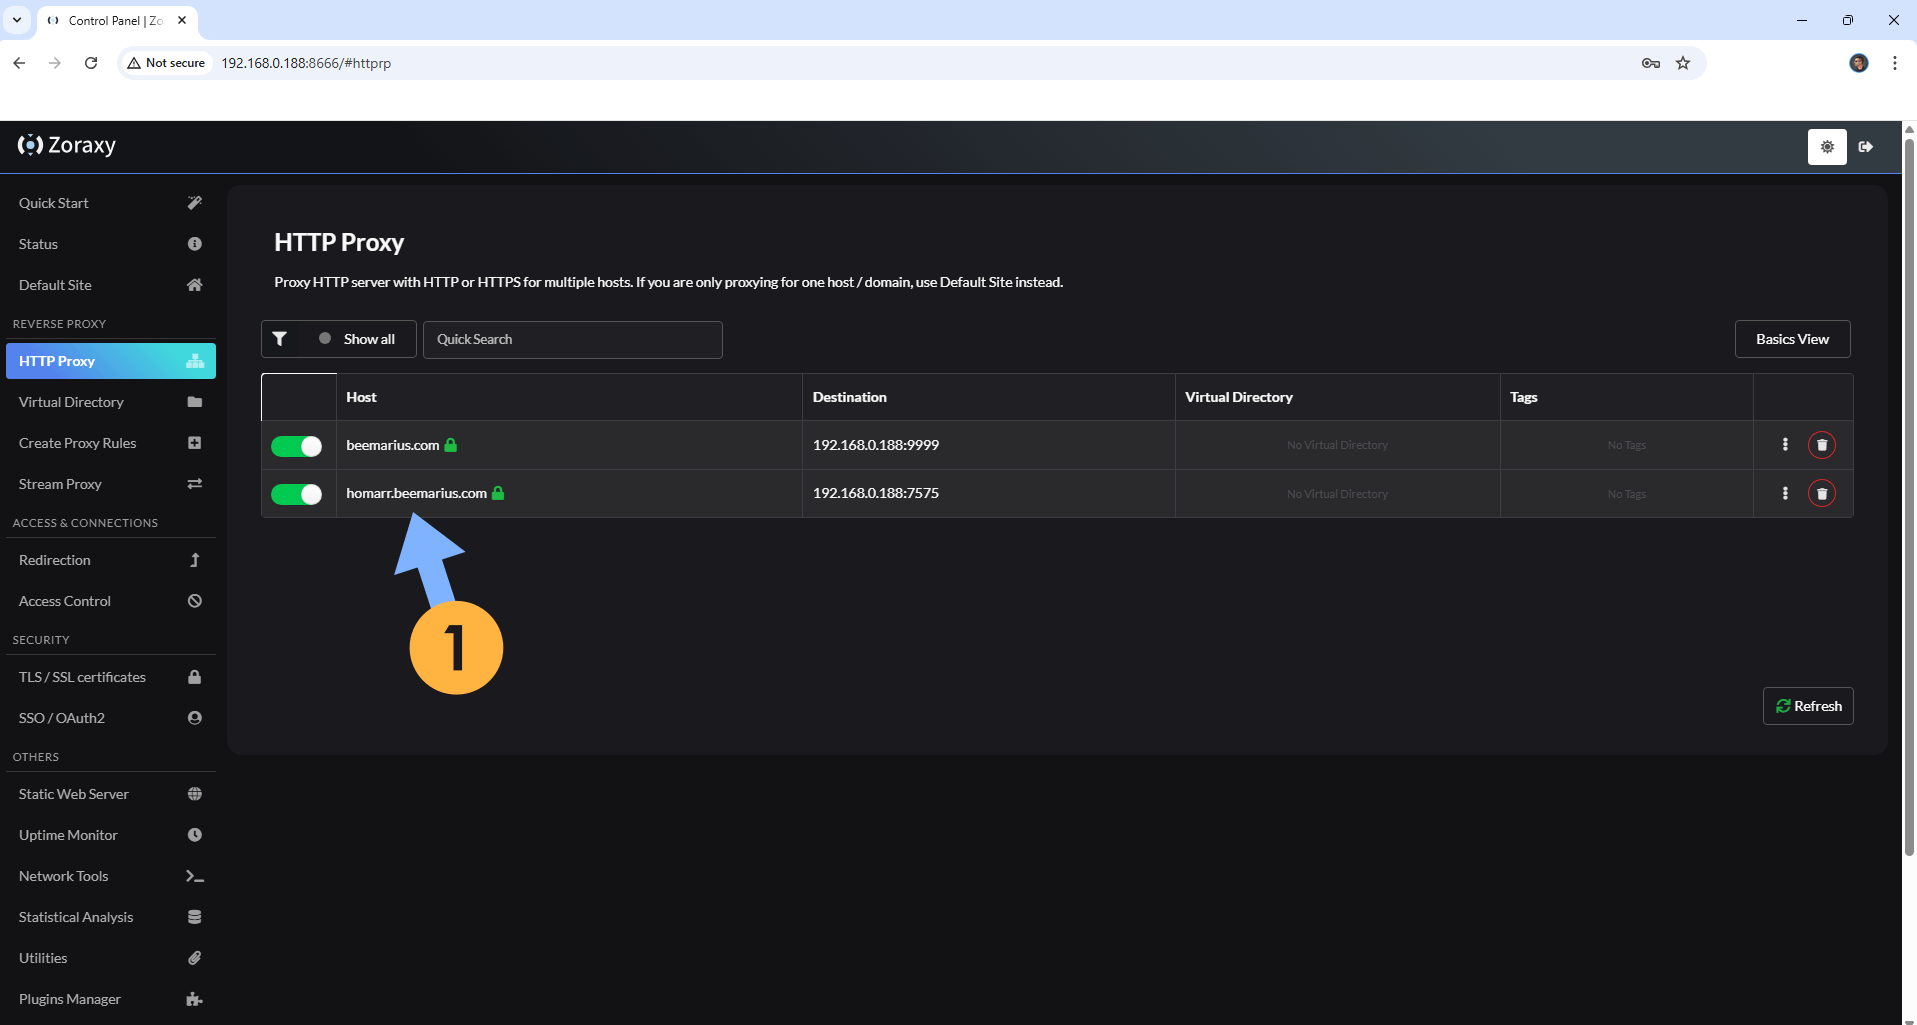
After the certificate is created, on the left sidebar, click HTTP Proxy. Click on your host/domain/subdomain name that has been created. Follow the instructions in the image below.
STEP 25
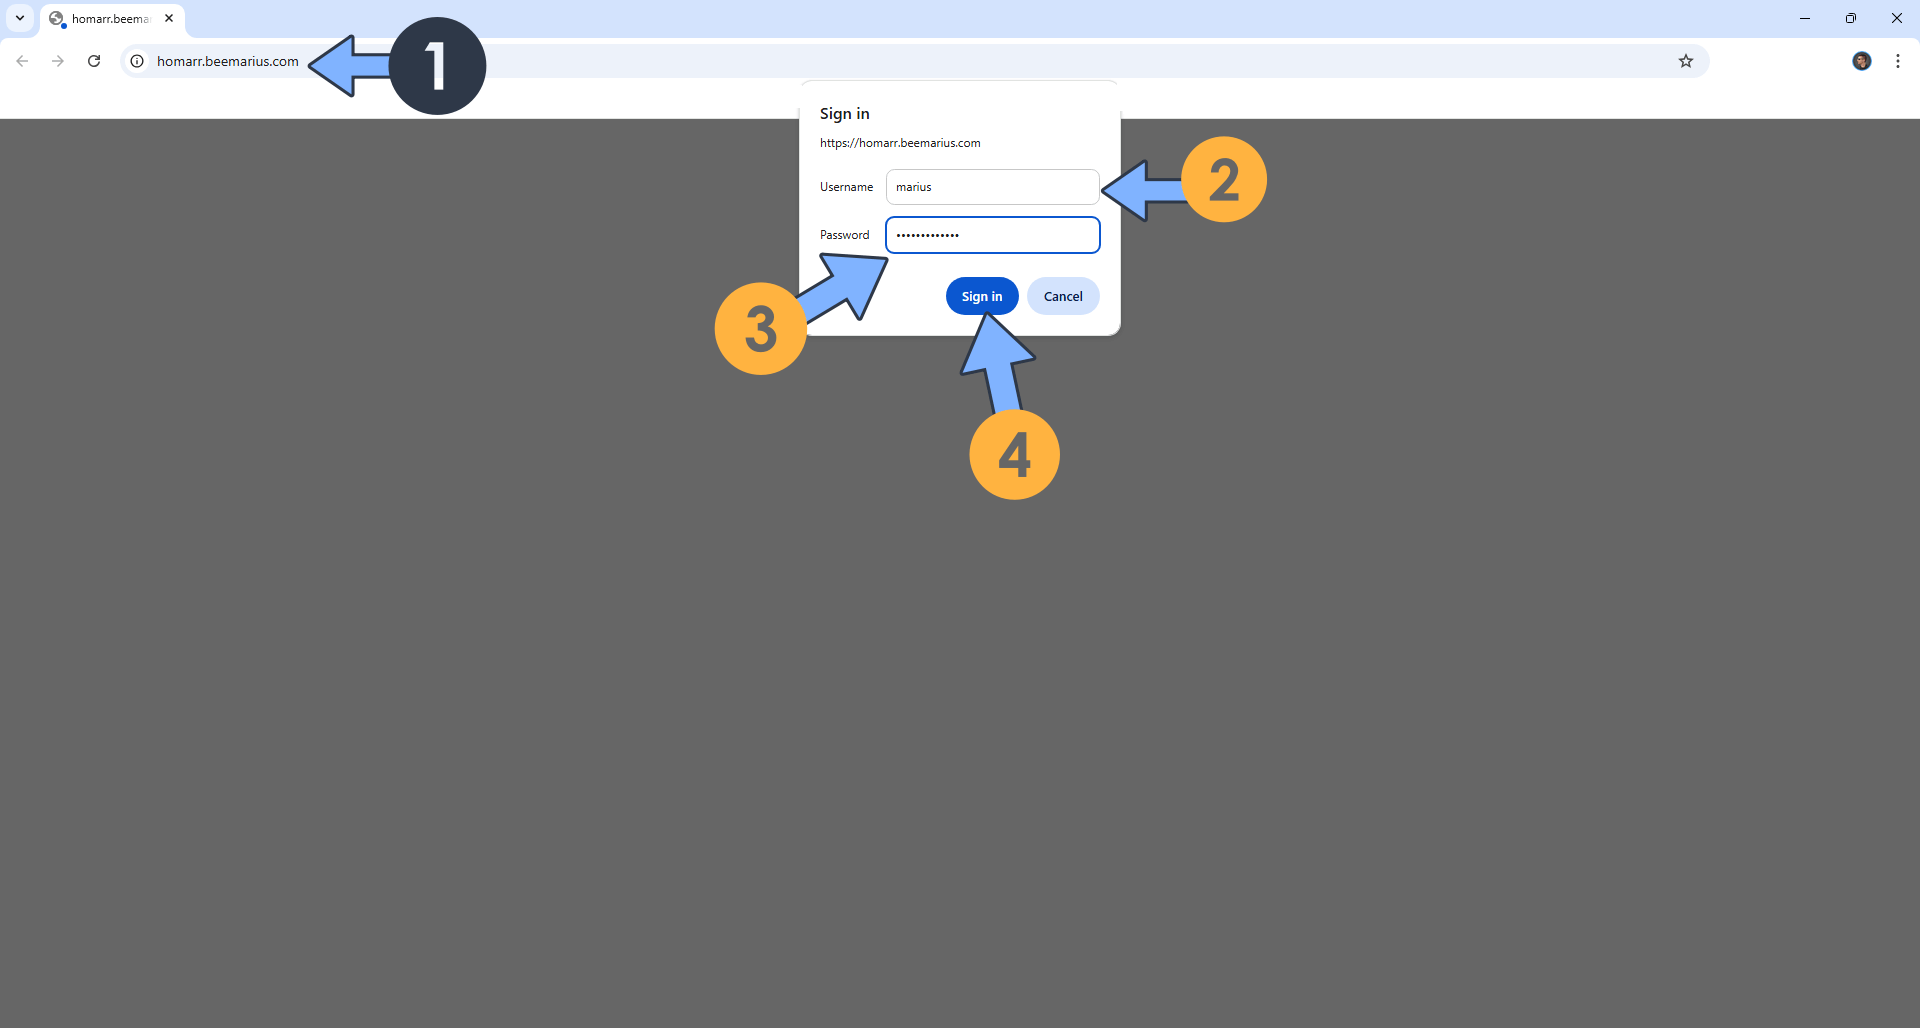
In your browser, type in your own subdomain/domain name. You will notice that you will be asked for a Basic Authorization (Username and Password). This happens because you have added the option for Basich Auth at STEP 22. Type in your own Username and Password that you have previously added at STEP 22, then click Sign in. Follow the instructions in the image below.
STEP 26
You can now access your Homarr Docker container via HTTPS / SSL Certificate and your OWN Domain / Subdomain Name from anywhere.
STEP 27
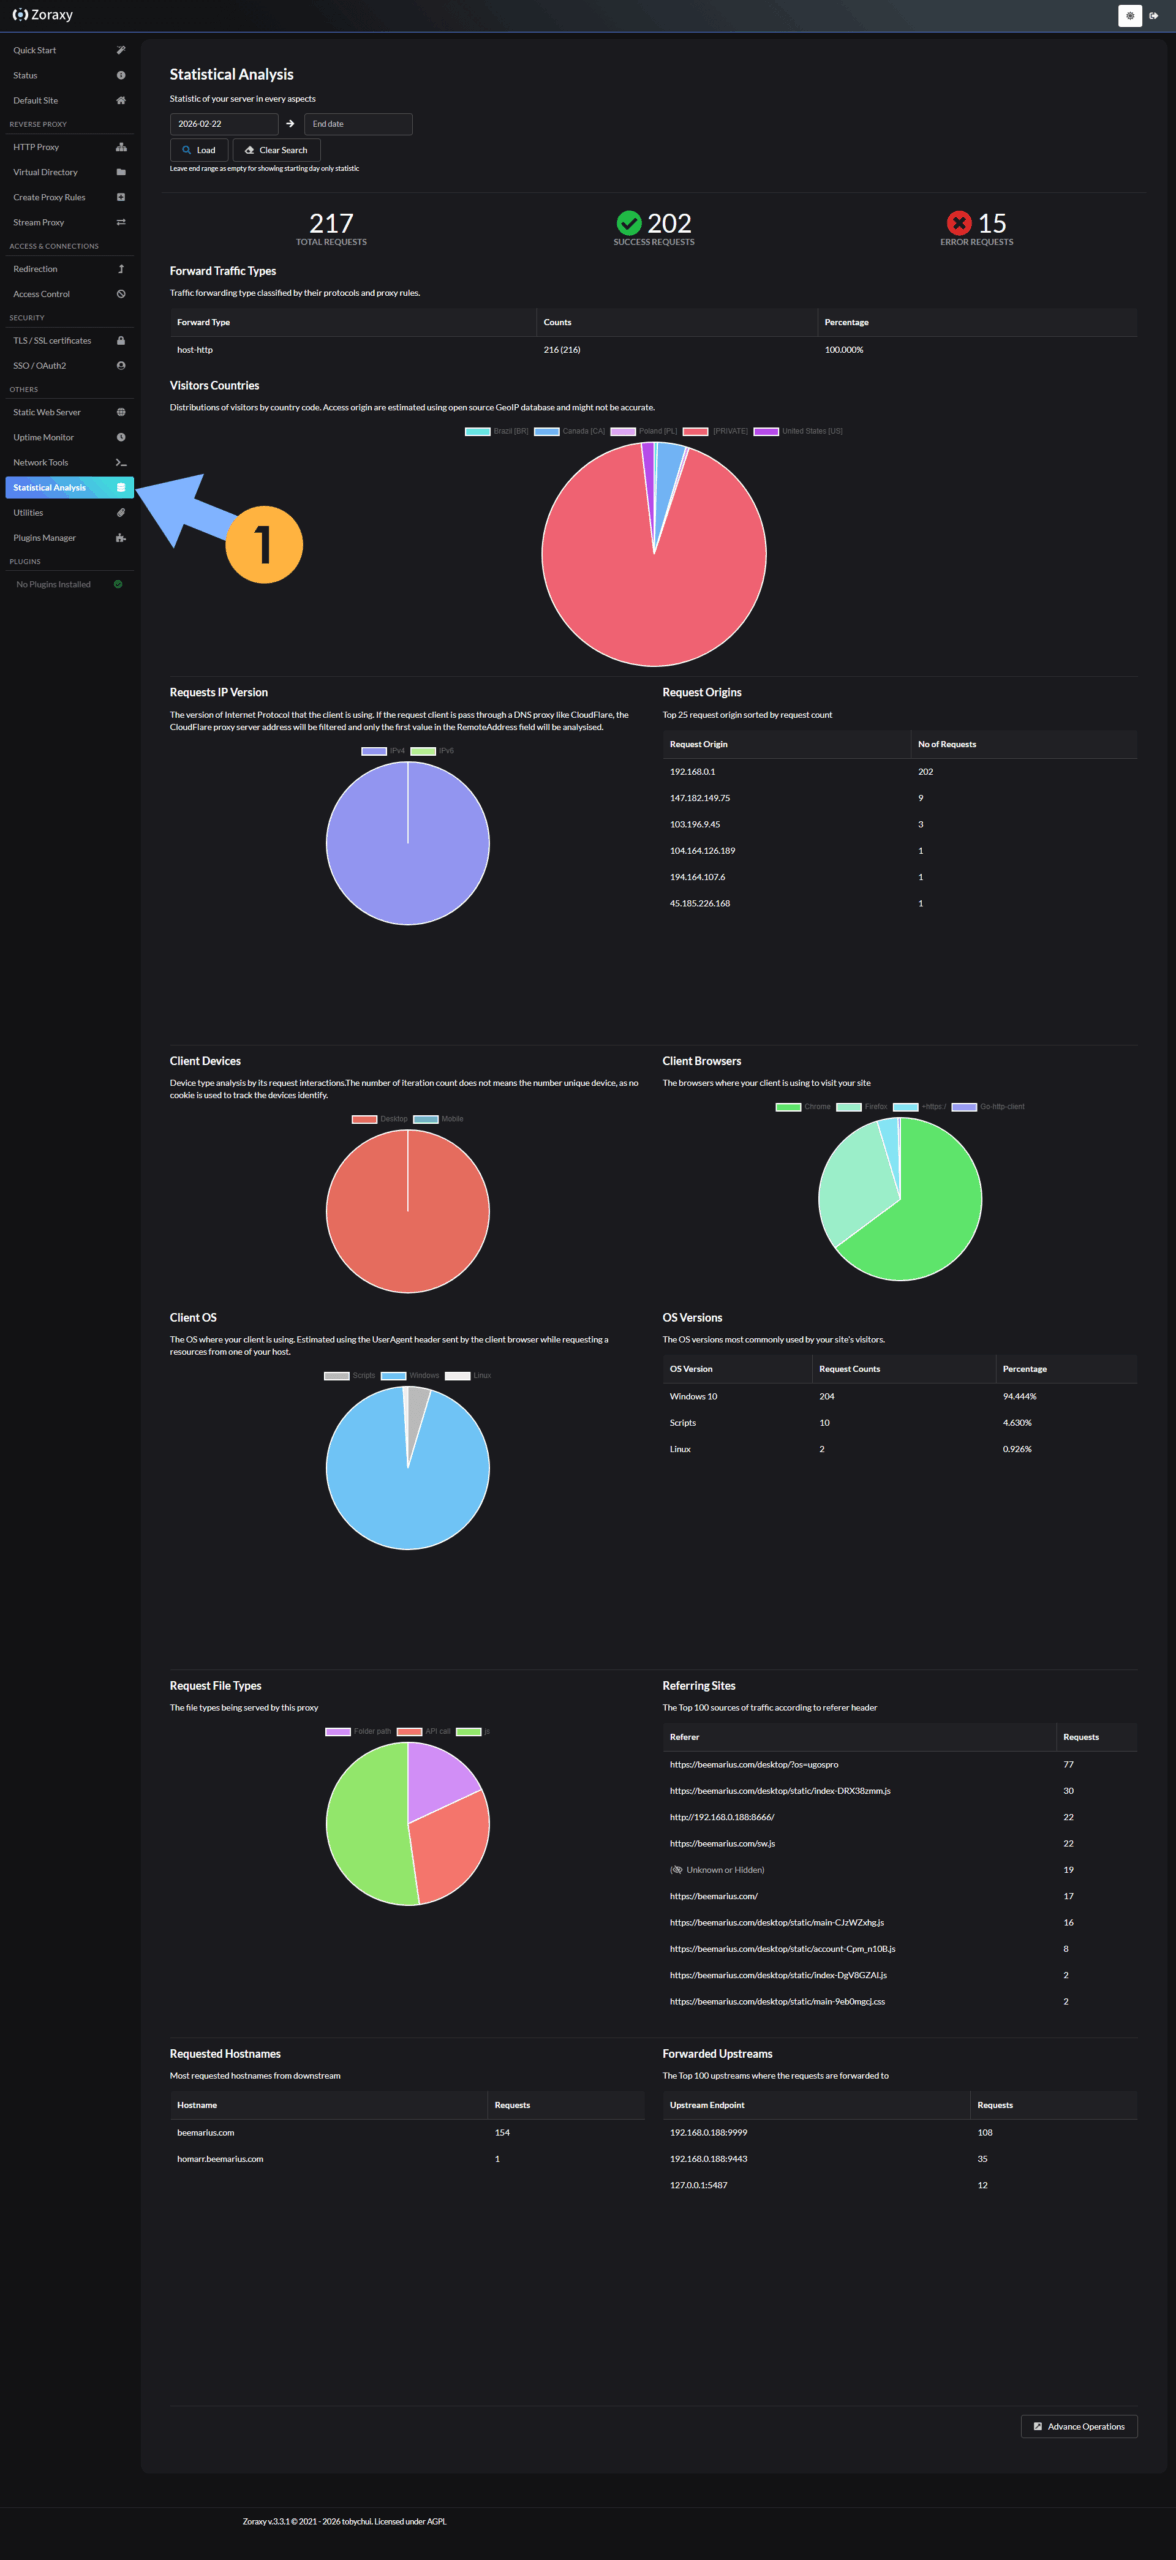
On the left sidebar in Zoraxy, click Statistical Analysis to access the full stats of your domain name.
Enjoy Zoraxy!
🆘TROUBLESHOOTING
🆙Note/Update/Container: How to Update Your Docker Containers on UGREEN NAS Using Portainer.
🐳Note: How to Create Docker Shortcuts on Desktop.
🆕Note: How to Update Portainer to the latest version.
🆕Note: How to Clean Docker.
This post was updated on Wednesday / October 14th, 2026 at 10:17 AM