The UniFi Controller is a wireless network management software solution from Ubiquiti Networks. It allows you to manage multiple wireless networks using a web browser. In this step by step guide I will teach you how to install UniFi Controller on your Synology NAS device using Docker.
STEP 1
Please Support My work by Making a Donation.
STEP 2
Install Docker via Synology “Package Center”.

STEP 3
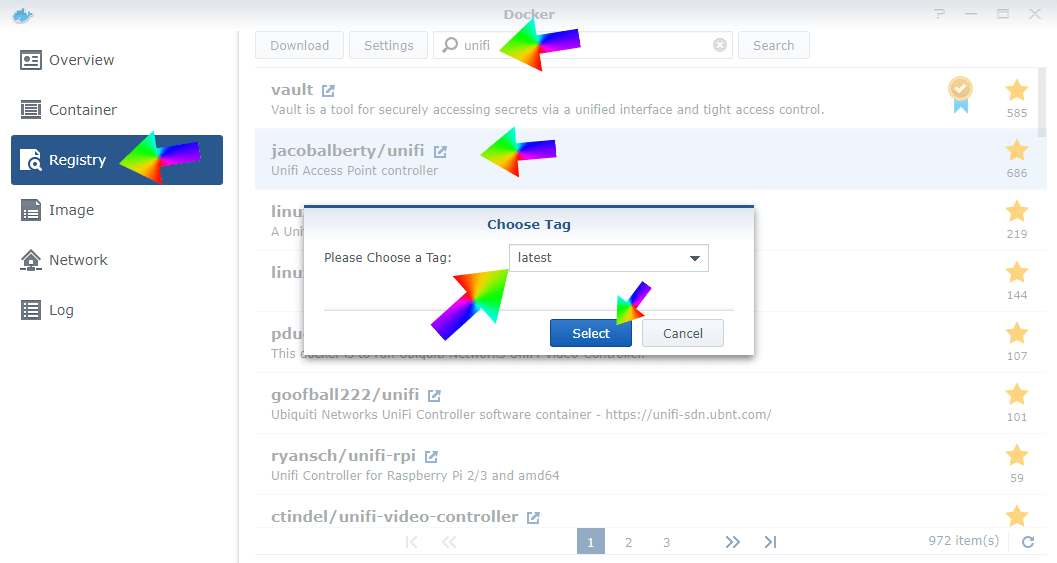
Open the Docker Package. From the Docker Console, go to Registry and search for unifi. Look for jacobalberty/unifi and select it, then click Download. You will be prompted to Choose Tag, select latest. Follow the instructions in the image below.
STEP 4
After you click “Select”, the download process of the Unifi Controller docker container will start. You can click on Image on the Docker Console to see the download progress. The current container is about 703 MB. Follow the instructions in the image below.

STEP 5
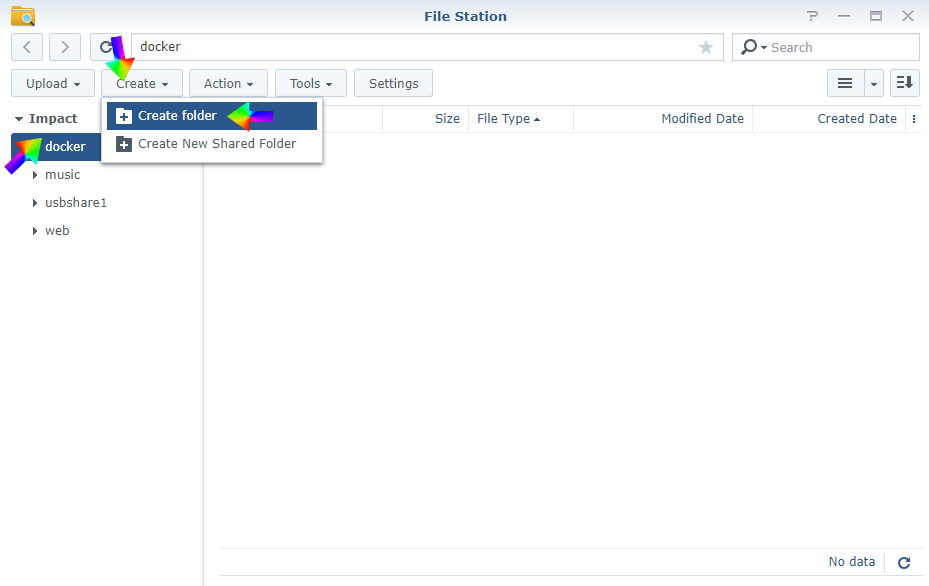
Go to File Station and open the docker folder. Inside the docker folder, create a new folder. Follow the instructions in the image below.
STEP 6
Create a new folder and name it “dns“. Follow the instructions in the image below.
Note: Be careful to enter only lowercase, not uppercase letters.

STEP 7
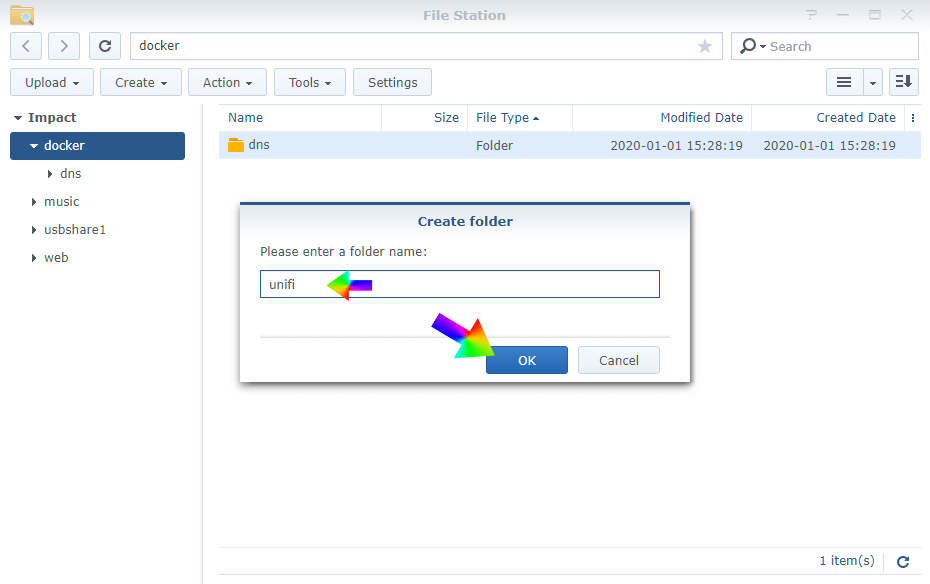
Create another new folder and name it “unifi“. Follow the instructions in the image below.
Note: Be careful to enter only lowercase, not uppercase letters.
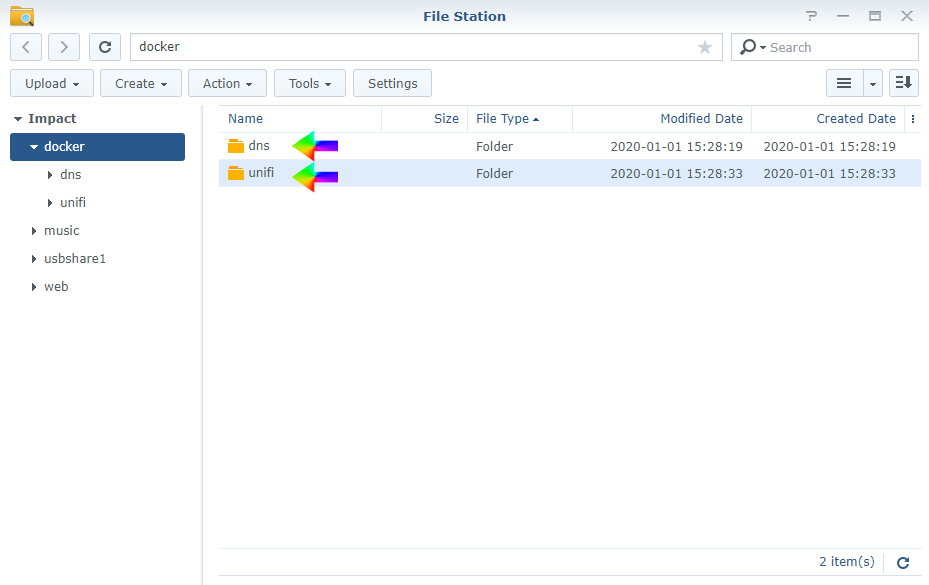
STEP 8
The final result should look like this. Follow the instructions in the image below.
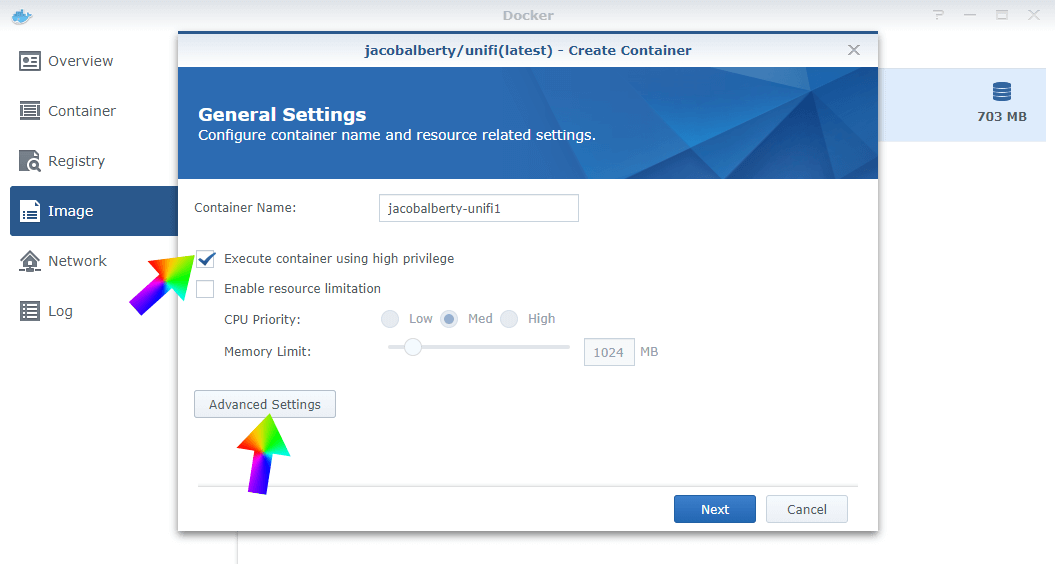
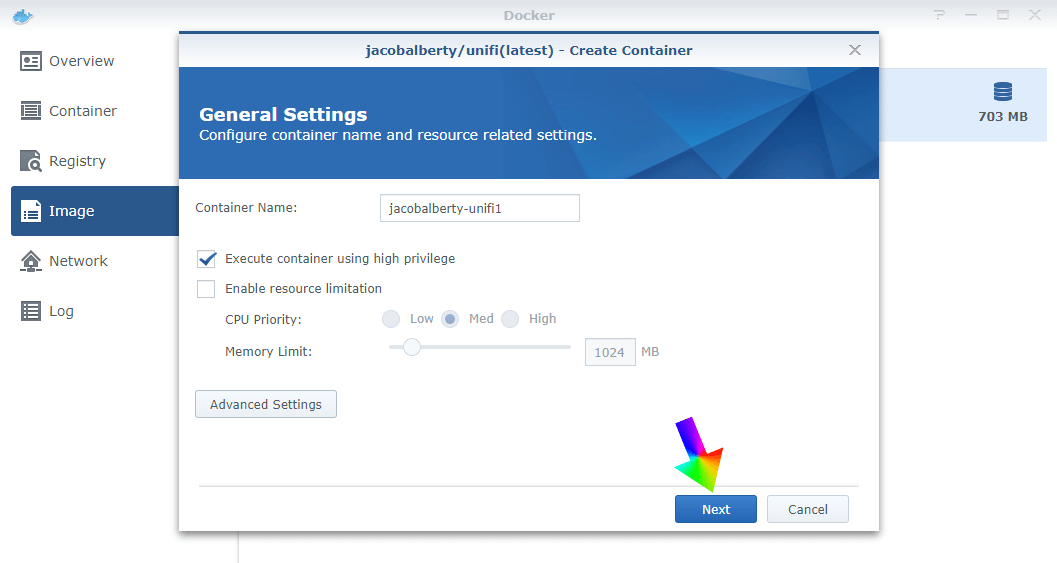
STEP 9
Now go back to the Docker Package. After the download is completed from the Docker Console, go to Image, then select the jacobalberty/unifi container. Click Launch. Check “Execute container using high privilege”, then click Advanced Settings. Follow the instructions in the image below.
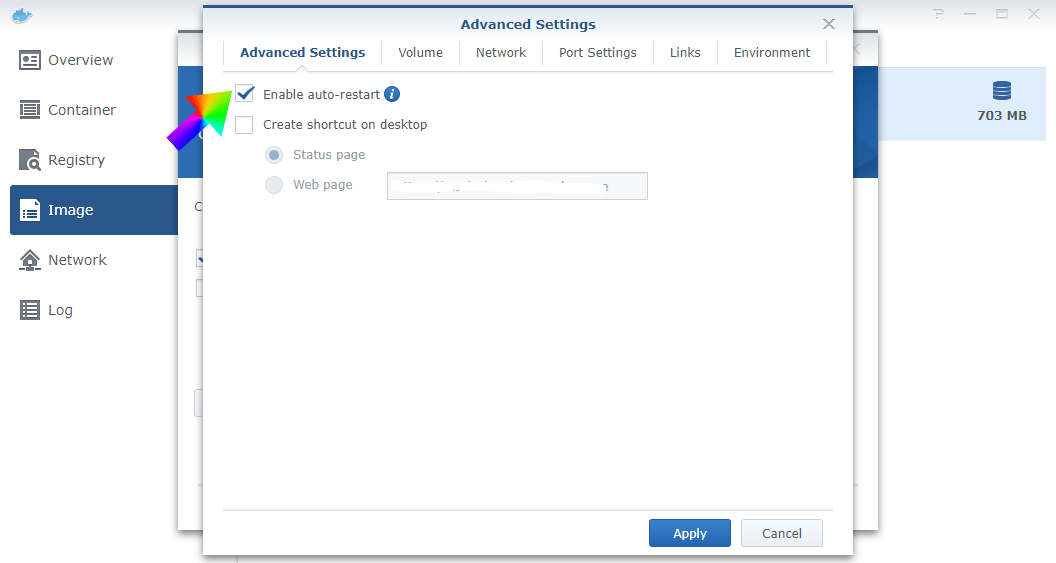
STEP 10
Select Enable auto-restart. Follow the instructions in the image below.
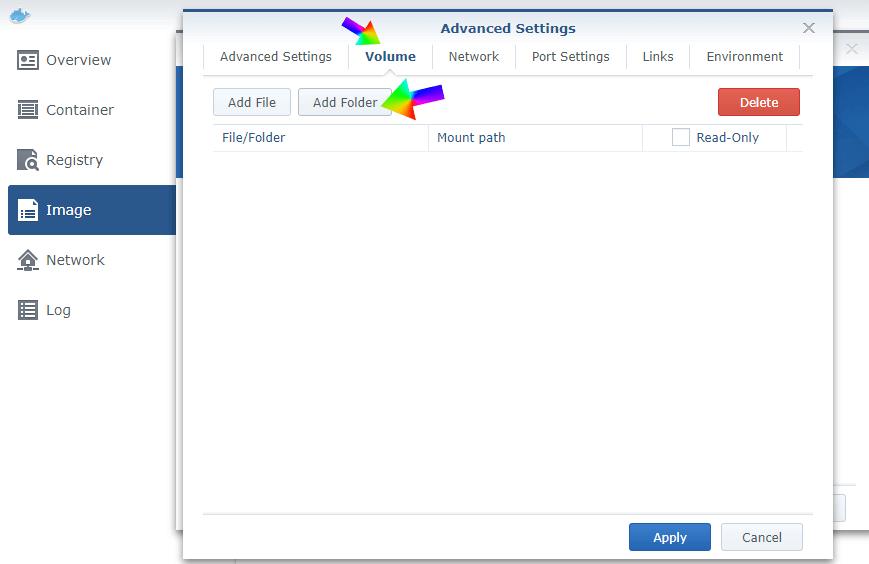
STEP 11
Next tab – “Volume“. Select Add Folder. Follow the instructions in the image below.
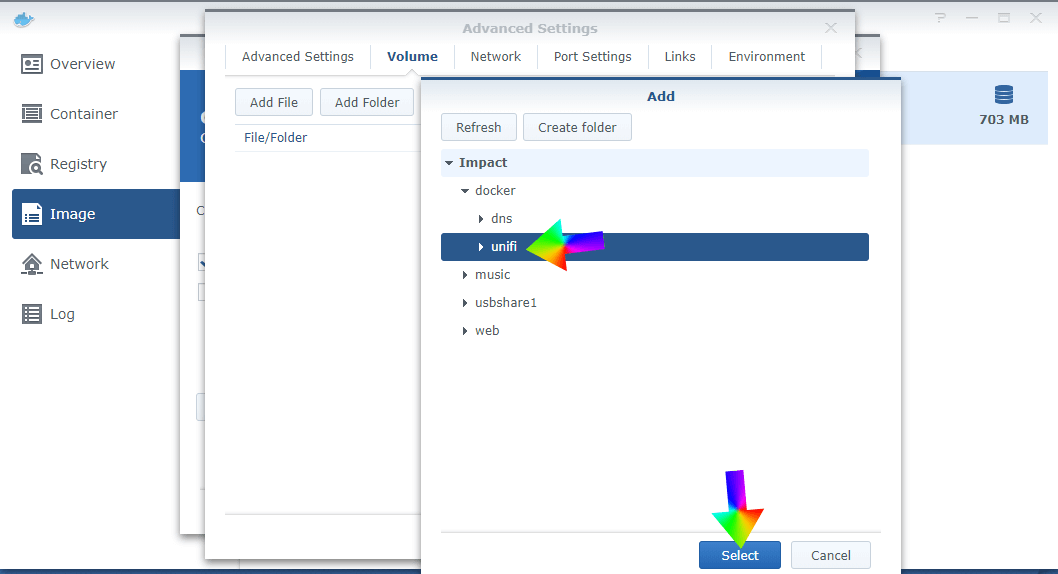
STEP 12
Choose the unifi folder, then click Select. Follow the instructions in the image below.
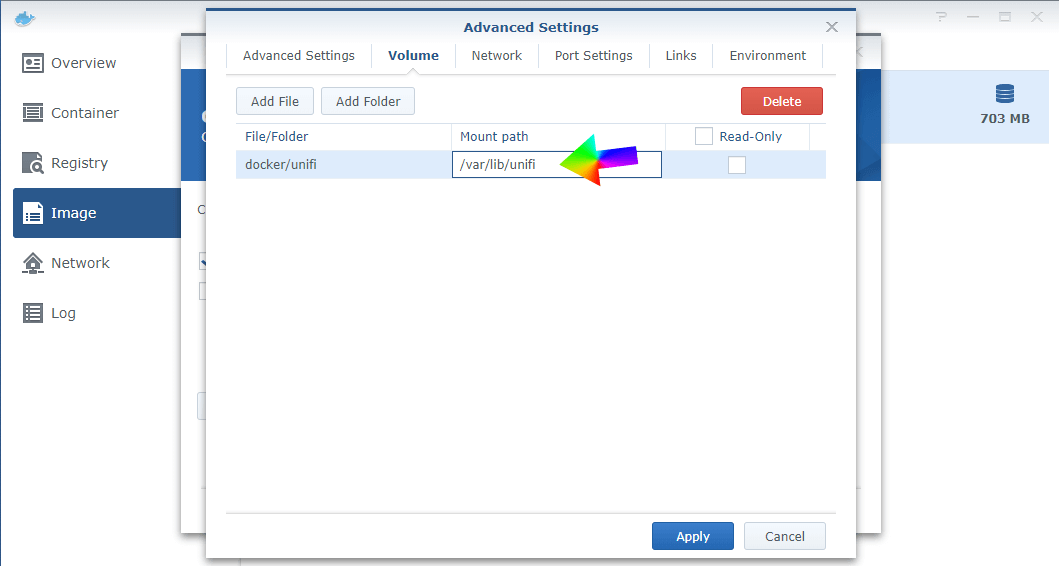
STEP 13
After you click Select, type /var/lib/unifi inside Mount path. Follow the instructions in the image below.
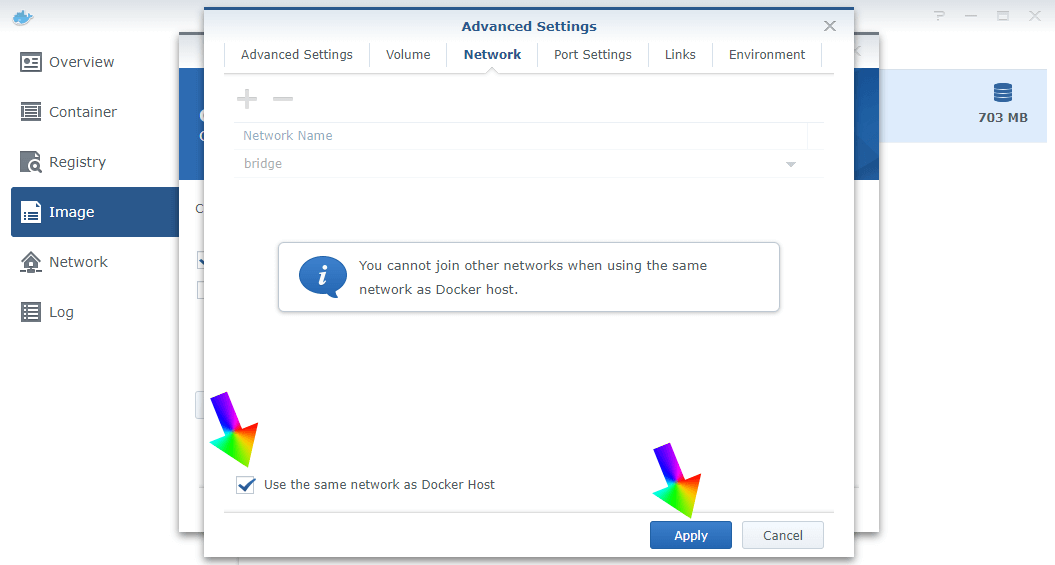
STEP 14
Next tab – “Network“. Check “Use the same network as Docker Host” then click Apply. Follow the instructions in the image below.
STEP 15
After clicking “Apply“, the screen below will open. Click “Next“. Follow the instructions in the image below.
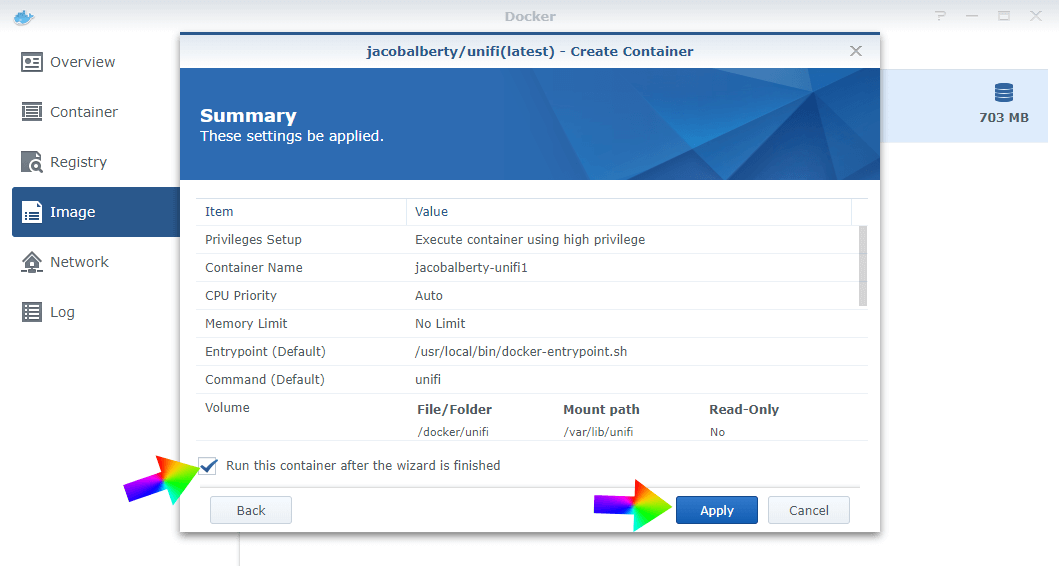
STEP 16
After clicking “Next“, the screen below will open. Select “Run this container after the wizard is finished” then click “Apply“. Follow the instructions in the image below.
STEP 17
🟢Please Support My work by Making a Donation. Almost 99,9% of the people that install something using my guides forget to support my work, or just ignore STEP 1. I’ve been very honest about this aspect of my work since the beginning: I don’t run any ADS, I don’t require subscriptions, paid or otherwise, I don’t collect IPs, emails, and I don’t have any referral links from Amazon or other merchants. I also don’t have any POP-UPs or COOKIES. I have repeatedly been told over the years how much I have contributed to the community. It’s something I love doing and have been honest about my passion since the beginning. But I also Need The Community to Support me Back to be able to continue doing this work.
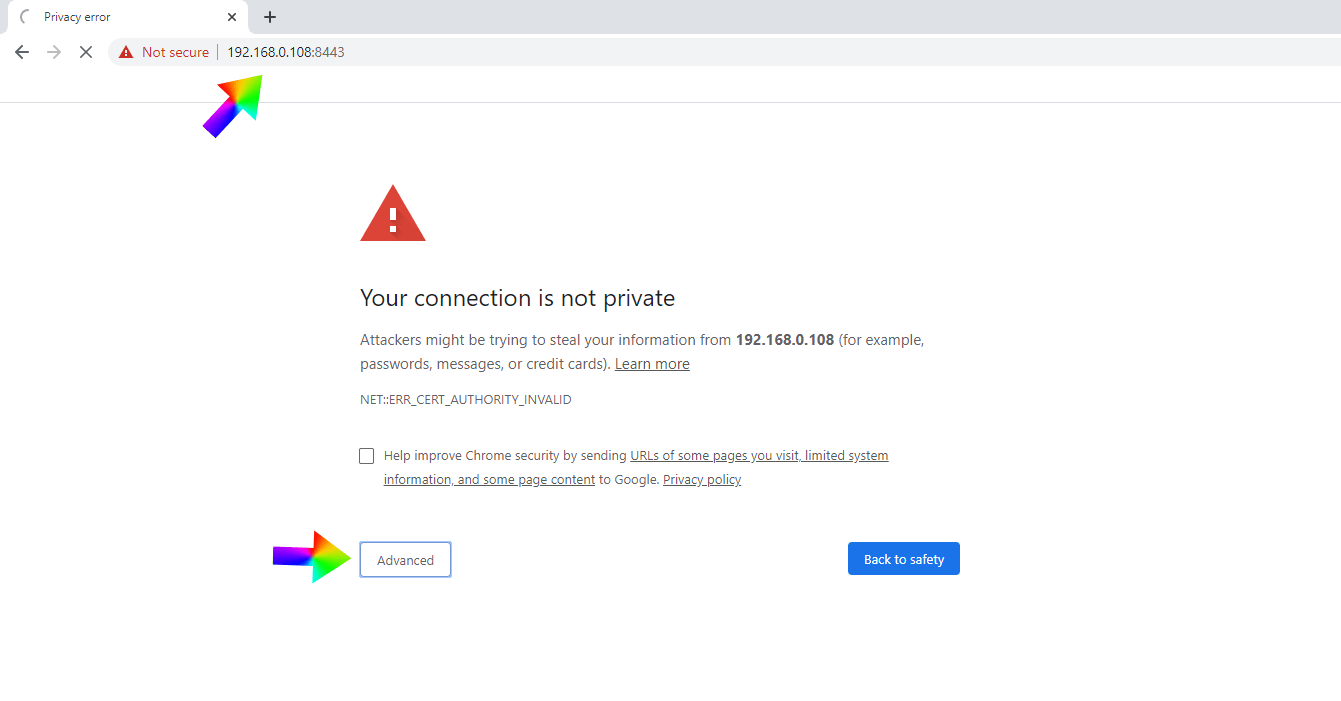
Now open your browser and type in https://Synology-ip-address:8443/ then click Advanced. Follow the instructions in the image below.
STEP 18
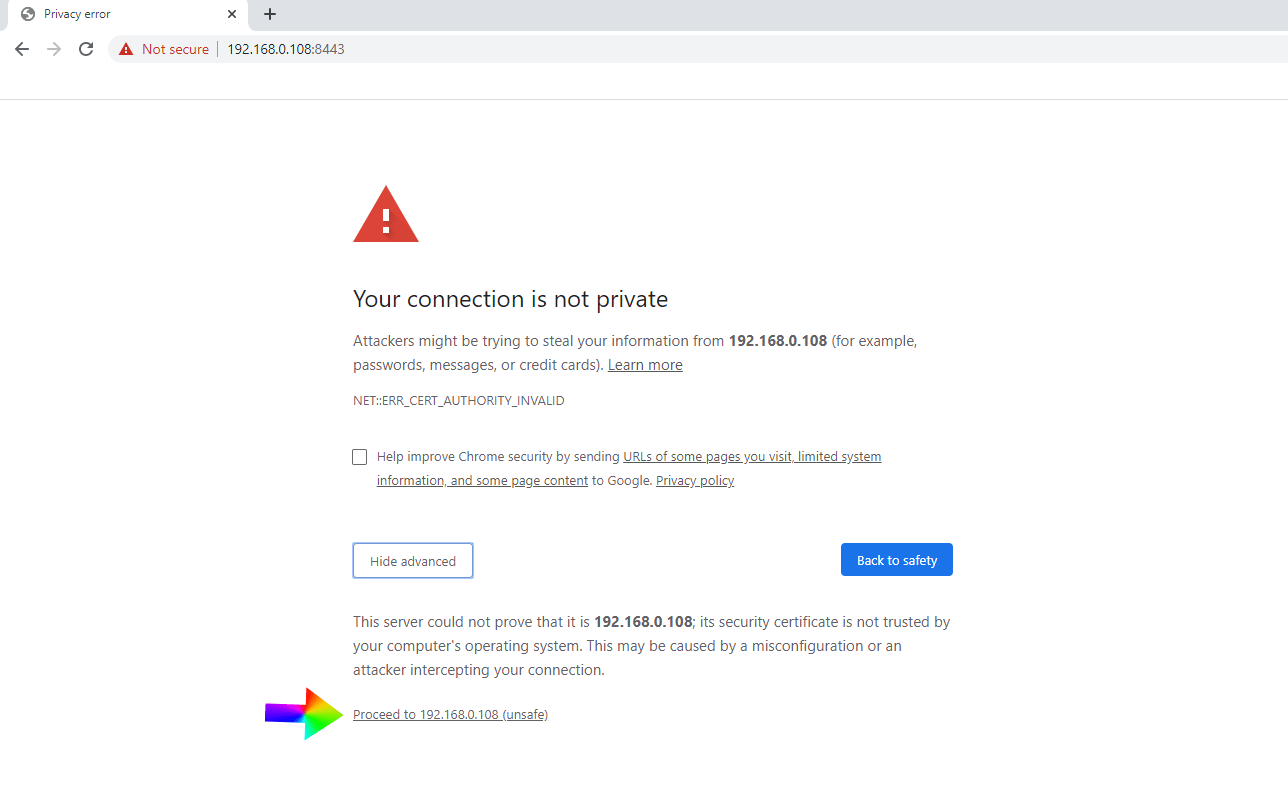
Click to Proceed to your local NAS IP (unsafe). Follow the instructions in the image below.
STEP 19
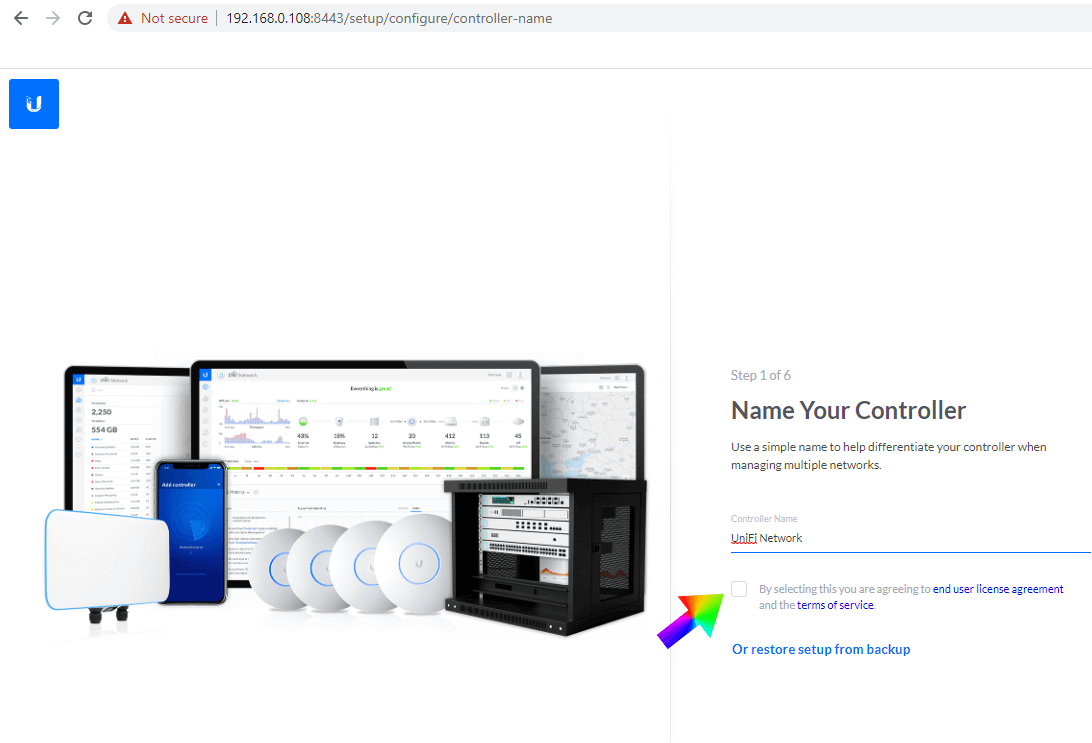
Install and set up the UniFi Controller according to your preferences. Enjoy!
Note: On STEP 9 you can change the container name according to your preference.
Note: (Reported by Neil Brewster @neilschmeel) After STEP 14 you can set some Environment variables before proceeding to STEP 15. I recommend to change in the container’s Environment variables the line RUNAS_UID0=true into RUNAS_UID0=false and the line BIND_PRIV=true into BIND_PRIV=false
Summary:
- In the container’s Environment variables Look for “RUNAS_UID0” and set its value to “false” instead “true“.
- In the container’s Environment variables Look for “BIND_PRIV” and set its value to “false” instead “true“.
Note: Find out how to update UniFi Controller container with the latest image.
This post was updated on Saturday / August 30th, 2025 at 1:44 AM