Plex is an American streaming media service and a client–server media player platform made by Plex, Inc. The Plex Media Server organizes video, audio, and photos from a user’s collections and from online services, and streams it to the players. The Plex Media Server desktop application runs on Windows, macOS, and Linux. Plex gives you one place to find and access all the media that matters to you. From personal media on your own Synology server to podcasts, web shows, and news, to streaming music, you can enjoy it all in one app, on any device. In this step by step guide I will show you 3 different methods on how to install Plex on your Synology NAS device.
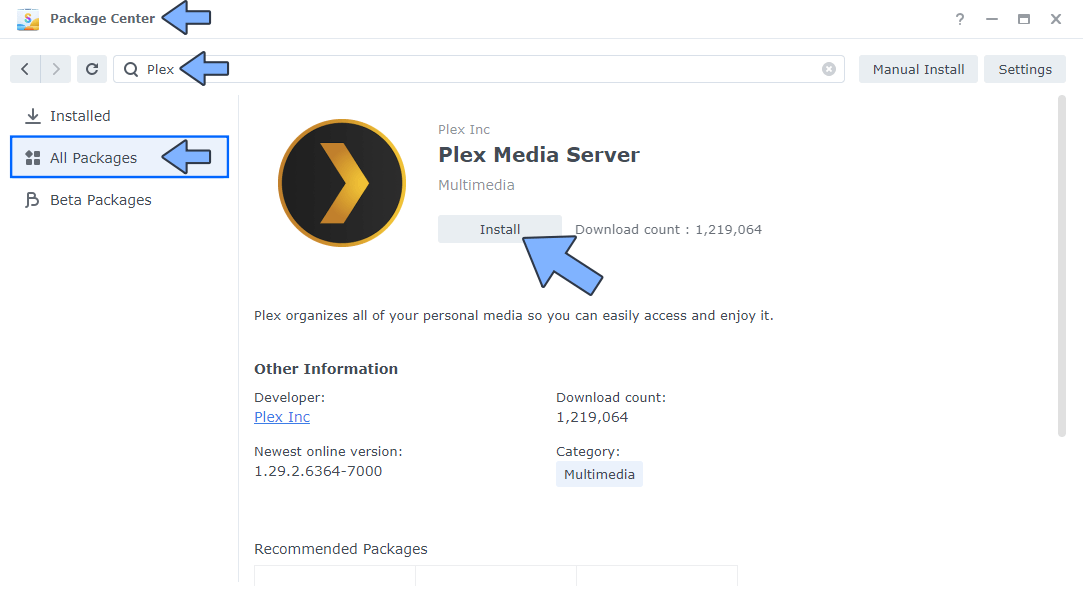
You can easily install Plex on your Synology NAS using the Plex package found in Synology Package Center. Open the Package Center, then search for Plex. Once you find the Plex package, click Install. Once installed, your Plex Media Server will be ready to use.
You can easily install Plex on your Synology NAS by downloading the always up to date official Plex package for free. This is the safest method because updates are always a priority for the Plex team. You will always have the latest version of Plex Media Server for your Synology NAS. The difference between the first installation method and the second is that Synology delays releasing 3rd party package updates for months.
Another easy method to install Plex on your Synology NAS is installing the Plex Media Server using the official package available for Docker. I have written a very simple guide for installing Plex on your Synology NAS using Docker. The main advantage of installing the Docker version of Plex versus method 1 and method 2 is speed. The Plex package installed via Docker uses up very few resources on your NAS. This method is preferable for those who already have experience with Docker.
If your Synology NAS supports Hardware Transcoding, you can install Plex using Docker & Portainer by following the guide on How to Install Plex With Hardware Transcoding on Your Synology NAS. Hardware transcoding makes media streaming from your NAS faster and more efficient.
You can also Install Plex using Portainer without Hardware Transcoding.
Note: These 5 very simple methods will allow you to Install Plex Media Server on your Synology NAS in a matter of minutes.
This post was updated on Friday / July 10th, 2026 at 1:36 AM