
PhotoPrism is a privately hosted app for browsing, organizing, and sharing your photo collection. It makes use of the latest technologies to tag and find pictures automatically without getting in your way. Say goodbye to solutions that force you to upload your visual memories to the cloud! In this step by step guide I will show you how to install PhotoPrism on your UGREEN NAS using Docker & Dockhand.
STEP 1
Please Support My work by Making a Donation.
STEP 2
Install Dockhand using my step by step guide. If you already have Dockhand installed on your UGREEN NAS, skip this STEP. Attention: Make sure you have installed the latest Dockhand version.
STEP 3
⚠️Mandatory: Add Read & Write Permissions to the Docker Folder.
STEP 4
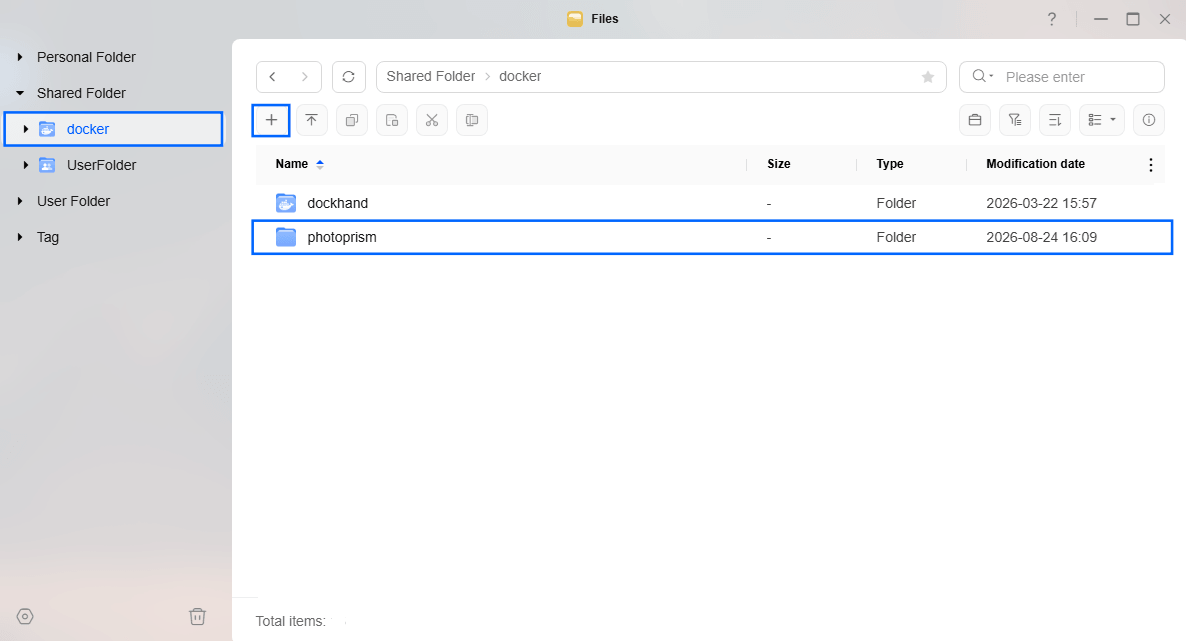
Go to Files and open the docker folder. Inside the docker folder, create one new folder and name it photoprism. Follow the instructions in the image below.
Note: Be careful to enter only lowercase, not uppercase letters.
STEP 5
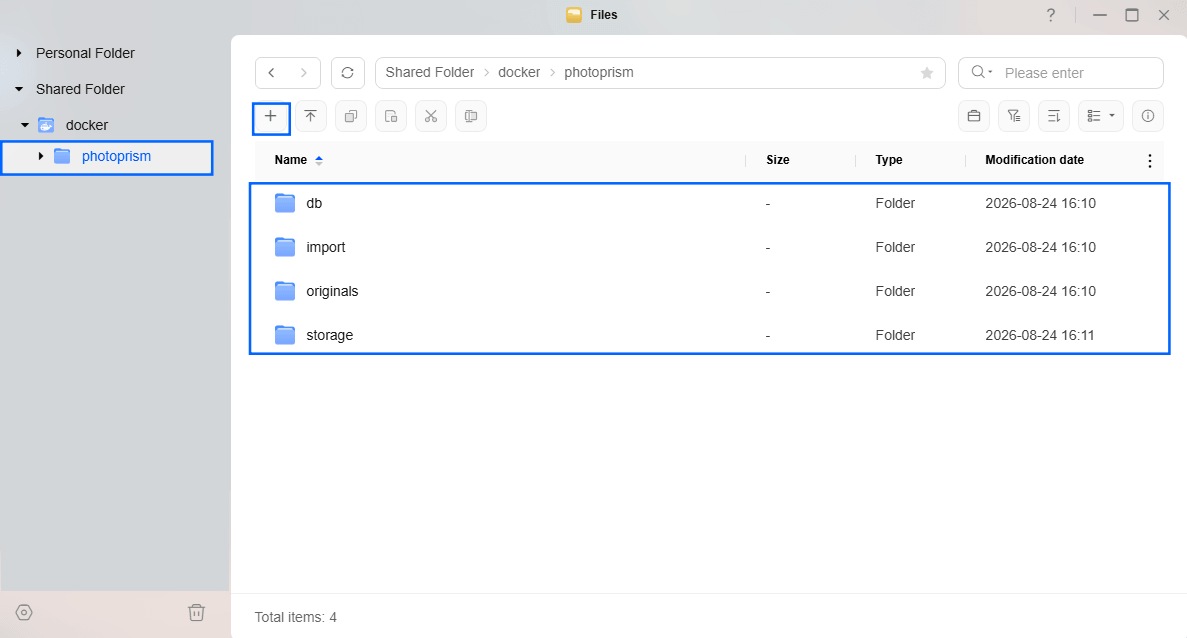
Now create four new folders inside the photoprism folder that you have previously created at STEP 4 and name them db, import, originals, storage. Follow the instructions in the image below.
Note: Be careful to enter only lowercase, not uppercase letters.
STEP 6
⚠️Mandatory: You can start populating your originals folder that you have previously created at STEP 5 with your own photos/videos.
STEP 7
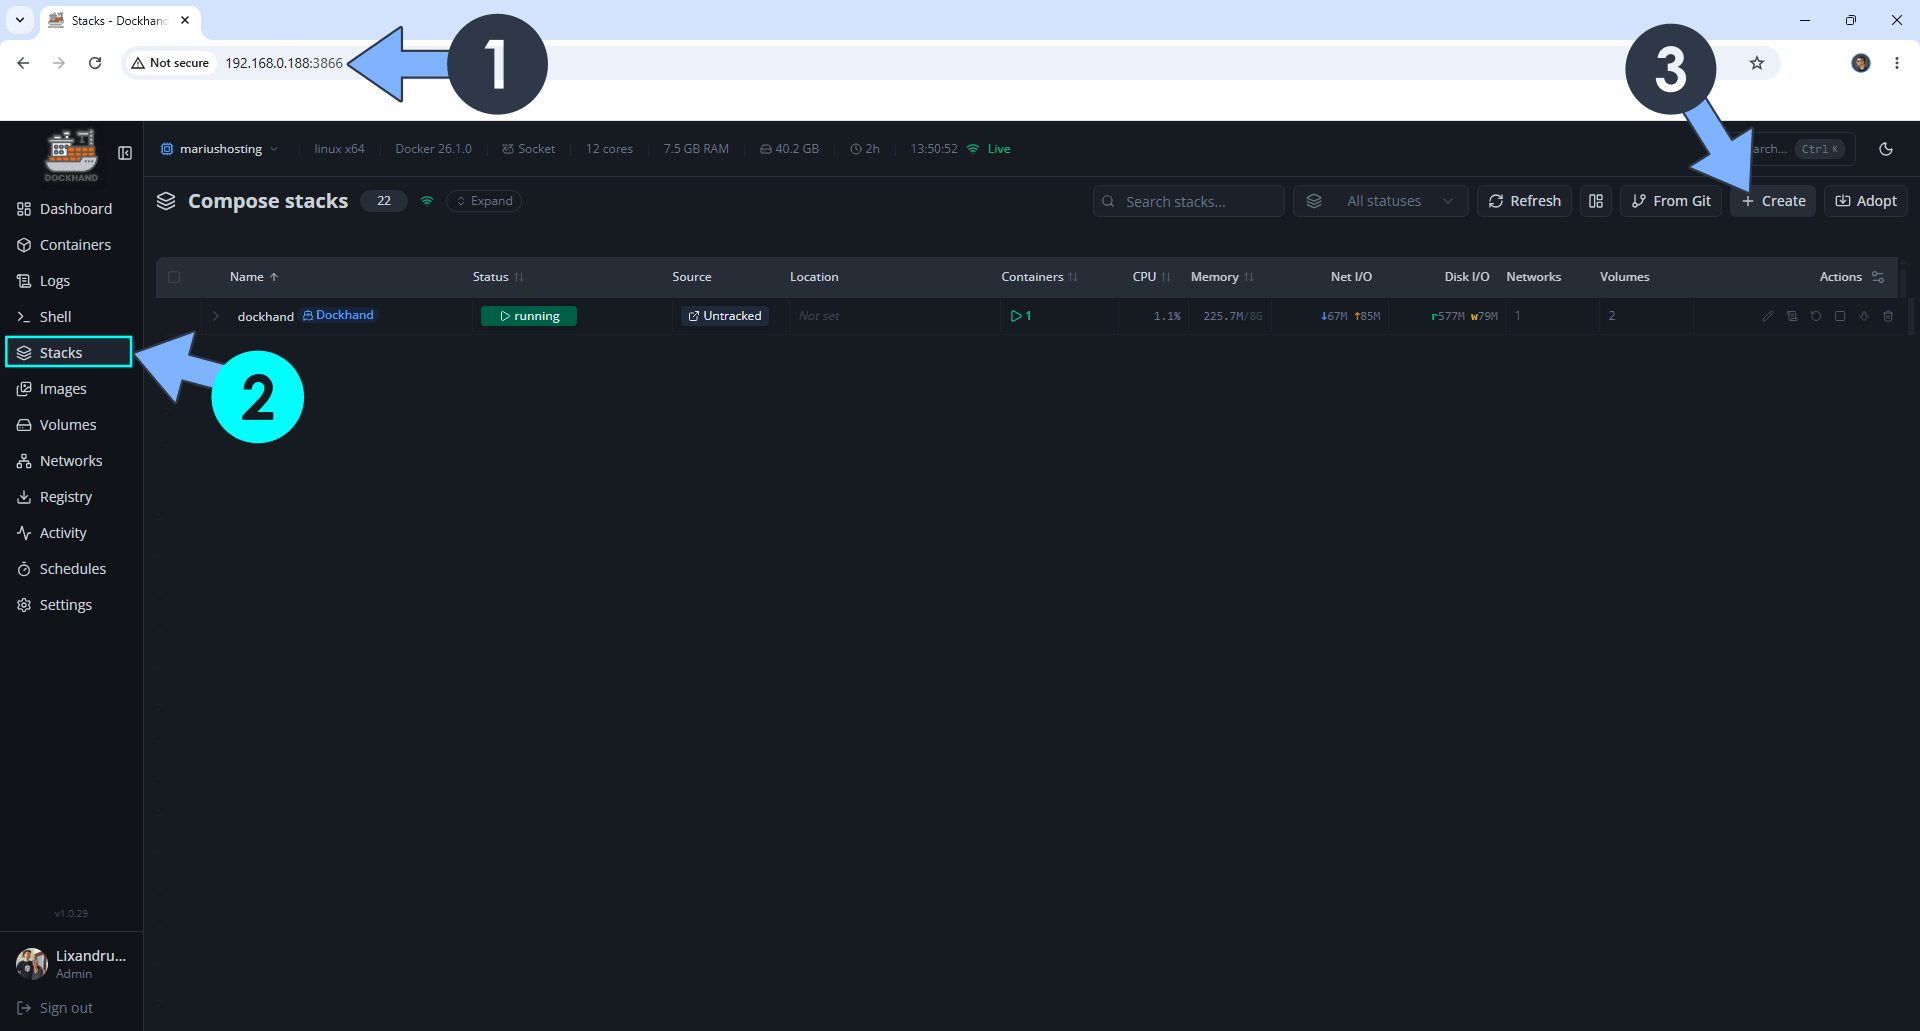
Open your browser and type in http://ugreen-ip-address:3866 to connect to your Dockhand container. On the left sidebar, click Stacks then + Create. Follow the instructions in the image below.
STEP 8
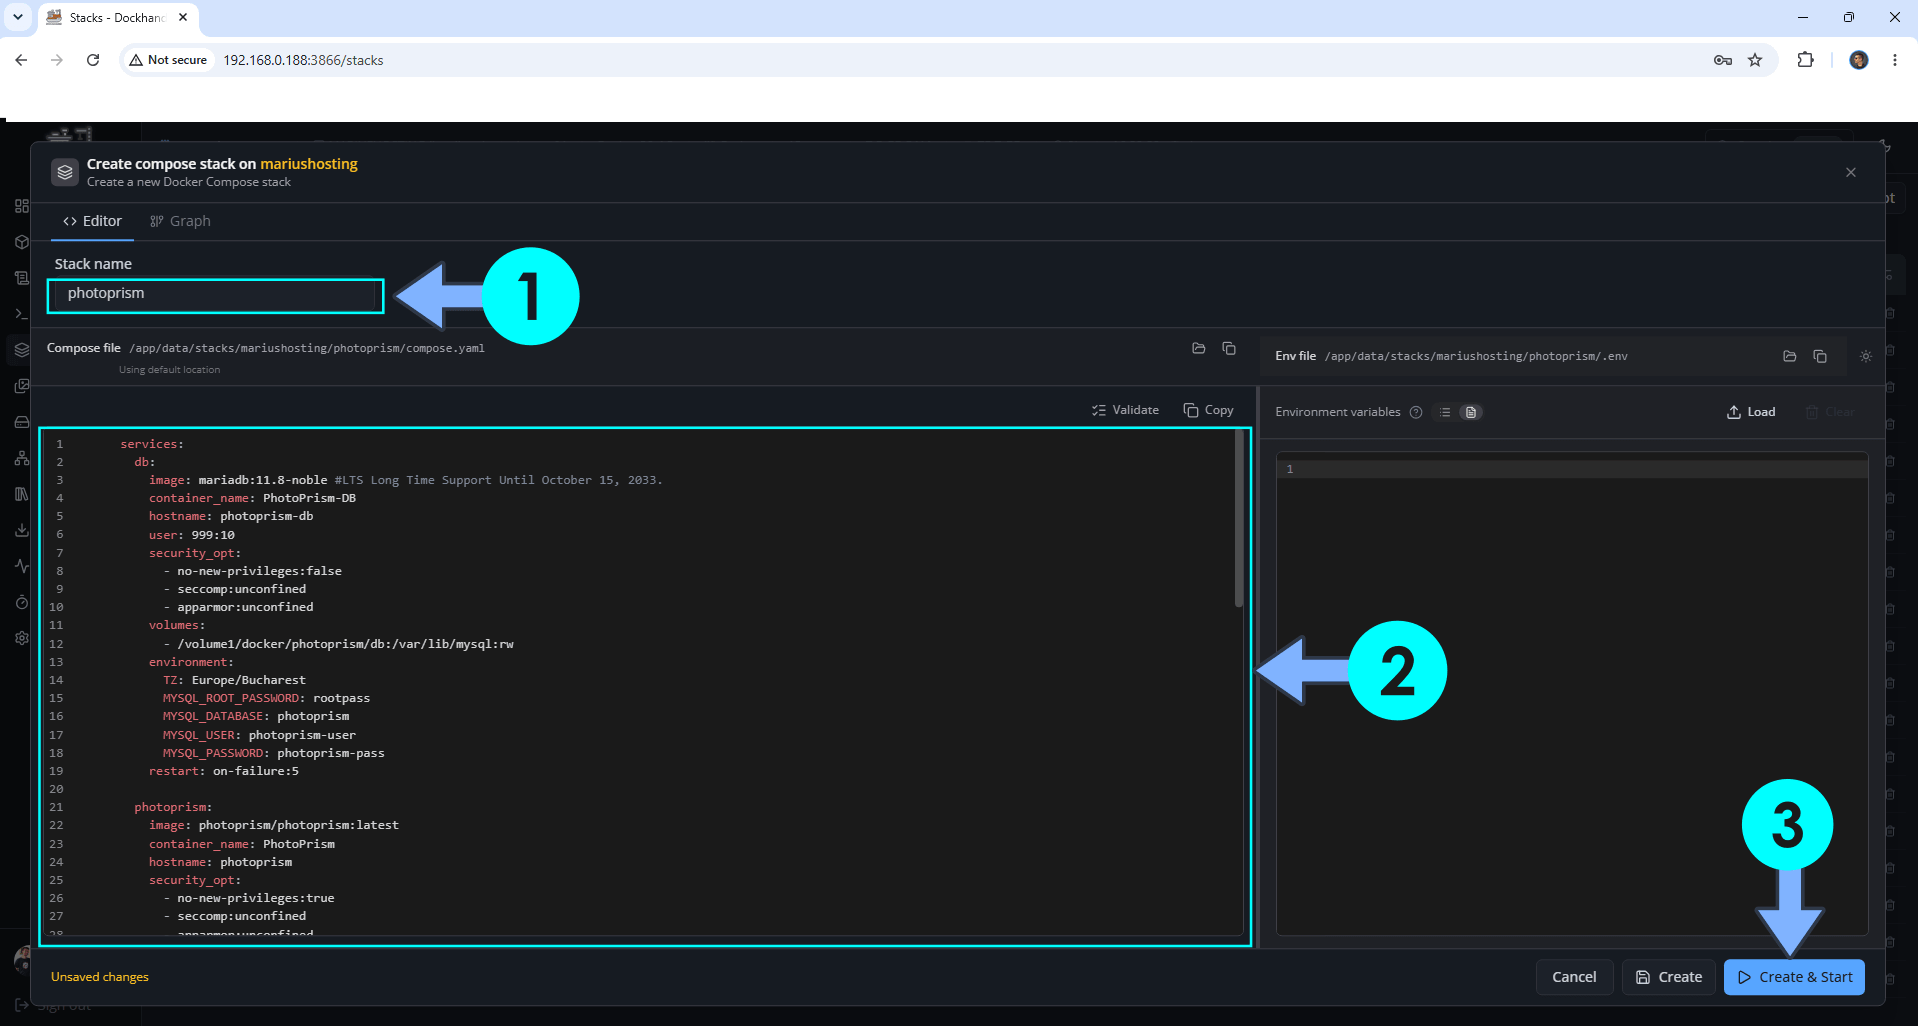
In the Stack name field, type in photoprism. ⚠️Warning: Type in the name in lowercase letters. The installation process can take up to a few seconds/minutes. It will depend on your Internet speed connection. Follow the instructions in the image below.
services:
  db:
    image: mariadb:11.8-noble #LTS Long Time Support Until October 15, 2033.
    container_name: PhotoPrism-DB
    hostname: photoprism-db
    user: 999:10
    security_opt:
      - no-new-privileges:false
      - seccomp:unconfined
      - apparmor:unconfined
    volumes:
      - /volume1/docker/photoprism/db:/var/lib/mysql:rw
    environment:
      TZ: Europe/Bucharest
      MYSQL_ROOT_PASSWORD: rootpass
      MYSQL_DATABASE: photoprism
      MYSQL_USER: photoprism-user
      MYSQL_PASSWORD: photoprism-pass
    restart: on-failure:5

  photoprism:
    image: photoprism/photoprism:latest
    container_name: PhotoPrism
    hostname: photoprism
    security_opt:
      - no-new-privileges:true
      - seccomp:unconfined
      - apparmor:unconfined
    user: 0:0
    healthcheck:
      test: wget --no-verbose --tries=1 --spider http://localhost:2342
    ports:
      - 2342:2342
    volumes:
      - /volume1/docker/photoprism/import:/photoprism/import:rw       # *Optional* base folder from which files can be imported to originals
      - /volume1/docker/photoprism/storage:/photoprism/storage:rw
      - /volume1/docker/photoprism/originals:/photoprism/originals:rw
#     - /volume1/docker/photoprism/family:/photoprism/originals/family:rw               # *Additional* media folders can be mounted like this
    environment:
      PHOTOPRISM_ADMIN_USER: marius
      PHOTOPRISM_ADMIN_PASSWORD: mariushosting
      PHOTOPRISM_UID: 999
      PHOTOPRISM_GID: 10
      PHOTOPRISM_AUTH_MODE: password
      PHOTOPRISM_SITE_URL: http://localhost:2342/
      PHOTOPRISM_ORIGINALS_LIMIT: 5120
      PHOTOPRISM_HTTP_COMPRESSION: gzip
      PHOTOPRISM_READONLY: false
      PHOTOPRISM_EXPERIMENTAL: false
      PHOTOPRISM_DISABLE_CHOWN: false
      PHOTOPRISM_DISABLE_WEBDAV: false
      PHOTOPRISM_DISABLE_SETTINGS: false
      PHOTOPRISM_DISABLE_TENSORFLOW: false
      PHOTOPRISM_DISABLE_FACES: false
      PHOTOPRISM_DISABLE_CLASSIFICATION: false
      PHOTOPRISM_DISABLE_RAW: false
      PHOTOPRISM_RAW_PRESETS: false
      PHOTOPRISM_JPEG_QUALITY: 100
      PHOTOPRISM_DETECT_NSFW: false
      PHOTOPRISM_UPLOAD_NSFW: true
      #PHOTOPRISM_THUMB_LIBRARY: "imaging"
      PHOTOPRISM_SPONSOR: true
      PHOTOPRISM_DATABASE_DRIVER: mysql
      PHOTOPRISM_DATABASE_SERVER: photoprism-db:3306
      PHOTOPRISM_DATABASE_NAME: photoprism
      PHOTOPRISM_DATABASE_USER: photoprism-user
      PHOTOPRISM_DATABASE_PASSWORD: photoprism-pass
      PHOTOPRISM_WORKERS: 2
      PHOTOPRISM_THUMB_FILTER: blackman       # best to worst: blackman, lanczos, cubic, linear
      PHOTOPRISM_APP_MODE: standalone         # progressive web app MODE - fullscreen, standalone, minimal-ui, browser
#     PHOTOPRISM_SITE_CAPTION: "AI-Powered Photos App"
#     PHOTOPRISM_SITE_DESCRIPTION: ""
#     PHOTOPRISM_SITE_AUTHOR: ""
    working_dir: "/photoprism"
    restart: on-failure:5
    depends_on:
      db:
        condition: service_started
Note: Before you paste the code above in the Stack editor area below, change the value numbers for user with your own UID and GID values. (Follow my step by step guide on how to do this.) 999 is my personal UID value and 10 is my personal GID value. You have to type in your own values.
Note: Before you paste the code above in the Stack editor area below, change the value for TZ. (Select your current Time Zone from this list.)
Note: Before you paste the code above in the Stack editor area below, change the value for PHOTOPRISM_ADMIN_USER. Type in your own username. marius is an example for a username.
Note: Before you paste the code above in the Stack editor area below, change the value for PHOTOPRISM_ADMIN_PASSWORD. Type in your own password. mariushosting is an example for a password.
Note: Before you paste the code above in the Stack editor area below, change the value numbers for PHOTOPRISM_UID and PHOTOPRISM_GID with your own values. (Follow my step by step guide on how to do this.) 999 is my personal UID value and 10 is my personal GID value. You have to type in your own values.
STEP 9
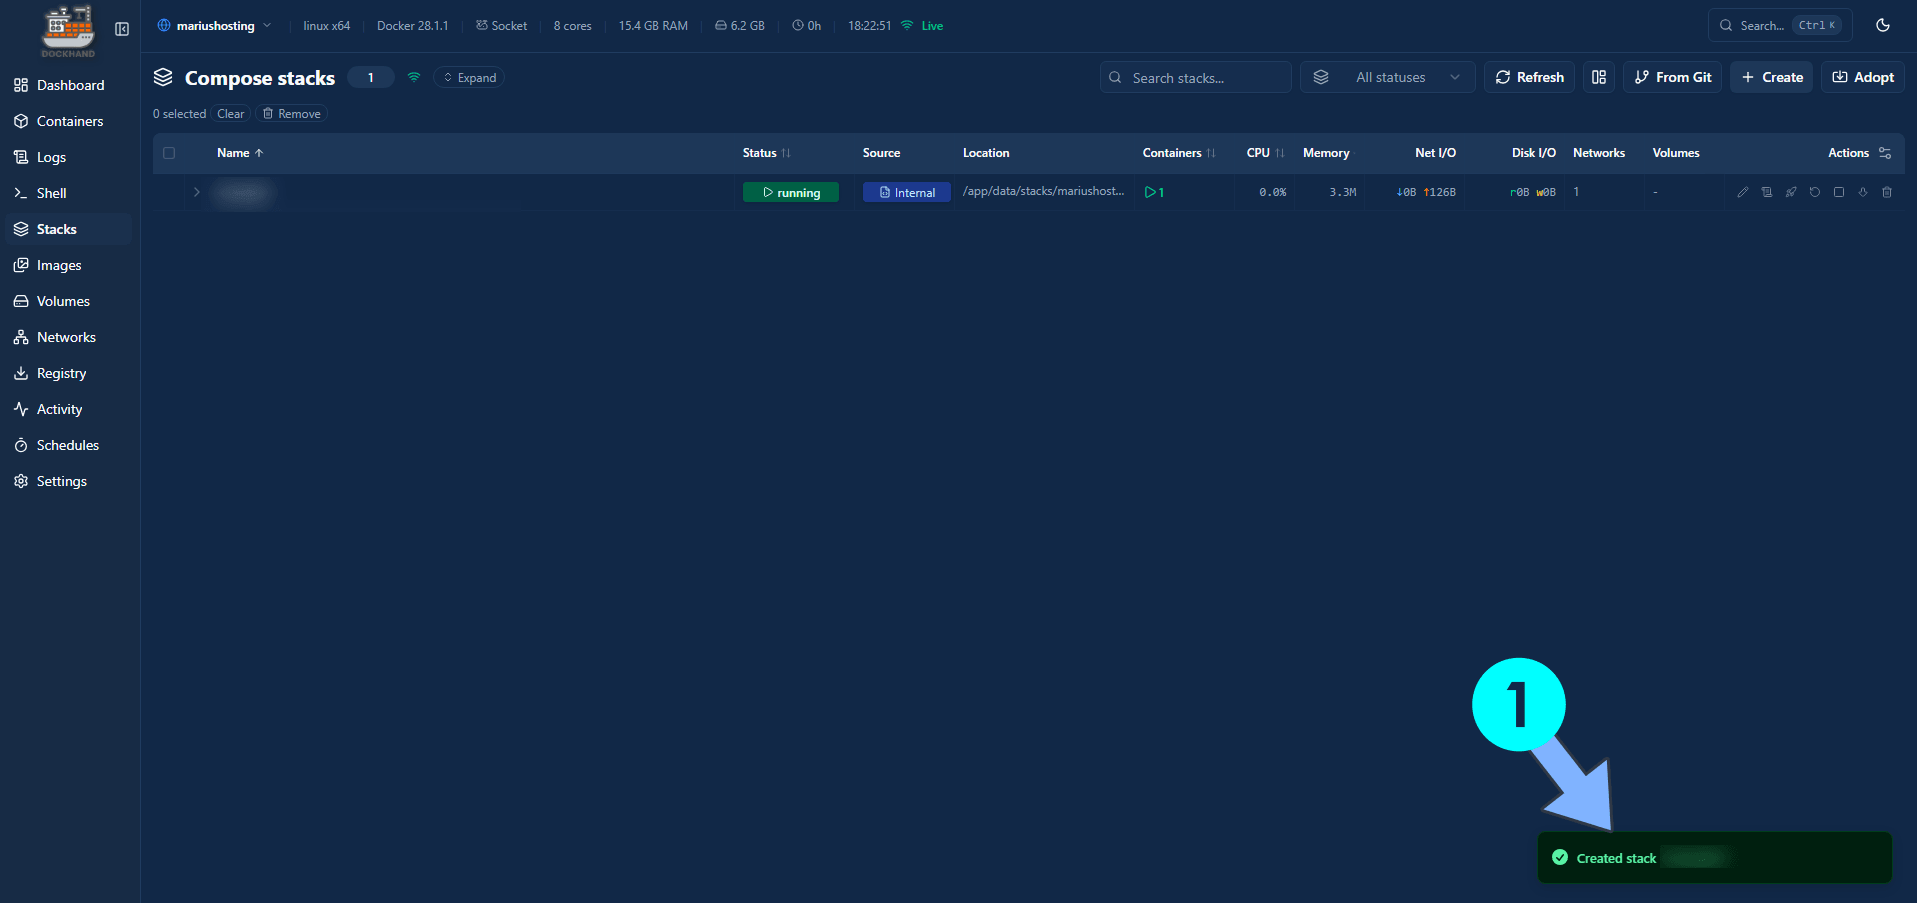
If everything goes right, you will see the following message at the bottom right of your screen: “Created stack “photoprism”“.
STEP 10
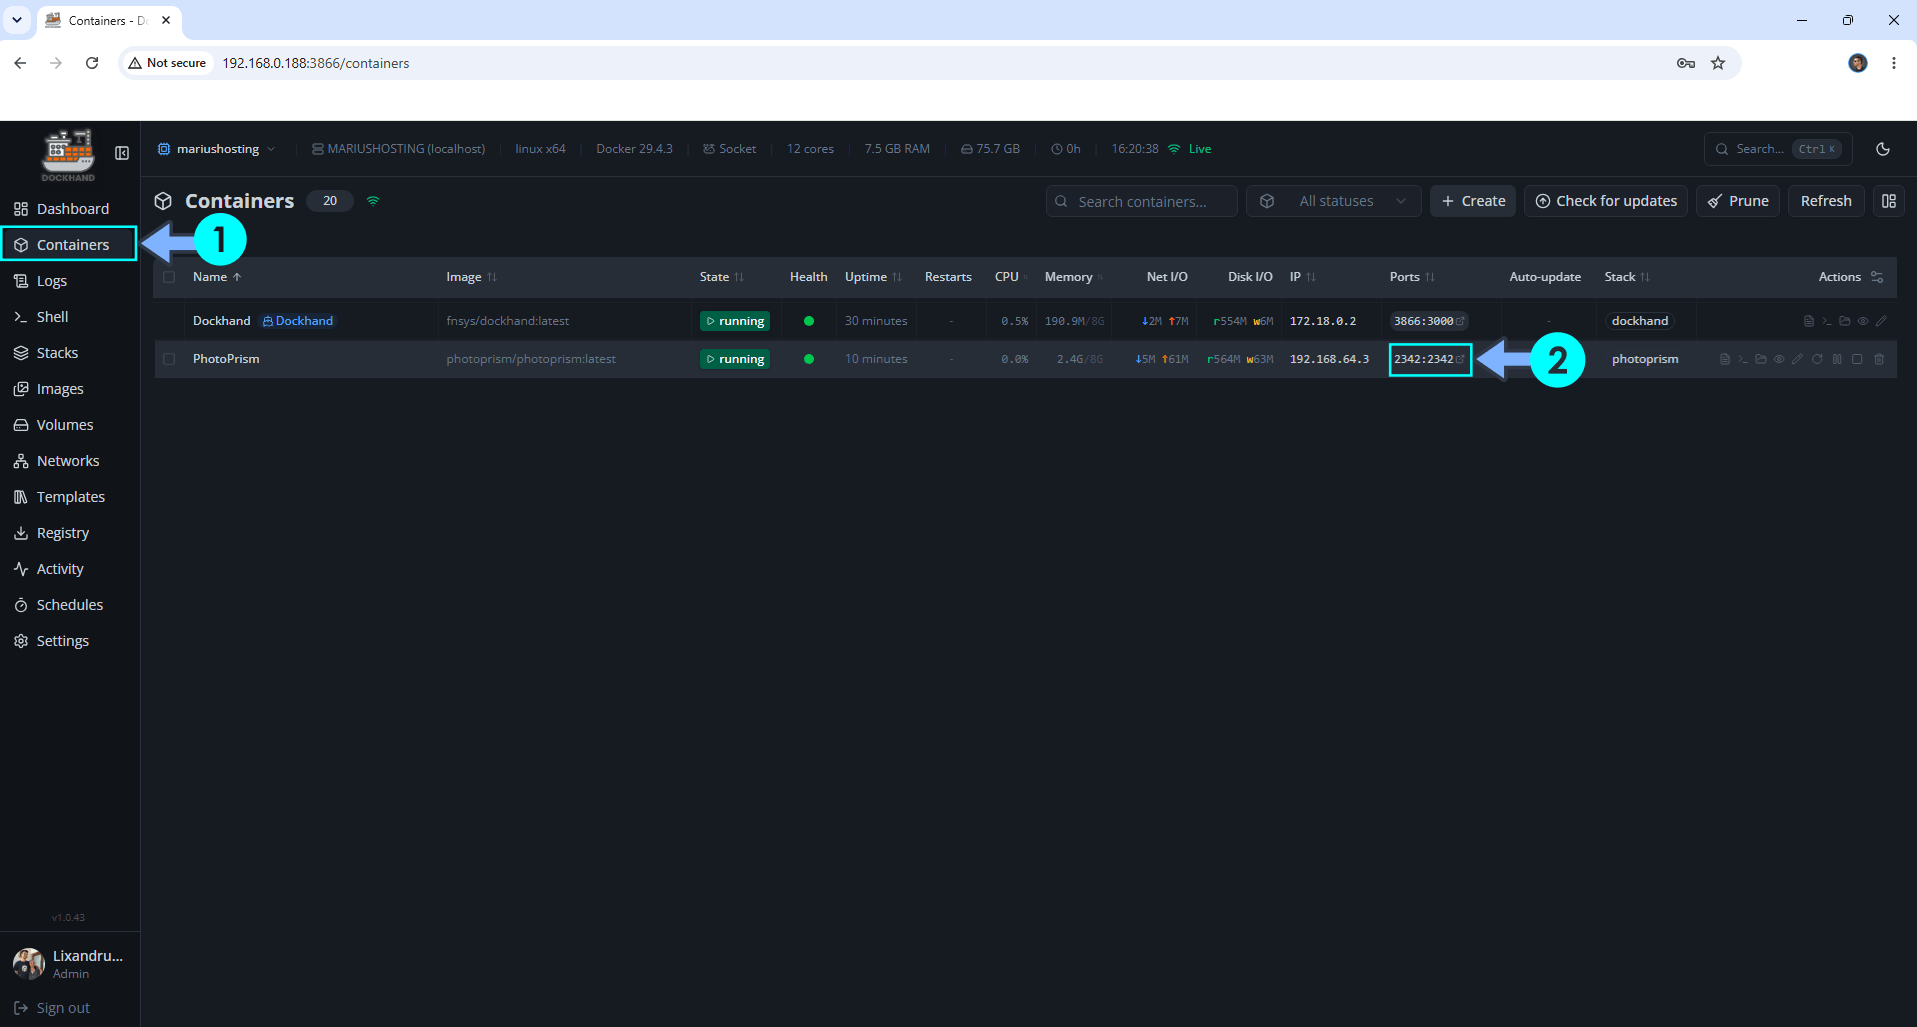
On the left sidebar, click Containers. Identify your PhotoPrism container then click on ports 2342:2342. Follow the instructions in the image below.
STEP 11
🟢Please Support My work by Making a Donation. Almost 99,9% of the people that install something using my guides forget to support my work, or just ignore STEP 1. I’ve been very honest about this aspect of my work since the beginning: I don’t run any ADS, I don’t require subscriptions, paid or otherwise, I don’t collect IPs, emails, and I don’t have any referral links from Amazon or other merchants. I also don’t have any POP-UPs or COOKIES. I have repeatedly been told over the years how much I have contributed to the community. It’s something I love doing and have been honest about my passion since the beginning. But I also Need The Community to Support me Back to be able to continue doing this work.
STEP 12
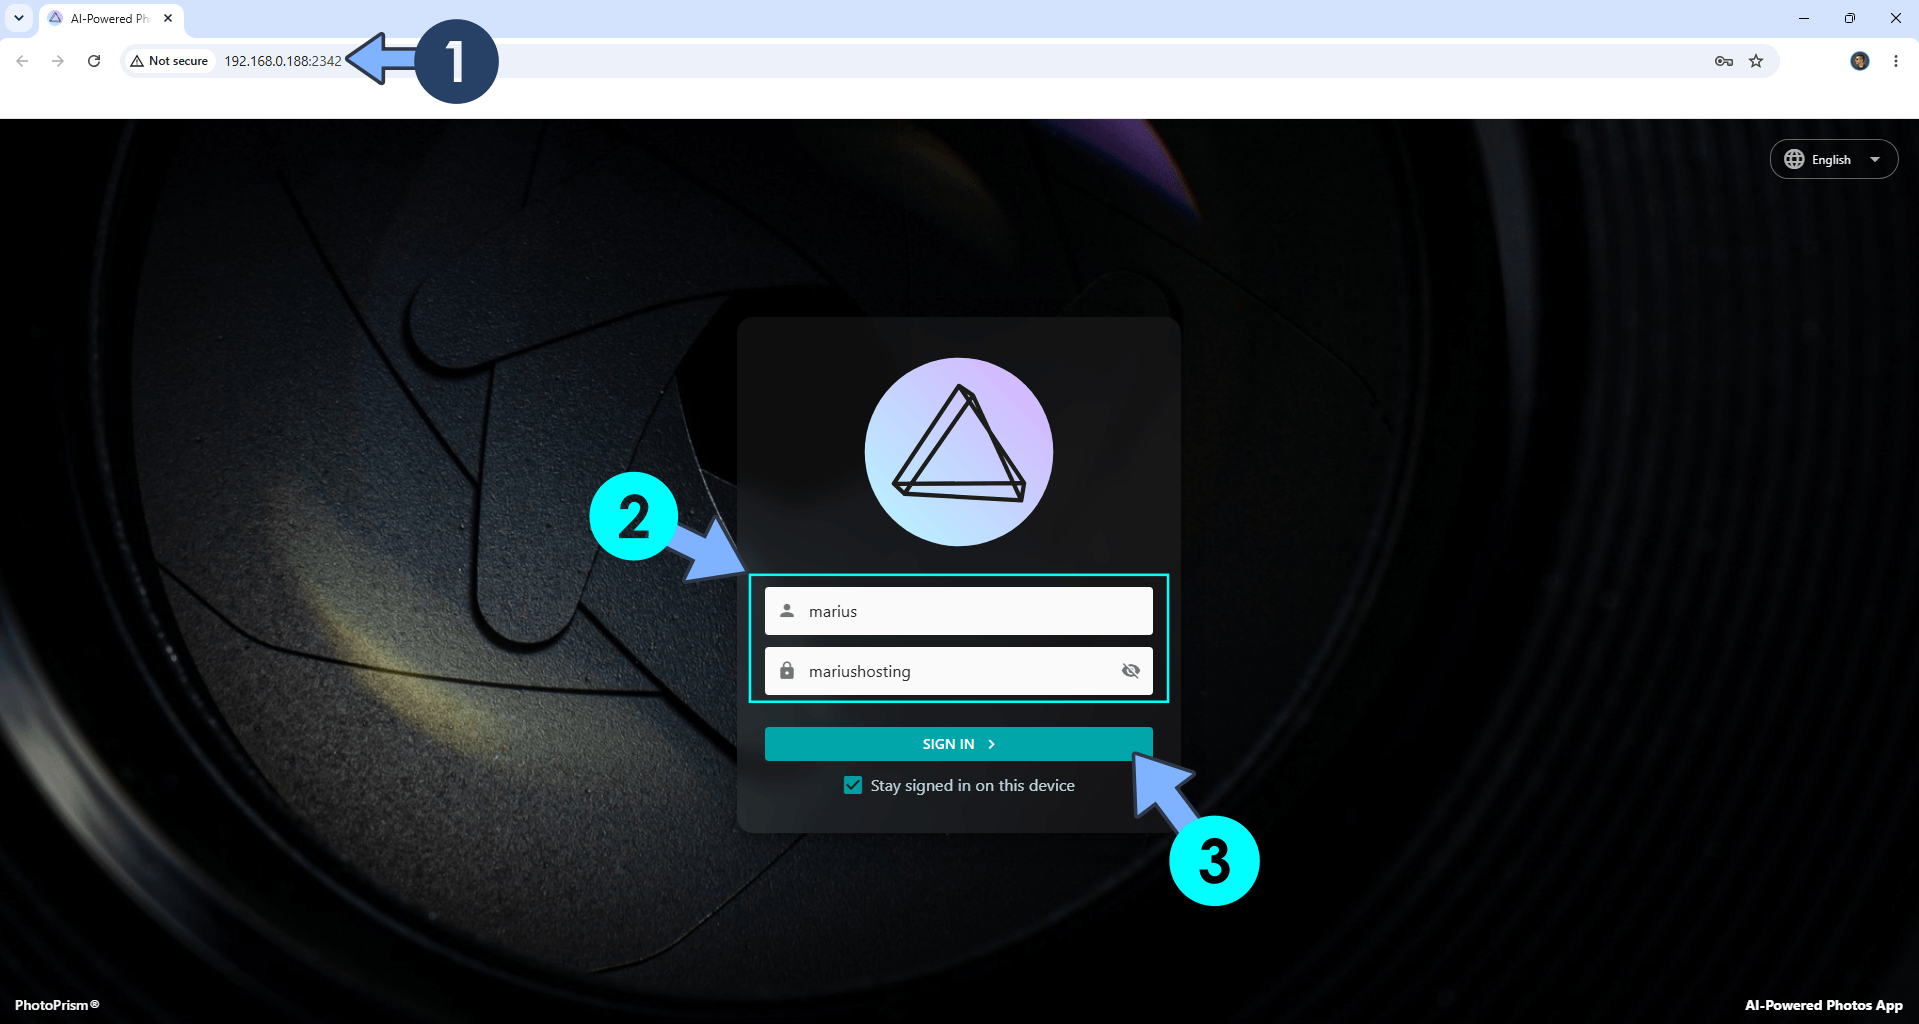
The installation process can take up to a few seconds/minutes. It will depend on your Internet speed connection. Now open your browser and type in http://ugreen-ip-address:2342 Type in your own Username and Password that you have previously created at STEP 8 then click SIGN IN. Follow the instructions in the image below.
STEP 13
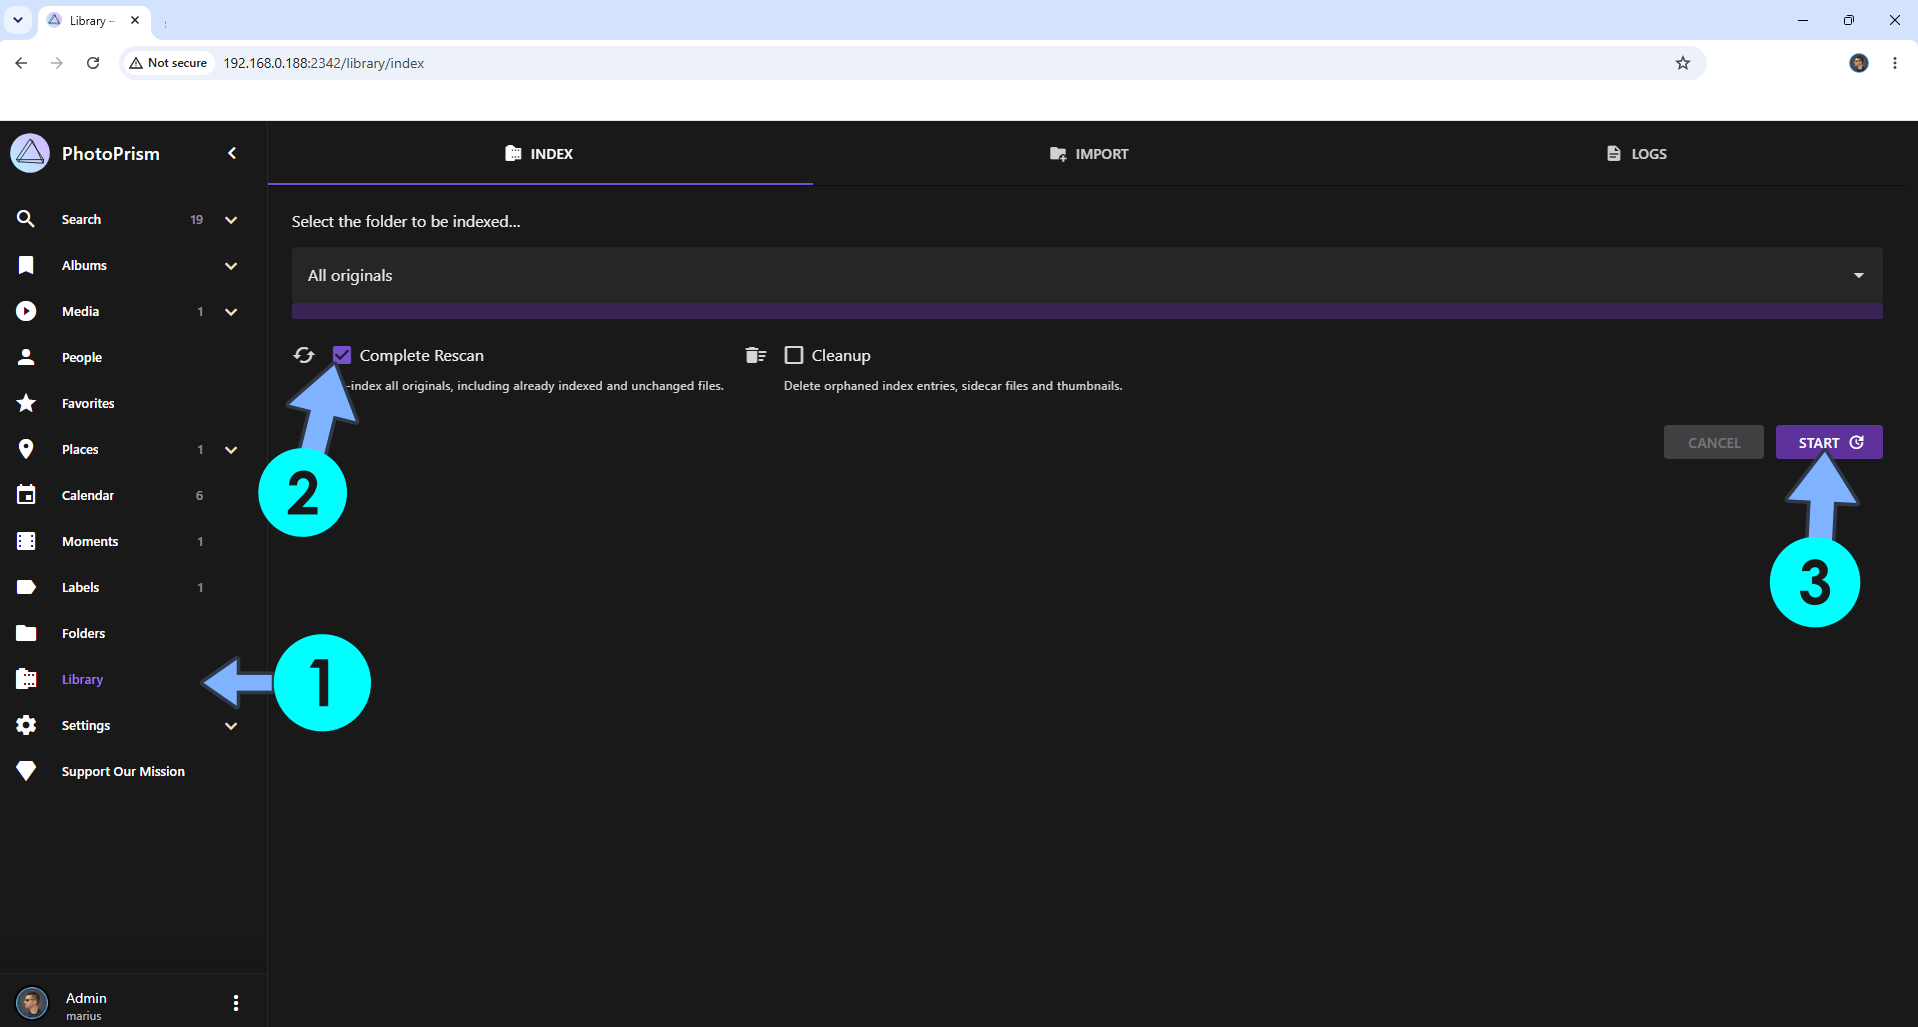
On the left sidebar, click Library. Select Complete Rescan. Click START to index your photos/videos. Follow the instructions in the image below.
STEP 14
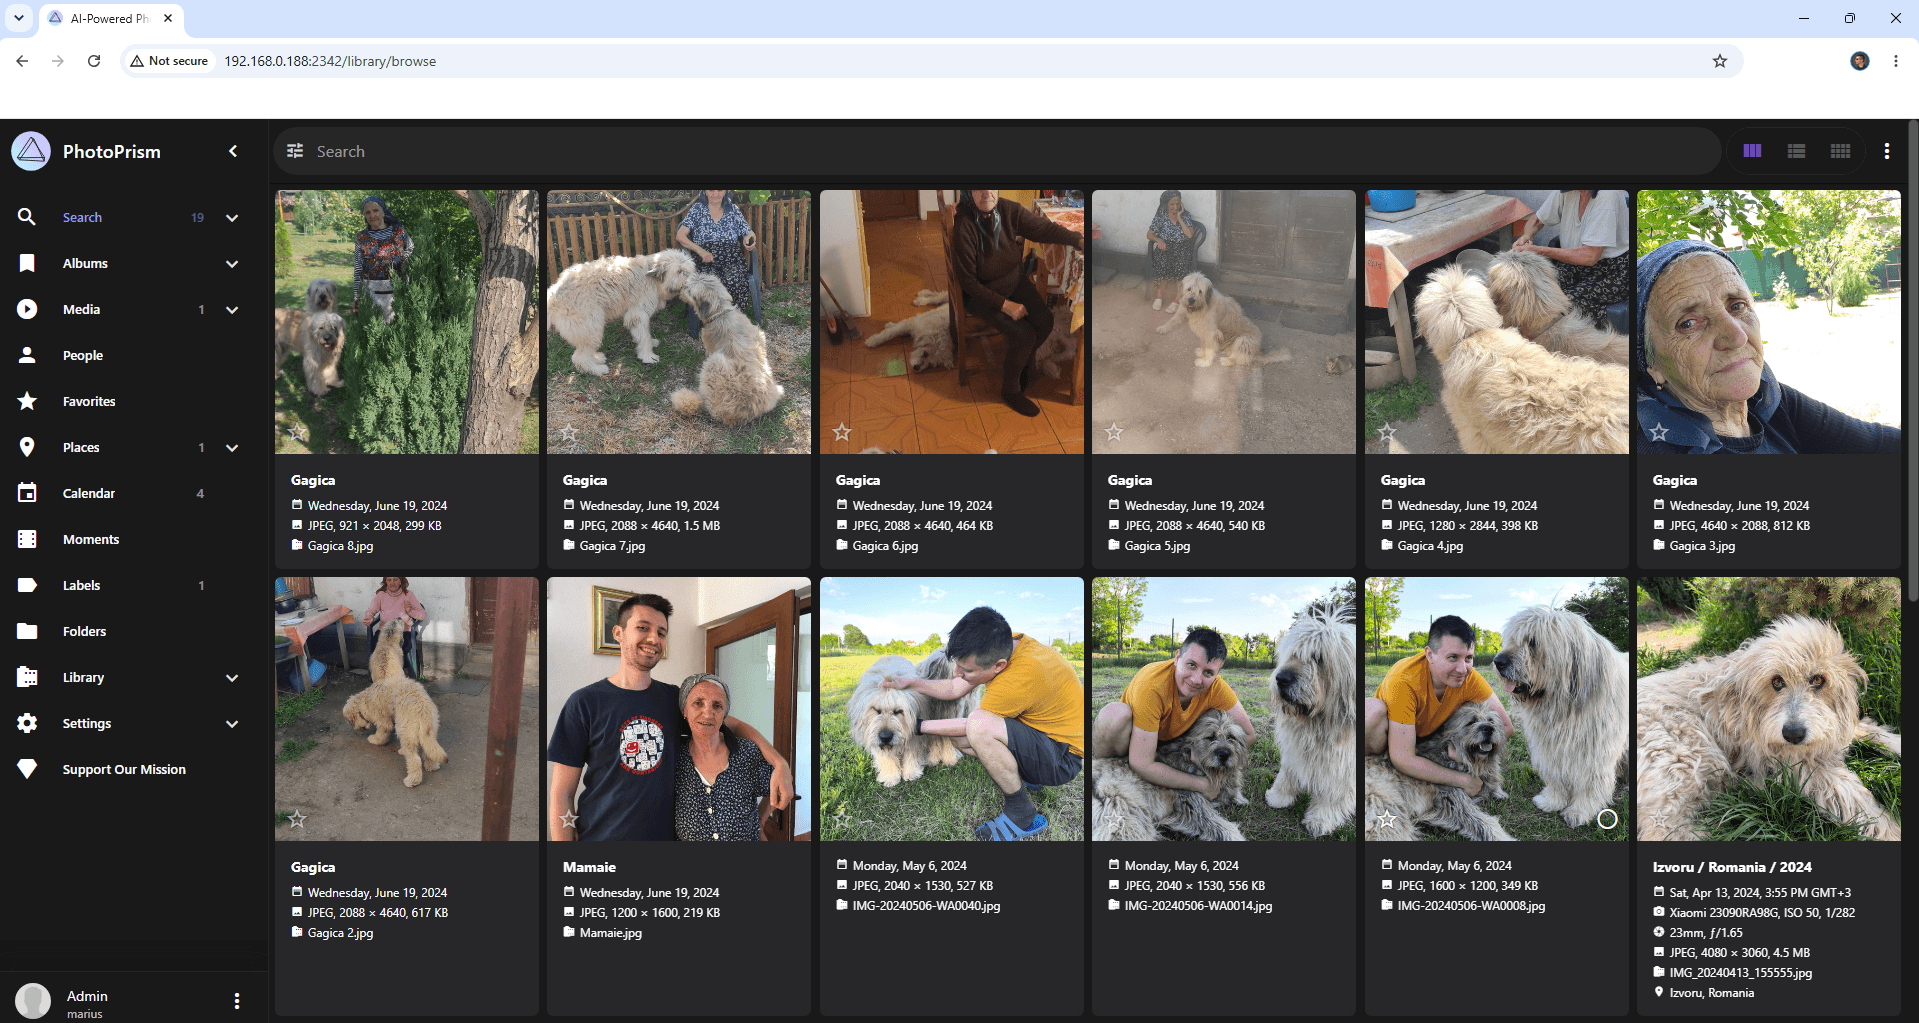
Depending on how many photos/videos you have, it can take up to several hours or days to index all of your pictures/videos.
STEP 15
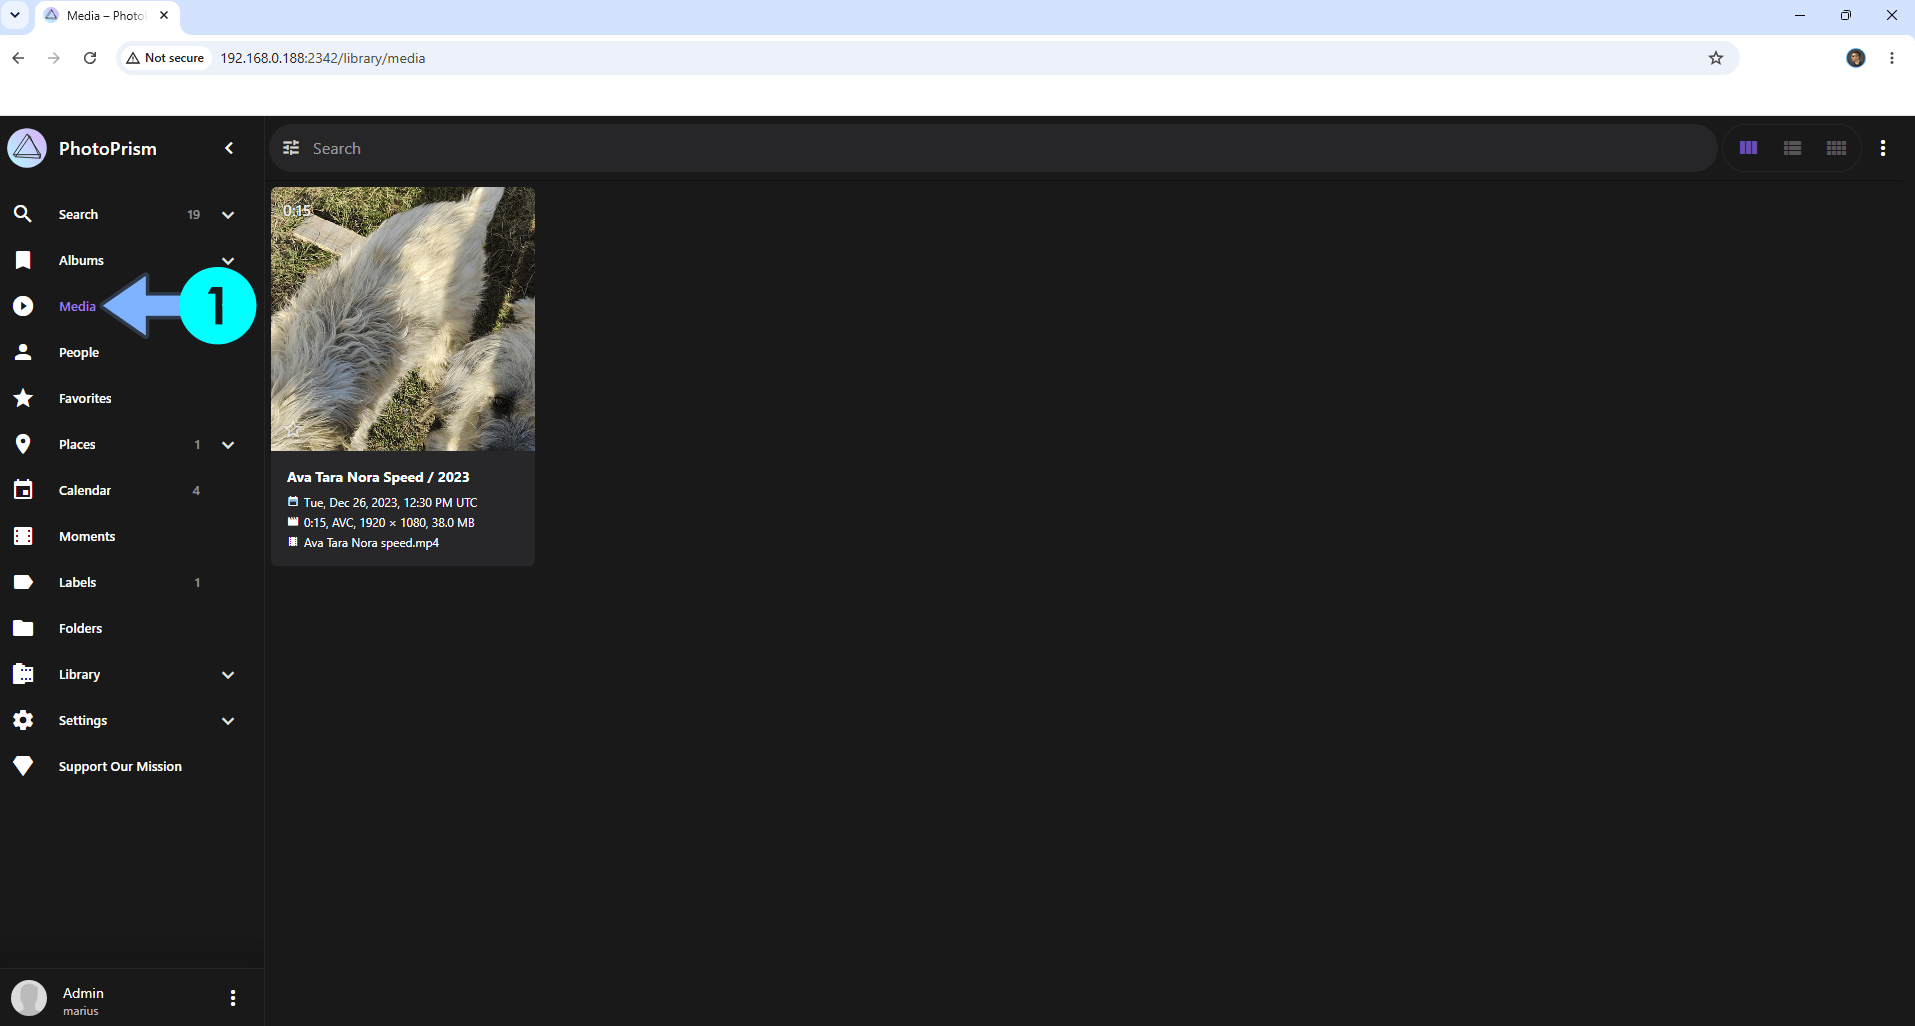
On the left sidebar, click Media. In this area you can see your media/videos at a glance!
STEP 16
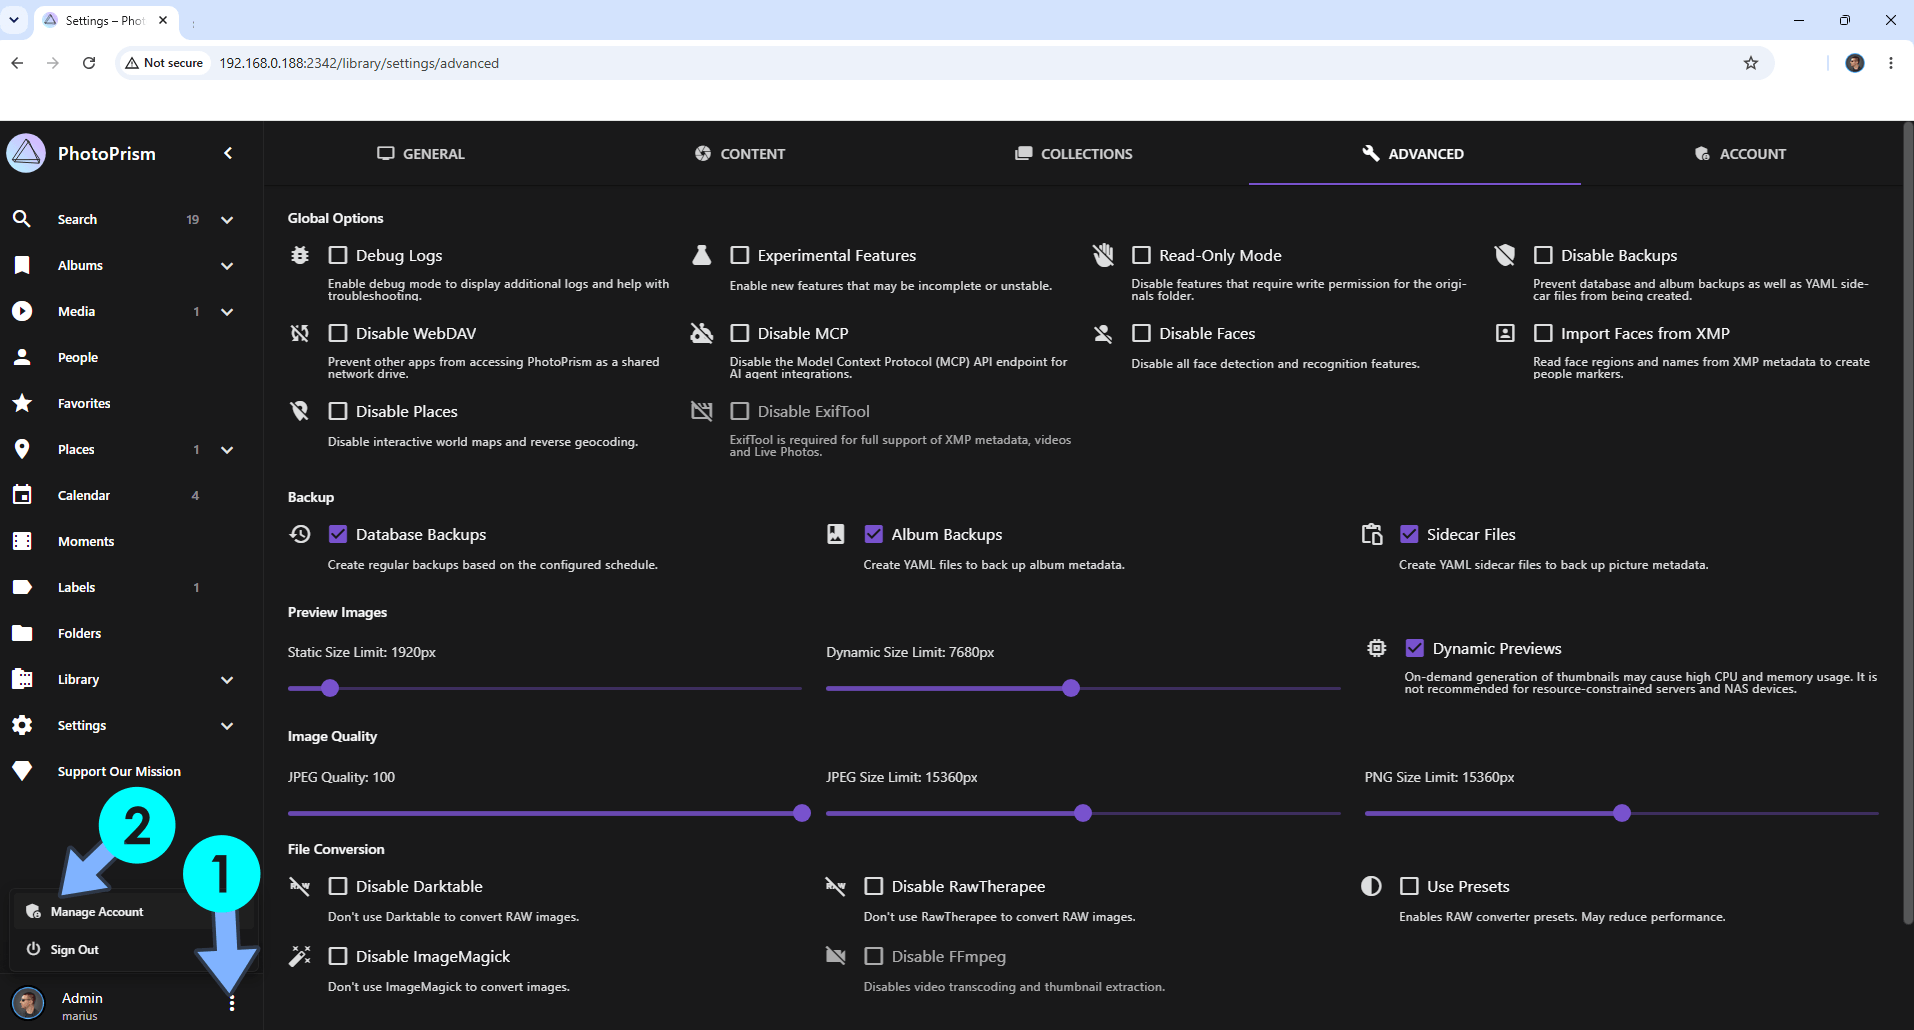
At the bottom of the page, click on the 3 vertical lines then Manage Account. In this area you can manage your favorite settings. Follow the instructions in the image below.
STEP 17
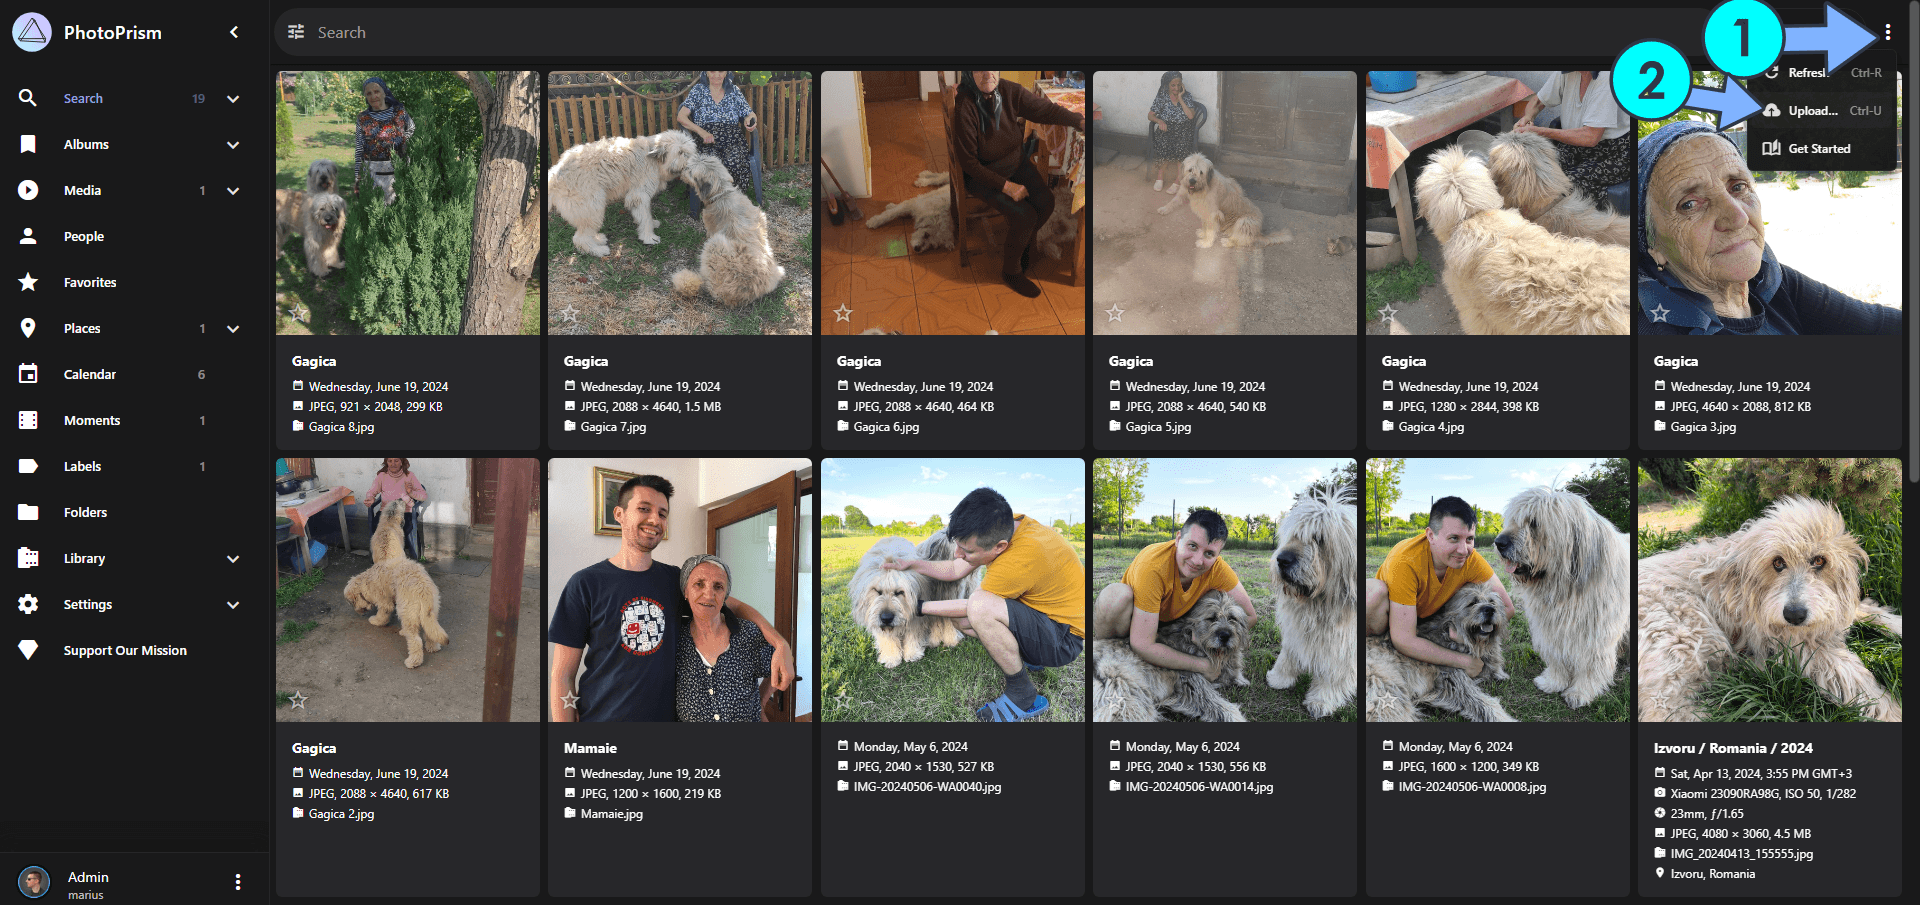
You can also upload your own pictures from your PC. Click the upload icon at the top right of the page. All the uploaded pictures will be uploaded in your own photo path folder named originals that you have previously created at STEP 5. Follow the instructions in the image below.
Enjoy PhotoPrism on your UGREEN NAS!
Note: If you want to run the PhotoPrism container over HTTPS, check out How to Run Docker Containers Over HTTPS on Your UGREEN NAS.
🆙Note/Update/Container: How to Update Your Docker Containers on UGREEN NAS Using Dockhand.
🐳Note: How to Create Docker Shortcuts on Desktop.
🆕Note: How to Update Dockhand to the latest version.
🆕Note: How to Clean Docker.
This post was updated on Monday / September 21st, 2026 at 6:06 PM