
Have you already installed Dockhand on your UGREEN NAS? Wondering how to update the Dockhand container on your UGREEN NAS when a new version comes out? Today I will show you how to update your Dockhand container with the latest image version if you have an UGREEN NAS.
💡Note: Check out my guide on how to Update Dockhand on Your Synology NAS.
💡Note: Check out my guide on how to Update Dockhand on Your Asustor NAS.
⚠️The first basic rule is to NOT delete the dockhand folder in Files. This is where your Dockhand stack etc. are saved. After understanding this simple rule, let’s move on to the guide on how to update Dockhand on your UGREEN NAS.
STEP 1
Please Support My Work by Making a Donation.
STEP 2
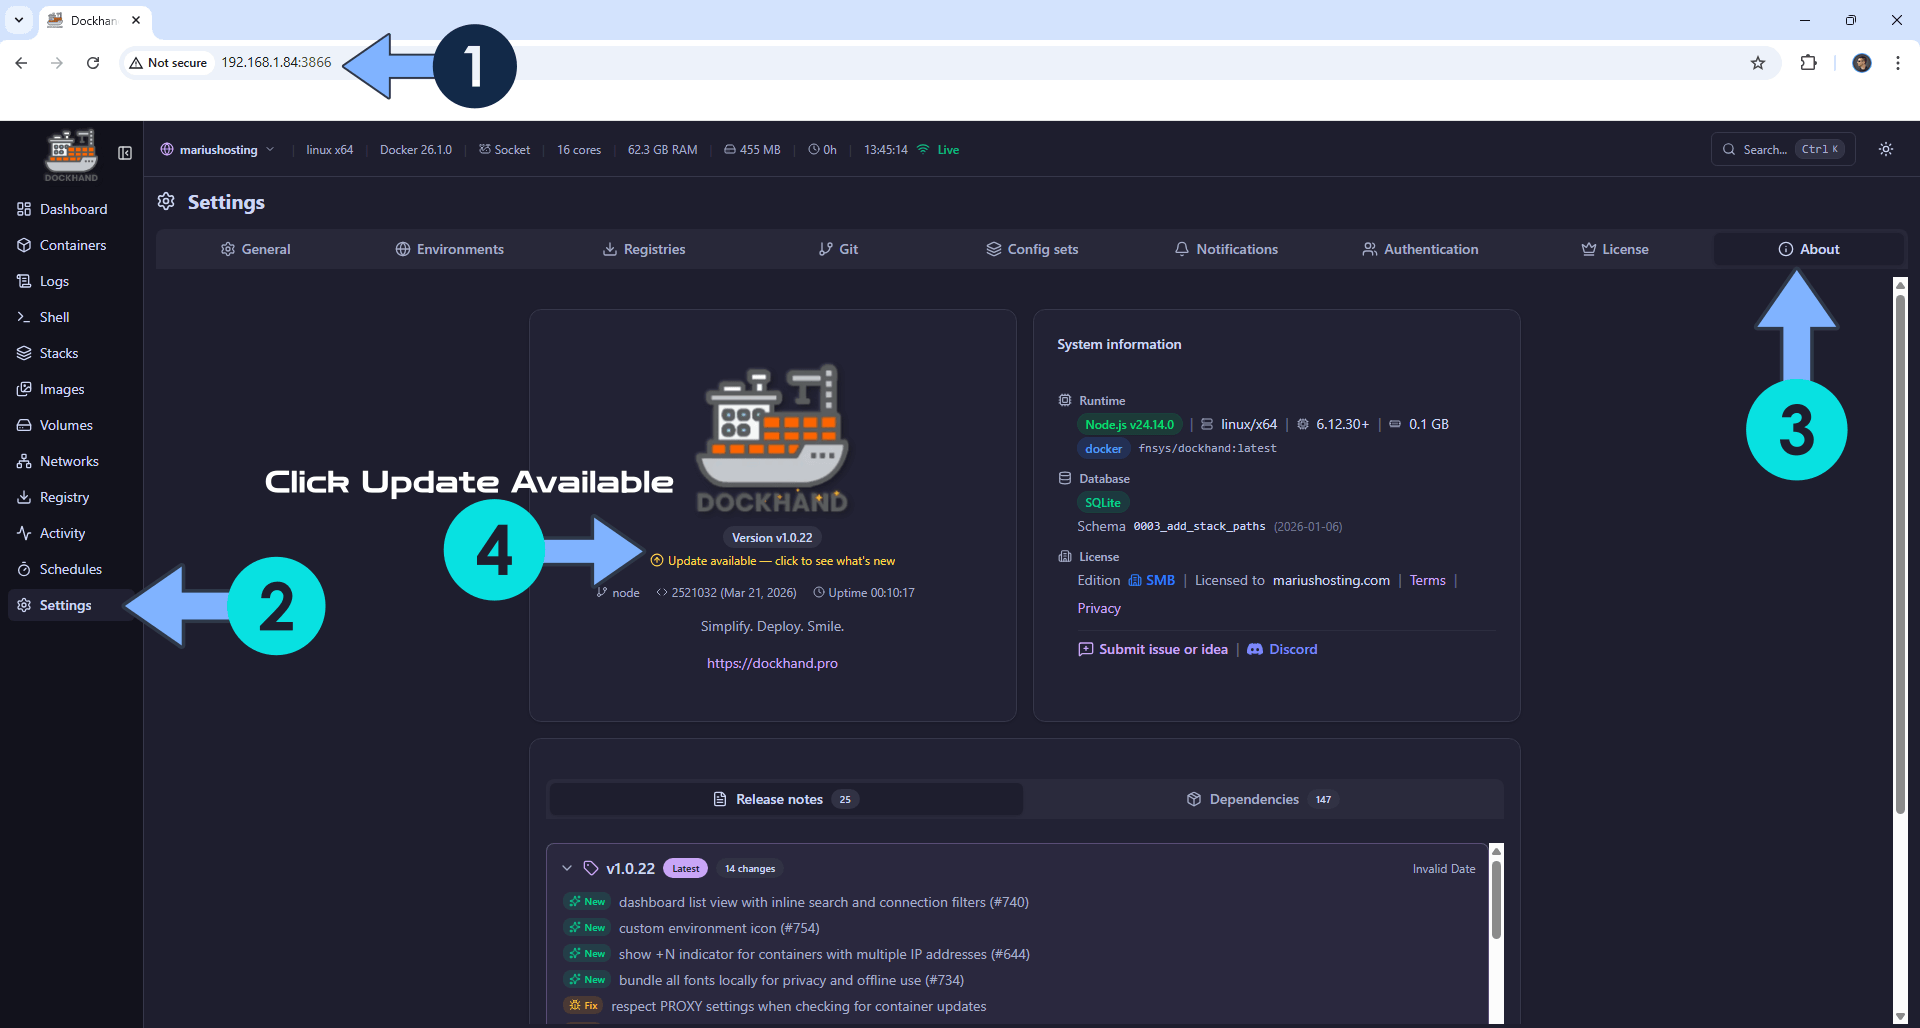
Open your browser and type in http://ugreen-ip-address:3866
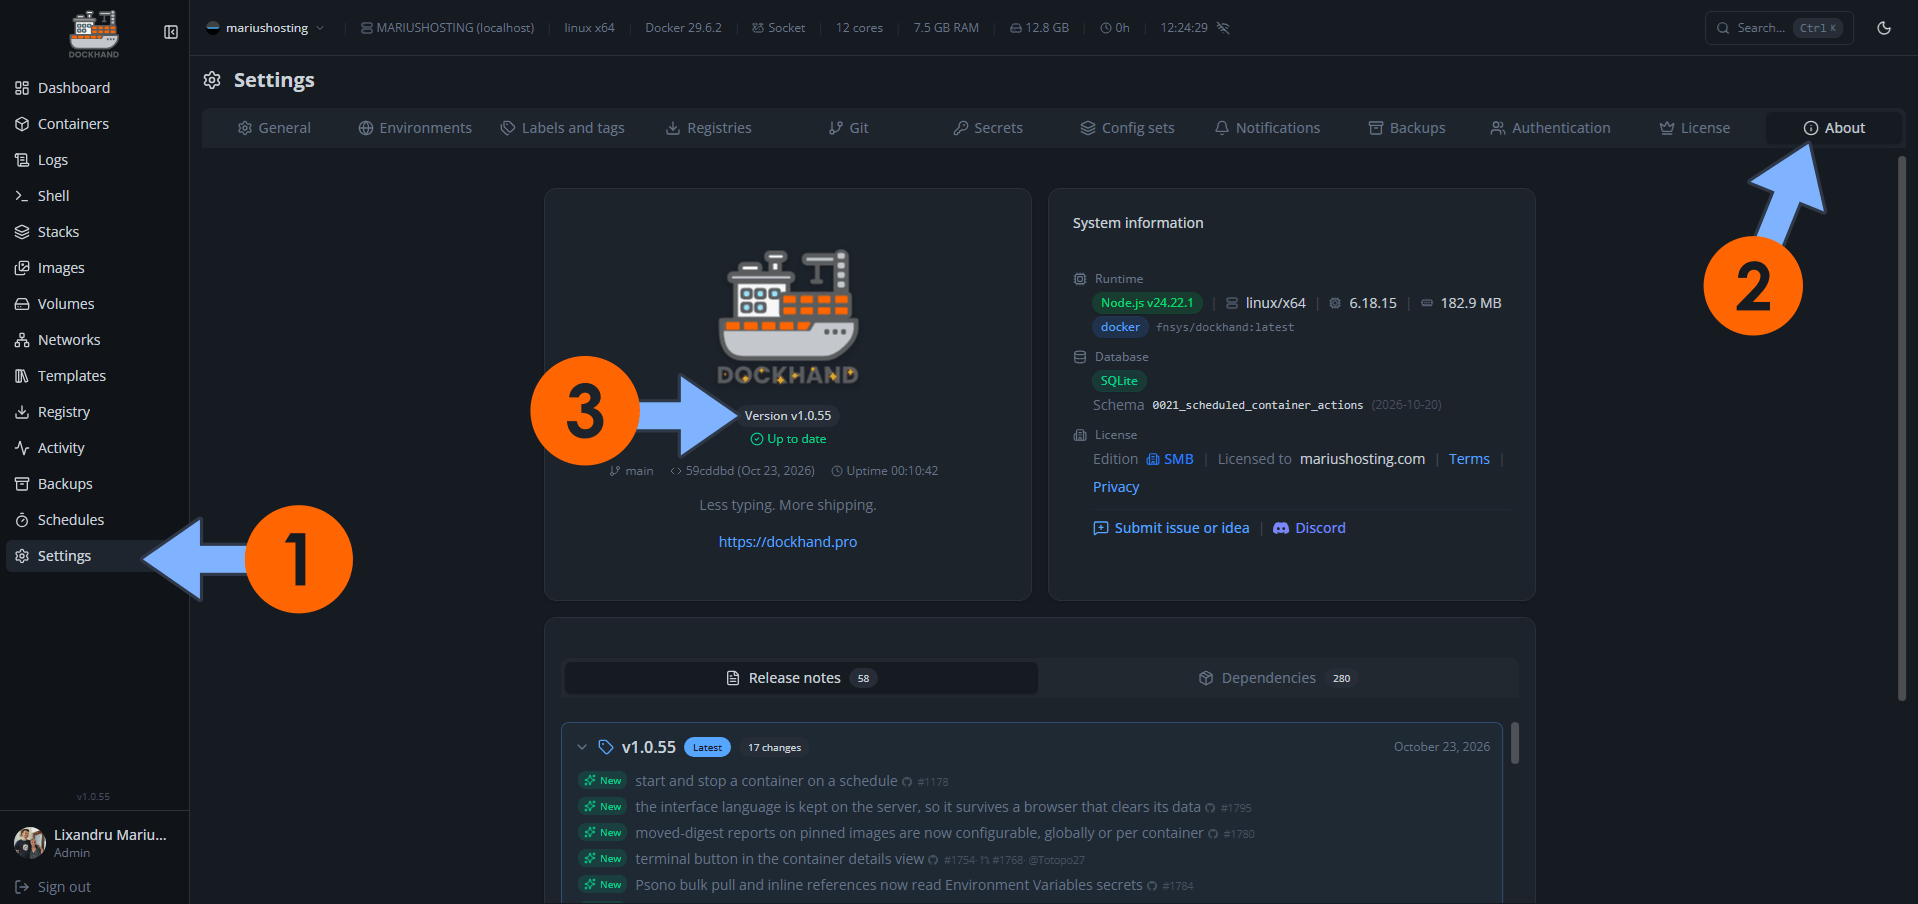
On the left sidebar, click Settings. Click the About tab. If a new Dockhand version is out, you will see an “Update available – click to see what’s new” link. Click on the link. Follow the instructions in the image below. ⚠️Warning: If there is no available update, you will not see any clickable link.
STEP 3
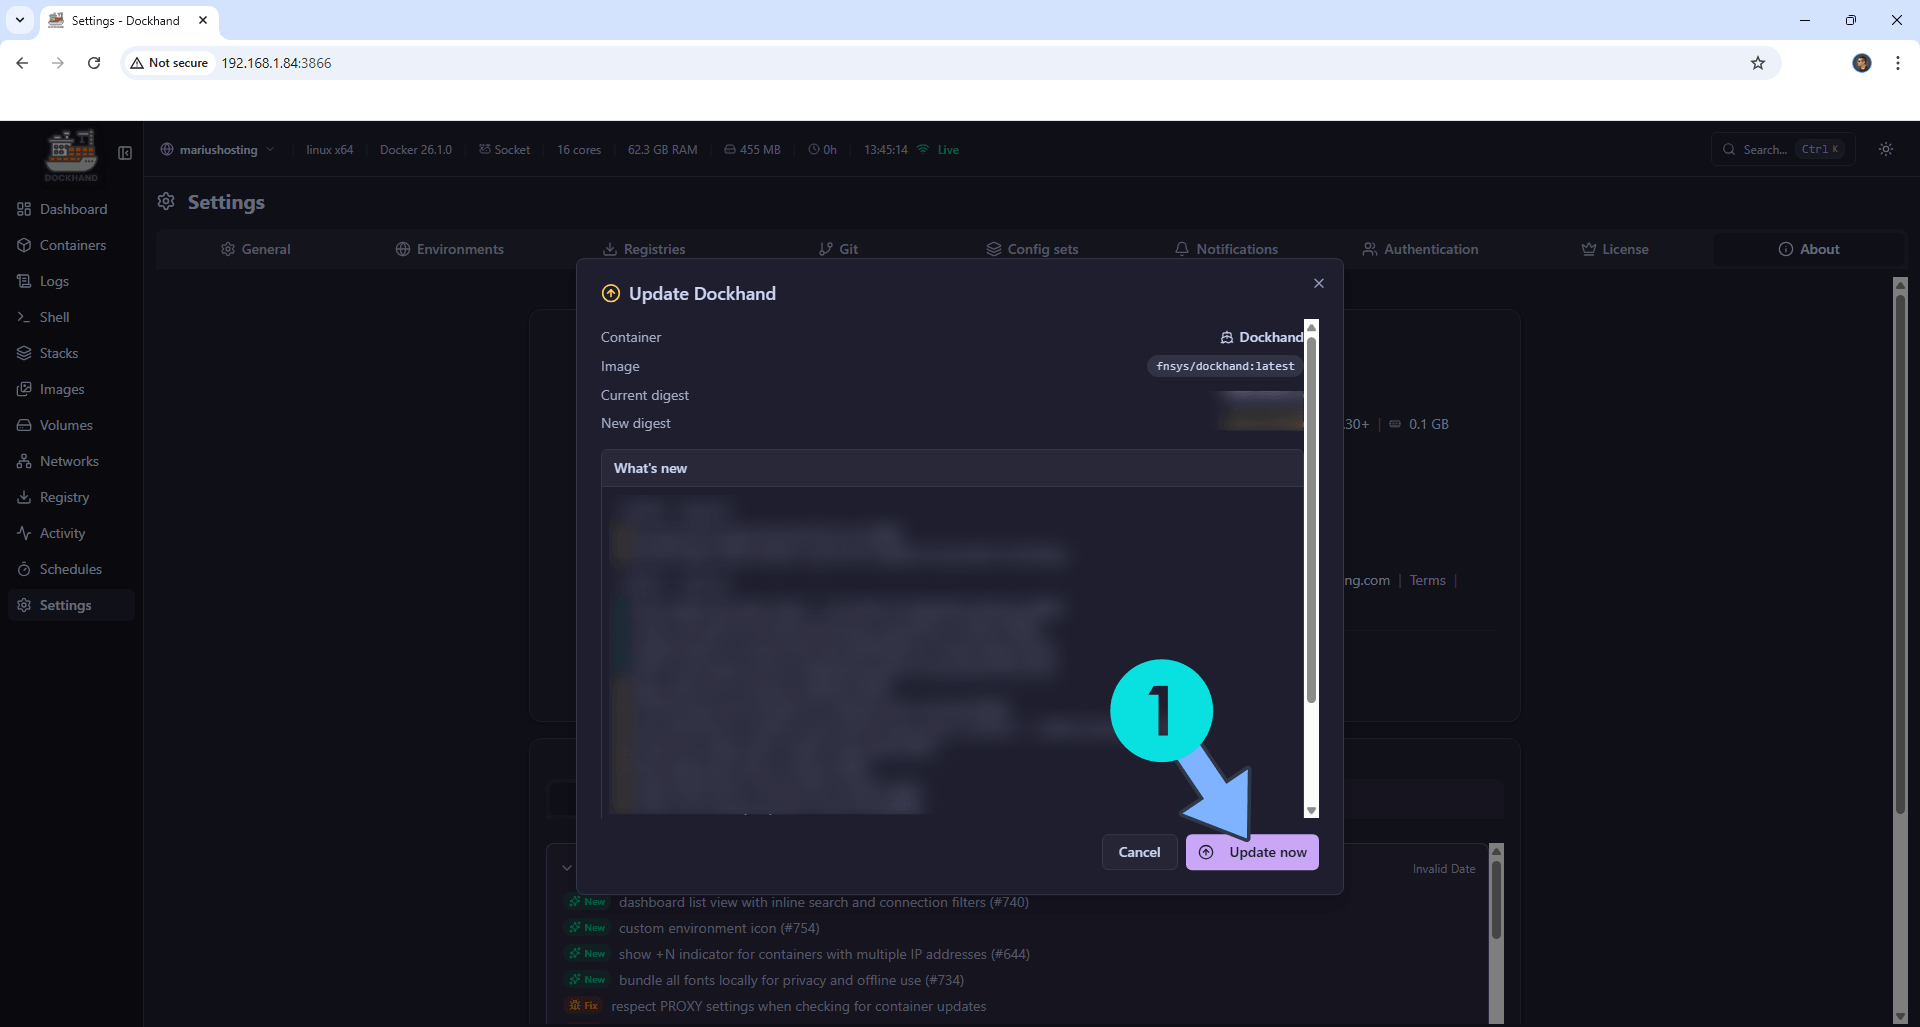
Click the Update now button. Follow the instructions in the image below.
STEP 4
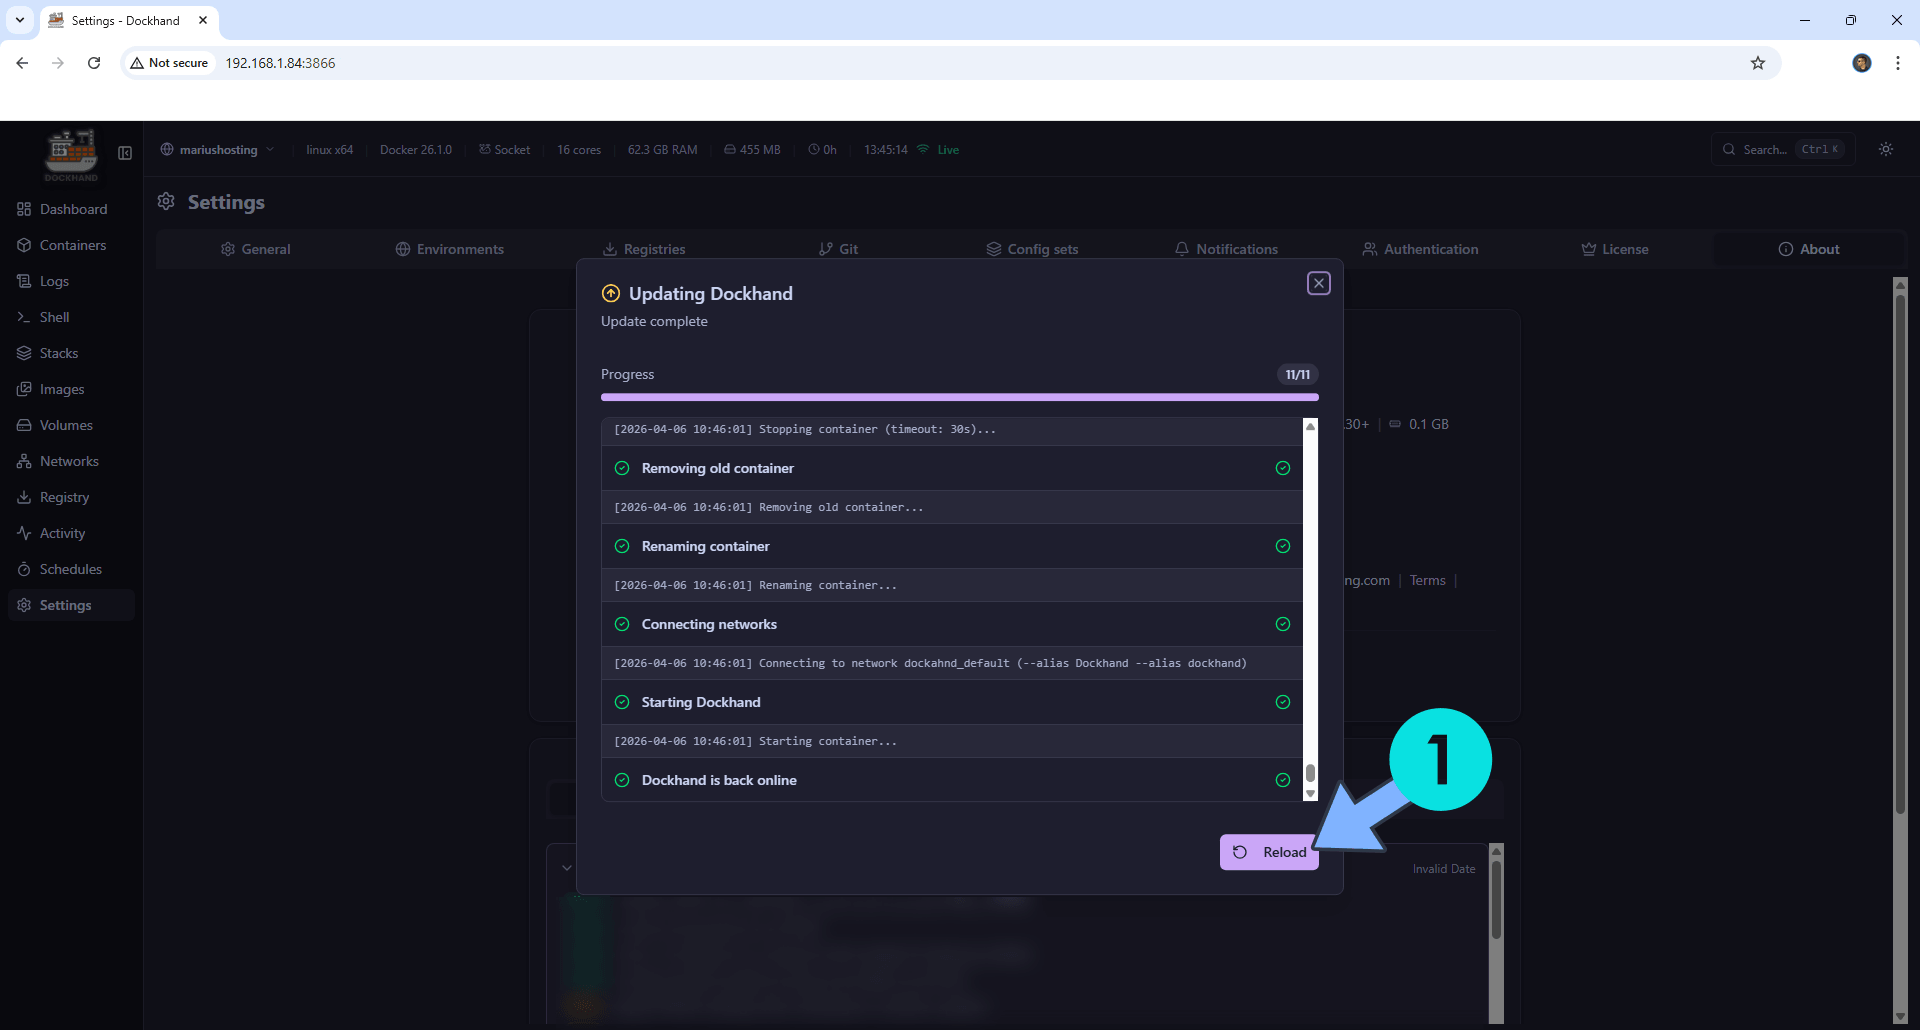
The update process will start. Wait until the update is done, then click Reload. Follow the instructions in the image below.
STEP 5
Enjoy your updated Dockhand Container!
📌Alternative Update Method If The One Above Fails
⚠️The first basic rule is to NOT delete the dockhand folder in File Station. This is where your Dockhand stack etc. are saved. After understanding this simple rule, let’s move on to the guide on how to update Dockhand on your Synology NAS.
STEP 1
Open the Docker app.
STEP 2
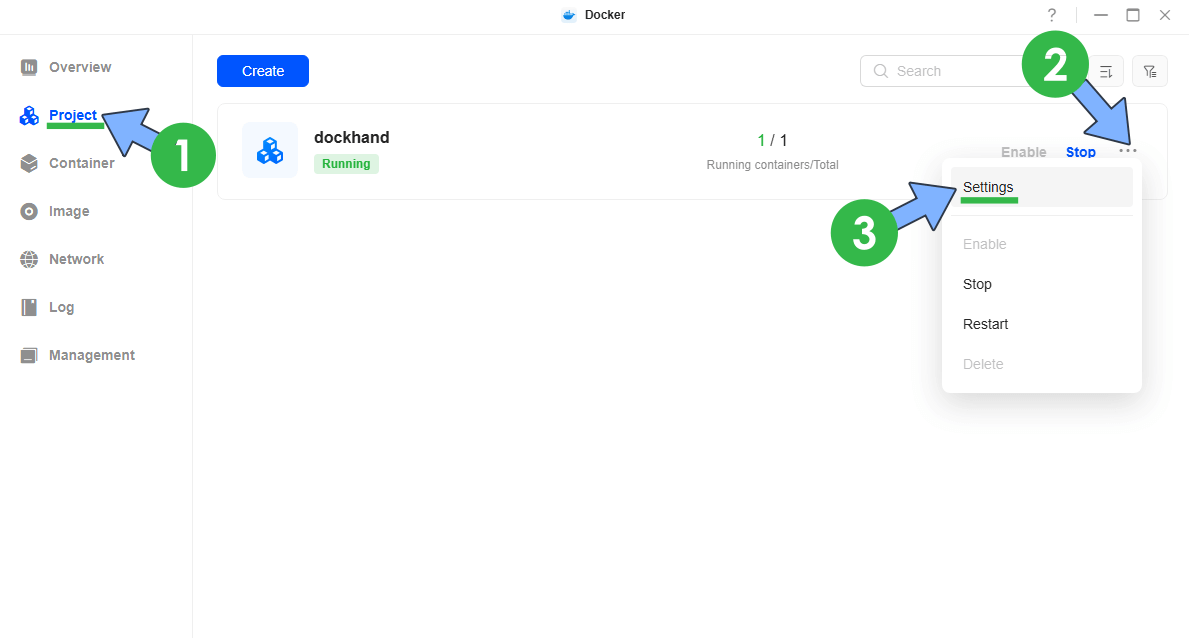
On the left sidebar in Docker, click Project. Select your dockhand project. Click on the 3 horizontal dots. Click Settings. Follow the instructions in the image below.
STEP 3
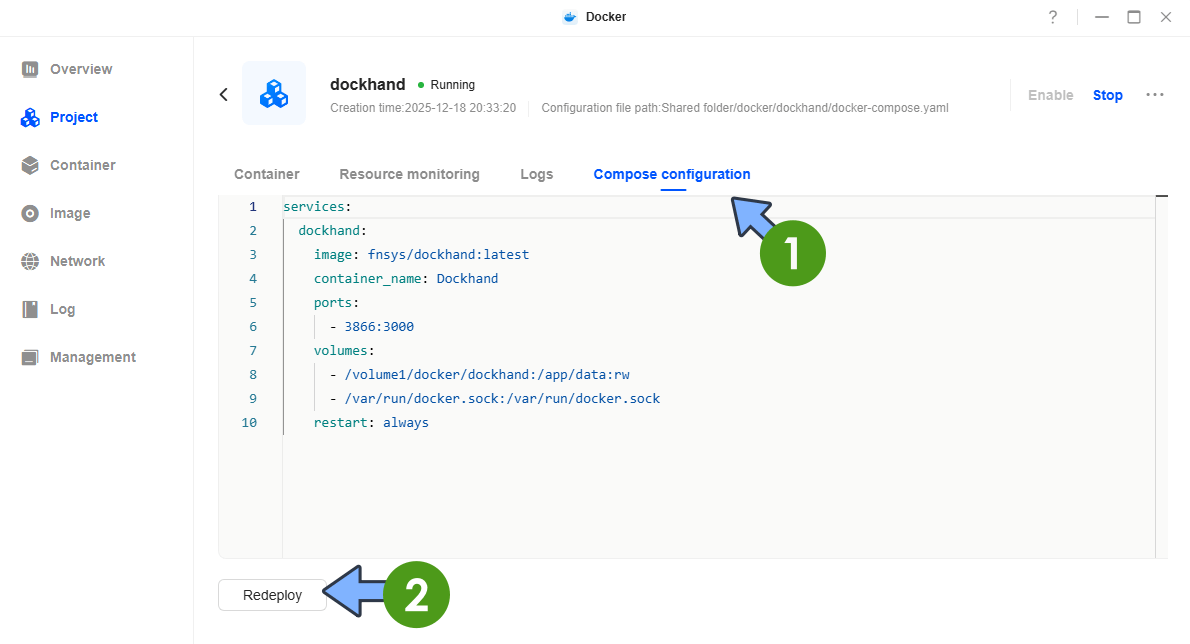
Click the Compose configuration tab, then Redeploy. Follow the instructions in the image below.
STEP 4
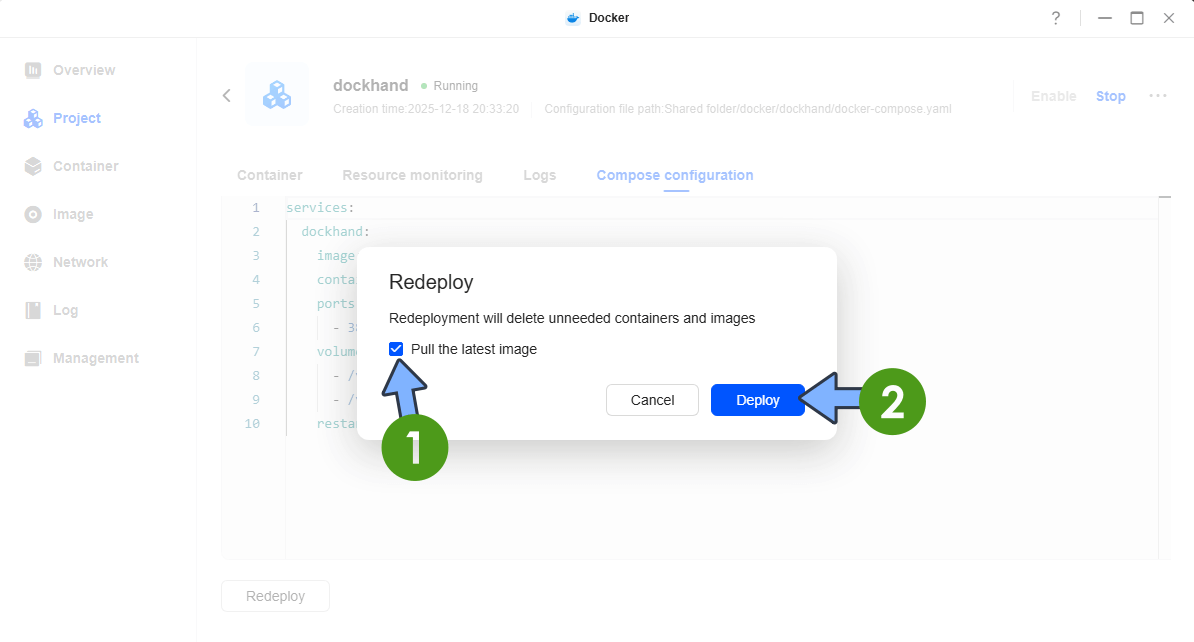
Select Pull the latest image, then click Deploy. Follow the instructions in the image below.
STEP 5
Click OK. Follow the instructions in the image below.
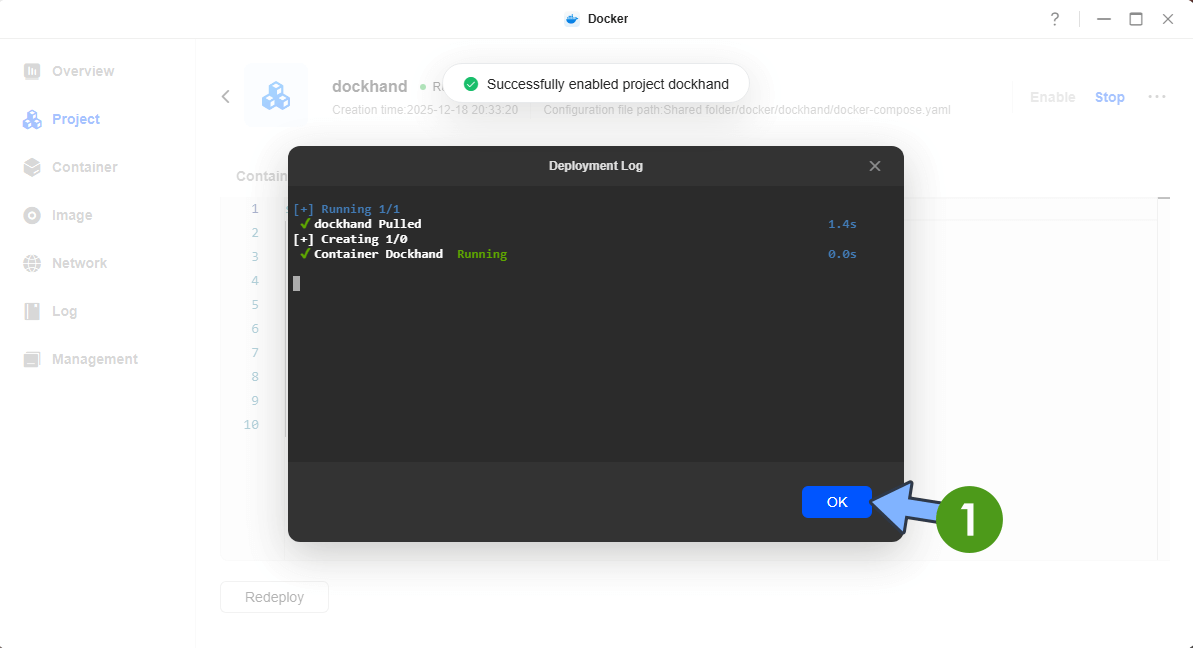
Enjoy the latest Dockhand on your UGREEN NAS!
This post was updated on Friday / October 23rd, 2026 at 12:30 PM