
Ollama is an open-source project that serves as a powerful and user-friendly platform for running LLMs on your local machine. Get up and running with large language models with Ollama on your own UGREEN NAS! I’ve installed Ollama on my iDX6011 Pro in a Docker container to be able to test various LLMs running on my own NAS server instead of a third-party server. The installation was simple and straightforward and it allowed me to try out a containerized version of this powerful open-source LLM runtime. On my NAS, Ollama handles everything from downloading AI models to providing a chat interface with data controls and notifications, and various integrations, without needing an account, subscriptions or even Internet access. In this step by step guide I will show you how to install Ollama on your UGREEN NAS using Docker & Dockhand.
💡Note: This guide works perfectly with the latest version of Ollama v0.40.4
💡Note: Check out my guide on how to Install Ollama on Your Synology NAS.
STEP 1
Please Support My work by Making a Donation.
STEP 2
Install Dockhand using my step by step guide. If you already have Dockhand installed on your UGREEN NAS, skip this STEP. Attention: Make sure you have installed the latest Dockhand version.
STEP 3
⚠️Mandatory: Enable HTTPS on your UGREEN NAS.
STEP 4
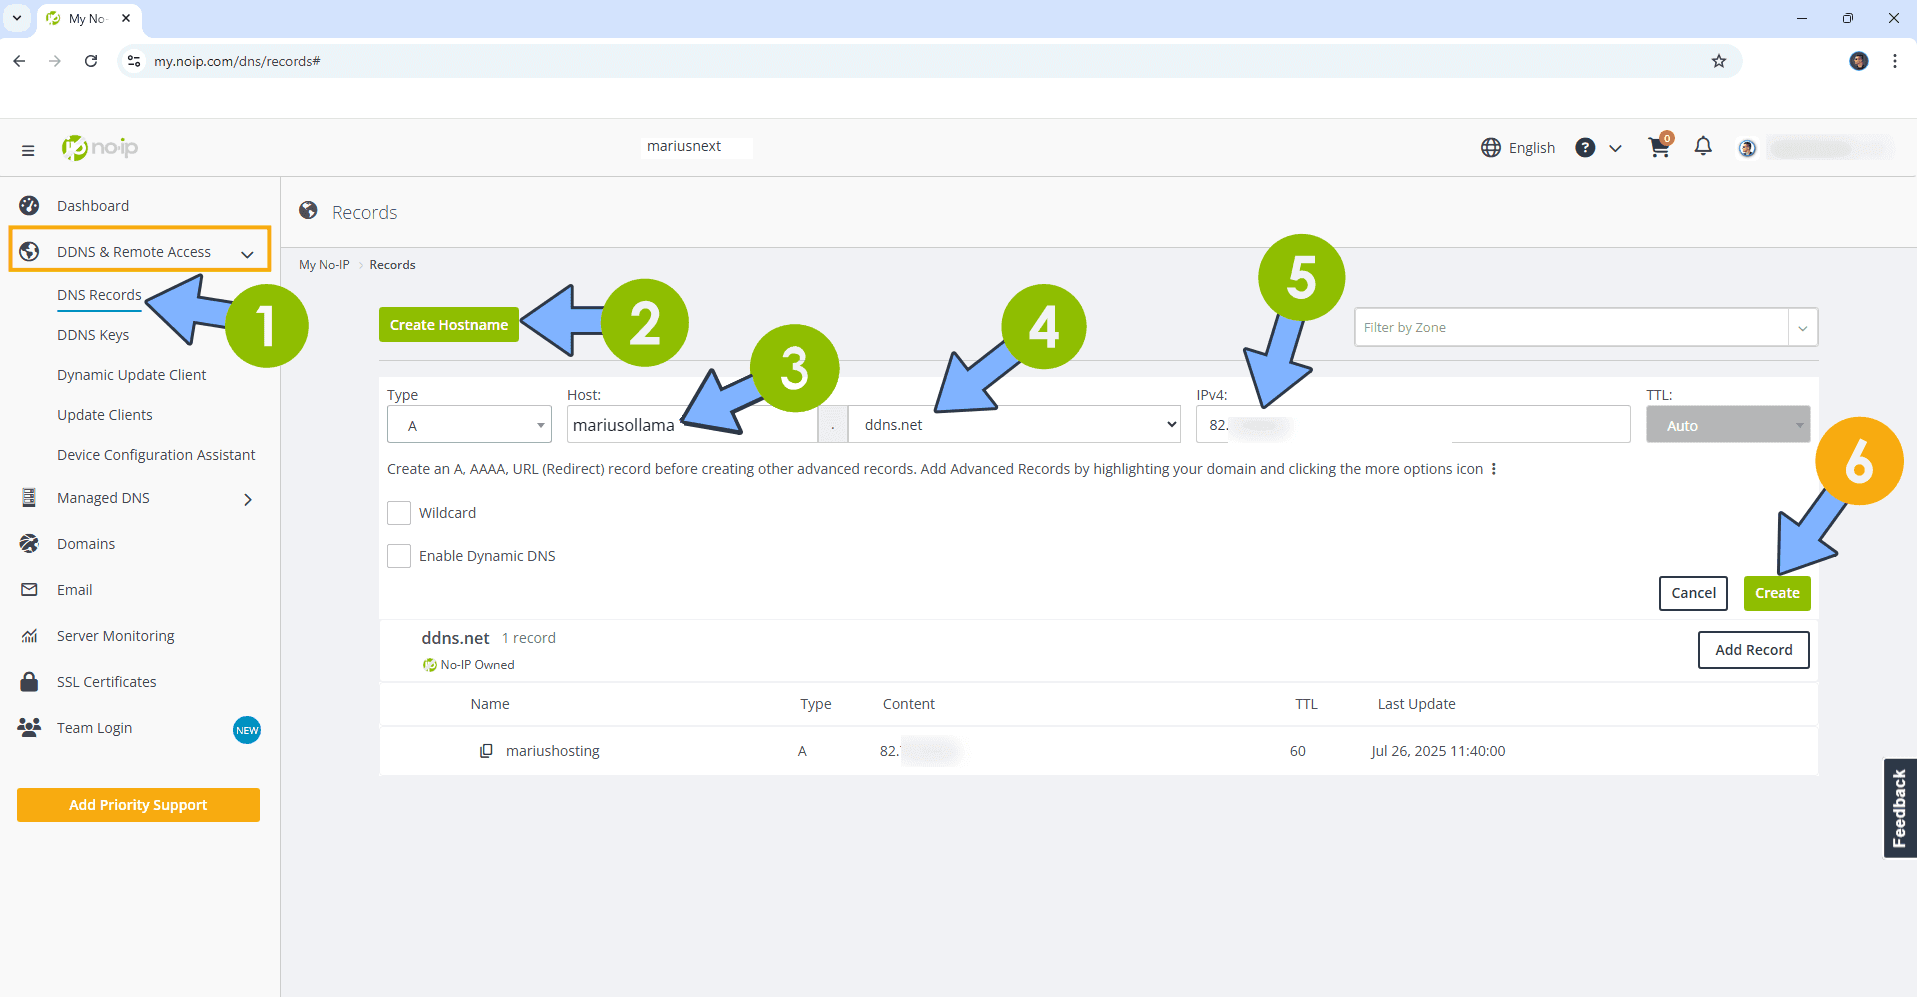
Create a new hostname on the noip website using your noip account. For example, I have created mariusollama as Host and I use the free ddns.net domain. In the IP Address area, type in your own IPV4 IP address from your ISP, then click Create. Follow the instructions in the image below.
STEP 5
⚠️Mandatory: Add Read & Write Permissions to the Docker Folder.
STEP 6
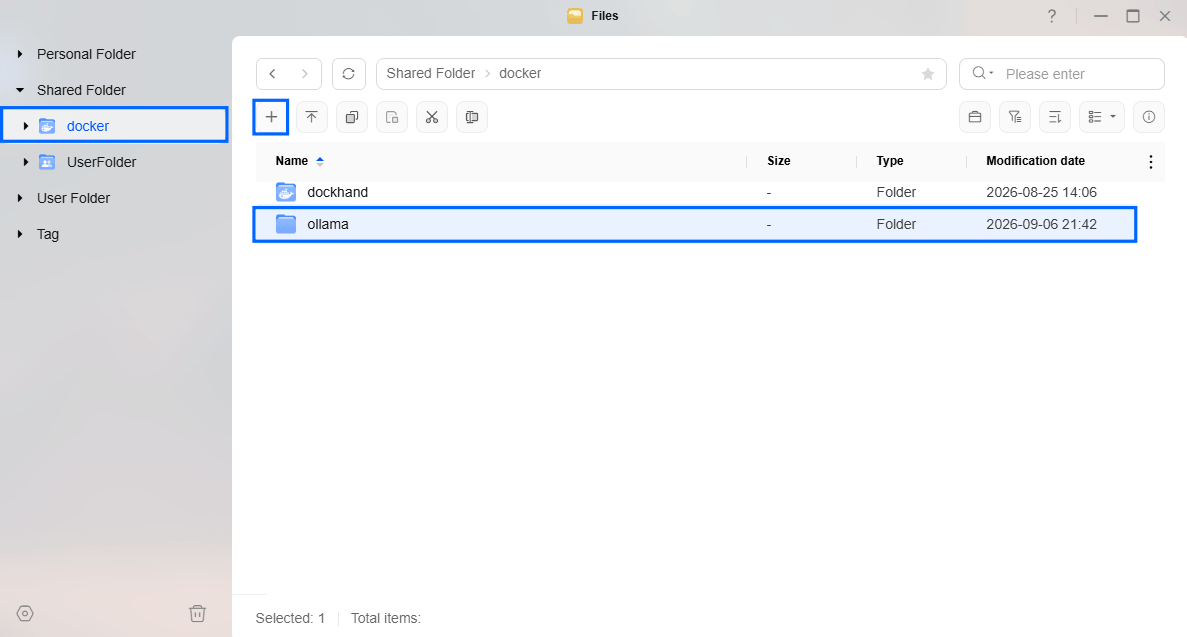
Go to Files and open the docker folder. Inside the docker folder, create one new folder and name it ollama. Follow the instructions in the image below.
Note: Be careful to enter only lowercase, not uppercase letters.
STEP 7
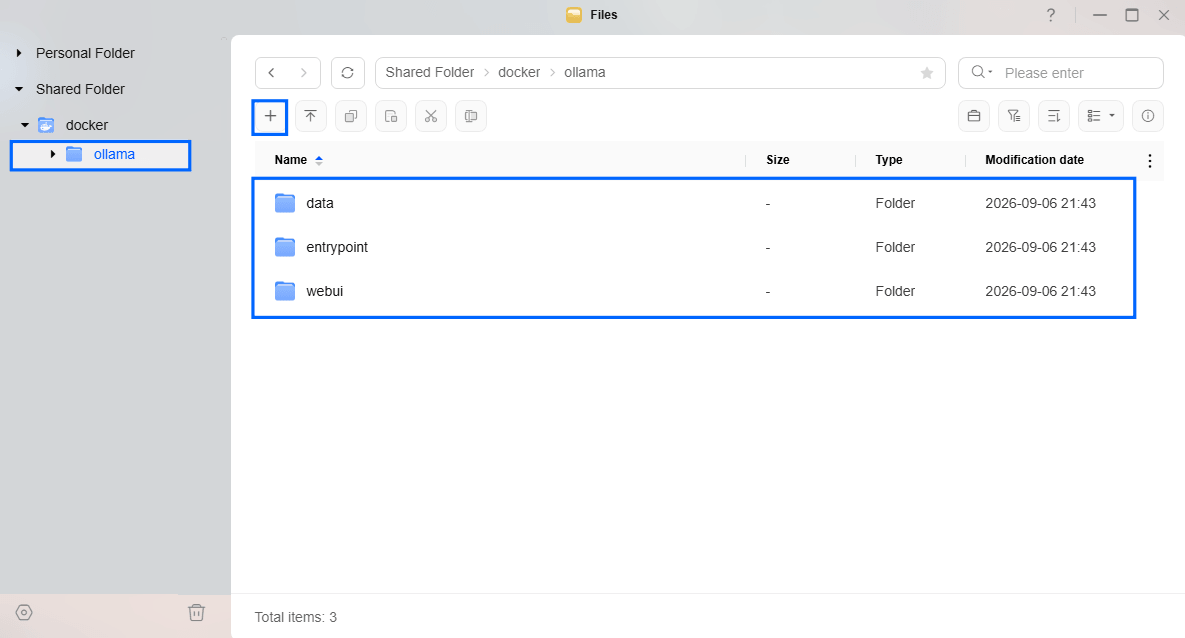
Now create three new folders inside the ollama folder that you have previously created at STEP 7 and name them data, entrypoint, webui. Follow the instructions in the image below.
Note: Be careful to enter only lowercase, not uppercase letters.
STEP 8
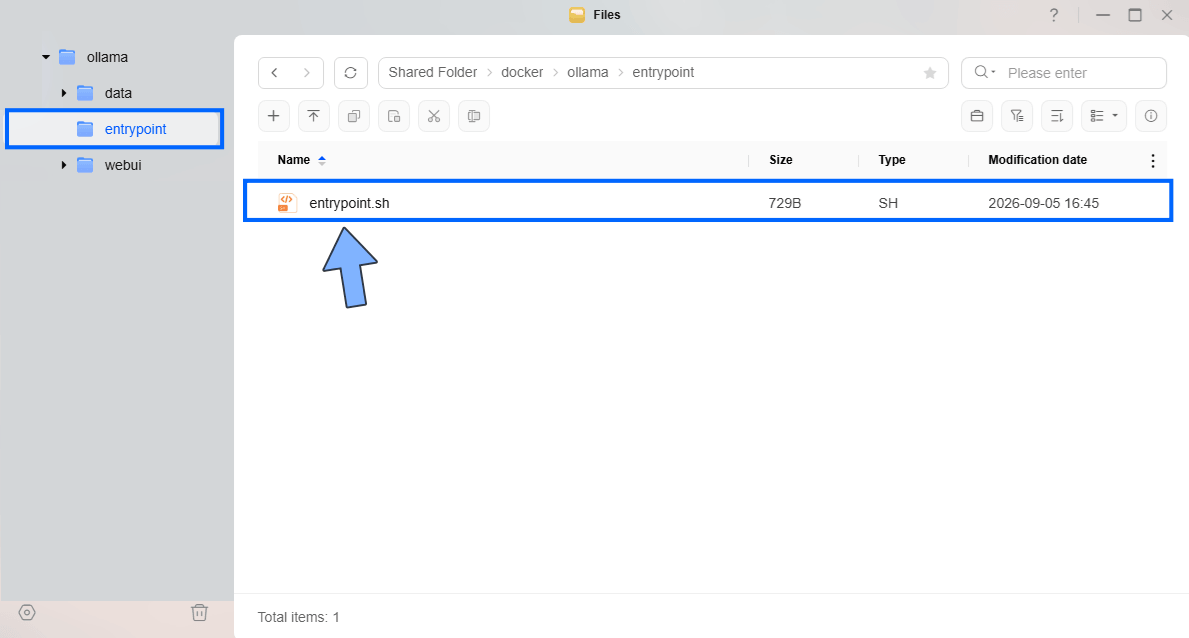
Download (click on the blue link below) and upload the entrypoint.sh file below in the entrypoint folder that you have previously created at STEP 7. Follow the instructions in the image below. 🔒Note: Support my work to unlock the password. You can use this password to download any file on mariushosting forever!
STEP 9
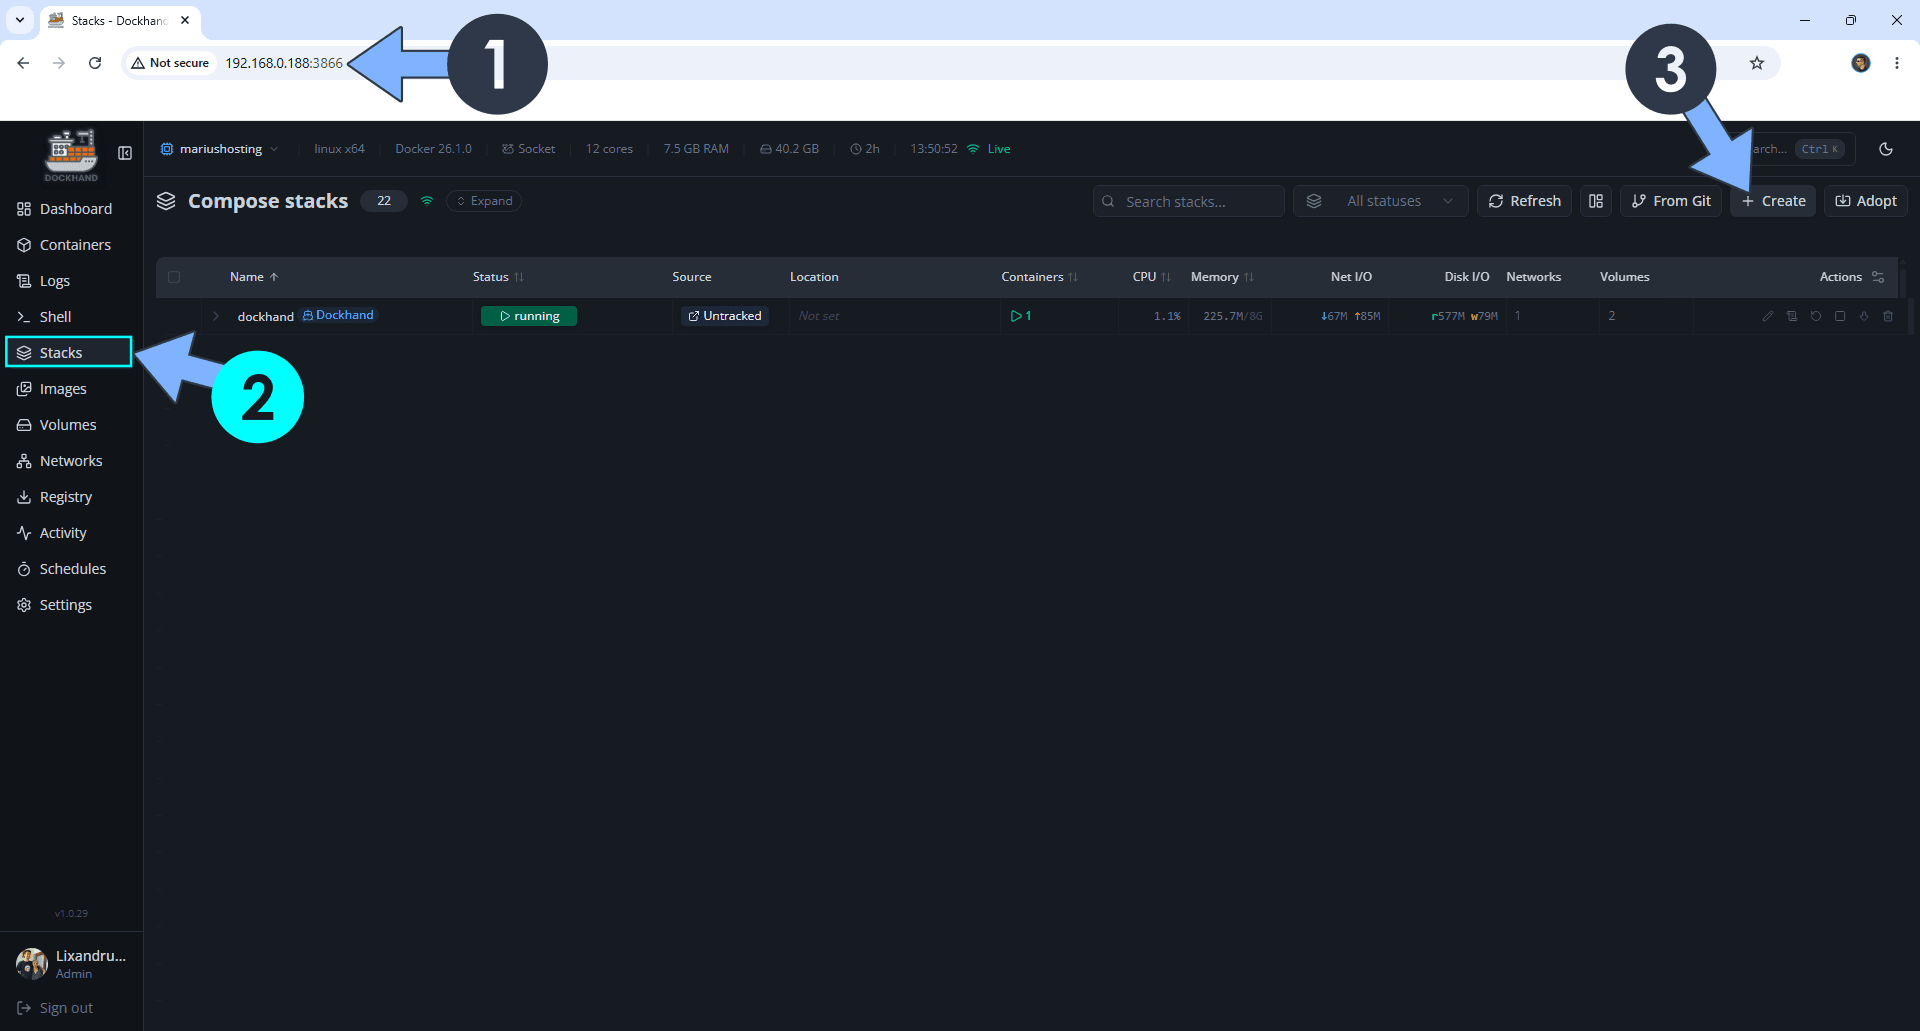
Open your browser and type in http://ugreen-ip-address:3866 to connect to your Dockhand container. On the left sidebar, click Stacks then + Create. Follow the instructions in the image below.
STEP 10
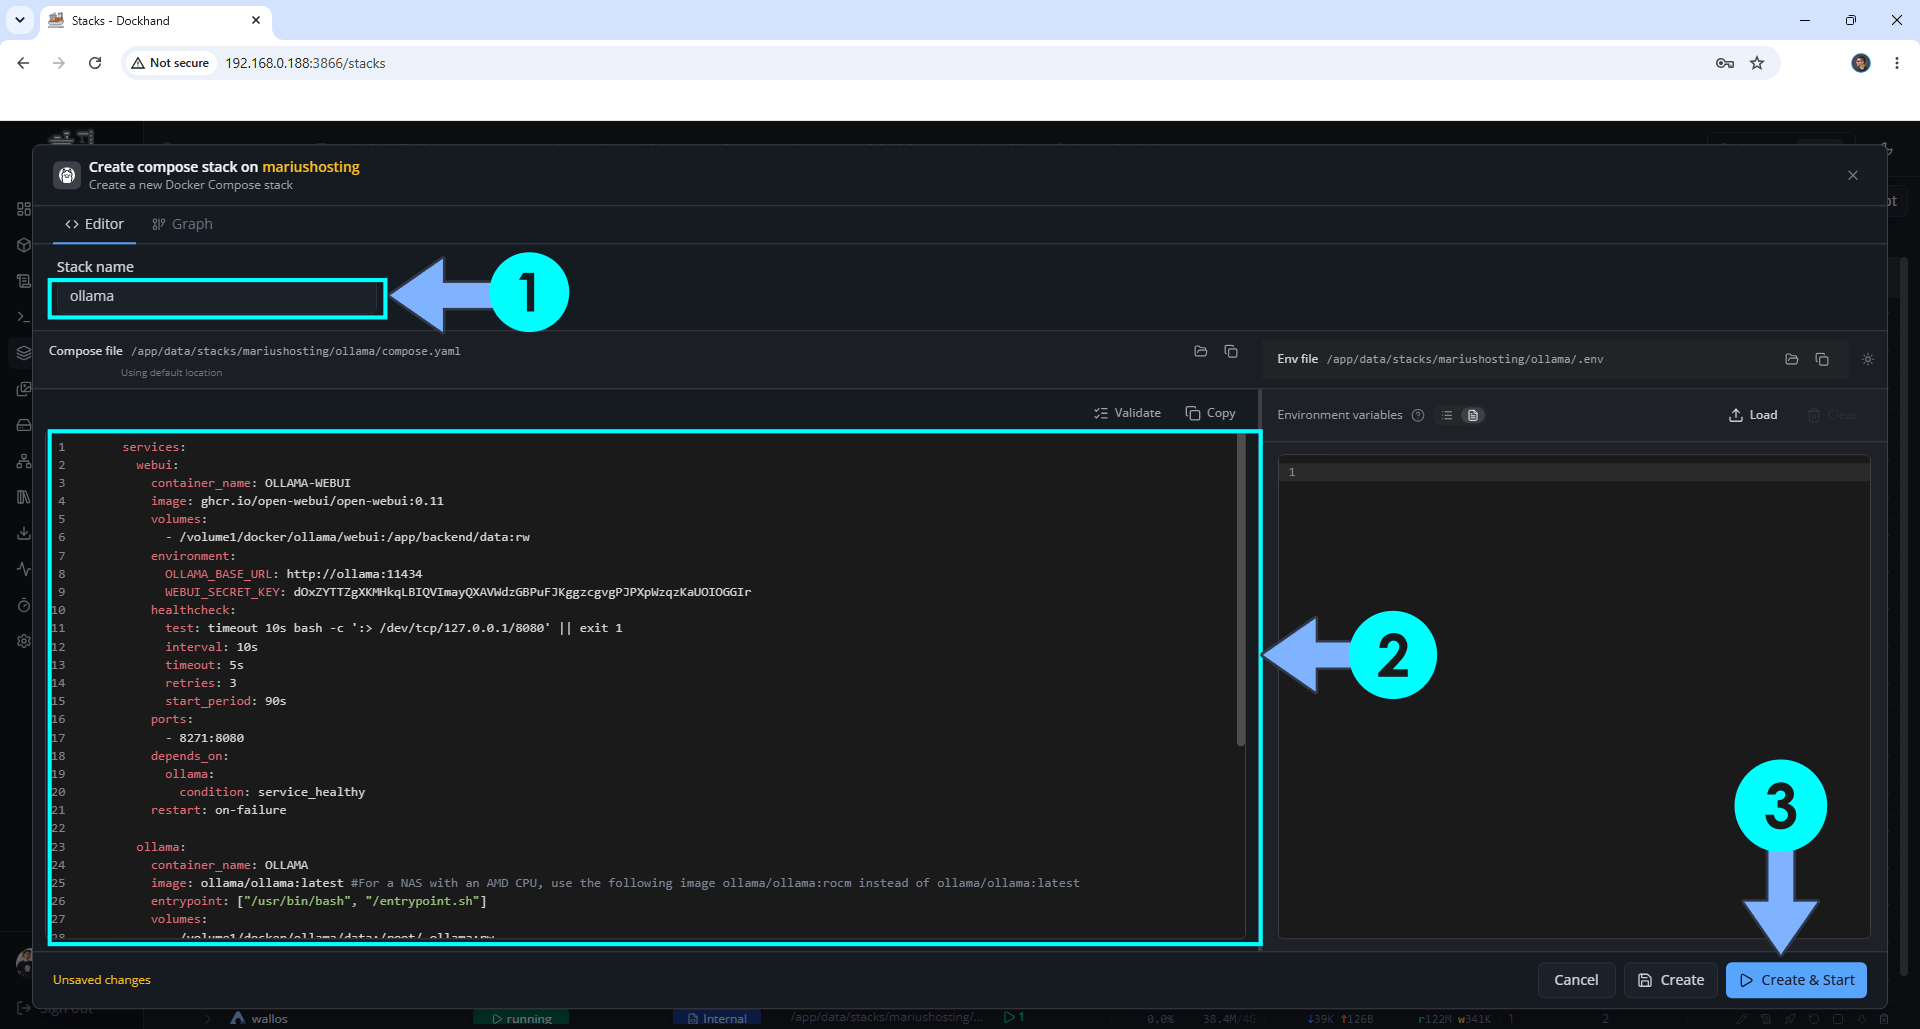
In the Stack name field, type in ollama. ⚠️Warning: Type in the name in lowercase letters. The installation process can take up to a few seconds/minutes. It will depend on your Internet speed connection. Follow the instructions in the image below.
Note: Copy Paste the code below in the Dockhand Compose Stack then click Create & Start.
services:
  webui:
    container_name: OLLAMA-WEBUI
    image: ghcr.io/open-webui/open-webui:0.11
    volumes:
      - /volume1/docker/ollama/webui:/app/backend/data:rw
    environment:
      OLLAMA_BASE_URL: http://ollama:11434
      WEBUI_SECRET_KEY: dOxZYTTZgXKMHkqLBIQVImayQXAVWdzGBPuFJKggzcgvgPJPXpWzqzKaUOIOGGIr
    healthcheck:
      test: timeout 10s bash -c ':> /dev/tcp/127.0.0.1/8080' || exit 1
      interval: 10s
      timeout: 5s
      retries: 3
      start_period: 90s
    ports:
      - 8271:8080
    depends_on:
      ollama:
        condition: service_healthy
    restart: on-failure

  ollama:
    container_name: OLLAMA
    image: ollama/ollama:latest #For a NAS with an AMD CPU, use the following image ollama/ollama:rocm instead of ollama/ollama:latest
    entrypoint: ["/usr/bin/bash", "/entrypoint.sh"]
    volumes:
      - /volume1/docker/ollama/data:/root/.ollama:rw
      - /volume1/docker/ollama/entrypoint/entrypoint.sh:/entrypoint.sh
    environment:
      MODELS: gemma4 #Check all the models at the following link https://ollama.com/library - You can separate models by commas like llama3.2,gemma2,mistral
      OLLAMA_INSTALL_MODELS: gemma4 #Check all the models at the following link https://ollama.com/library - You can separate models by commas like llama3.2,gemma2,mistral
      OLLAMA_HOSTNAME: mariusollama.ddns.net
    ports:
      - 11434:11434
    healthcheck:
      test: ["CMD", "ollama", "--version"]
      interval: 10s
      timeout: 5s
      retries: 3
      start_period: 30s
    restart: on-failure:5
Note: Before you paste the code above in the Stack editor area below, change the value for WEBUI_SECRET_KEY. (Generate your own Random 64 length WEBUI_SECRET_KEY.)
Note: Before you paste the code above in the Stack editor area below, change the value for OLLAMA_HOSTNAME and type in your own your own NO IP DDNS without https:// at the beginning that you have previously created at STEP 4.
STEP 11
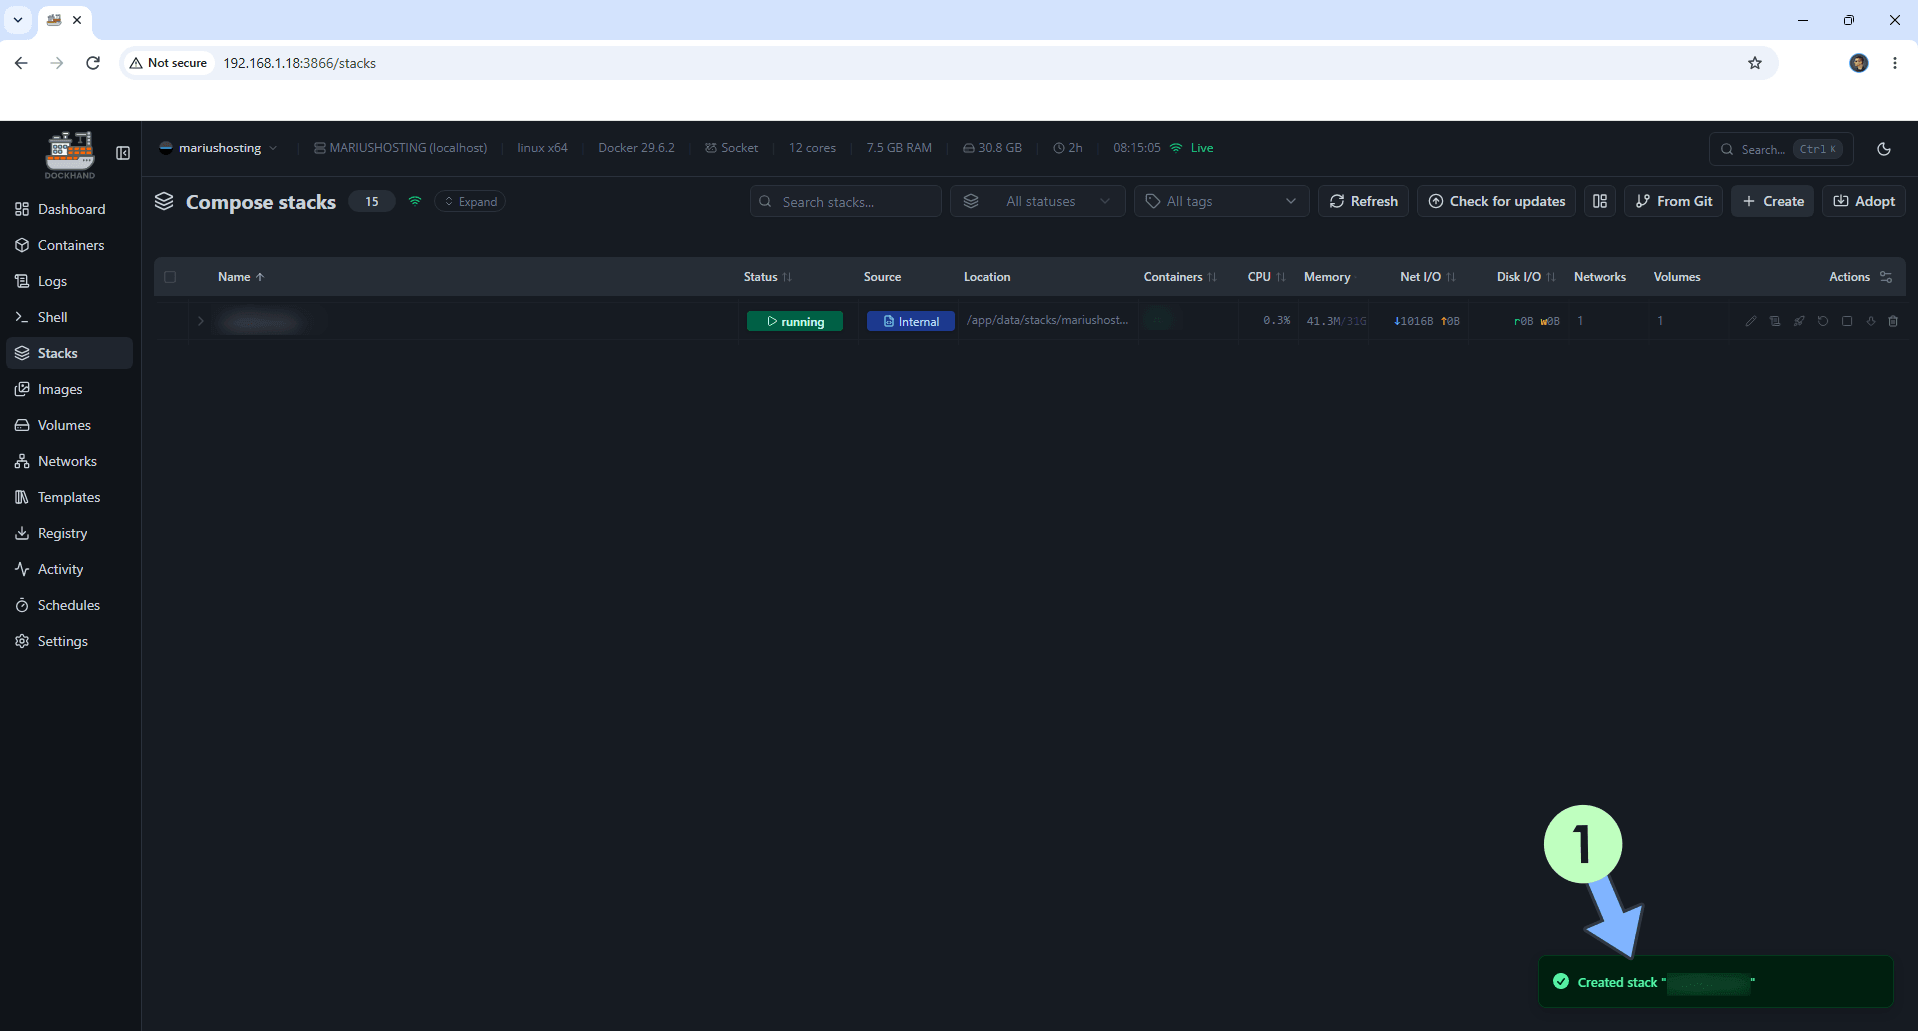
If everything goes right, you will see the following message at the bottom right of your screen: “Created stack “ollama”“.
STEP 12
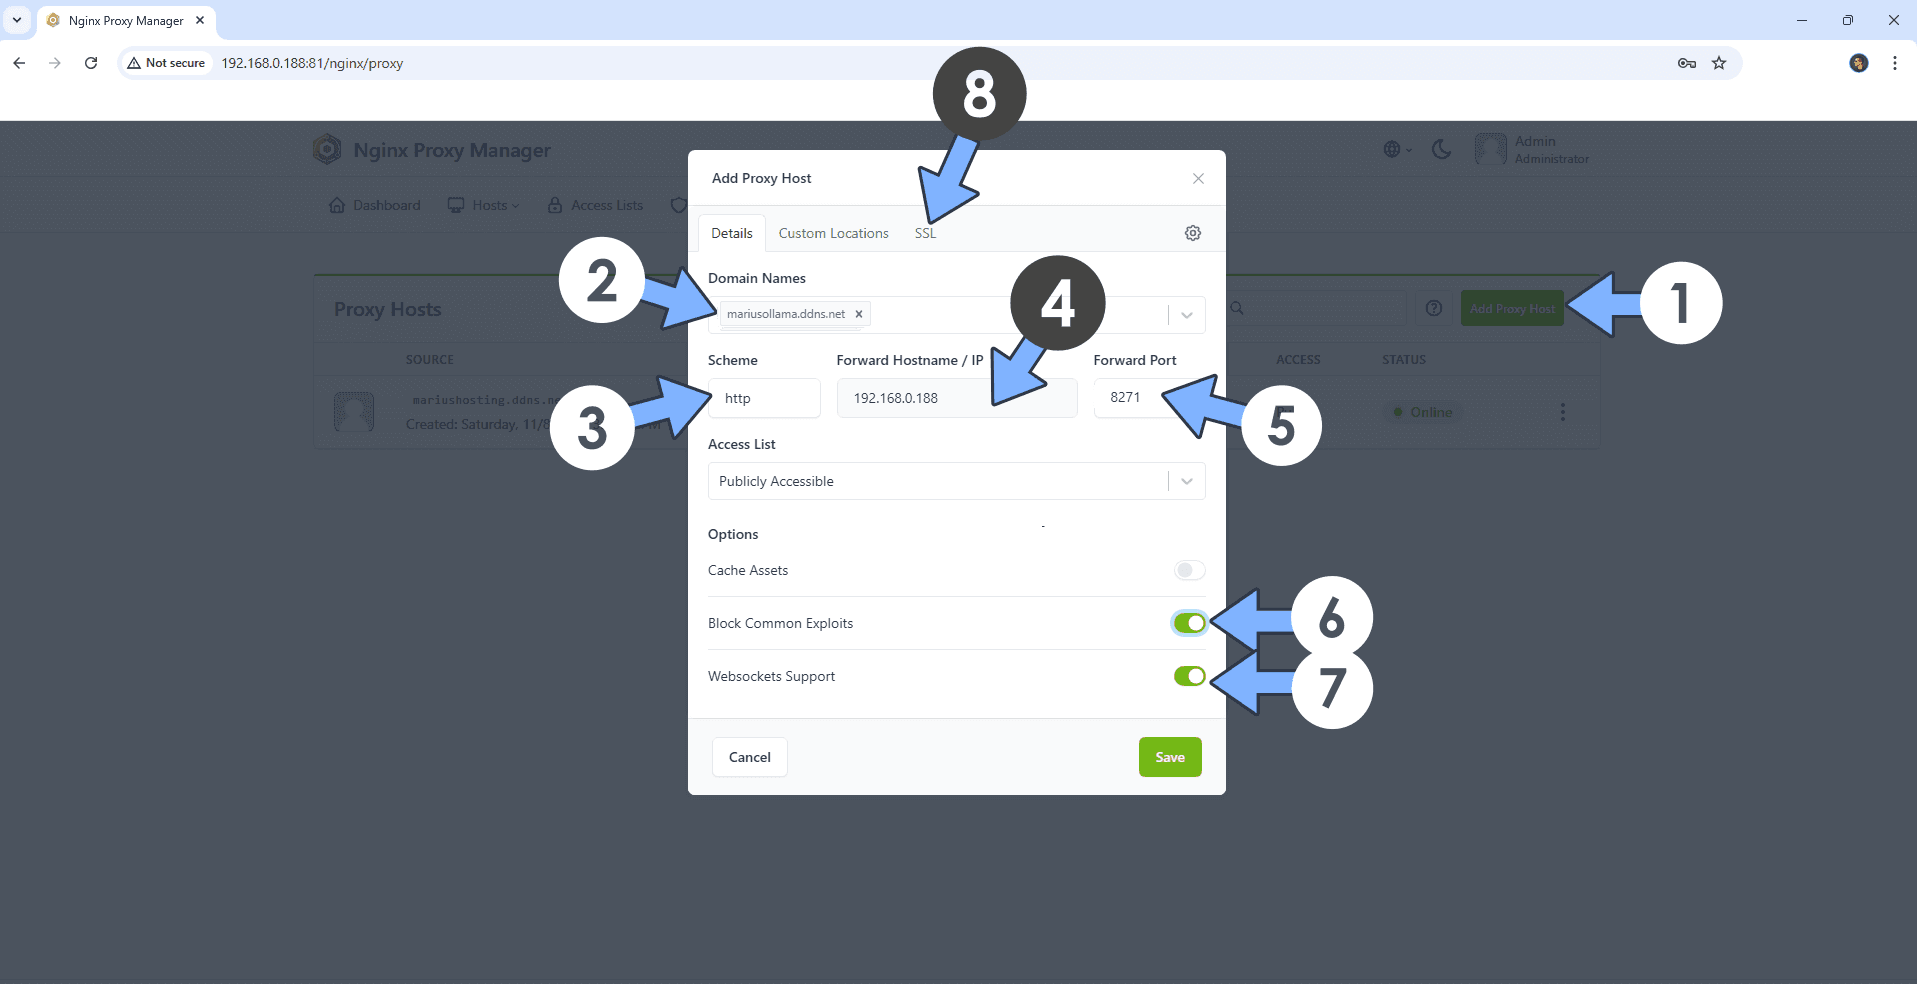
Open your Nginx Proxy Manager container that you have previously installed at STEP 3. Click Add Proxy Host. A new pop up window will open. Add the following details:
Domain Names: Type in your own noip domain name that you have previously created at STEP 4.
Scheme: http
Forward Hostname/IP: Type in the local NAS IP of your UGREEN NAS.
Forward Port: Type in the Ollama local Port that is 8271
Check Block Common Exploits
Check Websockets Support
Click the SSL tab. Follow the instructions in the image below.
STEP 13
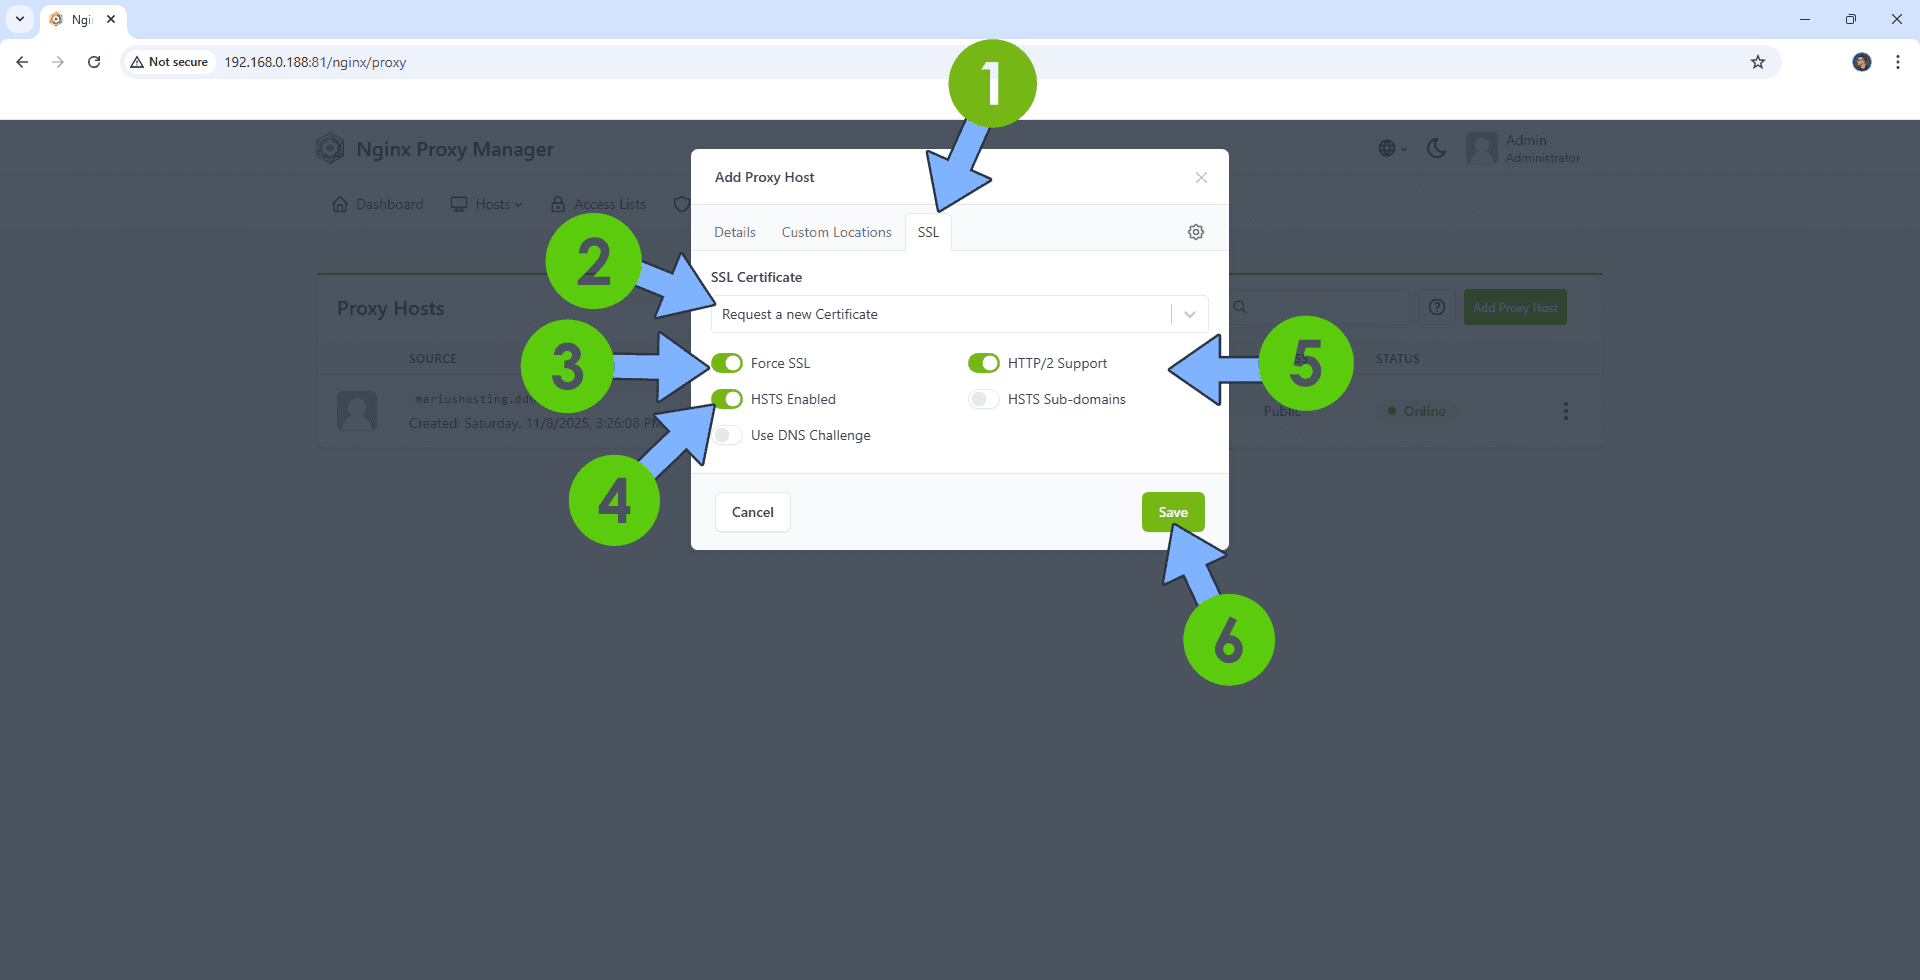
After you click the SSL tab, add the following details:
SSL Certificate: Request a new SSL Certificate
Check: Force SSL
Check: HSTS Enabled
Check: HTTP/2 Support
Click Save. Follow the instructions in the image below.
STEP 14
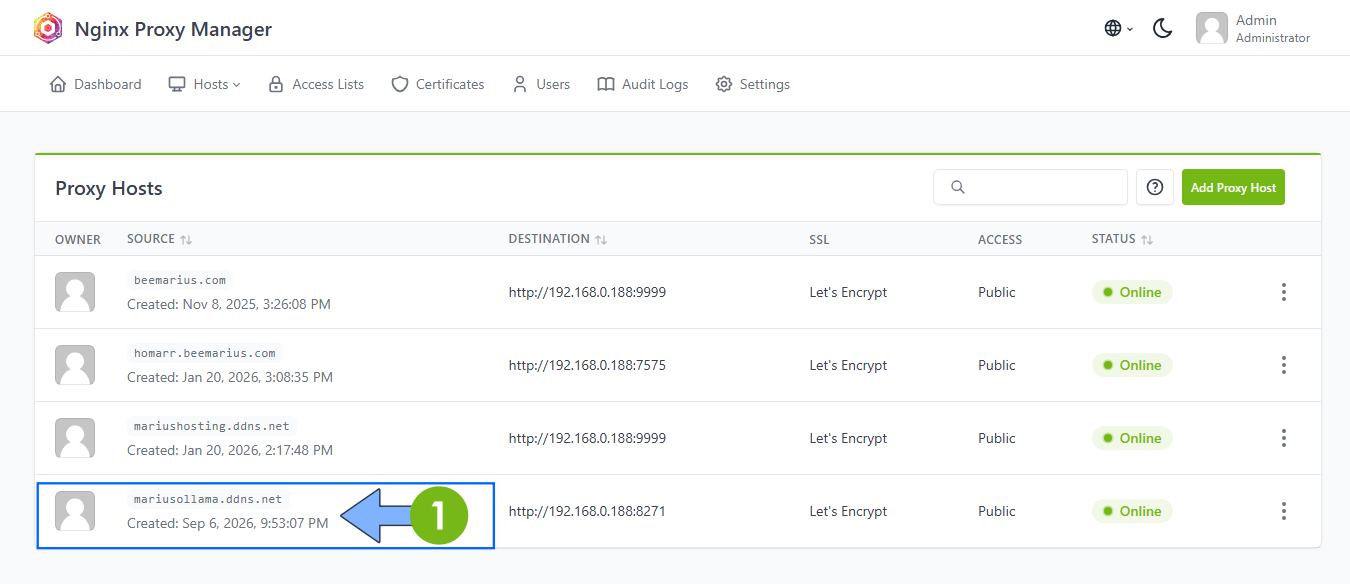
In the Proxy Hosts area, if everything goes right, you will see that your hostname has been generated. Click on it. Follow the instructions in the image below.
STEP 15
🟢Please Support My work by Making a Donation. Almost 99,9% of the people that install something using my guides forget to support my work, or just ignore STEP 1. I’ve been very honest about this aspect of my work since the beginning: I don’t run any ADS, I don’t require subscriptions, paid or otherwise, I don’t collect IPs, emails, and I don’t have any referral links from Amazon or other merchants. I also don’t have any POP-UPs or COOKIES. I have repeatedly been told over the years how much I have contributed to the community. It’s something I love doing and have been honest about my passion since the beginning. But I also Need The Community to Support me Back to be able to continue doing this work.
STEP 16
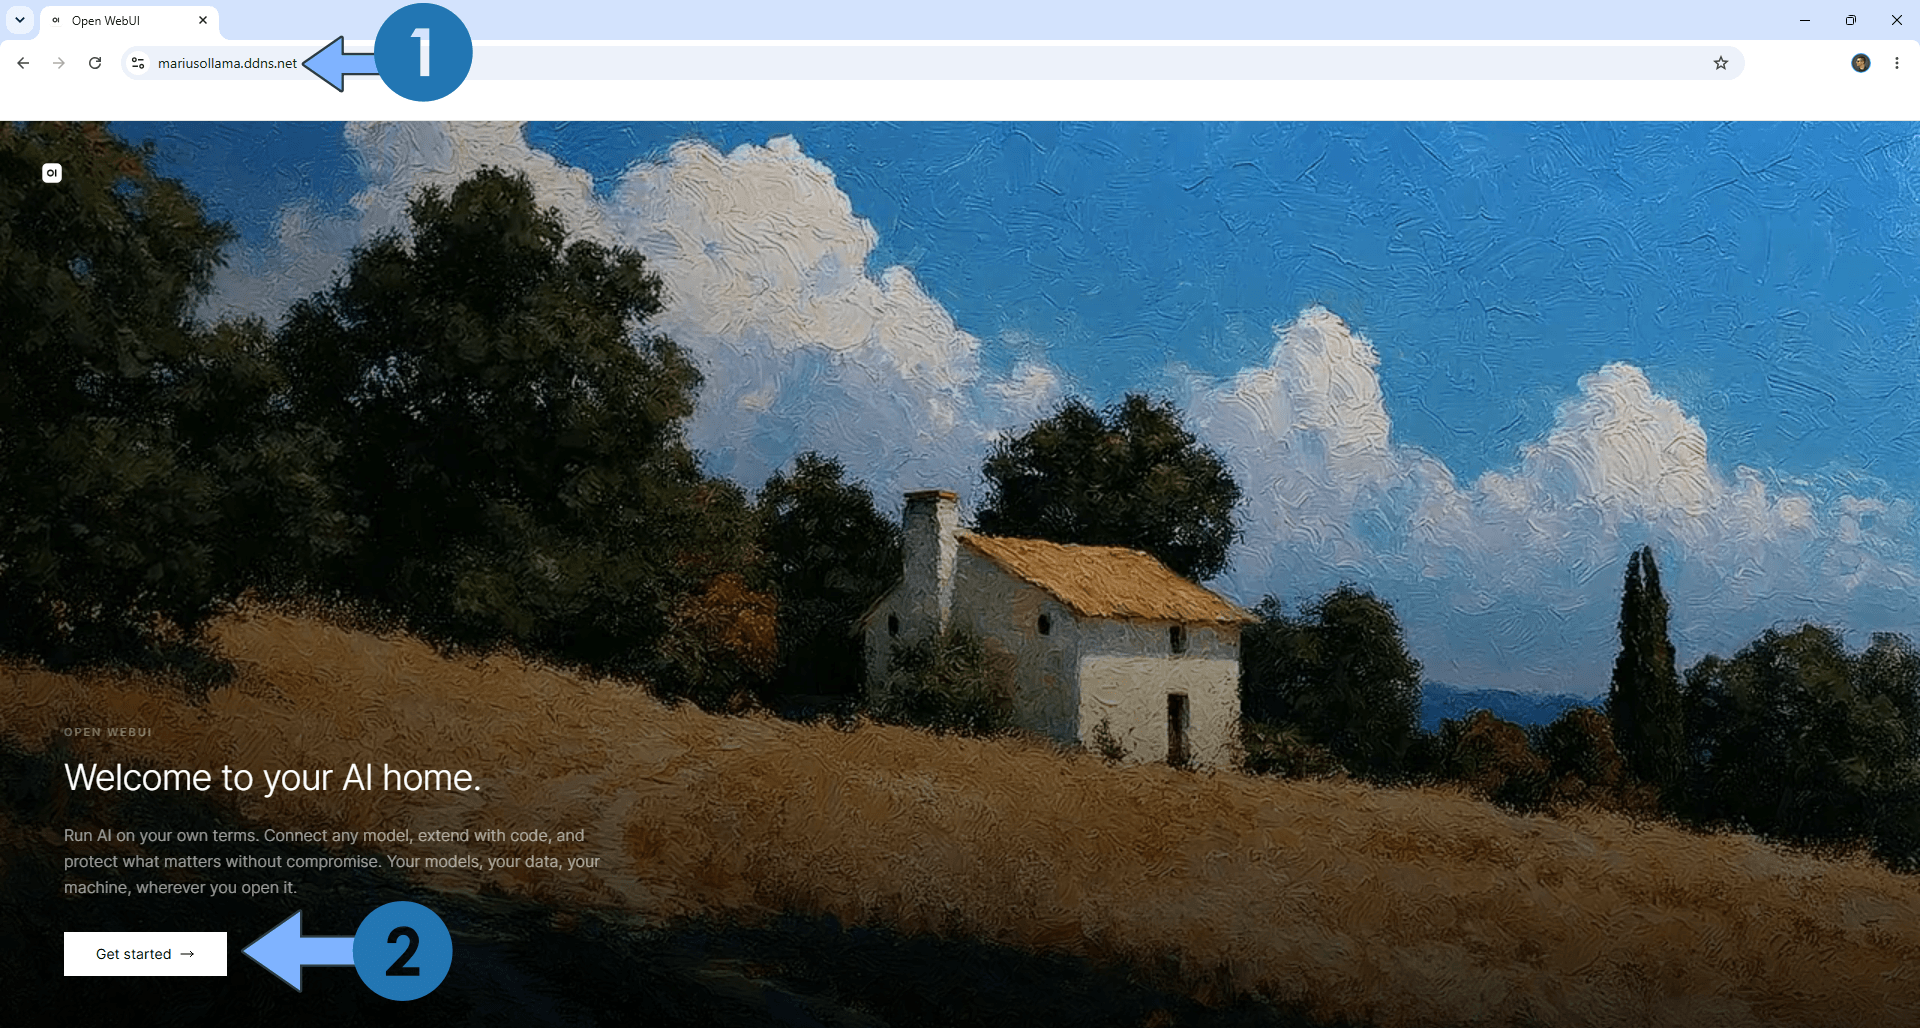
Now open your browser and type in your HTTPS/SSL certificate like this https://yourname.ddns.net that you have previously created at STEP 4. In my case it’s https://mariusollama.ddns.net If everything goes right, you will see the Ollama Login page. Click Get Started. Follow the instructions in the image below.
STEP 17
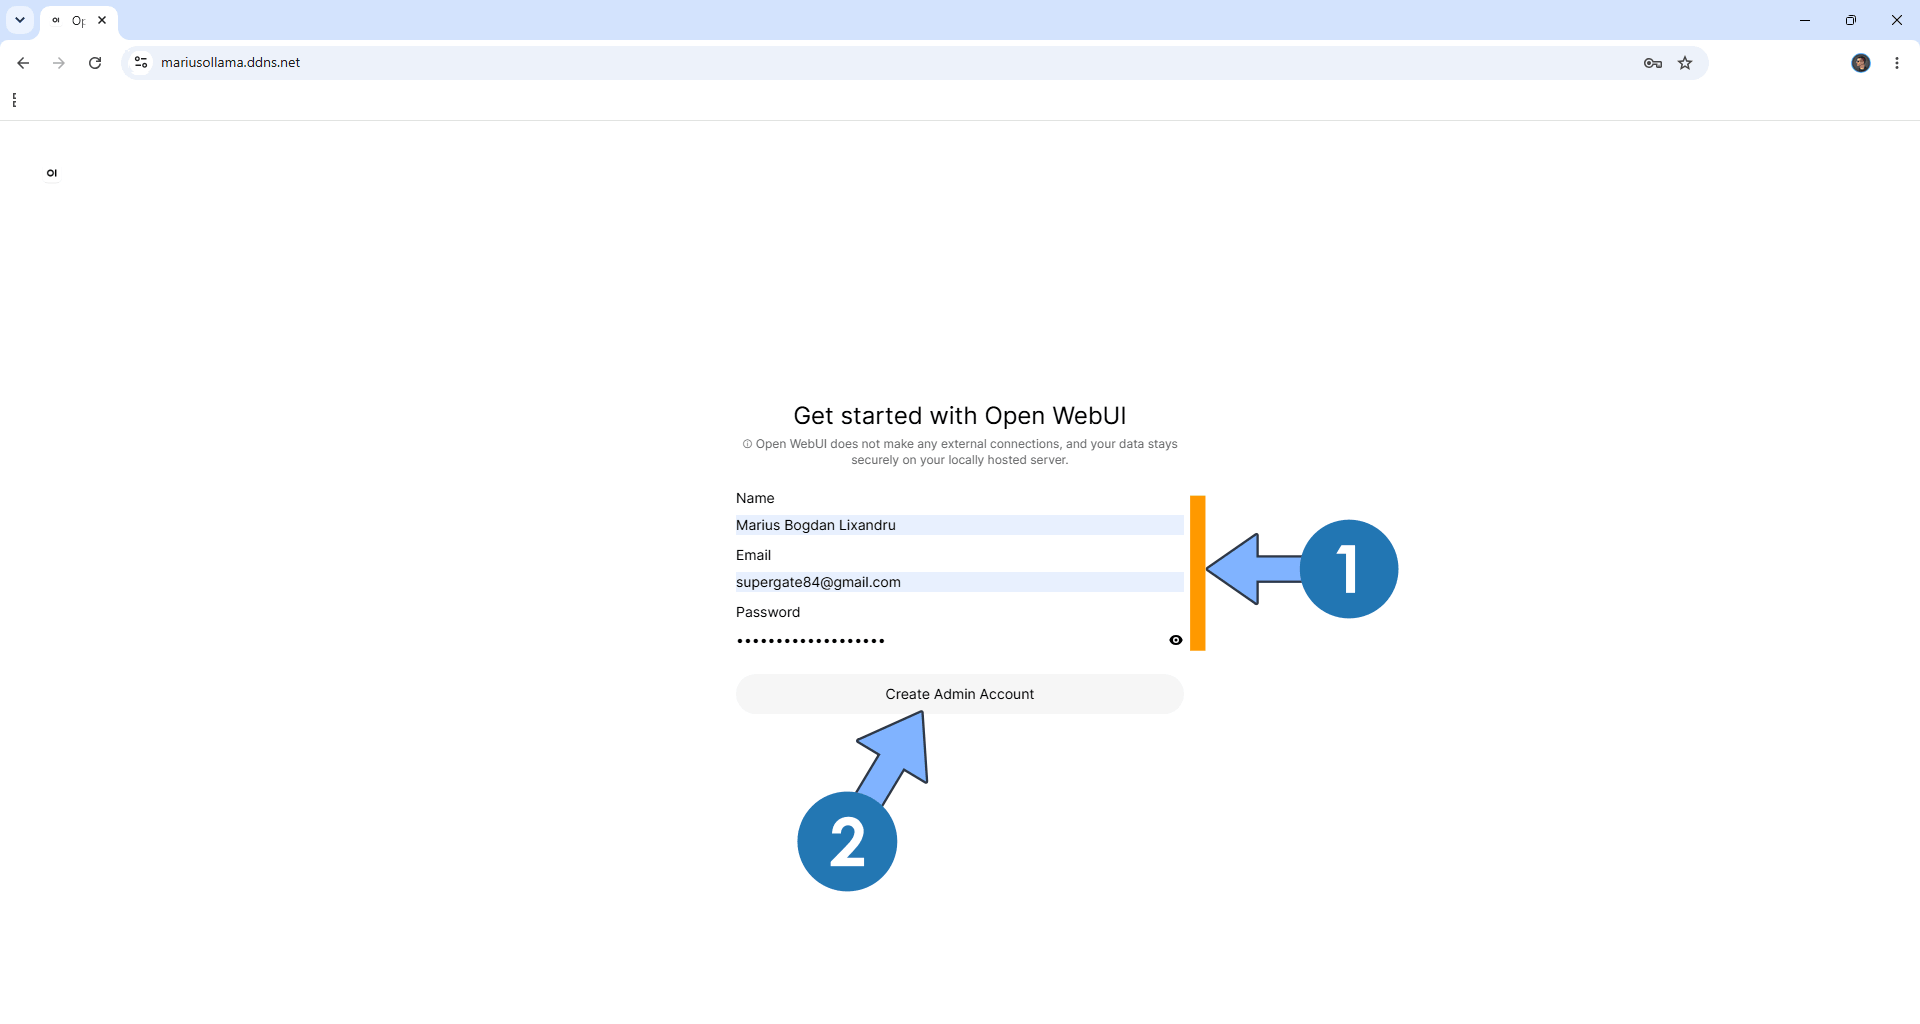
Type in your own details (Name, Email Address, Password), then click Create Admin Account. Follow the instructions in the image below.
STEP 18
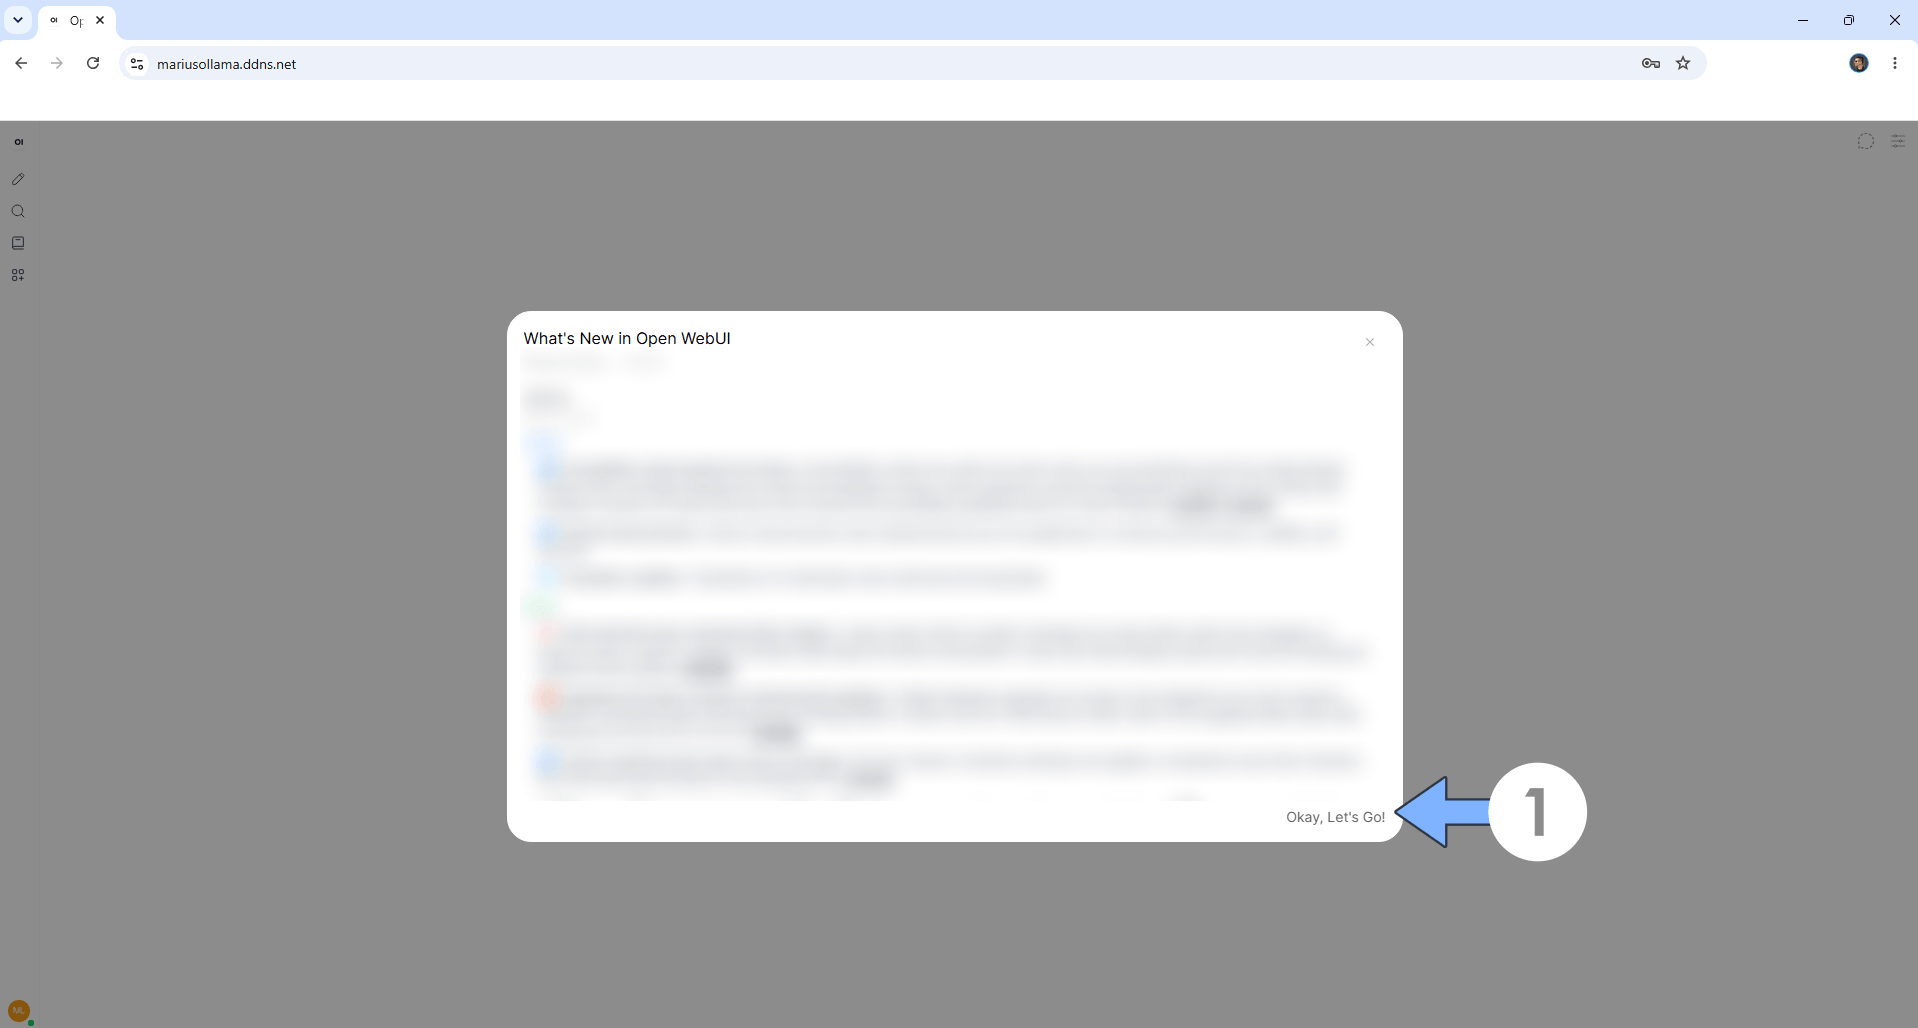
Click Okay, Let’s Go to close the pop up. Follow the instructions in the image below.
STEP 19
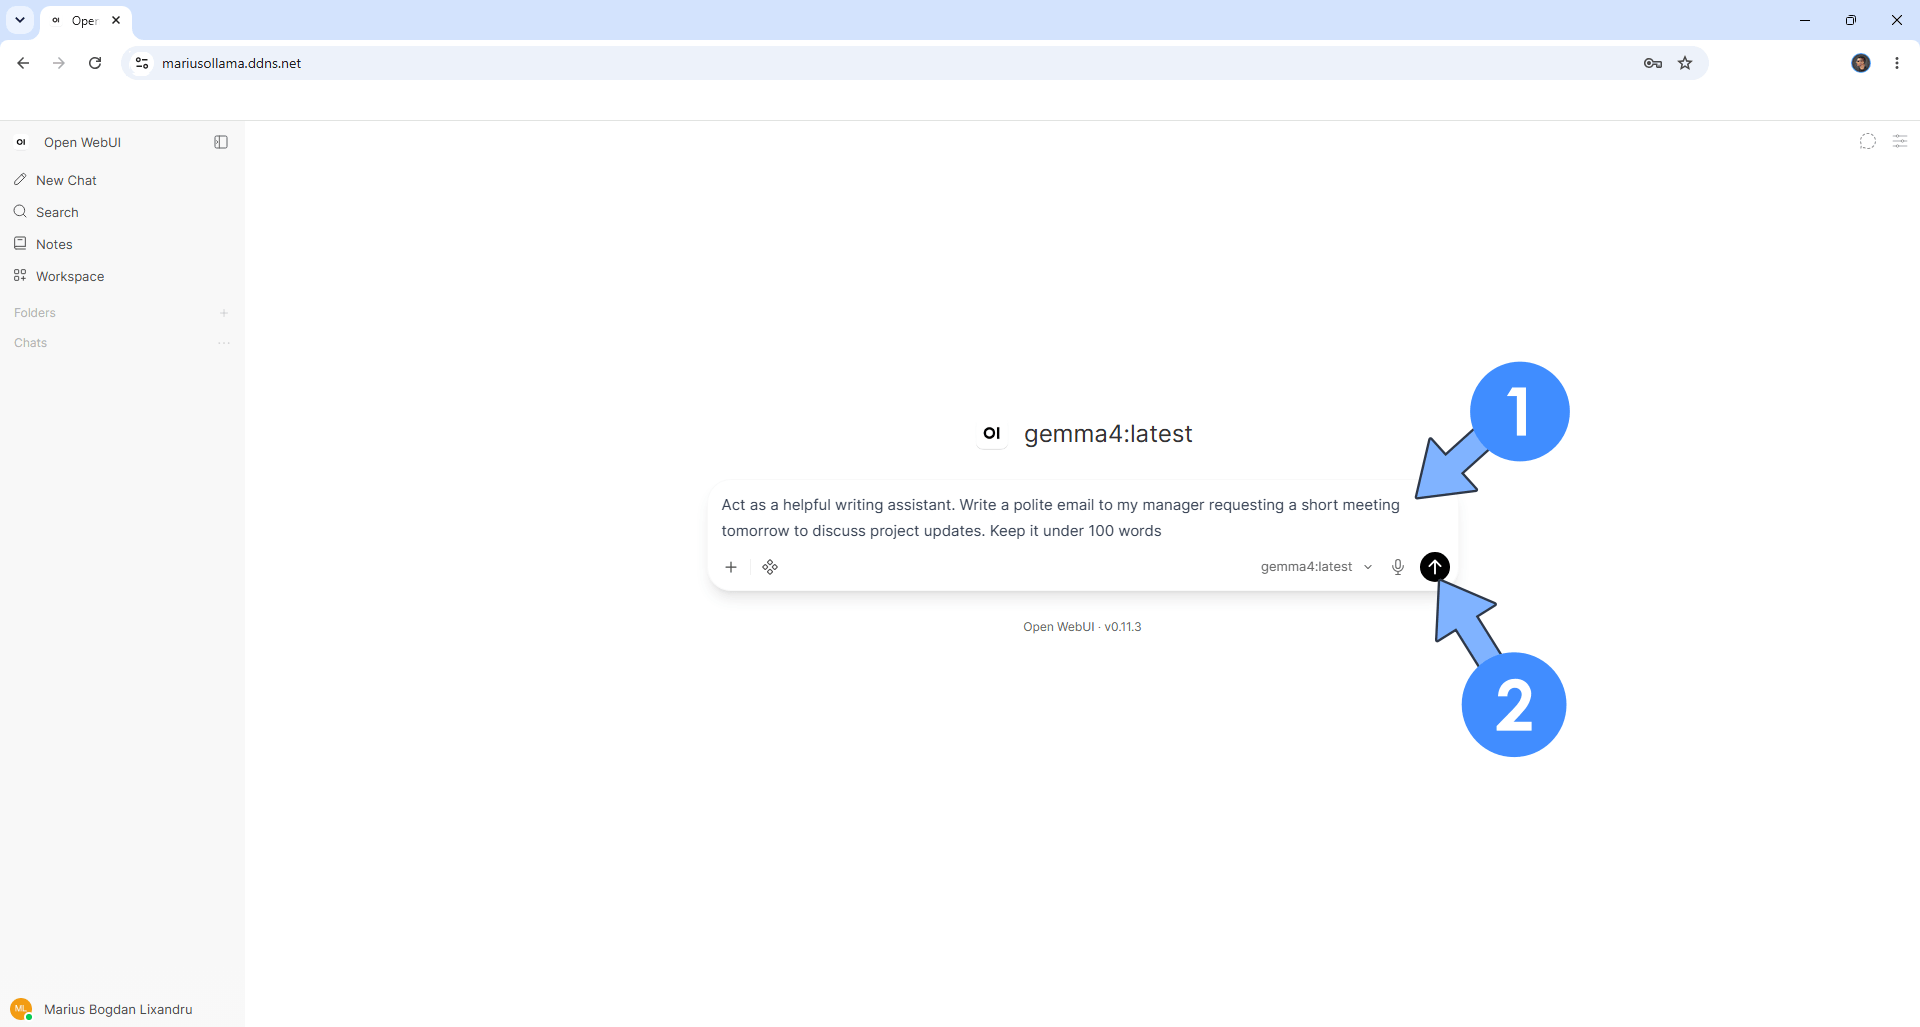
In the input box, type in your question, then click enter by clicking the little up arrow icon. Follow the instructions in the image below.
STEP 20
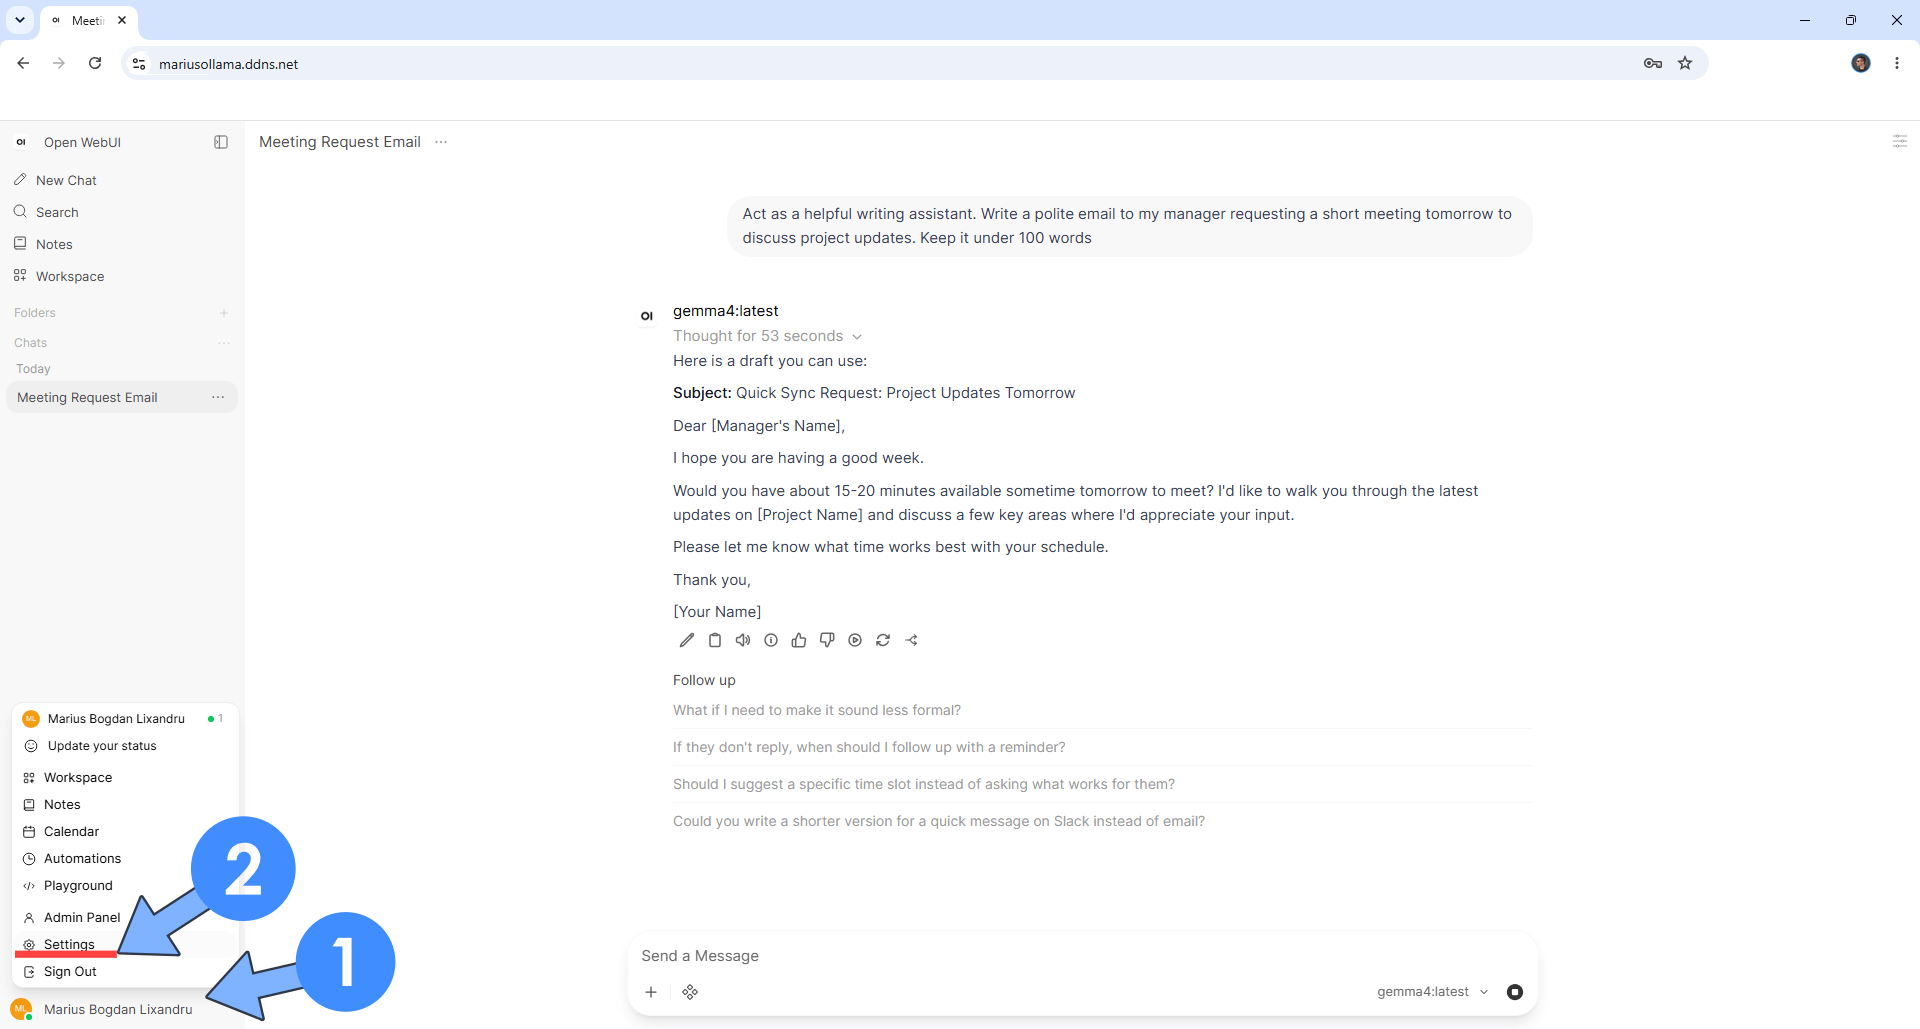
Your answer at a glance! At the bottom of the page, click on the user icon then Settings. Follow the instructions in the image below.
STEP 21
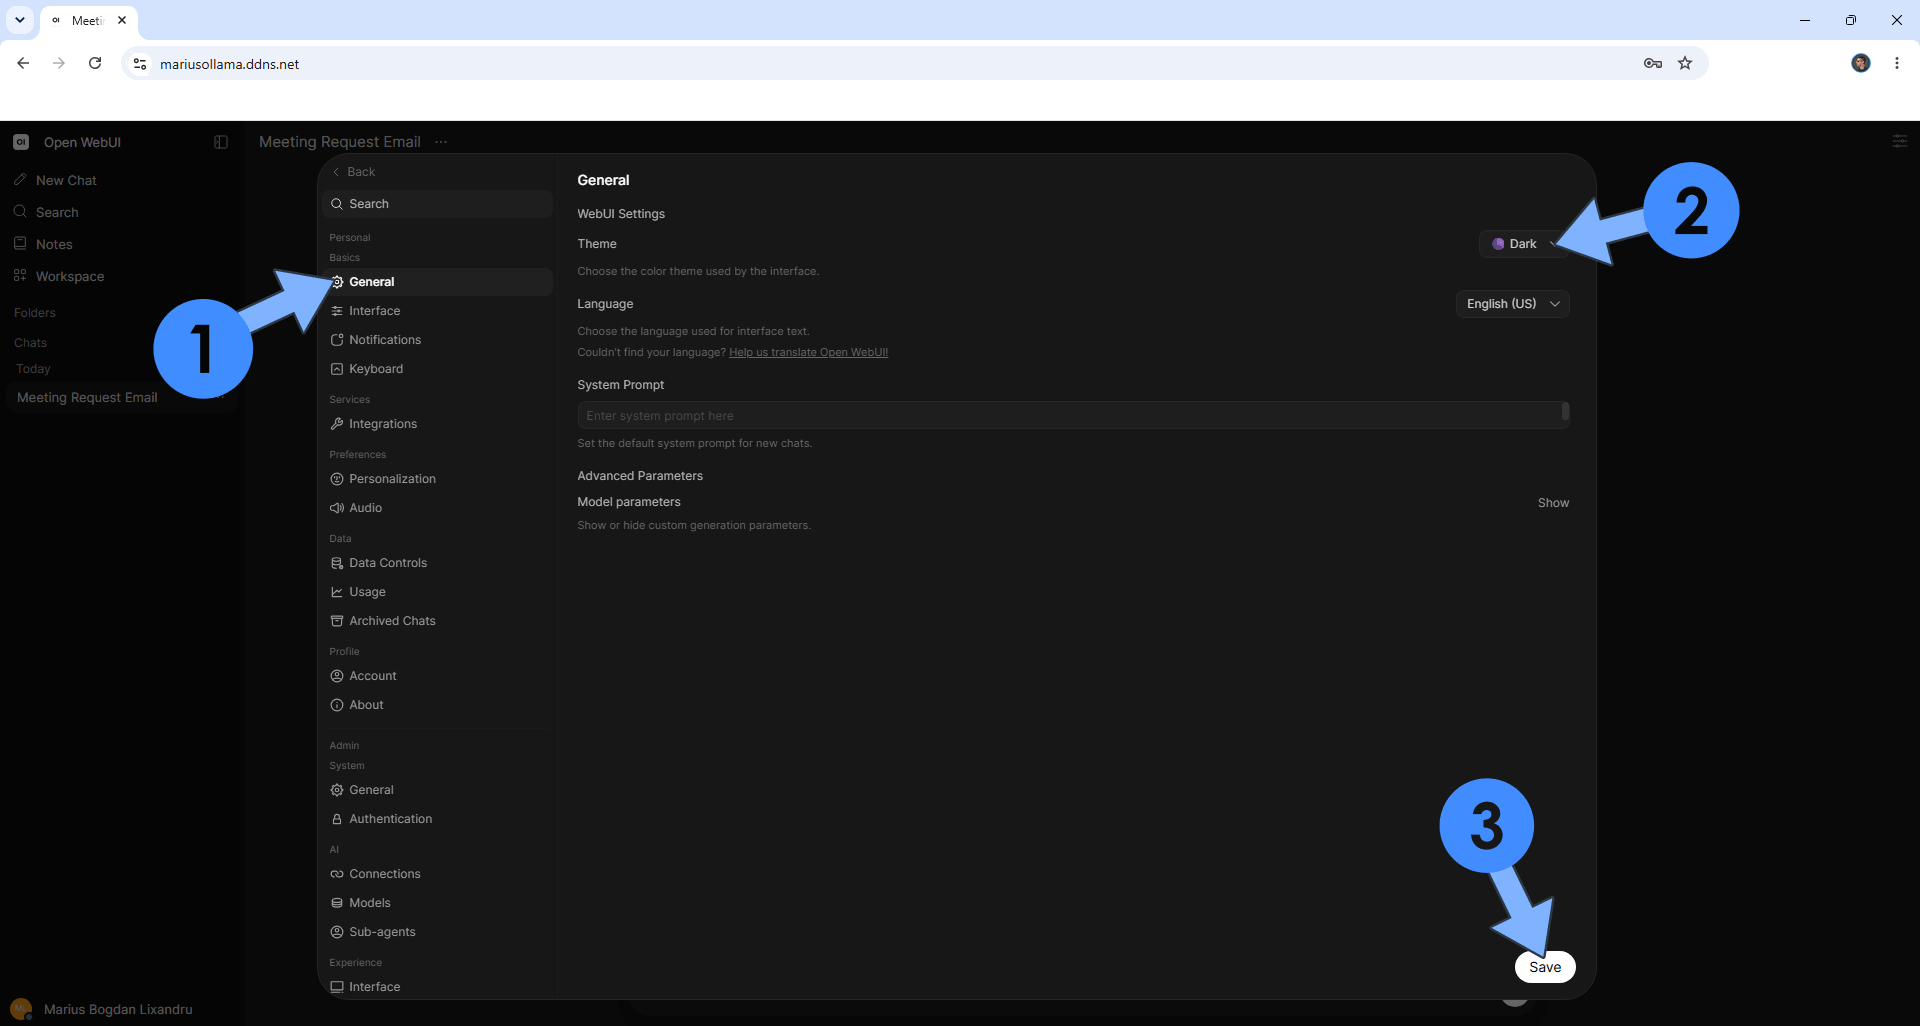
On the left sidebar, click General. Switch your theme to Dark. Click Save. Follow the instructions in the image below.
STEP 22
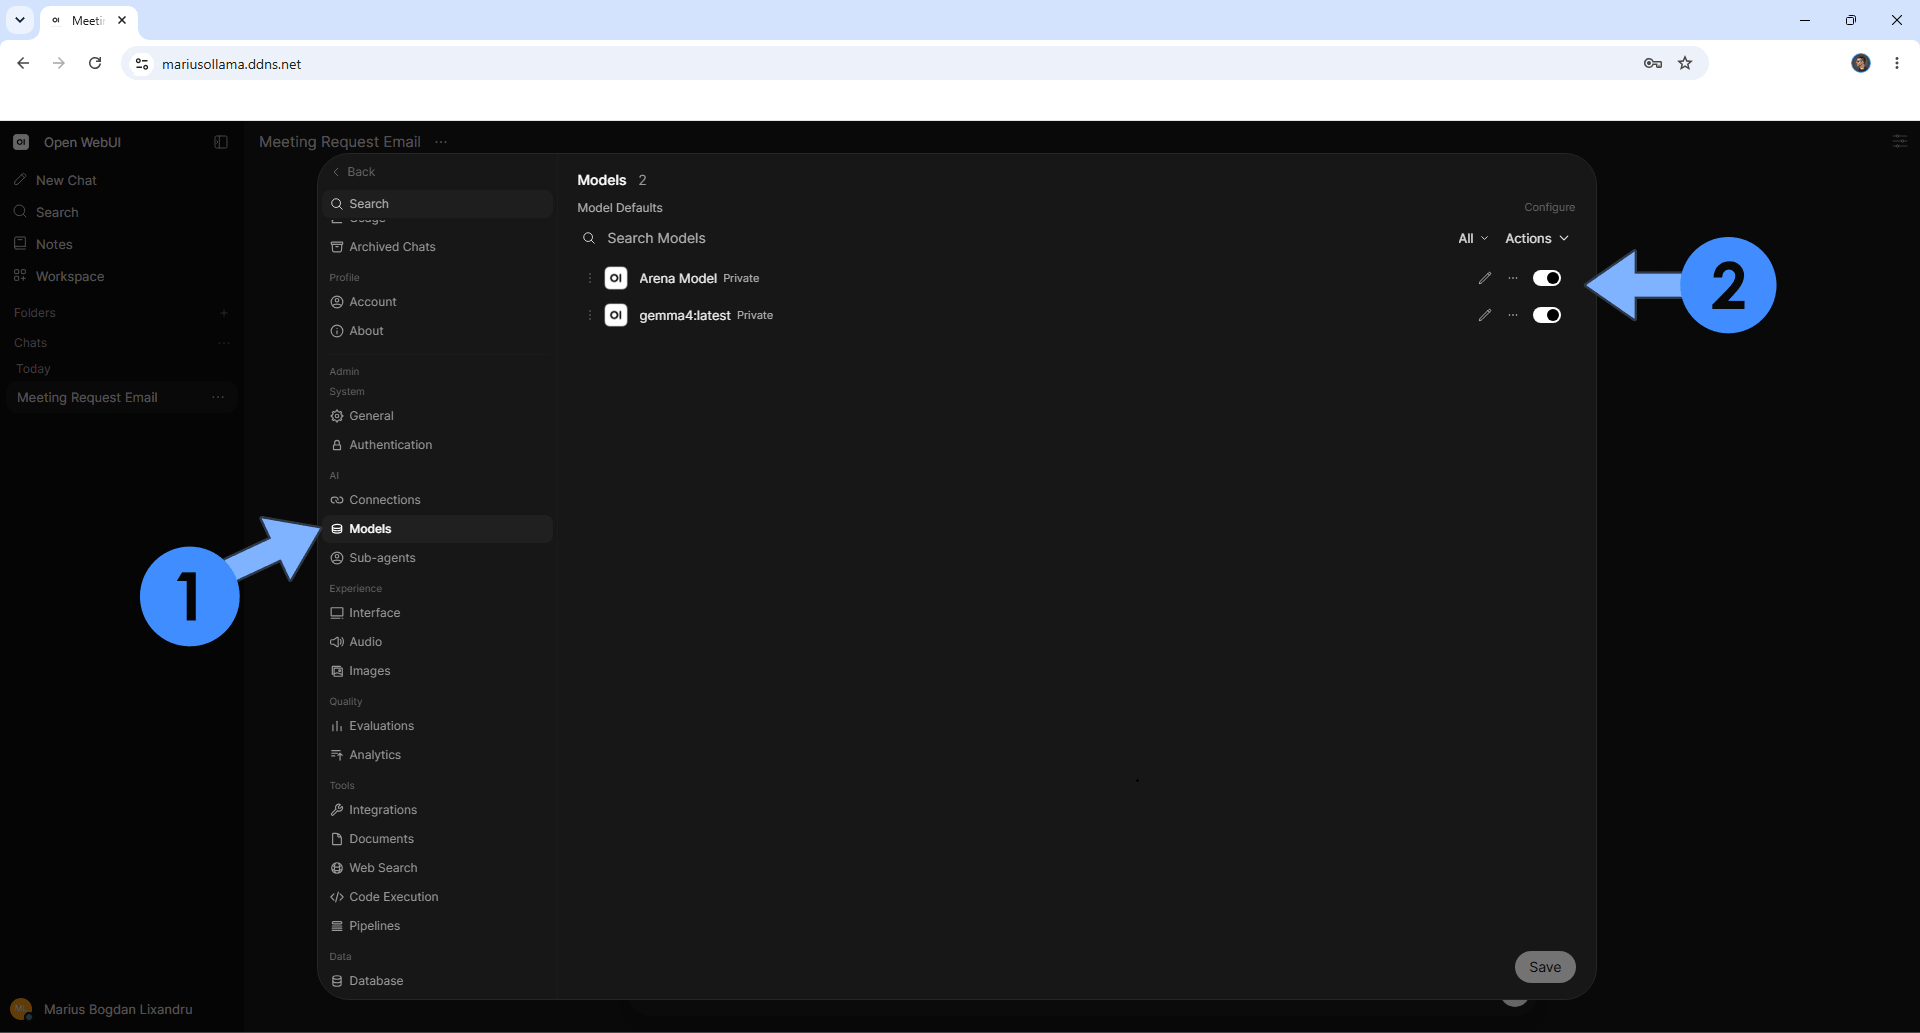
On the left sidebar, Click Models. Activate or deactivate your Models. Follow the instructions in the image below.
STEP 23
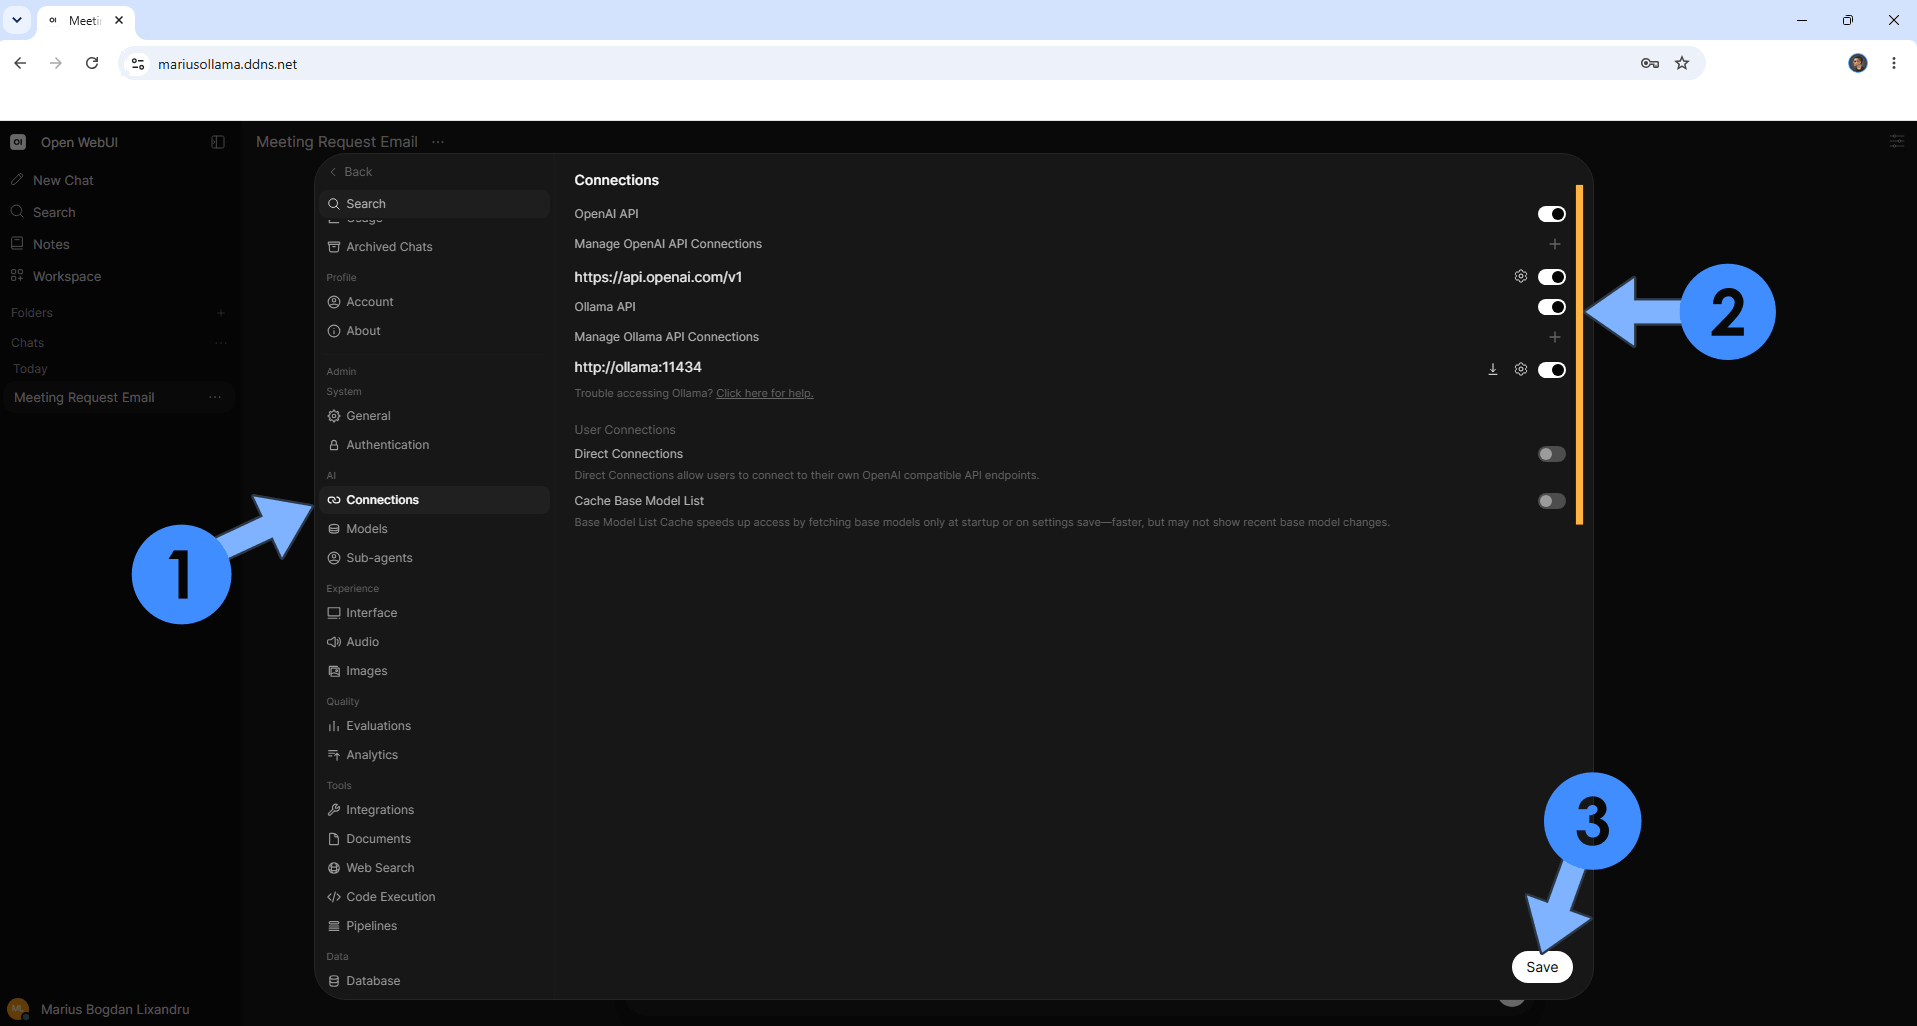
On the left sidebar, click Connection. Activate or deactivate your open AI API Key. Follow the instructions in the image below.
Enjoy Ollama on your UGREEN NAS!
🆘TROUBLESHOOTING
🆙Note/Update/Container: How to Update Your Docker Containers on UGREEN NAS Using Dockhand.
🐳Note: How to Create Docker Shortcuts on Desktop.
🆕Note: How to Update Dockhand to the latest version.
🆕Note: How to Clean Docker.
This post was updated on Wednesday / October 14th, 2026 at 10:51 PM