

Immich has become one of the most popular self-hosted photo and video management platforms, offering a polished, Google Photos like experience while keeping your media fully under your control. One of its most powerful features is the ability to use an external library, a folder of photos and videos that already exists on your storage, rather than requiring you to re-upload everything into Immich’s internal library. If you have installed Immich on your Synology NAS or UGREEN NAS, follow these steps below to set up an external library. Since many of you have asked me how to set up an external library on Immich, today I’ve put together a very simple and straightforward guide, just the way your Internet friend Marius likes, without any technical barriers.
STEP 1
Please Support My work by Making a Donation.
STEP 2
⚠️Mandatory: Install Immich using my Docker Guide for Synology NAS or UGREEN NAS or UGREEN NAS with GPU Acceleration. If you already have Immich installed on your Synology NAS or UGREEN NAS skip this STEP.
STEP 3
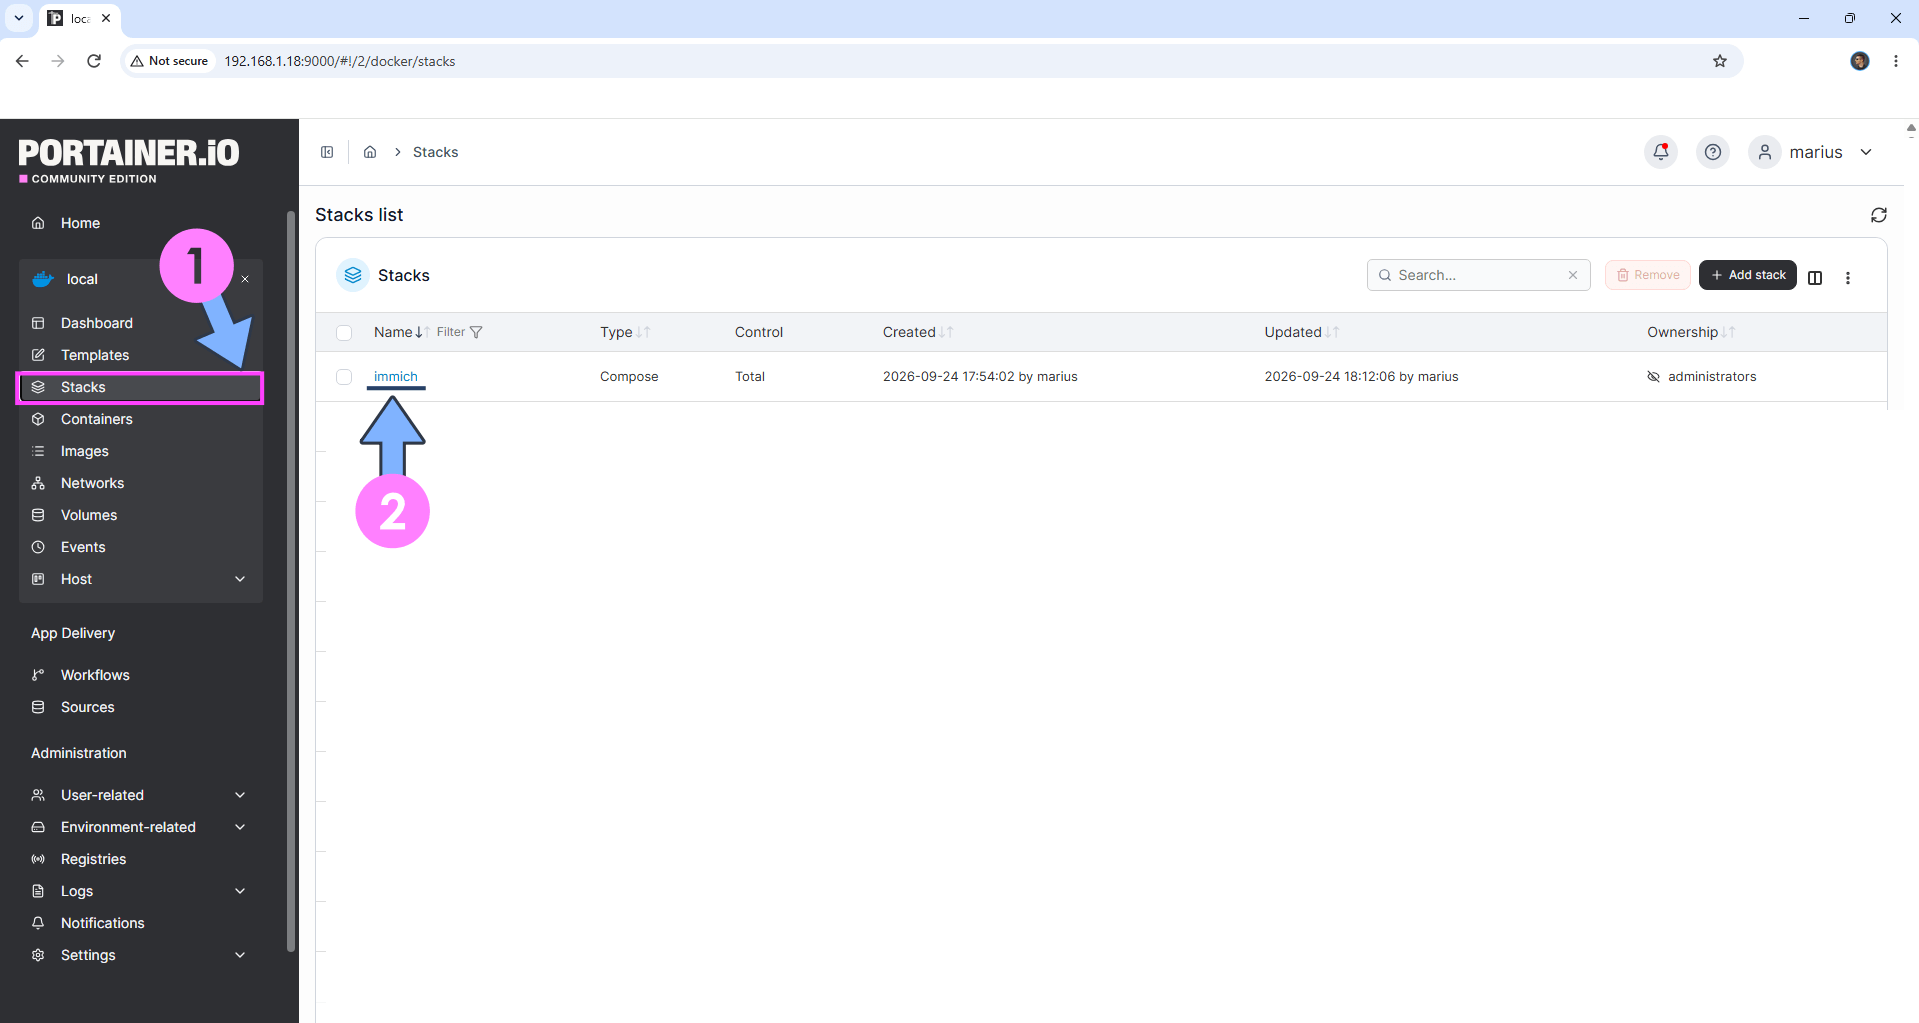
Open your Portainer. On the left sidebar, click Stack. Click on your immich stack. Follow the instructions in the image below.
STEP 4
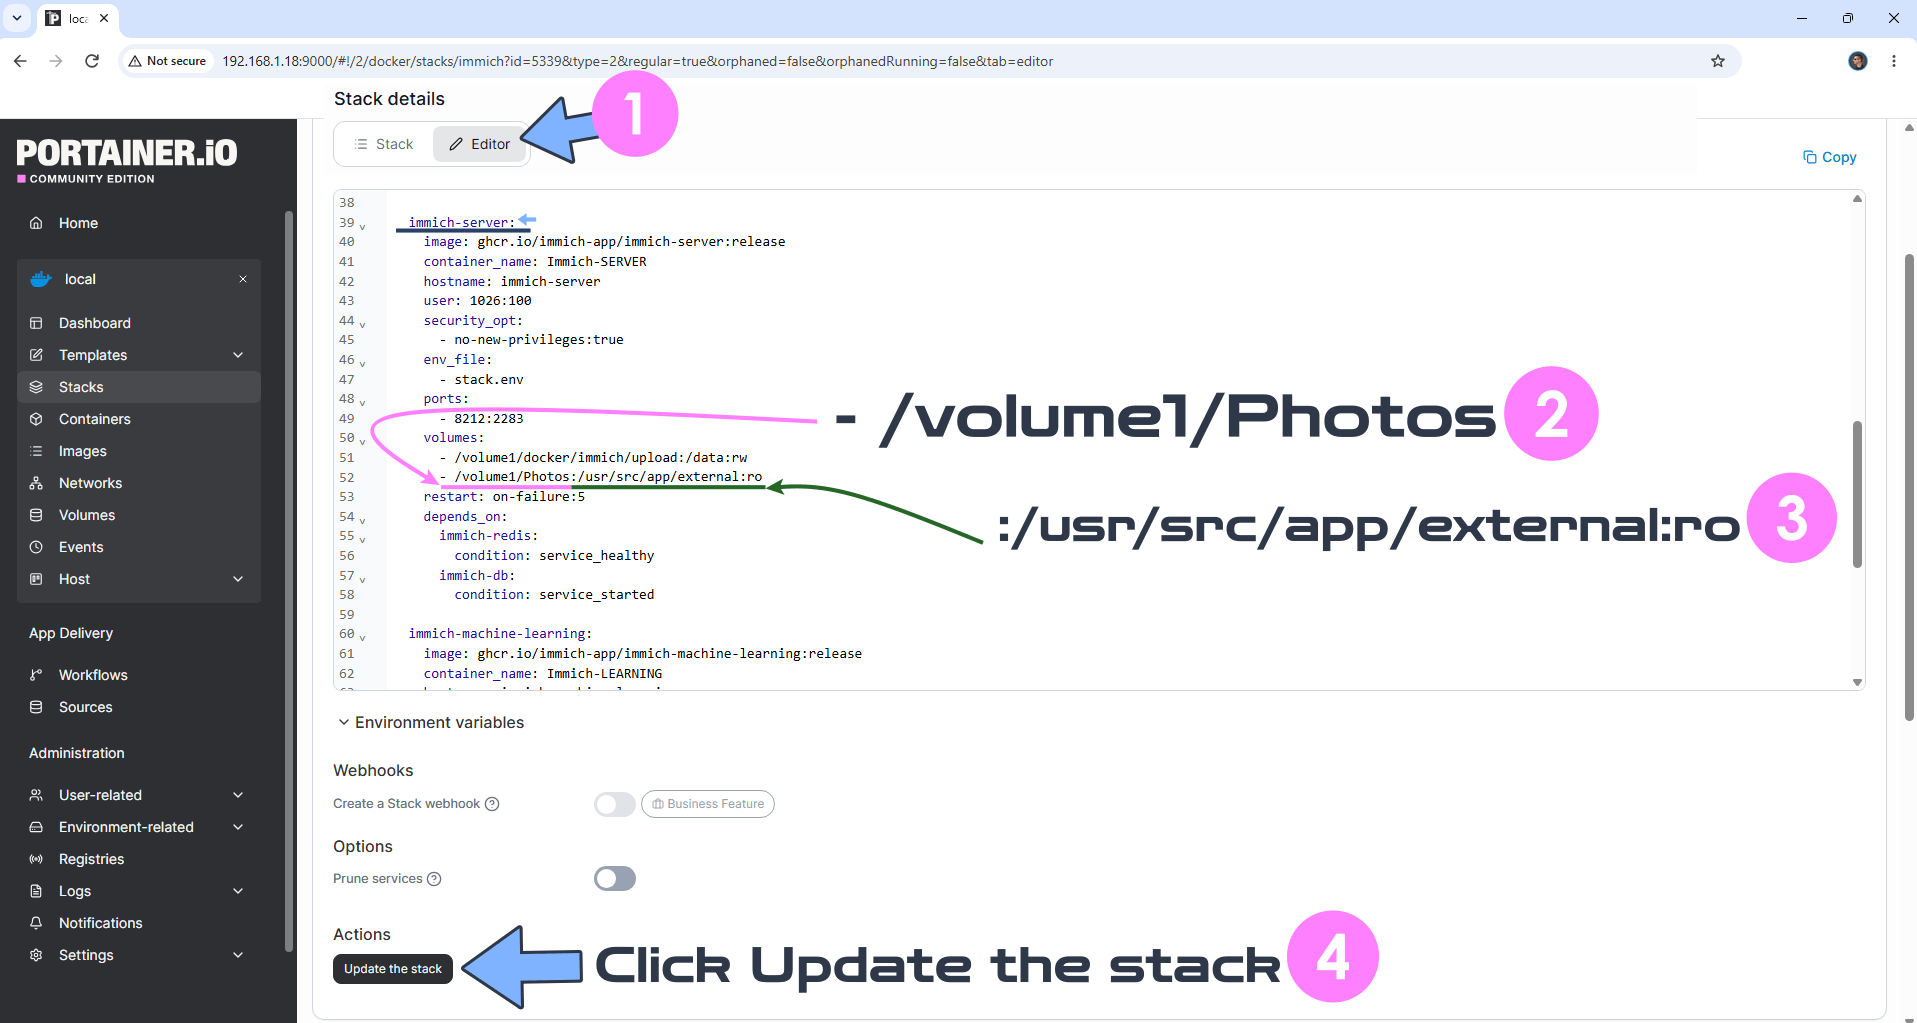
Click the Editor tab. Scroll down the compose stack until you find the immich-server part. Under volumes: add your external volume path folder. In my case, my external volume is /volume1/Photos
add the external volume with the – (dash) in front like – /volume1/Photos
after the – /volume1/Photos make sure to add the following line :/usr/src/app/external:ro
so your entire line will look like this:
– /volume1/Photos:/usr/src/app/external:ro
⚠️Note: the :ro after :/usr/src/app/external means read only.
Click Update the stack. Follow the instructions in the image below.
STEP 5
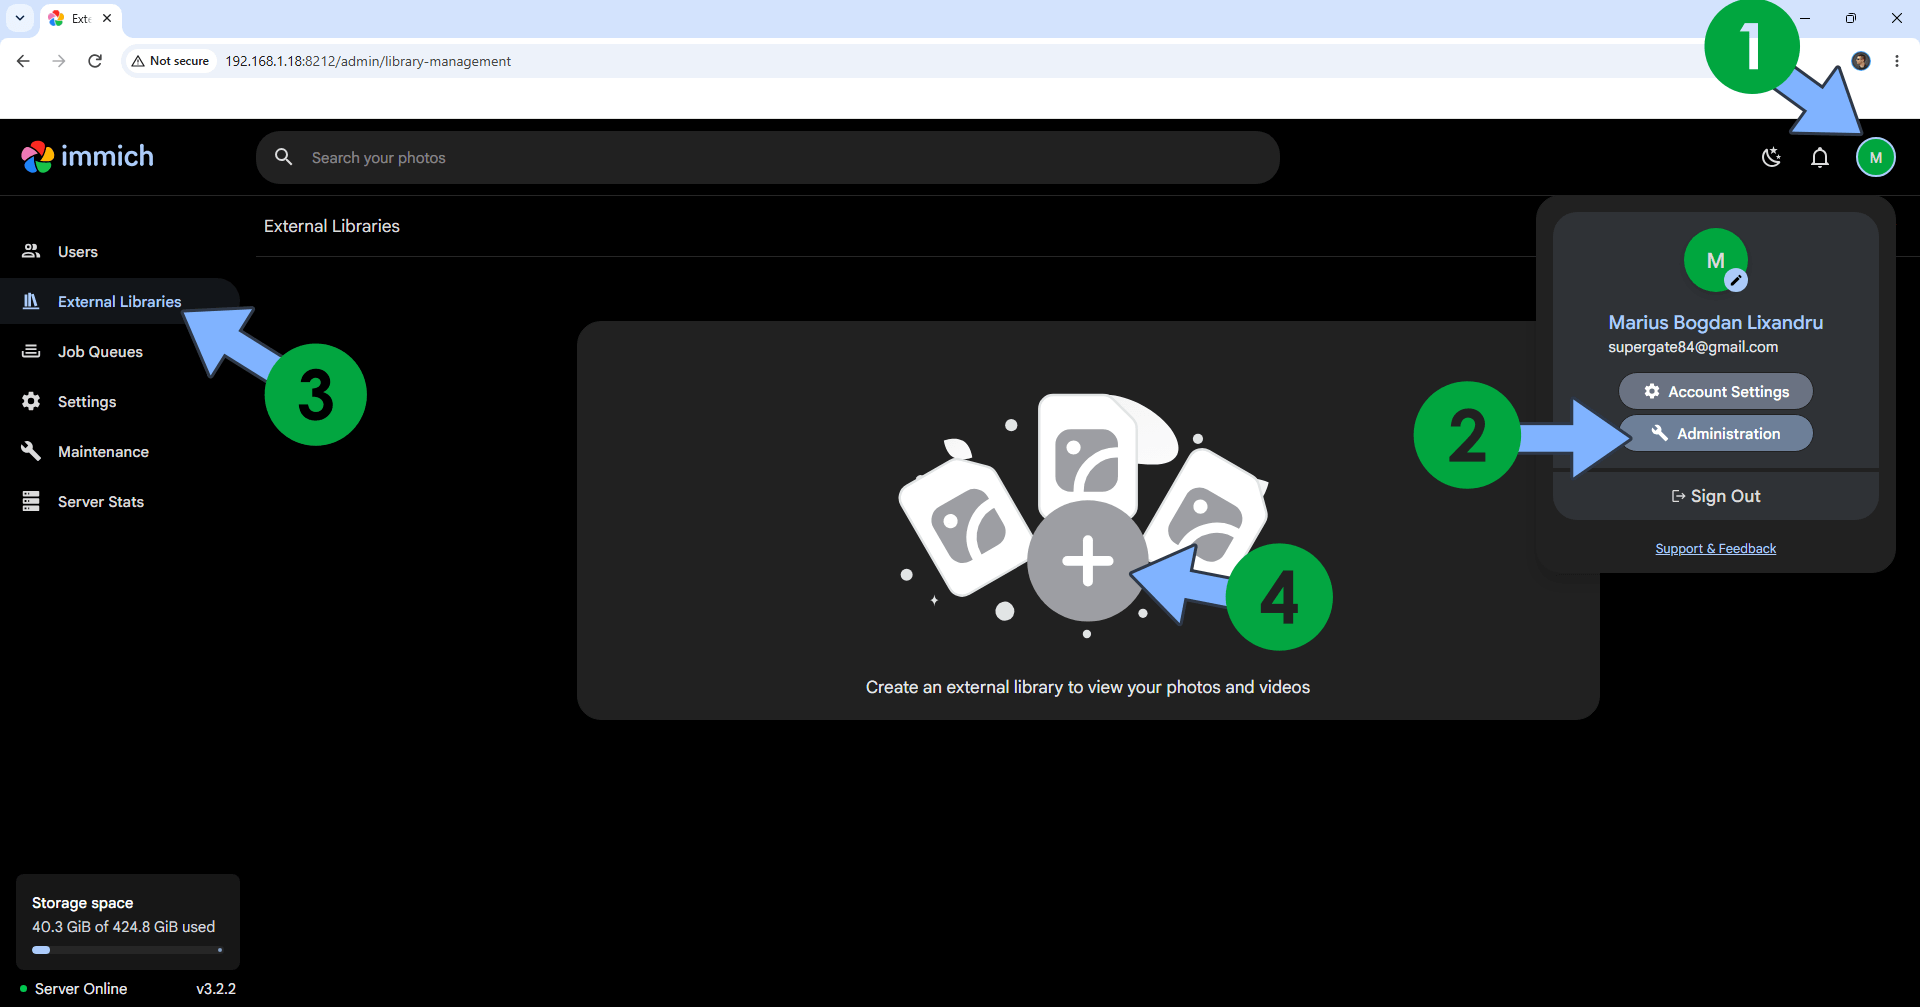
Open your Immich app. At the top right of the page, click the user icon then Administration. On the left sidebar, click External Libraries. Click the +grey icon. Follow the instructions in the image below.
STEP 6
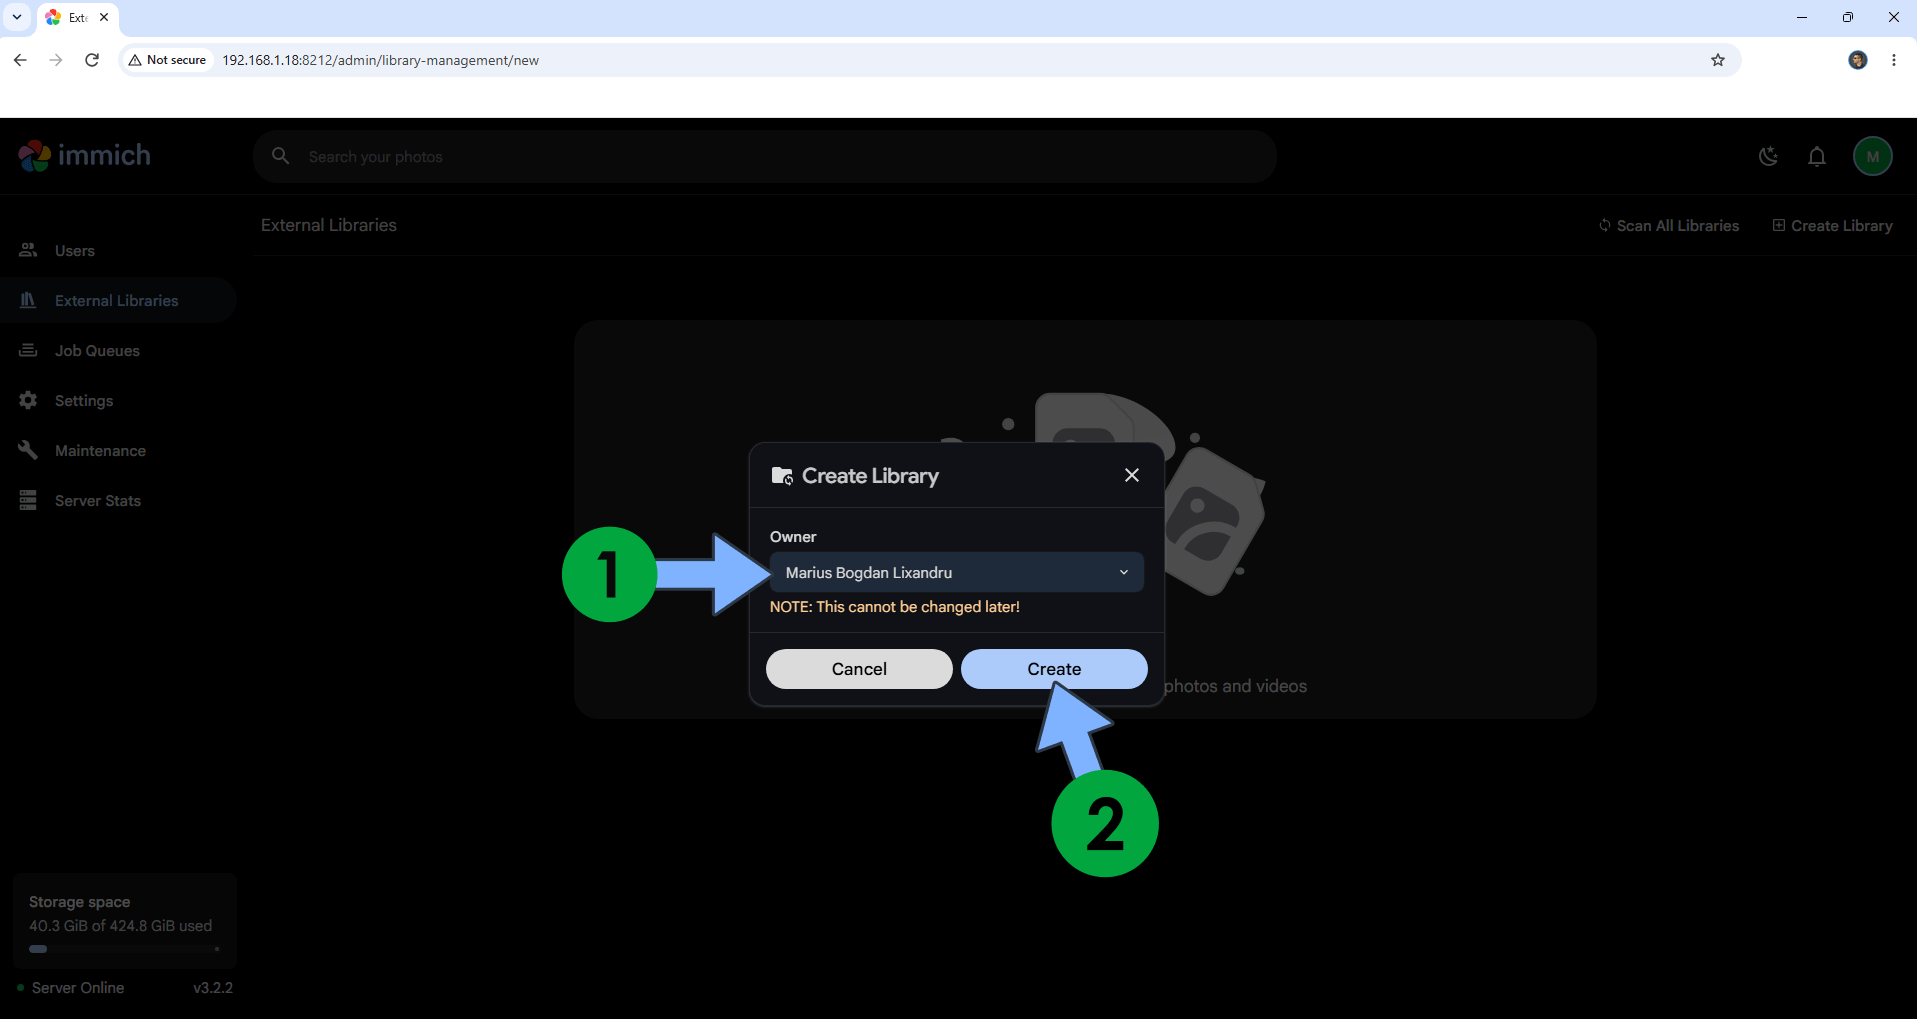
Select your Owner. Click Create. Follow the instructions in the image below.
STEP 7
Under Folders, click the +grey icon. Follow the instructions in the image below.
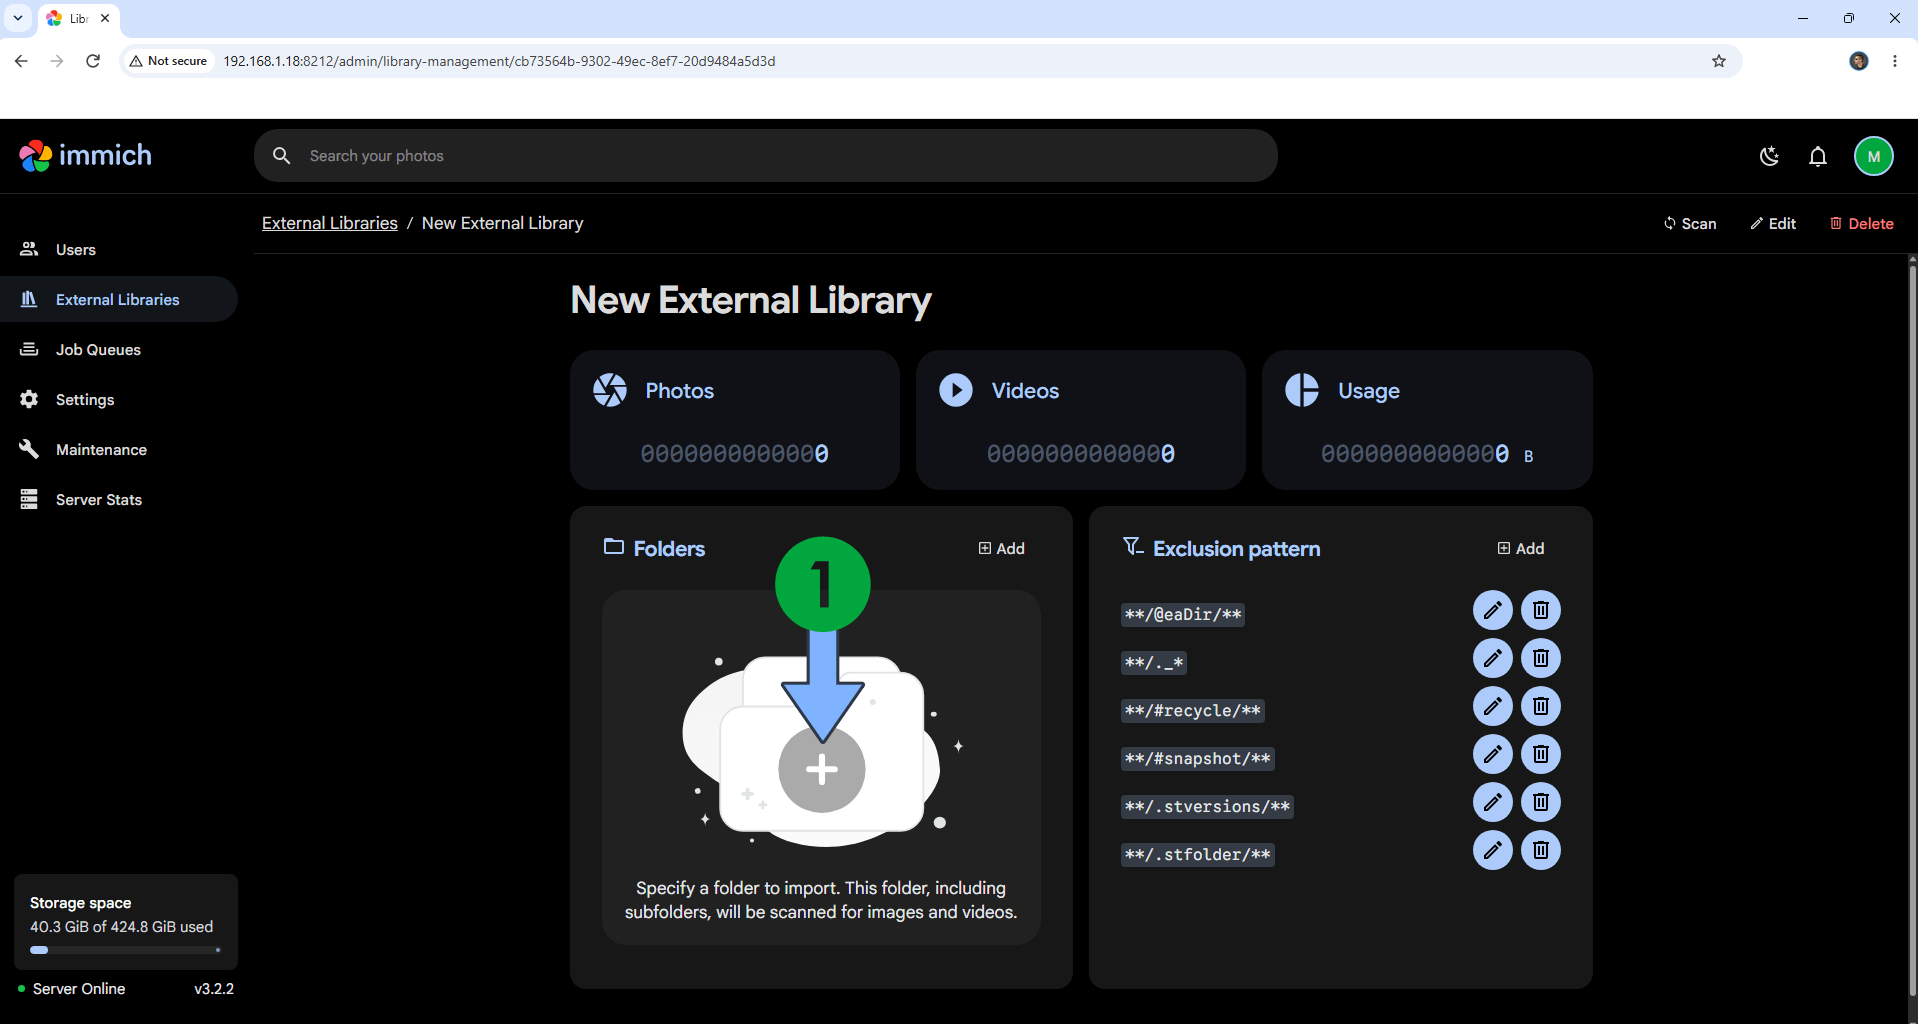
STEP 8
In the Path filed, type in /usr/src/app/external
Click Add. Follow the instructions in the image below.
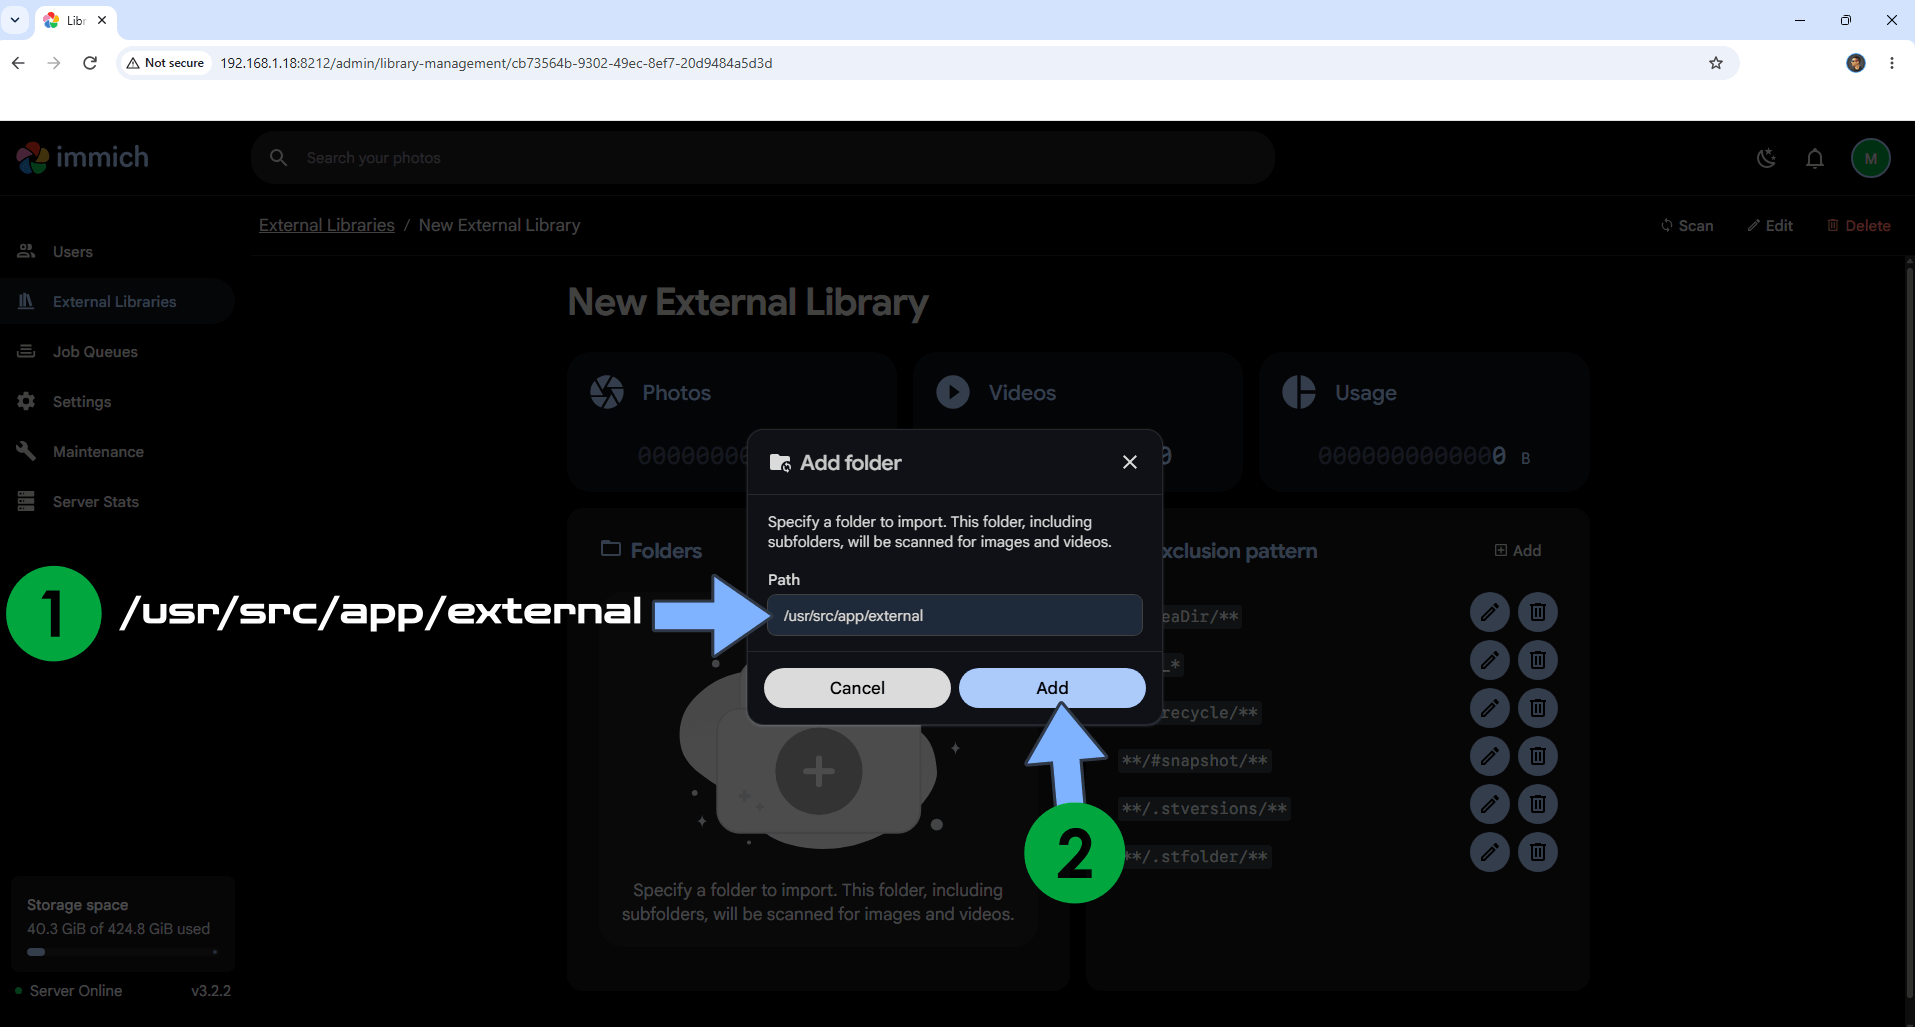
STEP 9
On the left sidebar, click External Libraries. You will now see your own External Library. Click on the 3 vertical dots then Scan. Follow the instructions in the image below.
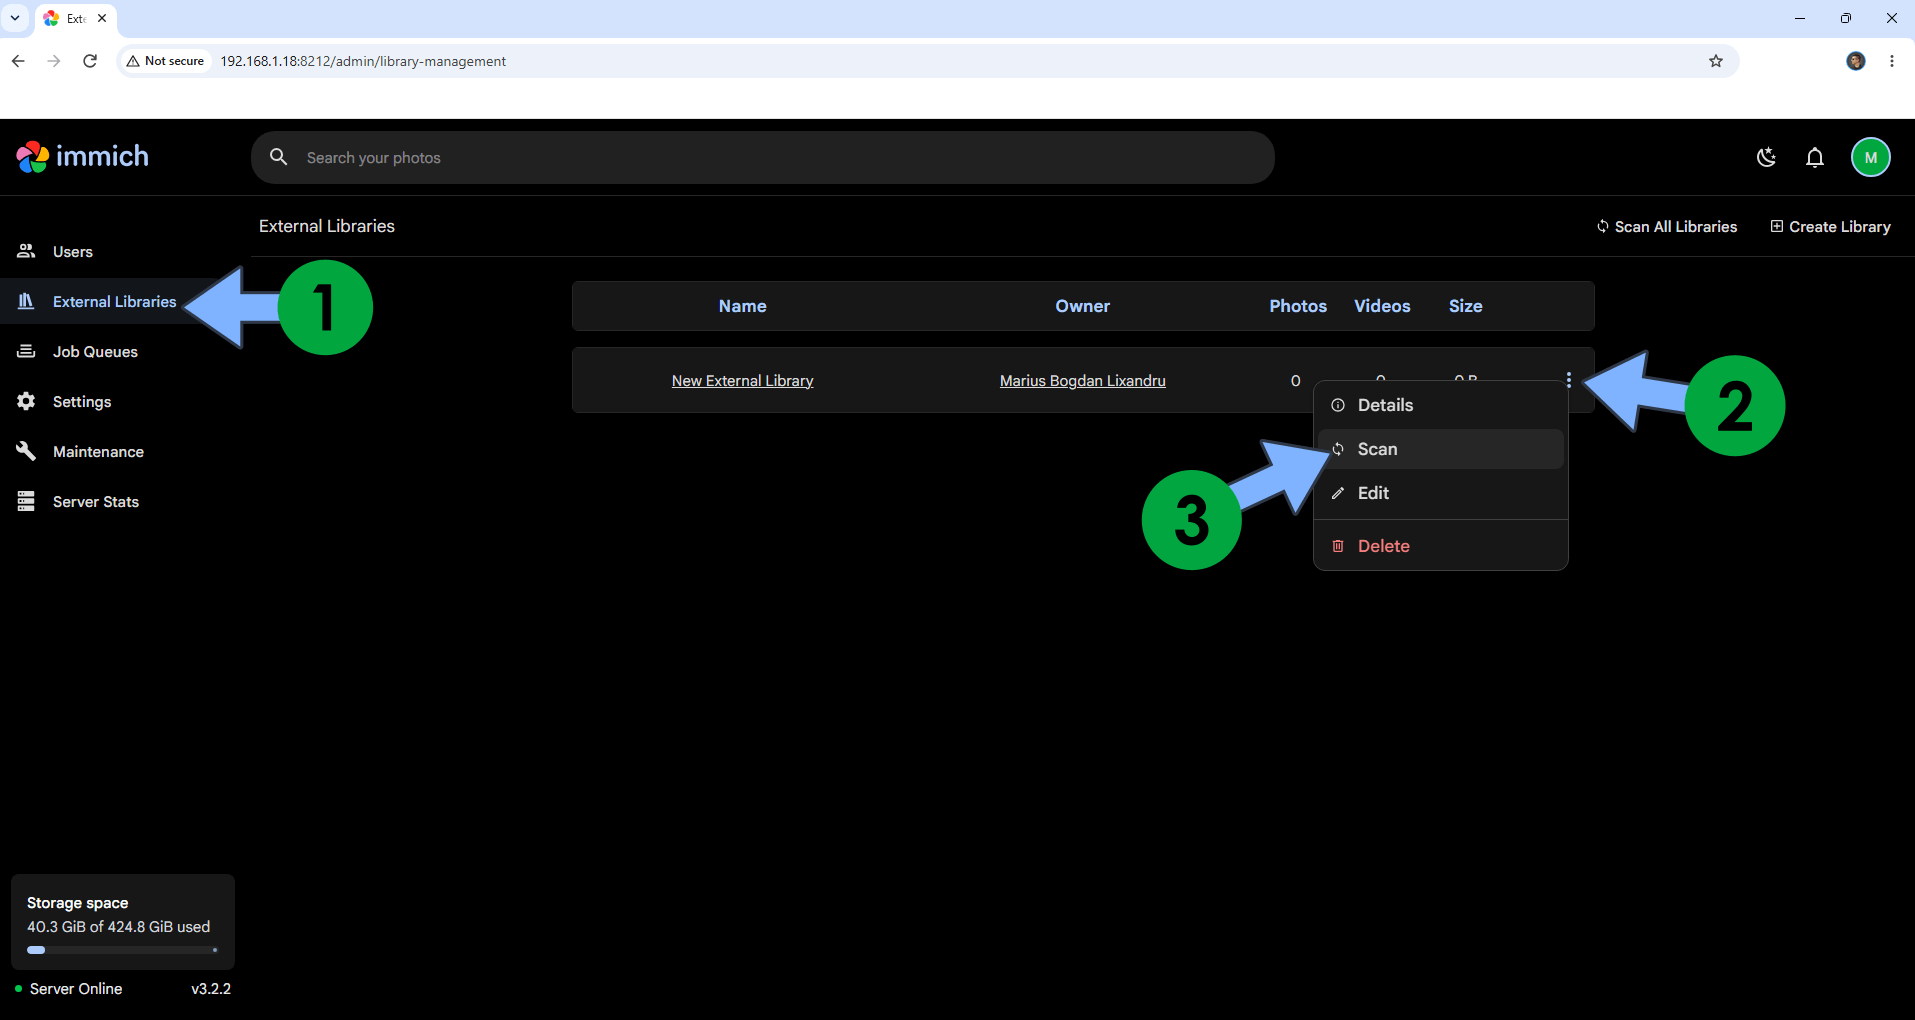
STEP 10
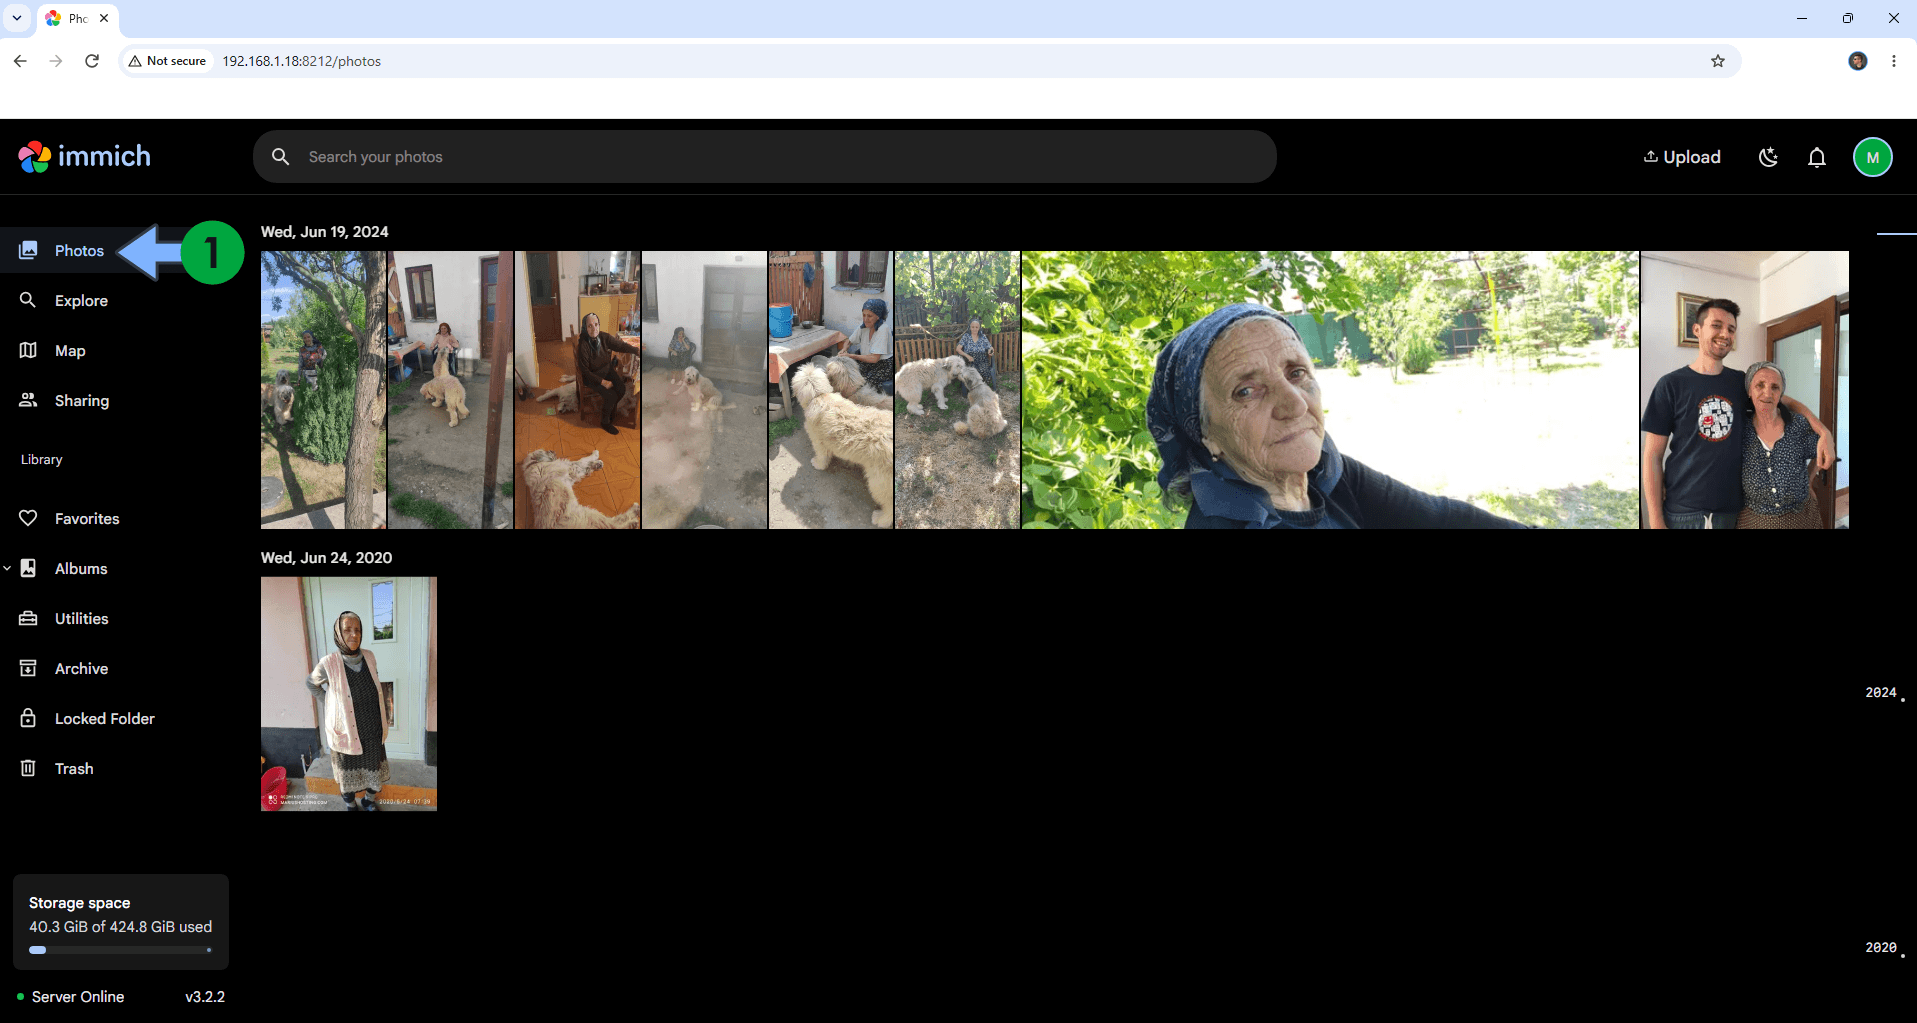
The scan can take a lot of time. It will depend on how many folders and how many gigabytes of data you have.
Your Photos and Videos from your External Library at a glance!
If Immich does not see the external folder after following the steps above, try this alternative mount path that works better on some Synology and UGREEN setups:
Go back to Portainer / Stacks / immich / Editor.
Find the volume line you added earlier and change it from:
- /volume1/Photos:/usr/src/app/external:roto
- /volume1/Photos:/mnt/usr/src/app/external:roClick Update the stack.
This alternative path under /mnt resolves permission and path visibility issues that can occur on certain NAS Docker configurations.
This post was updated on Wednesday / October 7th, 2026 at 12:15 AM