There are several methods to access Photo Station outside of your local network. The simplest option is to set up a QuickConnect ID in DSM / Control Panel / QuickConnect. You may refer to this article to setup QuickConnect ID. QuickConnect ID allows you to access some services including Photo Station from outside of your local network without the need to configure port-forwarding on your router. Once you have successfully created your Synology QuickConnect ID, you may access Photo Station by typing http://quickconnect.to/QuickConnectID/photo (substitute QuickConnectID with the ID you just created).
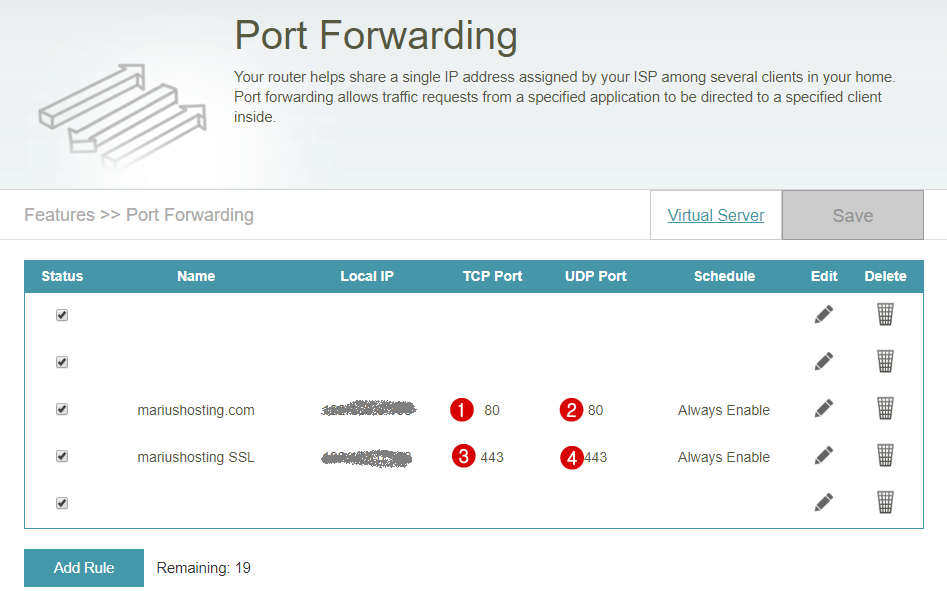
Alternatively, if you wish to access Photo Station outside of your local network using your own domain name or Synology DDNS like I use, you must ensure ports 80 (HTTP) and 443 (HTTPS) are forwarded to your Synology NAS on your router. Synology NAS can help you create port-forwarding rules within DSM for compatible routers. You may follow the instructions provided below. Every router has its own design interface regarding this aspect. At the moment I am using a D-Link router.
STEP 1
Please Support My work by Making a Donation.
STEP 2
Port Forwarding port 80 and 443 both TCP/UDP.

STEP 3
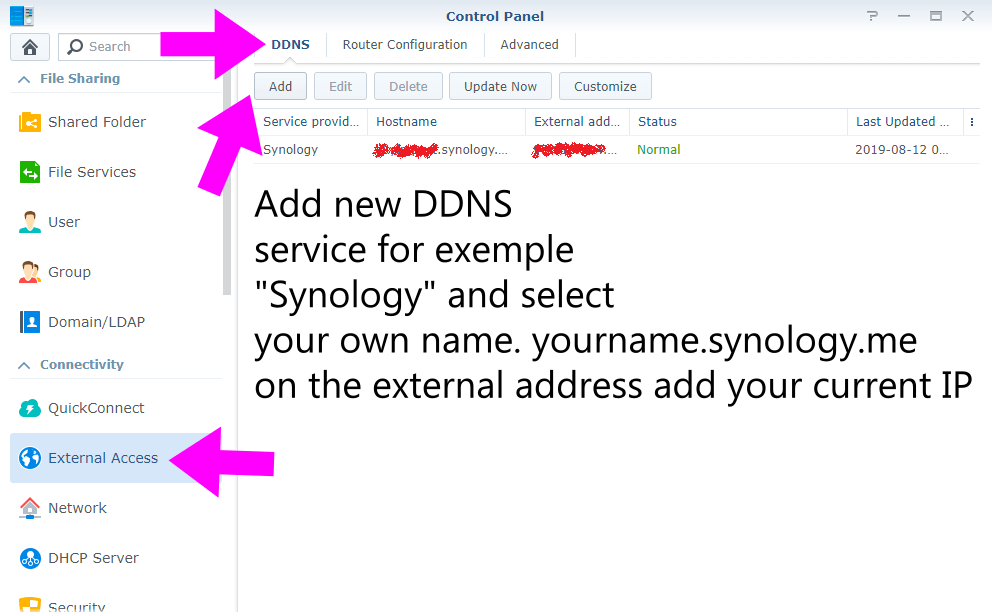
Go to Control Panel / External Access / DDNS /
From the list, add Synology or your favorite DDNS services.

STEP 4
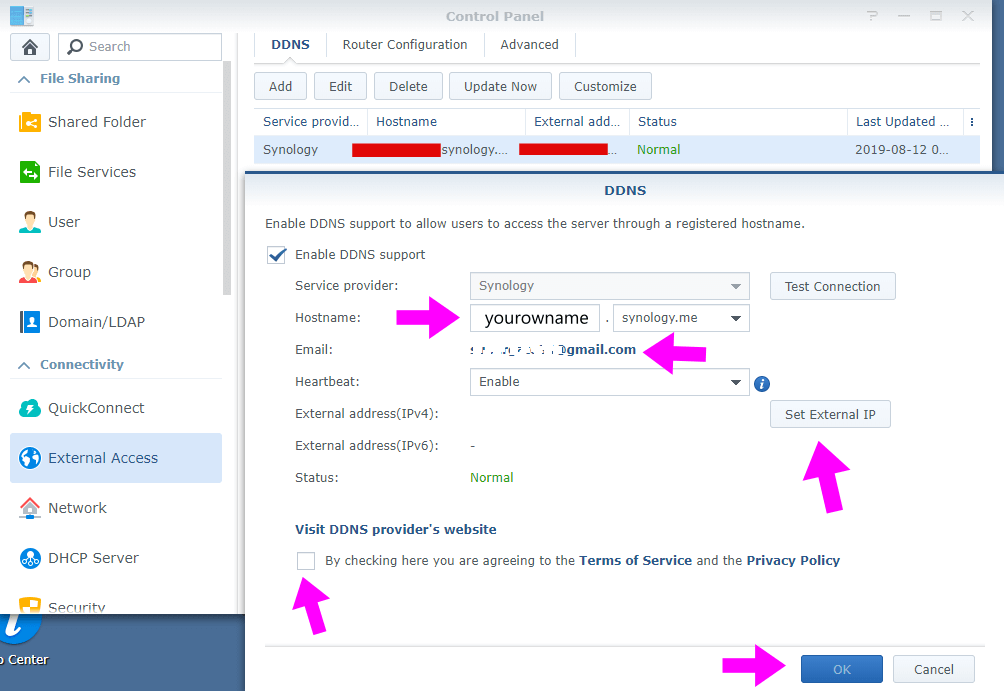
Remember to add your current IP Address and your email. After that, enable DDNS support and click OK after you agree to the Terms of Service.

Once port-forwarding rules have been created on your router, test port connection to check if ports 80 and 443 are open.
If it indicates they are open, then you may access Photo Station using https://yourname.synology.me/photo.
This post was updated on Friday / December 27th, 2019 at 8:22 AM
