
Mail-Archiver is an open-source web app that archives, searches, and exports emails from multiple IMAP accounts. It automatically saves incoming and outgoing emails with attachments, syncs folder structures, and supports mailbox migration. A powerful search feature helps find emails quickly, while bulk export to PDF or PST aids backups and compliance. The intuitive dashboard manages accounts and archives. In this step by step guide I will show you how to install Mail-Archiver on your UGREEN NAS using Docker & Portainer.
This guide works perfectly with the latest Mail-Archiver v2606.4 release.
STEP 1
Please Support My work by Making a Donation.
STEP 2
Install Portainer using my step by step guide. If you already have Portainer installed on your UGREEN NAS, skip this STEP. Attention: Make sure you have installed the latest Portainer version.
STEP 3
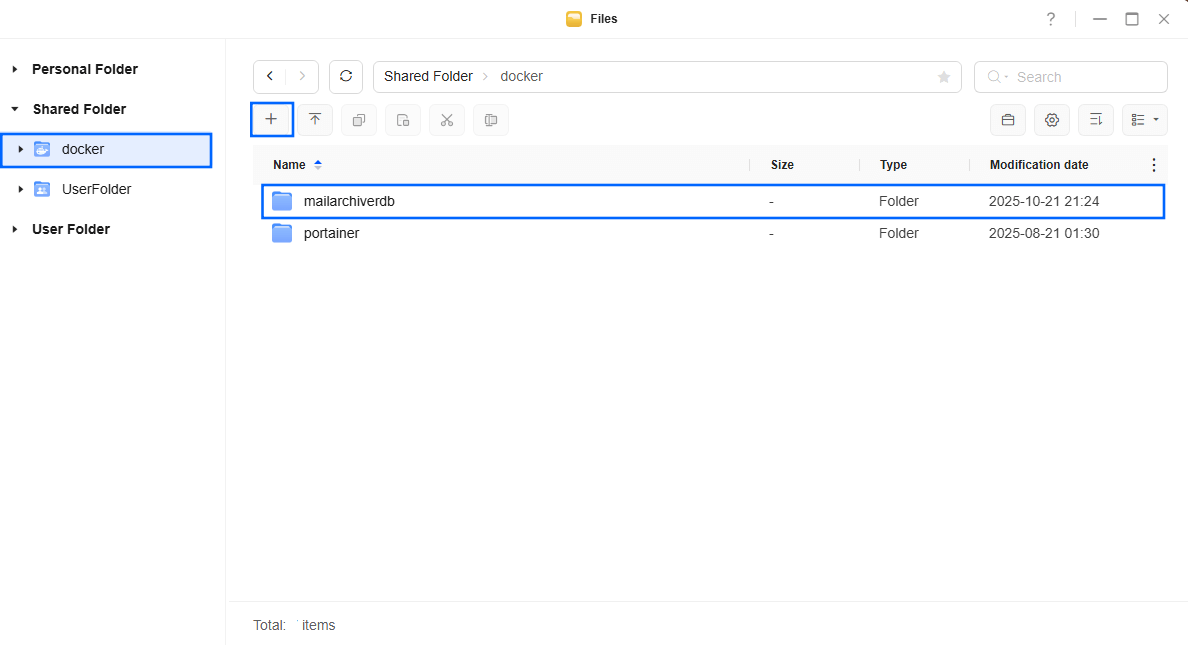
Go to Files and open the docker folder. Inside the docker folder, create one new folder and name it mailarchiverdb. Follow the instructions in the image below.
Note: Be careful to enter only lowercase, not uppercase letters.
STEP 4
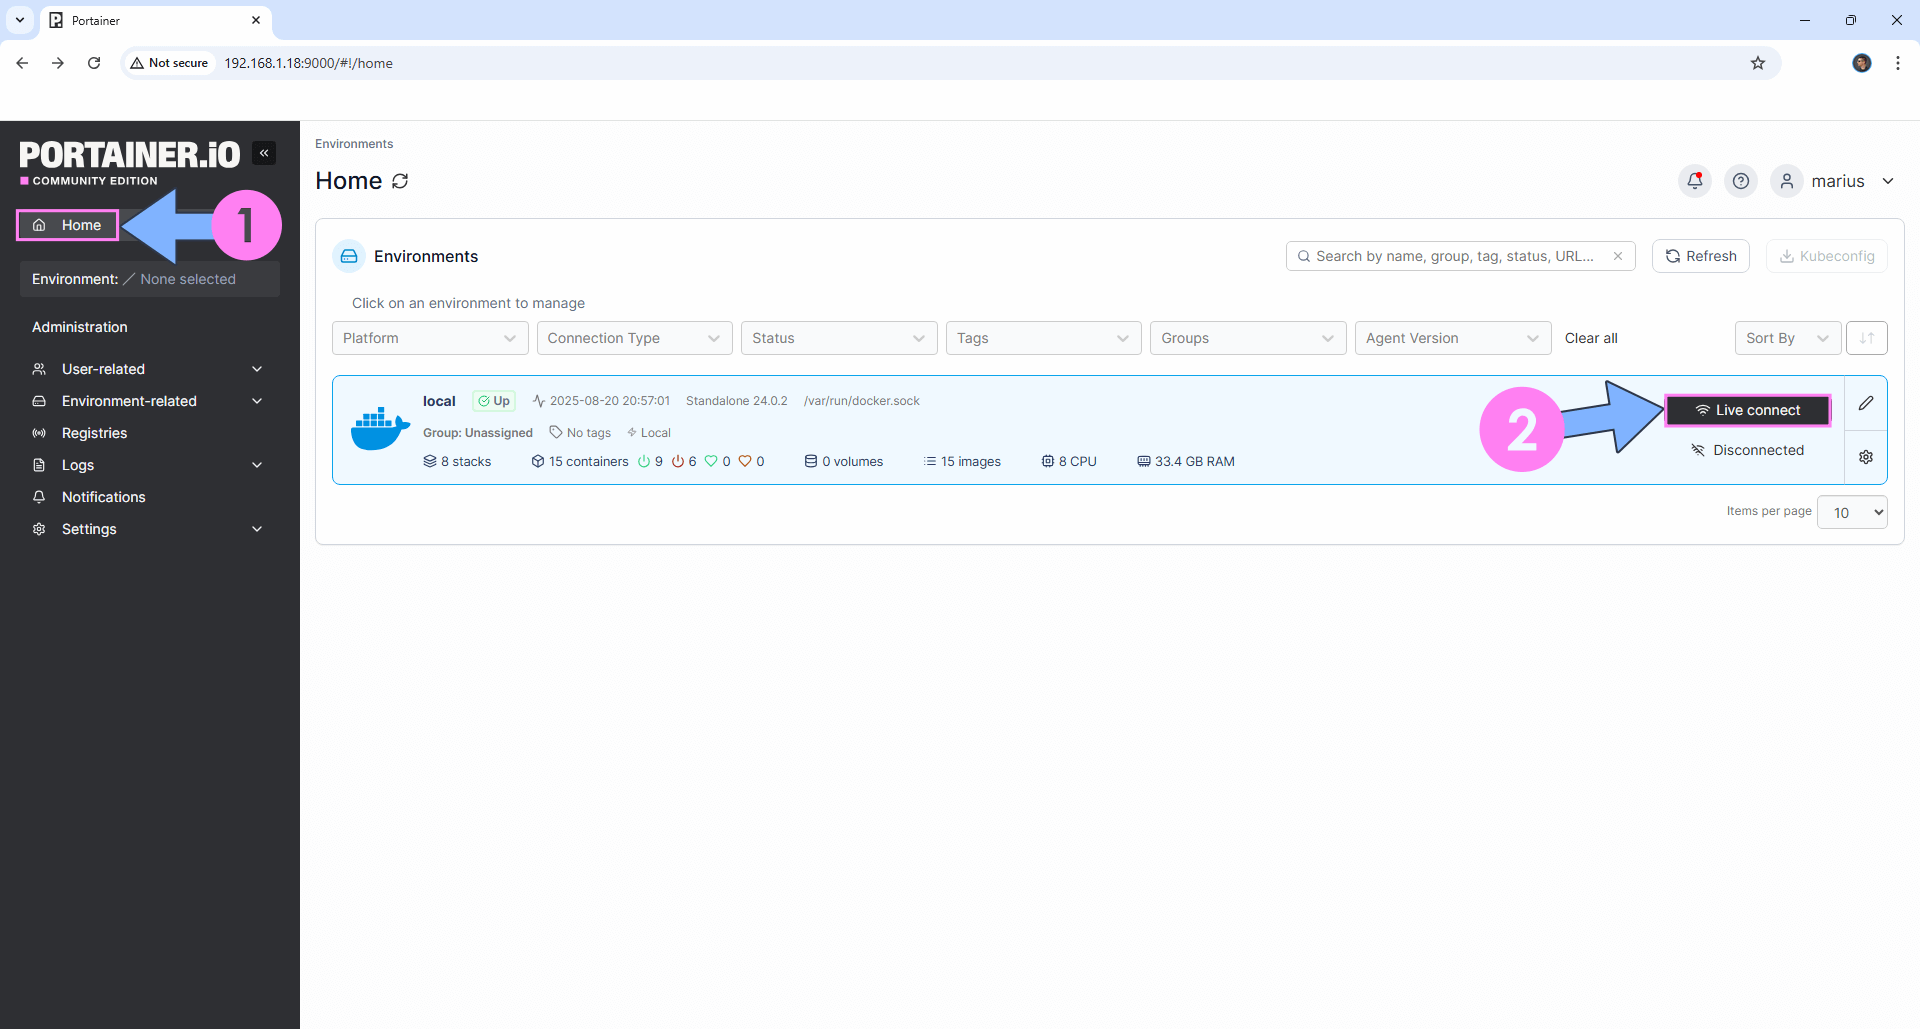
Log into Portainer using your username and password. On the left sidebar in Portainer, click on Home then Live connect. Follow the instructions in the image below.
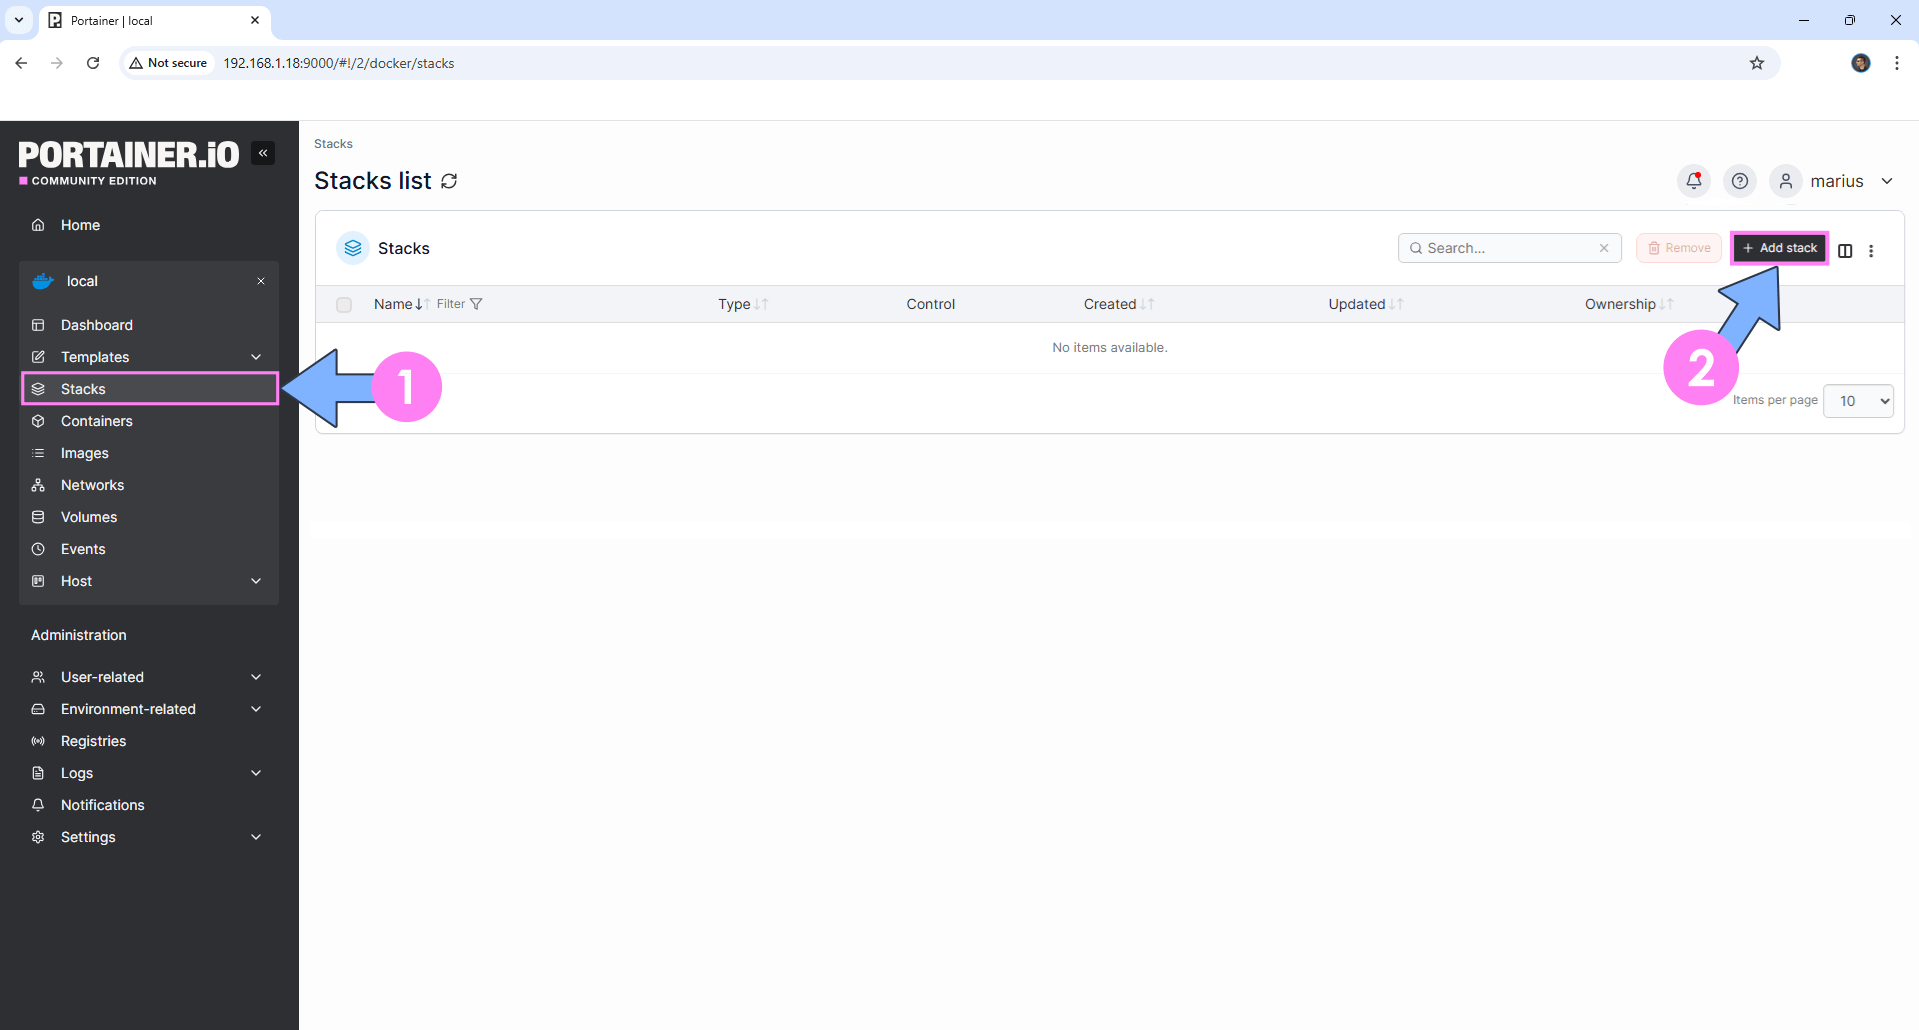
On the left sidebar in Portainer, click on Stacks then + Add stack. Follow the instructions in the image below.
STEP 5
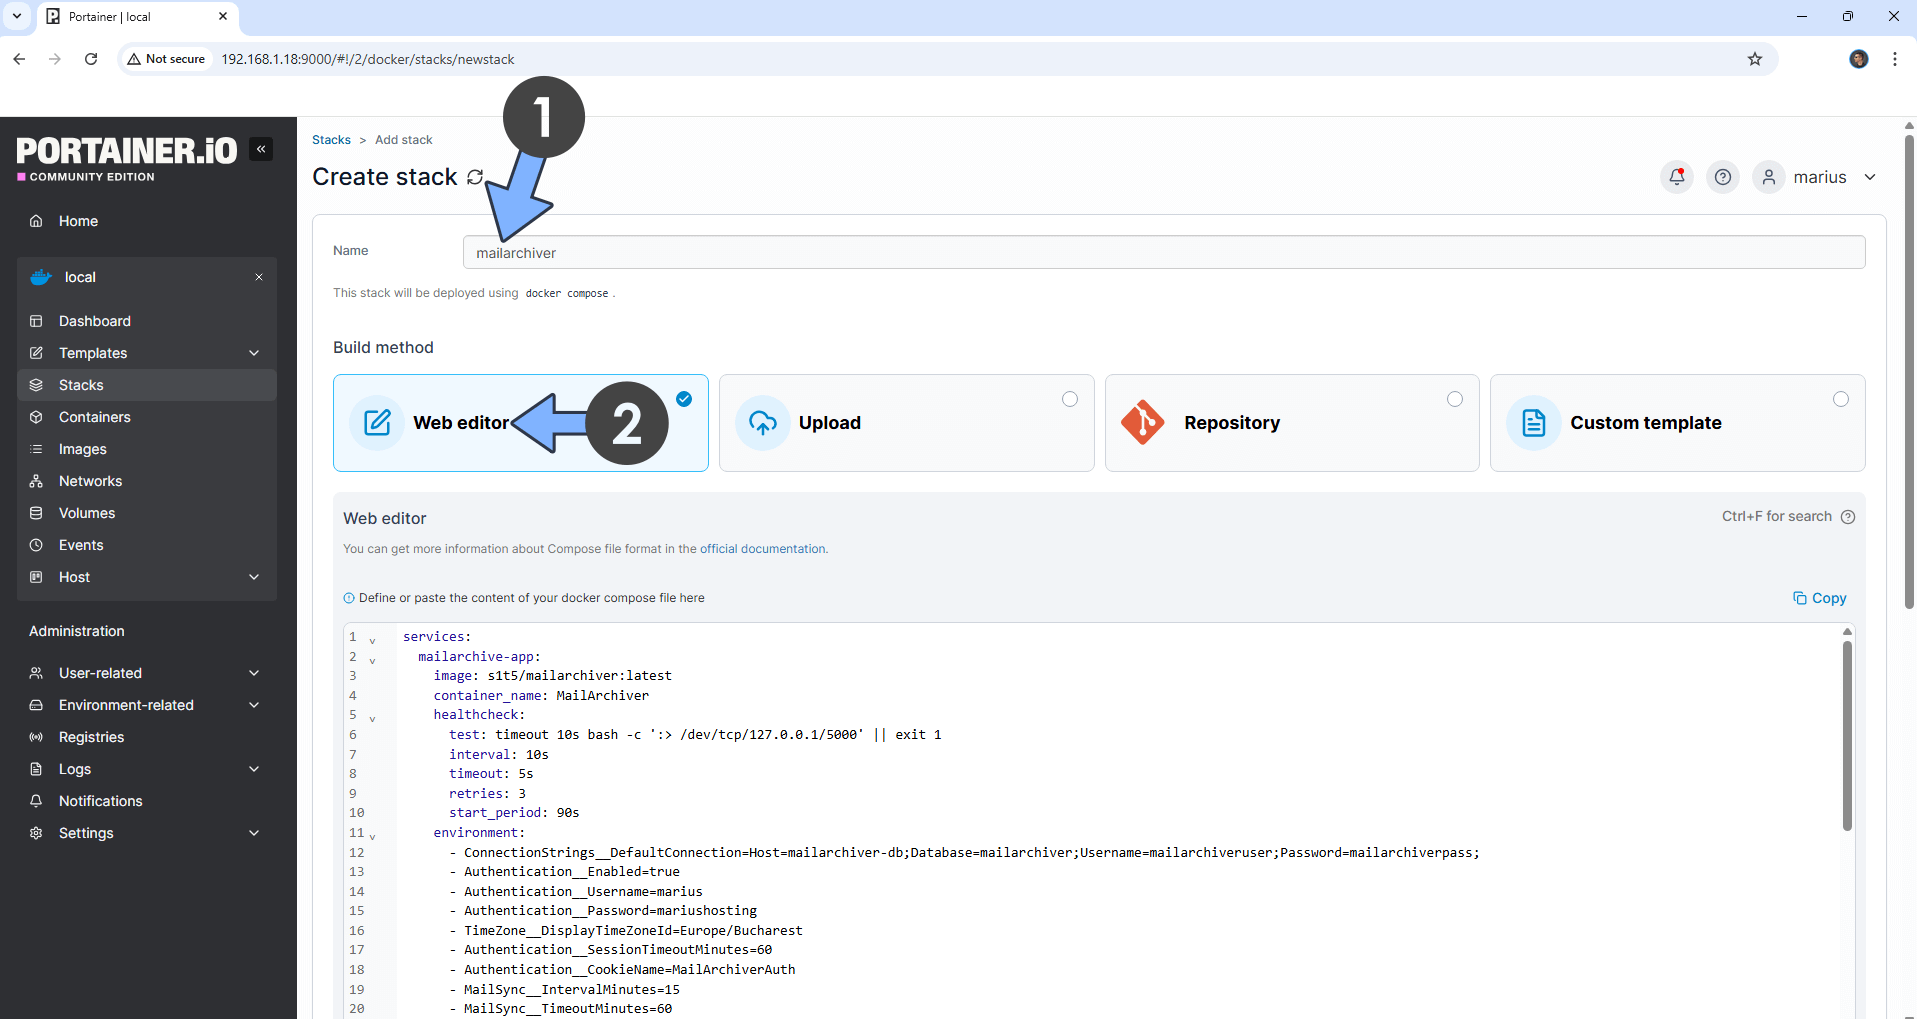
In the Name field type in mailarchiver. Follow the instructions in the image below.
services:
  mailarchive-app:
    image: s1t5/mailarchiver:latest
    container_name: MailArchiver
    healthcheck:
      test: timeout 10s bash -c ':> /dev/tcp/127.0.0.1/5000' || exit 1
      interval: 10s
      timeout: 5s
      retries: 3
      start_period: 90s
    environment:
      - ConnectionStrings__DefaultConnection=Host=mailarchiver-db;Database=mailarchiver;Username=mailarchiveruser;Password=mailarchiverpass;
      - Authentication__Enabled=true
      - Authentication__Username=marius
      - Authentication__Password=mariushosting
      - TimeZone__DisplayTimeZoneId=Europe/Bucharest
      - Authentication__SessionTimeoutMinutes=60
      - Authentication__CookieName=MailArchiverAuth
      - MailSync__IntervalMinutes=15
      - MailSync__TimeoutMinutes=60
      - MailSync__ConnectionTimeoutSeconds=180
      - MailSync__CommandTimeoutSeconds=300
      - MailSync__AlwaysForceFullSync=false
      - MailSync__IgnoreSelfSignedCert=false
      - BatchRestore__AsyncThreshold=50
      - BatchRestore__MaxSyncEmails=150
      - BatchRestore__MaxAsyncEmails=50000
      - BatchRestore__SessionTimeoutMinutes=30
      - BatchRestore__DefaultBatchSize=50
      - BatchOperation__BatchSize=50
      - BatchOperation__PauseBetweenEmailsMs=50
      - BatchOperation__PauseBetweenBatchesMs=250
      - Selection__MaxSelectableEmails=250
      - Upload__MaxFileSizeGB=10
      - Upload__KeepAliveTimeoutHours=4
      - Upload__RequestHeadersTimeoutHours=2
      - Npgsql__CommandTimeout=600
    ports:
      - 5065:5000
    depends_on:
      db:
        condition: service_healthy
    restart: on-failure:5

  db:
    image: postgres:17-alpine
    container_name: MailArchiver-DB
    hostname: mailarchiver-db
    security_opt:
      - no-new-privileges:true
    healthcheck:
      test: ["CMD", "pg_isready", "-q", "-d", "mailarchiver", "-U", "mailarchiveruser"]
      timeout: 45s
      interval: 10s
      retries: 10
    environment:
      POSTGRES_DB: mailarchiver
      POSTGRES_USER: mailarchiveruser
      POSTGRES_PASSWORD: mailarchiverpass
    volumes:
      - /volume1/docker/mailarchiverdb:/var/lib/postgresql/data:rw
    restart: on-failure:5
Note: Before you paste the code above in the Web editor area below, change the value for TimeZone__DisplayTimeZoneId. (Select your current Time Zone from this list.)
Note: Before you paste the code above in the Web editor area below, change the value for Authentication__Username. Type in your own username. marius is an example for a username.
Note: Before you paste the code above in the Web editor area below, change the value for Authentication__Password. Type in your own password. mariushosting is an example for a password.
STEP 6
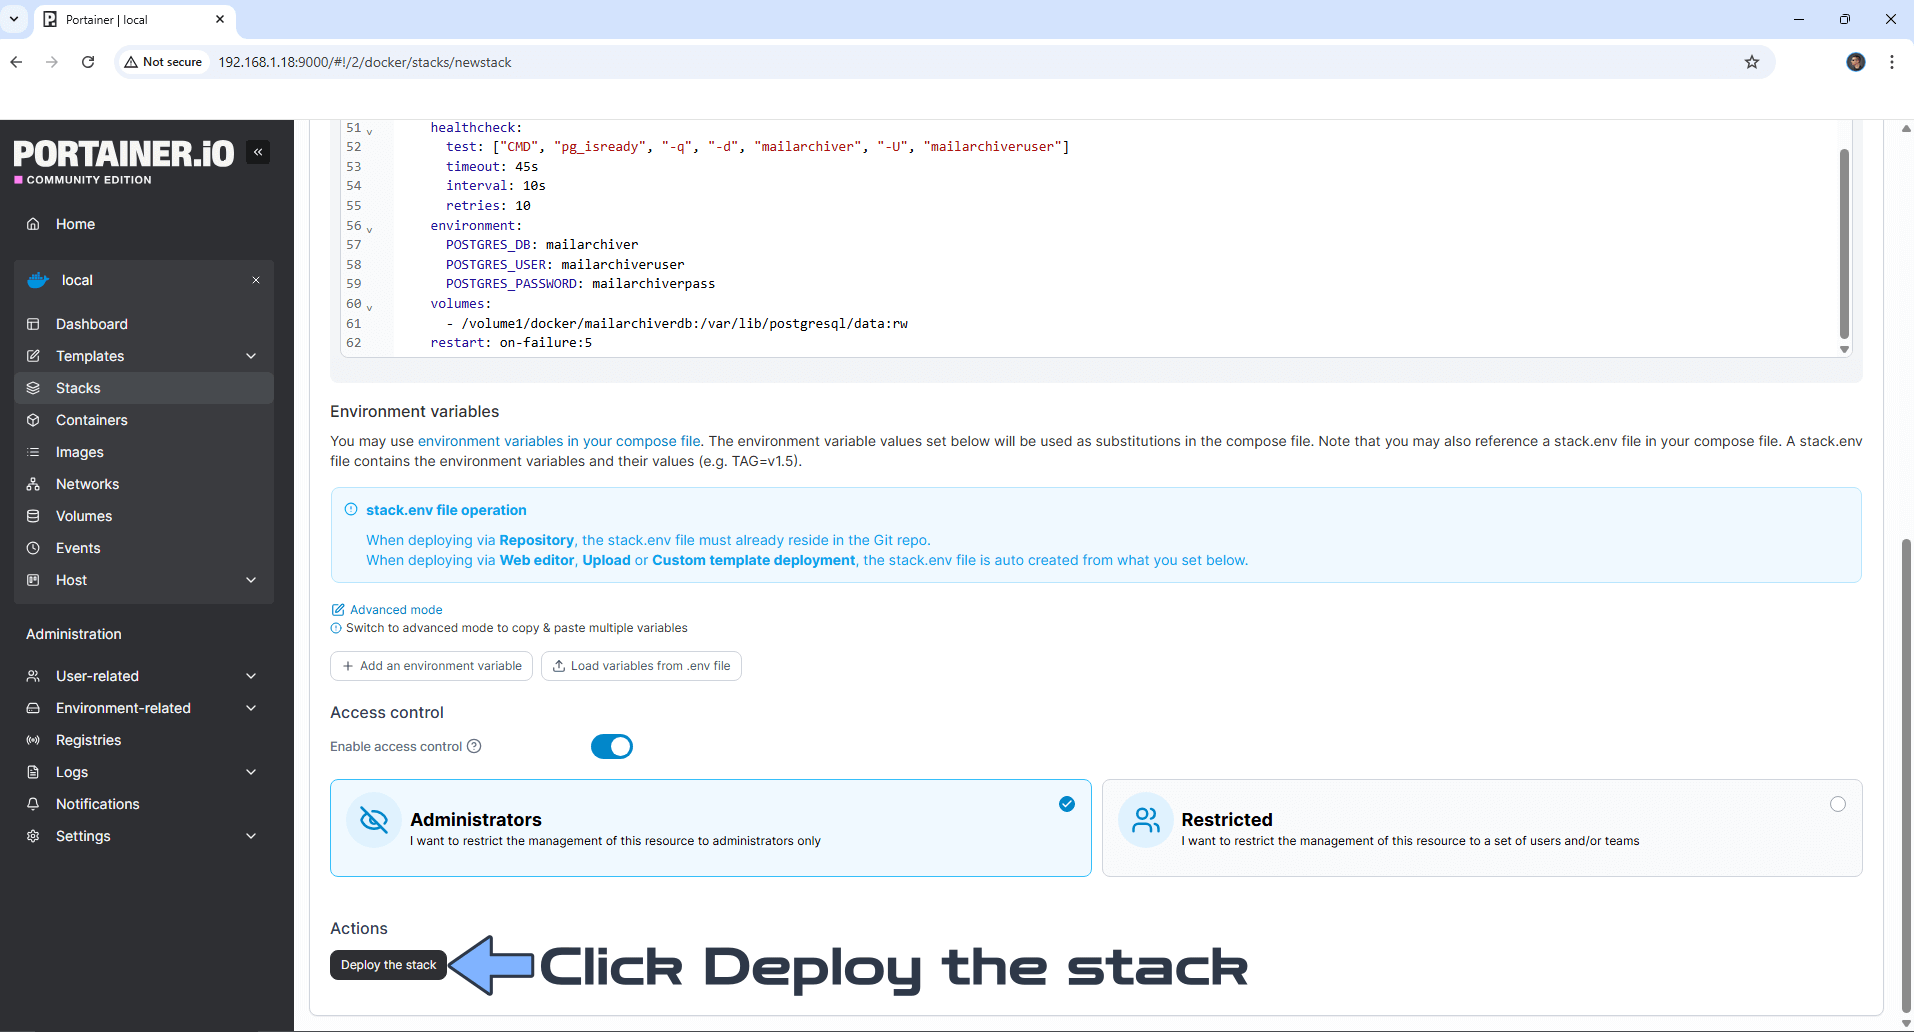
Scroll down on the page until you see a button named Deploy the stack. Click on it. Follow the instructions in the image below. The installation process can take up to a few minutes. It will depend on your Internet speed connection.
STEP 7
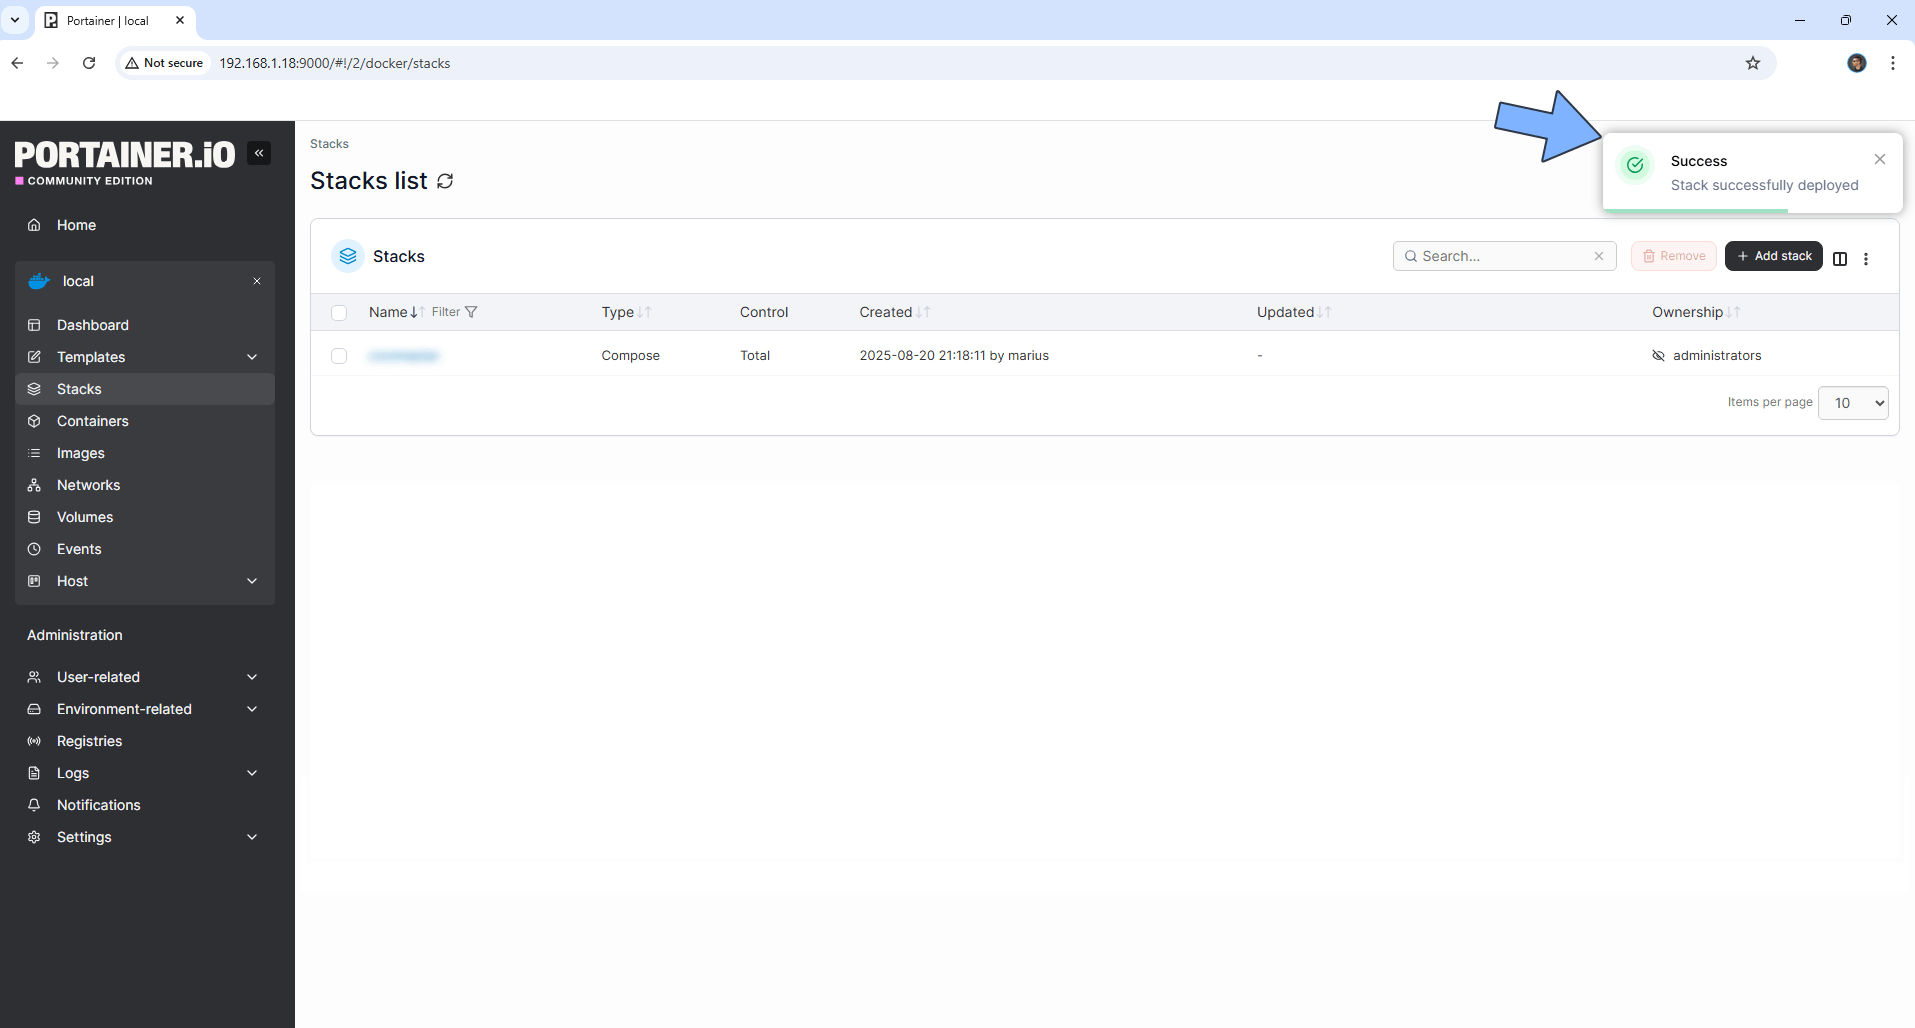
If everything goes right, you will see the following message at the top right of your screen: “Success Stack successfully deployed“.
STEP 8
🟢Please Support My work by Making a Donation. Almost 99,9% of the people that install something using my guides forget to support my work, or just ignore STEP 1. I’ve been very honest about this aspect of my work since the beginning: I don’t run any ADS, I don’t require subscriptions, paid or otherwise, I don’t collect IPs, emails, and I don’t have any referral links from Amazon or other merchants. I also don’t have any POP-UPs or COOKIES. I have repeatedly been told over the years how much I have contributed to the community. It’s something I love doing and have been honest about my passion since the beginning. But I also Need The Community to Support me Back to be able to continue doing this work.
STEP 9
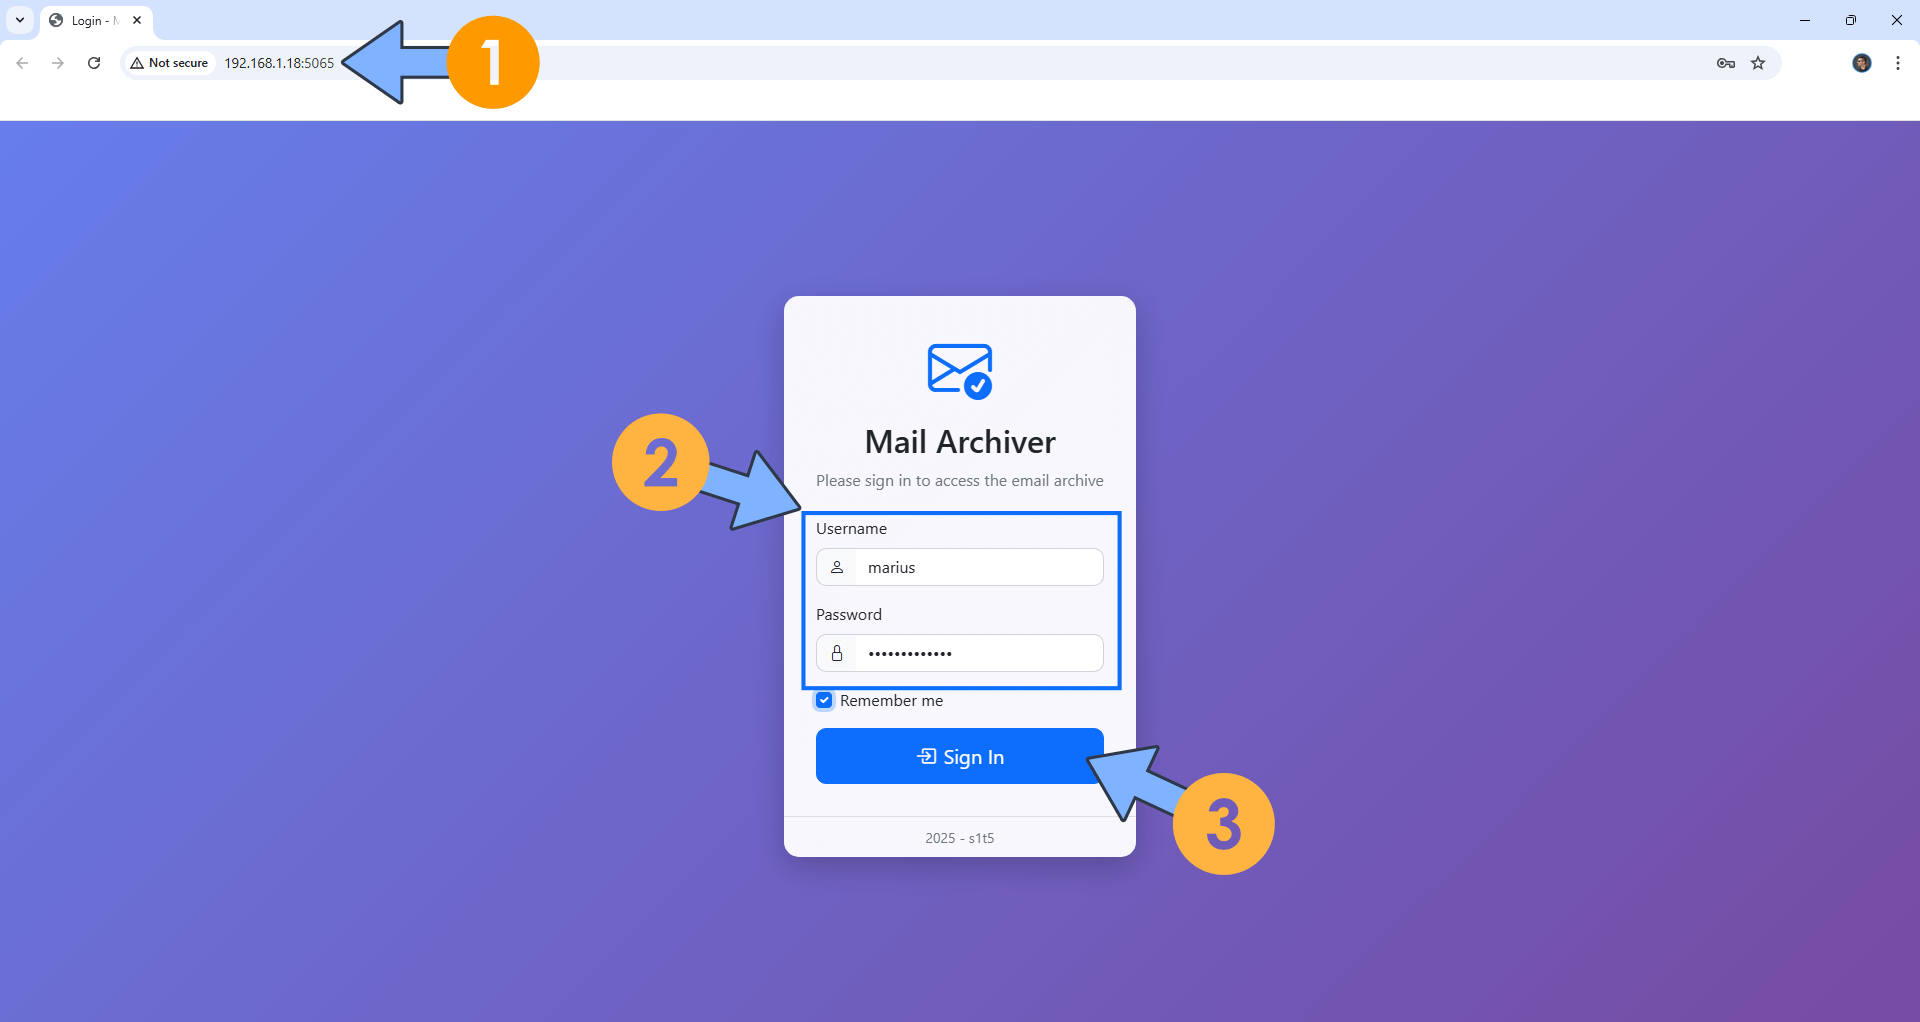
The installation process can take up to a few seconds/minutes. It will depend on your Internet speed connection. Now open your browser and type in http://ugreen-ip-address:5065 If everything goes right, you will see the Mail-Archiver Sign in page. Type in your own Username (Authentication__Username) and Password (Authentication__Password) that you have previously added at STEP 5. Click Sign In. Follow the instructions in the image below.
STEP 10
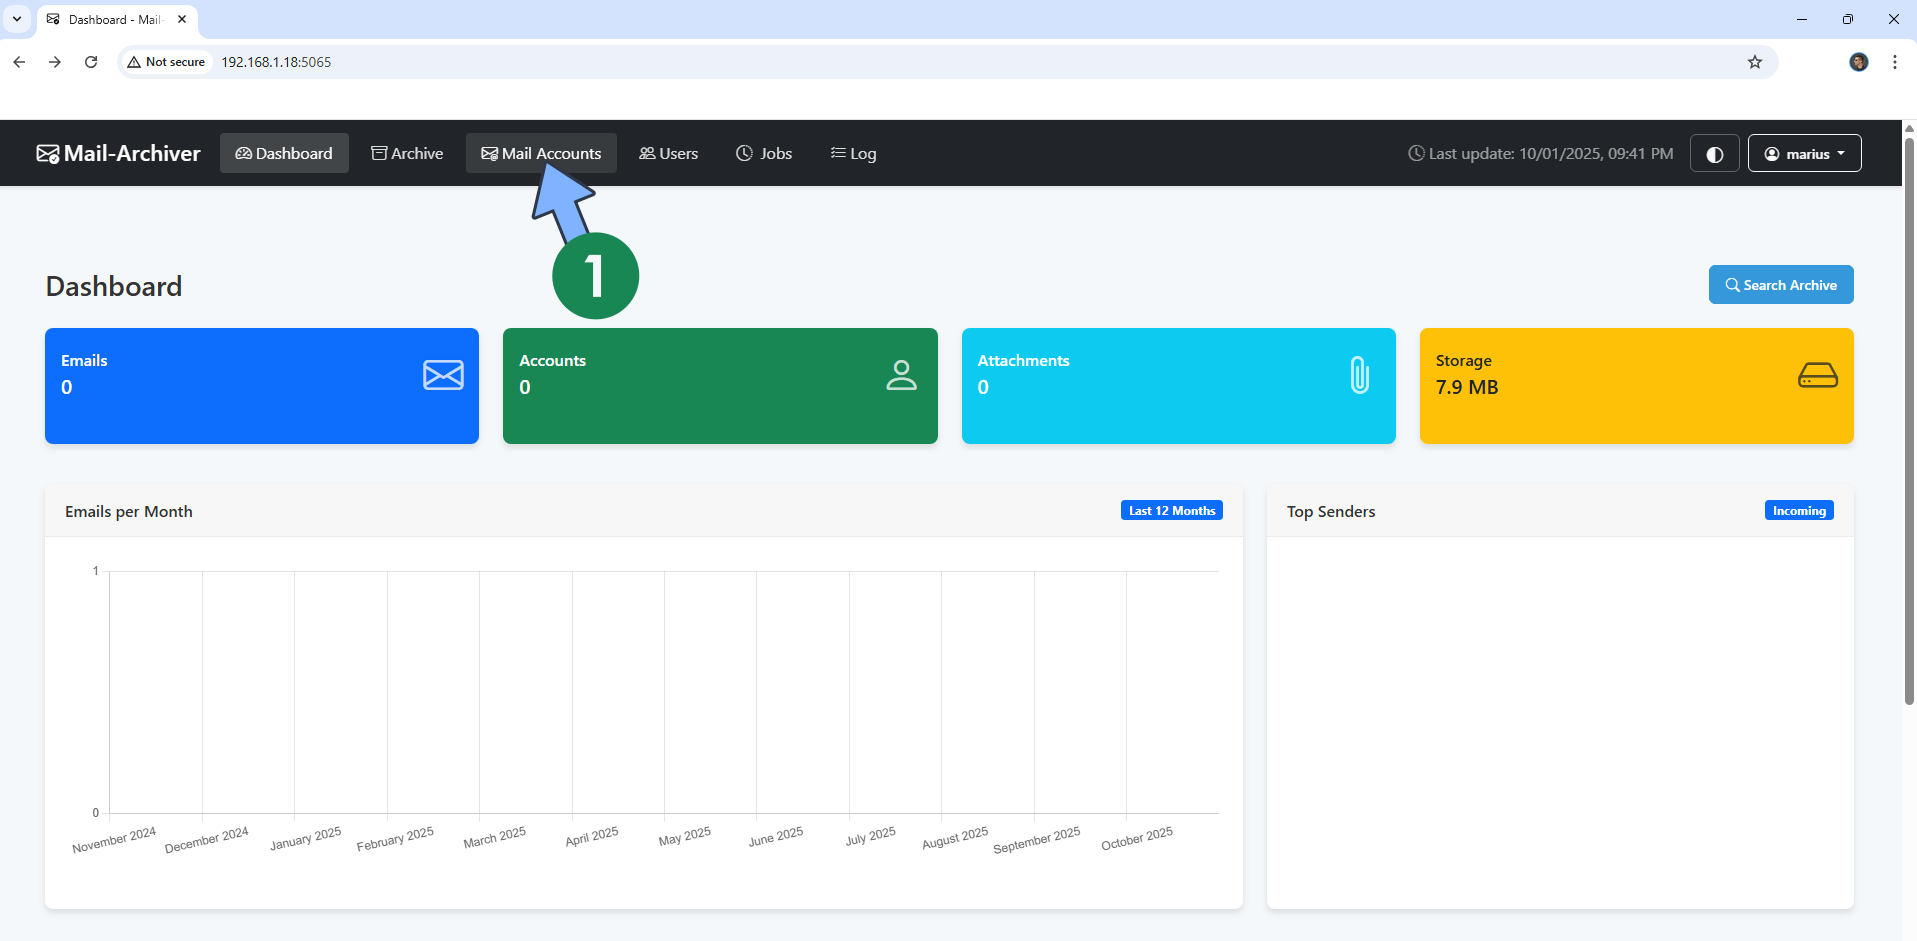
Click the Mail Accounts tab. Follow the instructions in the image below.
STEP 11
Follow my step by step guide on how to activate SMTP/IMAP for your Gmail account. This step is mandatory. Note: If you don’t want to use the easiest way for IMAP with Google and you already have IMAP details from your own Mail Server, you can just skip this STEP and use your personalized email IMAP details instead.
STEP 12
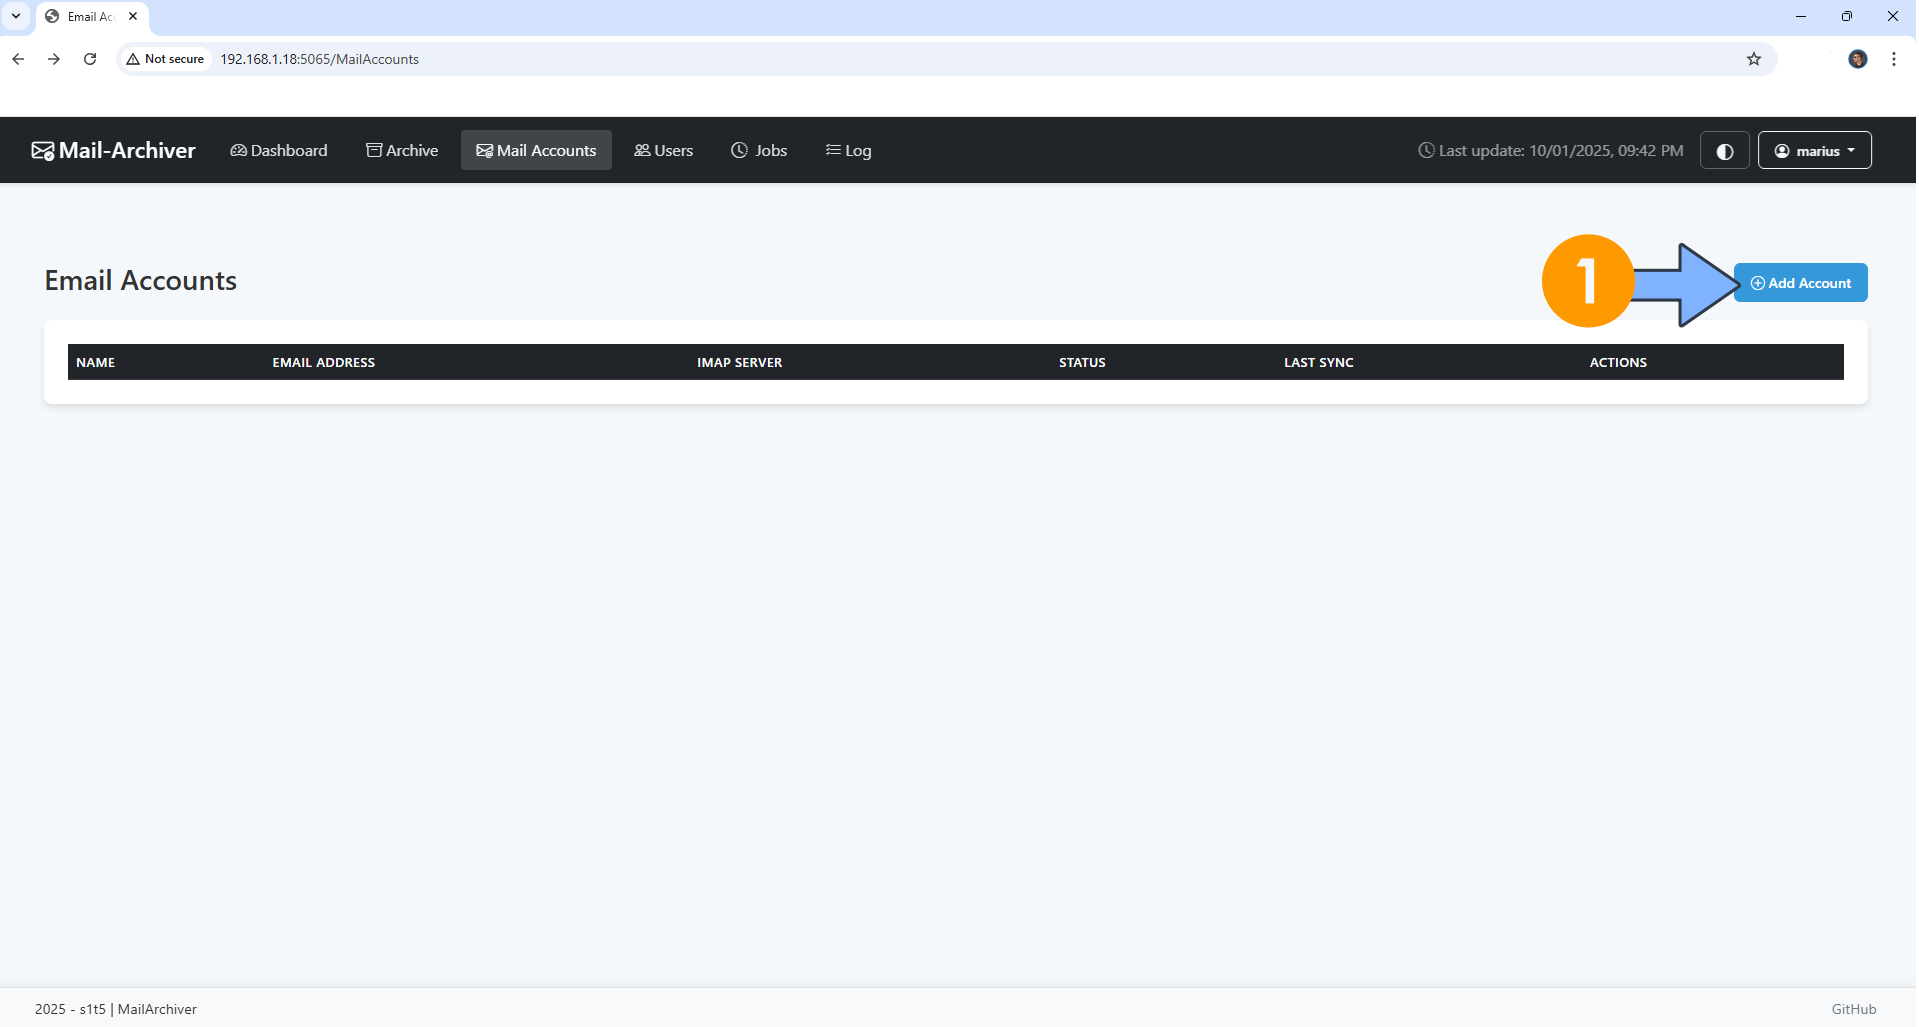
Click Add Account. Follow the instructions in the image below.
STEP 13
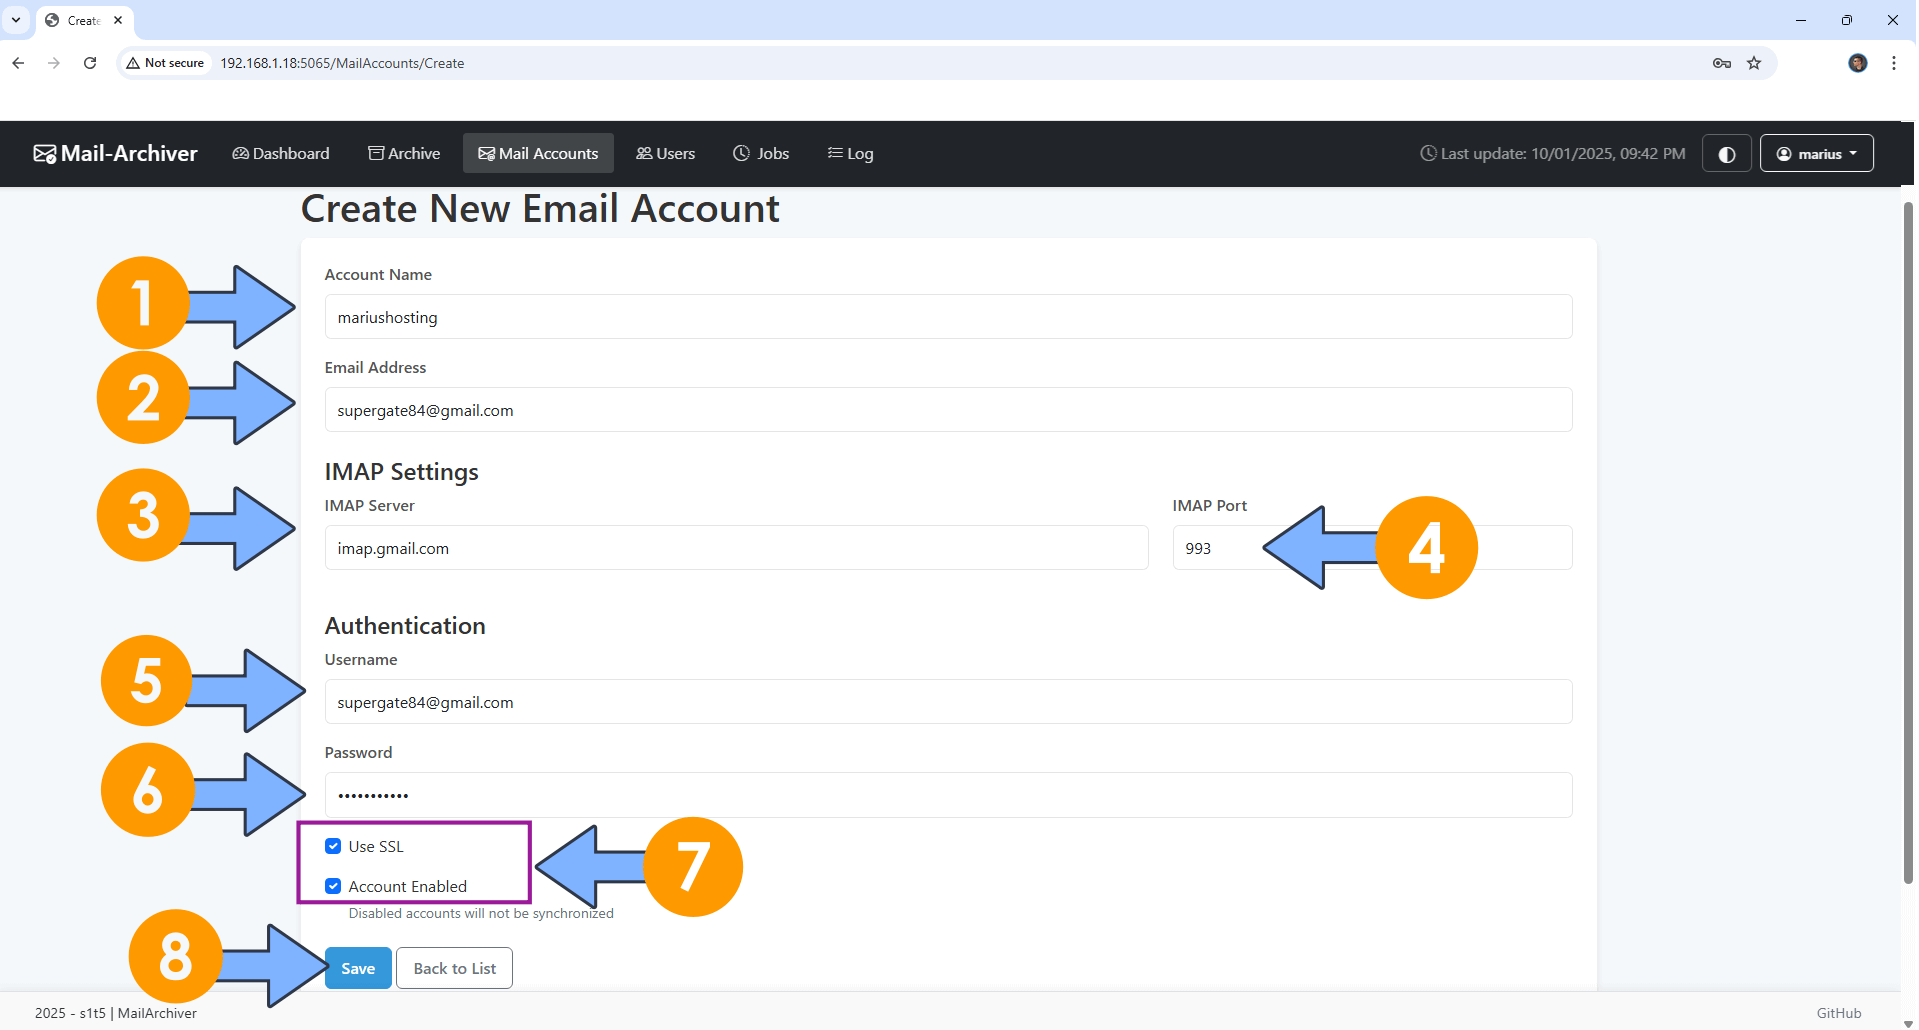
Create New Email Account.
On the Account Name field, type in a name for the account.
On the Email Address field, type in your own Gmail address. / STEP 11
On the IMAP Server field, type in imap.gmail.com
On the IMAP Port field, type in 993
On the Username field, type in your own Gmail address. / STEP 11
On the Password field, type in your own Gmail APP Password. / STEP 11 ⚠️Note: Do NOT confuse your Gmail password with the APP Password that you have previously created at STEP 11. They are two different things. In this case you should use the APP Password, the one you have created at STEP 11.
Check Use SSL and Account Enabled.
Click Save.
STEP 14
Click Sync. Follow the instructions in the image below.

STEP 15
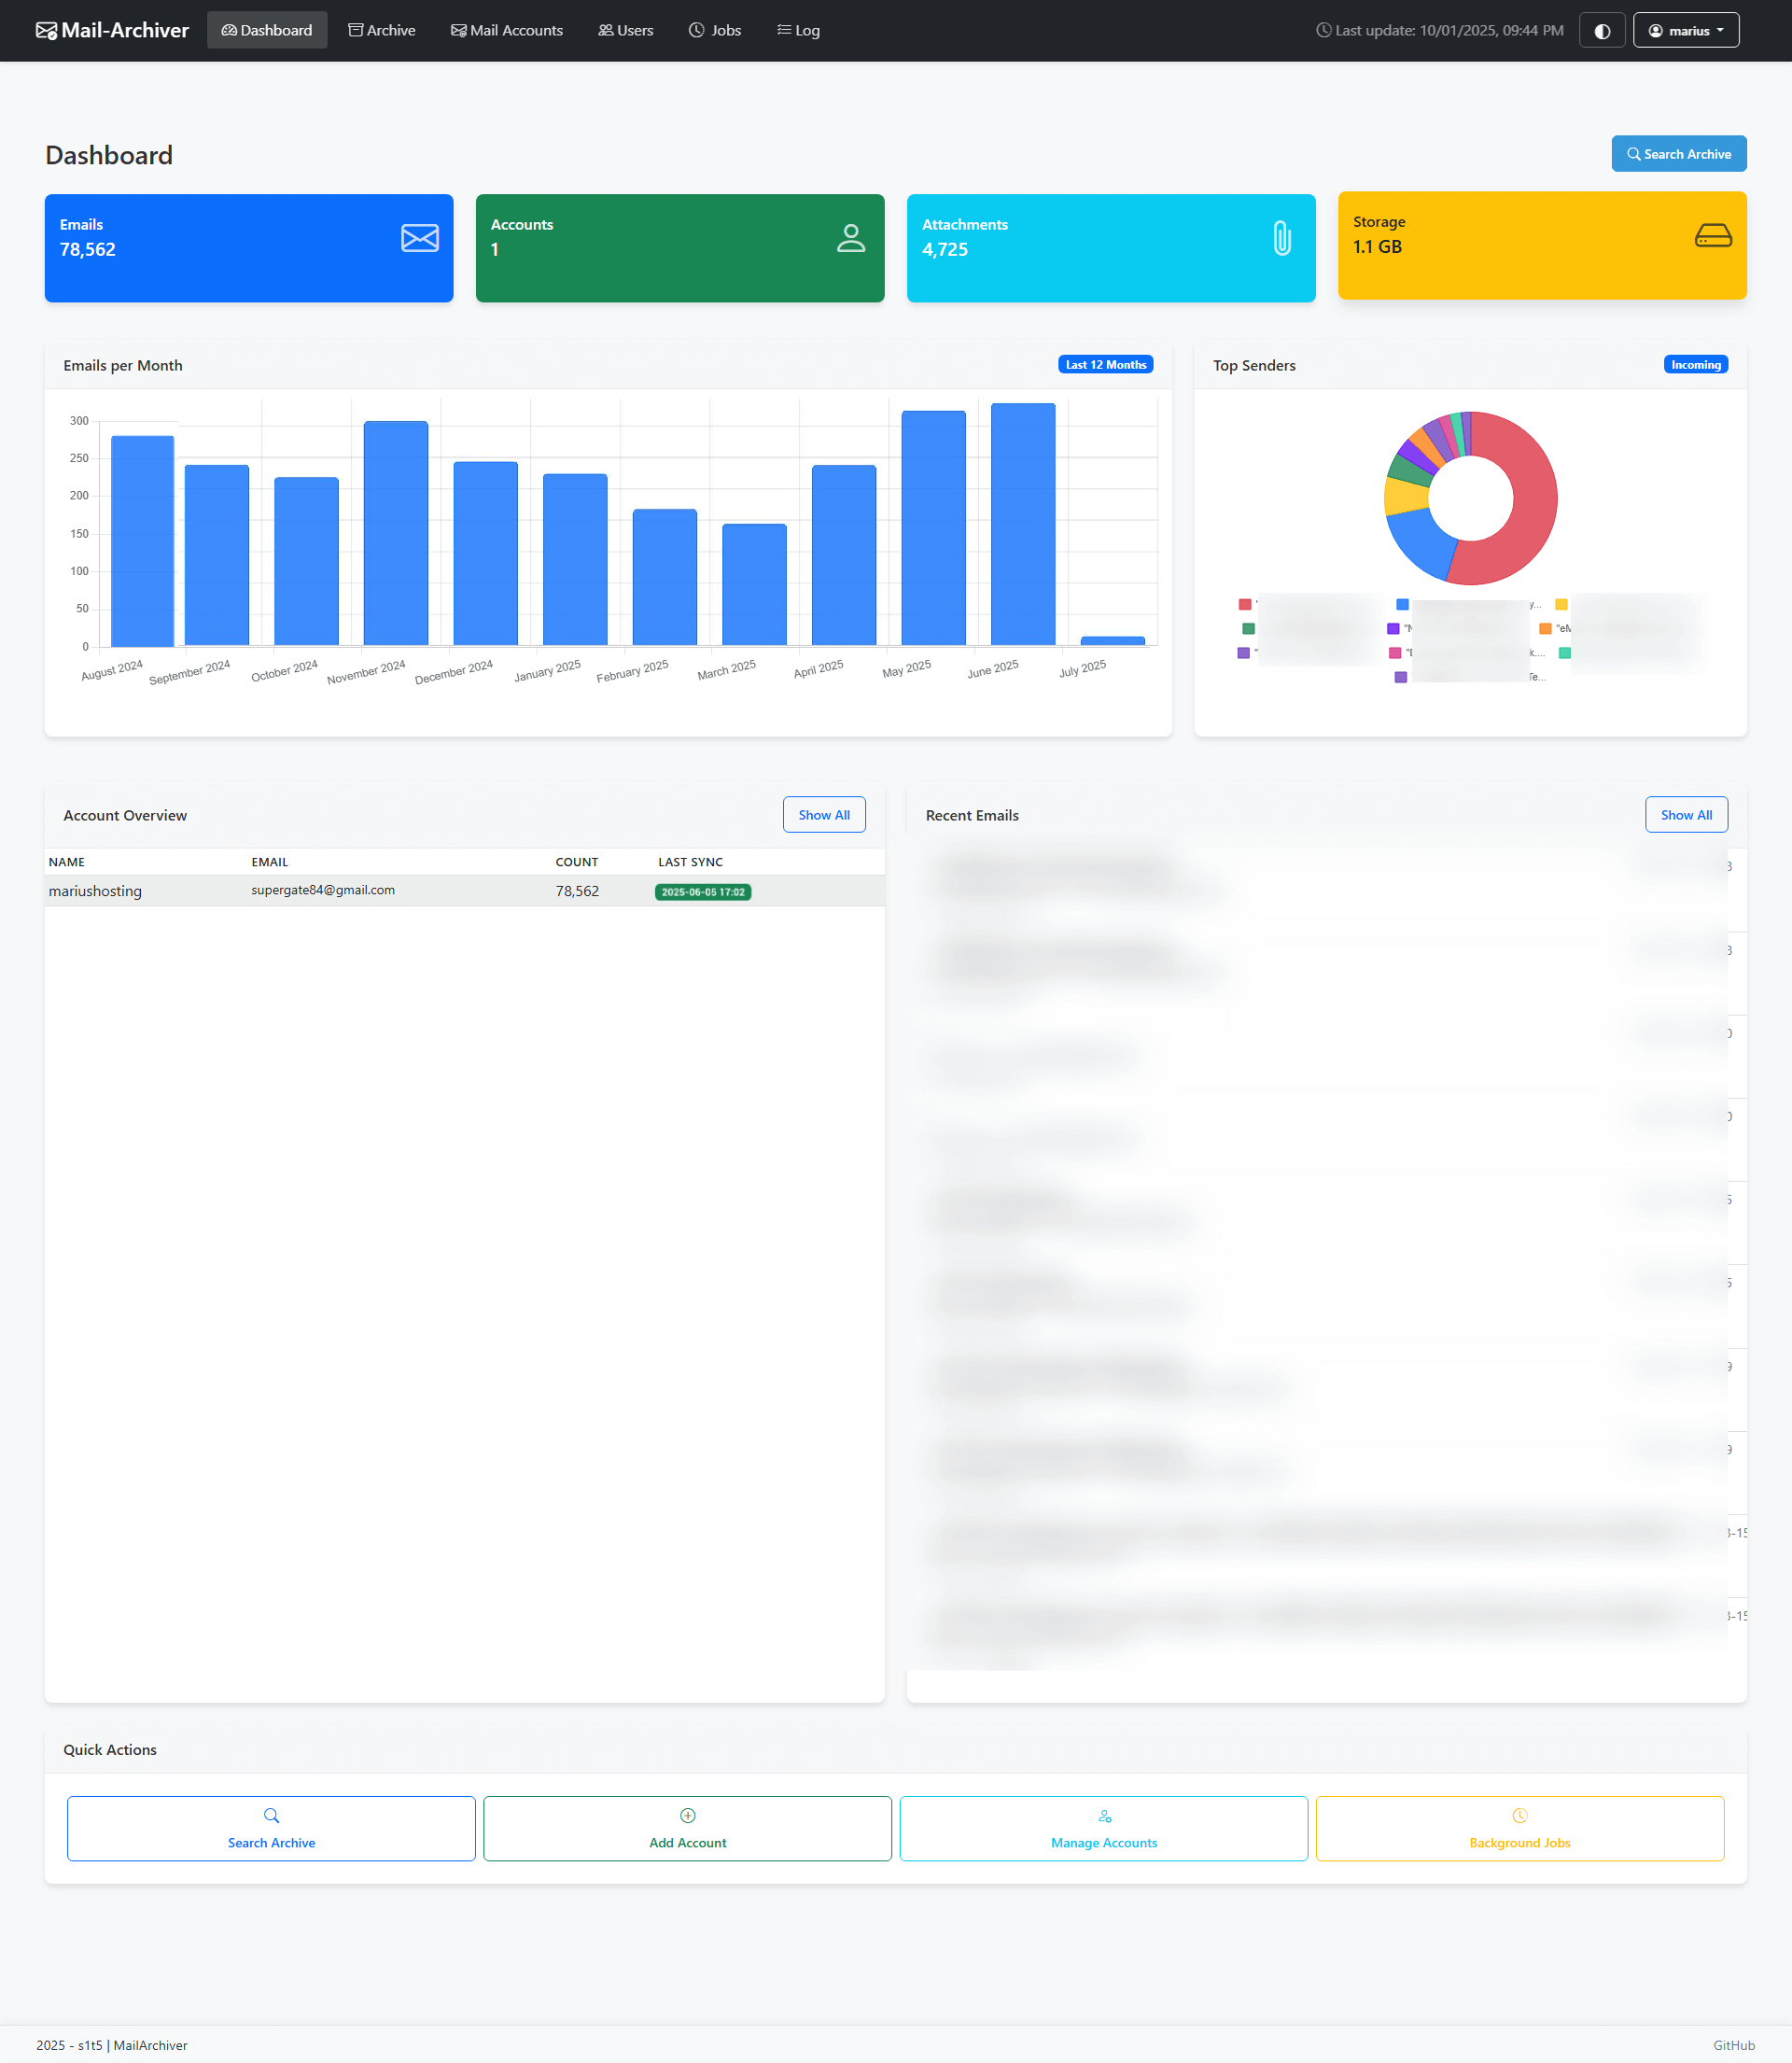
Your Mail-Archiver at a glance. It will take a long time to download all your email data, especially if you use it a lot for work and have a lot of attachments. ⚠️Note: The email attachments are stored in the PostgreSQL database as binary, in the table “EmailAttachments”.
STEP 16
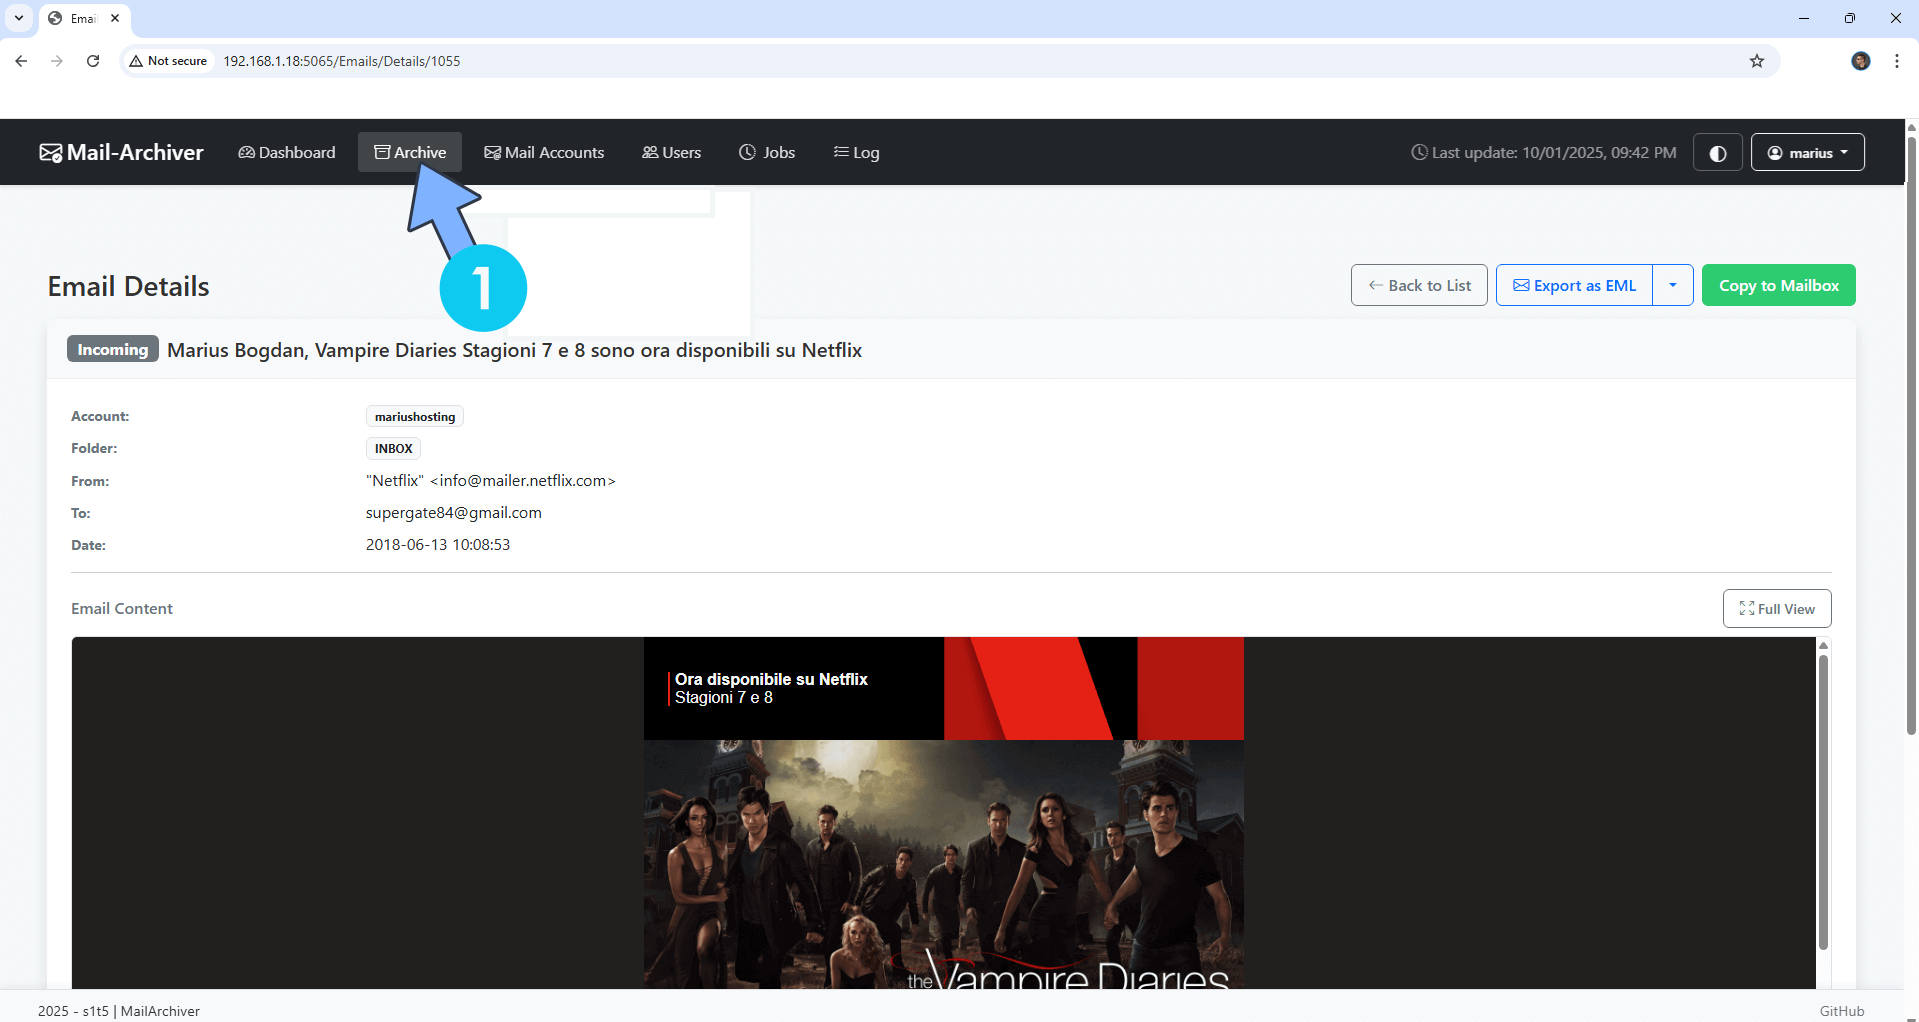
Click the Archive tab to check your downloaded email. Follow the instructions in the image below.
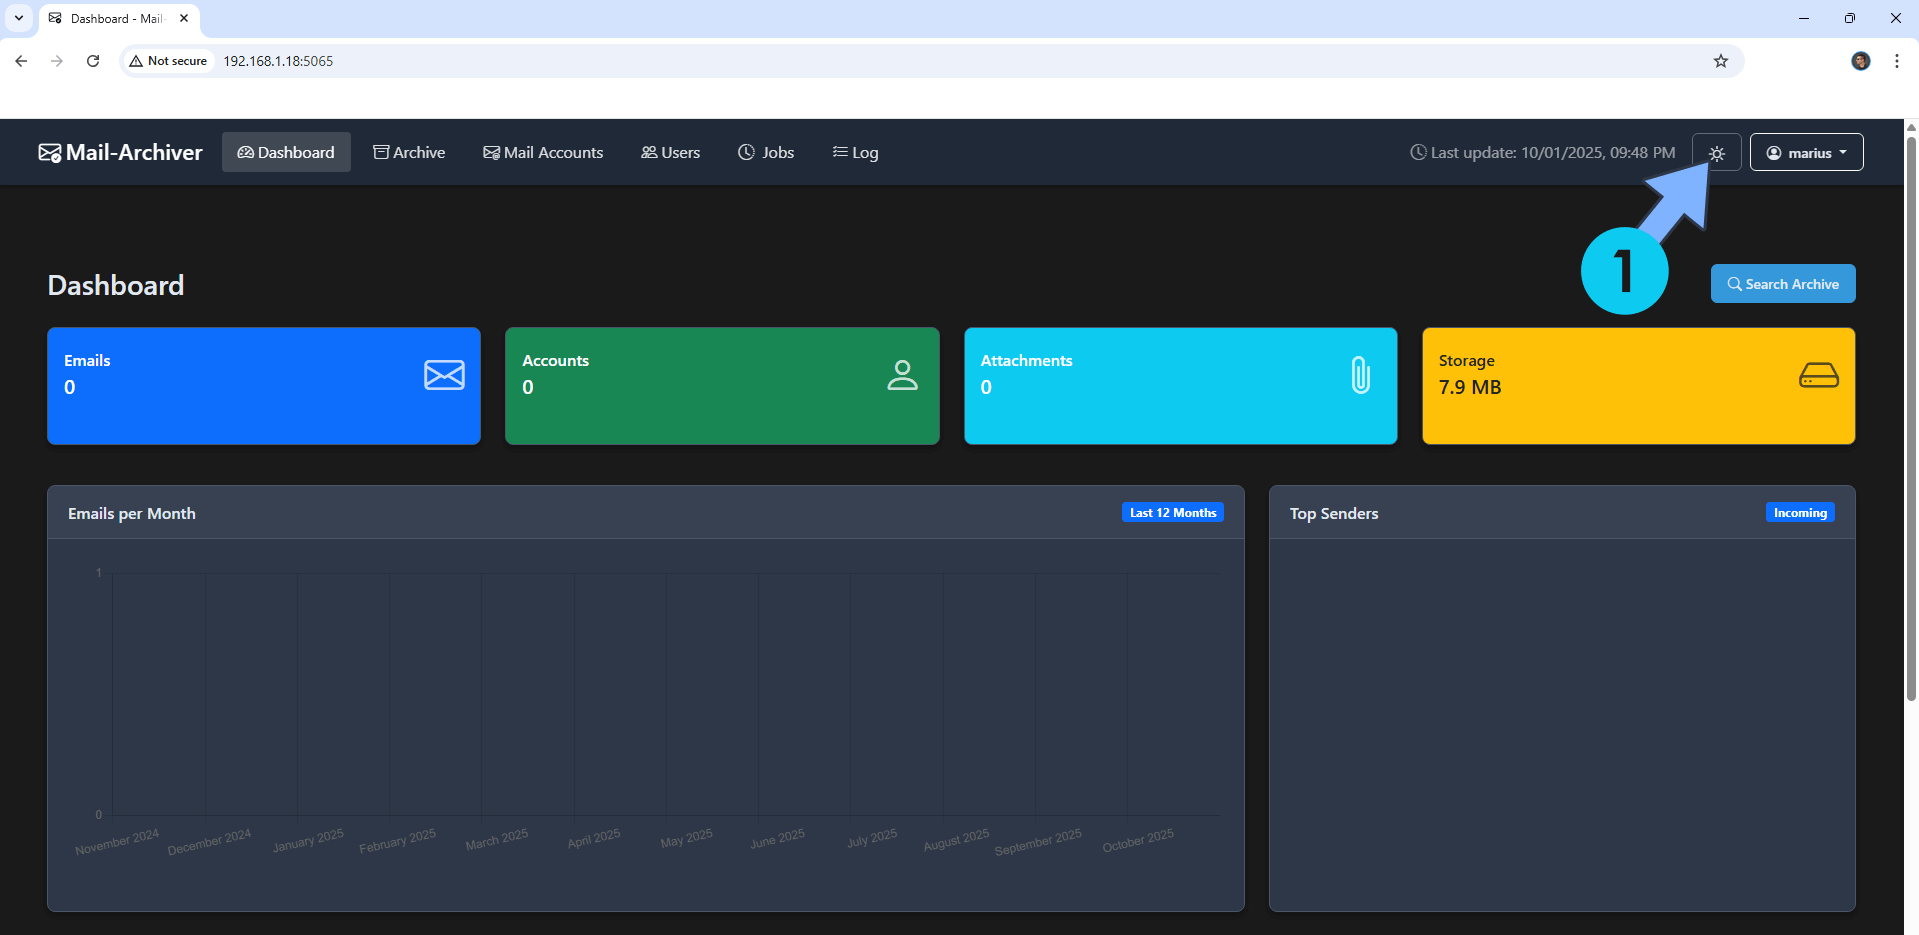
STEP 17
At the top right of the page, you can also switch the theme to Dark. Follow the instructions in the image below.
Enjoy Mail-Archiver!
Note: If you want to run the Mail-Archiver container over HTTPS, check out How to Run Docker Containers Over HTTPS on Your UGREEN NAS. ⚠️Warning: You should NOT expose this container to the INTERNET. Use it only on localhost because this container has a lot of private and confidential data inside it.
🆙Note/Update/Container: How to Update Your Docker Containers on UGREEN NAS Using Portainer.
🐳Note: How to Create Docker Shortcuts on Desktop.
🆕Note: How to Update Portainer to the latest version.
🆕Note: How to Clean Docker.
This post was updated on Tuesday / June 30th, 2026 at 7:25 PM