Nextcloud is a suite of client-server software for creating and using file hosting services. Nextcloud recently changed its name to Nextcloud Hub 26. It’s free and open-source which means that anyone is allowed to install and operate it on their own private server devices. In this step by step guide I will show you how to install Nextcloud Hub 26 on your UGREEN NAS using Docker & Portainer.
STEP 1
Please Support My work by Making a Donation.
STEP 2
Install Portainer using my step by step guide. If you already have Portainer installed on your UGREEN NAS, skip this STEP. Attention: Make sure you have installed the latest Portainer version.
STEP 3
⚠️Mandatory: Enable HTTPS on your UGREEN NAS.
STEP 4
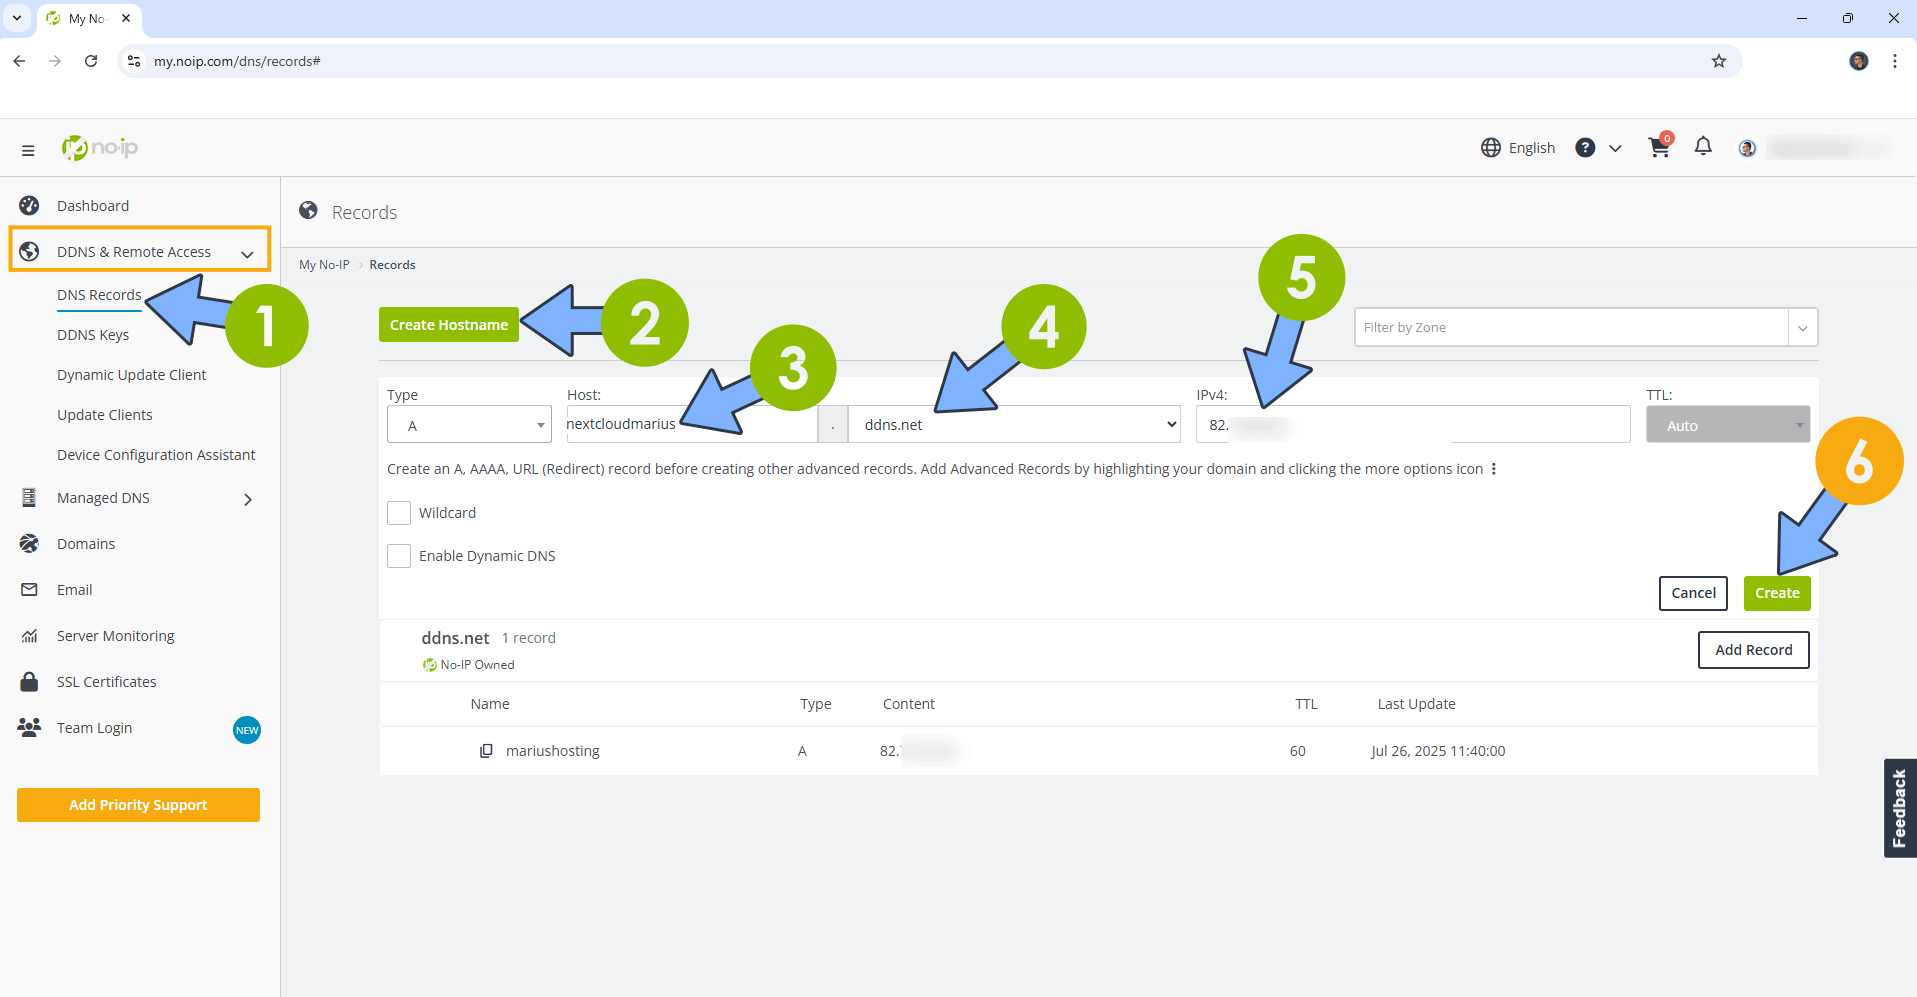
Create a new hostname on the noip website using your noip account. For example, I have created nextcloudmarius as Host and I use the free ddns.net domain. In the IP Address area, type in your own IPV4 IP address from your ISP, then click Create. Follow the instructions in the image below.
STEP 5
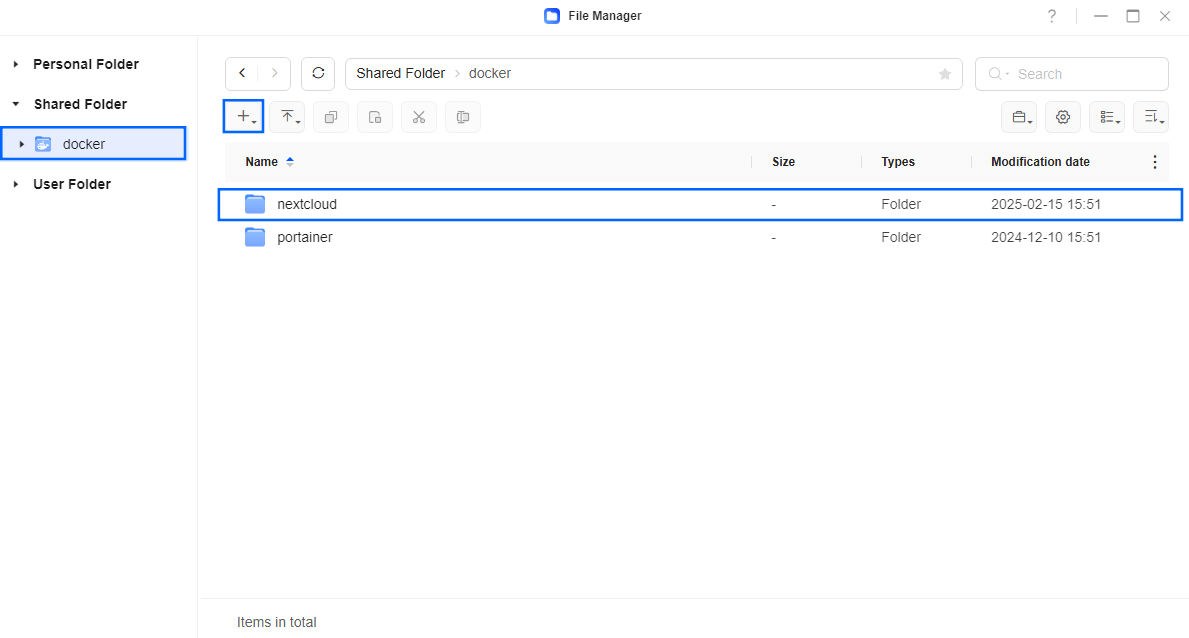
Go to File Manger and open the docker folder. Inside the docker folder, create one new folder and name it nextcloud. Follow the instructions in the image below.
Note: Be careful to enter only lowercase, not uppercase letters.
STEP 6
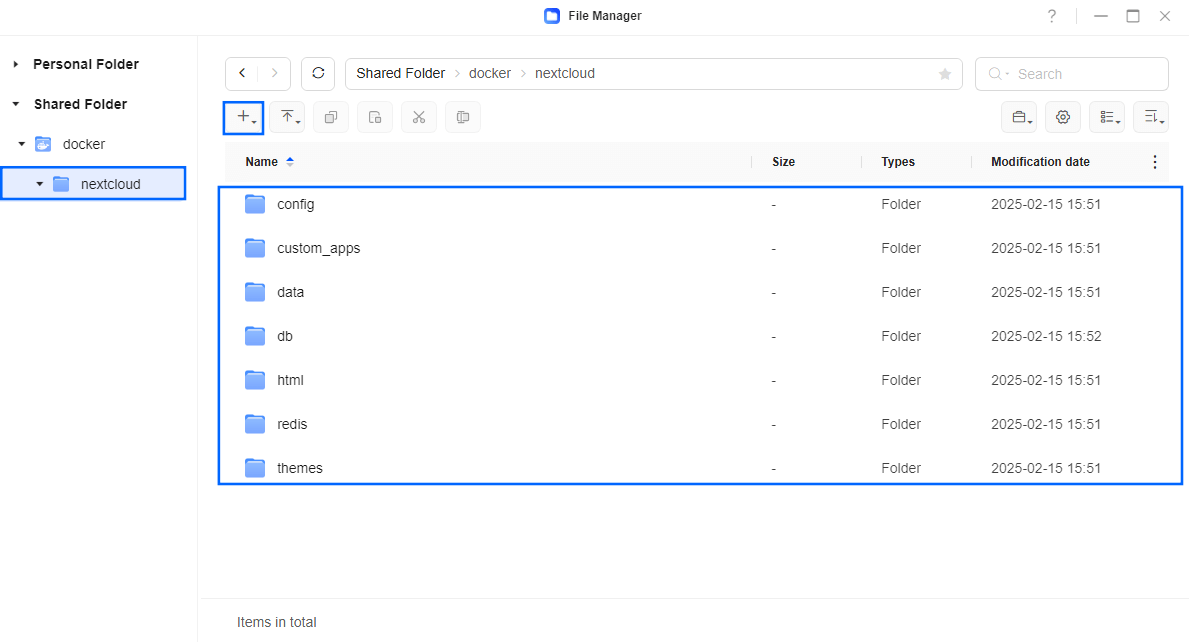
Now create seven new folders inside the nextcloud folder that you have previously created at STEP 5 and name them config, custom_apps, data, db, html, redis, themes. Follow the instructions in the image below.
Note: Be careful to enter only lowercase, not uppercase letters.
STEP 7
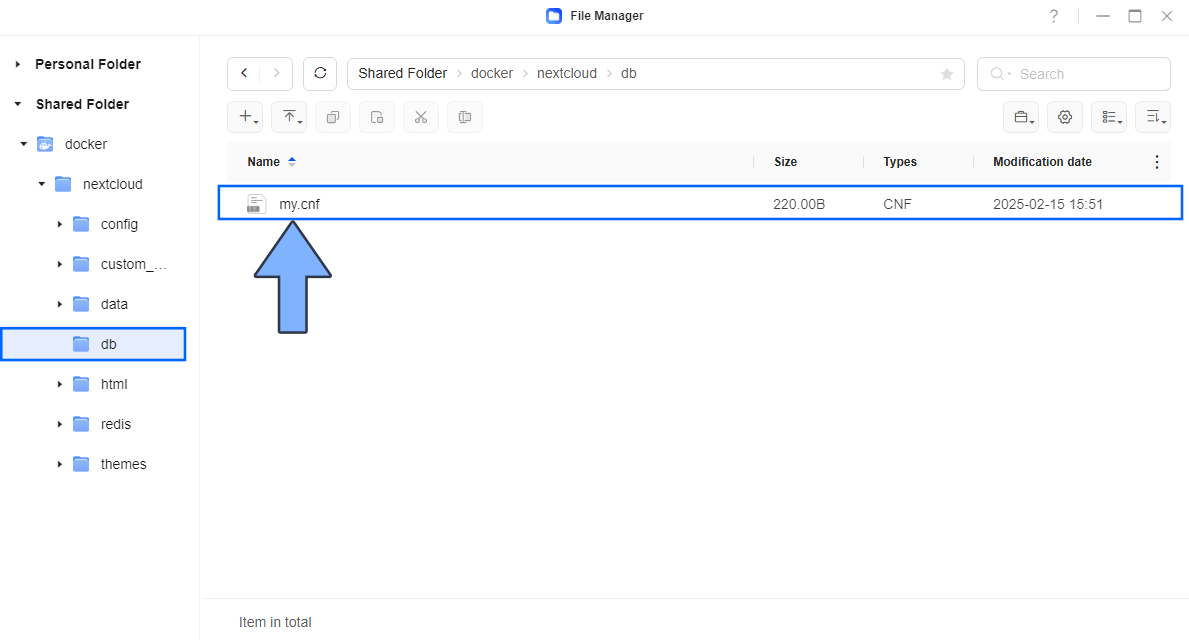
Download (click on the blue link below) and upload the my.cnf file below in the db folder that you have previously created at STEP 6. Follow the instructions in the image below. 🔒Note: Support my work to unlock the password. You can use this password to download any file on mariushosting forever!
STEP 8
⚠️Mandatory Add Read & Write Permissions to the Docker Folder. If you have already added the Read and Write Permissions to the Docker Folder, skip this STEP.
STEP 9
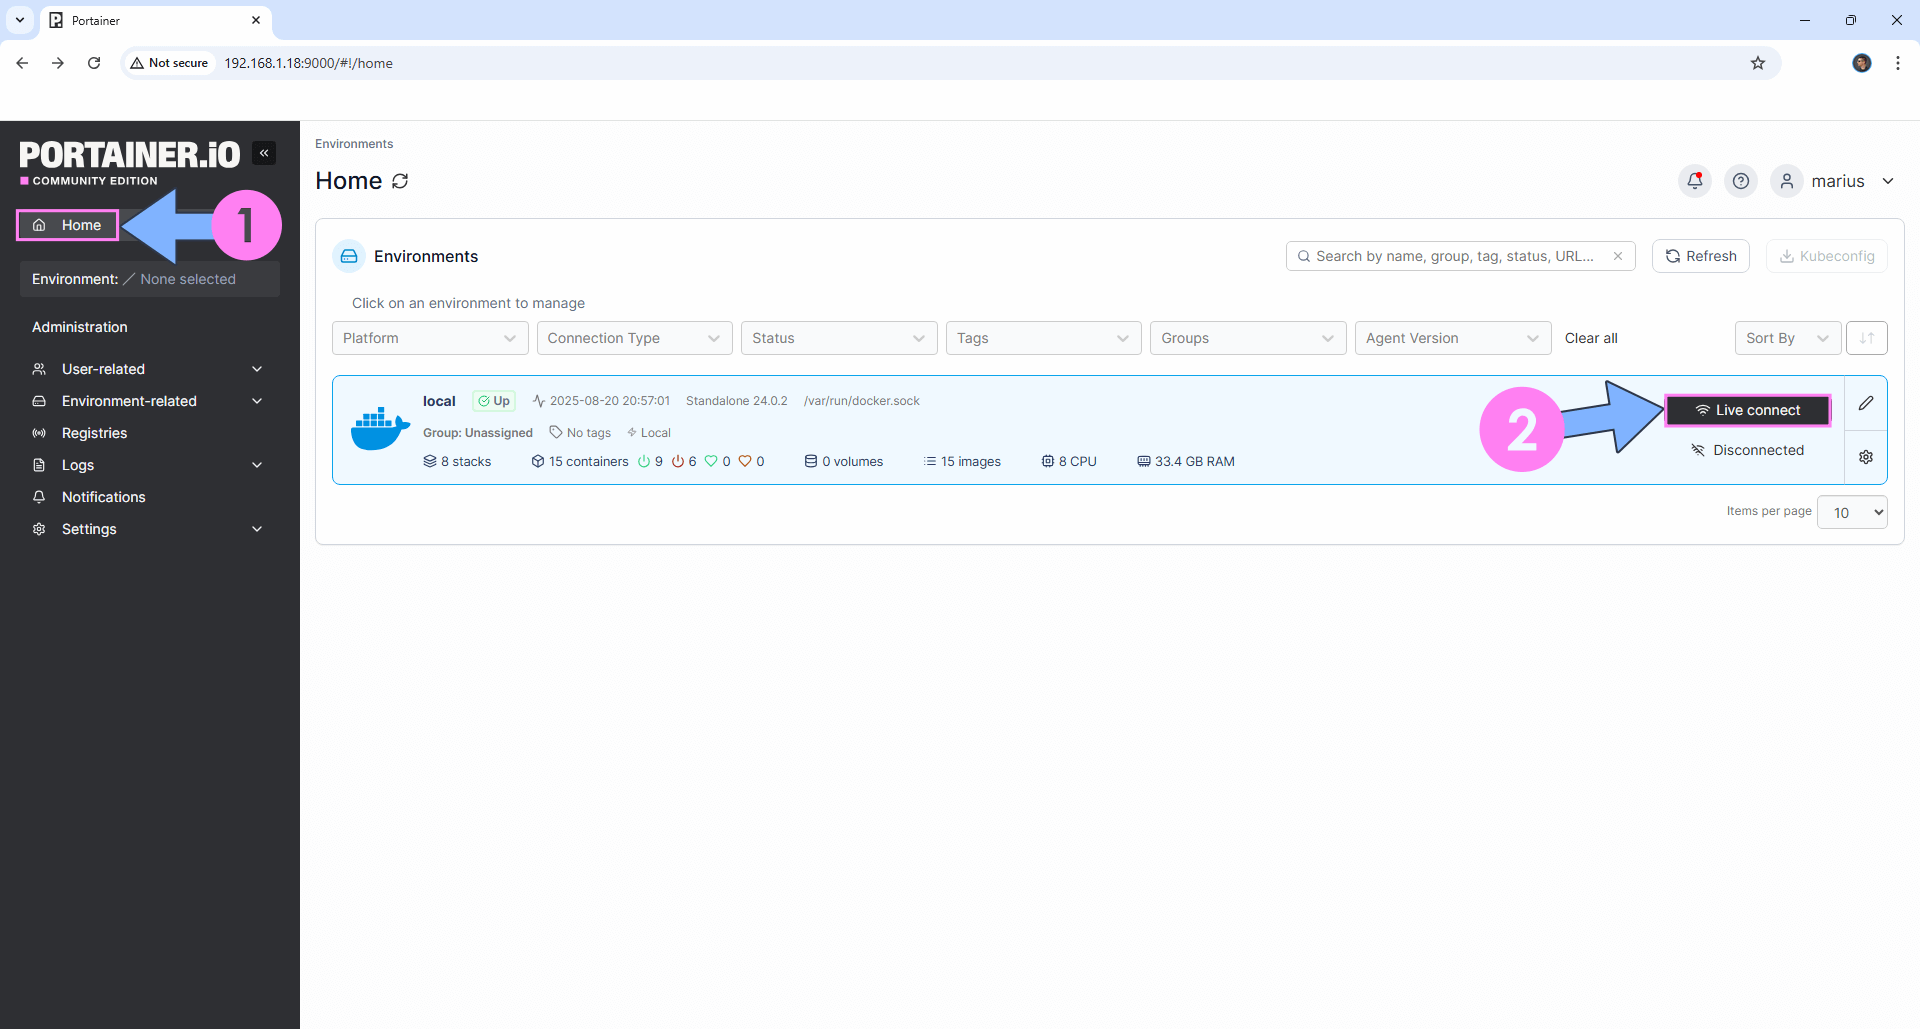
Log into Portainer using your username and password. On the left sidebar in Portainer, click on Home then Live connect. Follow the instructions in the image below.
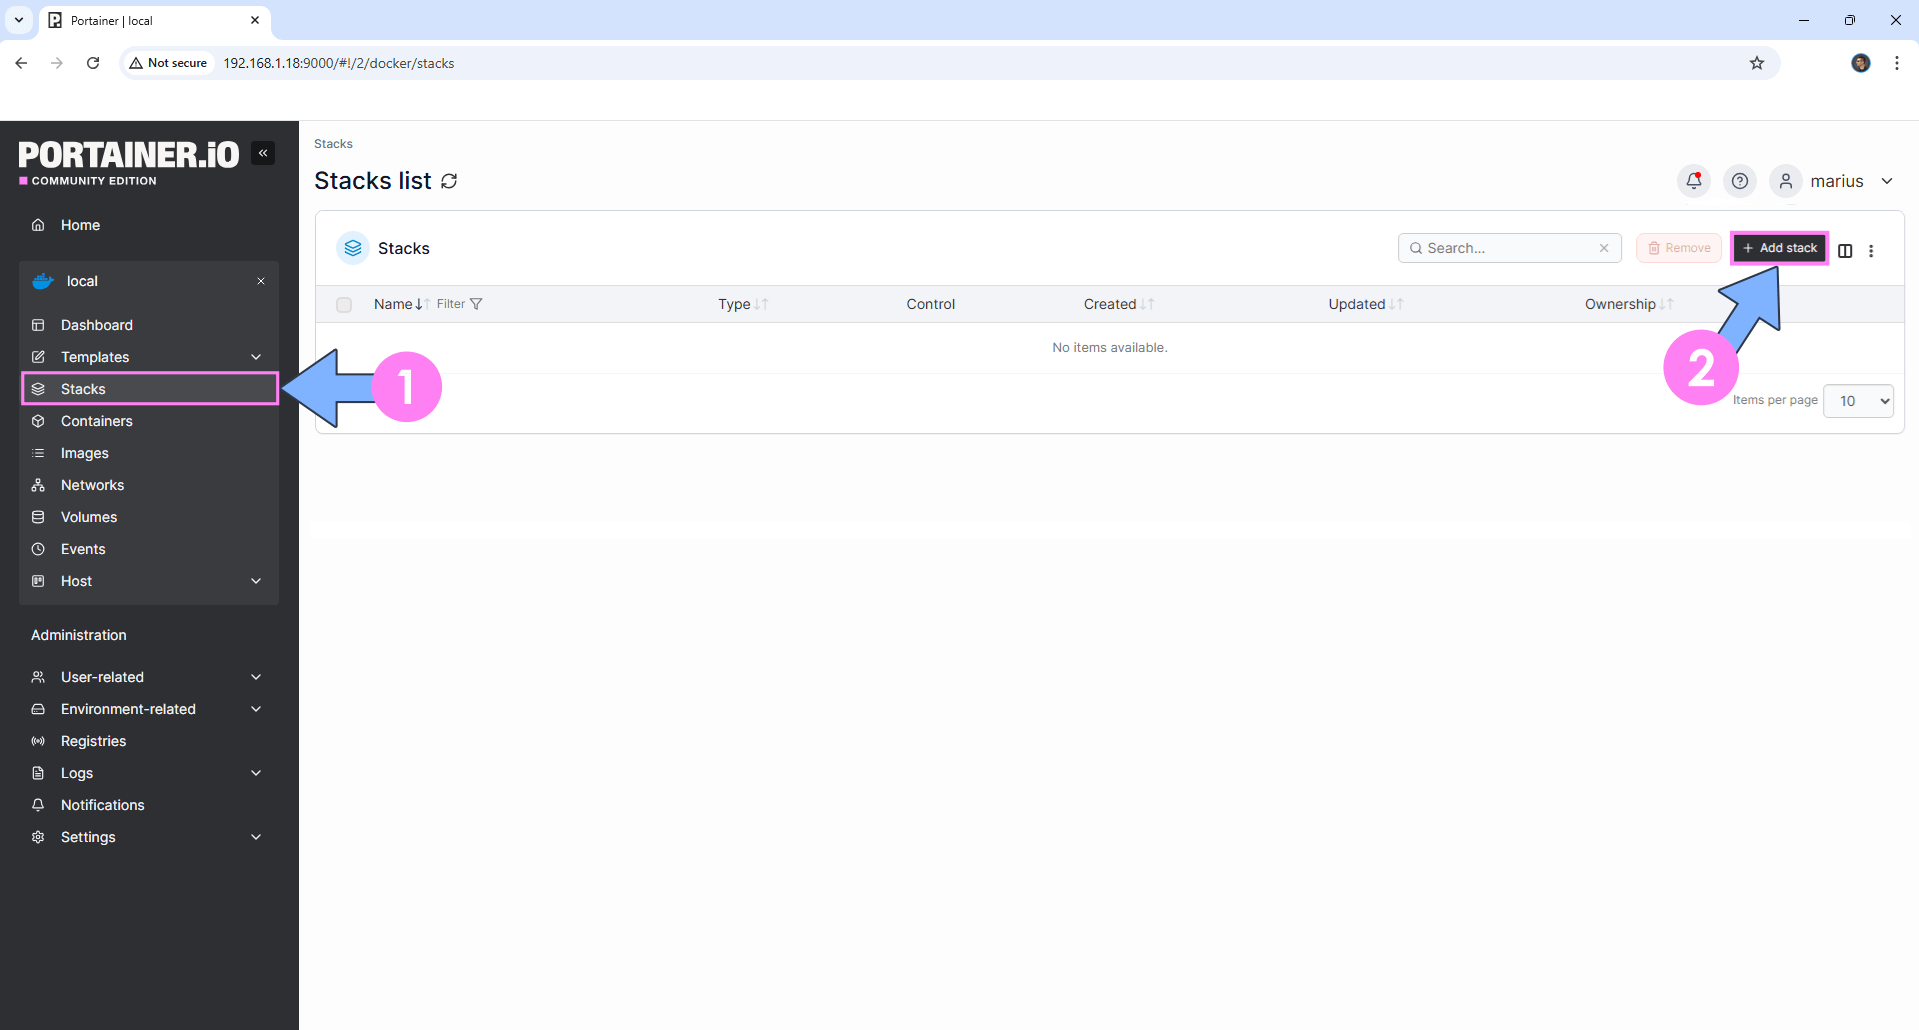
On the left sidebar in Portainer, click on Stacks then + Add stack. Follow the instructions in the image below.
STEP 10
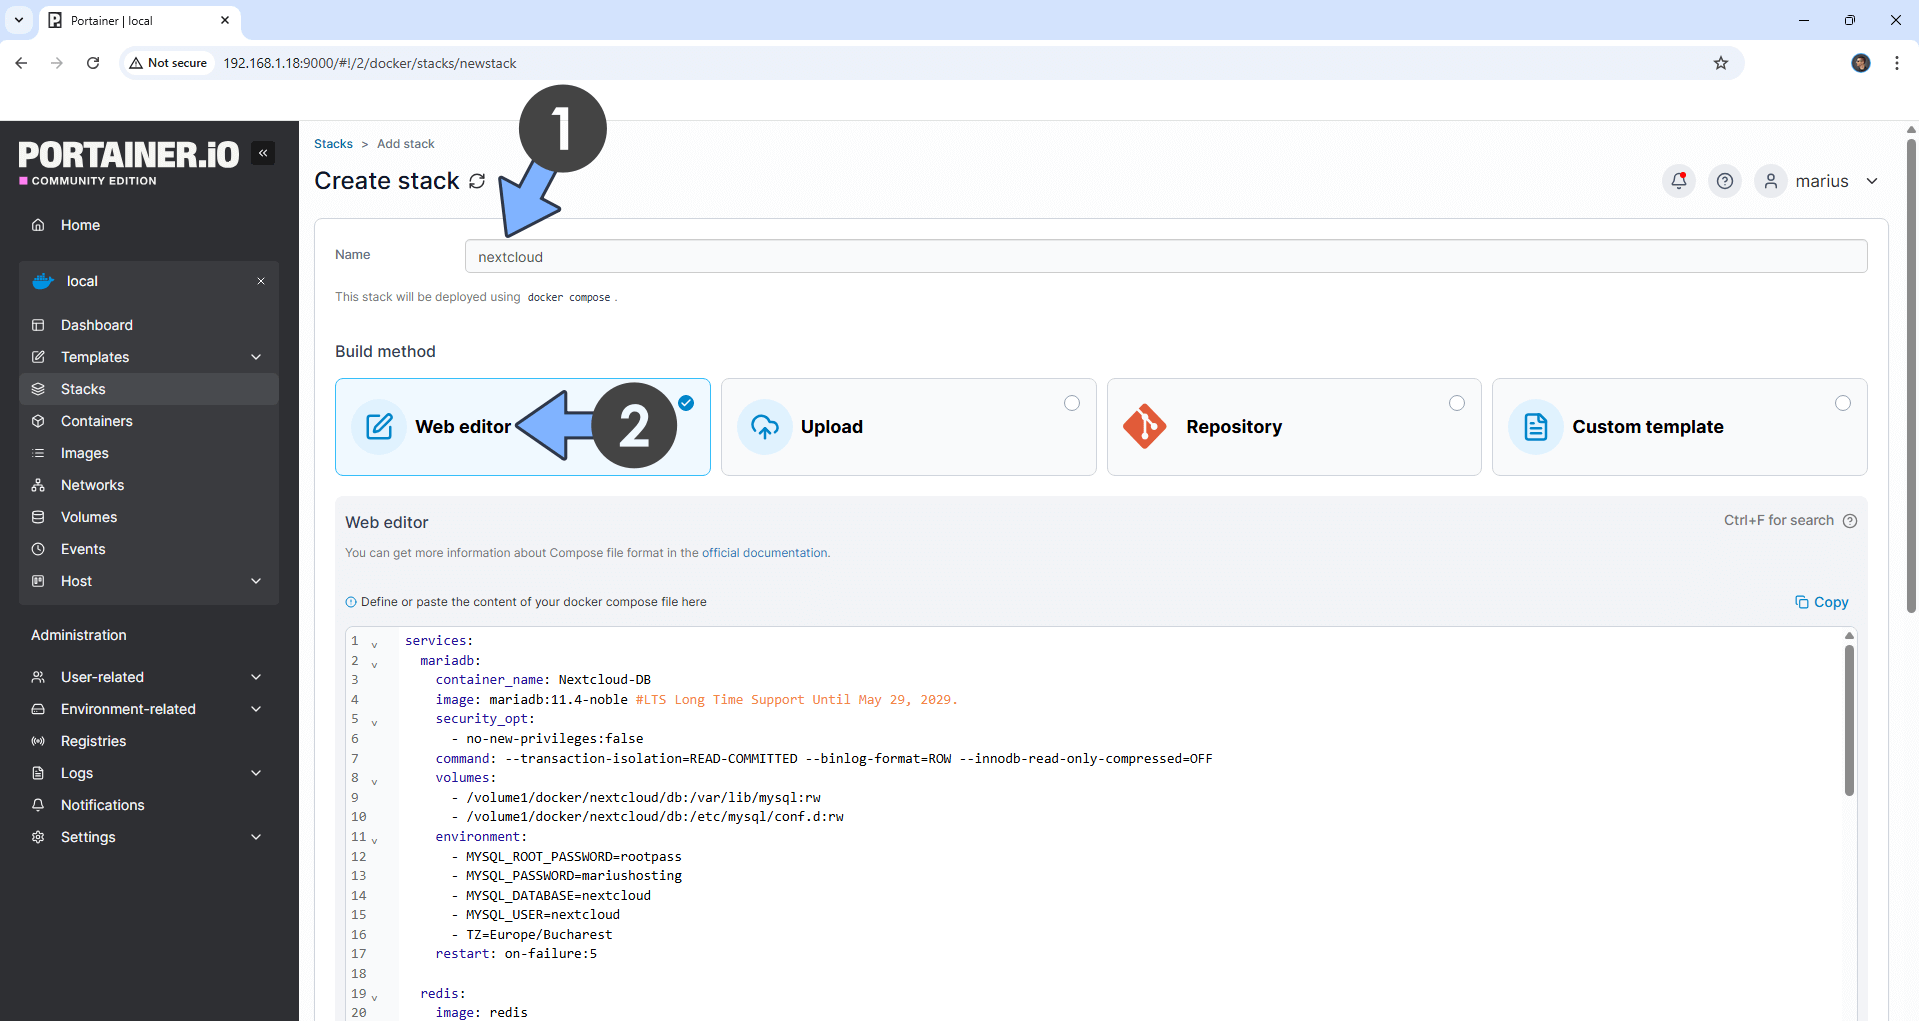
In the Name field type in nextcloud. Follow the instructions in the image below.
services:
  mariadb:
    container_name: Nextcloud-DB
    image: mariadb:11.8-noble #LTS Long Time Support Until October 15, 2033.
    security_opt:
      - no-new-privileges:false
    command: --transaction-isolation=READ-COMMITTED --binlog-format=ROW --innodb-read-only-compressed=OFF
    volumes:
      - /volume1/docker/nextcloud/db:/var/lib/mysql:rw
      - /volume1/docker/nextcloud/db:/etc/mysql/conf.d:rw
    environment:
      - MYSQL_ROOT_PASSWORD=rootpass
      - MYSQL_PASSWORD=mariushosting
      - MYSQL_DATABASE=nextcloud
      - MYSQL_USER=nextcloud
      - TZ=Europe/Bucharest
    restart: on-failure:5

  redis:
    image: redis
    container_name: Nextcloud-REDIS
    hostname: nextcloudredis
    user: 999:10
    healthcheck:
     test: ["CMD-SHELL", "redis-cli ping || exit 1"]
    volumes:
      - /volume1/docker/nextcloud/redis:/data:rw
    environment:
      TZ: Europe/Bucharest
    restart: on-failure:5

  nextcloud:
    container_name: Nextcloud
    ports:
      - 8082:80
    depends_on:
      mariadb:
       condition: service_started
      redis:
       condition: service_healthy
    environment:
      - REDIS_HOST=nextcloudredis
      - NEXTCLOUD_ADMIN_USER=marius
      - NEXTCLOUD_ADMIN_PASSWORD=mariuspass10
      - NEXTCLOUD_TRUSTED_DOMAINS=yourownhostname.ddns.net 192.168.0.188
      - TRUSTED_PROXIES=192.168.0.188
      - OVERWRITEHOST=yourownhostname.ddns.net
      - OVERWRITEPROTOCOL=https
      - MYSQL_PASSWORD=mariushosting
      - MYSQL_DATABASE=nextcloud
      - MYSQL_USER=nextcloud
      - MYSQL_HOST=mariadb
    healthcheck:
     test: curl -f http://localhost:80/ || exit 1
    volumes:
      - /volume1/docker/nextcloud/html:/var/www/html:rw
      - /volume1/docker/nextcloud/custom_apps:/var/www/html/custom_apps:rw
      - /volume1/docker/nextcloud/config:/var/www/html/config:rw
      - /volume1/docker/nextcloud/data:/var/www/html/data:rw
      - /volume1/docker/nextcloud/themes:/var/www/html/themes:rw
    image: nextcloud
    restart: on-failure:5

  cron:
   image: nextcloud:apache
   container_name: Nextcloud-CRON
   restart: always
   volumes:
     - /volume1/docker/nextcloud/config:/var/www/html/config:rw
     - /volume1/docker/nextcloud/html:/var/www/html:rw
     - /volume1/docker/nextcloud/custom_apps:/var/www/html/custom_apps:rw
     - /volume1/docker/nextcloud/data:/var/www/html/data:rw
   entrypoint: /cron.sh
   depends_on:
    mariadb:
       condition: service_started
    redis:
       condition: service_started
Note: Before you paste the code above in the Web editor area below, change the value for MYSQL_PASSWORD and MYSQL_PASSWORD. Type in your own password for both values; they have to be identical. mariushosting is an example for a password.
Note: After you paste the code in the Web editor, change the value for TZ (Select your current Time Zone from this list).
Note: Before you paste the code above in the Web editor area below, change the value numbers for user with your own UID and GID values. (Follow my step by step guide on how to do this.) 999 is my personal UID value and 10 is my personal GID value. You have to type in your own values.
Note: Before you paste the code above in the Web editor area below, change the value for NEXTCLOUD_ADMIN_USER. Type in your own username. marius is an example for a username. You will need this username later at STEP 16.
Note: Before you paste the code above in the Web editor area below, change the value for NEXTCLOUD_ADMIN_PASSWORD. Type in your own password. mariuspass10 is an example for a password. You will need this password later at STEP 16.
Note: Before you paste the code above in the Web editor area below, change the value for NEXTCLOUD_TRUSTED_DOMAINS with your own DDNS hostname without https:// at the beginning that you have previously created at STEP 4. Type in your own local NAS IP. The DDNS and your own local NAS IP are separated by space. 192.168.0.188 is my NAS local IP. You should add your own NAS local IP.
Note: Before you paste the code above in the Web editor area below, change the value for TRUSTED_PROXIES – Type in your own local NAS IP. 192.168.0.188 is my NAS local IP. You should add your own NAS local IP.
Note: Before you paste the code above in the Web editor area below, change the value for OVERWRITEHOST with your own DDNS hostname without https:// at the beginning that you have previously created at STEP 4.
STEP 11
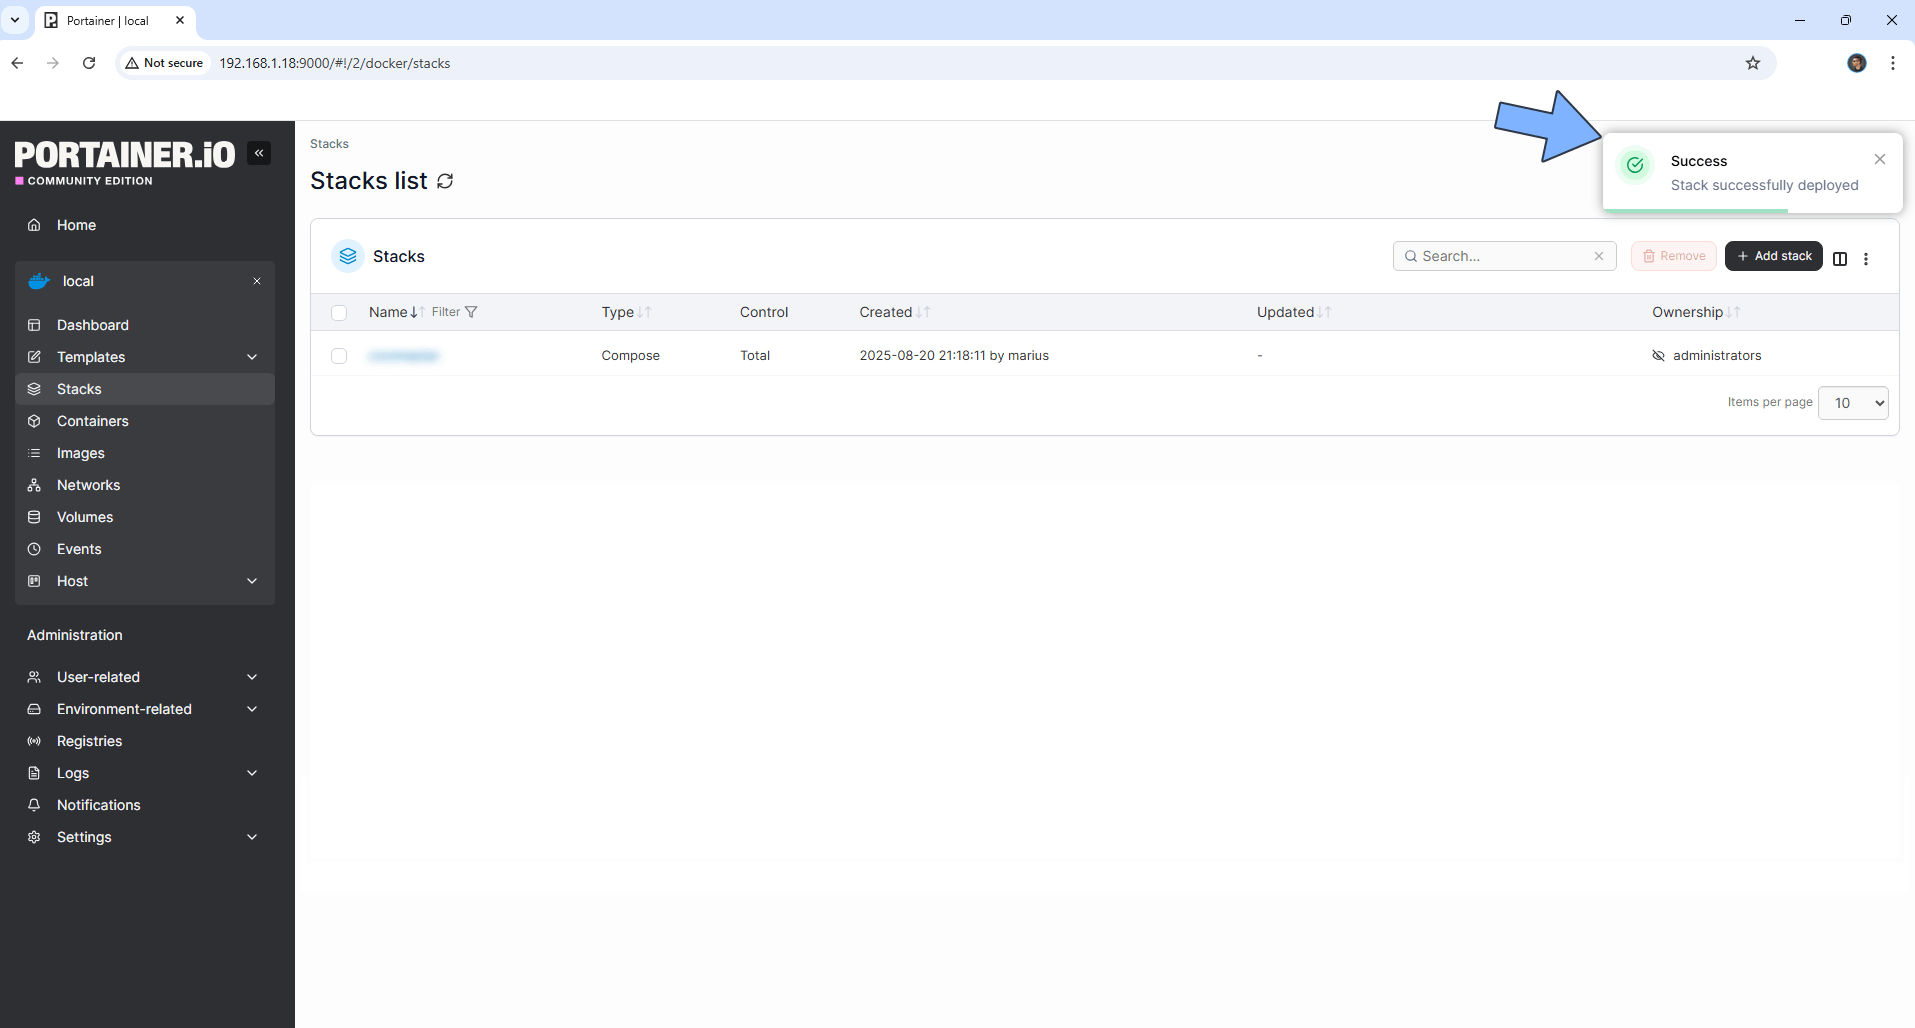
Scroll down on the page until you see a button named Deploy the stack. Click on it. Follow the instructions in the image below. The installation process can take up to a few minutes. It will depend on your Internet speed connection.

STEP 12
If everything goes right, you will see this message at the top right of your screen: “Success Stack successfully deployed“.
STEP 13
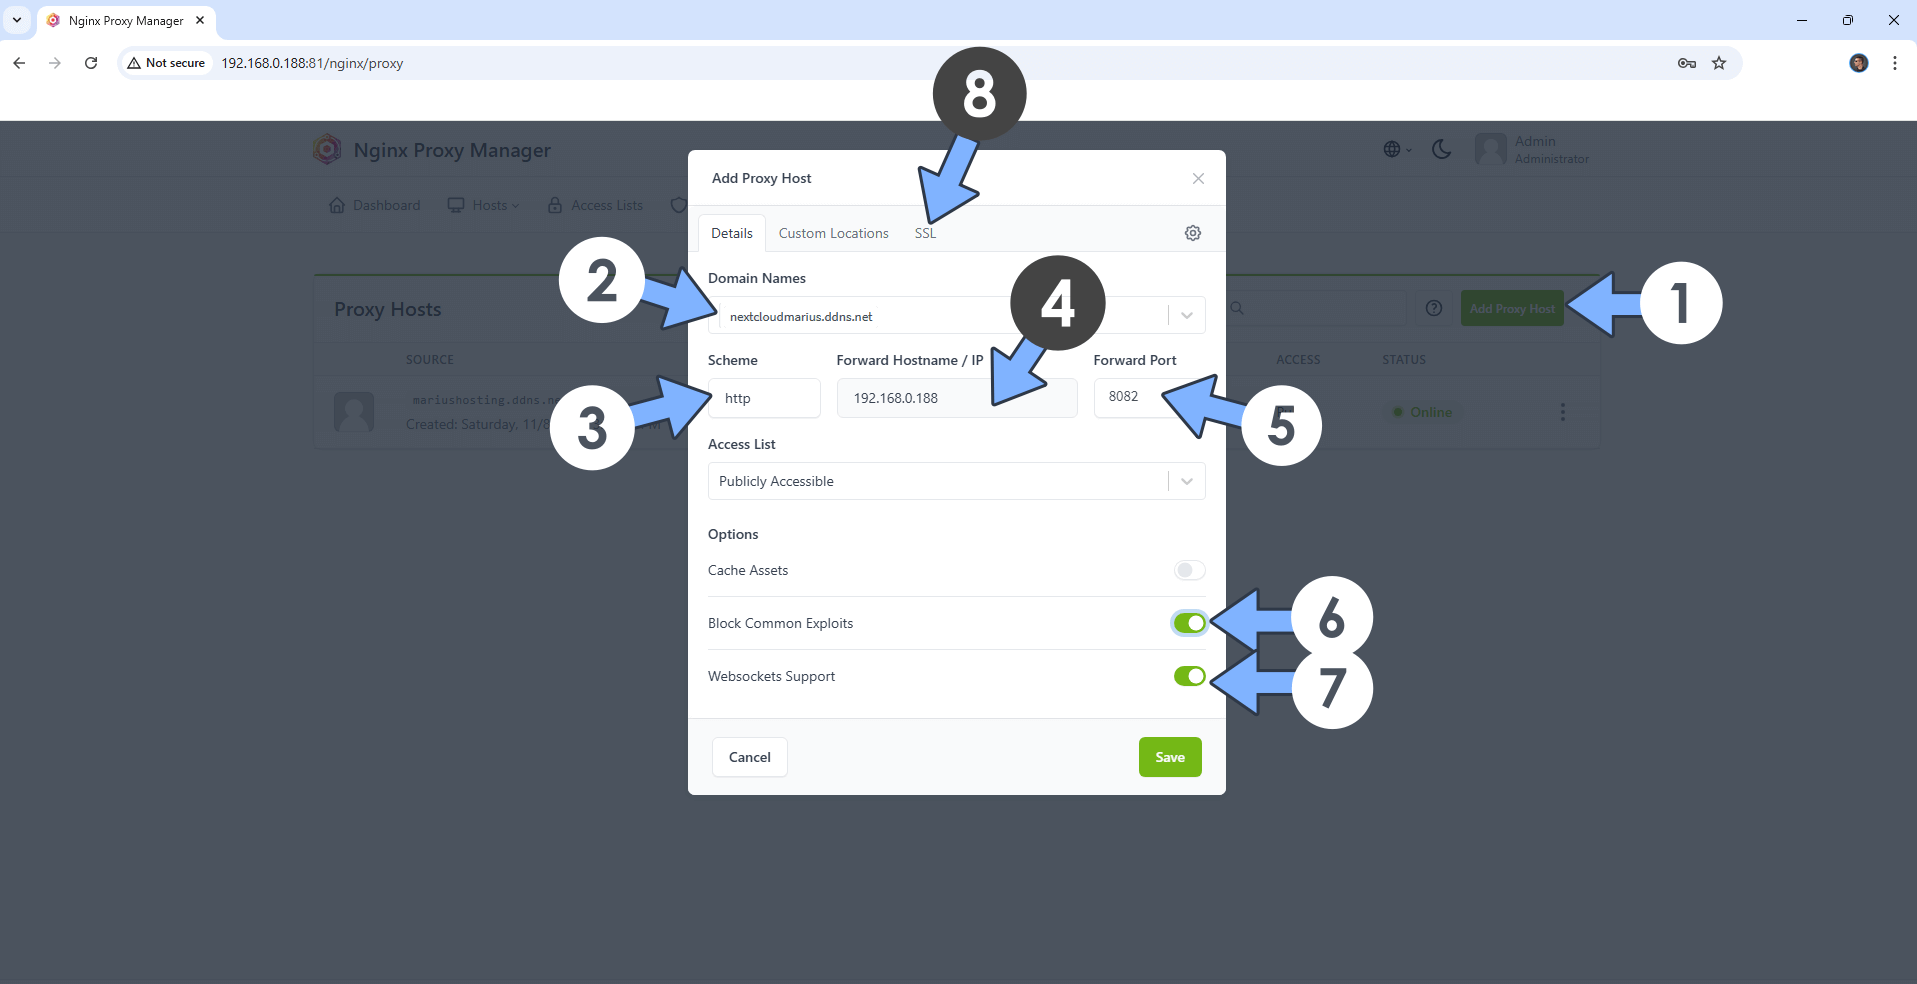
Open your Nginx Proxy Manager container that you have previously installed at STEP 3. Click Add Proxy Host. A new pop up window will open. Add the following details:
Domain Names: Type in your own noip domain name that you have previously created at STEP 4.
Scheme: http
Forward Hostname/IP: Type in the local NAS IP of your UGREEN NAS.
Forward Port: Type in the Nextcloud local Port that is 8082
Check Block Common Exploits
Check Websockets Support
Click the SSL tab. Follow the instructions in the image below.
STEP 14
After you click the SSL tab, add the following details:
SSL Certificate: Request a new SSL Certificate
Check: Force SSL
Check: HSTS Enabled
Check: HTTP/2 Support
Click Save. Follow the instructions in the image below.

STEP 15
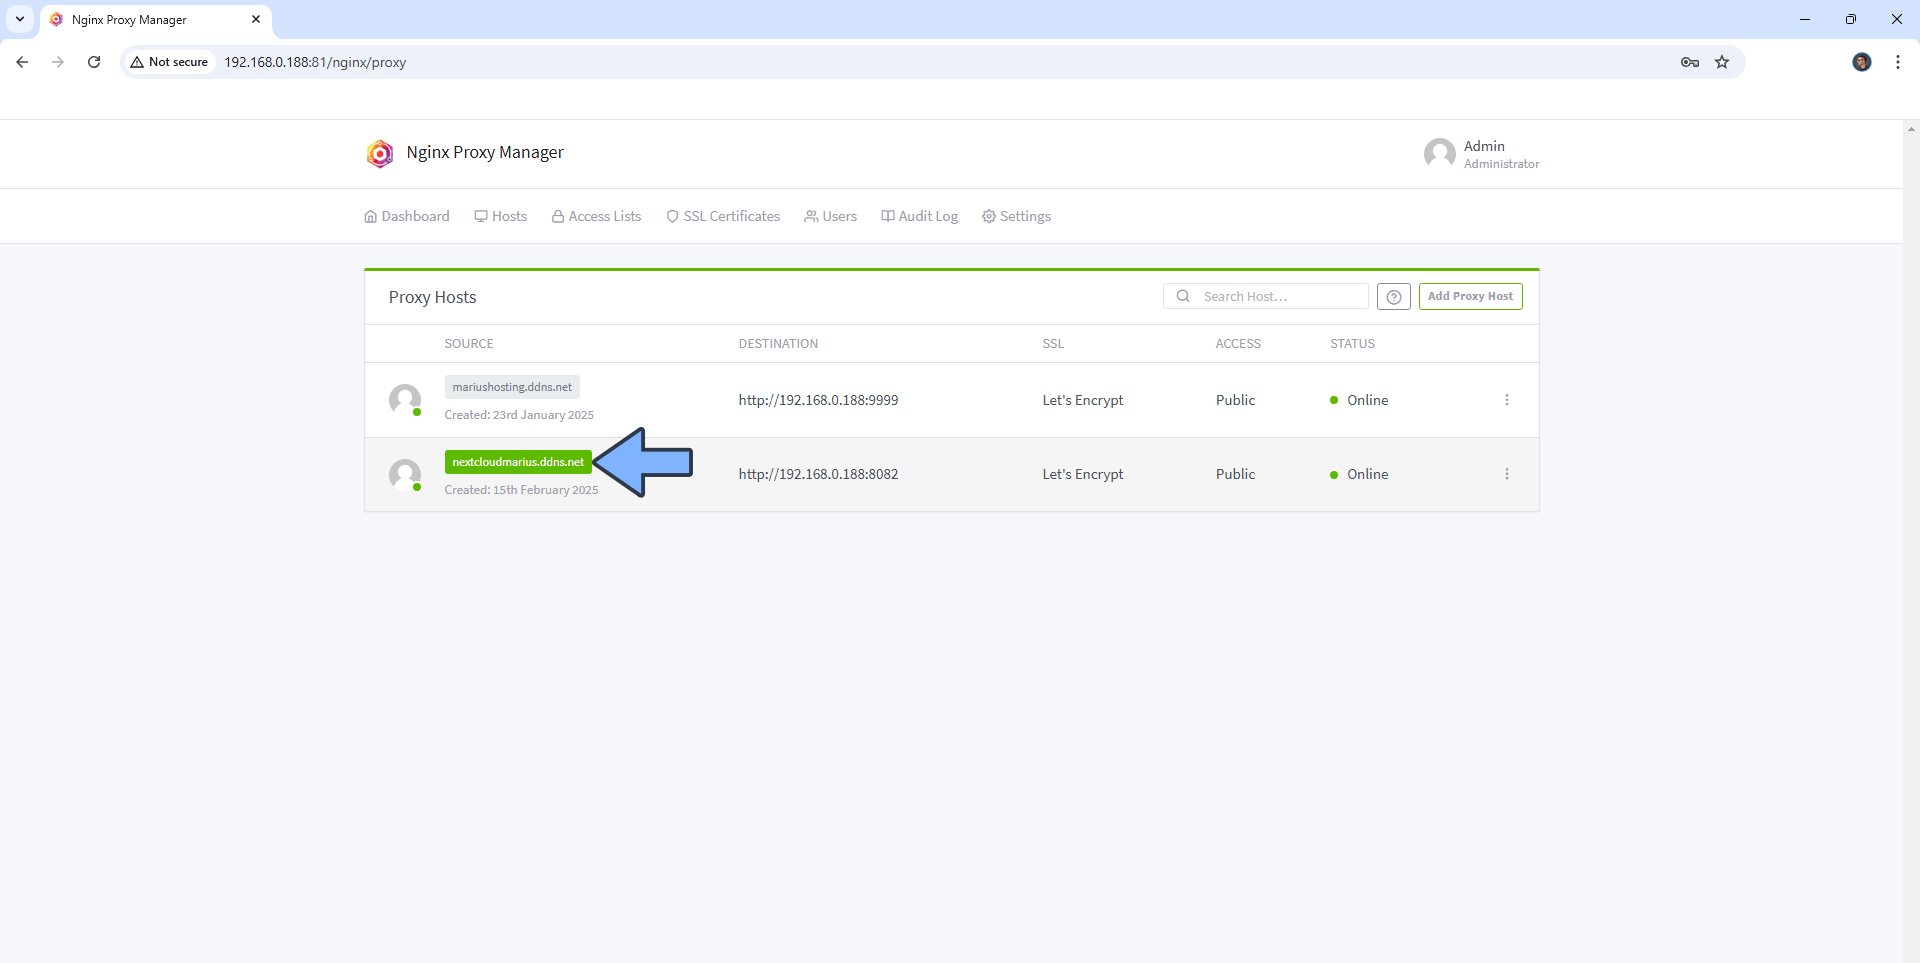
In the Proxy Hosts area, if everything goes right, you will see that your hostname has been generated. Click on it. Follow the instructions in the image below.
STEP 16
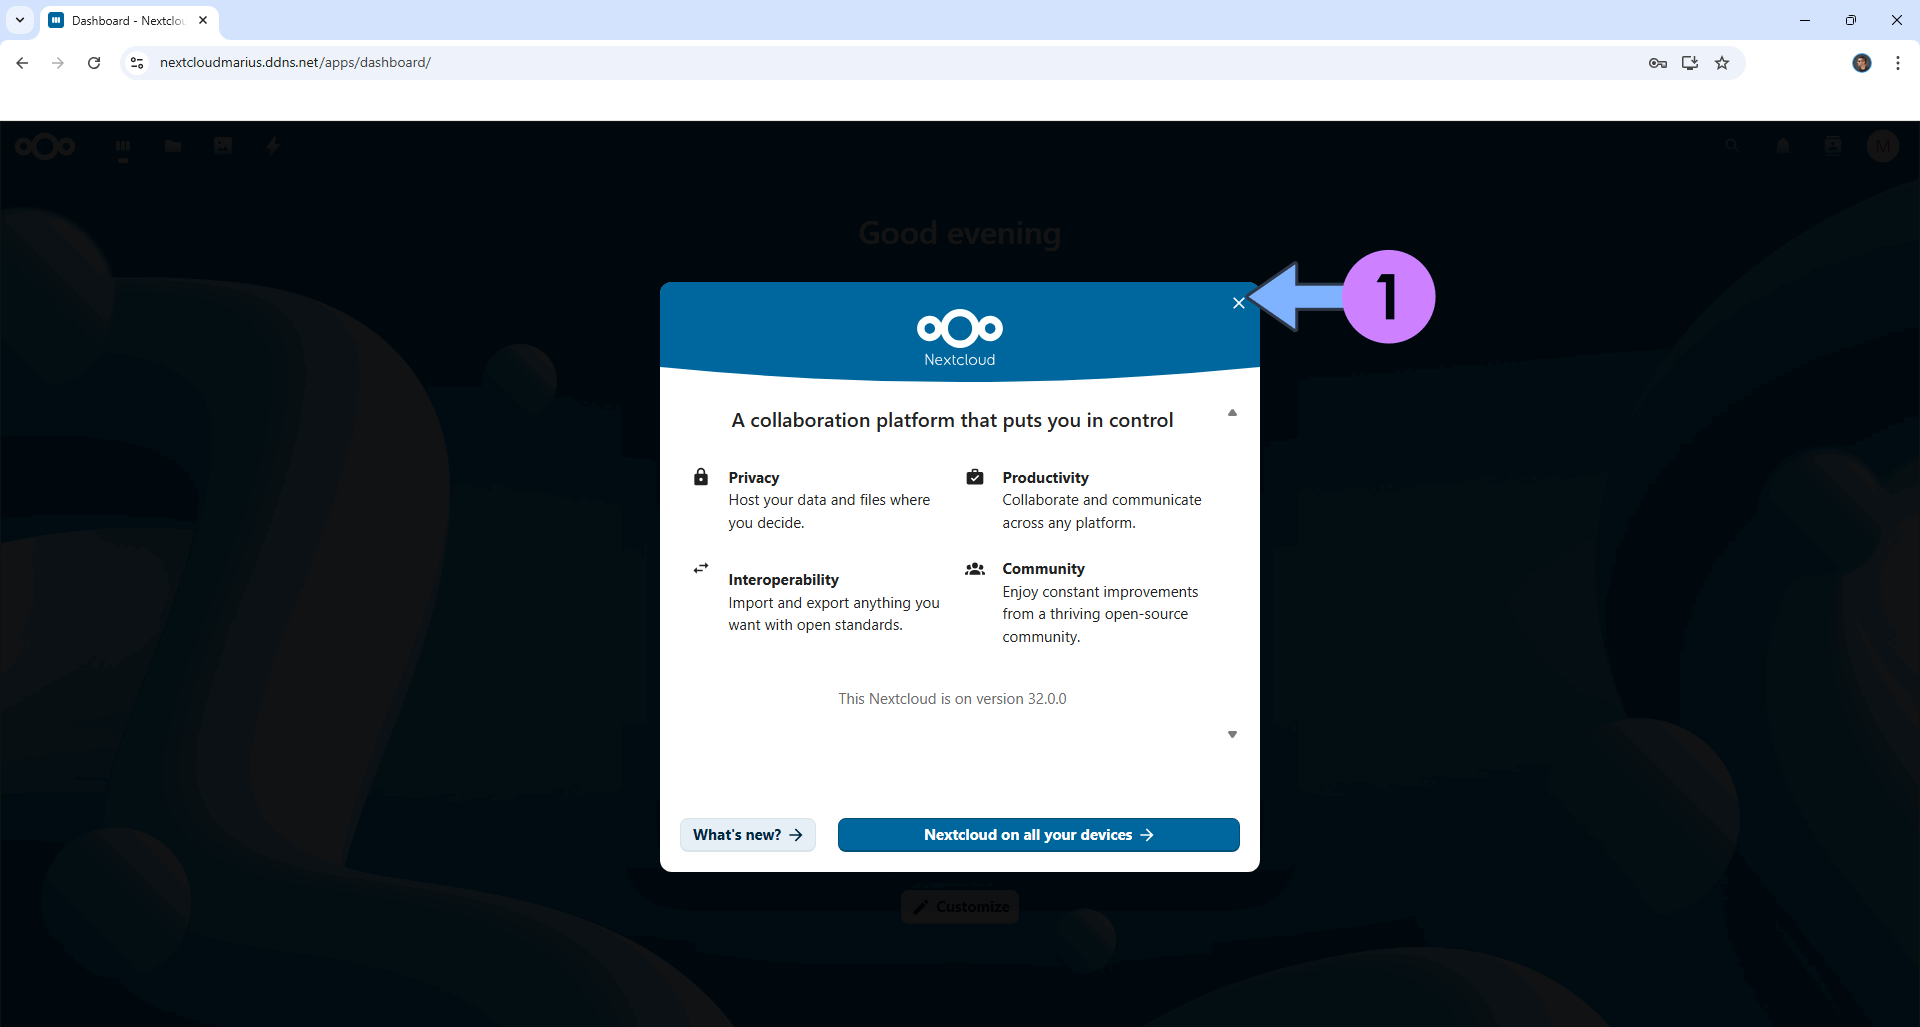
You should wait 3-4 minutes because the installation process will take some time. Now open your browser and type in your HTTPS/SSL certificate like this https://yourownhostname.ddns.net In my case it’s https://nextcloudmarius.ddns.net If everything goes right, you will see the Nextcloud main page. Type in your own Username (NEXTCLOUD_ADMIN_USER) and Password (NEXTCLOUD_ADMIN_PASSWORD) that you have previously added at STEP 10, then click Log in. Follow the instructions in the image below.

Close the pop-up. Follow the instructions in the image below.
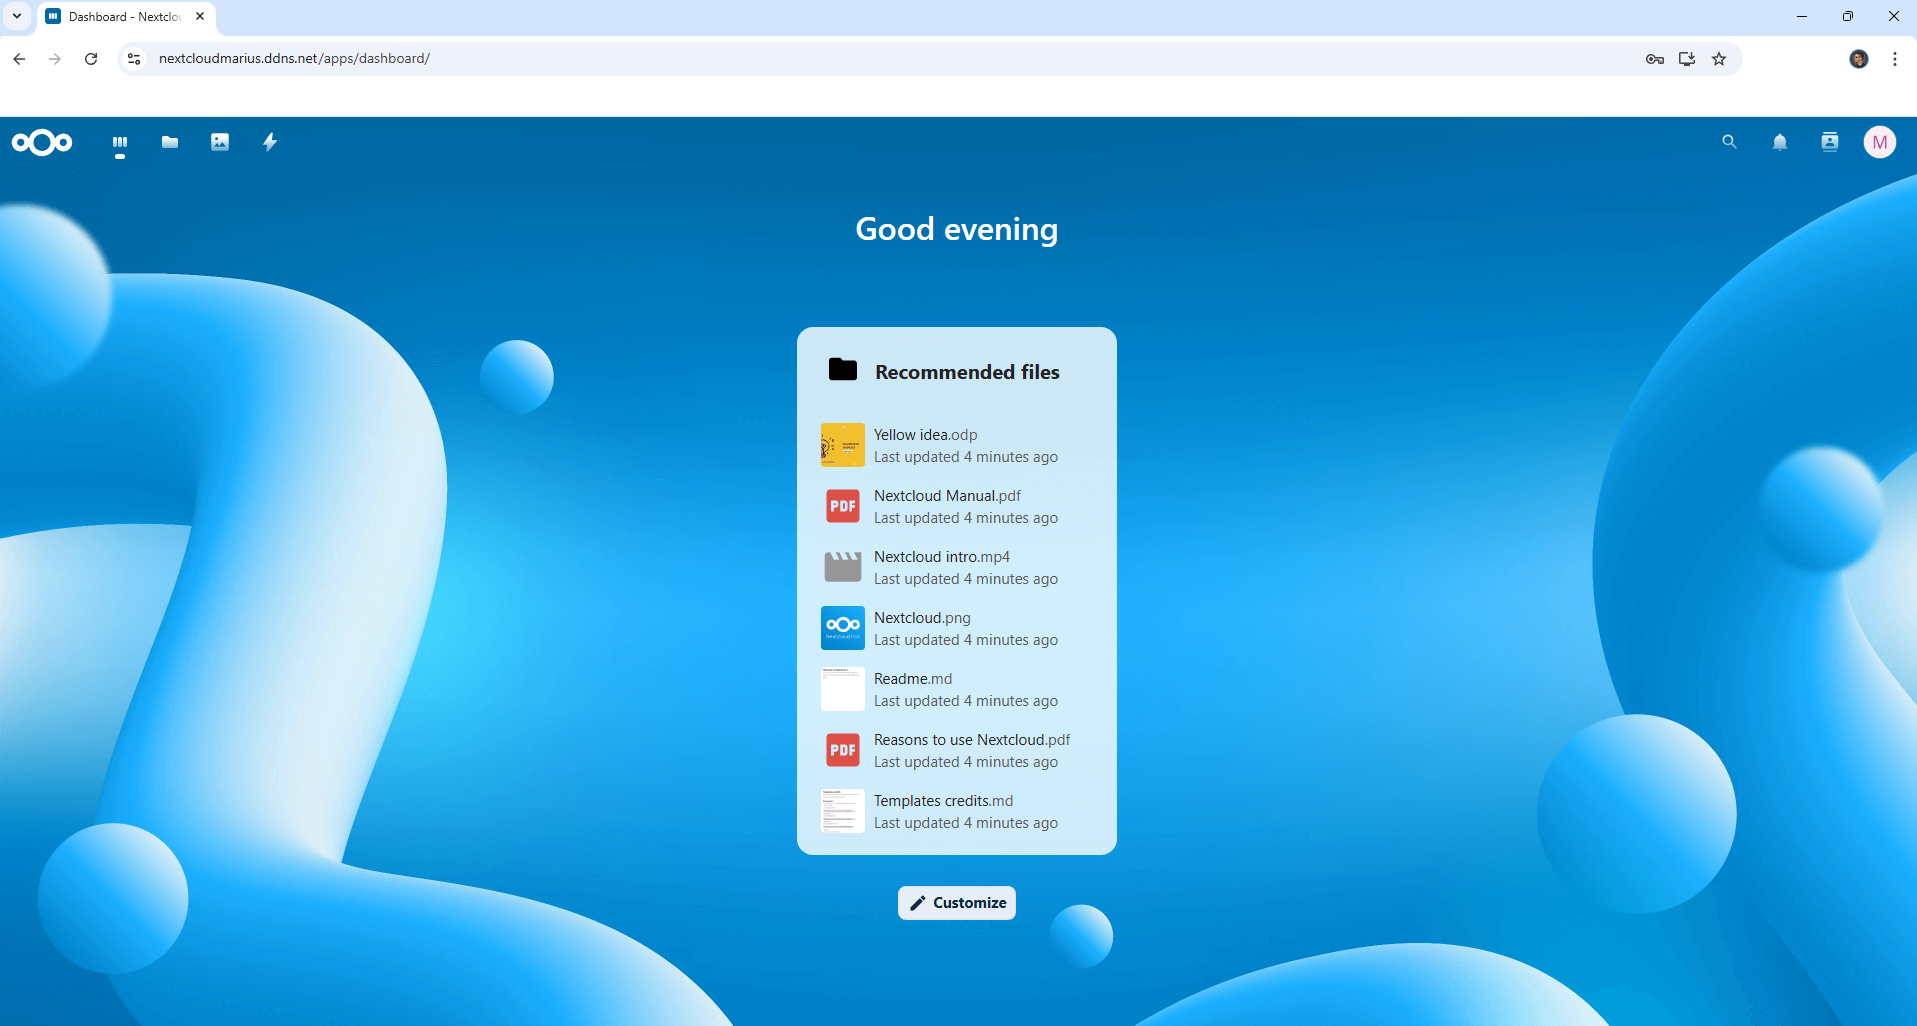
STEP 17
Your Nextcloud Installation will look like this.
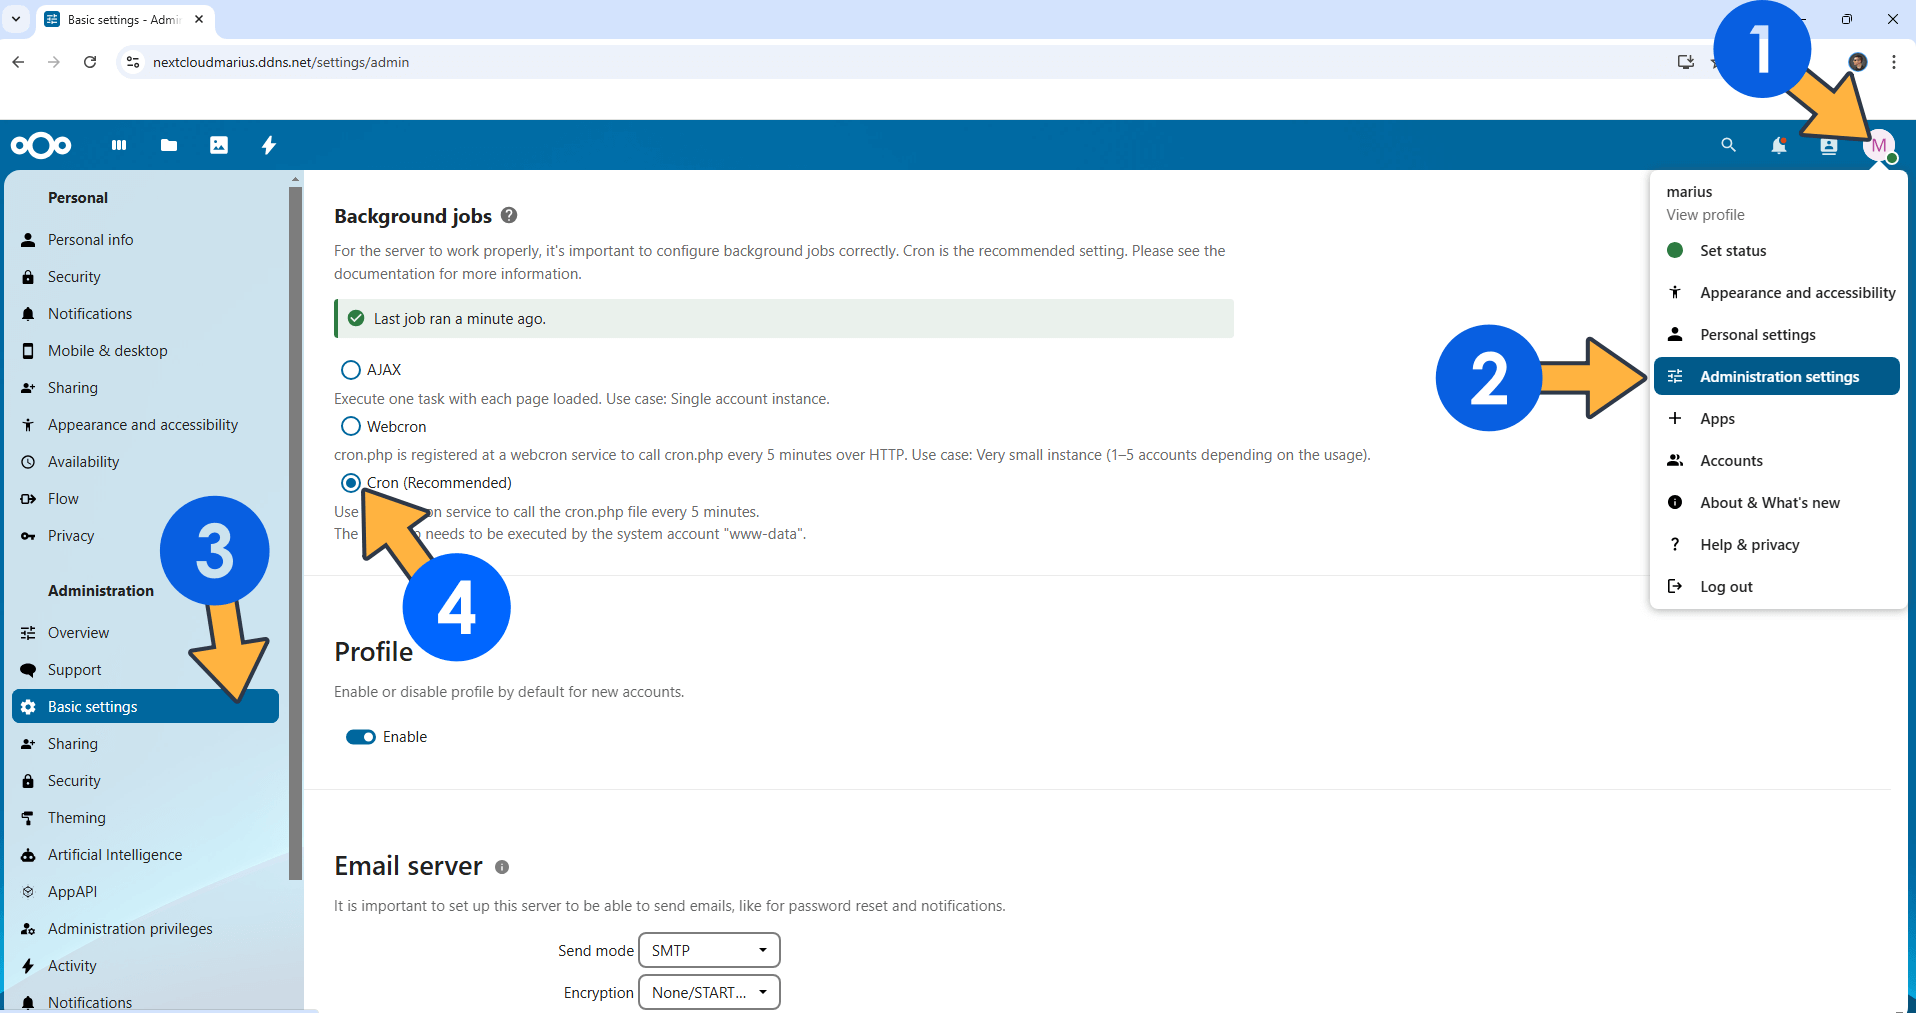
STEP 18
Activate Cronjobs. At the top right of the page click on your profile icon then Administration settings. On the left sidebar click Basic settings then check Cron. Follow the instructions in the image below.
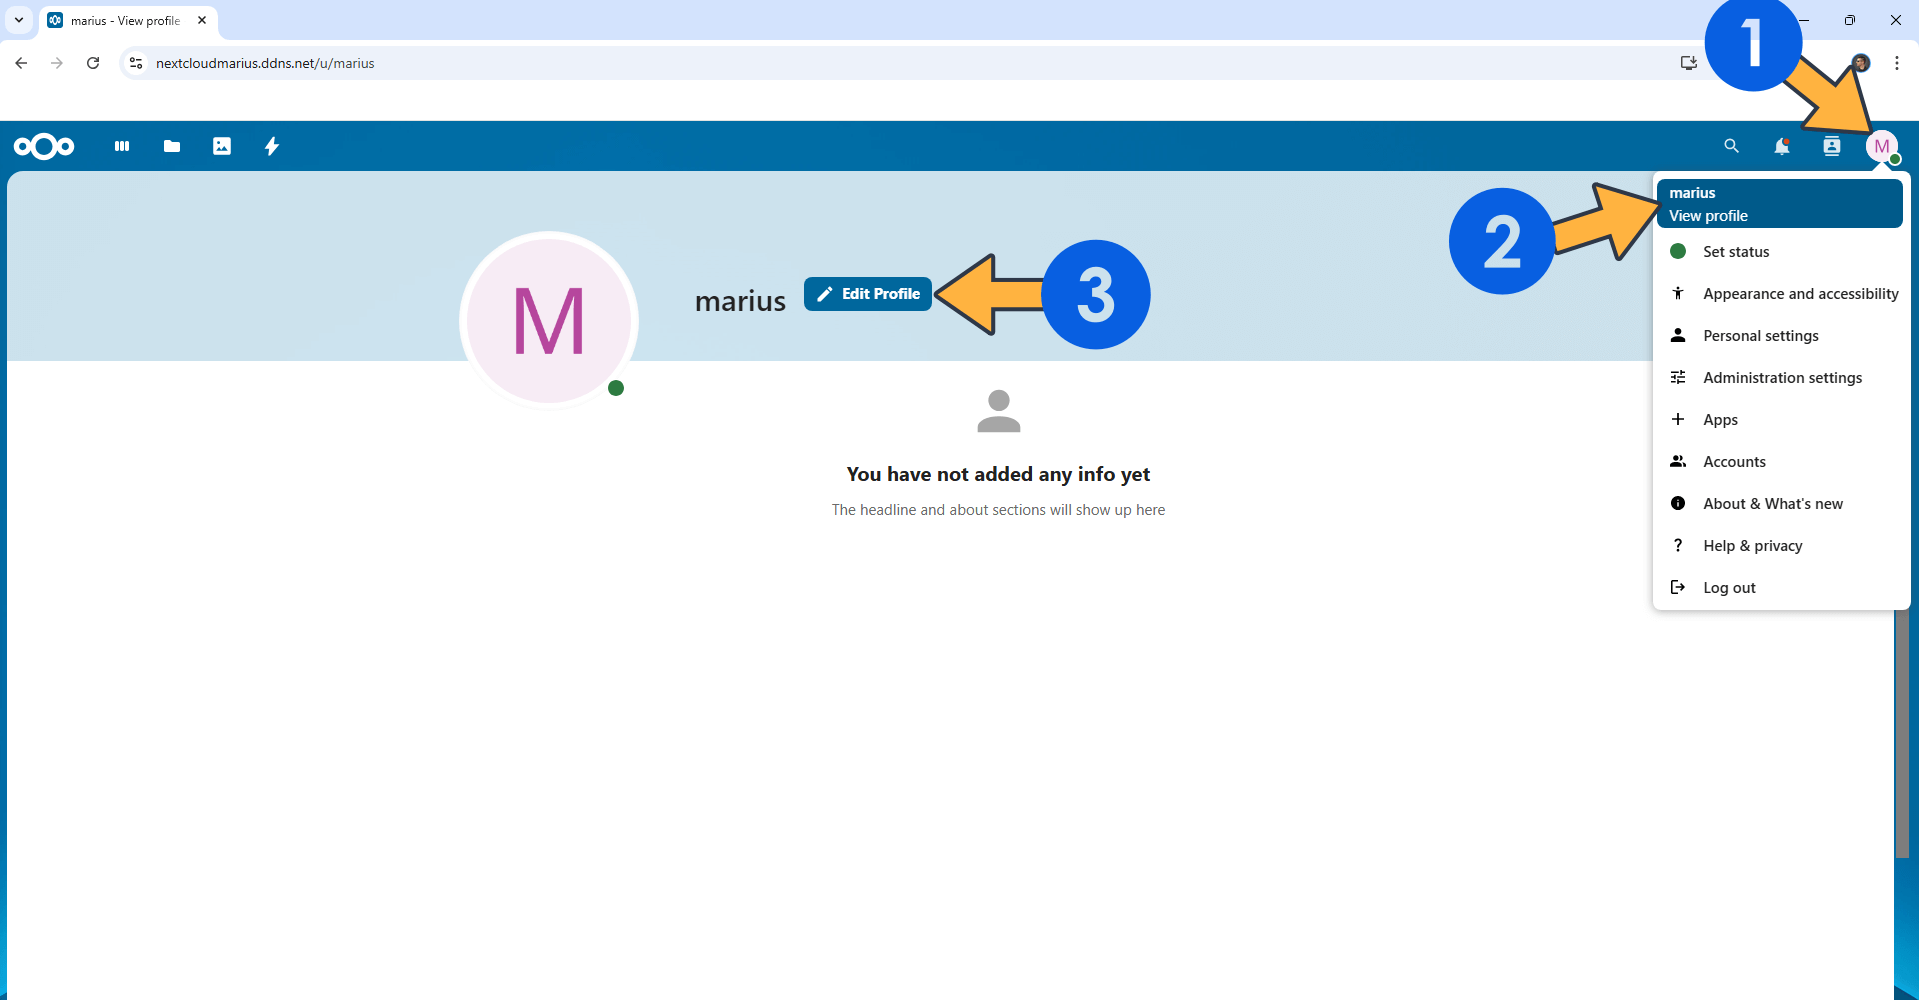
STEP 19
At the top right of the page click View profile then Edit Profile. Follow the instructions in the image below.
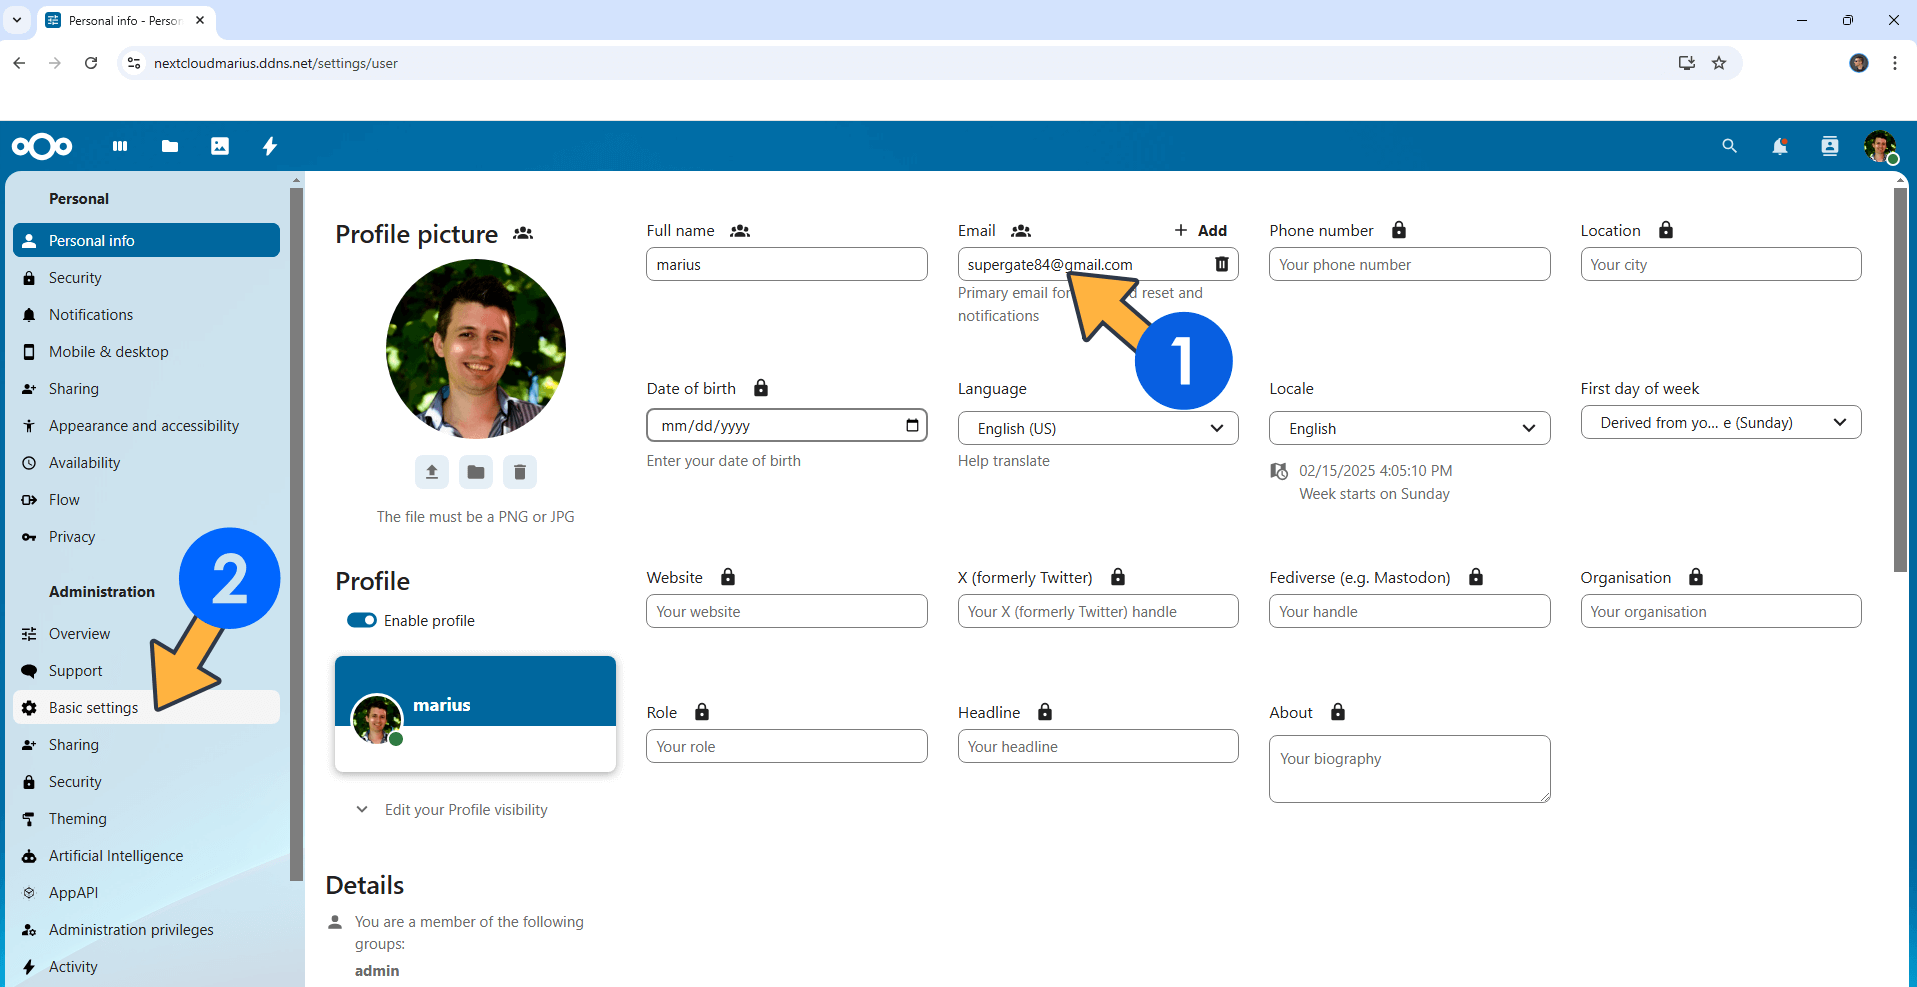
STEP 20
Type in your own Gmail Address then click Basic settings. Follow the instructions in the image below.
STEP 21
Follow my step by step guide on how to activate SMTP for your Gmail account. This step is mandatory. Note: If you don’t want to use the easiest way for SMTP with Google and you already have SMTP details from your own Mail Server, you can just skip this STEP and use your personalized email SMTP details instead.
STEP 22
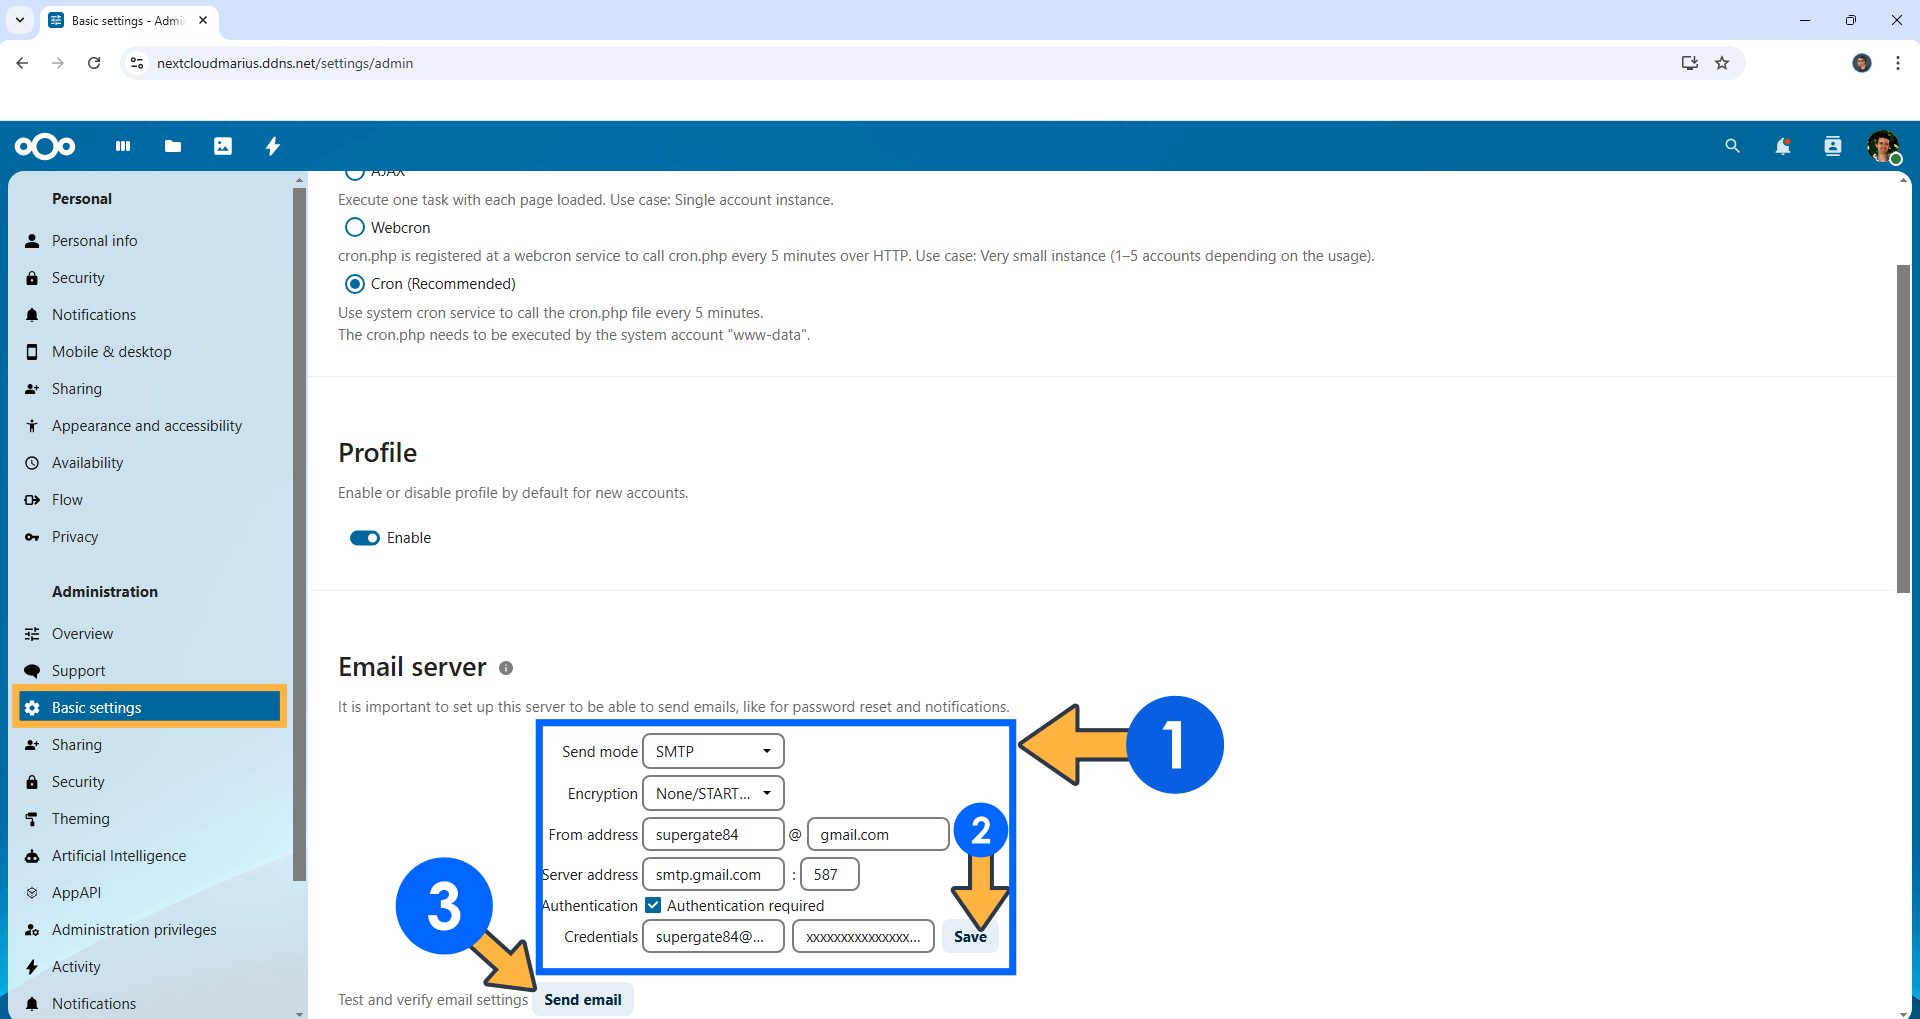
On the Email server area type in your own Email details then click Save. Click Send email. Follow the instructions in the image below. ⚠️Warning: If you forget to click Save, your SMTP details will not be saved.
STEP 23
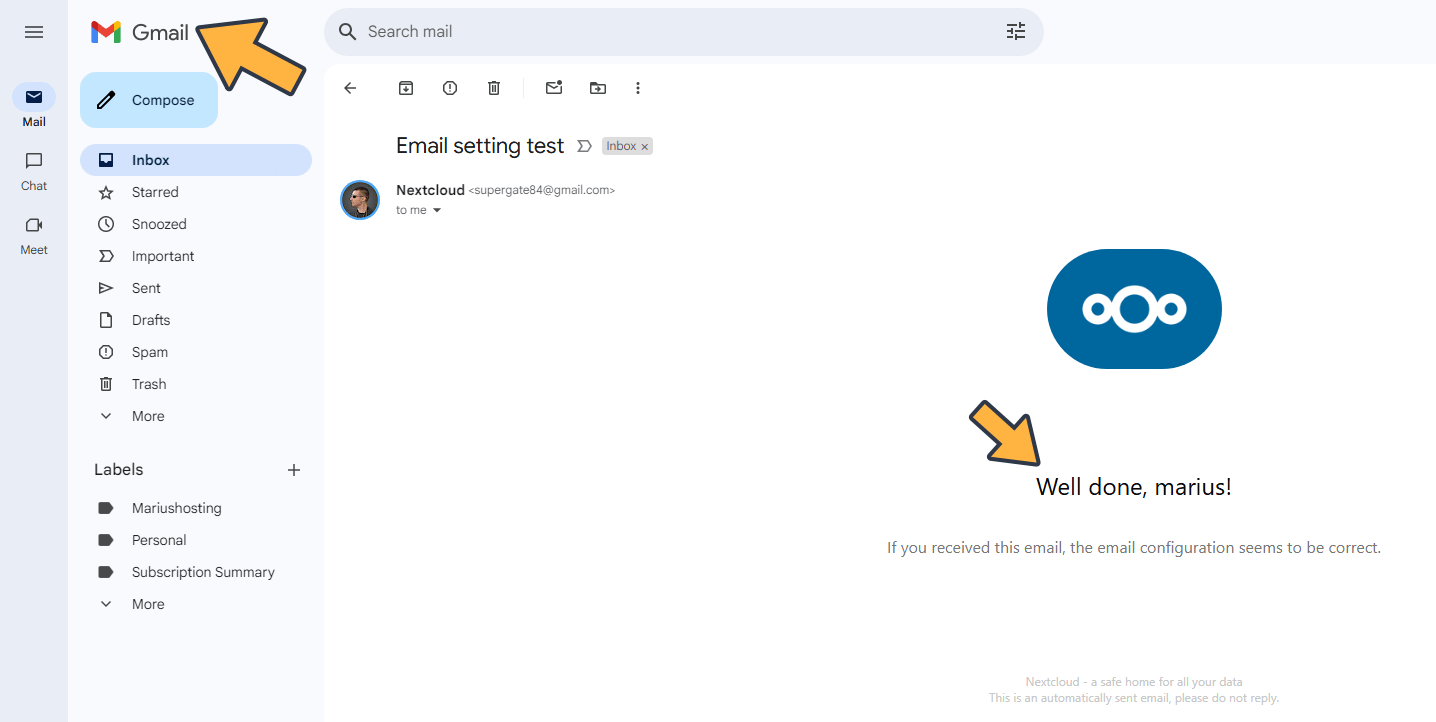
Check your email. Follow the instructions in the image below.
Enjoy Nextcloud on your UGREEN NAS!
⚠️Mandatory Add Read & Write Permissions to the Docker Folder. If you have already added the Read and Write Permissions to the Docker Folder, skip this STEP.
🆙Note/Update/Container: How to Update Your Docker Containers on UGREEN NAS Using Portainer.
🐳Note: How to Create Docker Shortcuts on Desktop.
🆕Note: How to Update Portainer to the latest version.
🆕Note: How to Clean Docker.
This post was updated on Monday / June 29th, 2026 at 8:12 PM