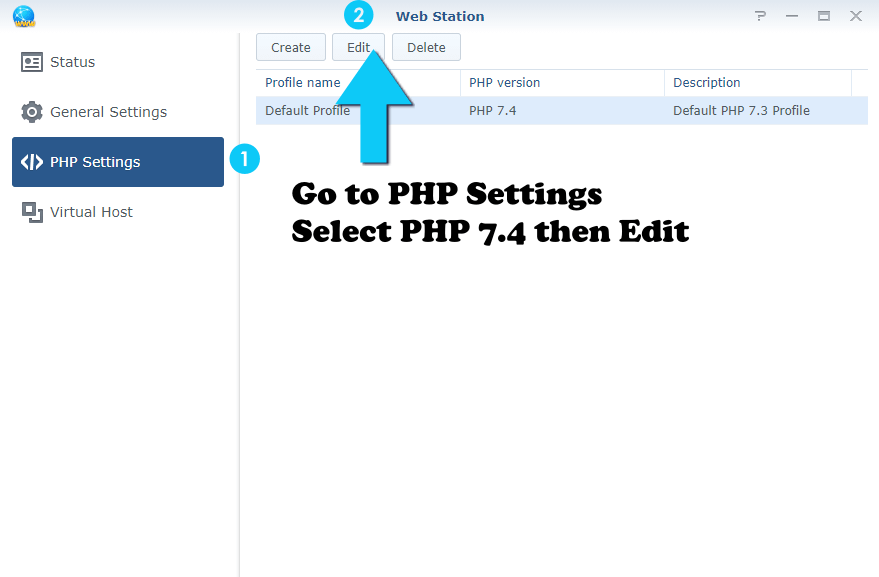
If you have WordPress installed on your Synology with DSM 6.2.4, surely you have wondered which of the PHP extensions you need to activate for it to work. Below is a short guide that explains what you need to activate. First of all, open the application called Web Station. Once opened, go to PHP Settings then Edit. Follow the instructions in the image below. (The images and instructions below work for PHP 7.3 – 7.2 – 7.1 – 7.0 too, even though they are about PHP 7.4).

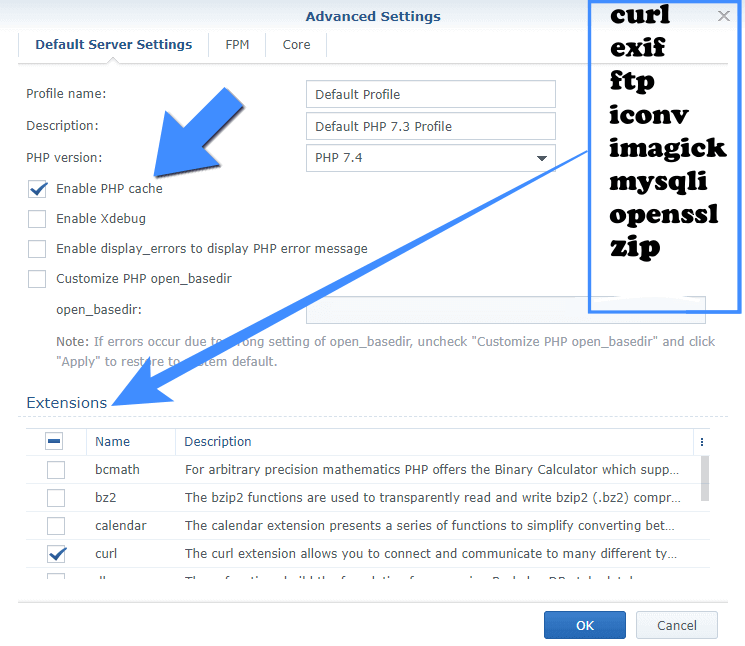
Once you click on Edit, the following screen will open:

PHP Settings: Set PHP version to 7.4 – Enable PHP cache. Select only these extensions to make WordPress work smoothly:
- curl
- exif
- ftp
- iconv
- imagick
- mysqli
- openssl
- zip
Press the OK button.
Note: Other core modules are always activated by default on your Synology NAS. If you want to see all PHP extensions installed on your Synology NAS here is the output for php -m:
root@username_NAS:~# php -m
This post was updated on Sunday / December 12th, 2021 at 7:45 PM
