
AdGuard is DNS ad blocking similar to Pi-Hole. It’s a privacy protection software which comprises open-source and shareware products that protect Microsoft Windows, Linux, OS X, Android and iOS users from unwanted ads, pop-ups, banners, as well as from tracking, obscene content, malware and phishing. Over 5 million people are reported to be using the software in 2018 and 7 million in 2019 with very fast growth. AdGuard is not only an ad blocker, but a whole ad blocking and privacy protection suite, a must-have product if you have a UGREEN NAS device. AdGuard Home intercepts and filters DNS requests. It works as a DNS server and prevents all the devices in a home network from connecting to the servers that track user browsing. In this step by step guide I will teach you how to install AdGuard on your UGREEN NAS device using Docker & Portainer.
STEP 1
Please Support My work by Making a Donation.
STEP 2
⚠️Mandatory Add Read & Write Permissions to the Docker Folder. If you have already added the Read and Write Permissions to the Docker Folder, skip this STEP.
STEP 3
⚠️Mandatory: Update your UGREEN NAS Firmware to the latest version. Go to Control Panel / Update and update your NAS with the latest Firmware.
STEP 4
Install Portainer using my step by step guide. If you already have Portainer installed on your UGREEN NAS, skip this STEP. Attention: Make sure you have installed the latest Portainer version.
STEP 5
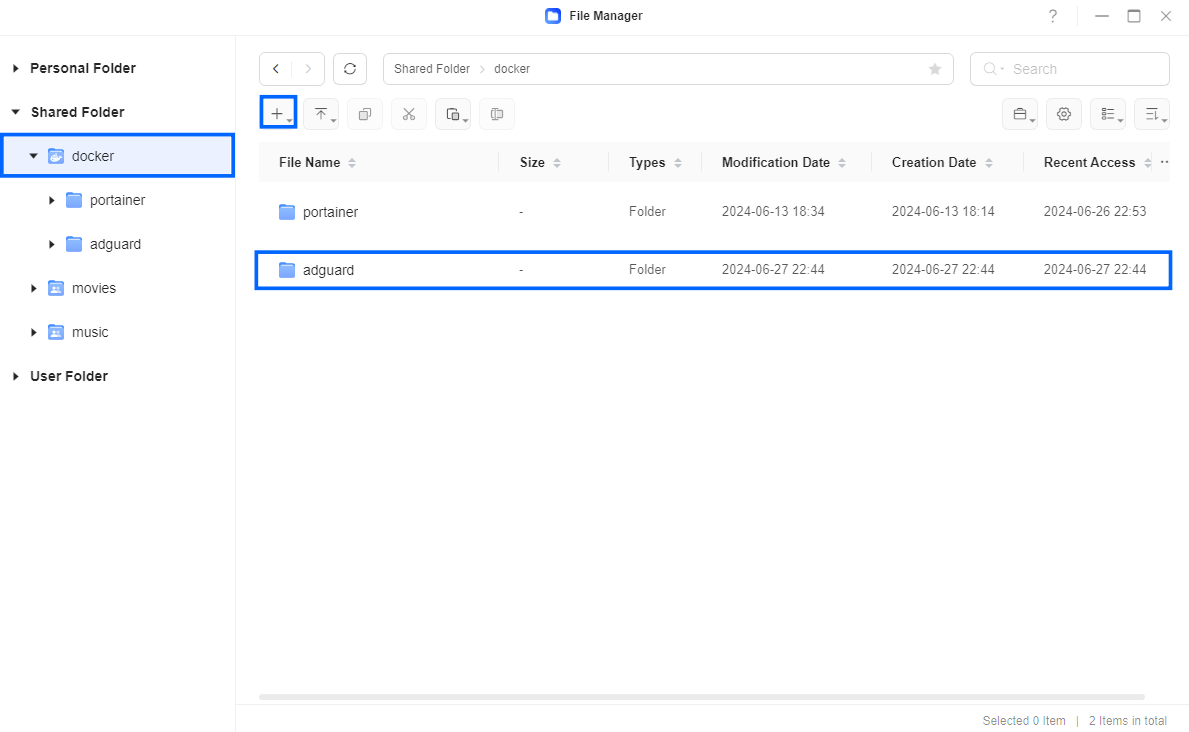
Go to File Manager and open the docker folder. Inside the docker folder, create one new folder and name it adguard. Follow the instructions in the image below.
Note: Be careful to enter only lowercase, not uppercase letters.
STEP 6
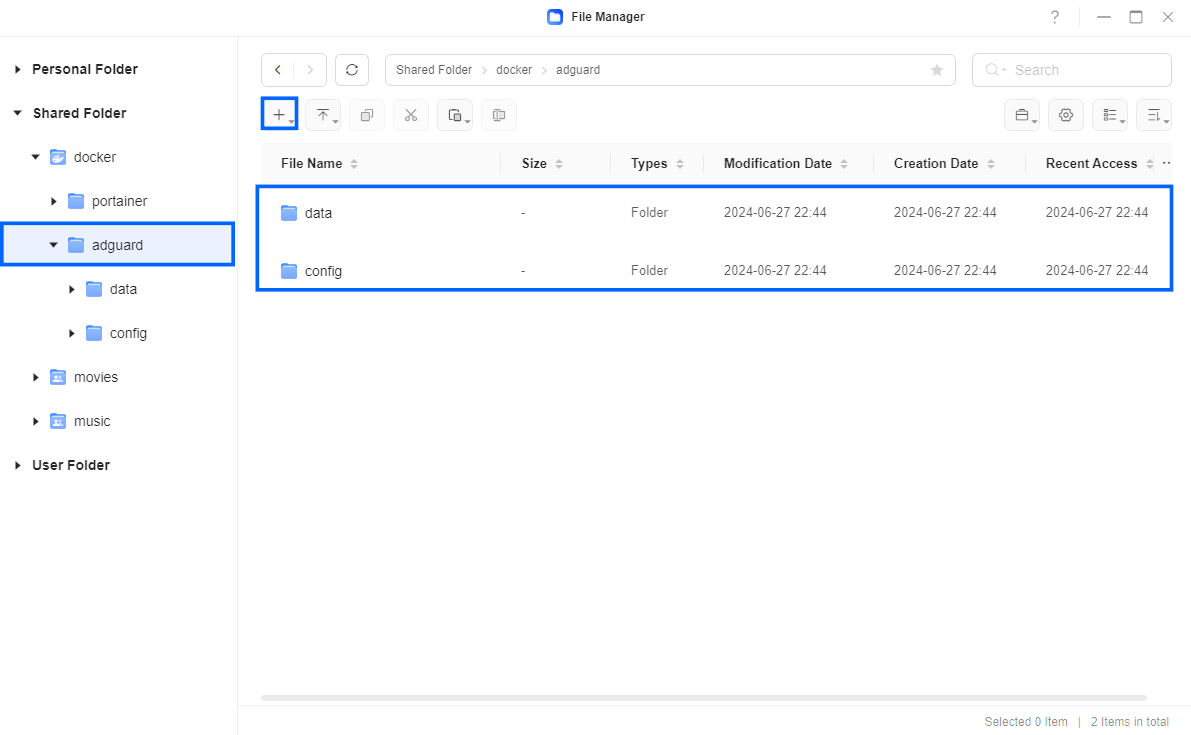
Now create two new folders inside the adguard folder that you previously created at STEP 5 and name them config and data. Follow the instructions in the image below.
Note: Be careful to enter only lowercase, not uppercase letters.
STEP 7
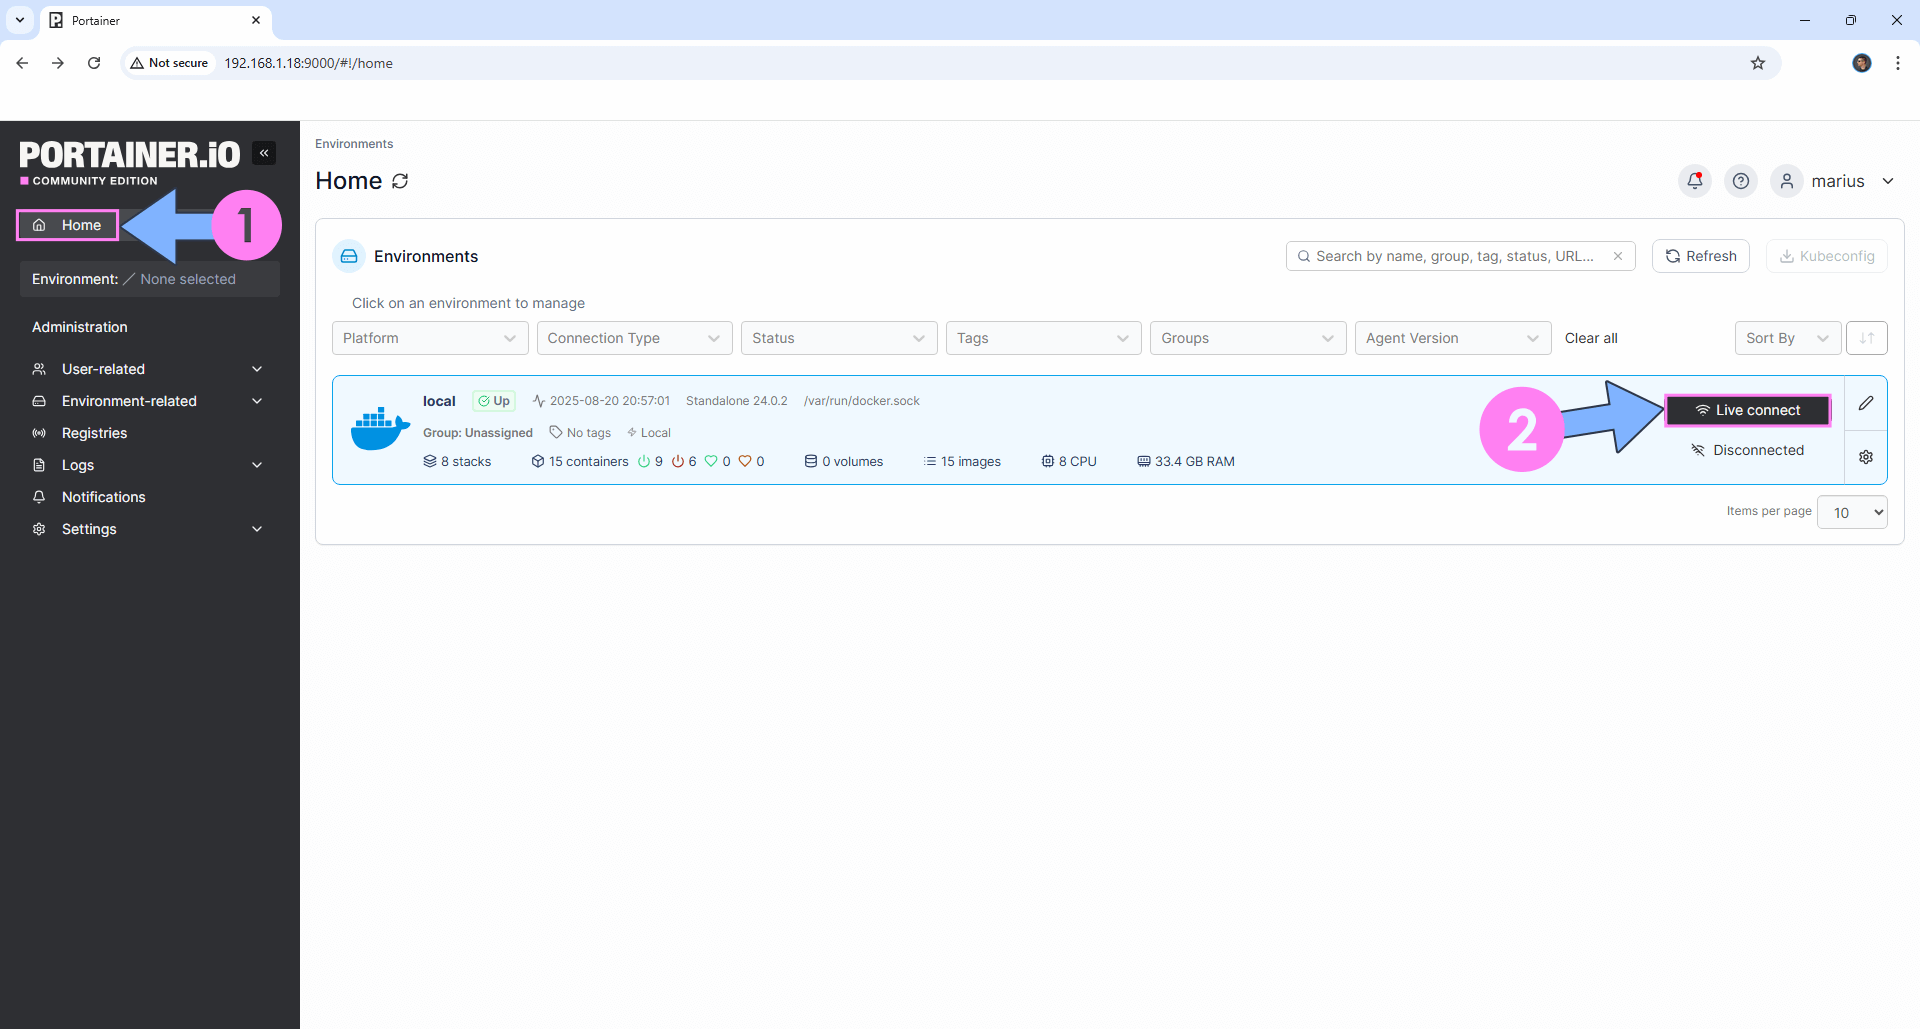
Log into Portainer using your username and password. On the left sidebar in Portainer, click on Home then Live connect. Follow the instructions in the image below.
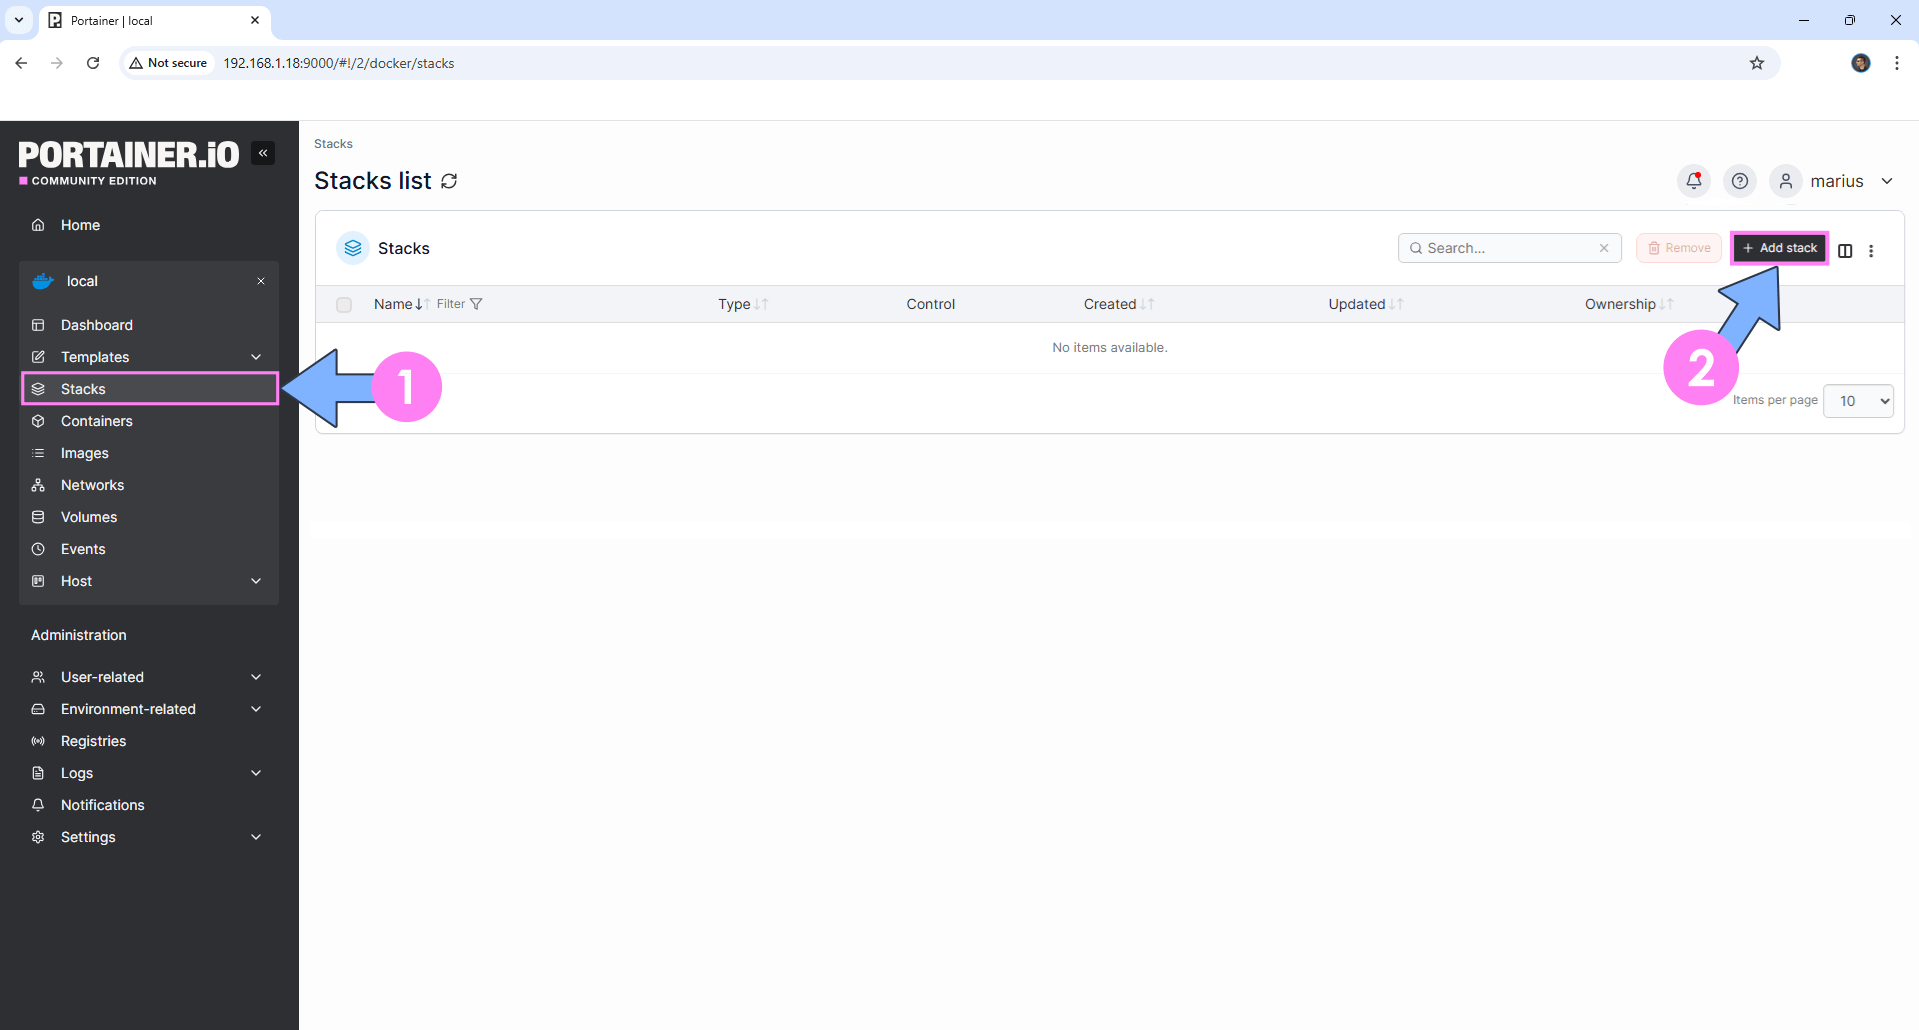
On the left sidebar in Portainer, click on Stacks then + Add stack. Follow the instructions in the image below.
STEP 8
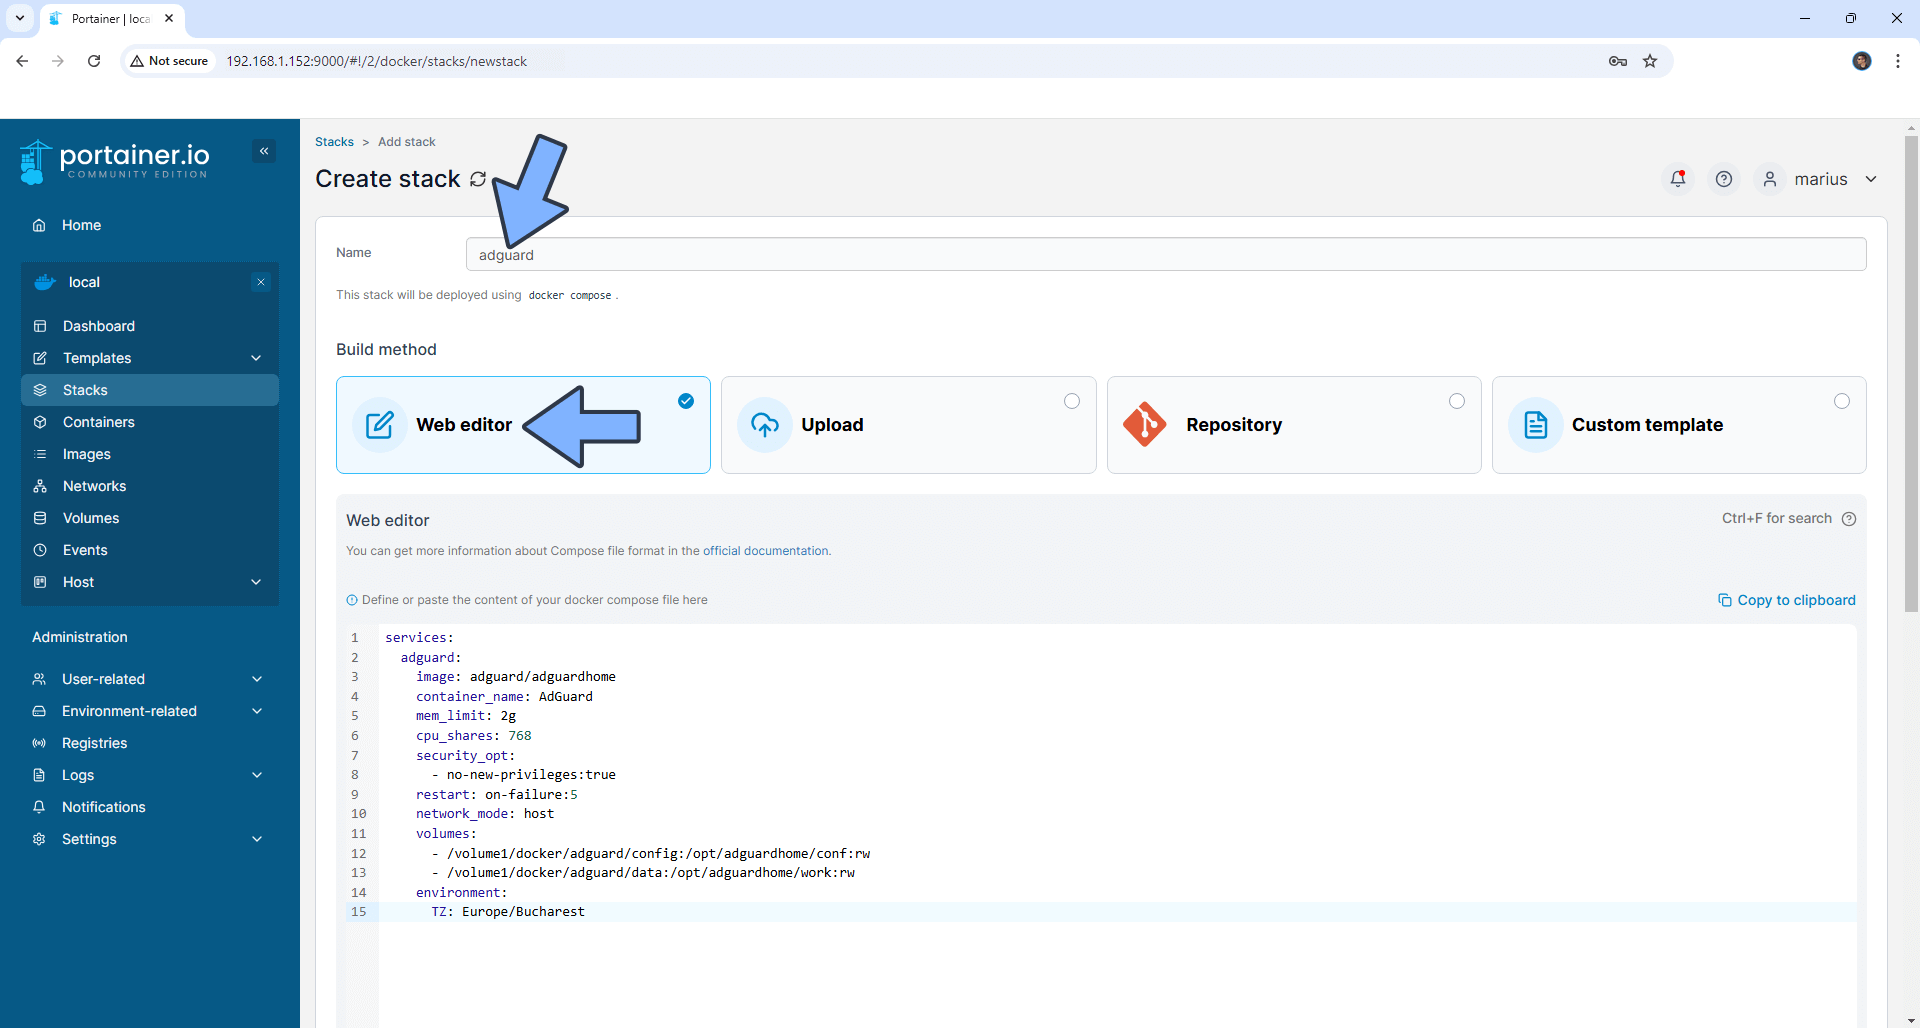
In the Name field type in adguard. Follow the instructions in the image below.
services:
  adguard:
    image: adguard/adguardhome
    container_name: AdGuard
    mem_limit: 2g
    cpu_shares: 768
    security_opt:
      - no-new-privileges:true
    restart: on-failure:5
    network_mode: host
    volumes:
      - /volume1/docker/adguard/config:/opt/adguardhome/conf:rw
      - /volume1/docker/adguard/data:/opt/adguardhome/work:rw
    environment:
      TZ: Europe/Bucharest
Note: Before you paste the code above in the Web editor area below, change the value for TZ. (Select your current Time Zone from this list.)
STEP 9
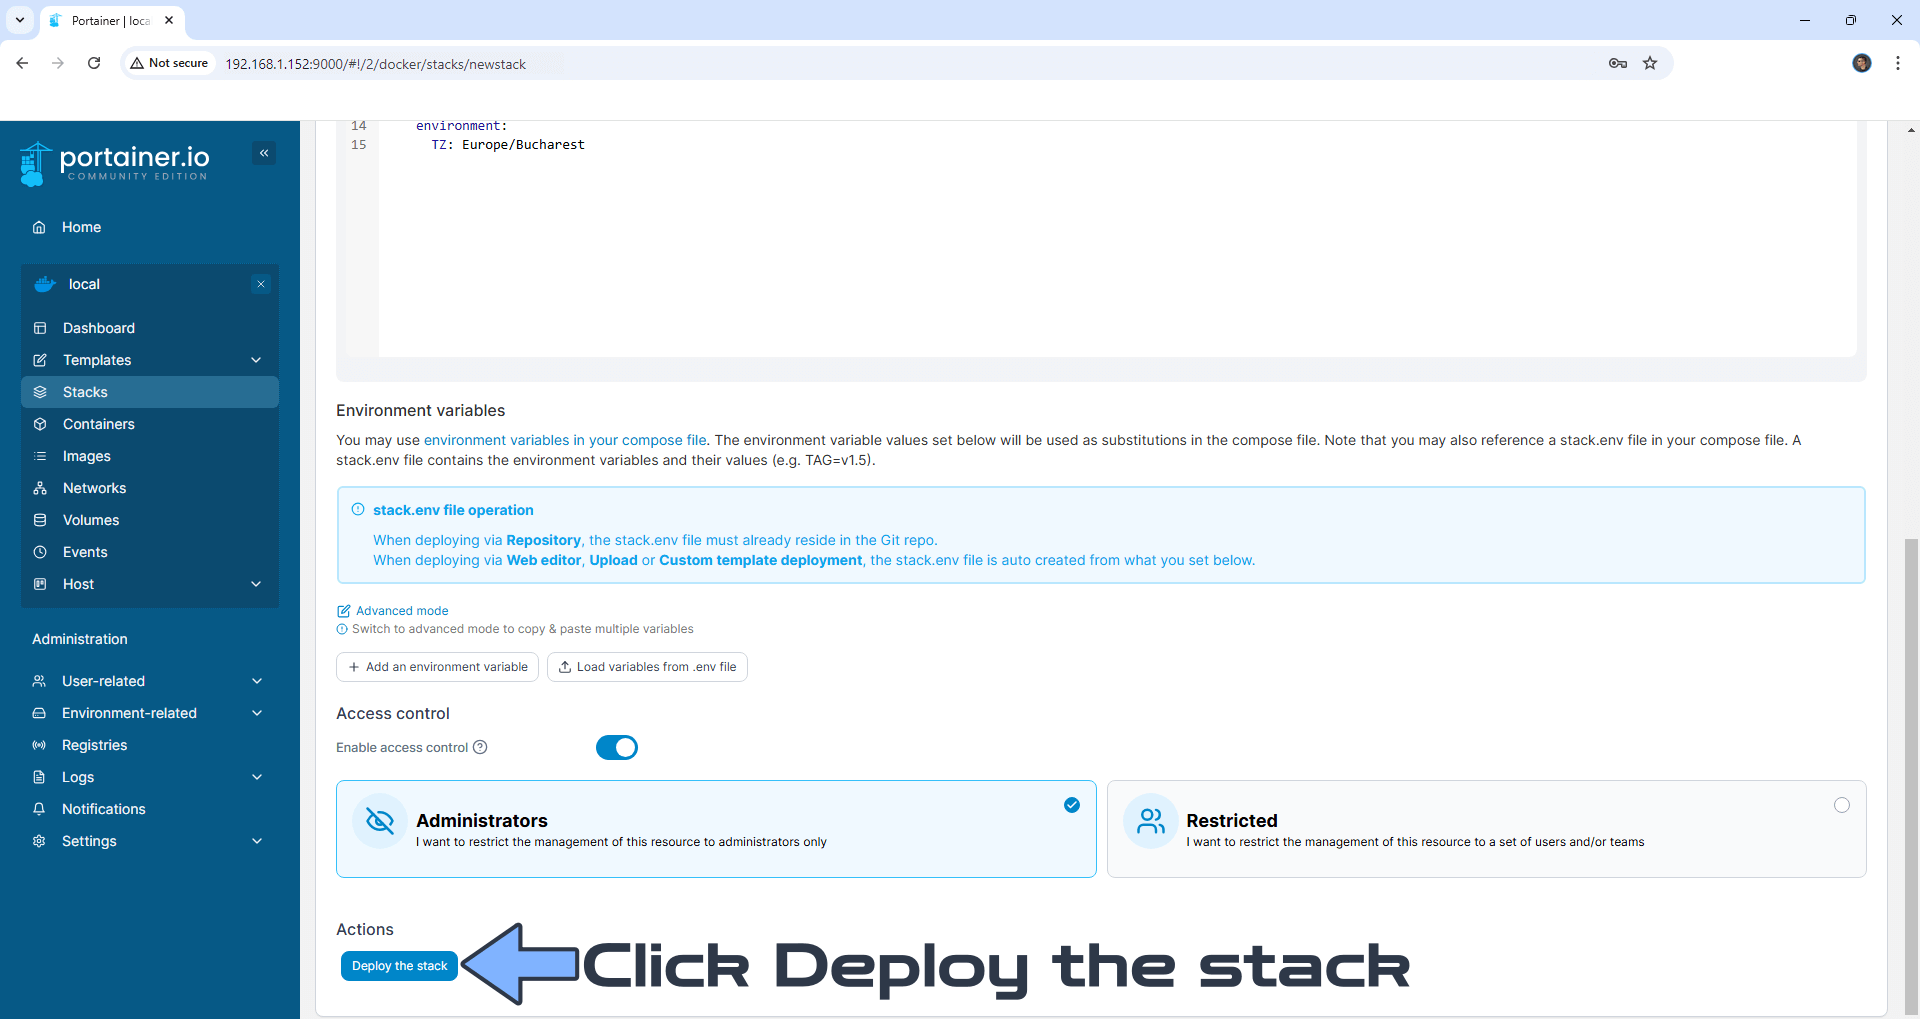
Scroll down on the page until you see a button named Deploy the stack. Click on it. Follow the instructions in the image below. The installation process can take up to a few minutes. It will depend on your Internet speed connection.
STEP 10
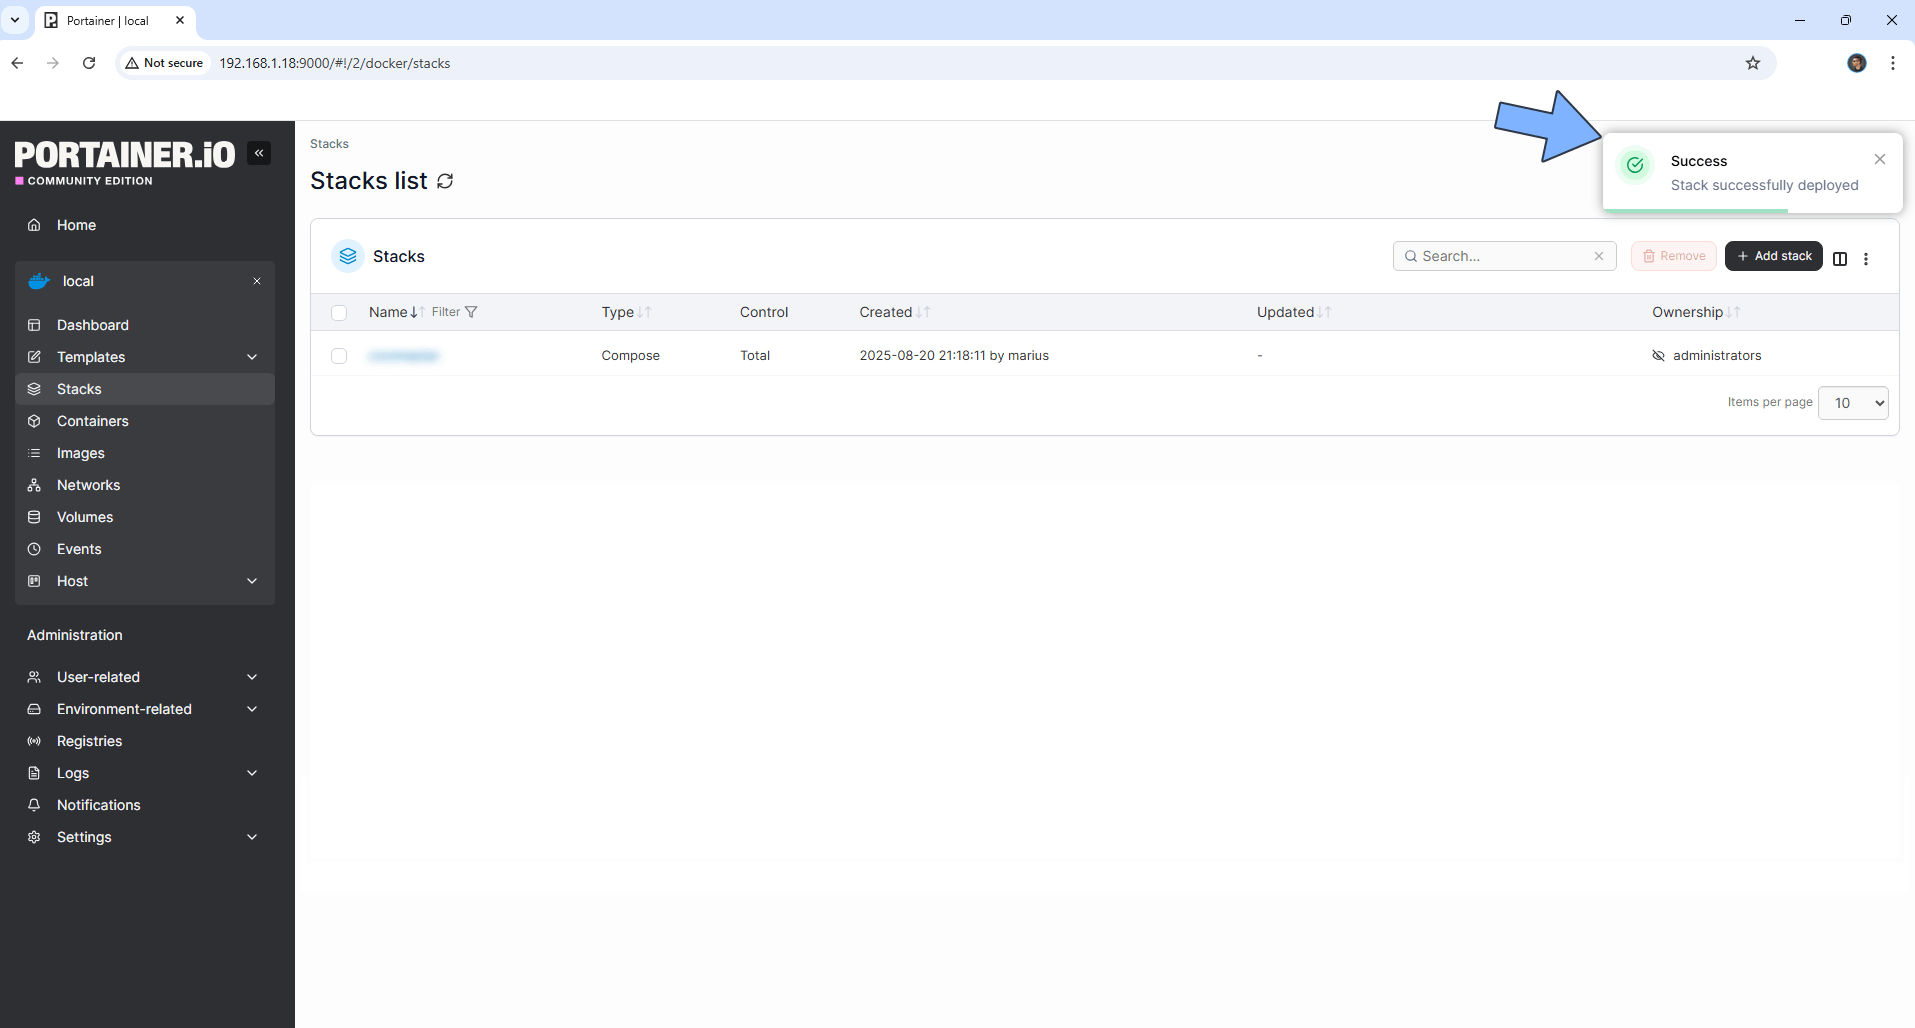
If everything goes right, you will see the following message at the top right of your screen: “Success Stack successfully deployed“.
STEP 11
🟢Please Support My work by Making a Donation. Almost 99,9% of the people that install something using my guides forget to support my work, or just ignore STEP 1. I’ve been very honest about this aspect of my work since the beginning: I don’t run any ADS, I don’t require subscriptions, paid or otherwise, I don’t collect IPs, emails, and I don’t have any referral links from Amazon or other merchants. I also don’t have any POP-UPs or COOKIES. I have repeatedly been told over the years how much I have contributed to the community. It’s something I love doing and have been honest about my passion since the beginning. But I also Need The Community to Support me Back to be able to continue doing this work.
STEP 12
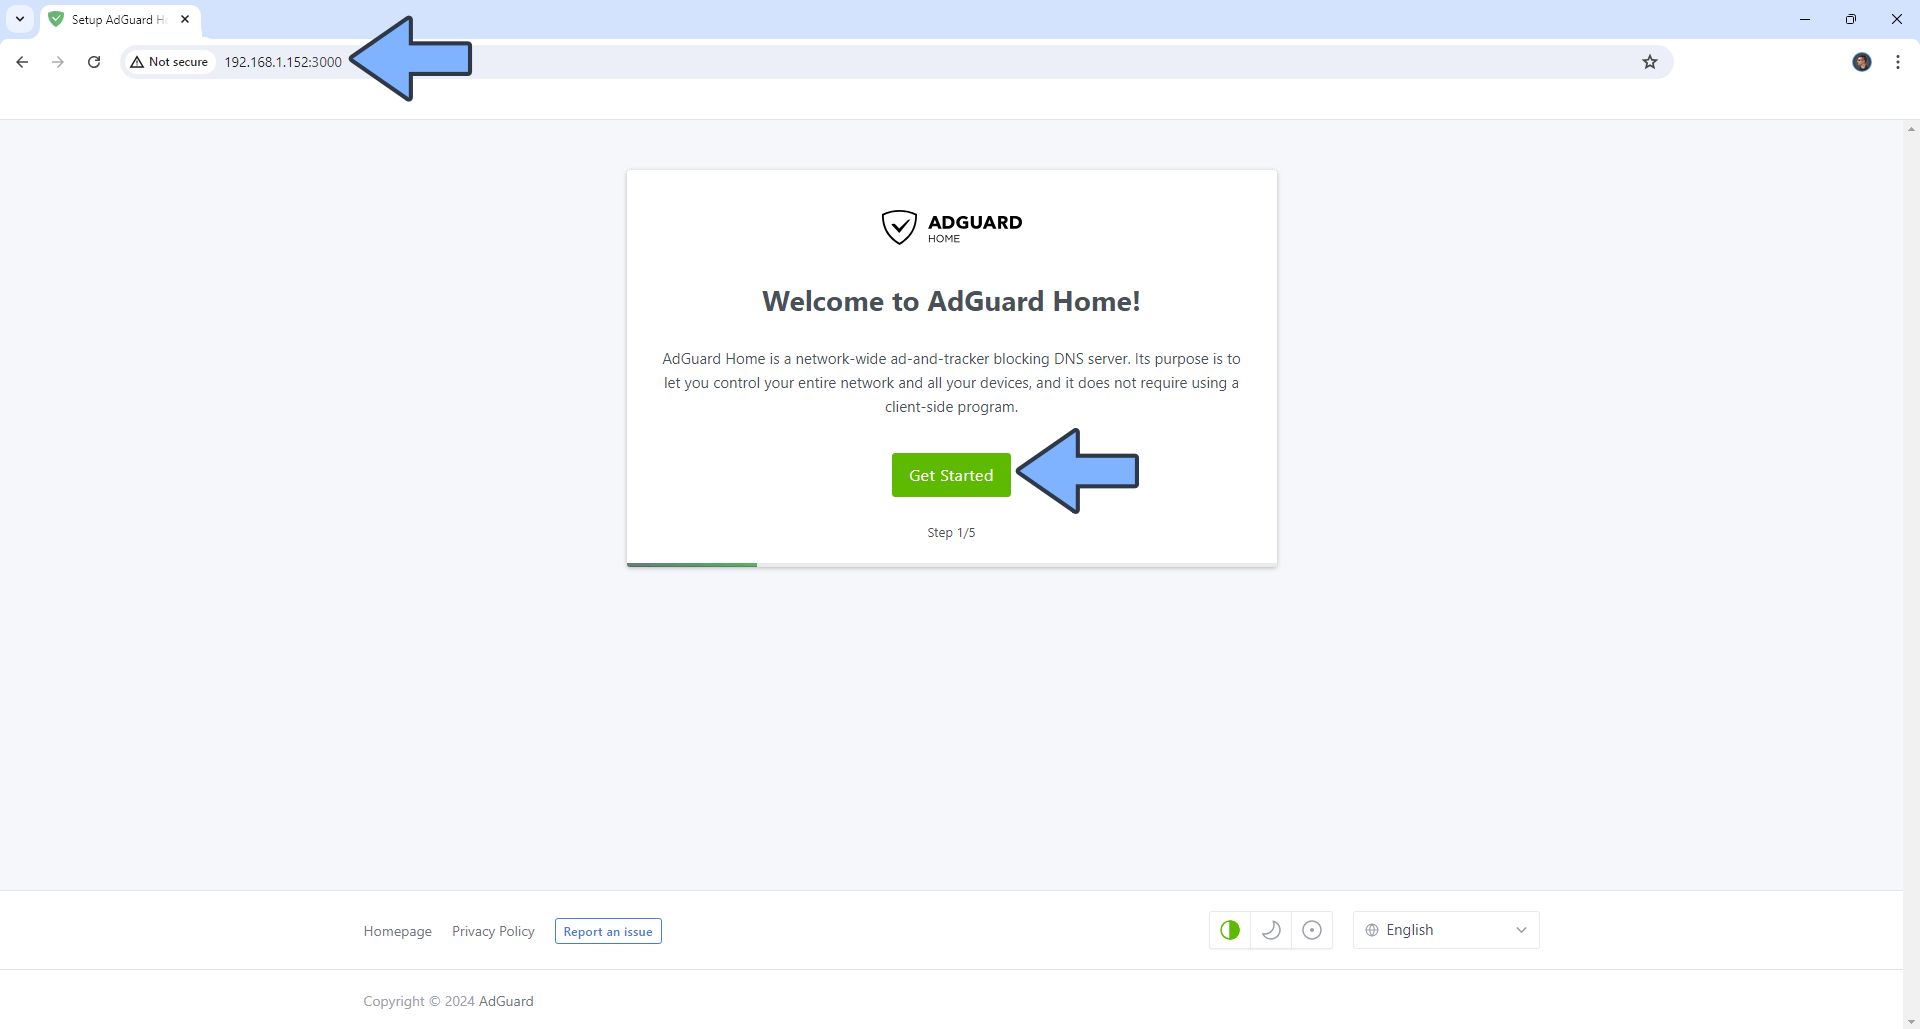
The installation process can take up to a few seconds/minutes. It will depend on your Internet speed connection. Now open your browser and type in http://ugreennas-ip-address:3000 Click Get Started. Follow the instructions in the image below.
STEP 13
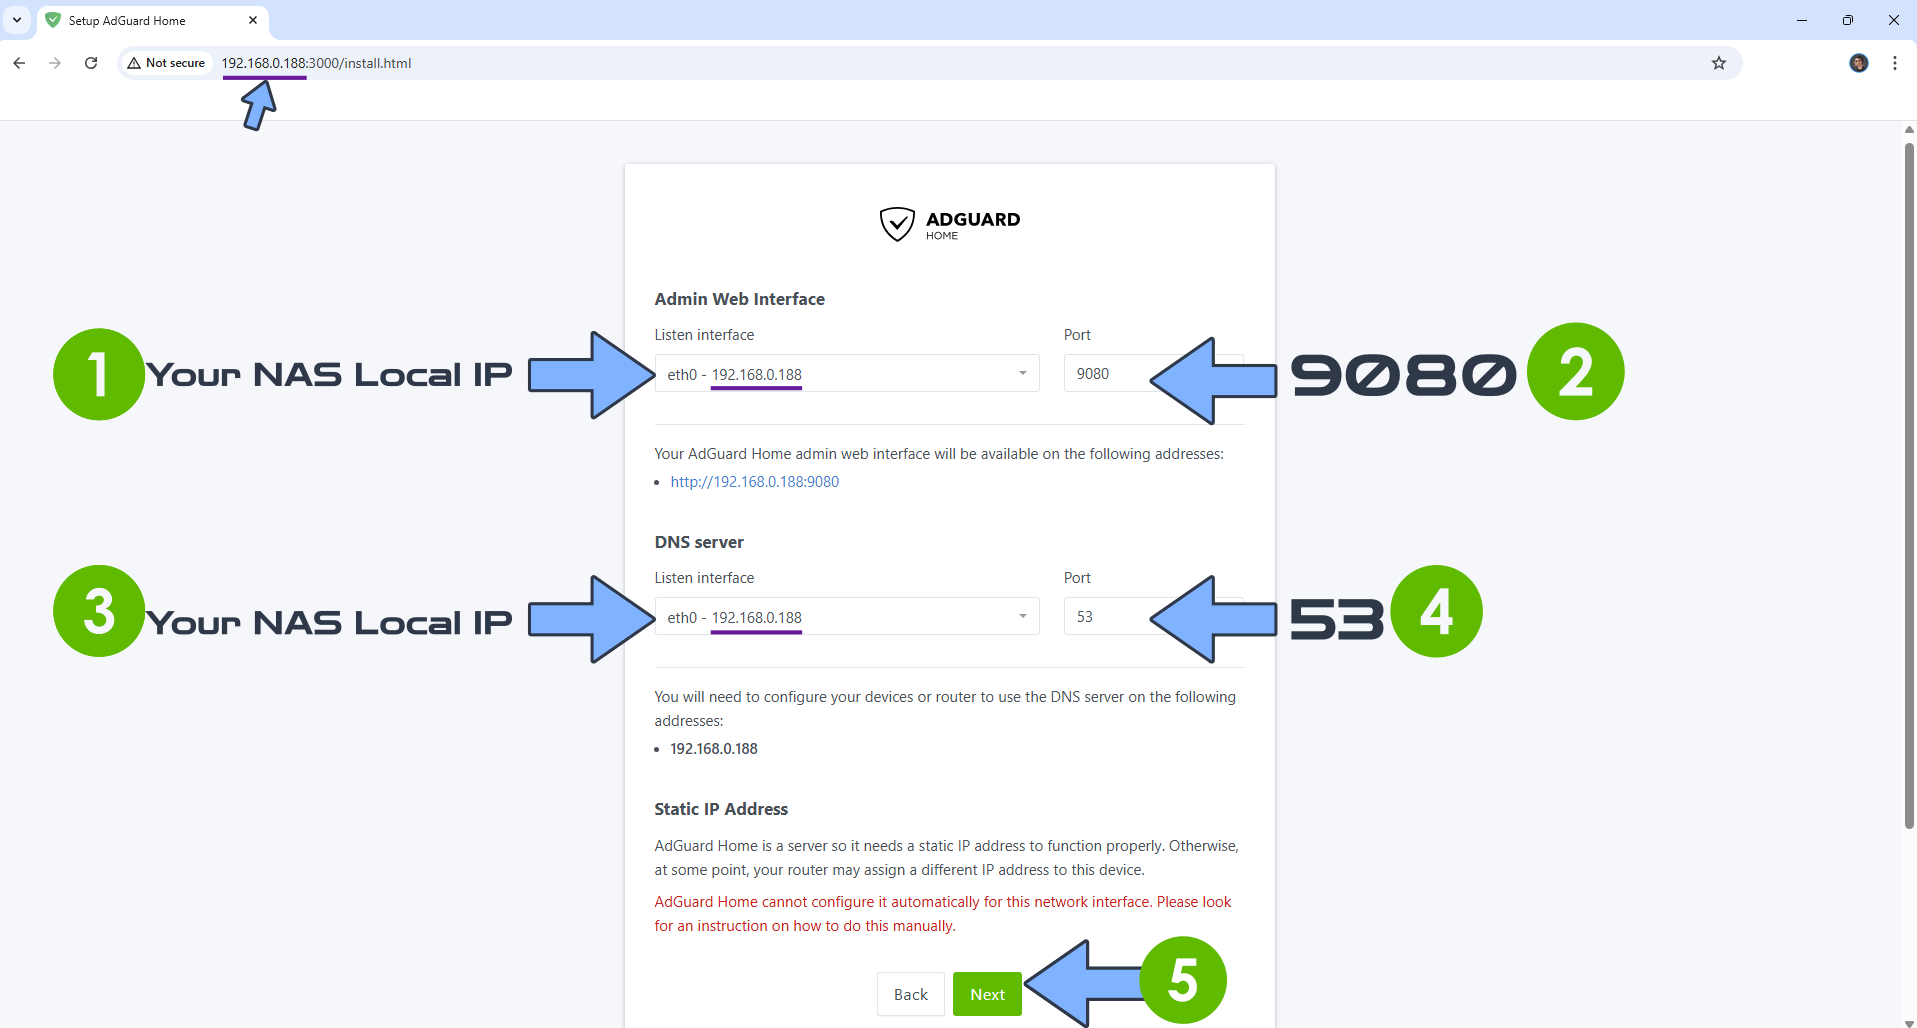
In the Admin Web Interface area, select your NAS local IP and change the default port from 80 to 9080.
In the DNS server area, select your NAS local IP and choose port 53.
Click Next. Follow the instructions in the image below.
STEP 14
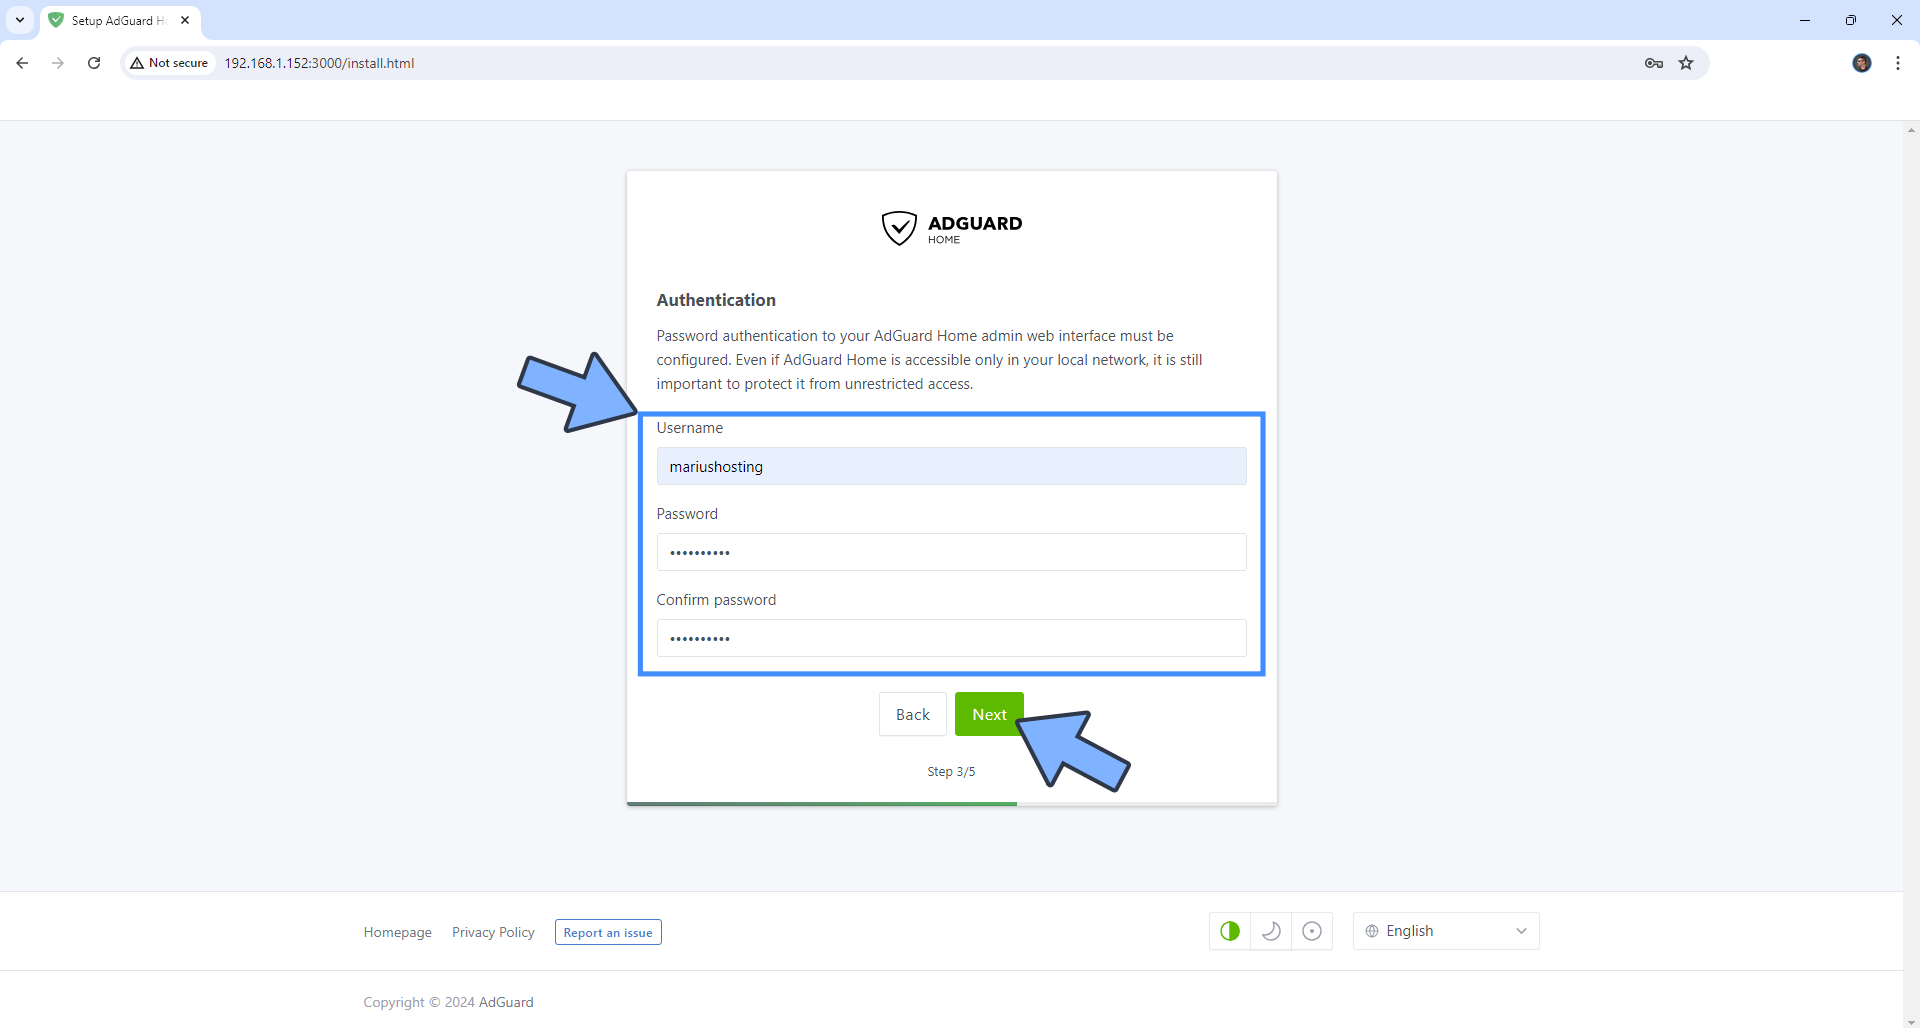
Add your own Username and Password then click Next. Follow the instructions in the image below.
STEP 15
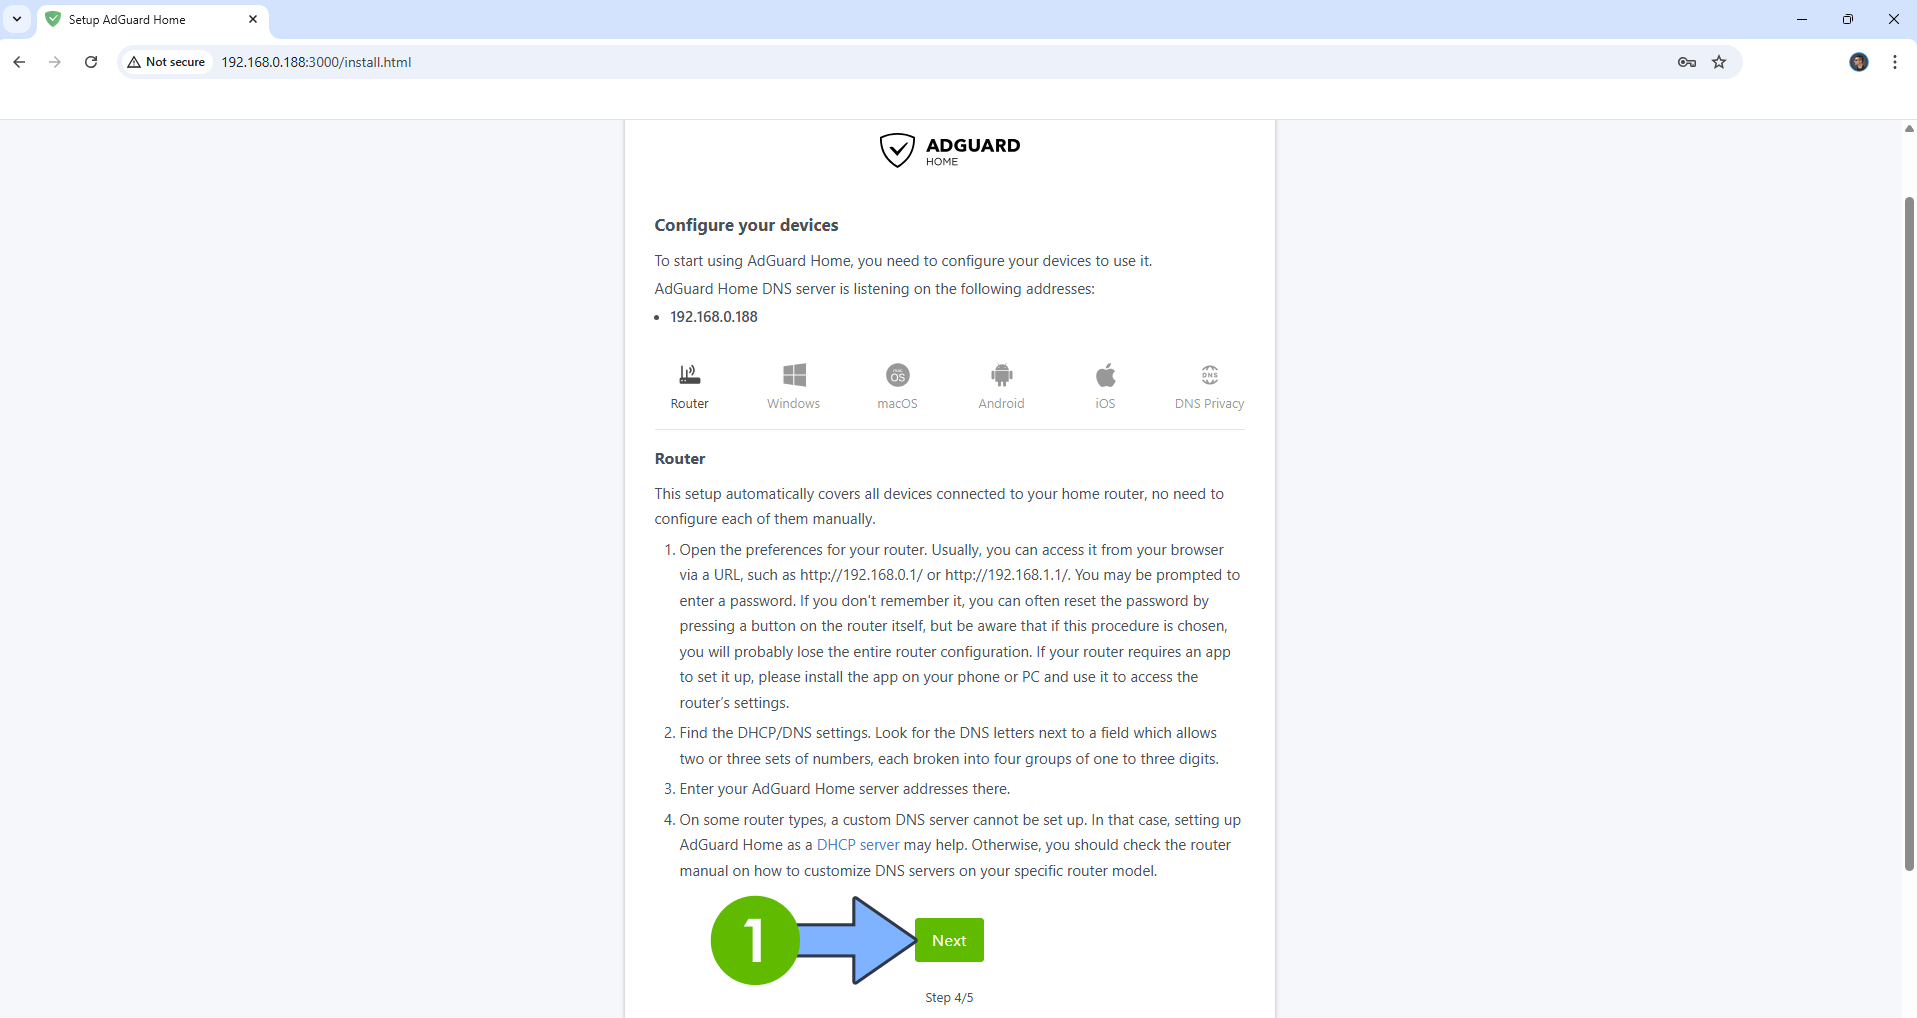
Click Next. Follow the instructions in the image below.
STEP 16
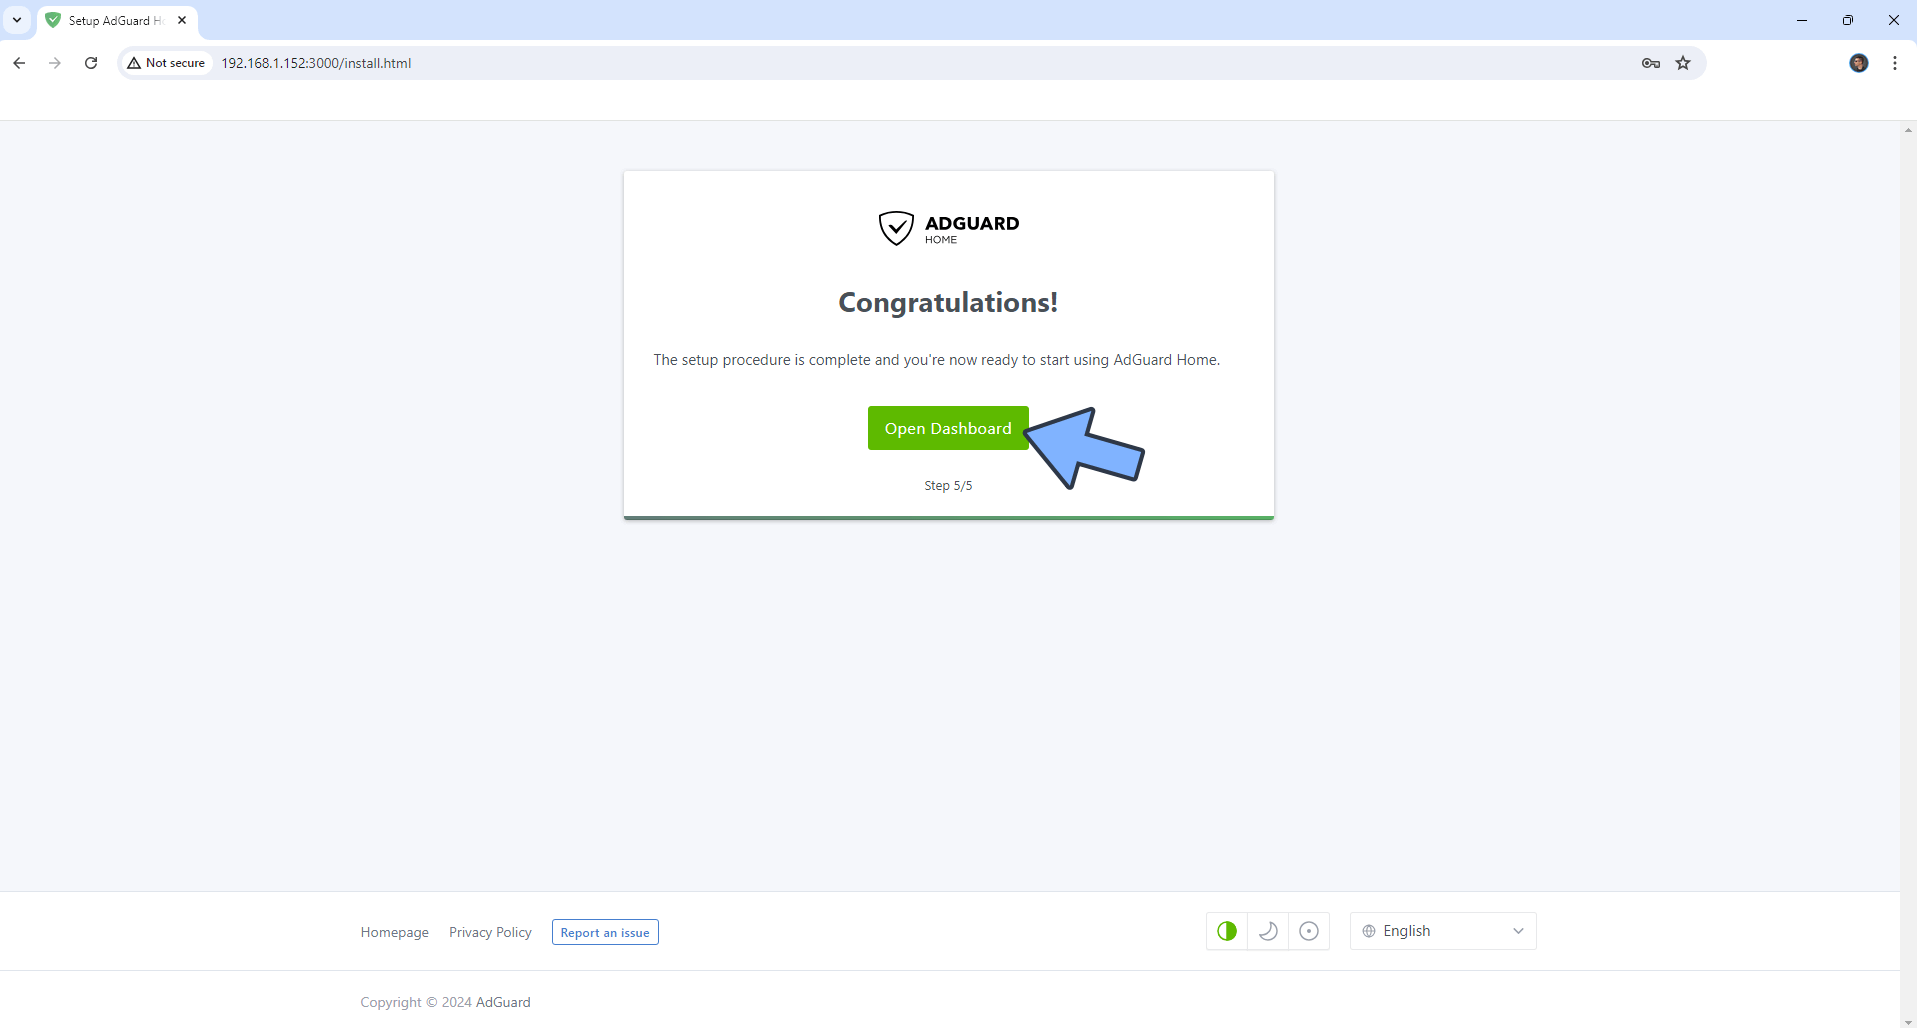
Click Open Dashboard. Follow the instructions in the image below.
STEP 17
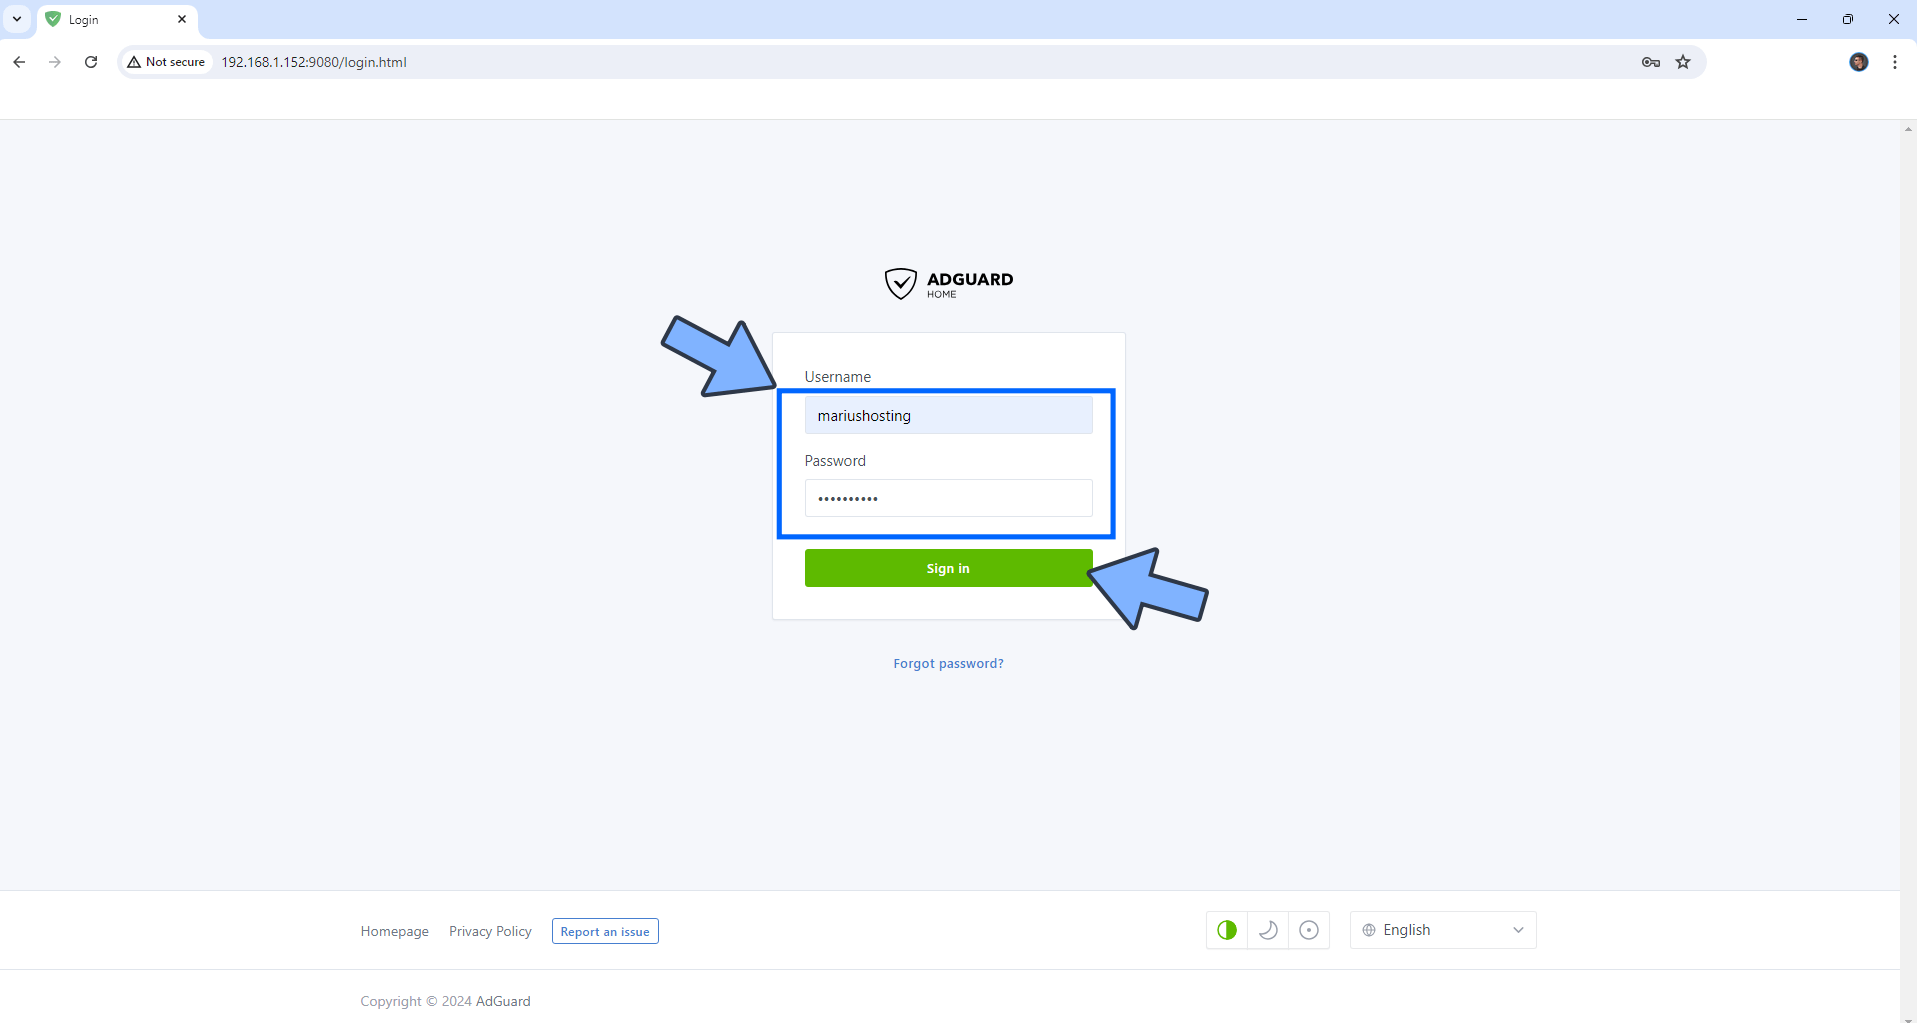
Type in your own Username and Password that you have previously created at STEP 14. Click Sign in. Follow the instructions in the image below.
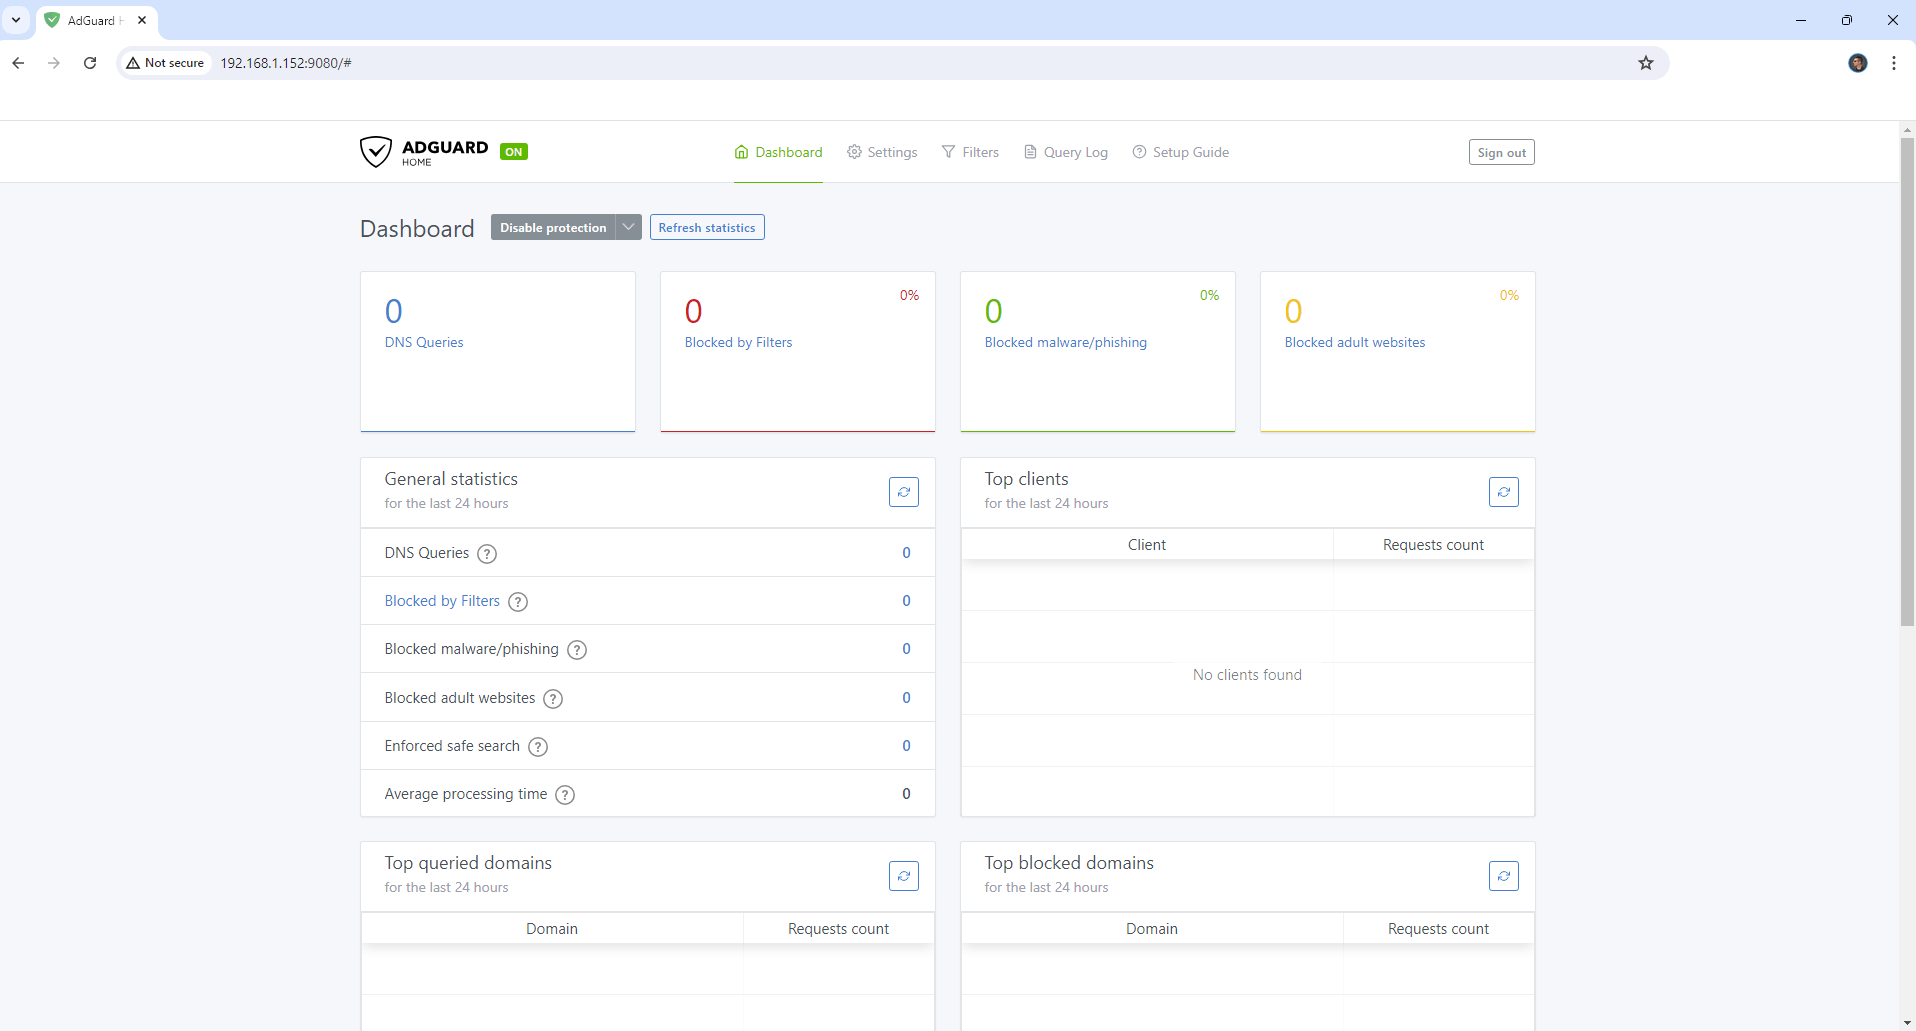
Your AdGuard Dashboard at a glance!
STEP 18
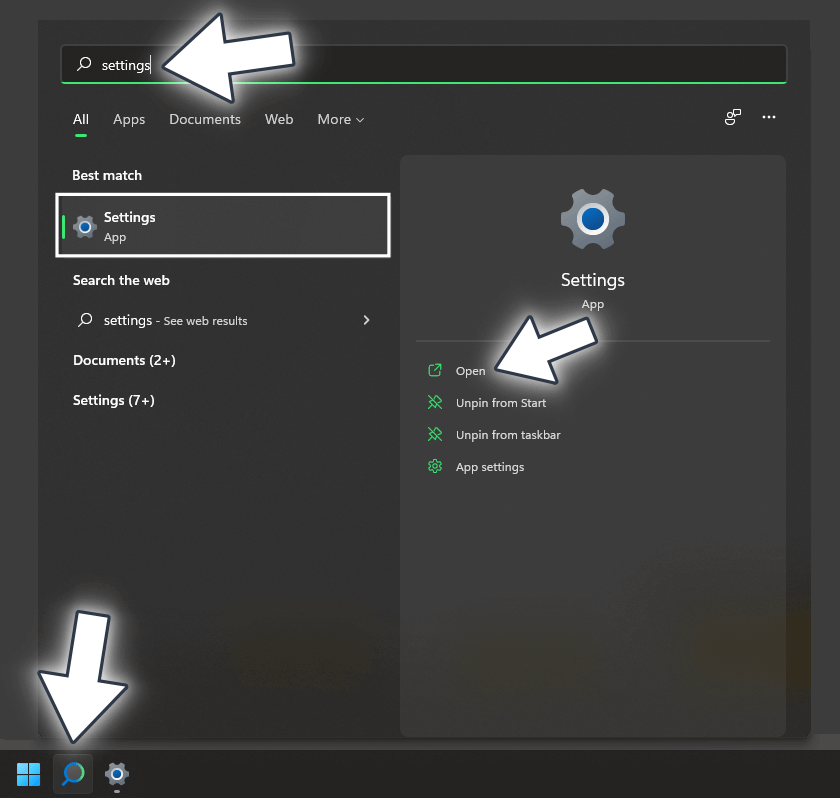
On your Windows 11 Desktop PC search for Settings. Once you find it, click Open. Follow the instructions in the image below.
STEP 19
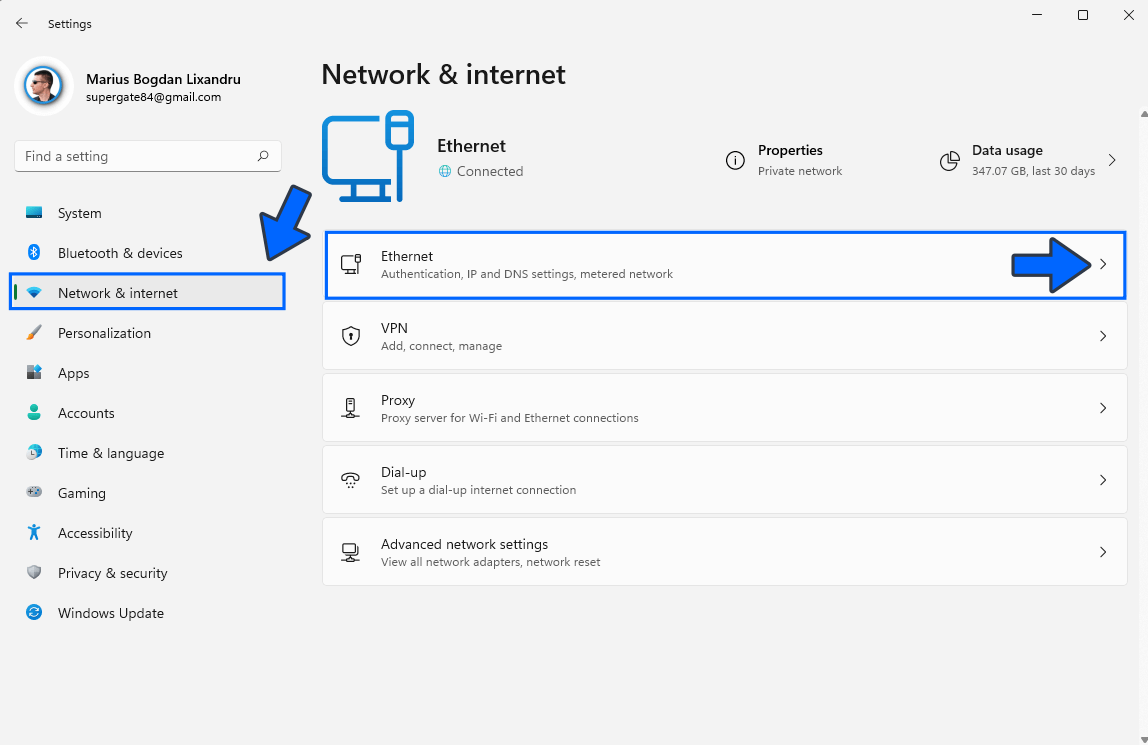
On the left sidebar click Network & Internet. Select your Ethernet connection, then click the little arrow. Follow the instructions in the image below.
STEP 20
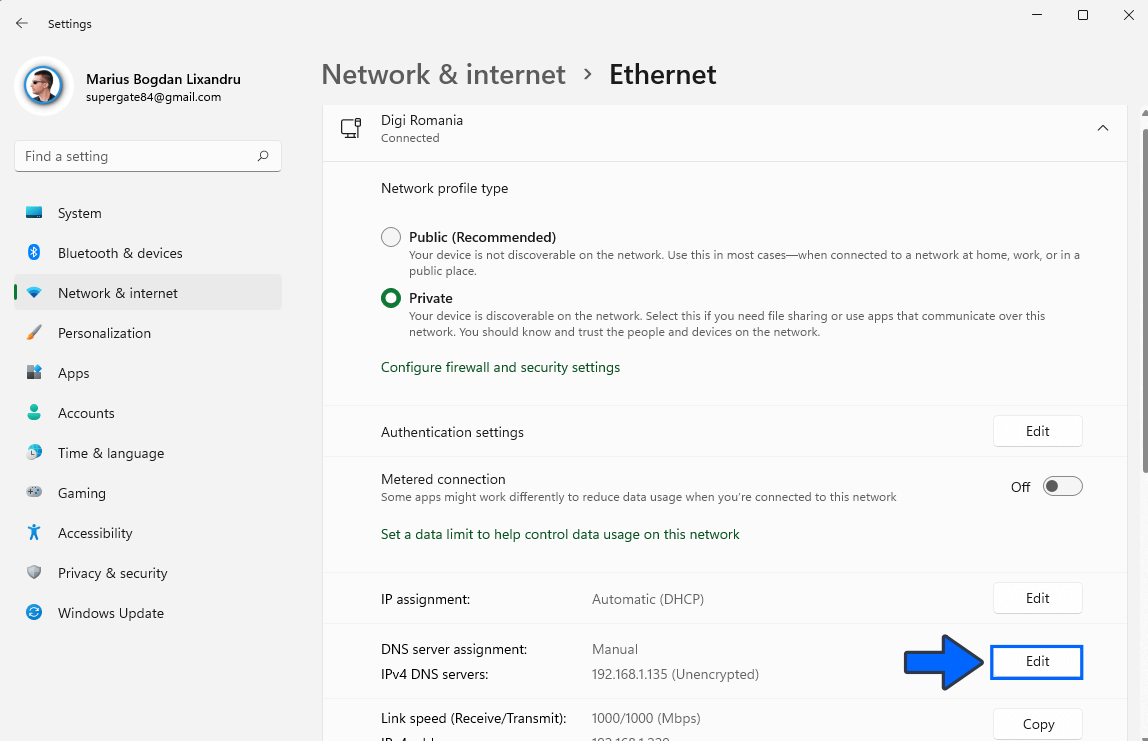
Scroll down until you find the option “DNS server assignment“. Click Edit. Follow the instructions in the image below.
STEP 21
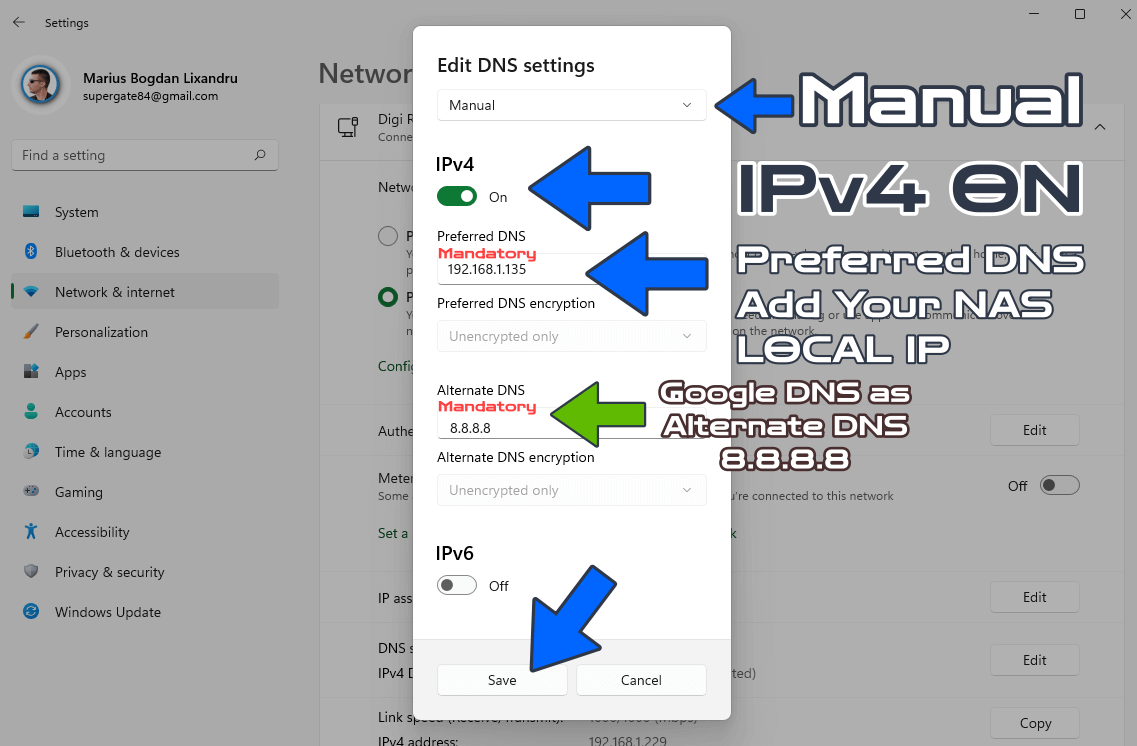
Edit DNS settings. Instead of Automatic DHCP, choose Manual. Turn ON IPv4. Add your UGREEN NAS local IP as the Preferred DNS and the Google DNS 8.8.8.8 as the Alternate DNS. Click Save. Follow the instructions in the image below.
STEP 22
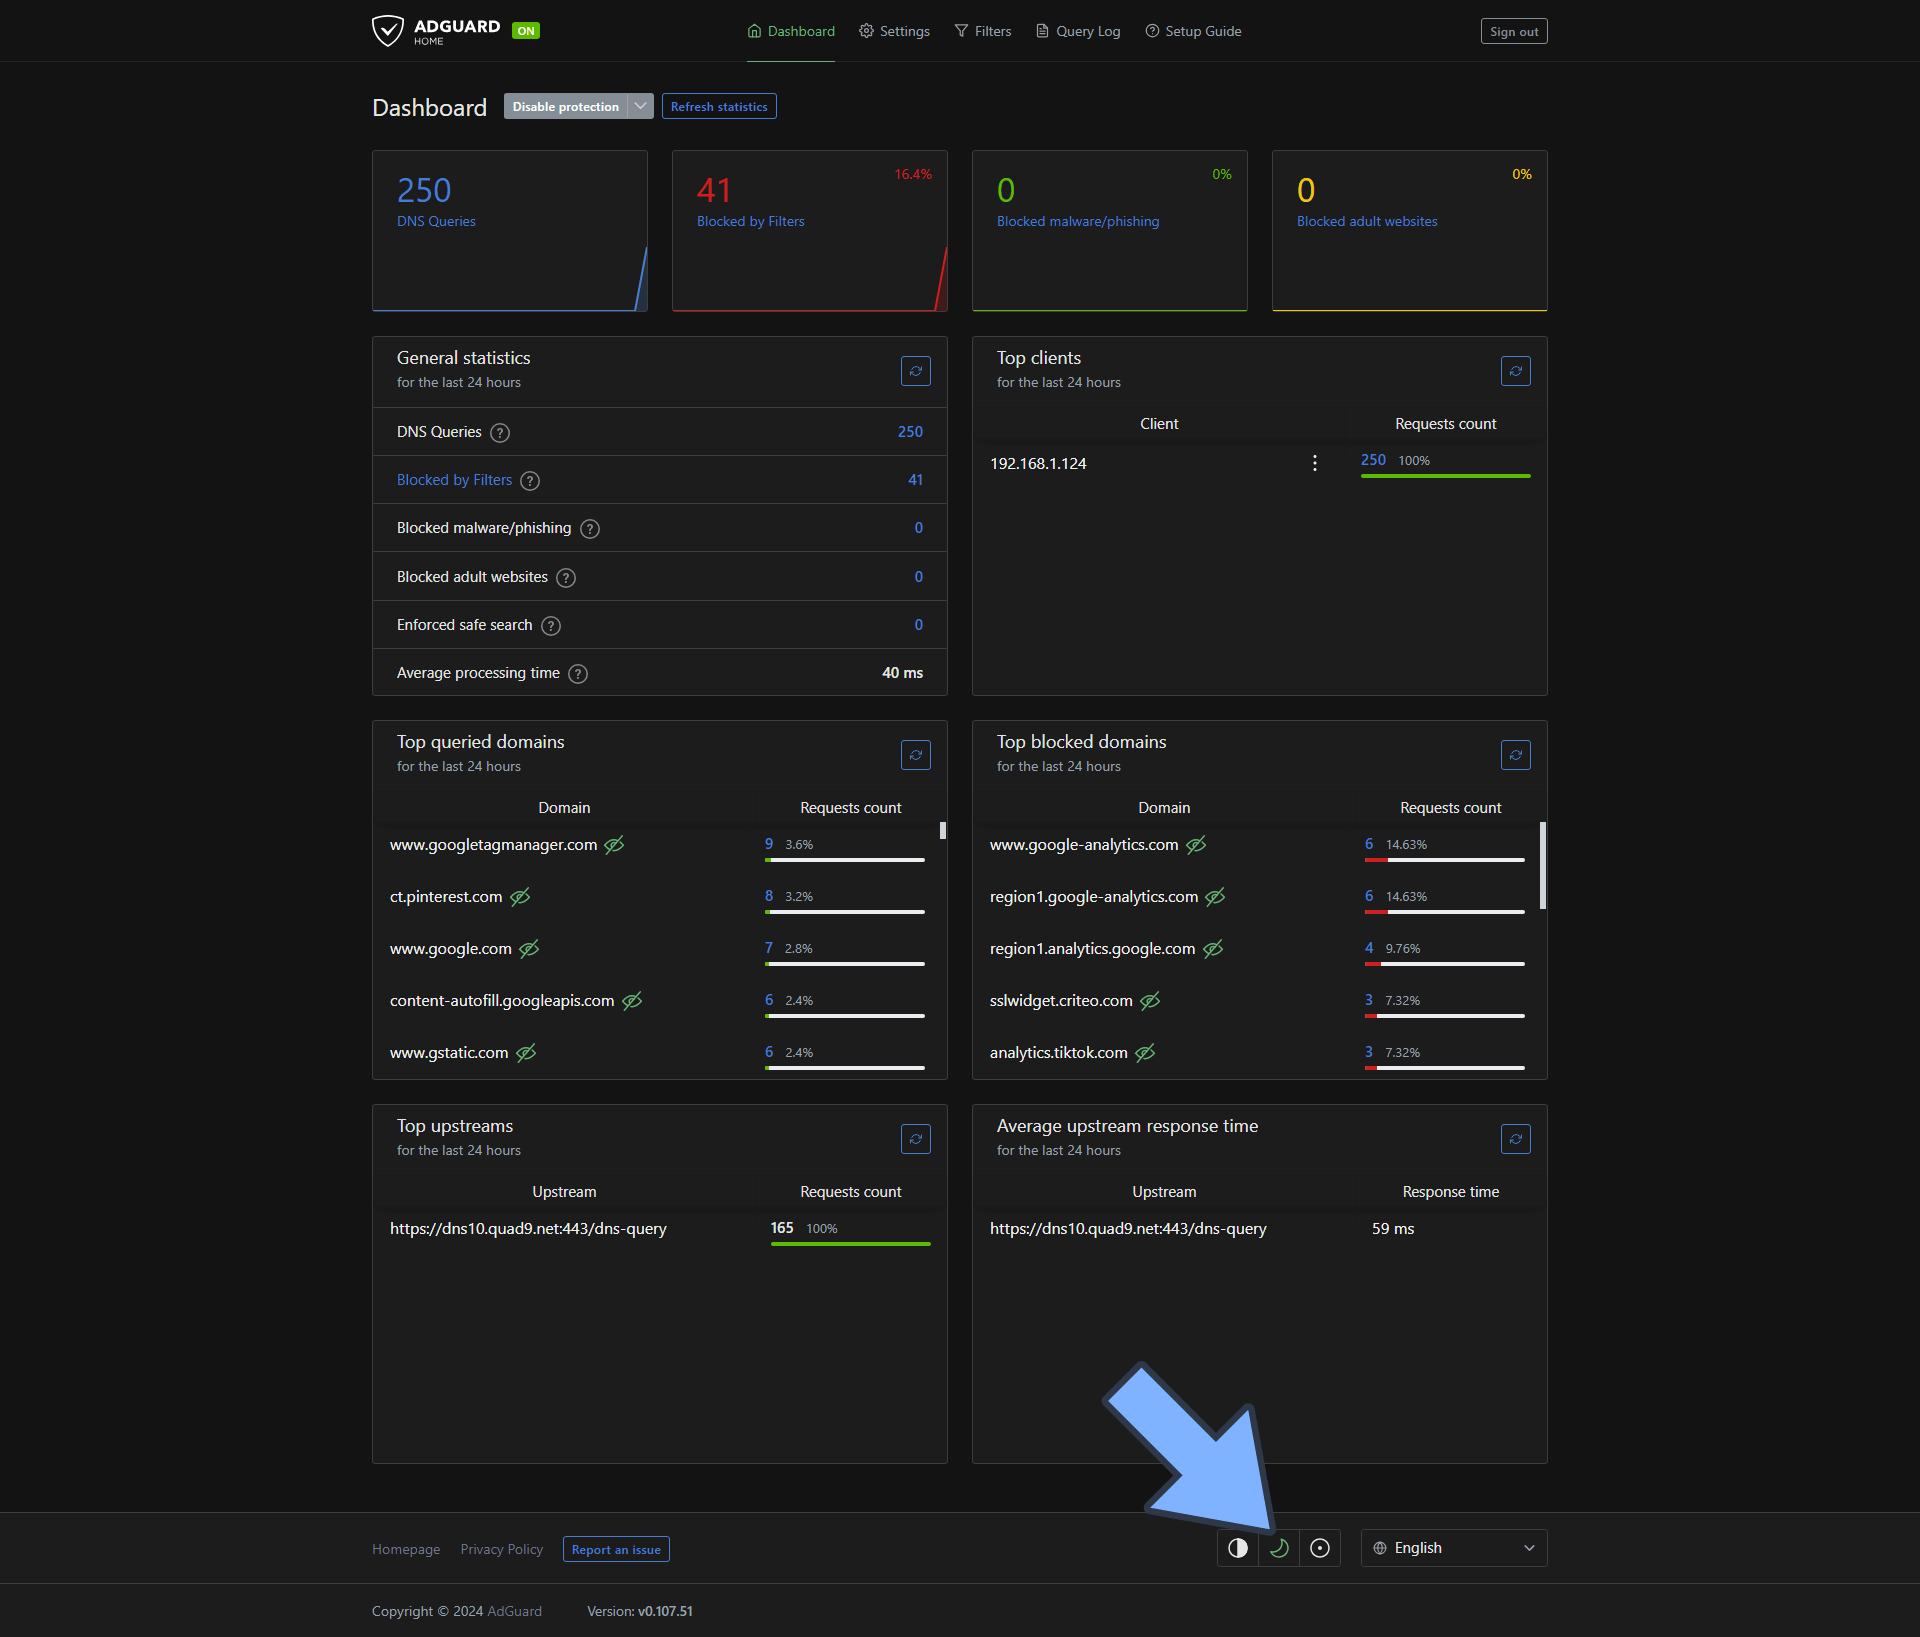
From now on your PC will be automatically protected from ads by AdGuard. Start surfing the Internet via a web browser and you will see the number of blocked queries rapidly increasing in the graph. You can also activate Dark Mode on AdGuard. At the end of the page, click the Dark icon to switch the theme to Dark Mode. Follow the instructions in the image below.
Enjoy AdGuard on Your UGREEN NAS!
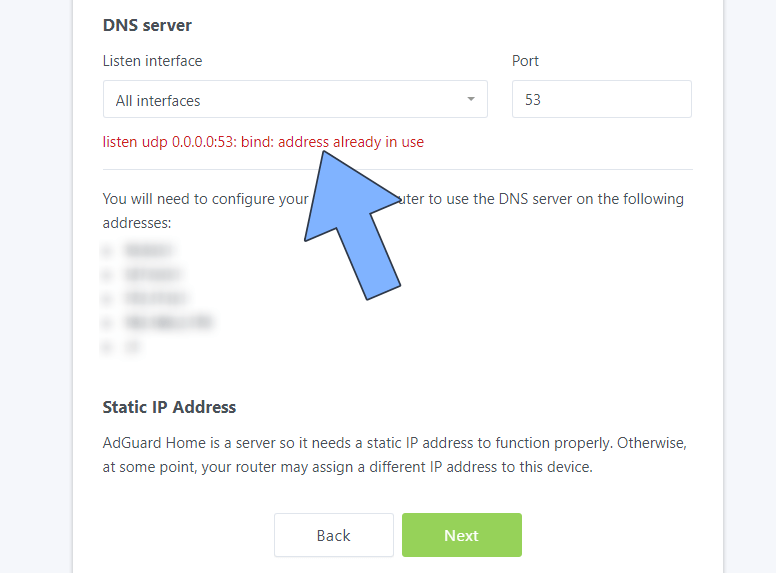
Note: DNS Server Error message: listen udp 0.0.0.0:53: bind: address already in use. In this scenario, something else is listening on the local DNS port 53. To avoid this, instead of All interfaces, choose your NAS local IP.
Note: If you want to run the AdGuard container over HTTPS, check out How to Run Docker Containers Over HTTPS on Your UGREEN NAS.
🆙Note/Update/Container: How to Update Your Docker Containers on UGREEN NAS Using Portainer.
🐳Note: How to Create Docker Shortcuts on Desktop.
🆕Note: How to Update Portainer to the latest version.
This post was updated on Friday / August 29th, 2025 at 3:21 PM
