
The TP-Link TL-R600VPN SafeStream Gigabit Multi-WAN Desktop VPN Router has a different graphical administration from that of modern Wireless routers intended for a large audience. So, how can you set up Port Forwarding on this router? Read below my step by step guide.
STEP 1
Please Support My work by Making a Donation.
STEP 2
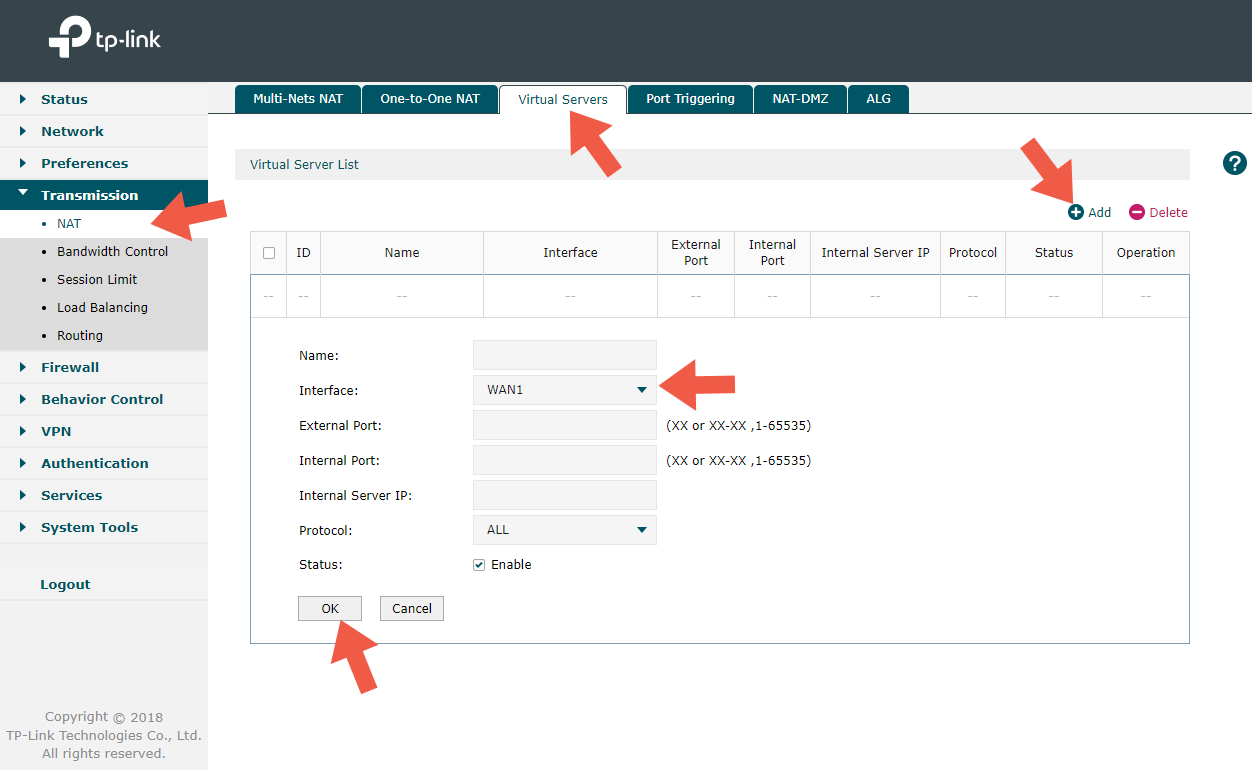
Connect at http://192.168.0.1/ using your browser. You will be asked for the username and password (which are usually admin – admin). After you log in, you will get this window as seen below. On the left sidebar under “Transmission” click on NAT. After you click on NAT, select “Virtual Servers“. Now click on the + Add button. Follow the instructions in the image below.
- On the Name area choose the name you want.
- On the Interface area choose WAN1 or WAN2.
- On the External and Internal Port areas type 80 or the port you need.
- On Internal Server IP select the local IP of the destination device.
- On the Protocol area choose All or just UDP or TCP.
- On the Status area, check Enable.
- To save the settings, click on the OK button.
This post was updated on Saturday / July 25th, 2020 at 11:41 PM