We have all been confronted with various ongoing attacks on our Synology device, attacks which aim to breach through the SSH 22 open port. These attacks directed at our Synology device are called brute force attacks. A brute-force attack consists of an attacker submitting many passwords or passphrases with the hope of eventually guessing correctly. The attacker systematically checks all possible passwords and passphrases until the correct one is found. The attacks come from all over the world and are continuous, day after day.
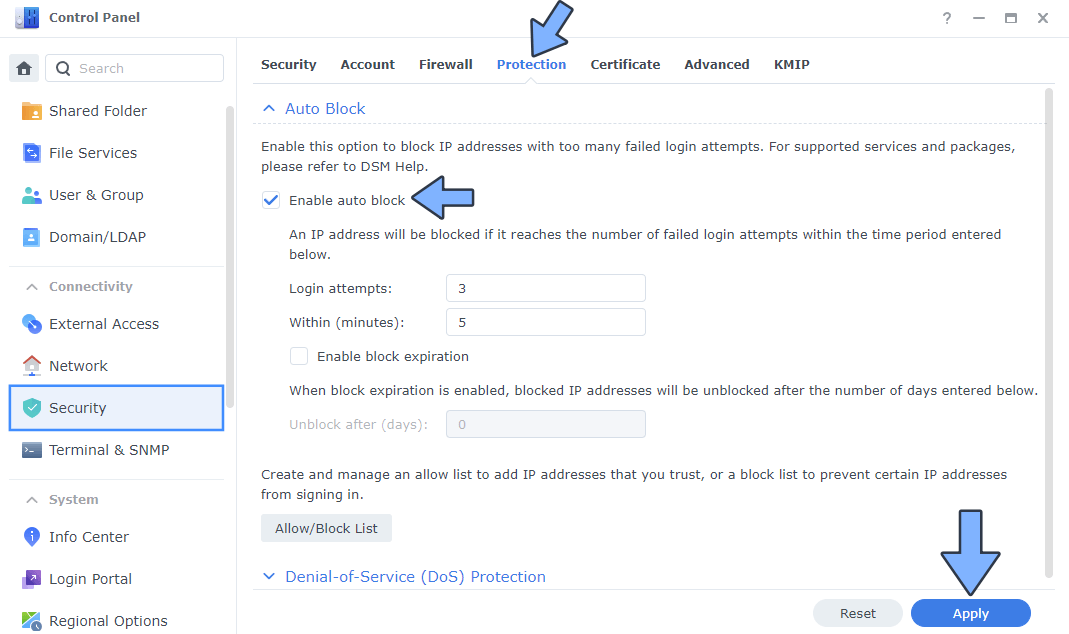
The auto block feature helps improve the security of your Synology NAS by blocking the IP addresses of clients with too many failed login attempts. This helps reduce the risk of accounts being broken into using brute-force attacks. Enabling auto block will automatically block IP addresses after exceeding a certain number of failed login attempts within the specified number of minutes. The number includes all failed login attempts via SRM, SSH, FTP, WebDAV, File Station, Download Station, VPN Server, and Synology mobile apps.
– Control Panel / Security / Protection tab / check Enable auto block.
– Enter a number of failed login attempts in Login attempts and a number of minutes in Within (minutes). I enabled a maximum of 3 login attempts before the intruder is blocked. Note: If you want to automatically remove a blocked IP address after a certain number of days, check Enable block expiration and enter a number in Unblock after (days).
– Click Apply to save your changes.
Download the updated IP BLOCK LIST and follow the instruction in the link.
If you do not use the SFTP service or SSH service that connects to port 22, disable port 22 on your router “PORT FORWARDING” and the problem is solved automatically because there is a firewall that will do its work in the background without you receiving any more notifications. So, activating or not activating port 22 depends on how you use your Synology NAS.
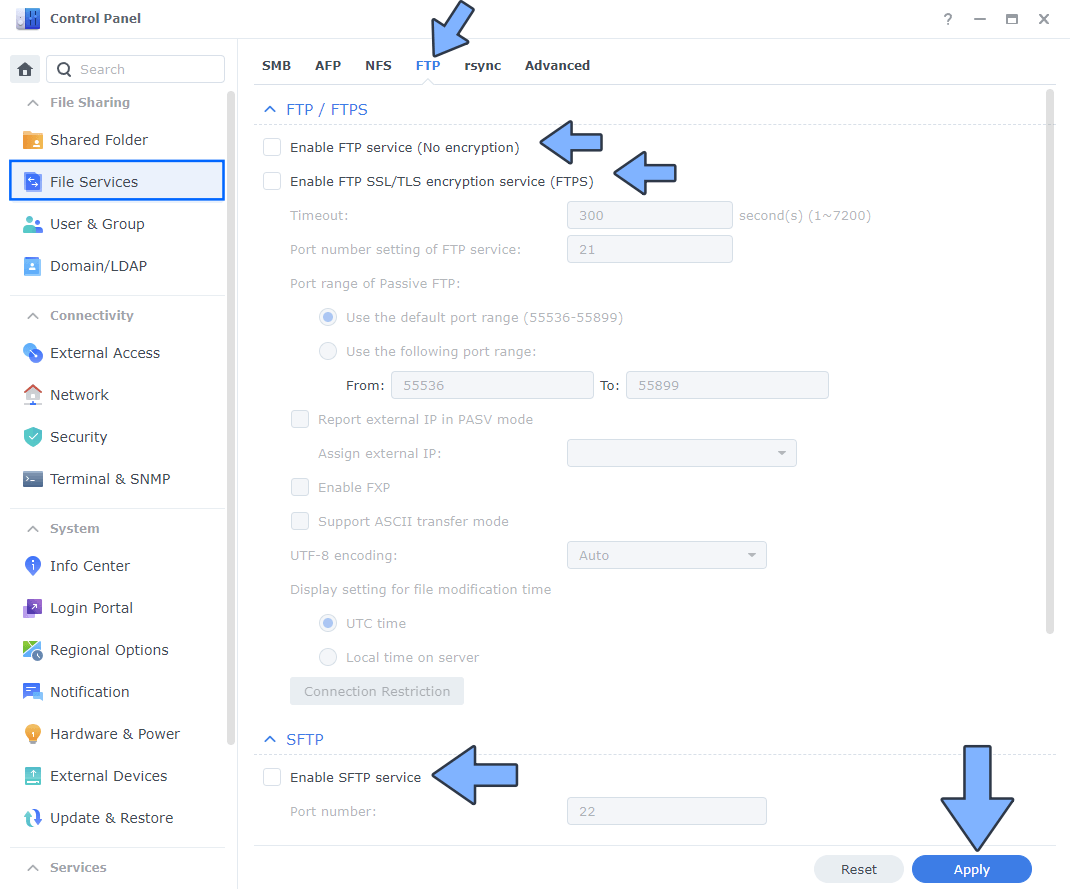
If you want to disable all services using port 22 follow these images and deactivate it on SFTP and SSH. Note: If you want to use the SFTP service again, you have to open port 22 on your router port forwarding once again and activate the SFTP service on control panel too.
Disable FTP and FTPS. Follow the instructions in the image below.
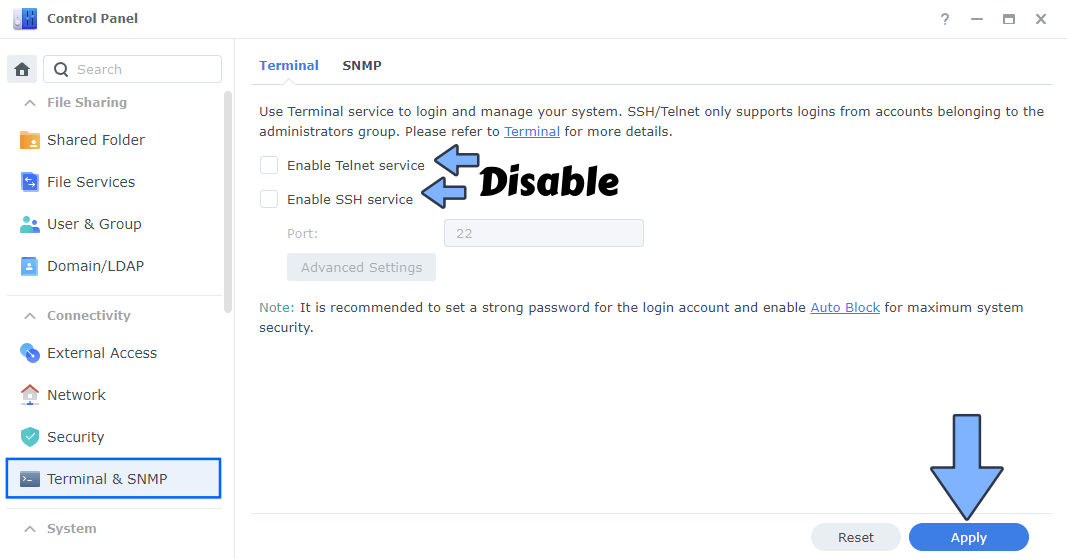
Disable SSH. Follow the instructions in the image below.
Note: Step by step guide on how to CORRECTLY SET UP YOUR SYNOLOGY NAS FIREWALL.
Note: Sometime it helpful to leave enabled SSH port 22 so you can login and run repairs if the webgui fails. So, activating or not activating port 22 depends on how you use your Synology NAS.
I’m worried about notifications: You do not have to worry about notifications because if you have a strong password, the system will be able to block any intruder without you having to do anything. If the notification icons are bothering you, you can disable them in the notification center. Simple, right?
This post was updated on Saturday / November 23rd, 2024 at 11:06 AM