Have you already installed Seafile 13 on your Synology NAS? Today, after many, many emails asking me how to set up email on Seafile 13 to be able to reset your own password, invite new members, etc., I have finally come about to writing an article on how to set up Gmail on Seafile 13 so you can now activate the new user registration option for your Seafile 13 instance. See the details below.
STEP 1
Please Support My work by Making a Donation.
STEP 2
Install Seafile using my Docker Guide. If you already have Seafile installed on your Synology NAS, skip this STEP.
STEP 3
Follow my step by step guide on how to activate SMTP for your Gmail account.
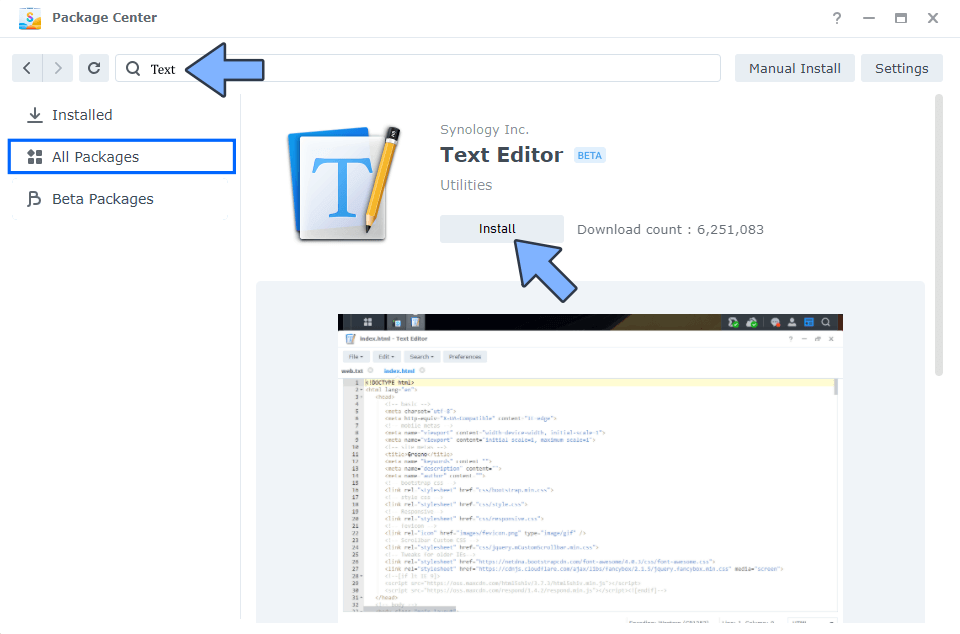
STEP 4
Install Text Editor via Synology “Package Center”. If you already have Text Editor installed on your Synology NAS, skip this STEP.
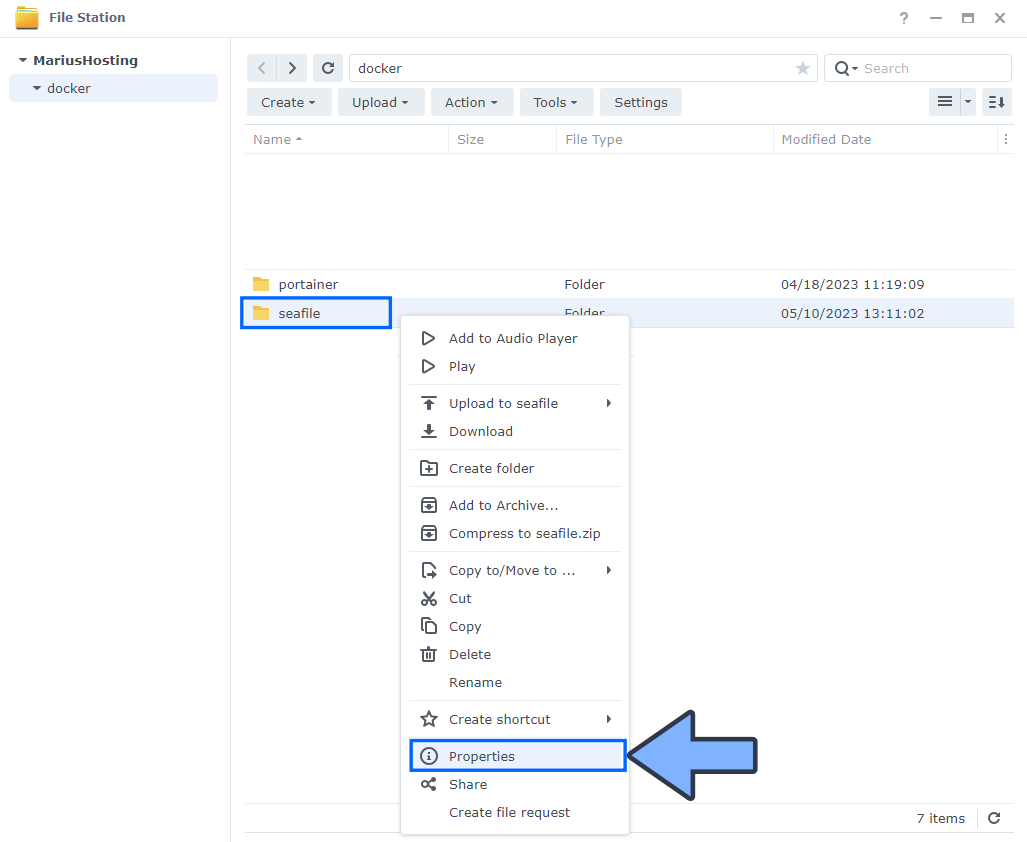
STEP 5
Right click on the seafile folder then click Properties. Follow the instructions in the image below.
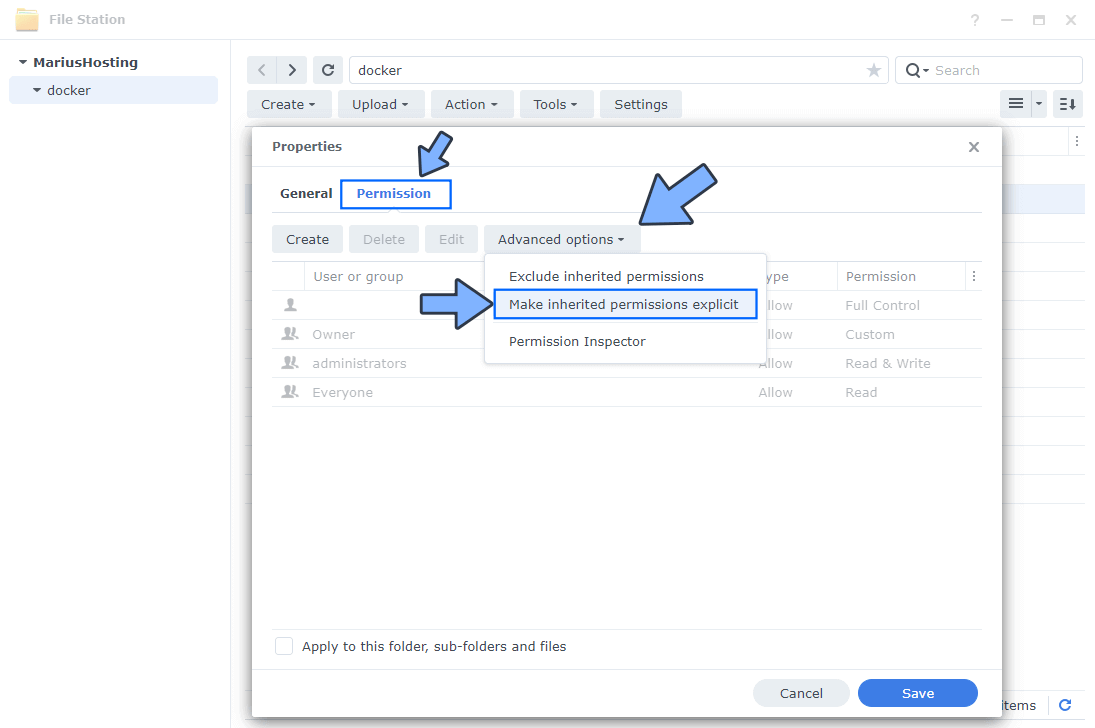
STEP 6
Go to the Permission tab then click Advanced options. From the drop-down menu choose “Make inherited permissions explicit“. Follow the instructions in the image below.
STEP 7
Select Everyone then click the Edit tab. Follow the instructions in the image below.

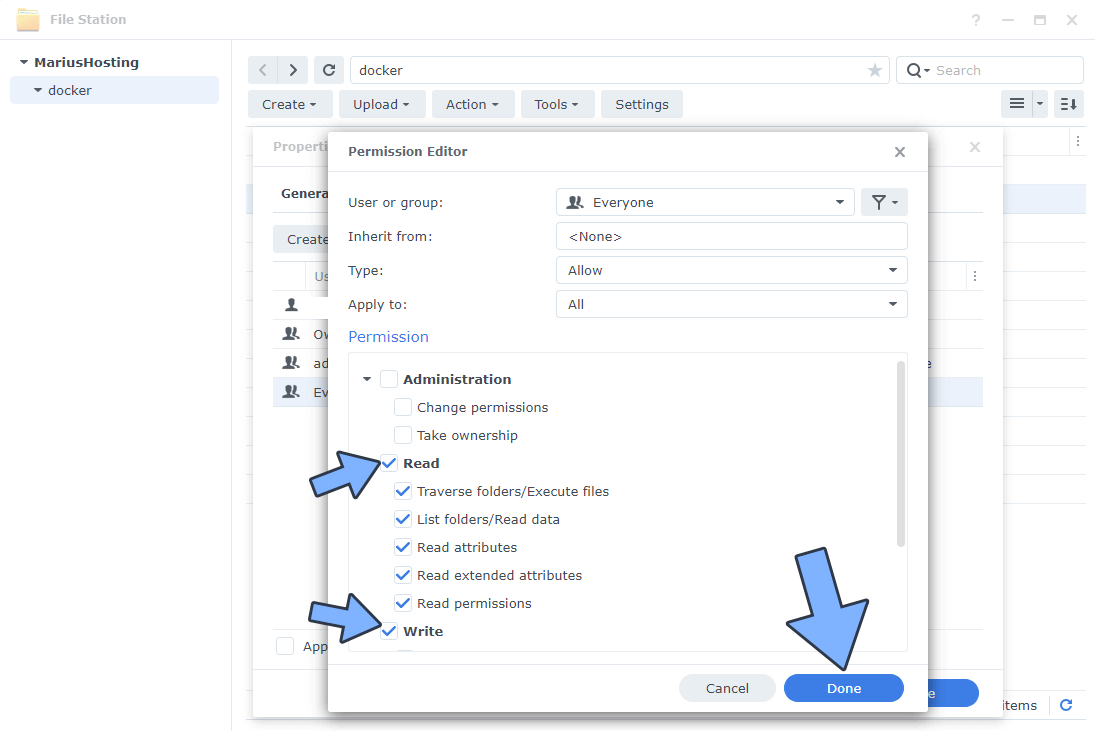
STEP 8
Check all Read and Write Permissions. Click Done. Follow the instructions in the image below.
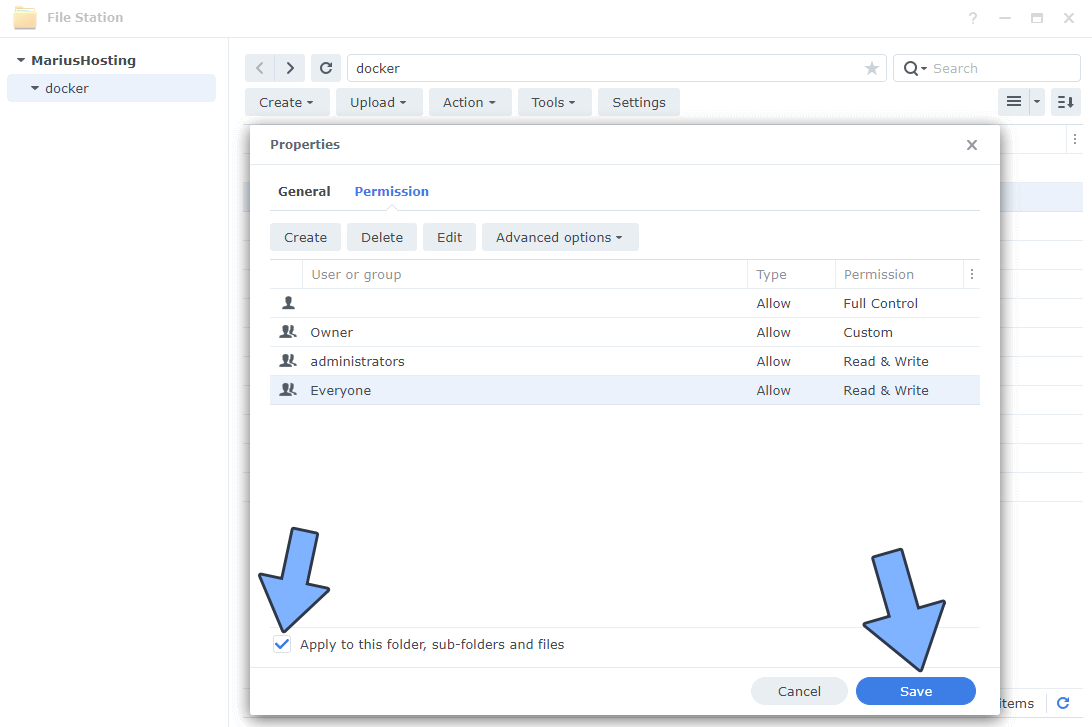
STEP 9
After you click Done on STEP 8, check “Apply to this folder, sub-folders and files“. Click Save. Follow the instructions in the image below.
STEP 10
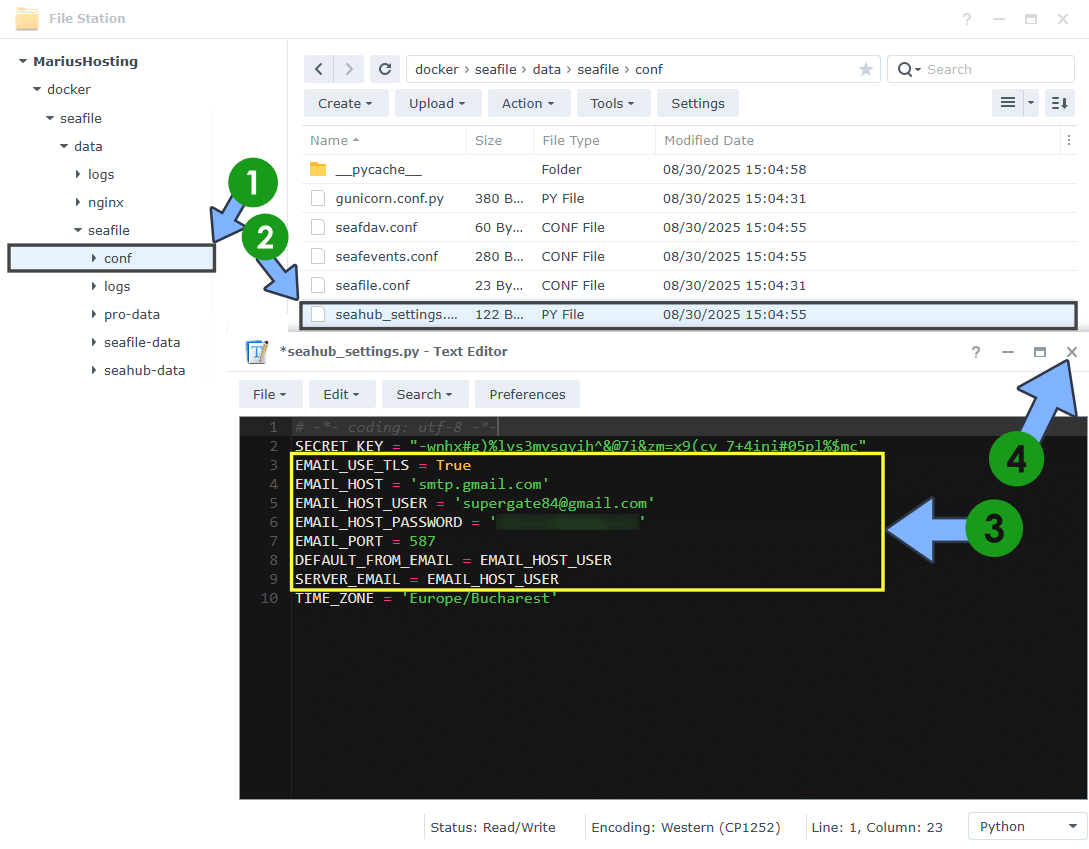
Go to the /volume1/seafile/data/seafile/conf folder, then double click on the seahub_settings.py file. Copy then paste the code below between the SECRET_KEY and TIME_ZONE lines in the seahub_settings.py file, then add your own SMTP details that you have previously got at STEP 3. After you have added the code below, save the settings by clicking X. Follow the instructions in the image below.
EMAIL_USE_TLS = True
EMAIL_HOST = 'smtp.gmail.com'
EMAIL_HOST_USER = 'Yourowngmailaddress'
EMAIL_HOST_PASSWORD = 'Yourownapppassword'
EMAIL_PORT = 587
DEFAULT_FROM_EMAIL = EMAIL_HOST_USER
SERVER_EMAIL = EMAIL_HOST_USER
Note: Your own Gmail Address should be inside the quotations marks ‘ ‘.
Note: Your own Gmail App password should be inside the quotations marks ‘ ‘.
Note: If you have a different EMAIL_HOST than smtp.gmail.com remember to add your SMTP host inside the quotations marks ‘ ‘.
STEP 11
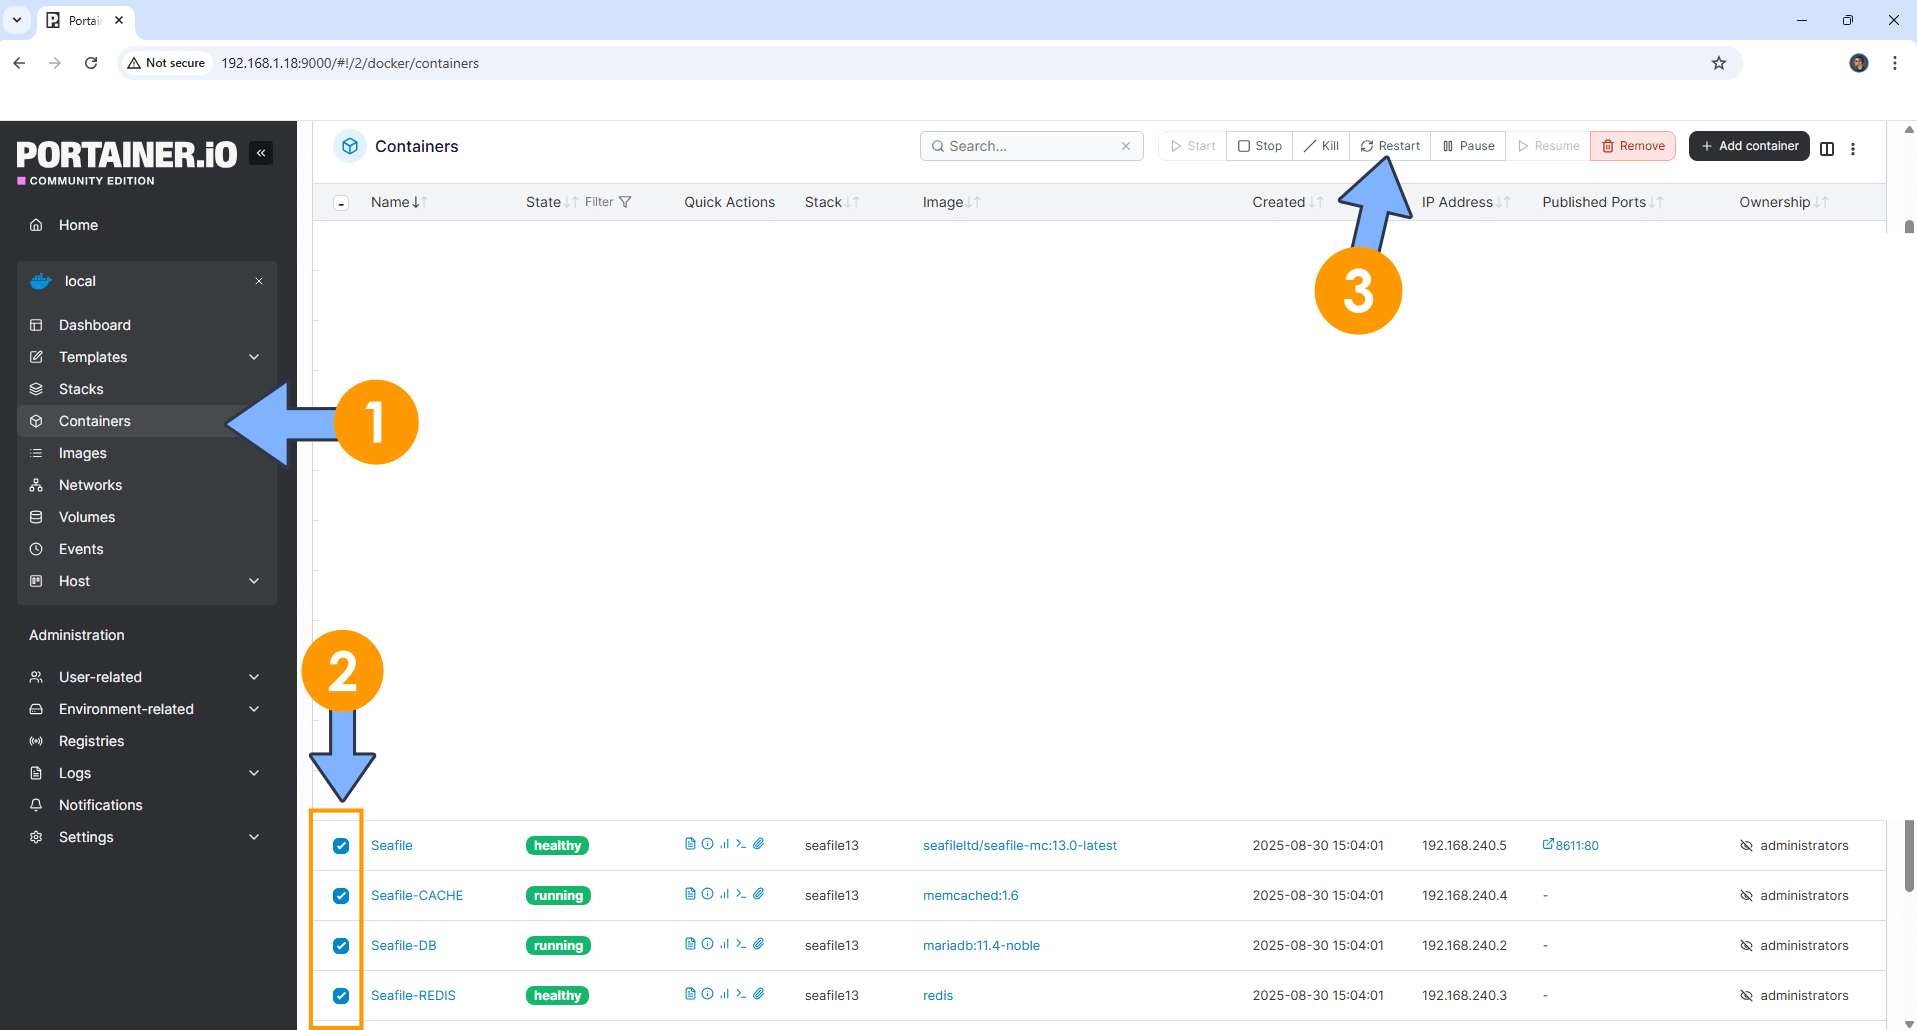
On the left sidebar in Portainer, click Containers. Identify your Seafile instances, select them then click Restart. Follow the instructions in the image below.
STEP 12
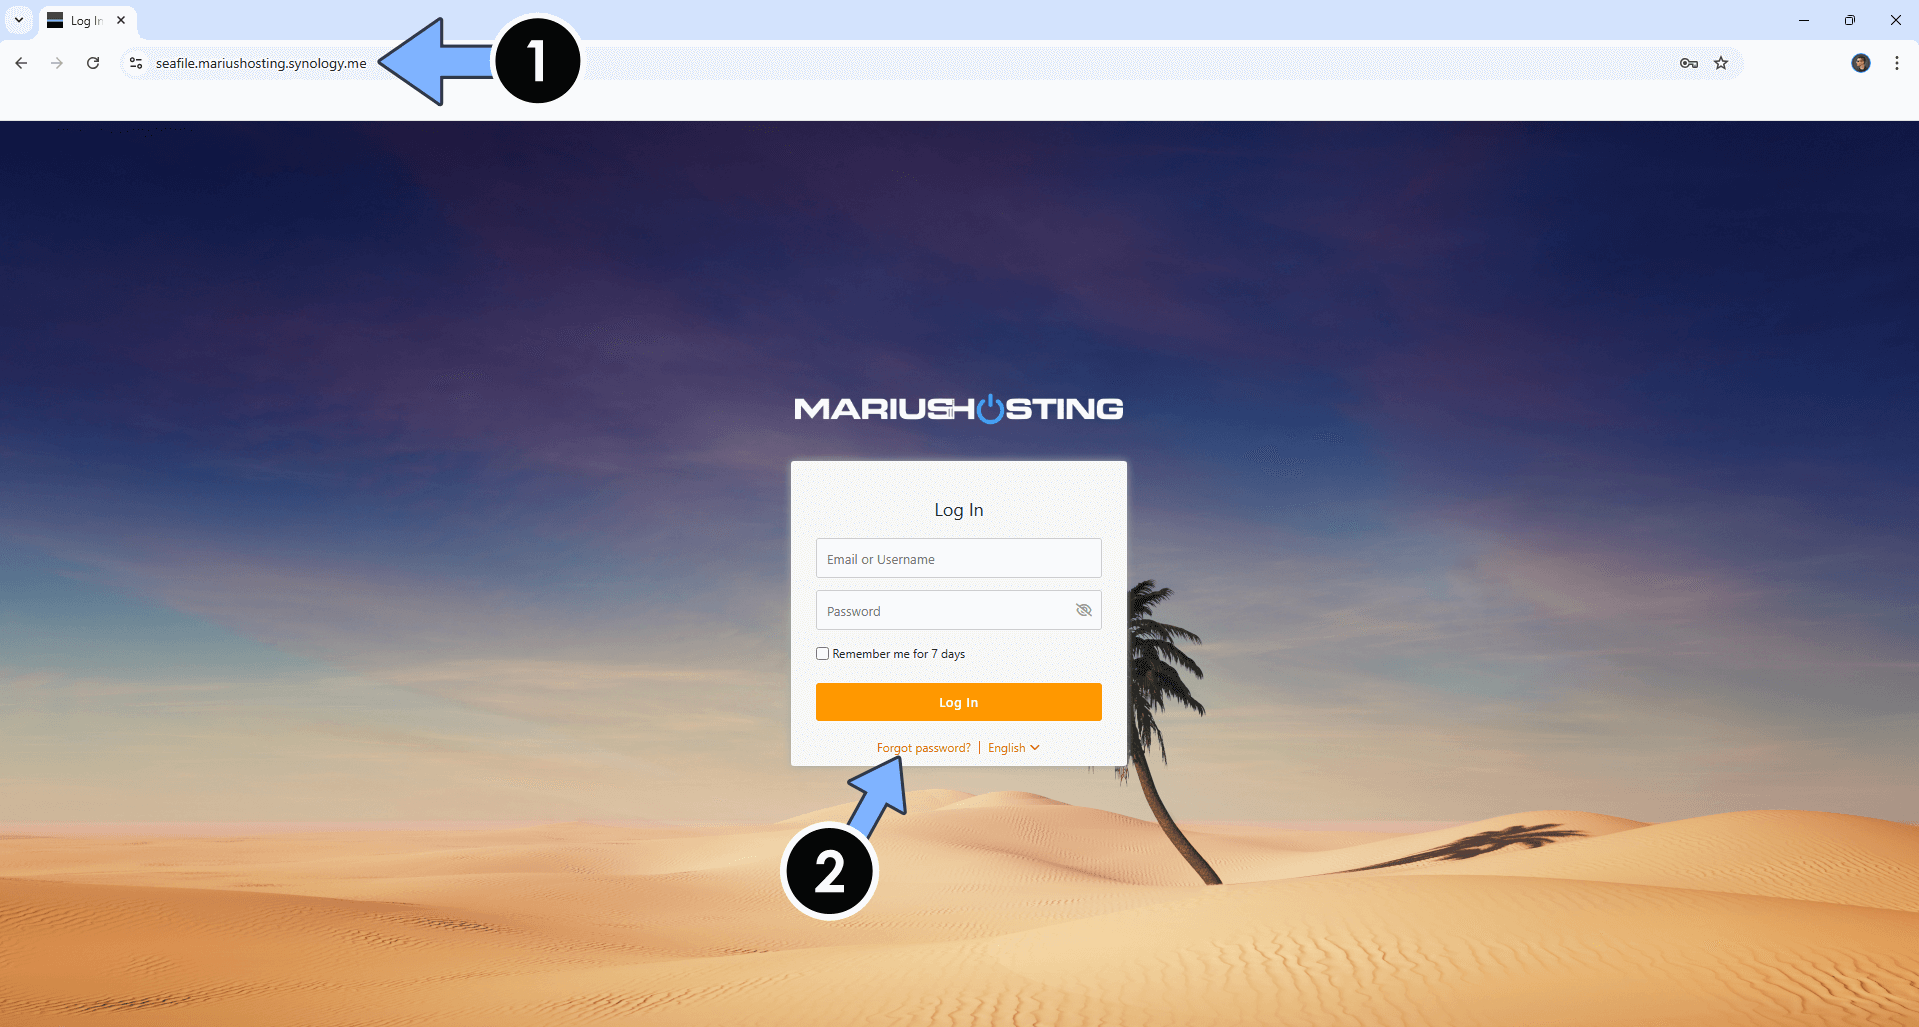
Check if your Seafile SMTP details work. Go to the Seafile login page, then click Forgot password. Follow the instructions in the image below.
STEP 13
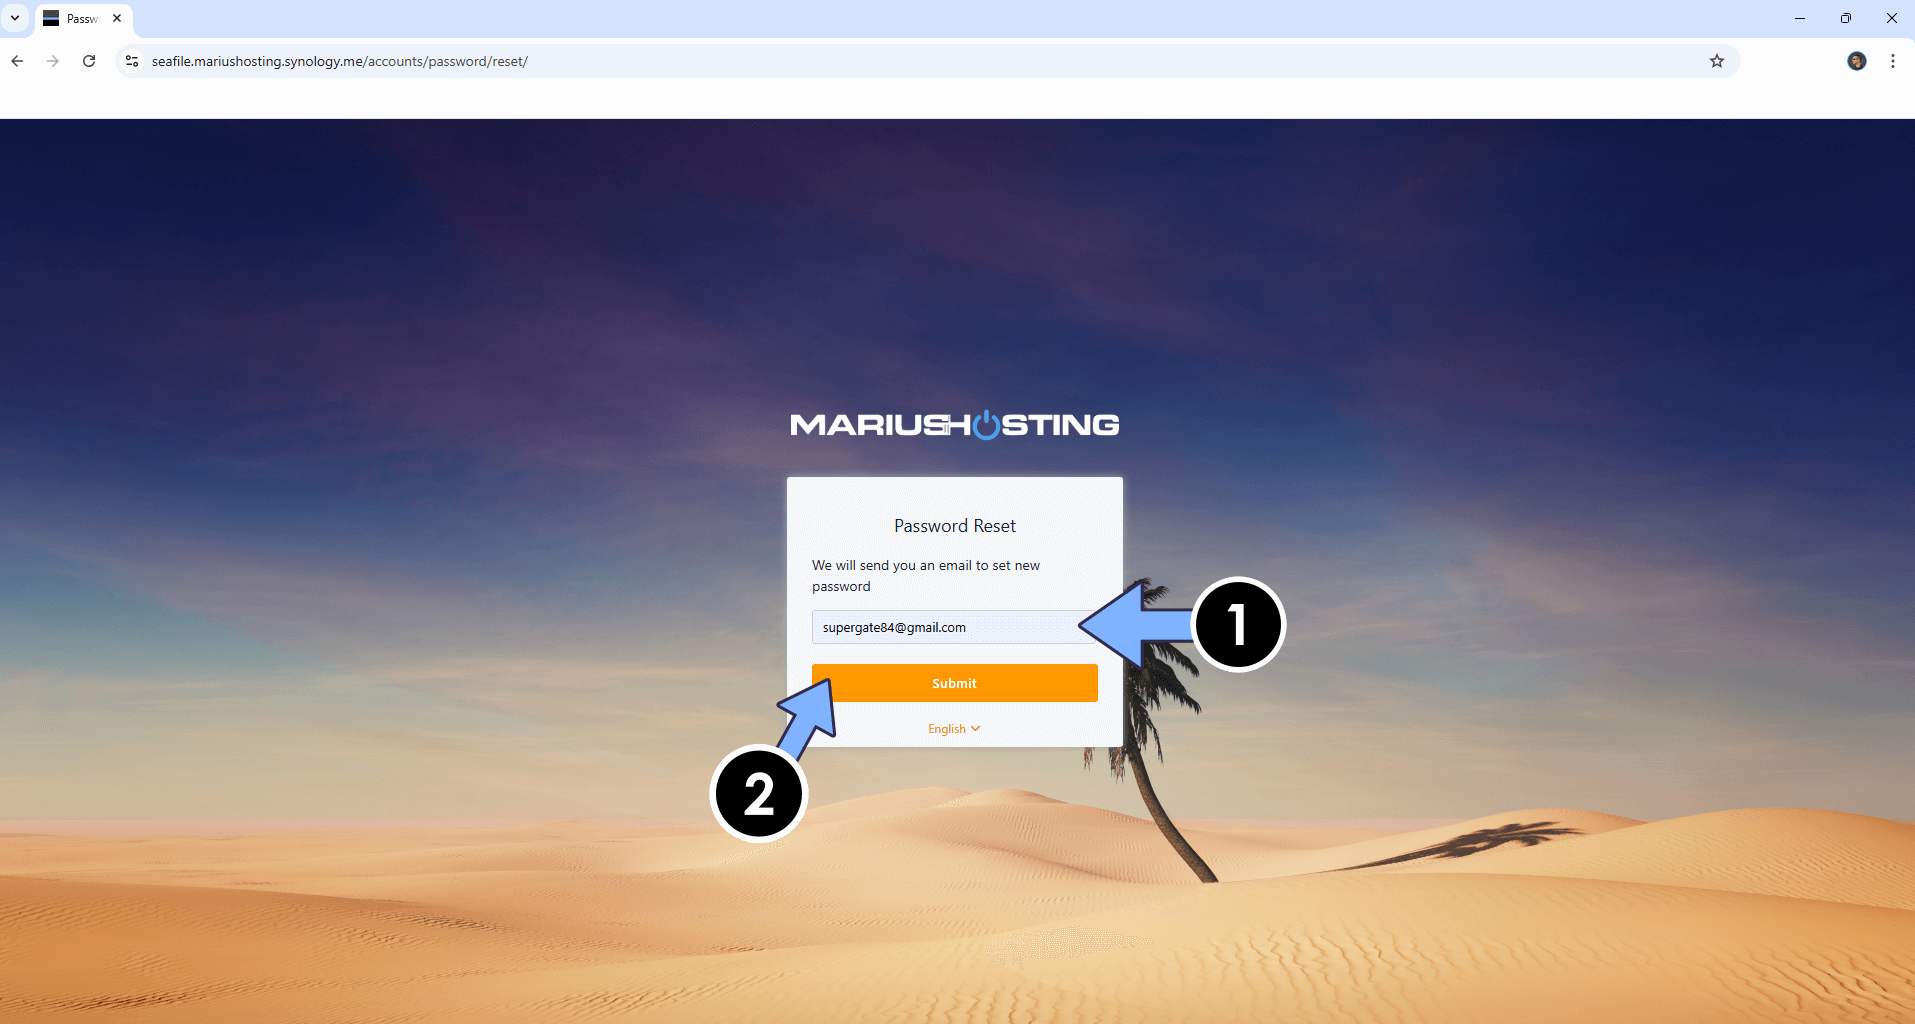
Type in your Email used to log in, then click Submit. Follow the instructions in the image below.
STEP 14
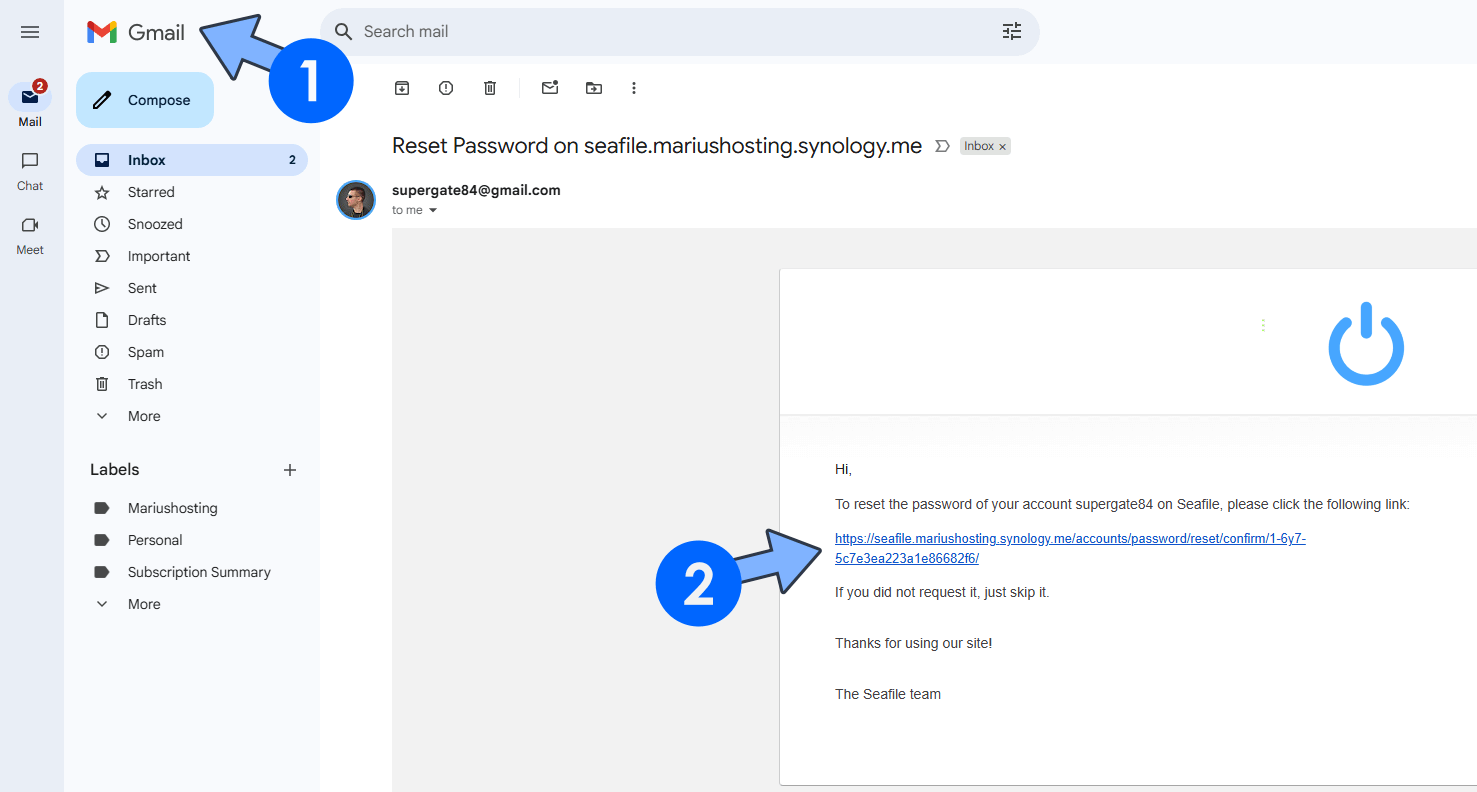
Your SMTP is now working! Enjoy Seafile 13 with the email notifications enabled!
This post was updated on Tuesday / September 2nd, 2025 at 3:46 PM