

Recently I have updated my Plane guide with the latest instructions. Now I want to show you how to set up email notifications on Plane since the previous instructions have changed. Setting up email notifications on Plane will help you reset your Plane password, invite new members to your workspace etc. See the steps below and enjoy Plane to its full potential.
STEP 1
Please Support My work by Making a Donation.
STEP 2
Install Plane using my Docker Guide. If you already have Plane installed on your Synology NAS, skip this STEP.
STEP 3
Follow my step by step guide on how to activate SMTP for your Gmail account.
STEP 4
Now open your browser and type in your HTTPS/SSL certificate like this https://plane.yourname.synology.me/god-mode – In my case it’s https://plane.mariushosting.synology.me/god-mode
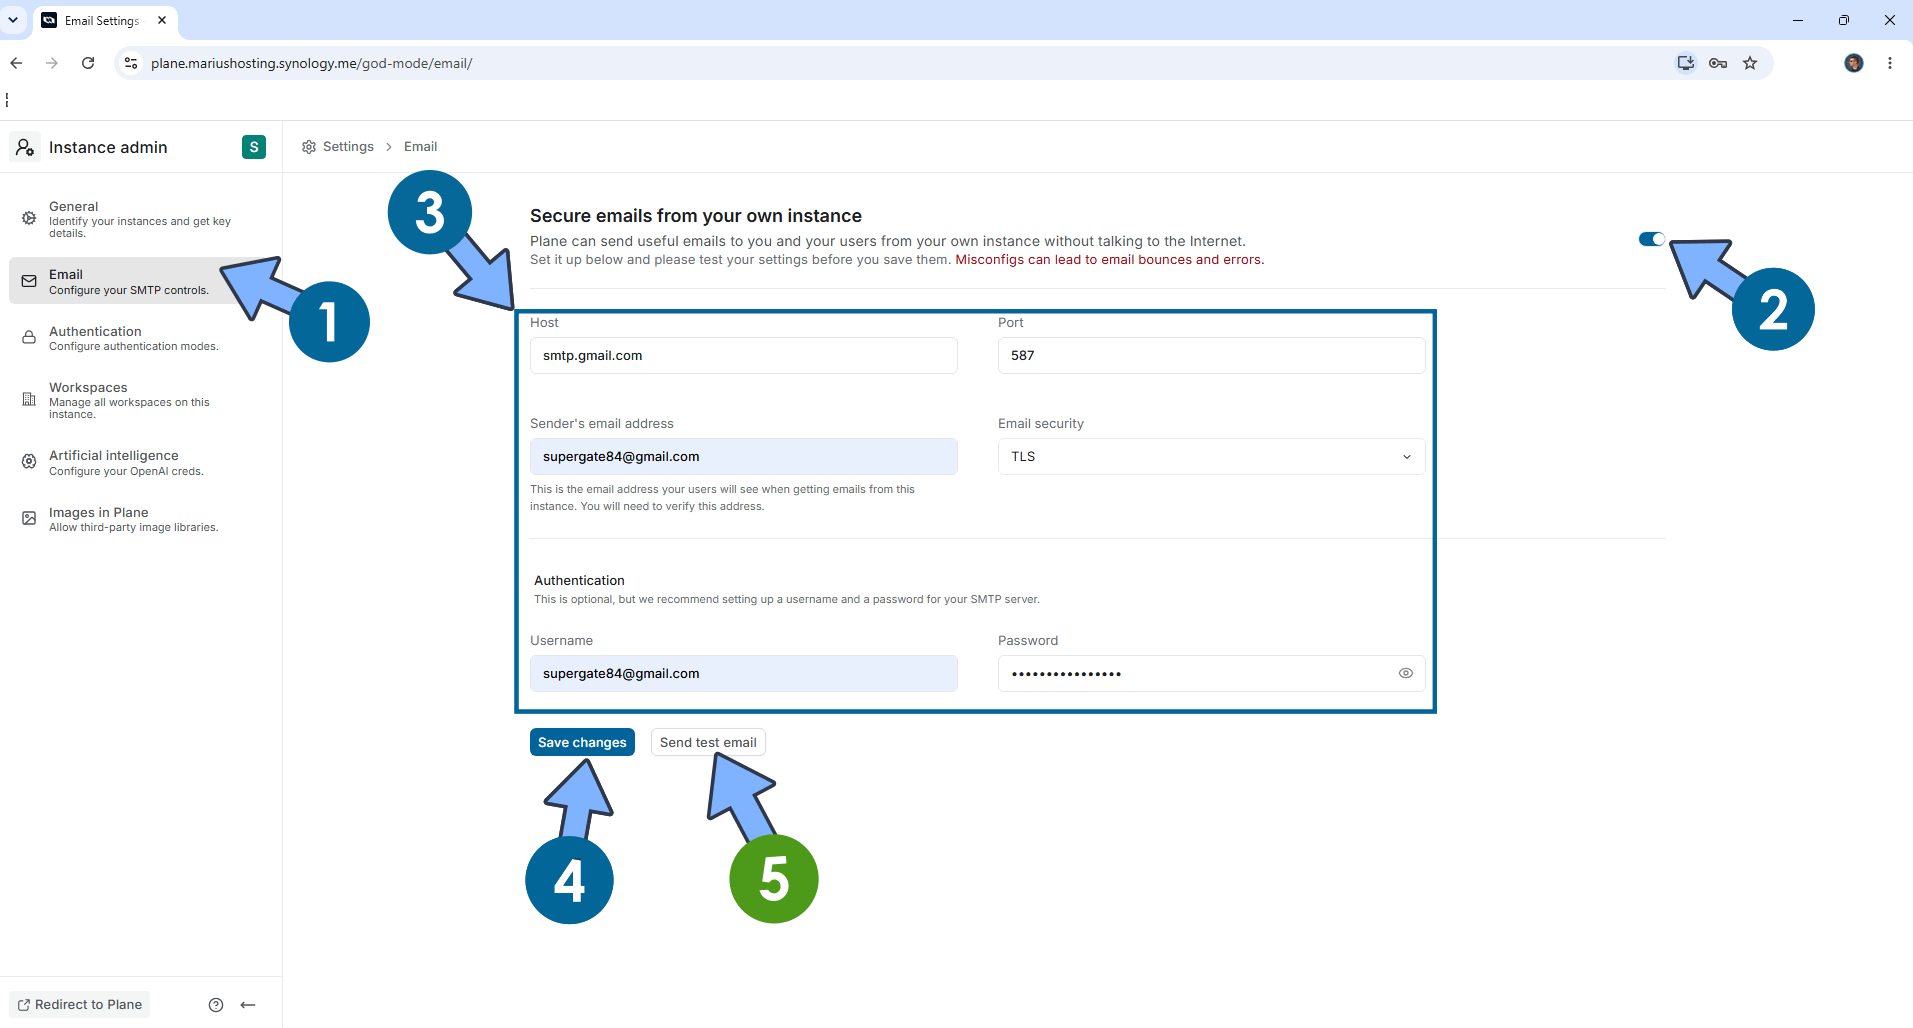
On the left sidebar, click Email. Add the details below. Follow the instructions in the image below.
Host: smtp.gmail.com
Port: 587
Sender email address: Type in your own Gmail address.
Email security: TLS.
Username: Type in your own Gmail address / STEP 3
Password: Type in your own Gmail App Password / STEP 3 ⚠️Warning: Do NOT confuse with your own Gmail password. This is the Gmail APP password.
Click Save changes, and, after that, click Send test email to test if the email is working properly.
STEP 5
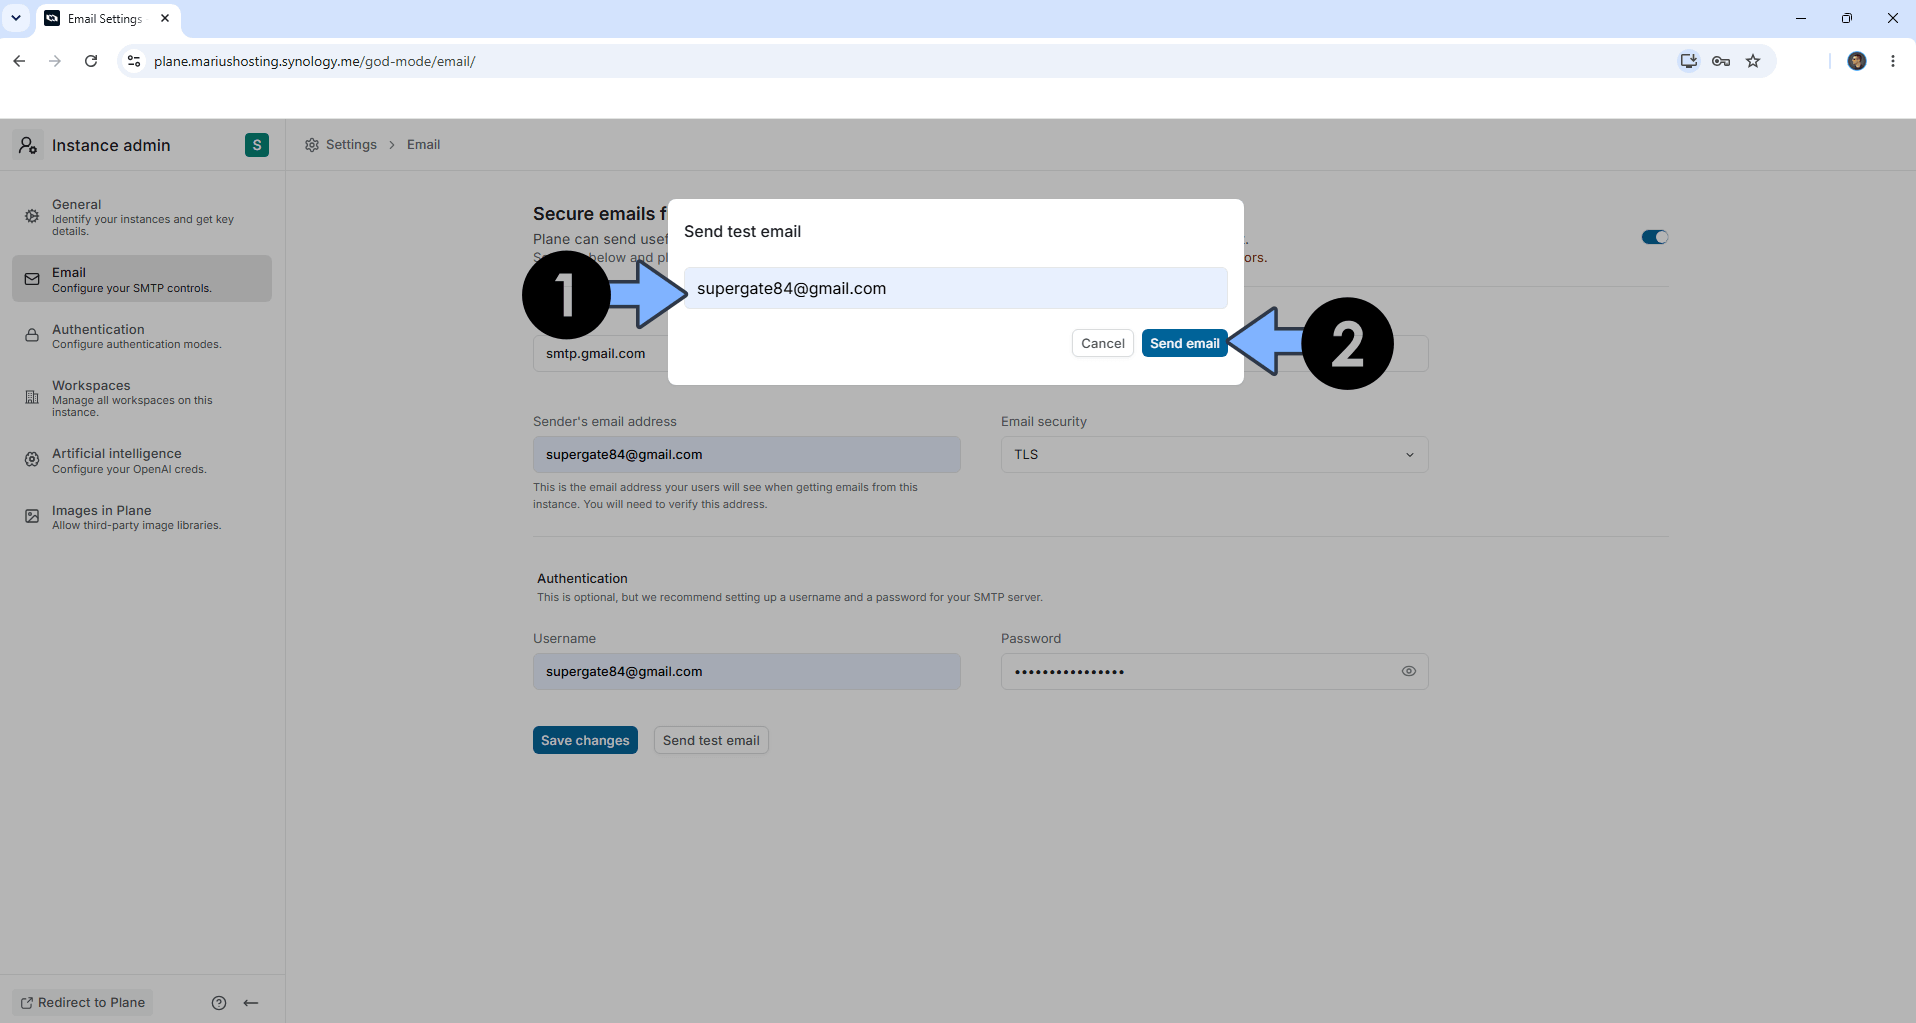
A new pop up window will open. Type in an email address then Send email. Follow the instructions in the image below.
STEP 6
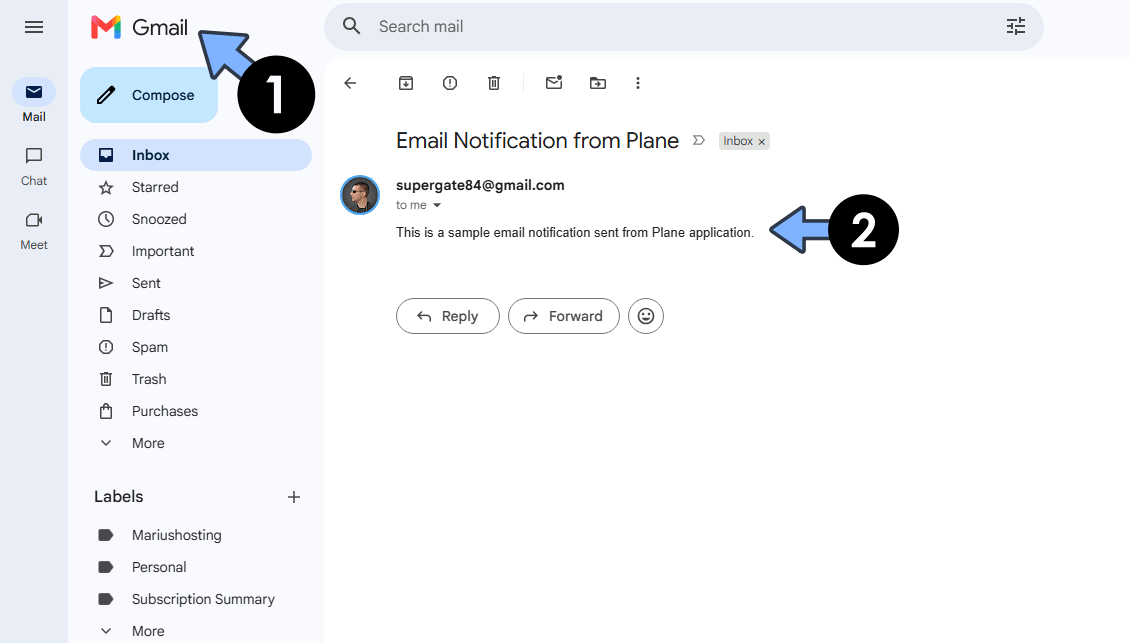
Enjoy Plane with Email Notifications!
This post was updated on Monday / October 5th, 2026 at 10:09 PM