Have you already installed Mautic on your Synology NAS? Today, after many, many emails asking me how to set up email Notifications on Mautic, I have finally come about to writing an article on how to set up Gmail Notifications on Mautic so you can get notified via email. See the details below.
STEP 1
Please Support My work by Making a Donation.
STEP 2
Install Mautic using my Docker Guide. If you already have Mautic installed on your Synology NAS, skip this STEP.
STEP 3
Follow my step by step guide on how to activate SMTP for your Gmail account.
STEP 4
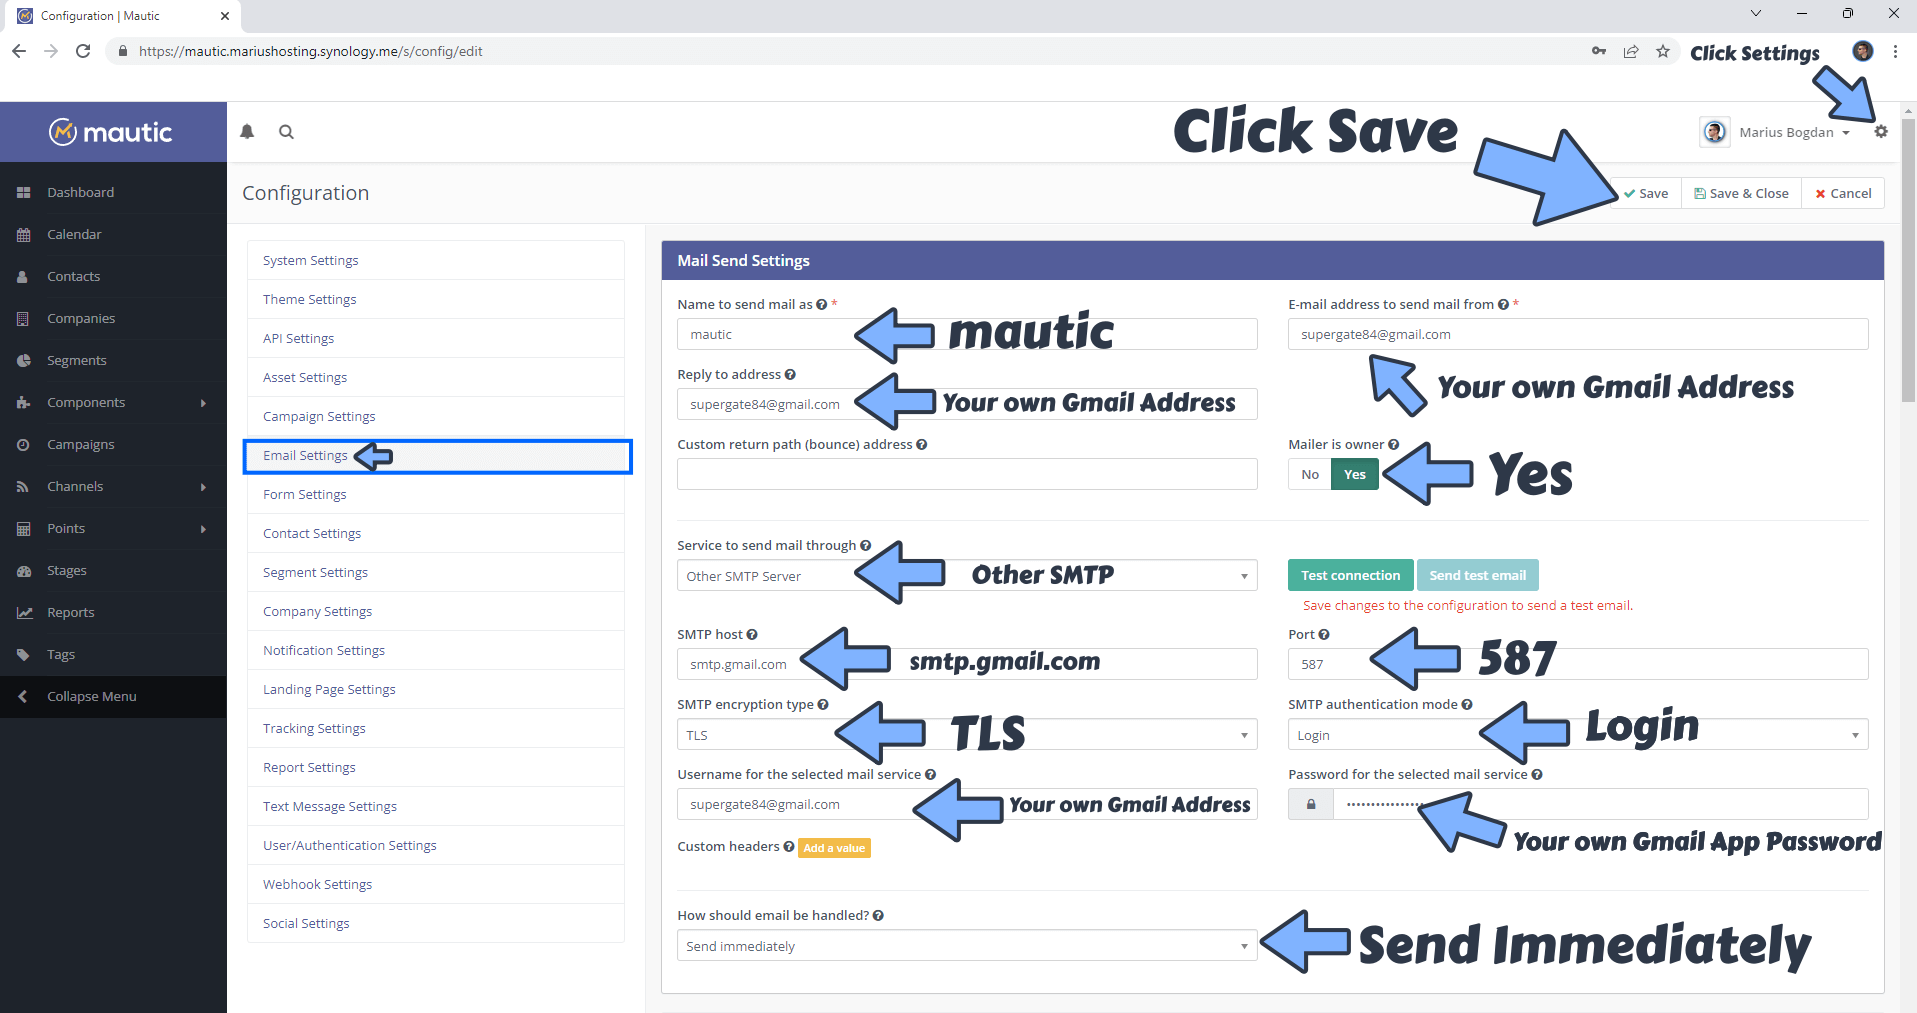
Open your Mautic instance. At the top right of the page, click on the Gear Icon to access the settings. After you click the Gear Icon, click Email Settings on the left sidebar. Click Notifications then Setup Notification. Follow the instructions in the image below.
Add the details below, then click Save. Follow the instructions in the image below.
Name to send mail as: Type in a Friendly name.
E-mail address to send mail from: Type in your own Gmail address / STEP 3.
Reply to address: Type in your own Gmail address / STEP 3.
Mail is owner: Yes
Service to send mail through: Other SMTP
SMTP Host: smtp.gmail.com
Port: 587
SMTP encryption type: TLS
SMTP authentication mode: Login
Username for the selected mail service: Type in your own Gmail address.
Password for the selected mail service: Type in your own Gmail App Password / STEP 3.
How should email be handled: Send Immediately.
STEP 5
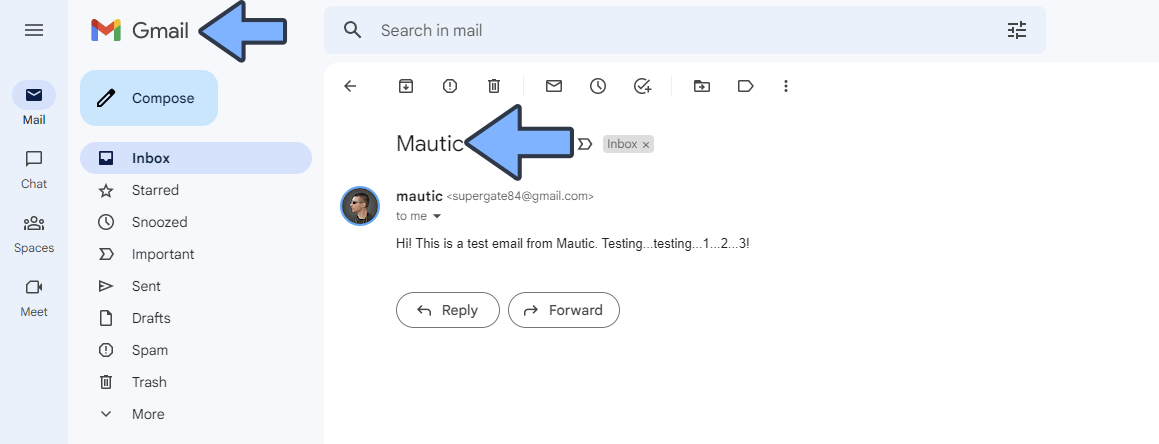
Click Send test email. Note: It’s mandatory to Save the settings at STEP 4 before sending the test email. Follow the instructions in the image below.
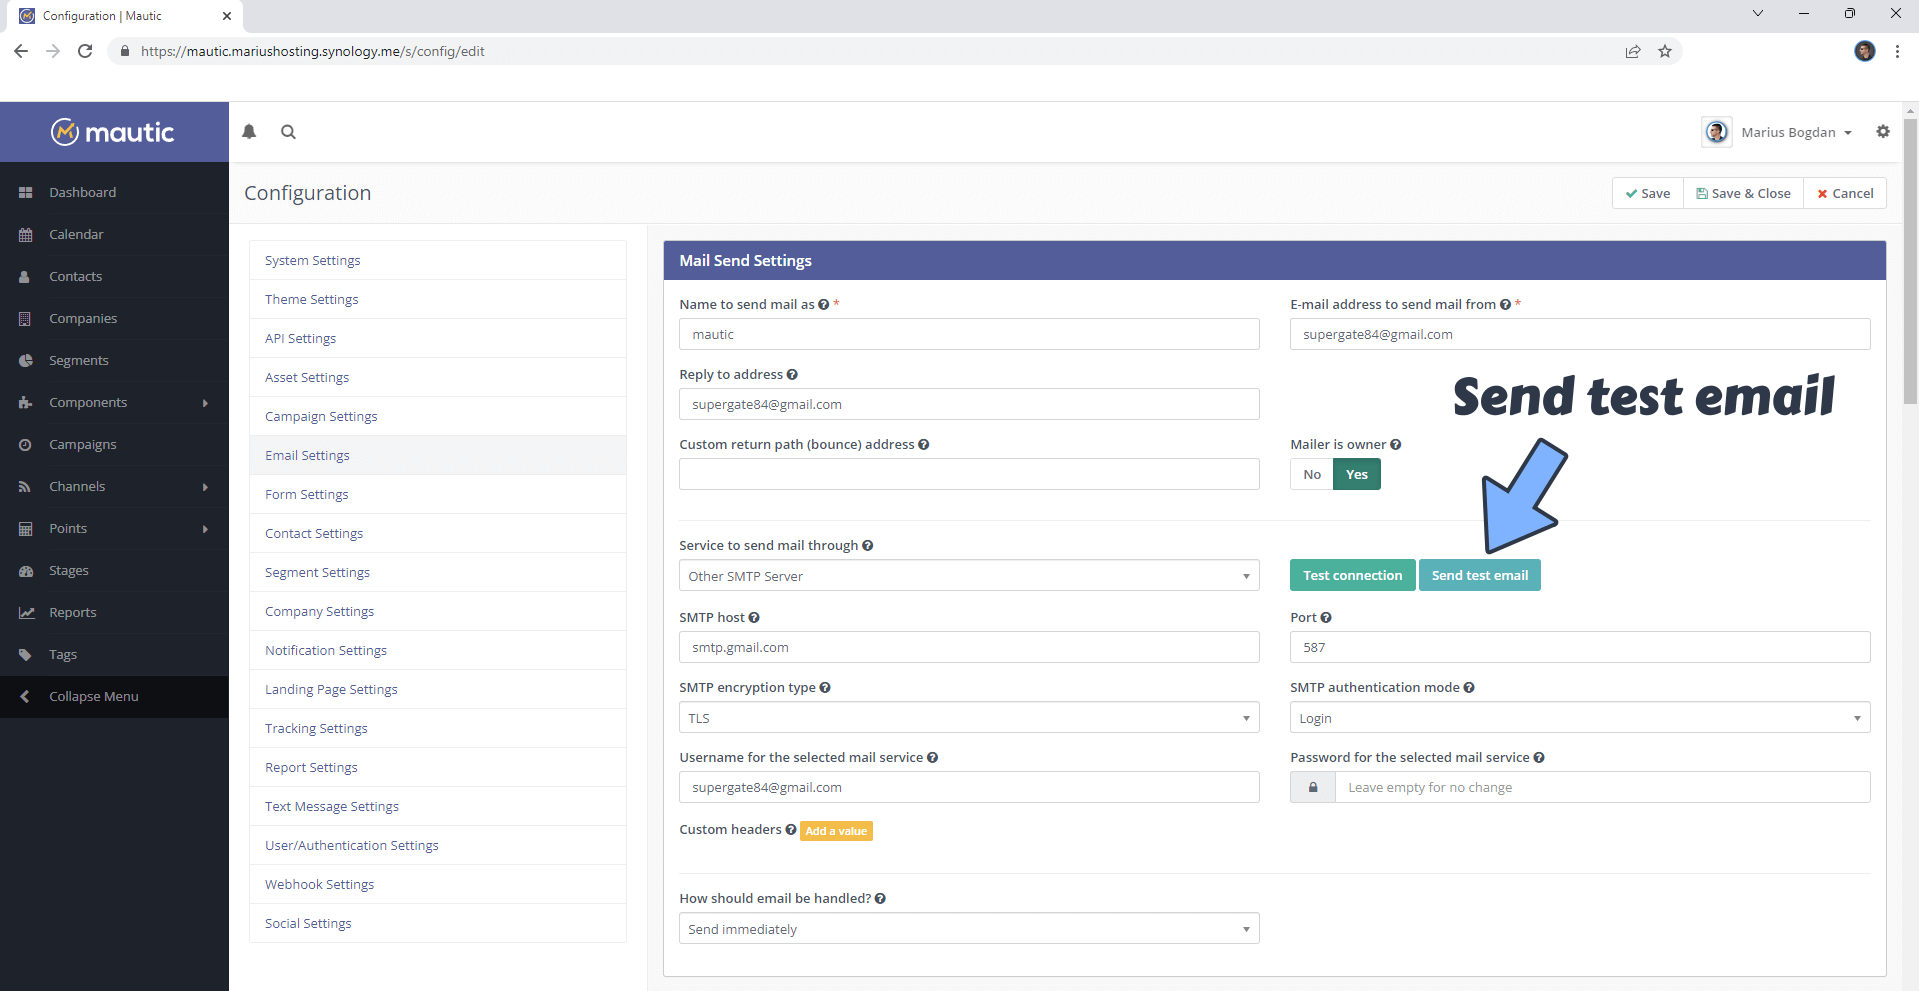
Once you click Send test mail you are done! Enjoy your Mautic Notifications via Email!
This post was updated on Monday / September 15th, 2025 at 2:03 AM