Have you already installed Flarum on your Synology NAS? Then today I’m going to show you how to set up email notifications on Flarum to be able to reset your own password, activate user registration etc. In the guide below I will walk you step by step through the process of setting up Gmail on Flarum so you can enjoy the full potential of the selfhosted Flarum forum.
STEP 1
Please Support My work by Making a Donation.
STEP 2
Install Flarum using my Docker Guide. If you already have Flarum installed on your Synology NAS, skip this STEP.
STEP 3
Follow my step by step guide on how to activate SMTP for your Gmail account.
STEP 4
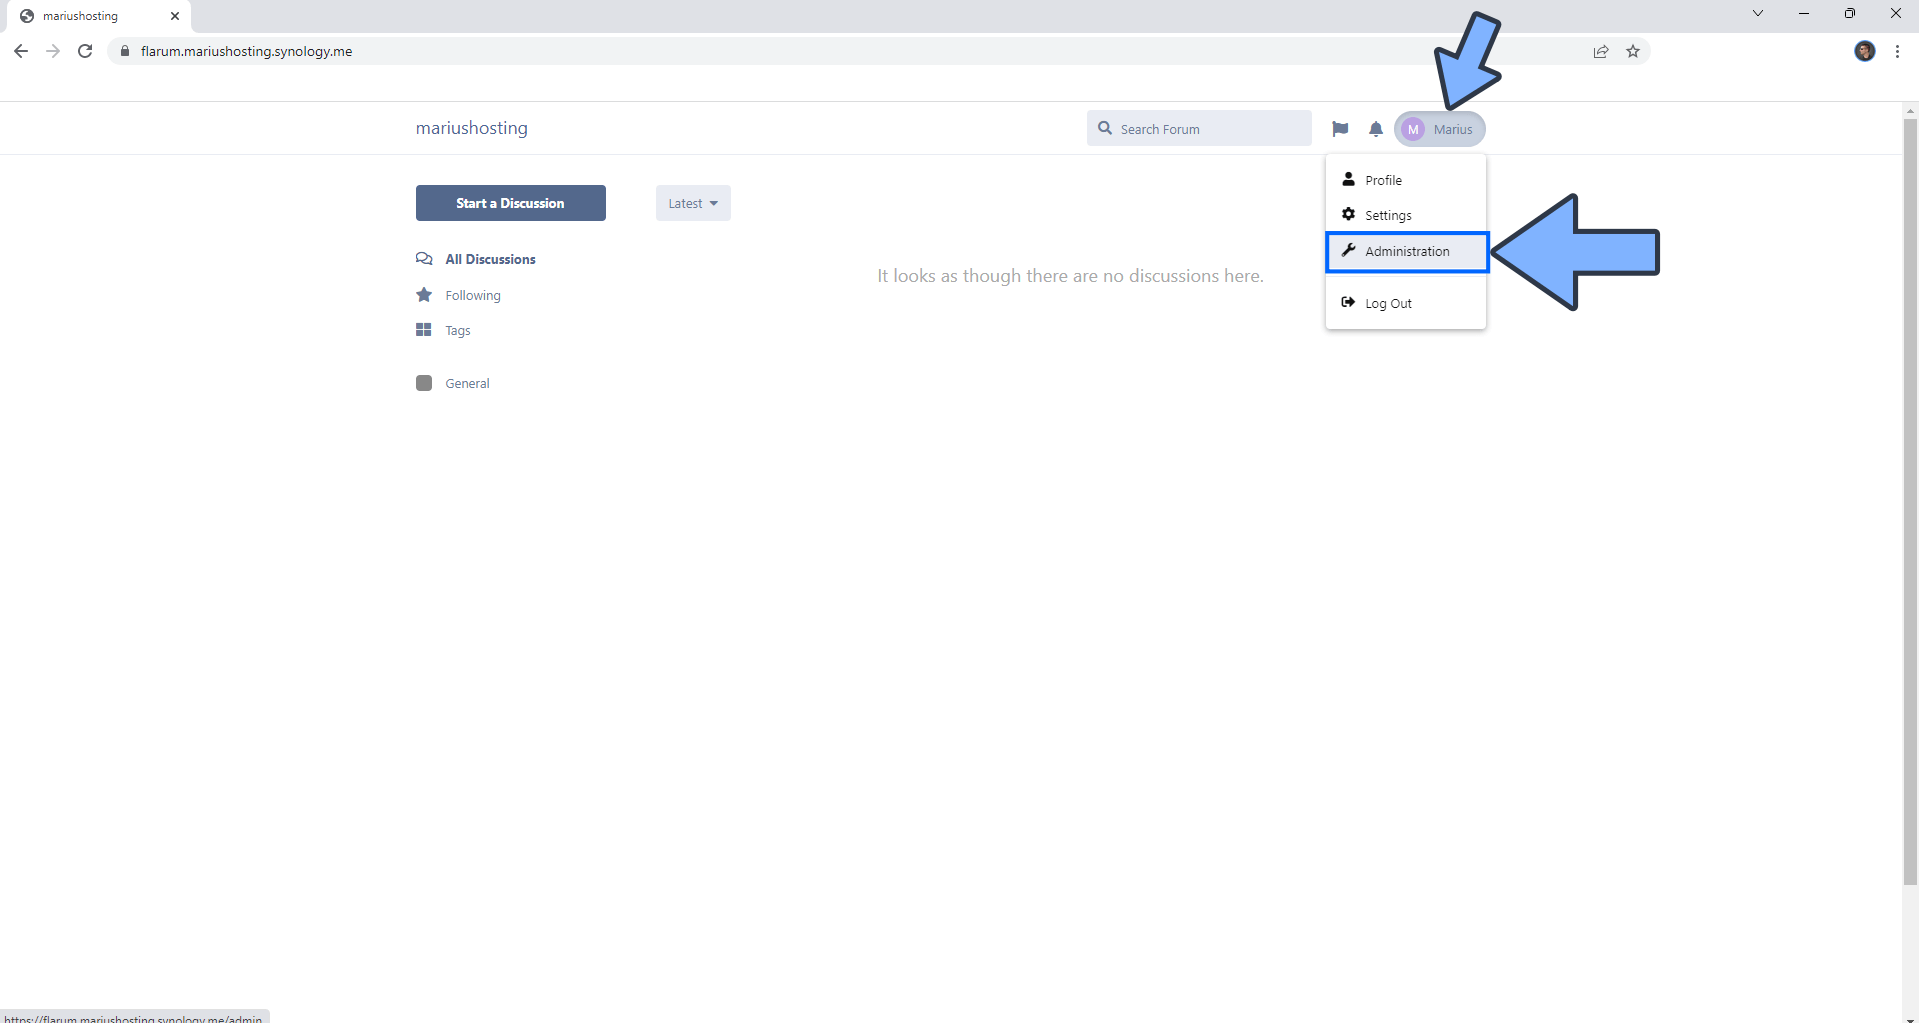
Open your Flarum instance. At the top right of the page click on your profile name then Administration. Follow the instructions in the image below.
STEP 5
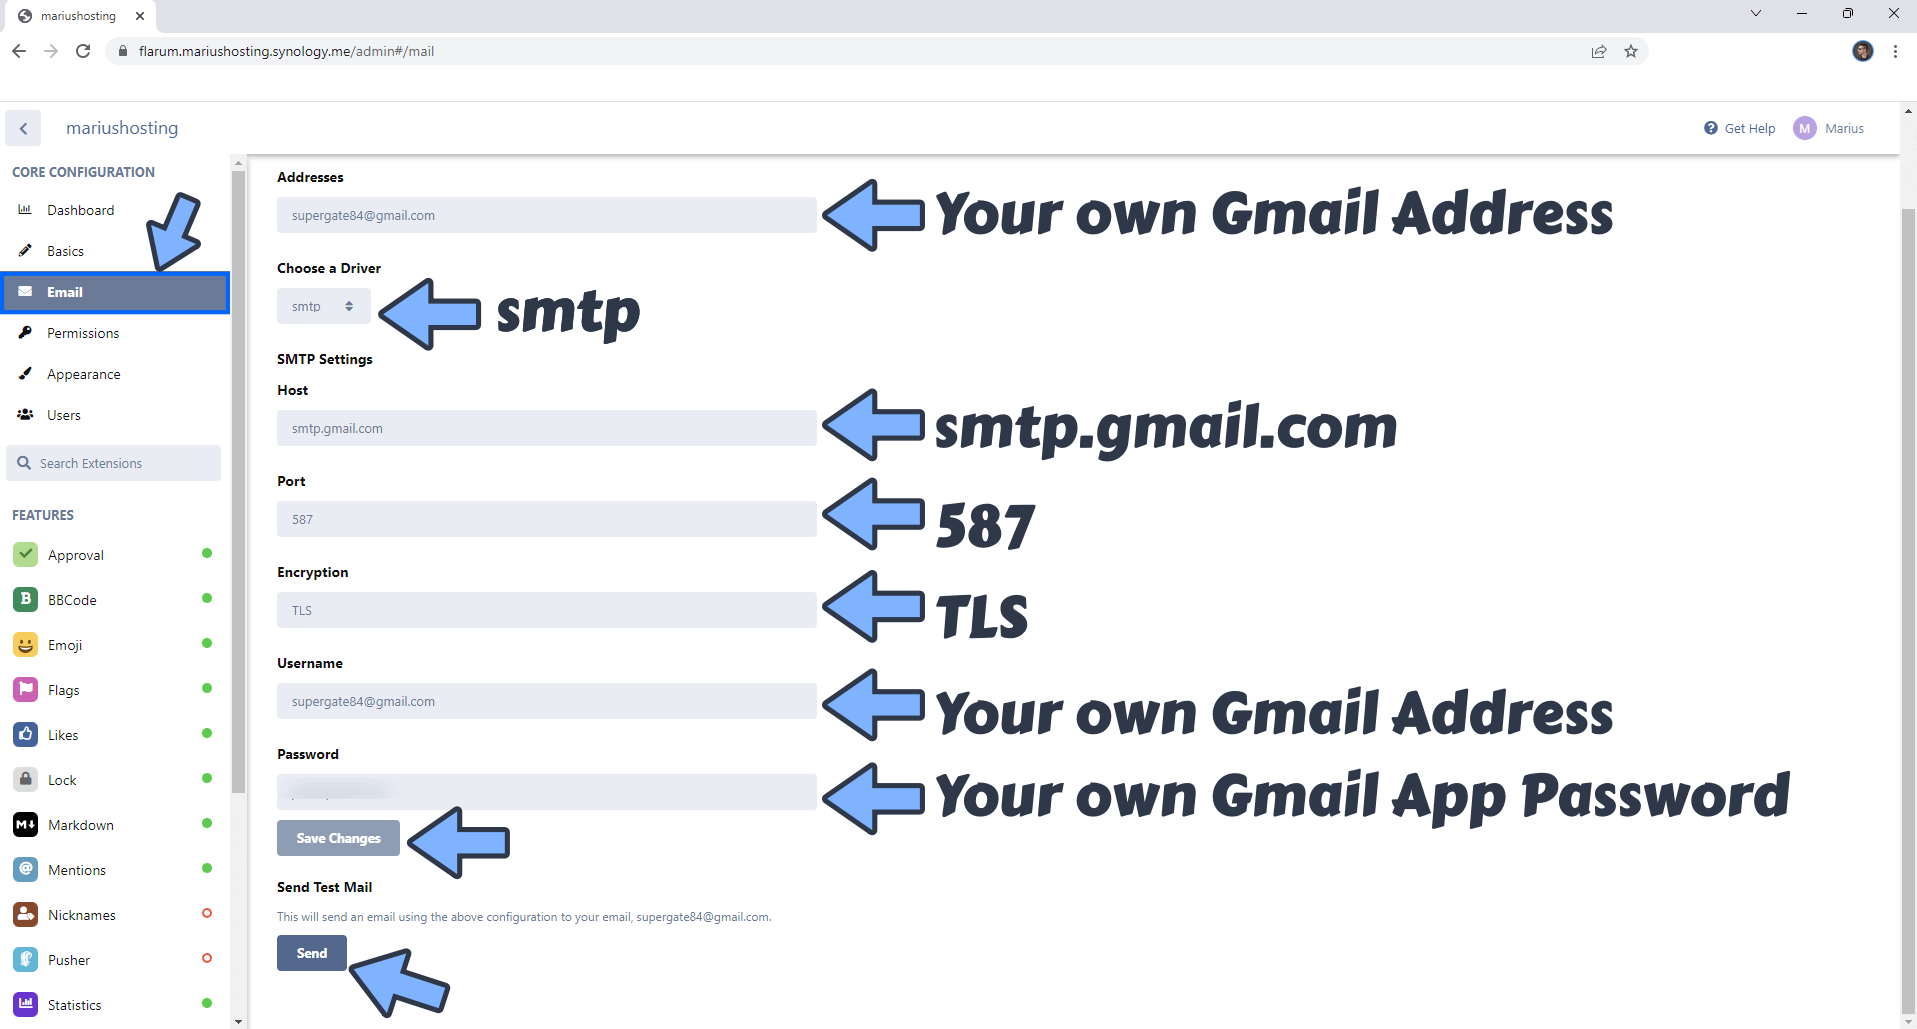
On the left sidebar click Email then add the details below. Follow the instructions in the image below.
Addresses: Type in your own Gmail address.
Choose a Driver: smtp
Host: smtp.gmail.com
Port: 587
Encryption: TLS
Username: Type in your own Gmail address.
Password: Type in your own Gmail App Password / STEP 3.
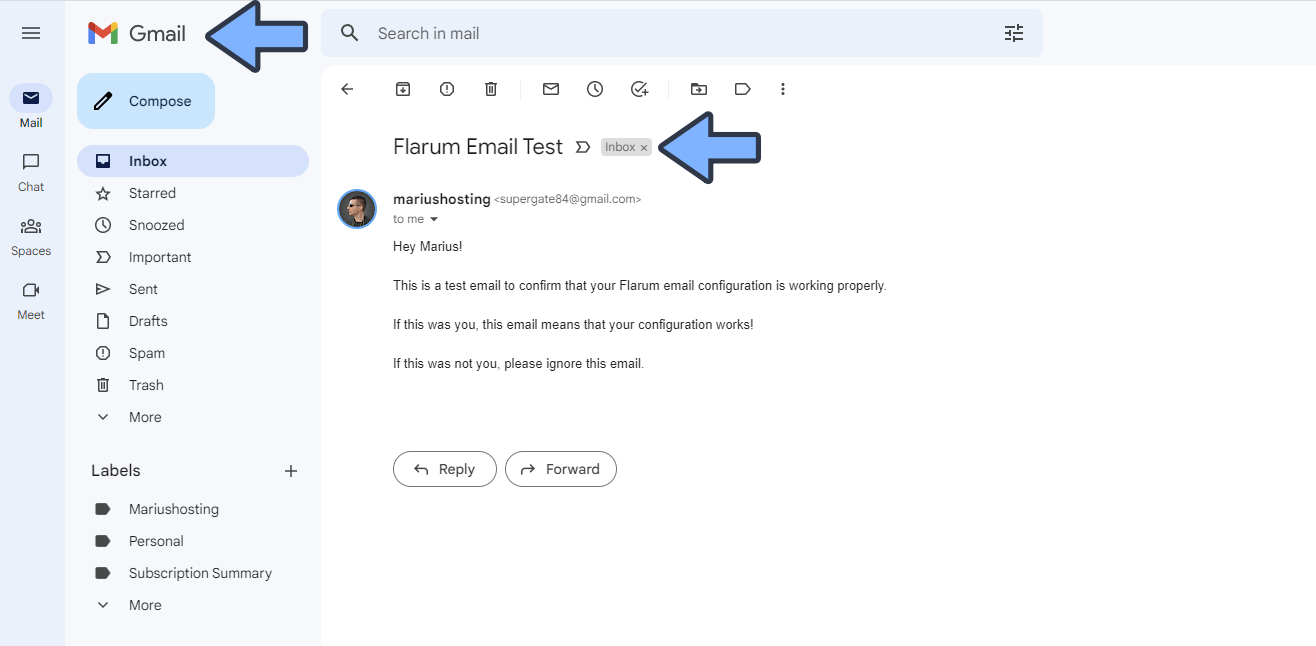
Note: Click Save Changes then click Send to test if the settings are correct.
Enjoy Flarum with the Email notifications enabled!
This post was updated on Sunday / May 18th, 2025 at 10:56 PM