Sometimes you have to change a faulty SSD/HDD disk on our Synology NAS. If you have set up RAID 1 or 5, what you will read below should help you. If you use your NAS as a web server or for hosting websites (like I do with mariushosting.com), you’ll find it very useful to know how to change a disk without having to turn off your NAS and, therefore, avoiding having downtime on your website. If you need to Hot Swap a hard drive on your NAS, you can use the drive indicator light on the front of your NAS to identify which drive needs replacing. What is Hot Swap? Some models (generally not the budget-friendly models) allow you to pull and replace a disk while the system is powered on, which is useful if you want to swap a disk without any downtime. Your DS model’s tech specs will tell you whether it supports hot swapping or not. Your selected RAID system needs to be tolerant of the hot swap by having 1 or 2 disc redundancy.
In the DSM operating system there’s an option called “Switch Drive Indicator Status” which allows you to “sleep” a disk and safely remove it. The green triangle LED on your NAS will turn orange after this operation. Below are step by step instructions on how to change an SSD/HDD disk if your NAS is turned on.
STEP 1
Please Support My work by Making a Donation.
STEP 2
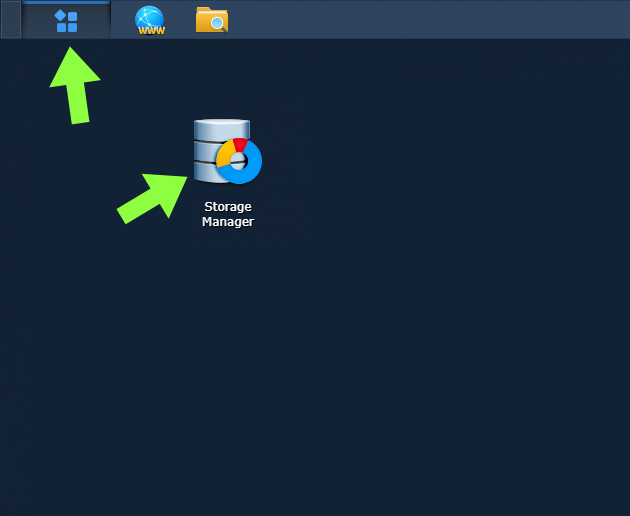
- Open Storage Manager. Follow the instructions in the image below.
STEP 3
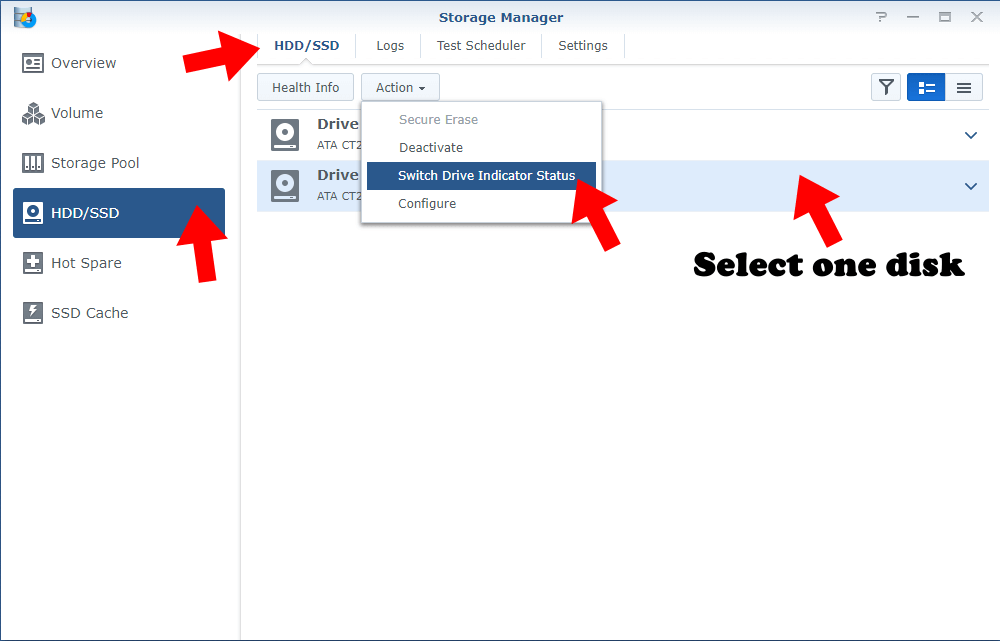
- Go to the HDD/SSD tab.
- Select a drive and click Action, then click Switch Drive Indicator Status. Follow the instructions in the image below.
STEP 4
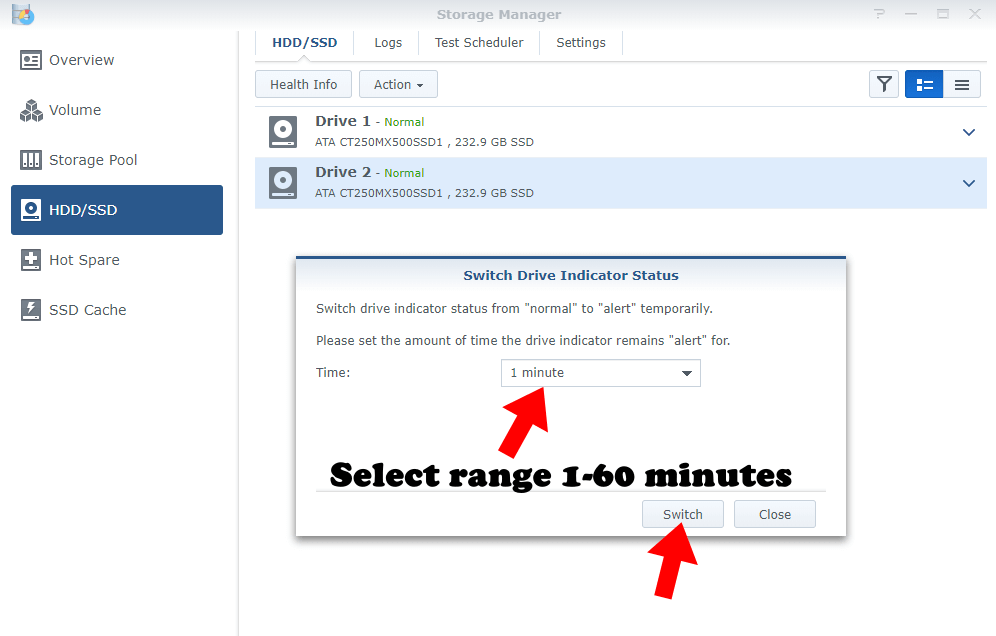
- Set the amount of time the drive indicator remains “alert” for, which can be between 1 minute and 60 minutes.
- Click Switch to switch drive indicator status.
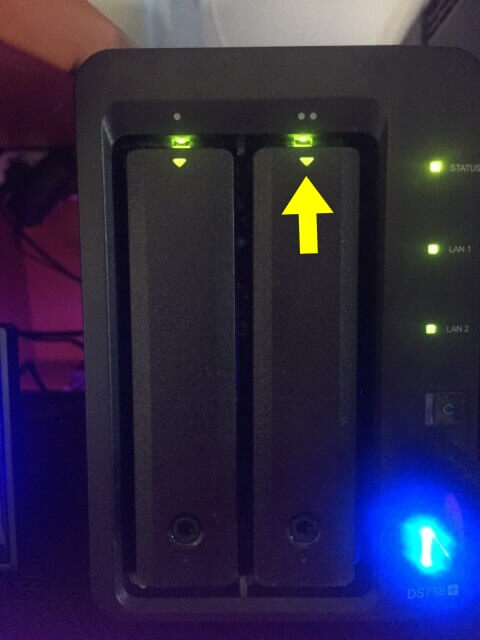
Before “Switch Drive Indicator Status”.
Notice the triangle LED light is green.
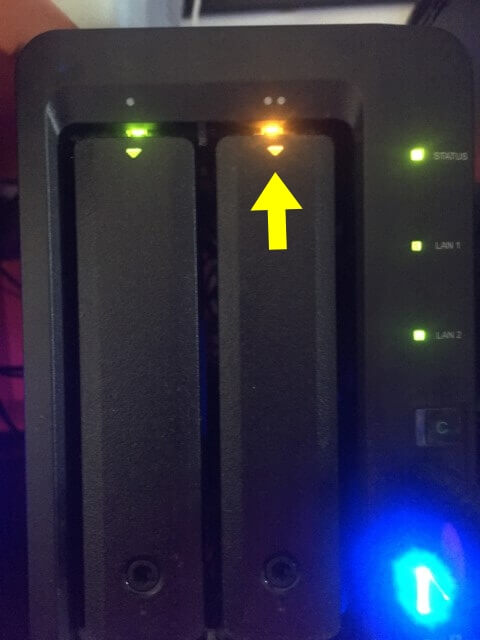
After “Switch Drive Indicator Status”.
When the orange led is on, you are free to change your faulty disk and insert a new one without having to turn off your NAS.
Note: You cannot switch the status of drive indicators on cache devices since there is no indicator on such devices.
Note: To restore drive indicator status, go to Storage Manager / Go to the HDD/SSD tab / Action / Switch Drive Indicator Status/ click Restore.
This post was updated on Friday / December 27th, 2019 at 8:10 AM
