Some of you wrote to me asking if I knew a trick or two to boost the speed of the Threat Prevention package on the new Synology WRX560 Router. Threat Prevention is a package found in the SRM operating system of Synology routers like the RT6600ax, WRX560, RT2600ac, MR2200ac. It is signature-based software that is able to monitor incoming and outgoing traffic using Deep Packet Inspection (DPI) – not just checking the domain or IP. Threat Prevention is able to drop any malicious packet detected in real time. In addition to Internet attacks, Threat Prevention can alert you to inappropriate user behavior, such as sending passwords through unencrypted HTTP traffic. In this step by step guide I will show you how to speed up the Threat Prevention package on your Synology WRX560 router.
STEP 1
Please Support My work by Making a Donation.
STEP 2
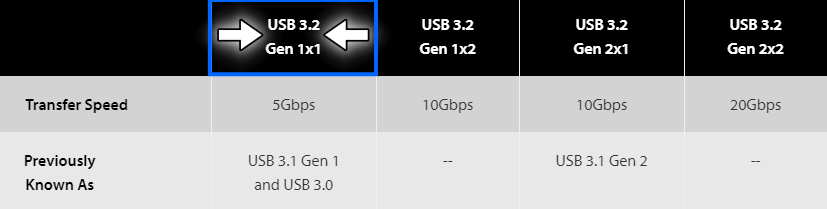
First things first: for the Threat Prevention package, it’s mandatory to attach an USB key to your Synology router. The type of USB key you should buy is a 3.2 Gen 1×1 32GB USB. The brand really doesn’t matter as much as the key meeting the stated criteria. For example, for my WRX560 router, I have an USB key from Kingston called the DataTraveler Kyson USB 3.2 Gen 1×1 32GB.
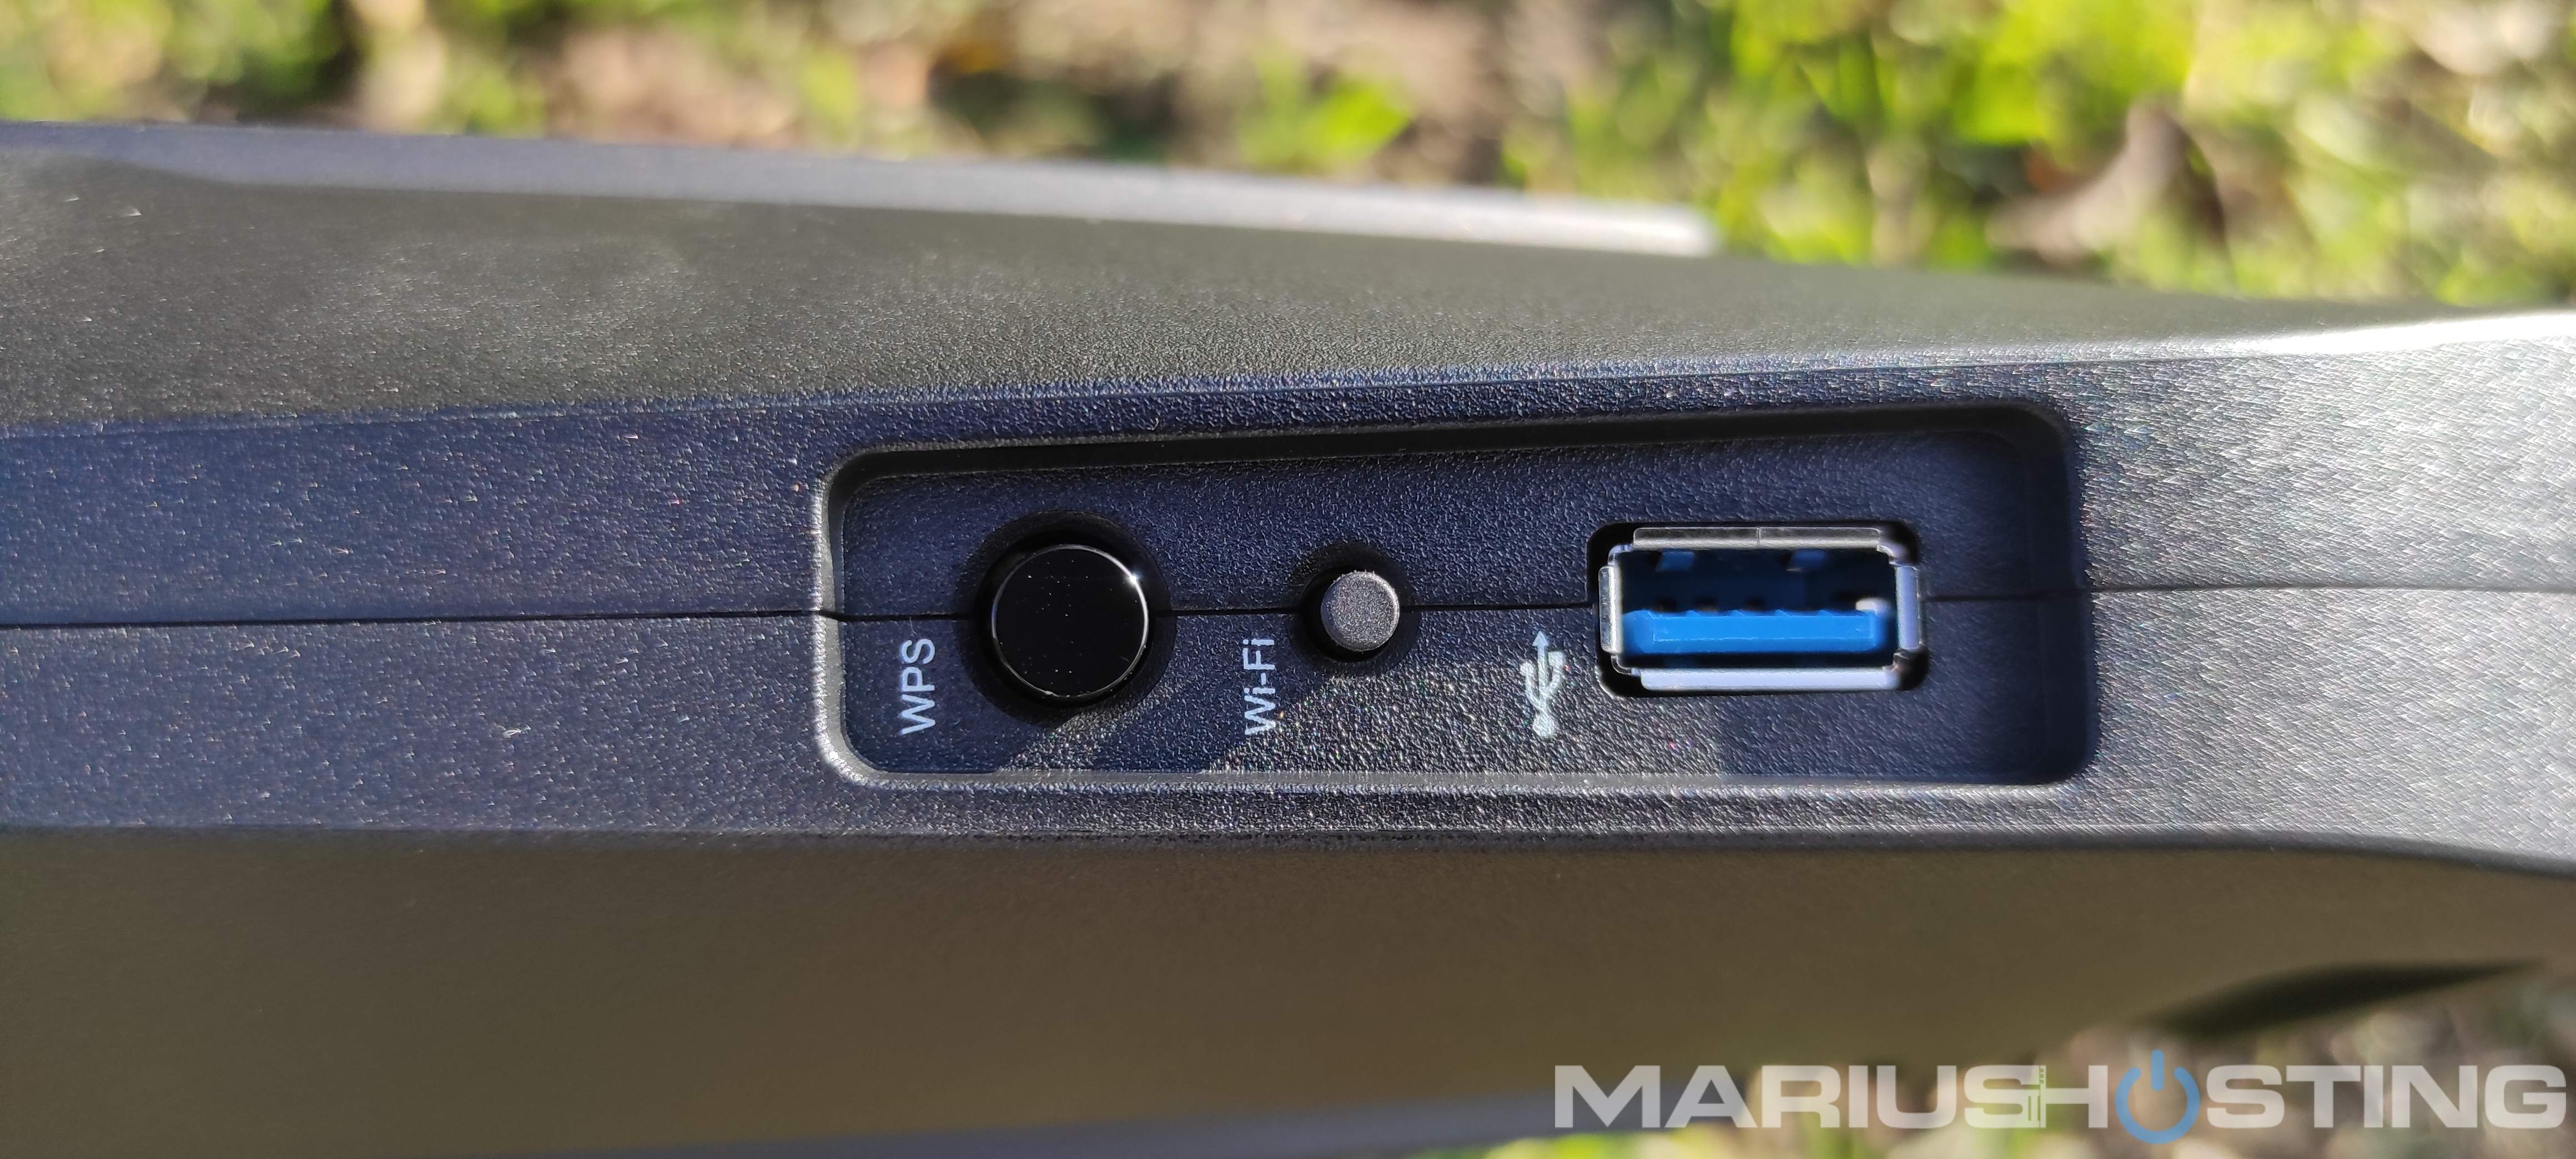
WRX560 Side View: On the side you can see the WPS button and the WI-FI button, followed by the USB key entry that makes it possible to install some packages such as Threat Prevention on the router.
STEP 3
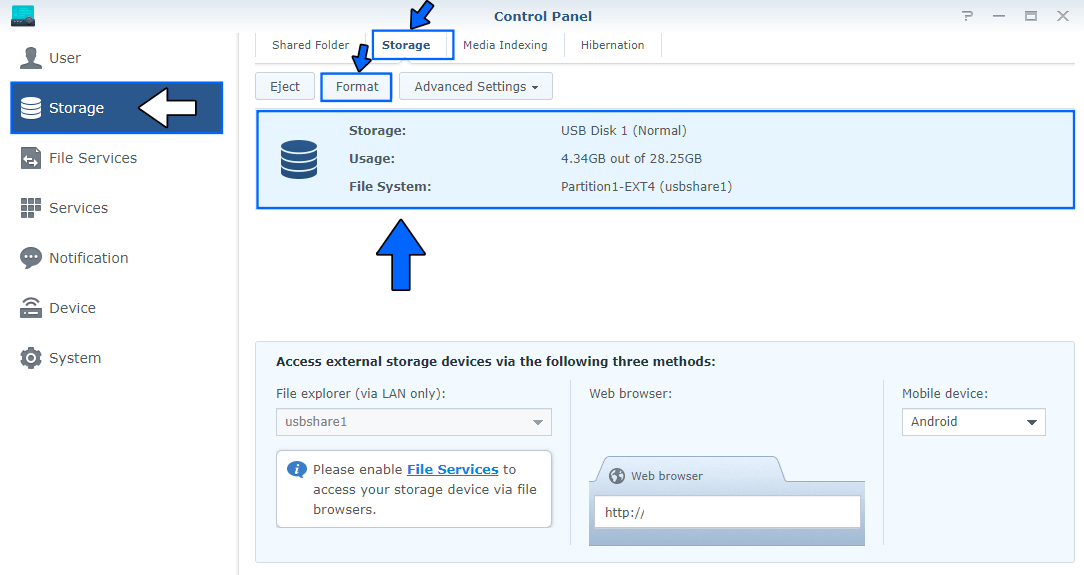
Immediately after you attach your USB key to your Synology router, format that key in the EXT4 File System. To achieve this, go to Control Panel / Storage / Storage tab / select your USB Key, then click Format. Follow the instructions in the image below. Note: Various benchmarks have concluded that the EXT4 File System can perform a variety of read-write operations faster than an NTFS.
STEP 4
Select Entire disk and EXT4 as your File System. Click OK. Follow the instructions in the image below.

STEP 5
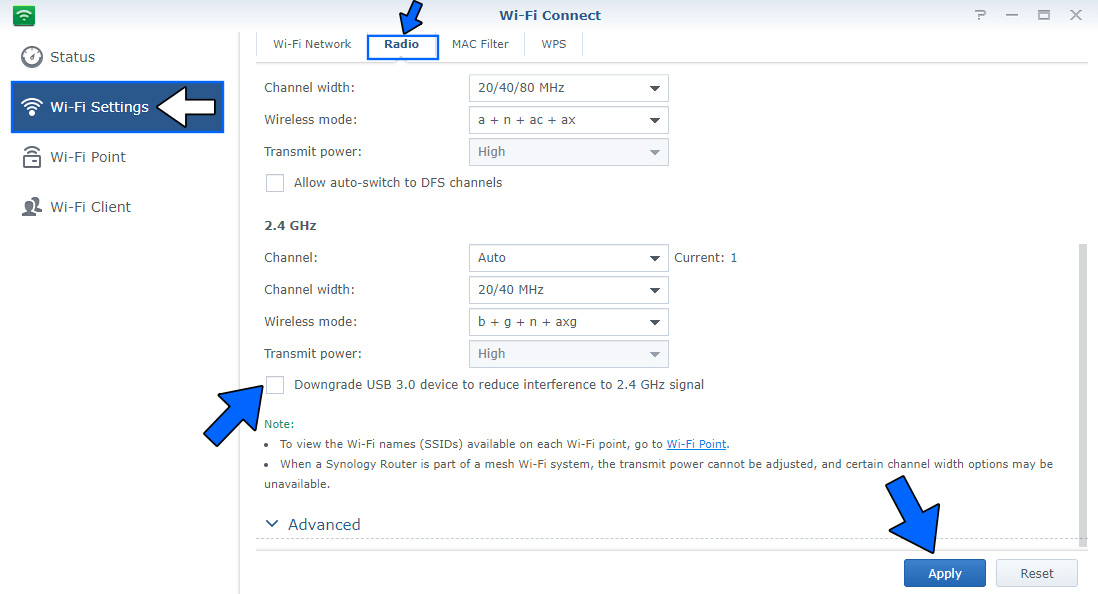
In your SRM operating system, open the package called Wi-Fi Connect. Go to Wi-Fi Settings / Radio tab / uncheck “Downgrade USB 3.0 device to reduce interference to 2.4 GHz signal”. Click Apply. Follow the instructions in the image below.
STEP 6
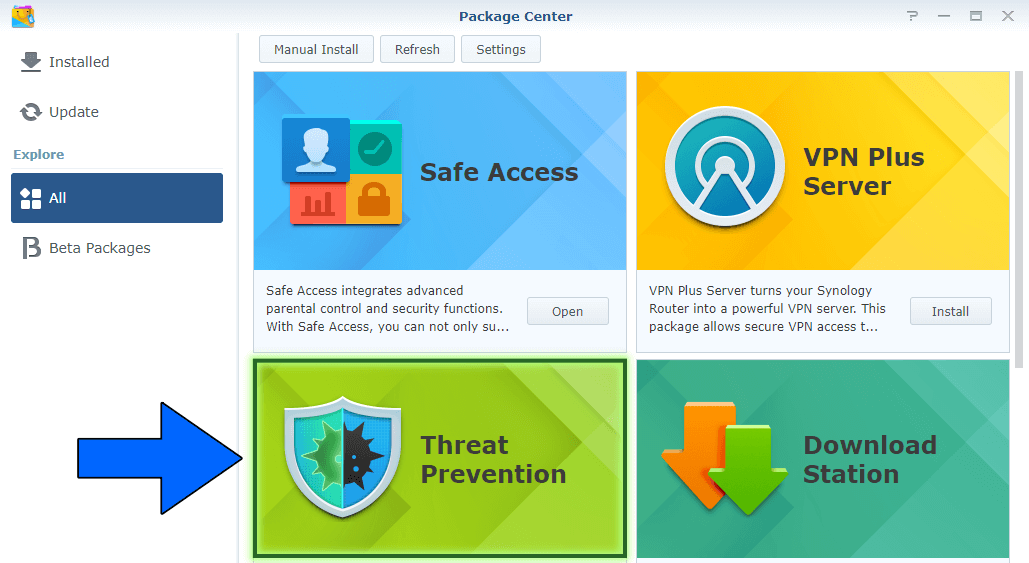
If you haven’t installed the Threat Prevention package yet, go to Package Center, then download it. Make sure you are downloading and using the latest Threat Prevention package.
STEP 7
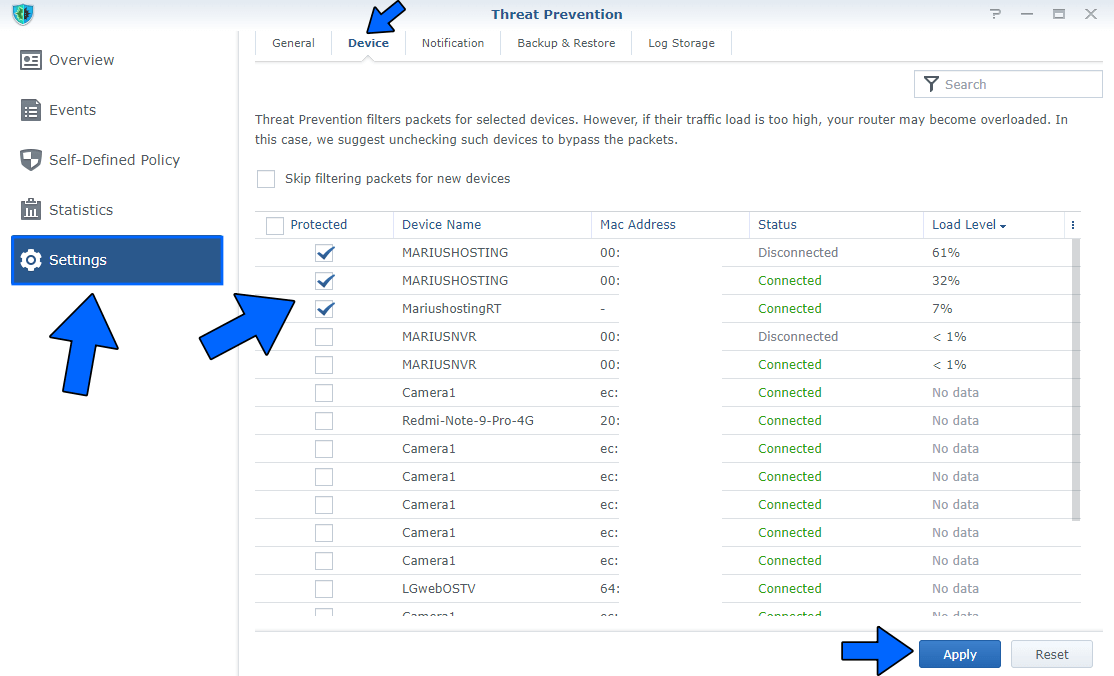
Open the Threat Prevention package. Go to Settings / Device tab / uncheck all the devices you don’t want to monitor. Click Apply. Follow the instructions in the image below.
STEP 8
Open the Threat Prevention package. Go to Settings / General tab / check Automatically update signatures, then select to download new signatures on a weekly basis. For example, I have chosen Sunday. Click Apply. Follow the instructions in the image below.

Note: If you implement these valuable tips and tricks from mariushosting, you will notice that your Threat Prevention package is considerably faster compared to how it was with the previous settings you had been using.
This post was updated on Monday / August 11th, 2025 at 2:42 AM