Did you know Synology has a package named Storage Analyzer that allows you to have a quick glance at the overall usage trends of your Synology NAS? You can create and manage tasks to analyze storage spaces, and generate detailed reports on volume usage. Today I will show you how to install and use Storage Analyzer on your Synology NAS device.
Storage Analyzer allows you to have a quick glance at the overall usage trends of your Synology NAS, create and manage tasks to analyze storage spaces, and generate detailed reports on volume usage. You can select report types, set a schedule to receive periodic storage reports, and easily view previous reports that match the specified time or criteria. You can specify the maximum number of duplicate files to be listed in the report. You can also choose to compare duplicate files by modified time and/or by file name to speed up the analysis. With Storage Analyzer, managing your system and modifying your settings according to the analysis becomes a lot easier and more efficient; for instance, based on analysis reports, you can delete files rarely accessed to release space for other usage, increase quota for users with larger demand, or install more storage space to meet the need and usage trends.
STEP 1
Please Support My work by Making a Donation.
STEP 2
Install Storage Analyzer via Synology “Package Center”.

STEP 3
STEP 4
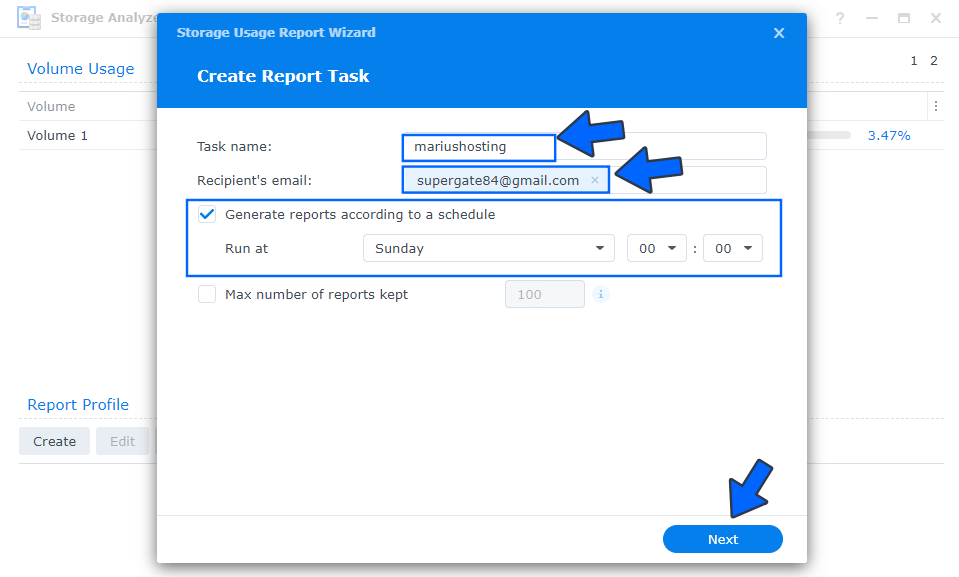
Open Storage Analyzer. Create a new Report Task. Type in a task name, and add your own recipient’s email. Schedule the report – I chose once a week on “Sunday”. Click Next. Follow the instructions in the image below.
STEP 5
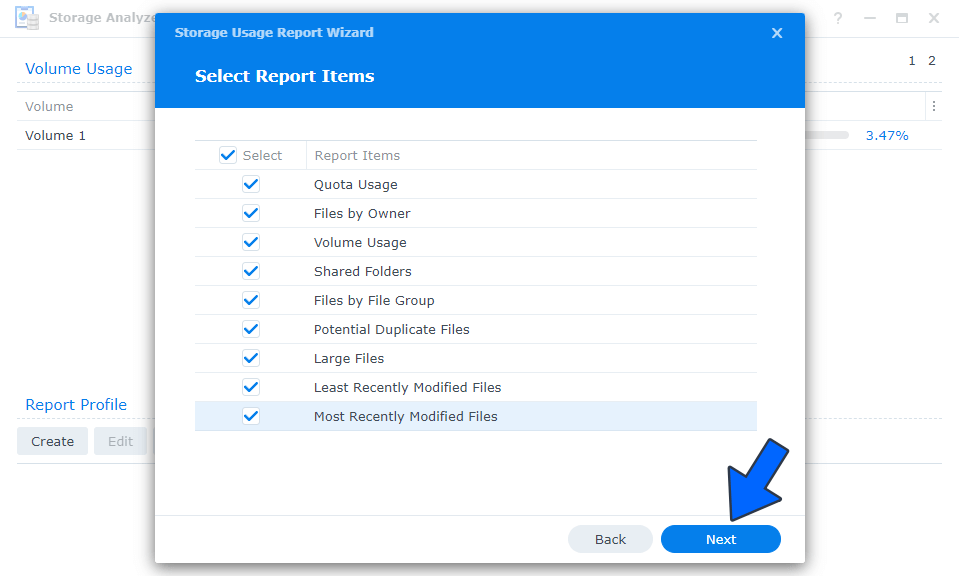
Select the report items according to your individual needs, then click Next. Follow the instructions in the image below.
STEP 6
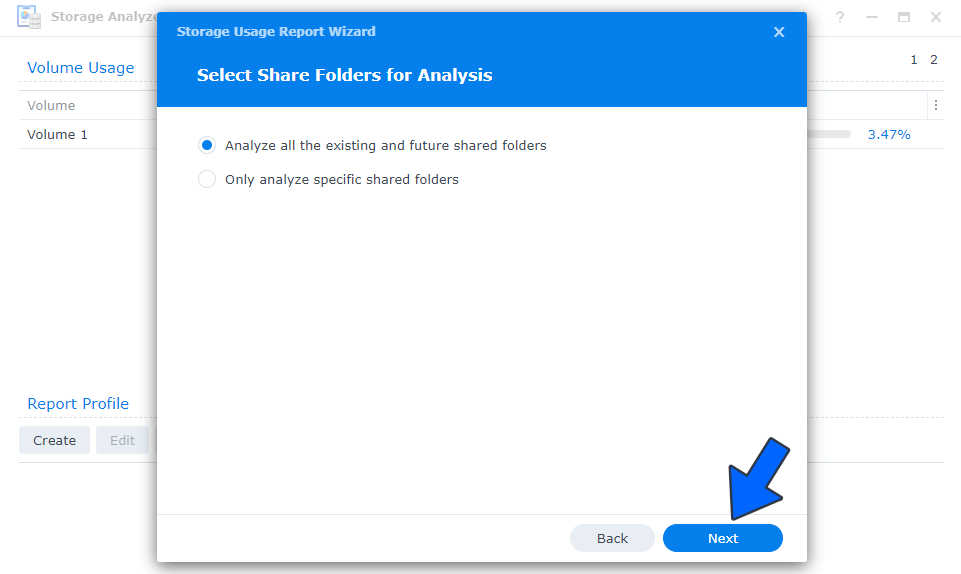
Choose “Analyze all the existing and future shared folders” then click Next. Follow the instructions in the image below.
STEP 7
Check “Find duplicate files when generating reports” then click Next. Follow the instructions in the image below.
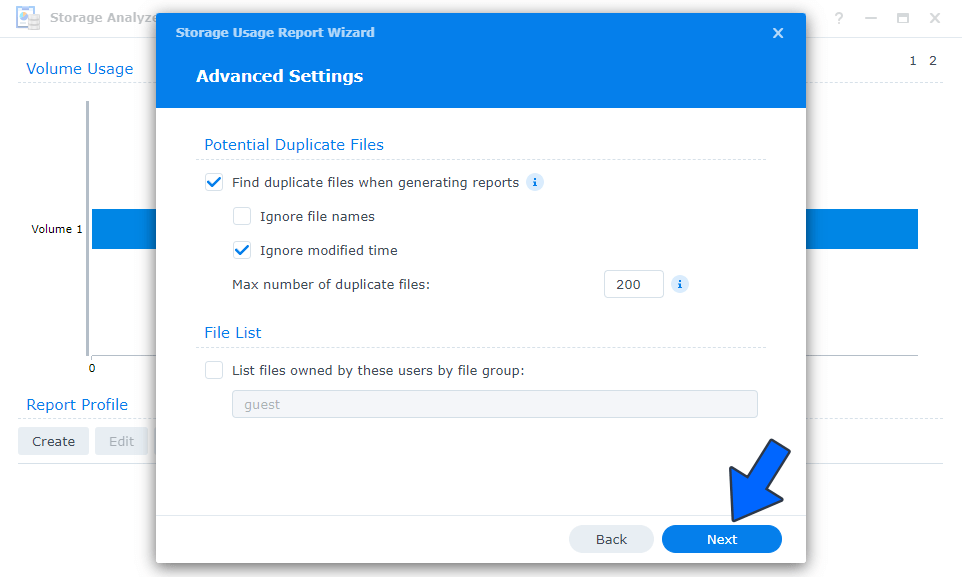
STEP 8
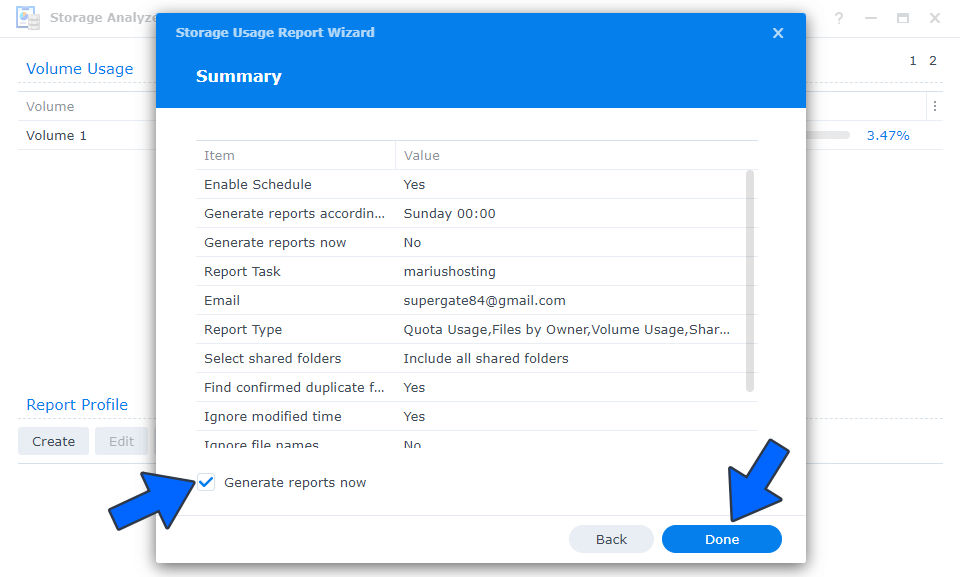
Summary. You can tick “Generate reports now” to see your first report. Click Done. Follow the instructions in the image below.
STEP 9
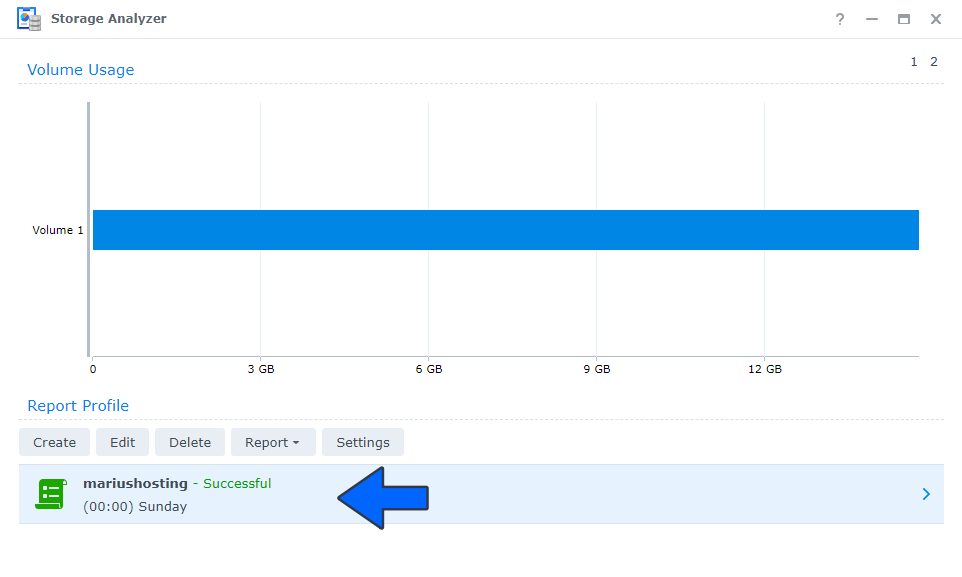
After a few minutes (depending on how full your storage is) your first report is successfully generated.
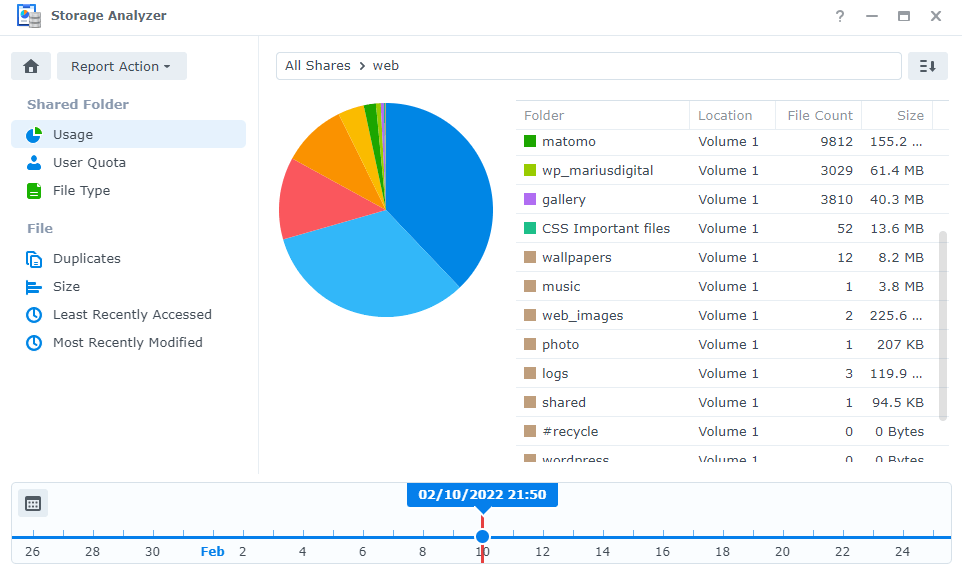
STEP 10
You can now take a look at your usage report at a glance.
STEP 11
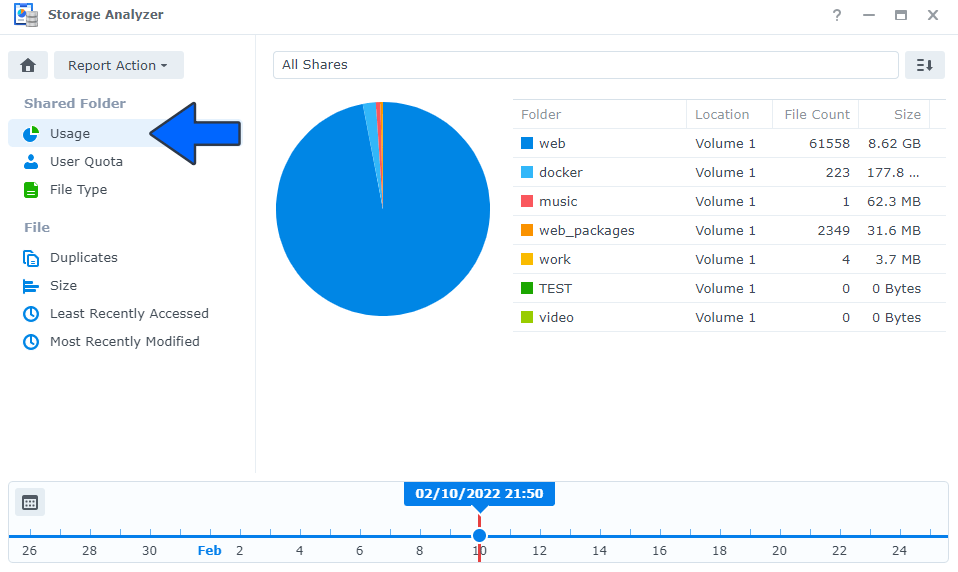
You can see the location of the files, the duplicates, the size of your folders etc.
STEP 12
You will also get a private link via email with your full Disk Usage Report that can be accessed locally or via your synology.me DDNS.

Note: How to Find Duplicate Files on a Synology NAS.
This post was updated on Wednesday / October 30th, 2024 at 4:55 PM