One day for one reason or another you may decide to delete all files on your Synology NAS. Maybe you want to sell your old NAS. Maybe you want to redo your NAS setup and start over again. In any case, you will surely want to erase everything on your disks. This guide comes to your aid. Today I will teach you how erase/delete all data on your Synology NAS without being able to recover any of it.
STEP 1
Please Support My work by Making a Donation.
STEP 2
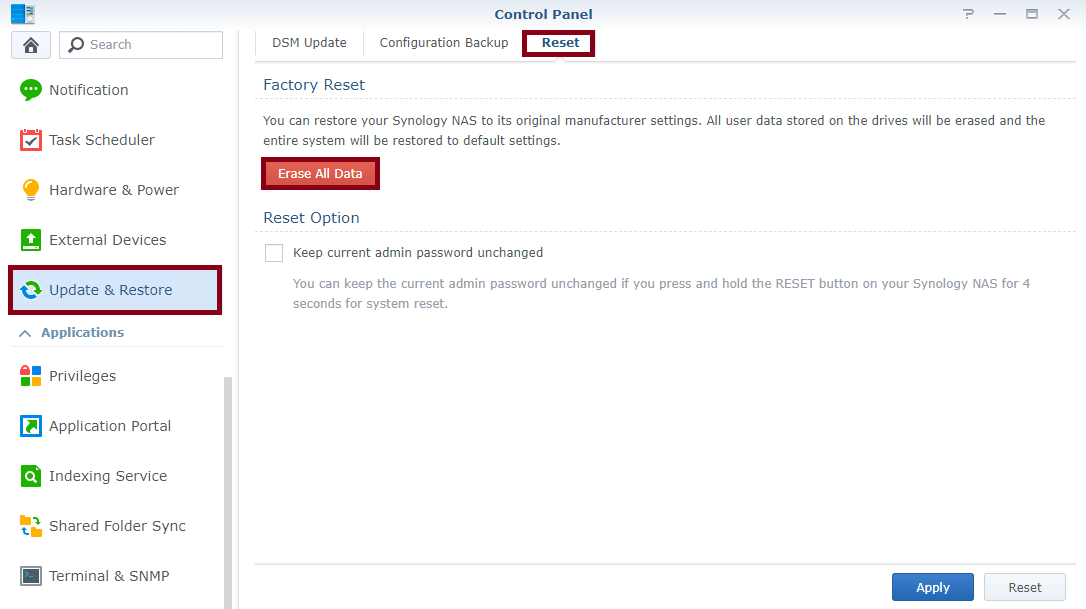
Go to Control Panel / Update & Restore / Reset. In this section you can Factory Reset your Synology NAS. Click Erase All Data. Follow the instructions in the image below.
STEP 3
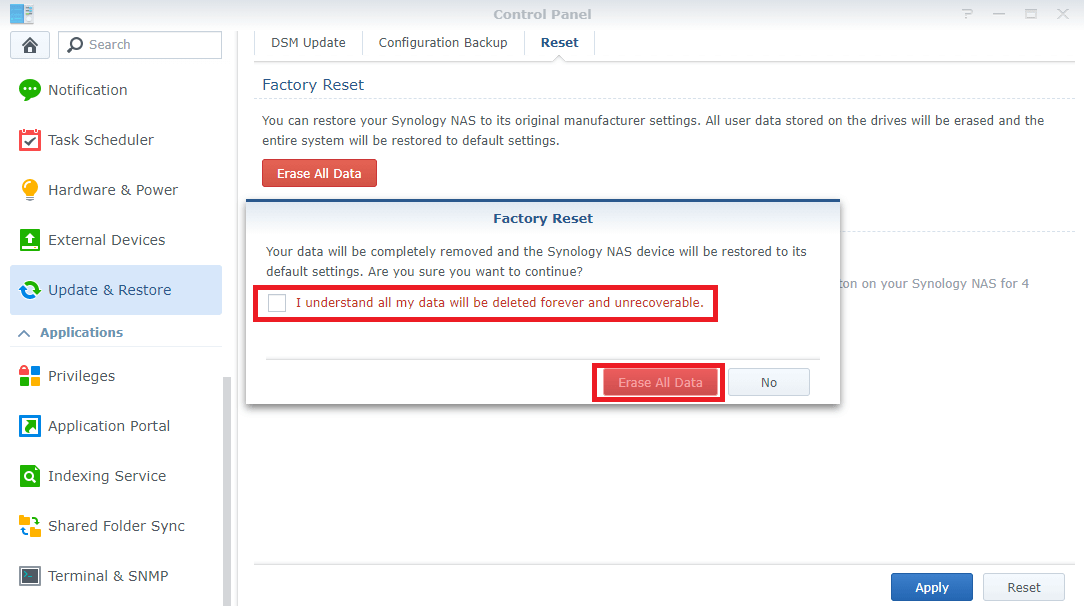
After you click “Erase all Data”, a new screen will open with this warning message:
Your data will be completely removed and the Synology NAS device will be restored to its default settings. Are you sure you want to continue?
Check: I understand all my data will be deleted forever and unrecoverable then click Erase All Data.
STEP 4
After you click “Erase all Data”, a new screen will open and you will be prompted to type in your current admin password to continue. After you type in the admin password, all data on your Synology NAS device will be deleted forever, and will be unrecoverable.
Note: This operation deletes all data on your disks and all of your saved settings.
Note: This operation may take several minutes depending on how much data you have on your disks.
This post was updated on Sunday / February 28th, 2021 at 11:56 PM