One day for one reason or another you may decide to delete all files on your Synology NAS. Maybe you want to sell your old NAS model or maybe you want to redo your NAS setup and start over again. In any case, you will surely want to erase everything on your disks. This guide comes to your aid. Today I will teach you how erase/delete all data on your Synology NAS without anyone being able to recover any of it. If you have decided to bring your Synology NAS back to its default “Manufacturer Settings”, there are two methods for doing this: a “Hardware” one and a “Software” one.
STEP 1
Please Support My work by Making a Donation.
STEP 2
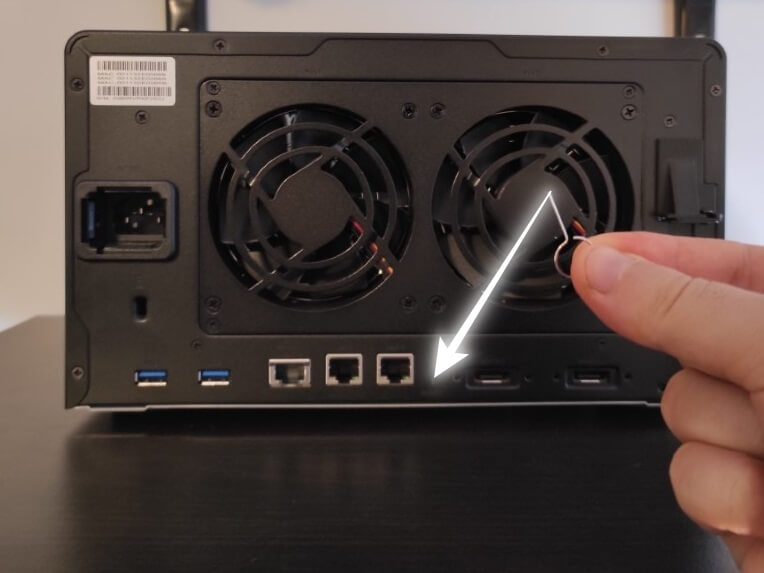
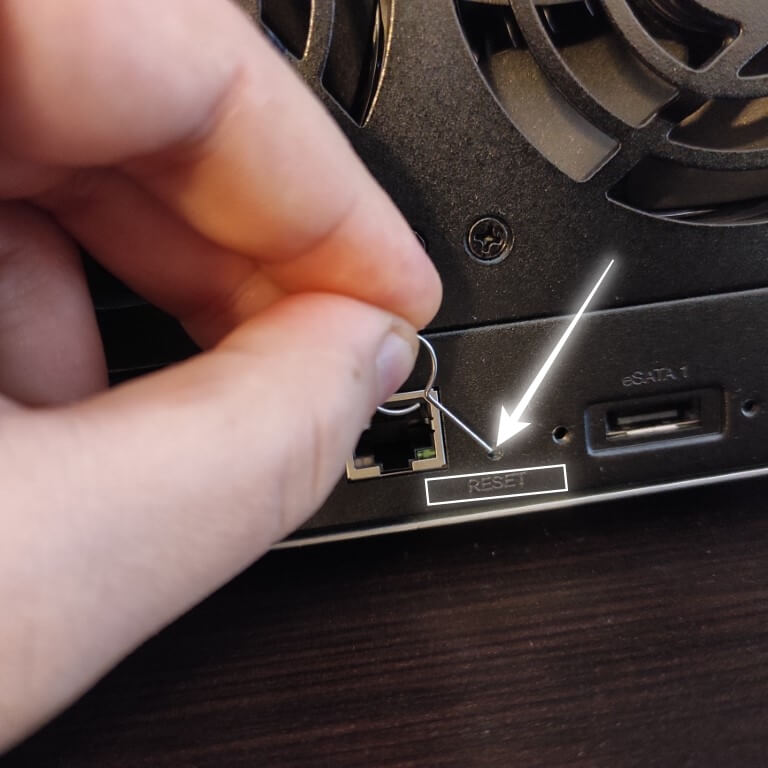
Locate your Reset button at the back of your NAS and prepare one sim card tray opener. Gently press and hold down the RESET button for around 4 seconds until you hear one beep sound, then release the button immediately. After that, press and hold down the button again with your sim card tray opener for 4 seconds until you hear 3 more beeps, and wait for around 2 minutes till the LED STATUS light on your Synology NAS flashes orange indicating that your Synology NAS has been successfully reset and the system configurations have been wiped. Follow the instructions in the image below.
To re-install DSM from scratch, type in find.synology.com in the search bar of your web browser and find your Synology NAS on the Web Assistant page.
STEP 1
Please Support My work by Making a Donation.
STEP 2
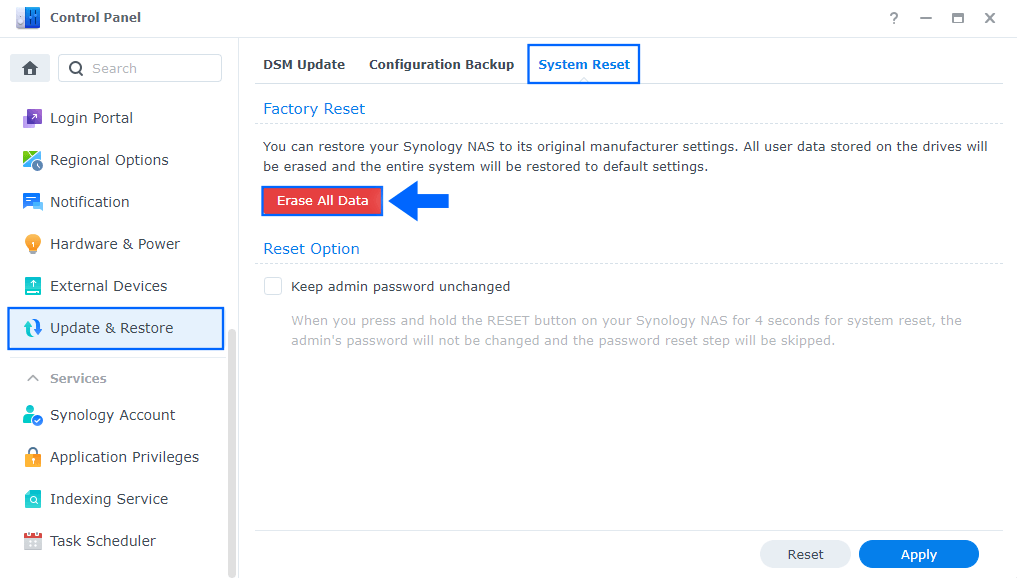
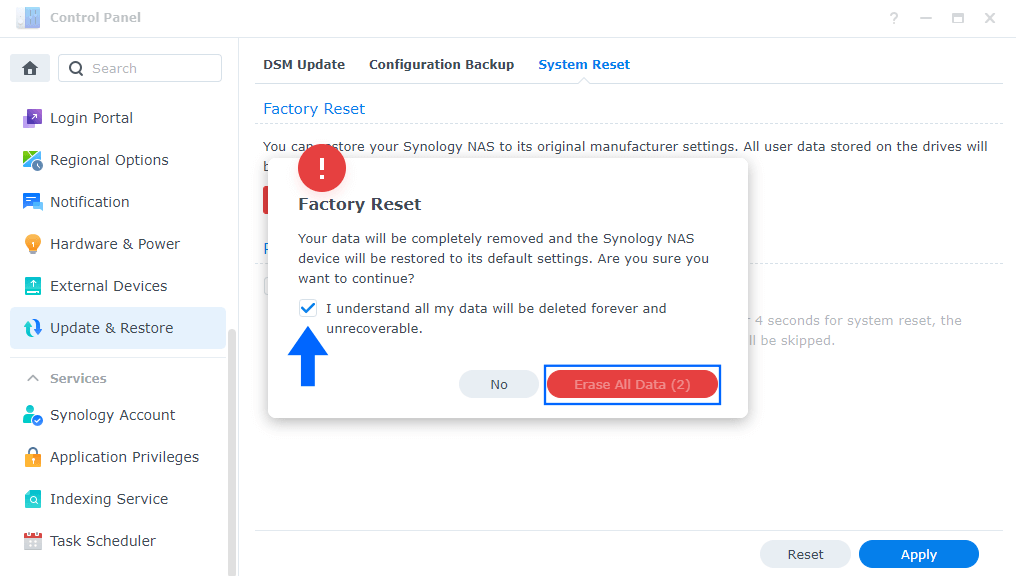
Go to Control Panel / Update & Restore / System Reset tab. In this section you can Factory Reset your Synology NAS. Click Erase All Data. Follow the instructions in the image below.
STEP 3
After you click Erase All Data on STEP 2, a new screen will open with this warning message:
Your data will be completely removed and the Synology NAS device will be restored to its default settings. Are you sure you want to continue?
Check: ‘I understand all my data will be deleted forever and unrecoverable.’ then click Erase All Data. A 5 second countdown will begin. Follow the instructions in the image below.
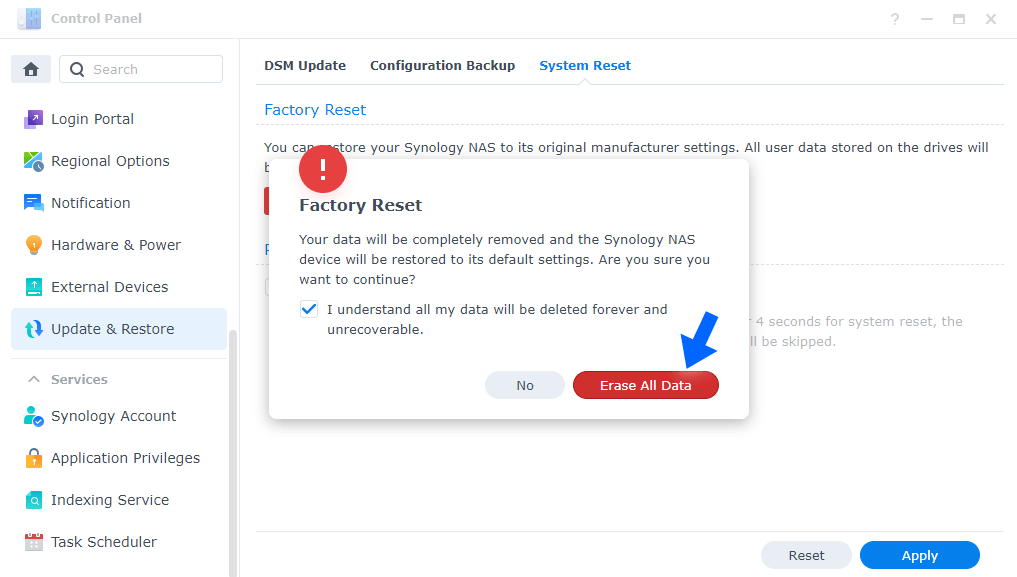
STEP 4
After the countdown is finished, you can click on the Erase All Data button. Follow the instructions in the image below.
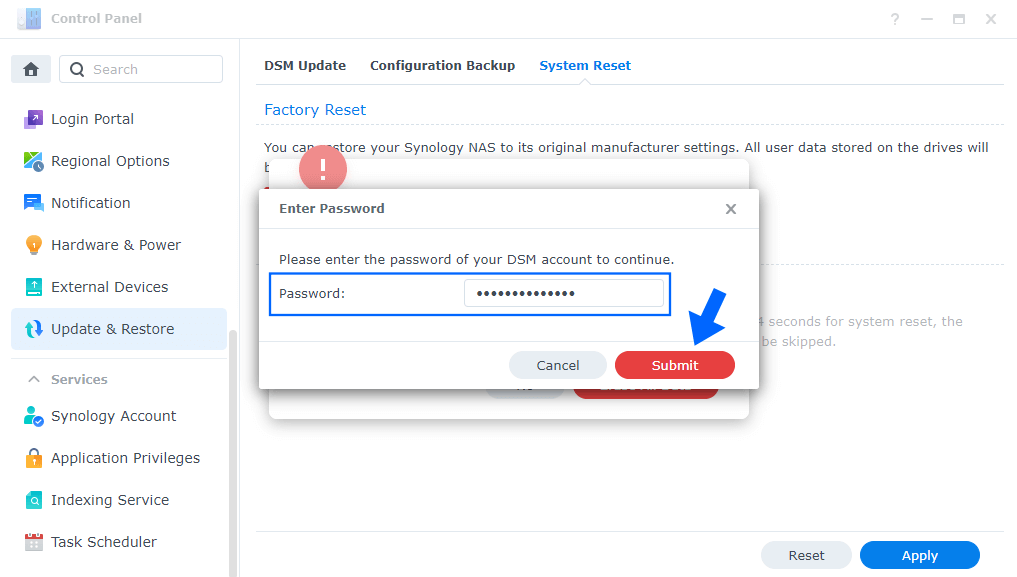
STEP 5
After you click “Erase All Data”, a new screen will open and you will be prompted to type in your current admin password. After that, click the Submit button to continue. After you type in the admin password and click the Submit button, all data on your Synology NAS device will be deleted forever, and will be unrecoverable.
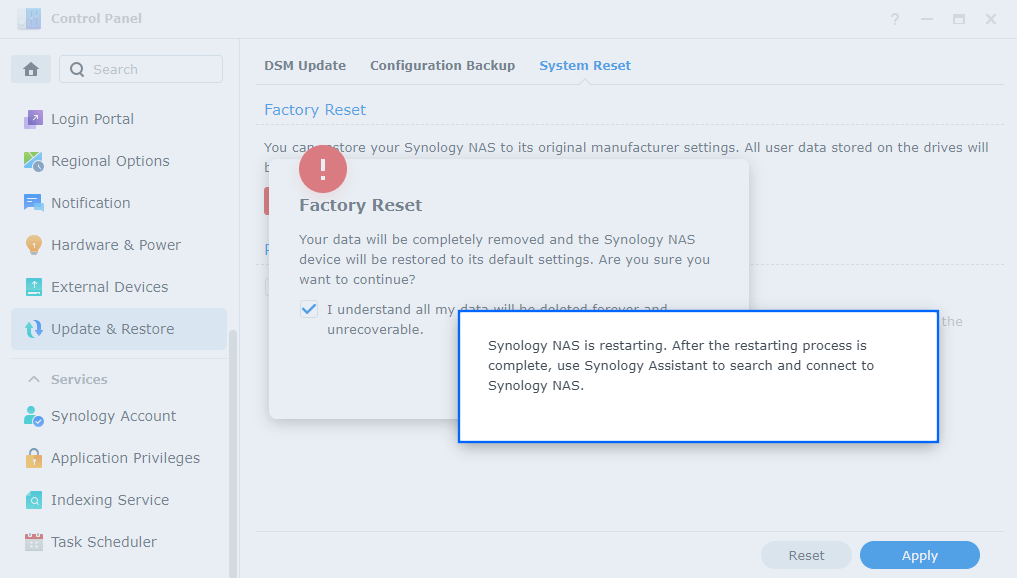
STEP 6
After clicking the Submit button, you will see the following pop-up message: ‘Synology NAS is restarting. After the restarting process is complete, use Synology Assistant to search and connect to Synology NAS.’ In my experience, you can avoid using the Synology Assistant. Just type in find.synology.com in the search bar of your web browser and find your Synology NAS on the Web Assistant page, then follow the instructions to reinstall DSM from scratch.
Note: With this two methods all data on your Synology NAS device will be deleted forever, and will be unrecoverable.
This post was updated on Wednesday / August 10th, 2022 at 10:31 PM