The easiest way to think of snapshots is that they literally “freeze” your files in time and allow you to recover those files later if necessary. Every time a snapshot is created, a “restore” point is also created which allows you to recover files/folders from a point in time, like navigating a time machine. The best part about this is that the snapshots themselves take up very little space and give you tons of flexibility. Read below my step by step guide on how to configure “Snapshots Replication” on your Synology NAS device.
STEP 1
Please Support My work by Making a Donation.
STEP 2
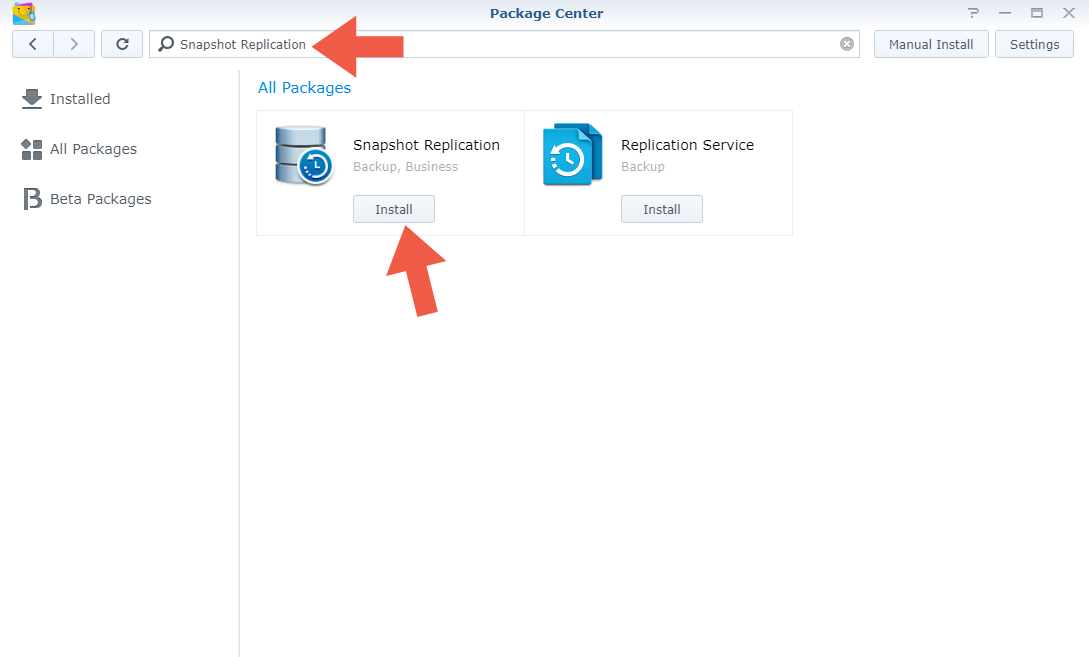
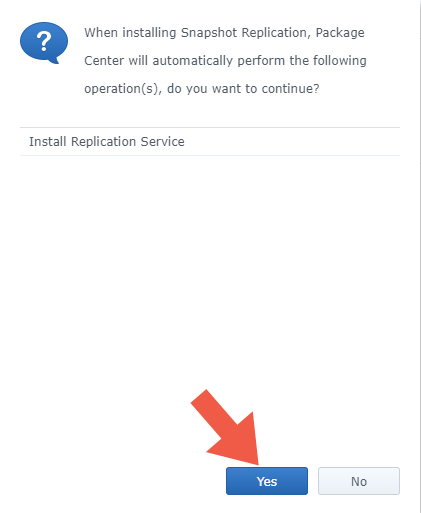
Go to Package Center, search for Snapshot Replication and install the Snapshot Replication package. When installing Snapshot Replication, a pop up window with the following message will appear: When installing Snapshot Replication, Package Center will automatically perform the following operation(s), do you want to continue? Install Replication Service. Click Yes. Follow the instructions in the images below.
STEP 3
When the installation of the package is complete, open the Snapshot Replication application. Follow the instructions in the image below.
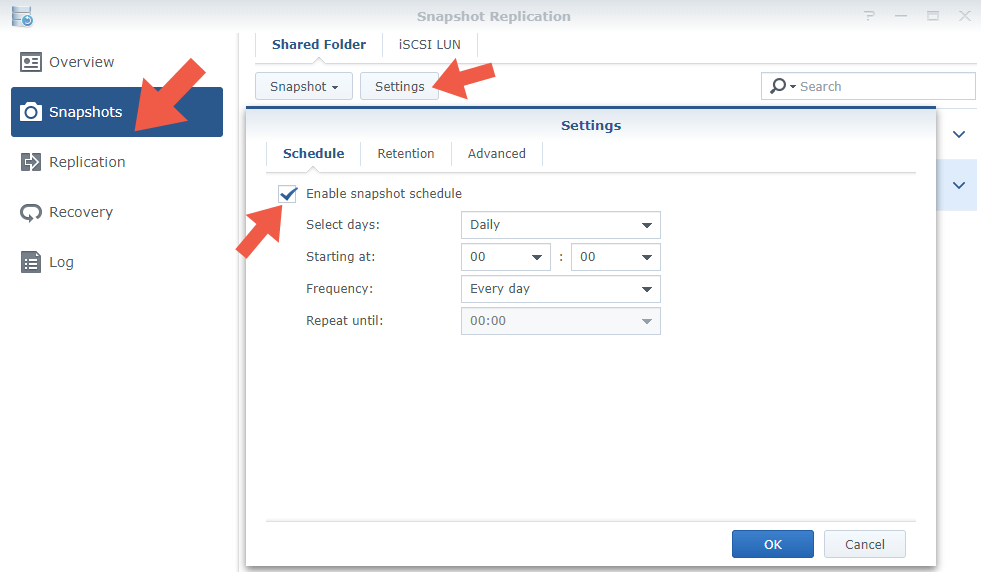
- Select Snapshots on the left sidebar.
- Select your Shared Folder then click on Settings.
- On Schedule Area check Enable snapshot schedule. Then set your schedule preferences.
STEP 4
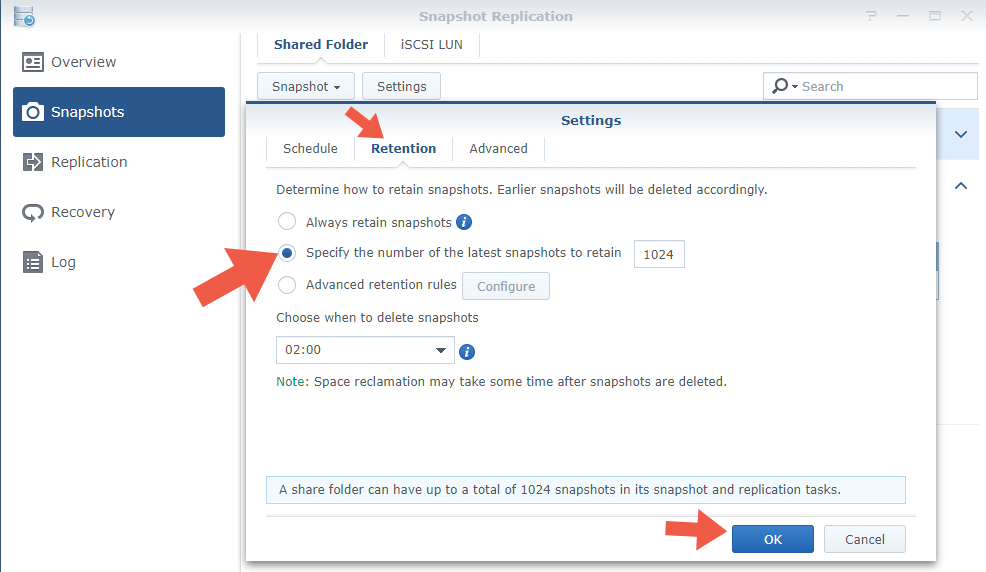
Next tab “Retention”. Select “Specify the number of the latest snapshots to retain“. Select how many snapshots you’d like to retain. The default value is 1024. You can change the default number value depending on the file type (and size). You’ll most likely have different retention policies for different folders. Then click OK. Follow the instructions in the image below.
STEP 5
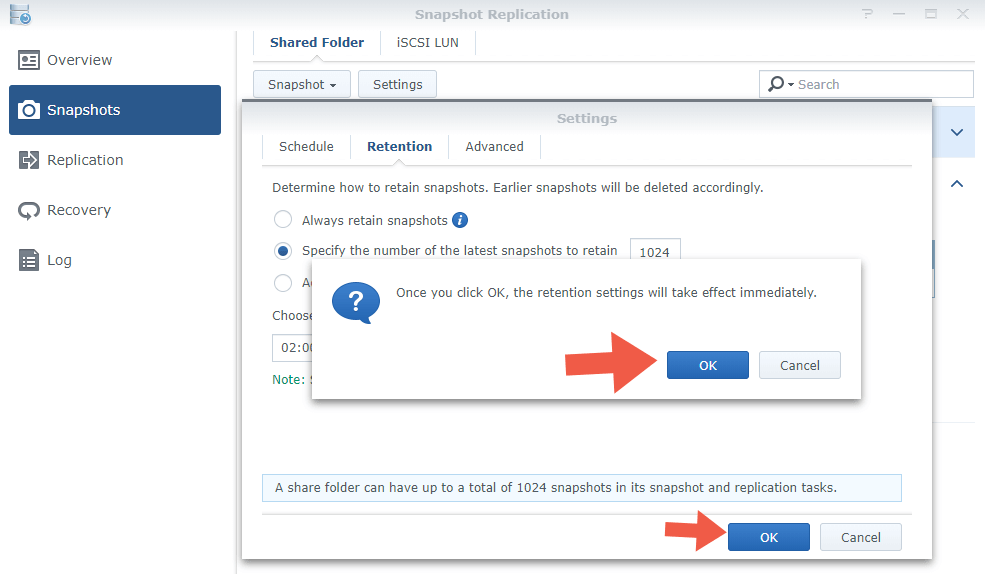
After you click OK, a pop up window with the following message will appear: “Once you click OK, the retention settings will take effect immediately. Click OK, then OK again. Follow the instructions in the image below.
STEP 6 (Take a Snapshot)
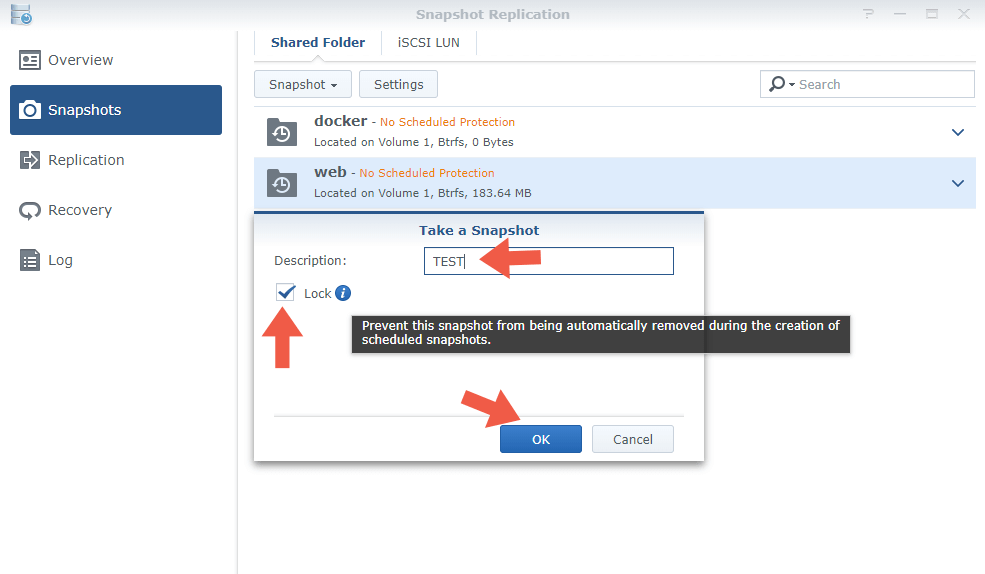
Now you can take a Snapshot! Click on Snapshots on the left sidebar, select your Shared Folder, then click on Snapshot and a drop-down menu will appear. In the drop down menu click on Take a Snapshot. Follow the instructions in the image below.

STEP 7
After you click “Take a Snapshot”, a pop up window will appear. On the description area type a description for your Snapshot then check “Lock” to prevent this snapshot from being automatically removed during the creation of scheduled snapshots. Click the OK button. Follow the instructions in the image below.
STEP 8 (Recover a Snapshot)
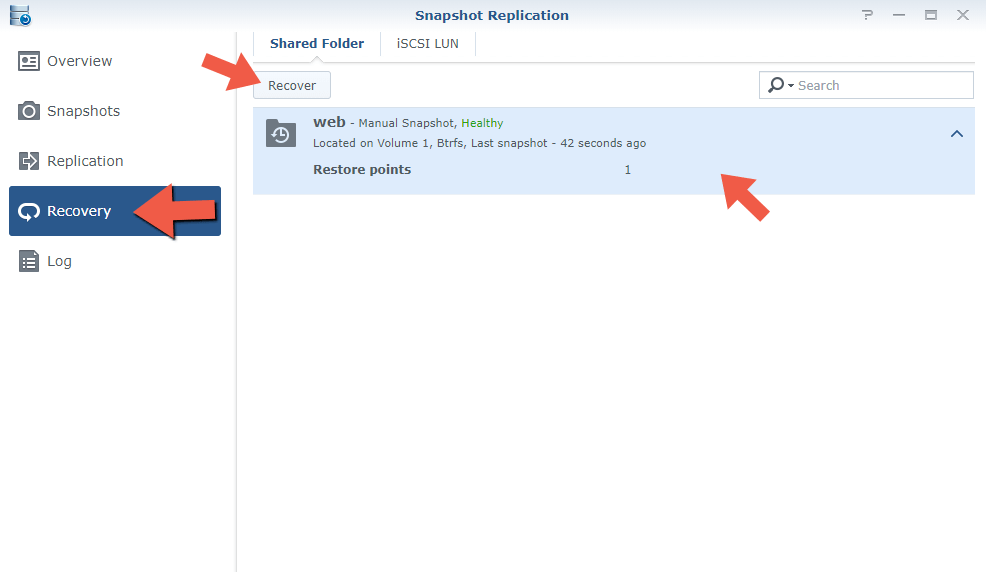
Now, if you want to recover a Snapshot, just click on the left sidebar on “Recovery” then select your Shared Folder and click on “Recover“. Follow the instructions in the image below.
STEP 9
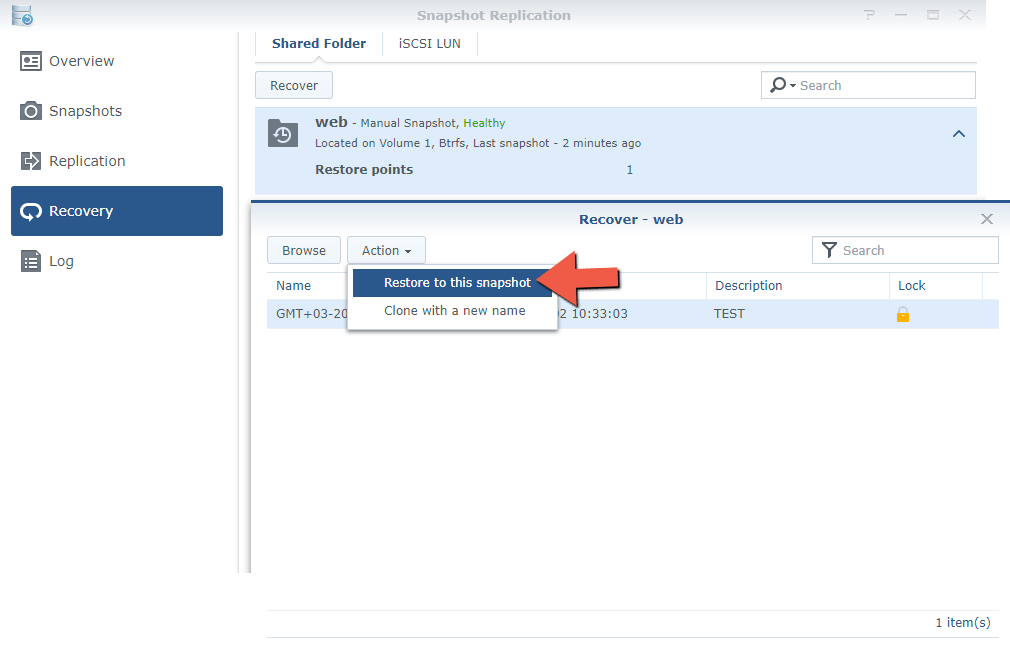
Once you click “Recover”, a window will open. Click on Action and a drop-down menu will appear with the following option: “Restore to this snapshot“. Click on it. Follow the instructions in the image below.
STEP 10
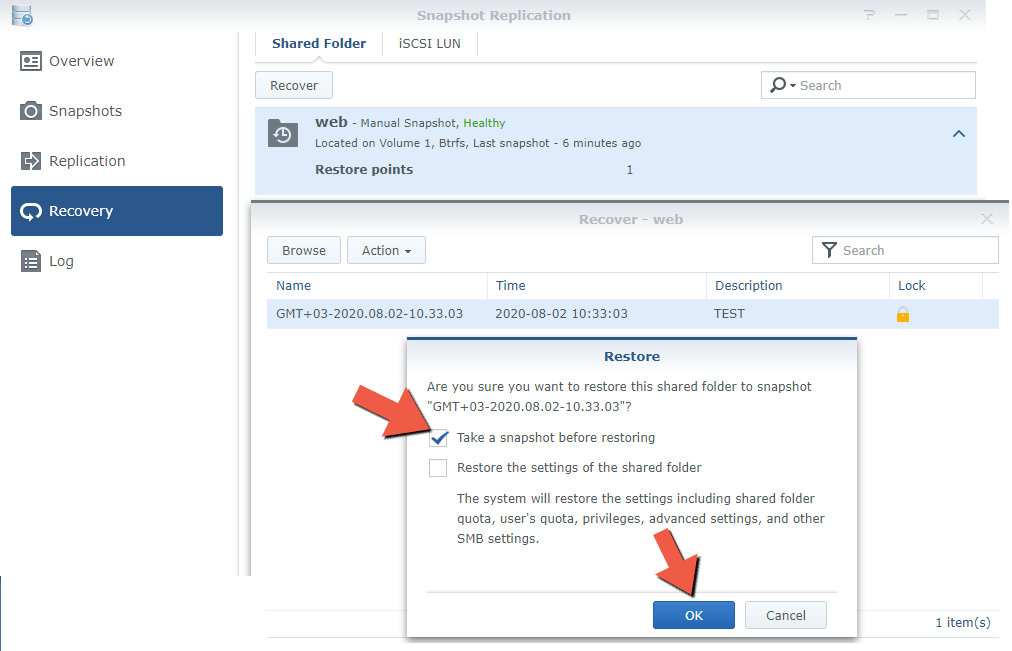
After you click on “Restore to this snapshot”, a new window will open and the app will tell you to take other snapshots before restoring to make sure you will not lose any data. Check it then click on the OK button and enjoy your restoration point! Follow the instructions in the image below.
Note: After the snapshots have been configured, your system will start to create snapshots regularly. When the retention policy hits its maximum, old snapshots will be automatically deleted. Your files are now protected! Keep in mind that this is not a backup. Read more on how to create a Backup.
This post was updated on Sunday / August 2nd, 2020 at 5:37 PM