Did you know DSM 7 offers the possibility to benchmark your HDD disks, your SSD disks and your NVMe disks? Today I’m going to teach you how to automatically benchmark your disks yourself from home, and find out which disks are better than others.
STEP 1
Please Support My work by Making a Donation.
STEP 2
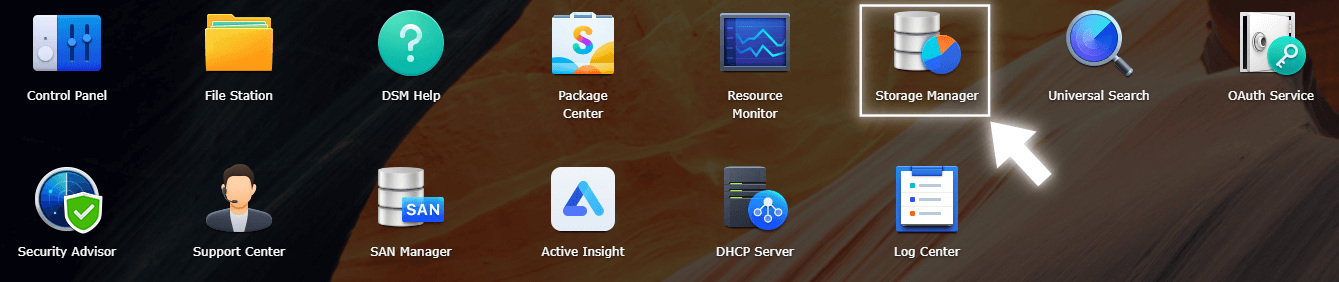
Go to the DSM Main menu. Follow the instructions in the image below.

STEP 3
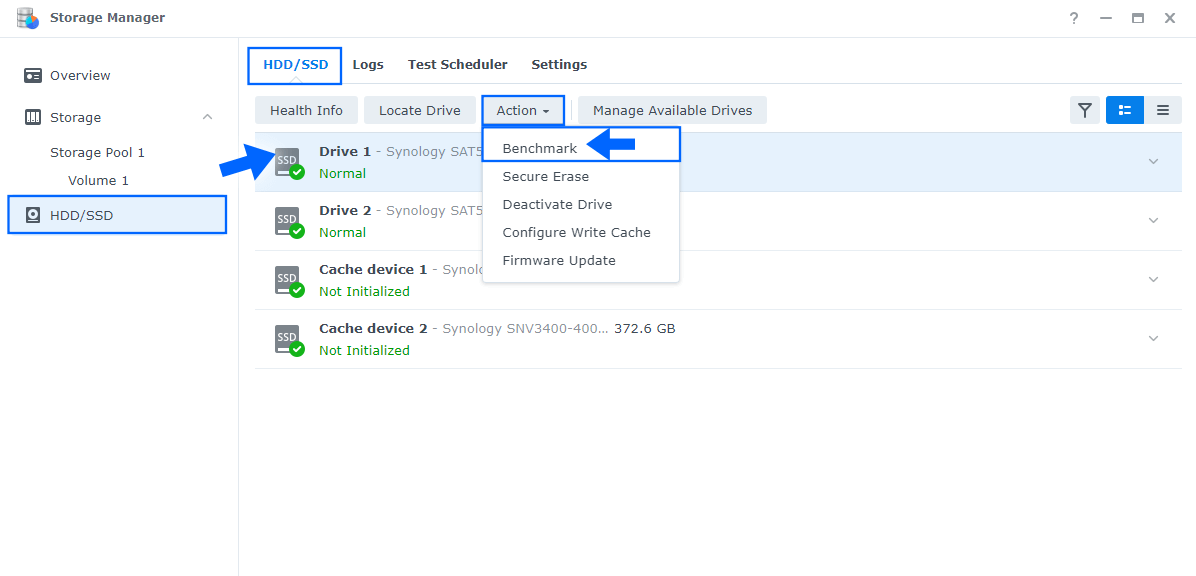
Click on the Storage Manager icon. Follow the instructions in the image below.
STEP 4
In the Storage Manager left panel, click HDD/SSD. Select your disk from the list then click the Action tab and then “Benchmark“. Follow the instructions in the image below.
STEP 5
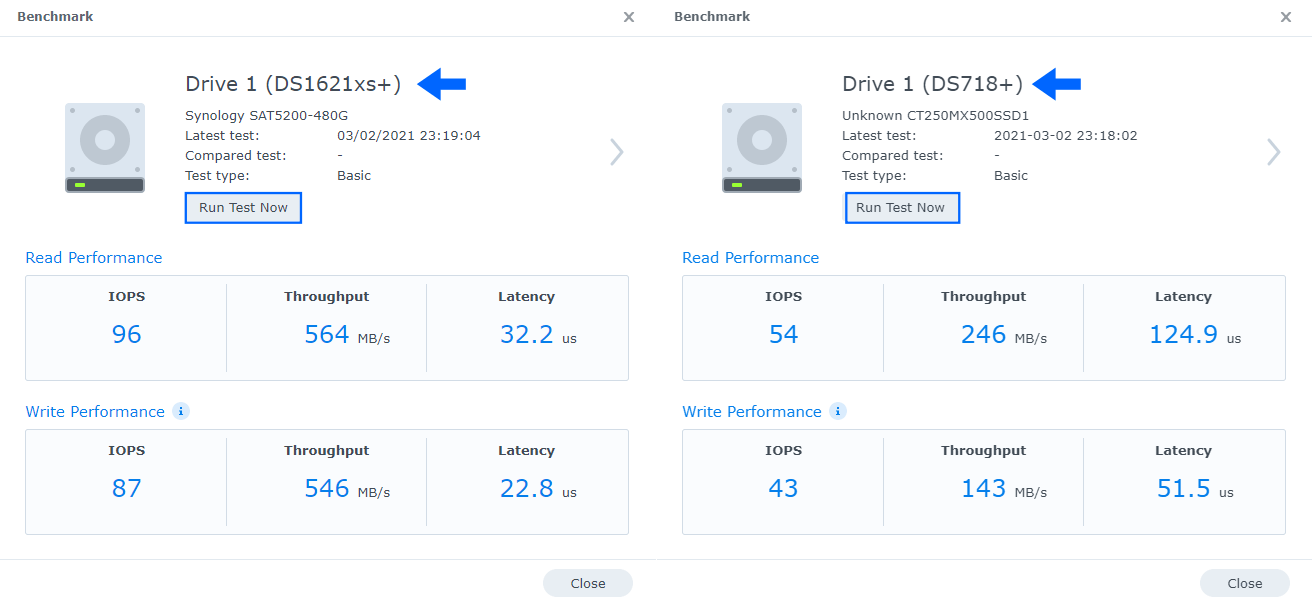
After you click Benchmark, the Benchmark test on your disk will start. You can discover the following parameters for both Read / Write Performance:
- IOPS: Input/output operations per second.
- Throughput: Disk throughput is the measurement of how fast (per second) your storage can read/write data.
- Latency: Disk latency refers to the time delay between a request for data and the return of the data.
Note: In the image below I tested the SAT5200 SSD vs Crucial MX500 SSD. Guess who won the test? The Synology disks, obviously!
Note: This option to Benchmark your disks is available only in DSM 7, but not DSM 6.2.4
Note: What is Benchmark? In computing, a benchmark is the act of running a computer program, a set of programs, or other operations, in order to assess the relative performance of an object, normally by running a number of standard tests and trials against it.
This post was updated on Saturday / August 20th, 2022 at 12:10 AM