It’s a good practice to set up a Static IP for your Synology NAS. You’ll find it easier to locate shared devices in your internal/local area network and your fixed LAN IP address will prevent your NAS from floating around your network. I always see a Synology NAS device as a server for which it would be good to have a static LAN IP address. Setting up a static IP address for your Synology NAS will prove useful in many circumstances such as, for example, when you are using the Docker package for different containers. Today I will teach you how to assign a static IP to your Synology NAS.
STEP 1
Please Support My work by Making a Donation.
STEP 2
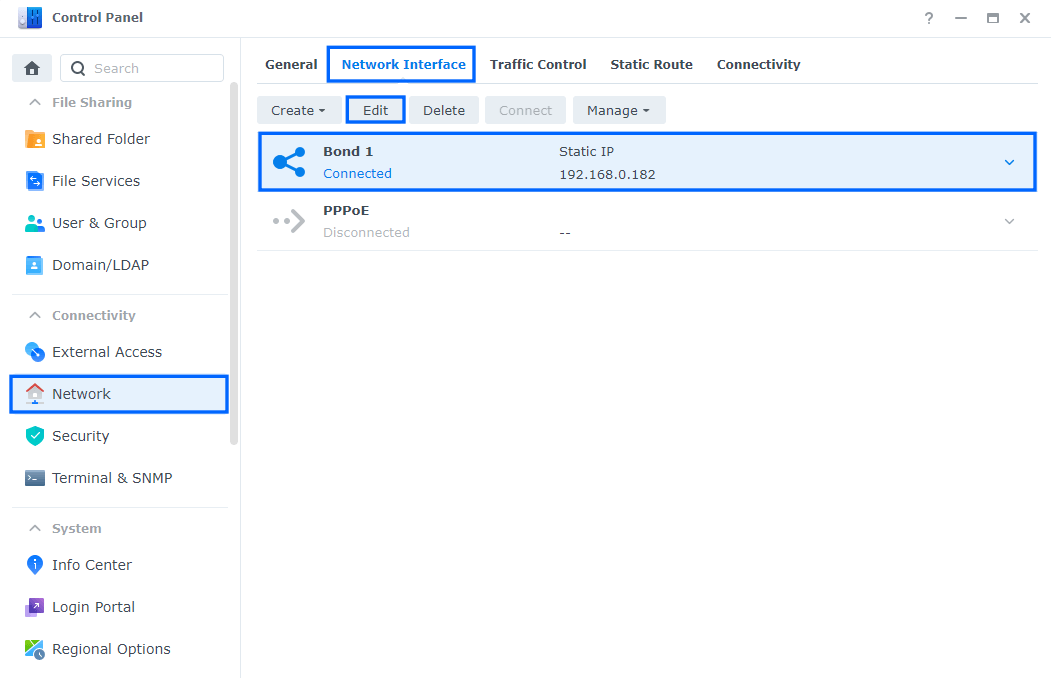
Go to Control Panel / Network / Network Interface. Select Bond 1 if you have activated Link Aggregation or LAN 1 then click on Edit. Follow the instructions in the image below.
STEP 3
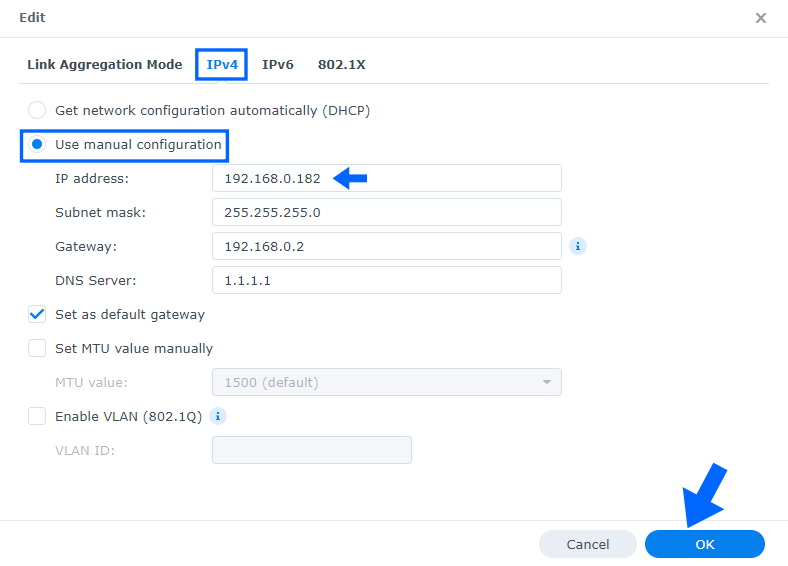
After you click Edit, the window below will open. Click on IPv4 and check “Use manual configuration“. On the IP address area type in your preferred static local IP address, then press OK to save the settings. From now on your NAS will use the new IP instead of the one assigned to it automatically by DHCP. Follow the instructions in the image below.
Note: Pay attention to the local IP address you choose for your Synology NAS device. Make sure it’s not already being used by another device in your local network area. Each device in your local network area should have a unique static IP address.
Note: I always set up a static IP for every Synology NAS in my local area network using manual configuration.
This post was updated on Monday / July 7th, 2025 at 11:27 PM