If you have purchased a Synology NAS of the + Series, or higher, you will have surely noticed that there are two or more CAT 5e LAN cables in the box it came in. While many of us connect the NAS to the router or the switch with just one LAN cable, the NAS supports two or more LAN connections and there’s a good reason for that. This being said, the first thing I’m going to ask you to do, if you have not already done so, is to connect the second LAN cable, or the third or fourth and so on, to your router. If you do not have enough free LAN ports in the router, use a switch.
What is Link Aggregation? Link Aggregation allows you to combine multiple 1GbE connections for higher performance when multiple devices connect to the local network at the same time. You cannot use Link Aggregation to gain a speed advantage when only one device is connected. So, you cannot use 3 1GbE ports to get a Read/Write speed higher than 125 MB/s (1000Mbit per second / 8 bits/byte = 125MB/s) on a large file transfer. Instead, you can have up to 3 devices all getting the full 1GbE speed. One of the biggest advantages of Link Aggregation is it provides traffic failover to maintain the network connection in case one connection is down. In this step by step guide I will show you how to activate Link Aggregation on your Synology NAS device.
STEP 1
Please Support My work by Making a Donation.
STEP 2
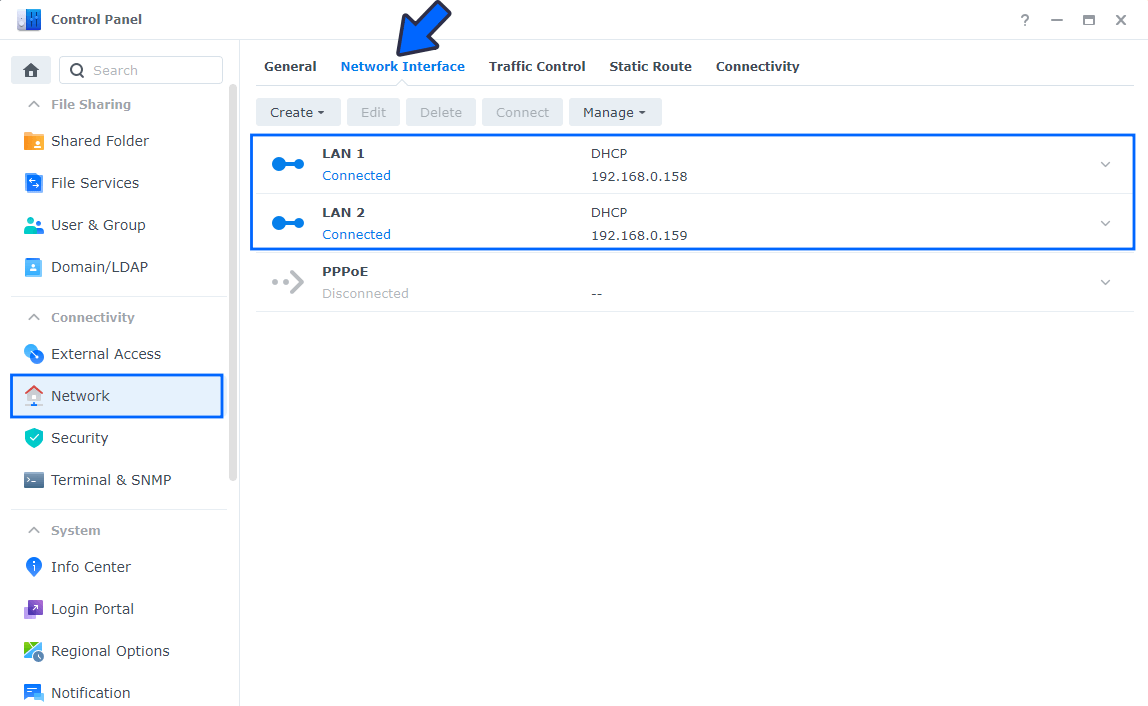
Go to Control Panel / Network / Network Interface. If all your LAN cables are physically connected to your router/switch, you will see them all in blue. If you see LAN 1, LAN 2 or LAN 3 greyed out, you will need to physically connect them to your router or switch. That is, connect all of your NAS LAN cables to your router or switch.
STEP 3
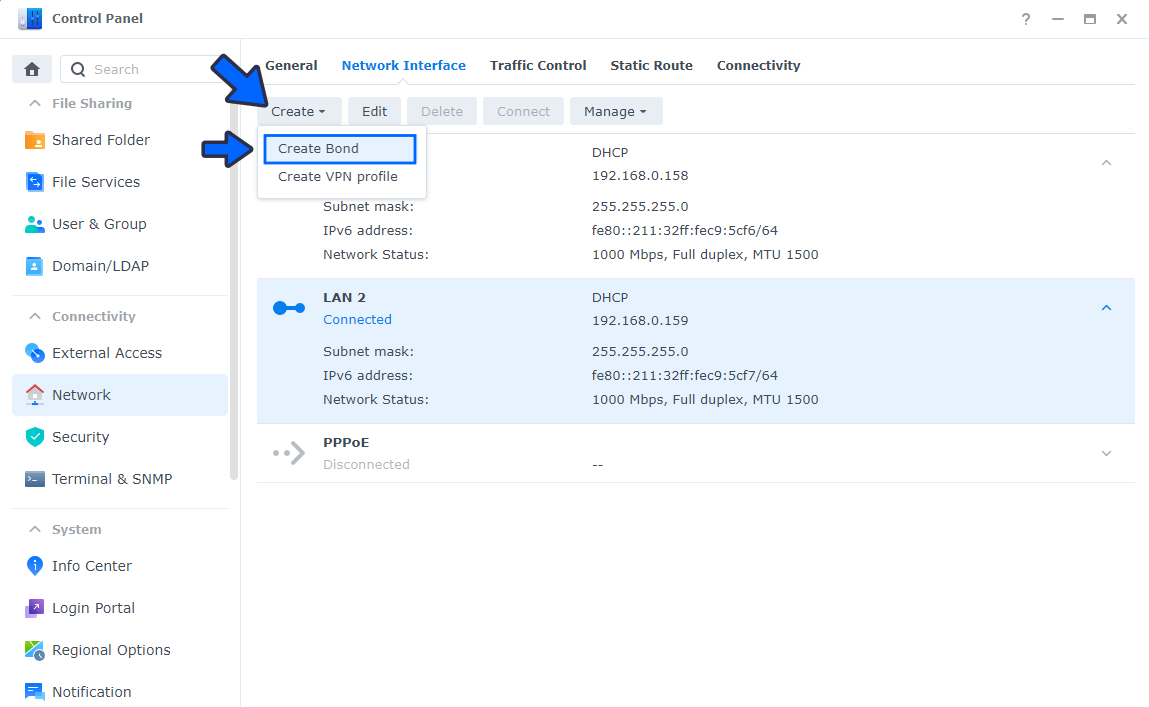
Click Create then Create Bond. Follow the instructions in the image below.
STEP 4
Choose Adaptive Load Balancing. Follow the instructions in the image below.
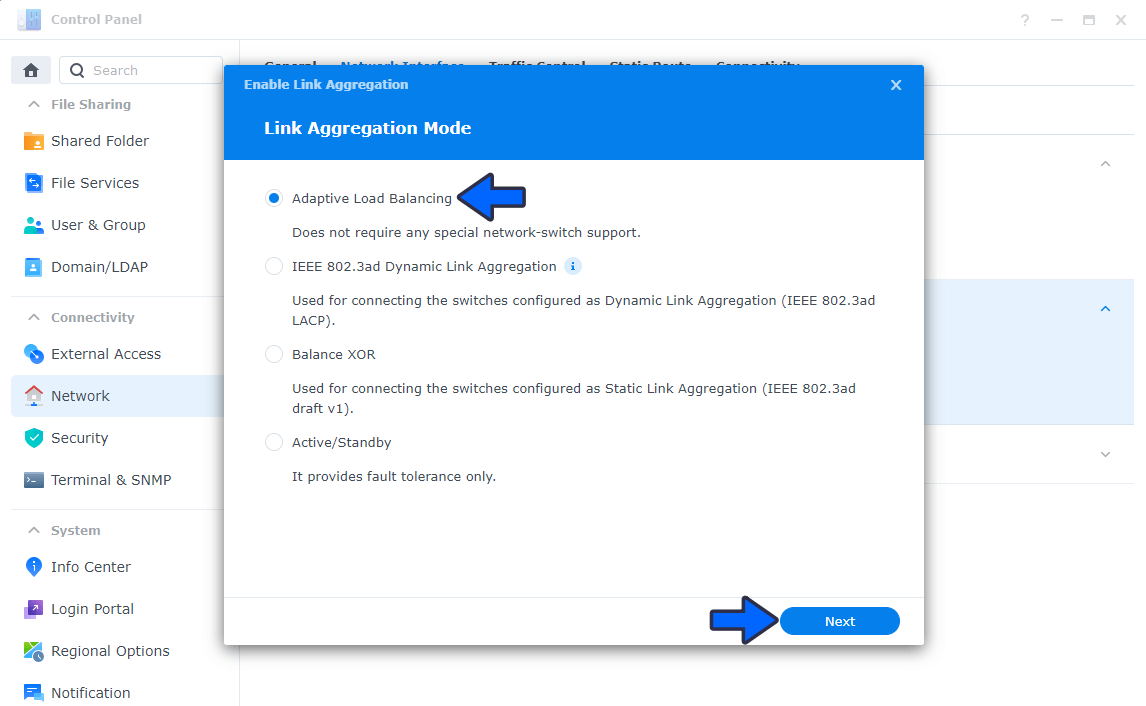
Note: You can also choose the second option, IEEE 802.3ad Dynamic Link Aggregation, but know that you need a switch that supports this option in order to be able to enable it.
STEP 5
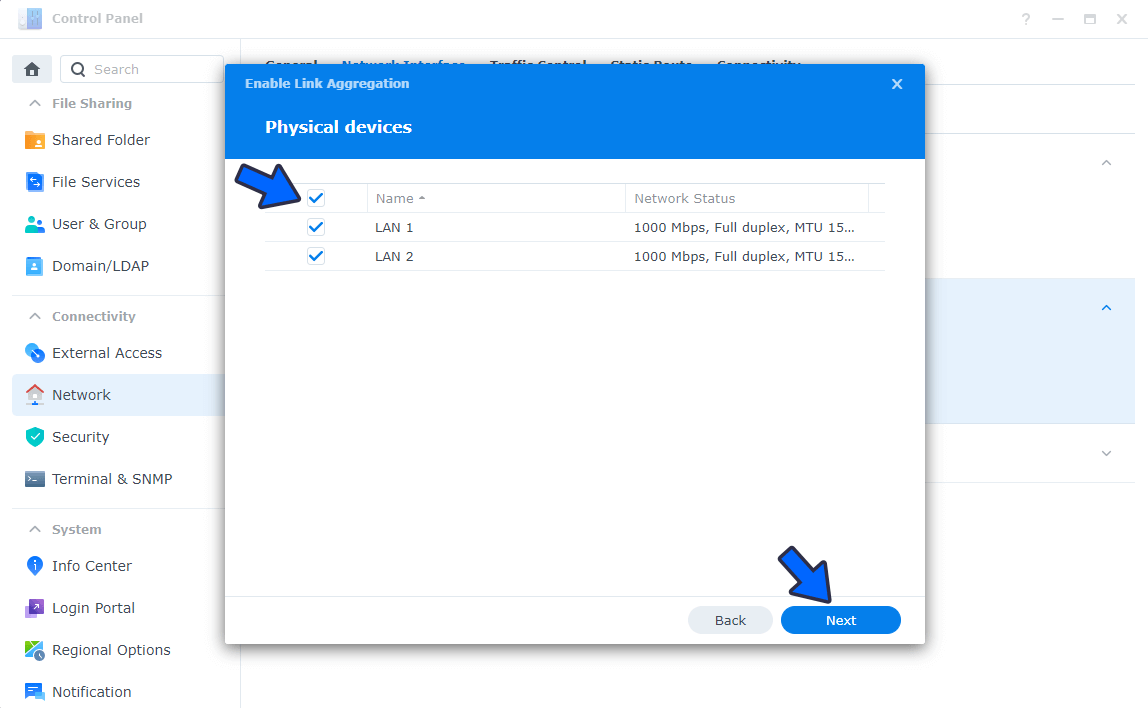
Select all your LANs then click Next. Follow the instructions in the image below.
STEP 6
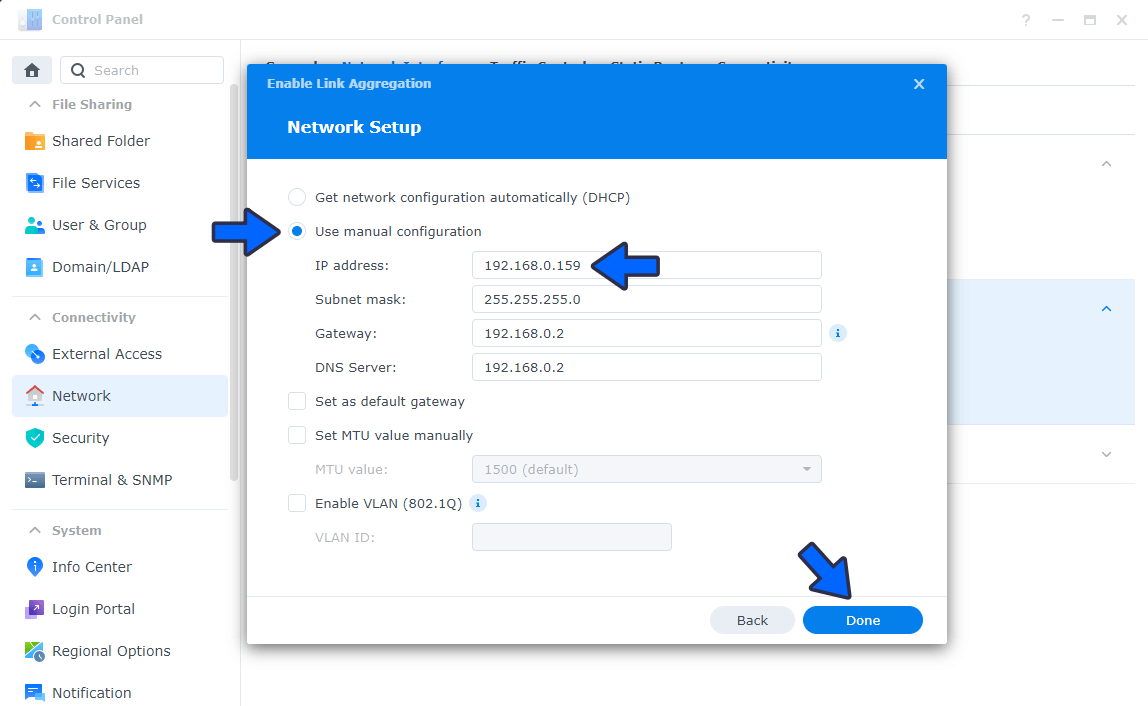
Choose “Use manual configuration” and, in the IP address area, keep the same LAN IP address you have been using to connect to your NAS until now. Click Done. Follow the instructions in the image below.
STEP 7
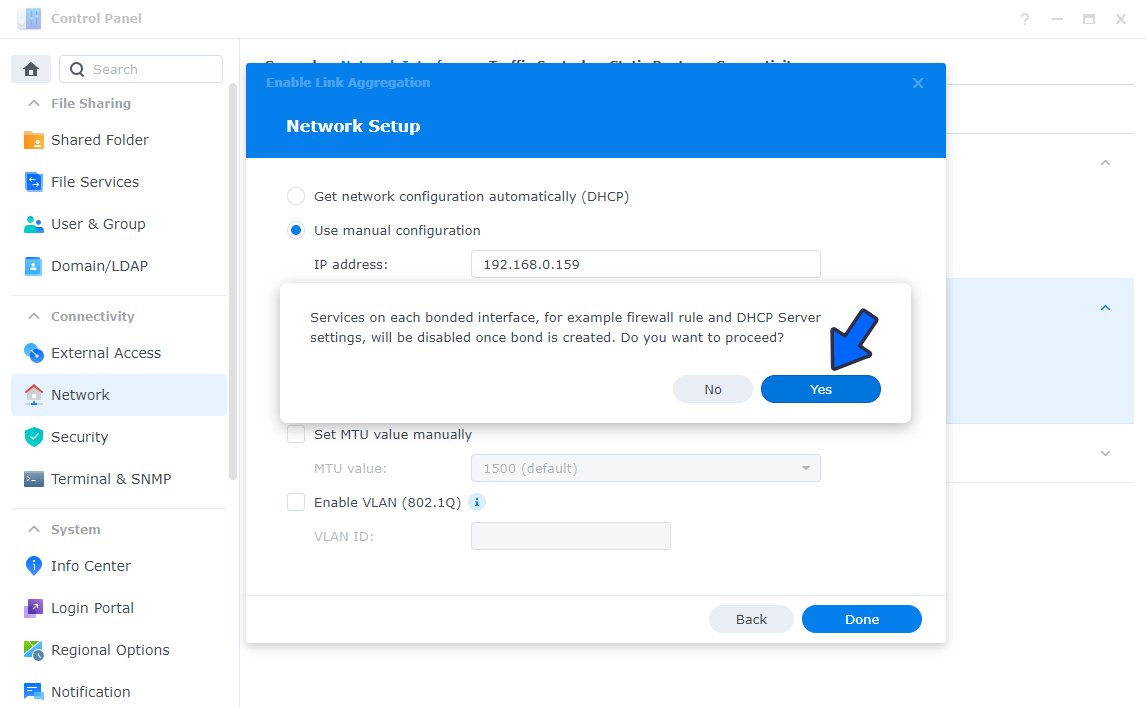
A new pop up message will appear. Click Yes. Follow the instructions in the image below.
STEP 8
It will take a couple of seconds/minutes for the settings to be applied to your network.
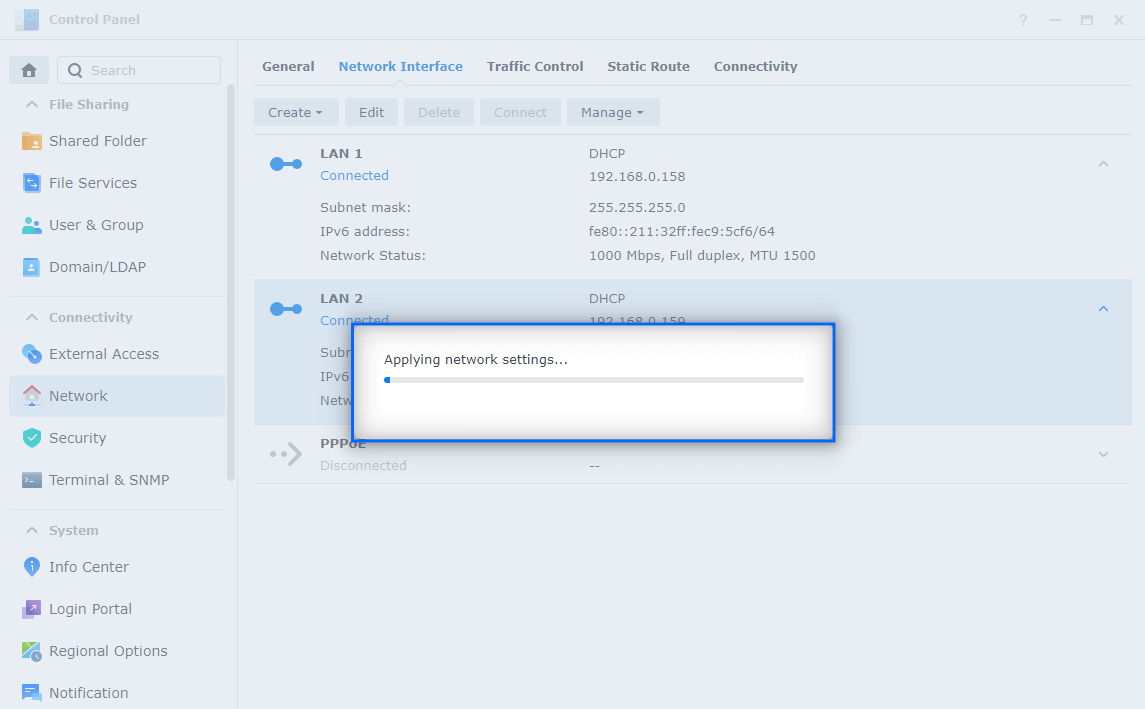
As you can see in the image below, Link Aggregation is set up correctly. Now, instead of several different LAN interfaces, you will have just only one interface called Bond 1.
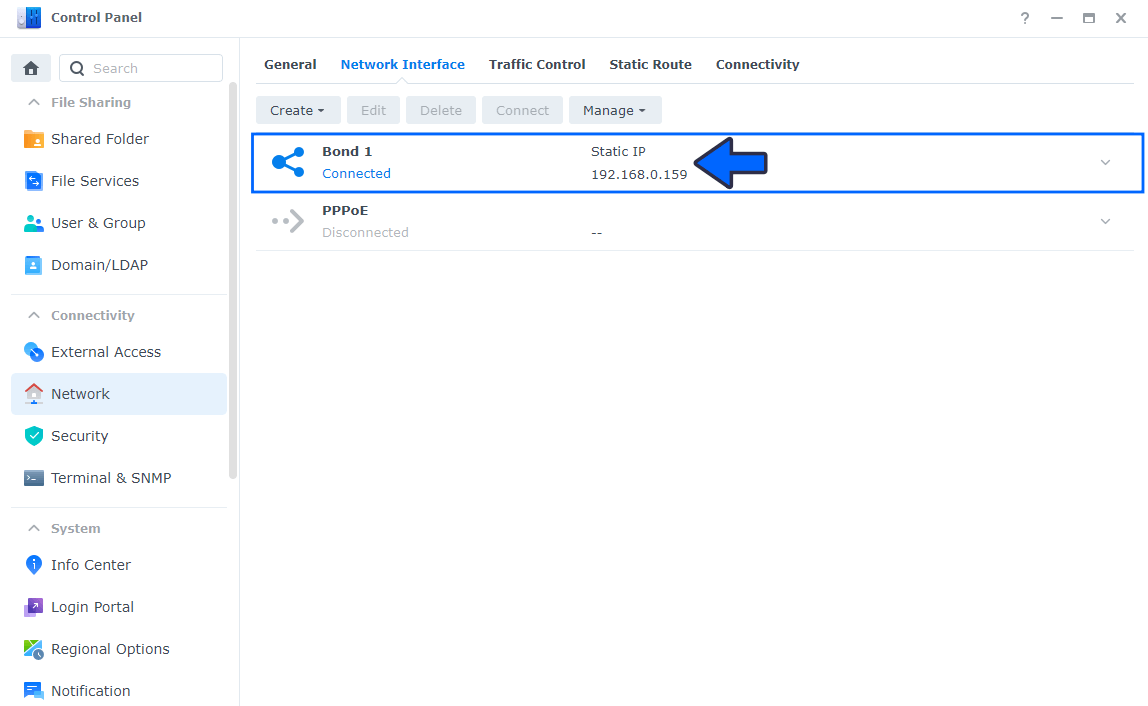
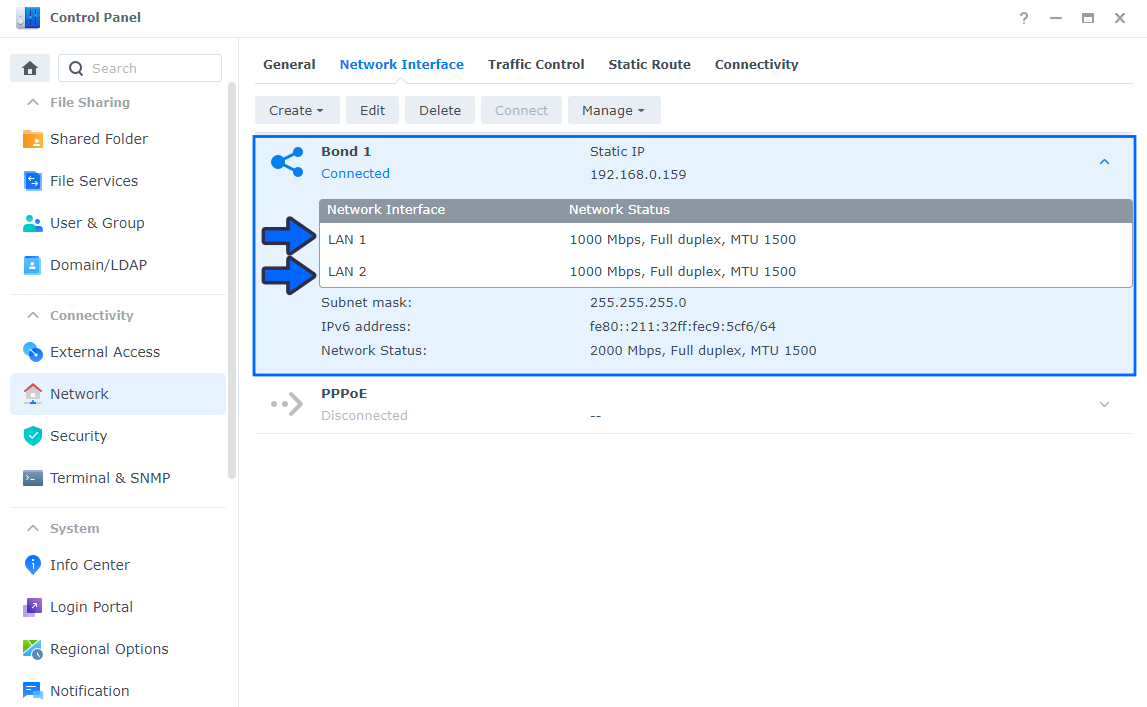
In my case, I have two LANs connected and using the same Static IP.
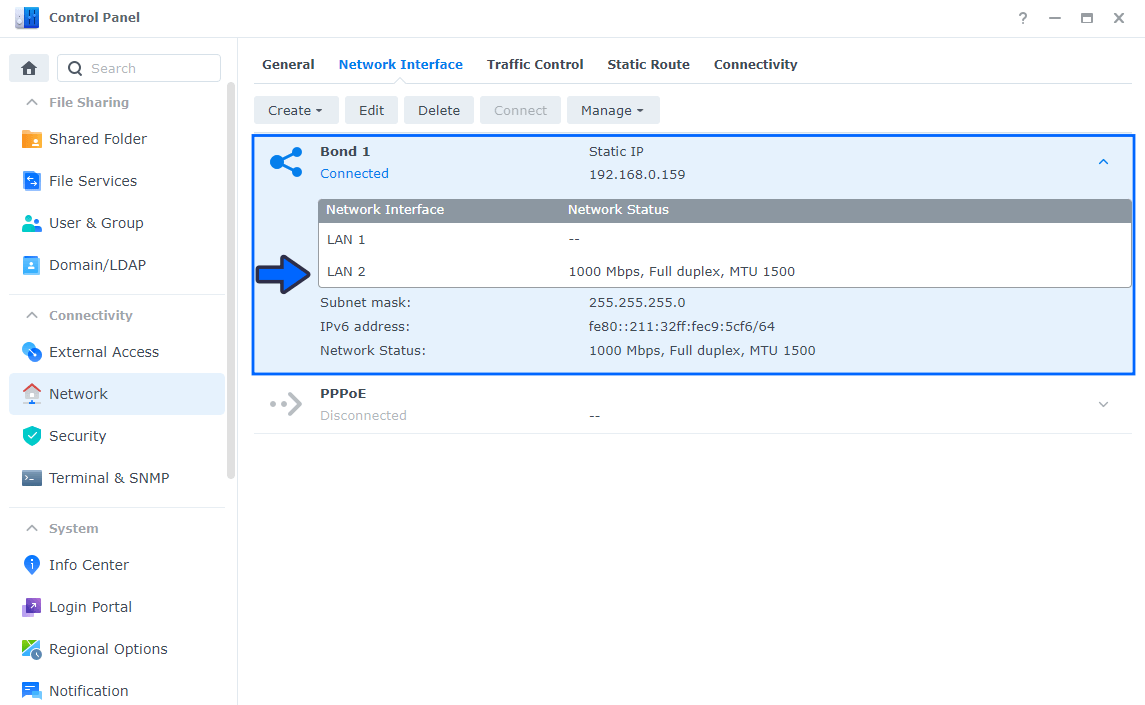
If I physically remove one LAN cable, the other one will take over and provide failover protection so that my NAS will continue to run without issues.
Note: Link Aggregation makes it so that you are using just one Bond (Bond 1) which can solve multiple connection issues in your local area network if you are hosting your website on your Synology NAS.
This post was updated on Wednesday / January 8th, 2025 at 1:13 AM