Did you know that you can add a watermark to your videos in Synology Surveillance Station? You can use your own logo (image) as watermark, or you can add text and change its color and font size, all in a simple and intuitive manner. Recording videos and saving them with a watermark has never been easier! In today’s article I will explain to you how to add a watermark to any of your videos downloaded via Surveillance Station. Note: You can also add a Watermark in the Live Camera Feed.
STEP 1
Please Support My work by Making a Donation.
STEP 2
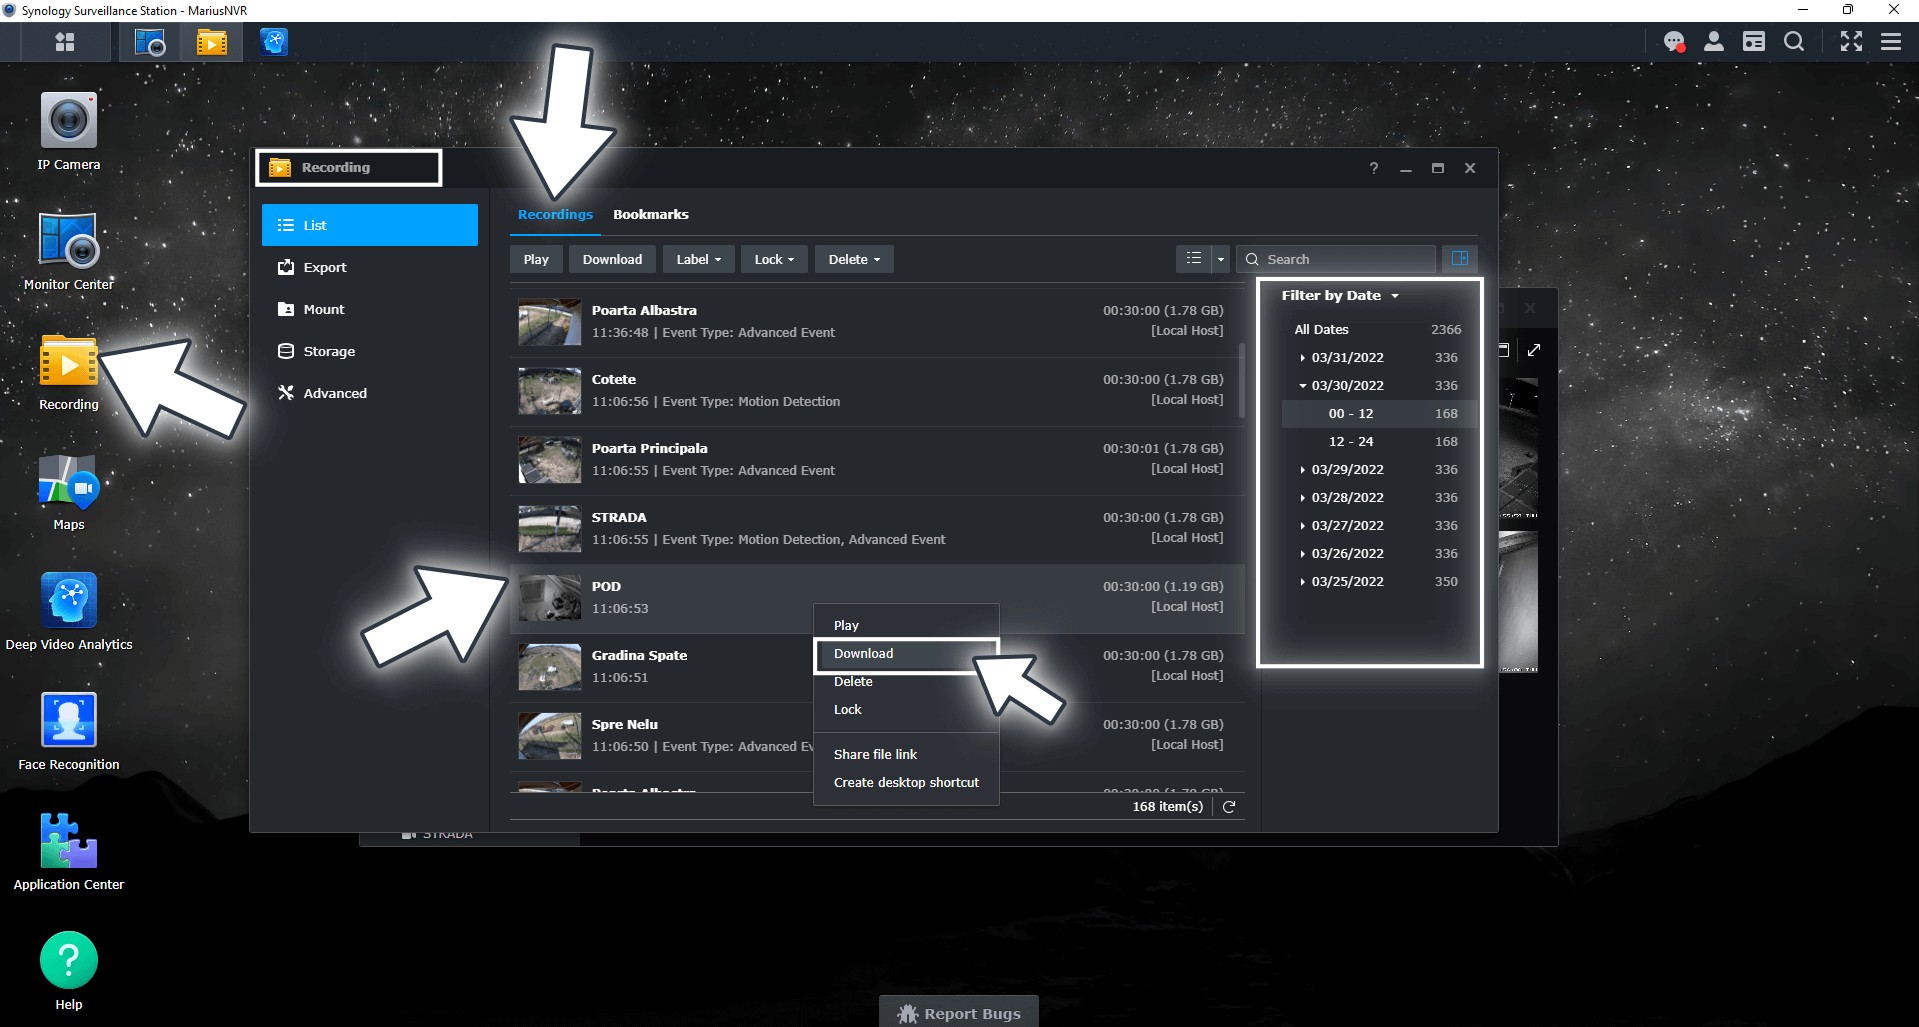
Open Synology Surveillance Station then click the Recording icon. Select a video from your list on the right, filtering by date or by camera. Right mouse click on the selected video, then click Download. Follow the instructions in the image below.

STEP 3
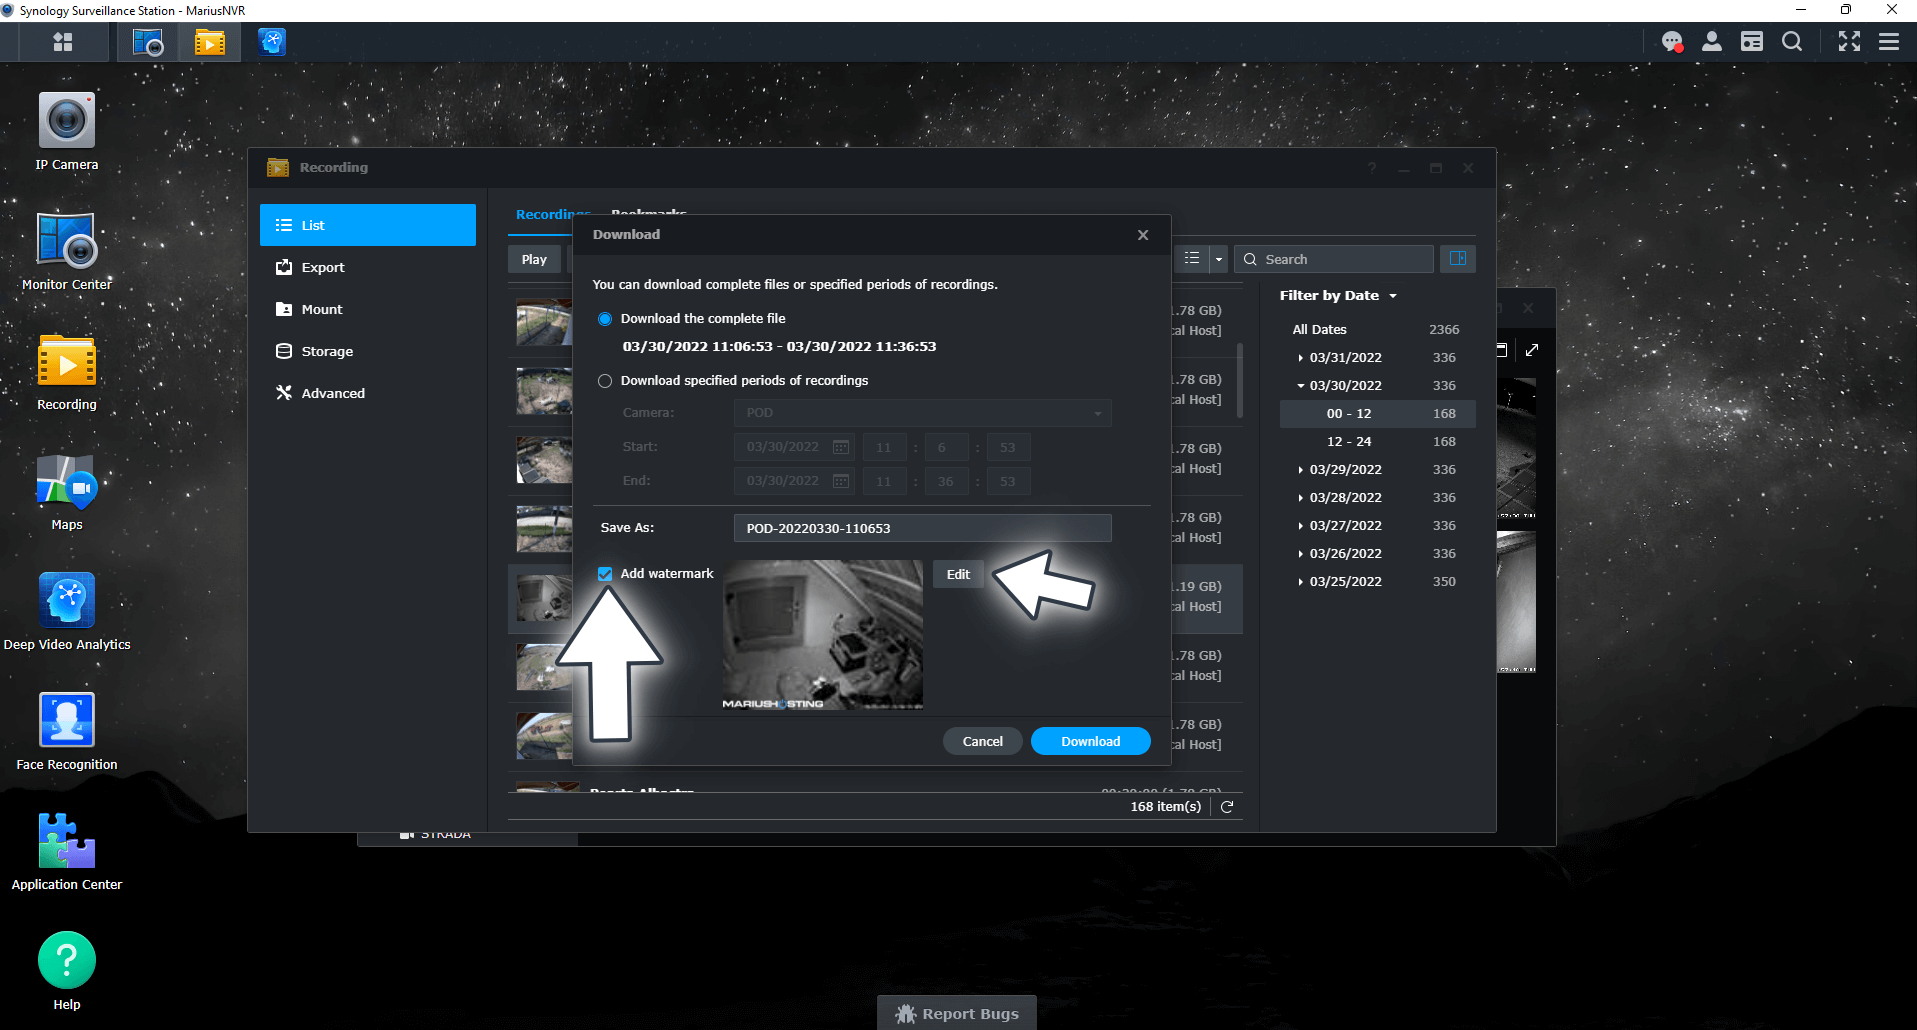
You can either download the complete video file, or download a specified period of recordings. In any case, you can add the watermark to the full or partial video, depending on your needs. Check “Add watermark” then click Edit. Follow the instructions in the image below.

STEP 4
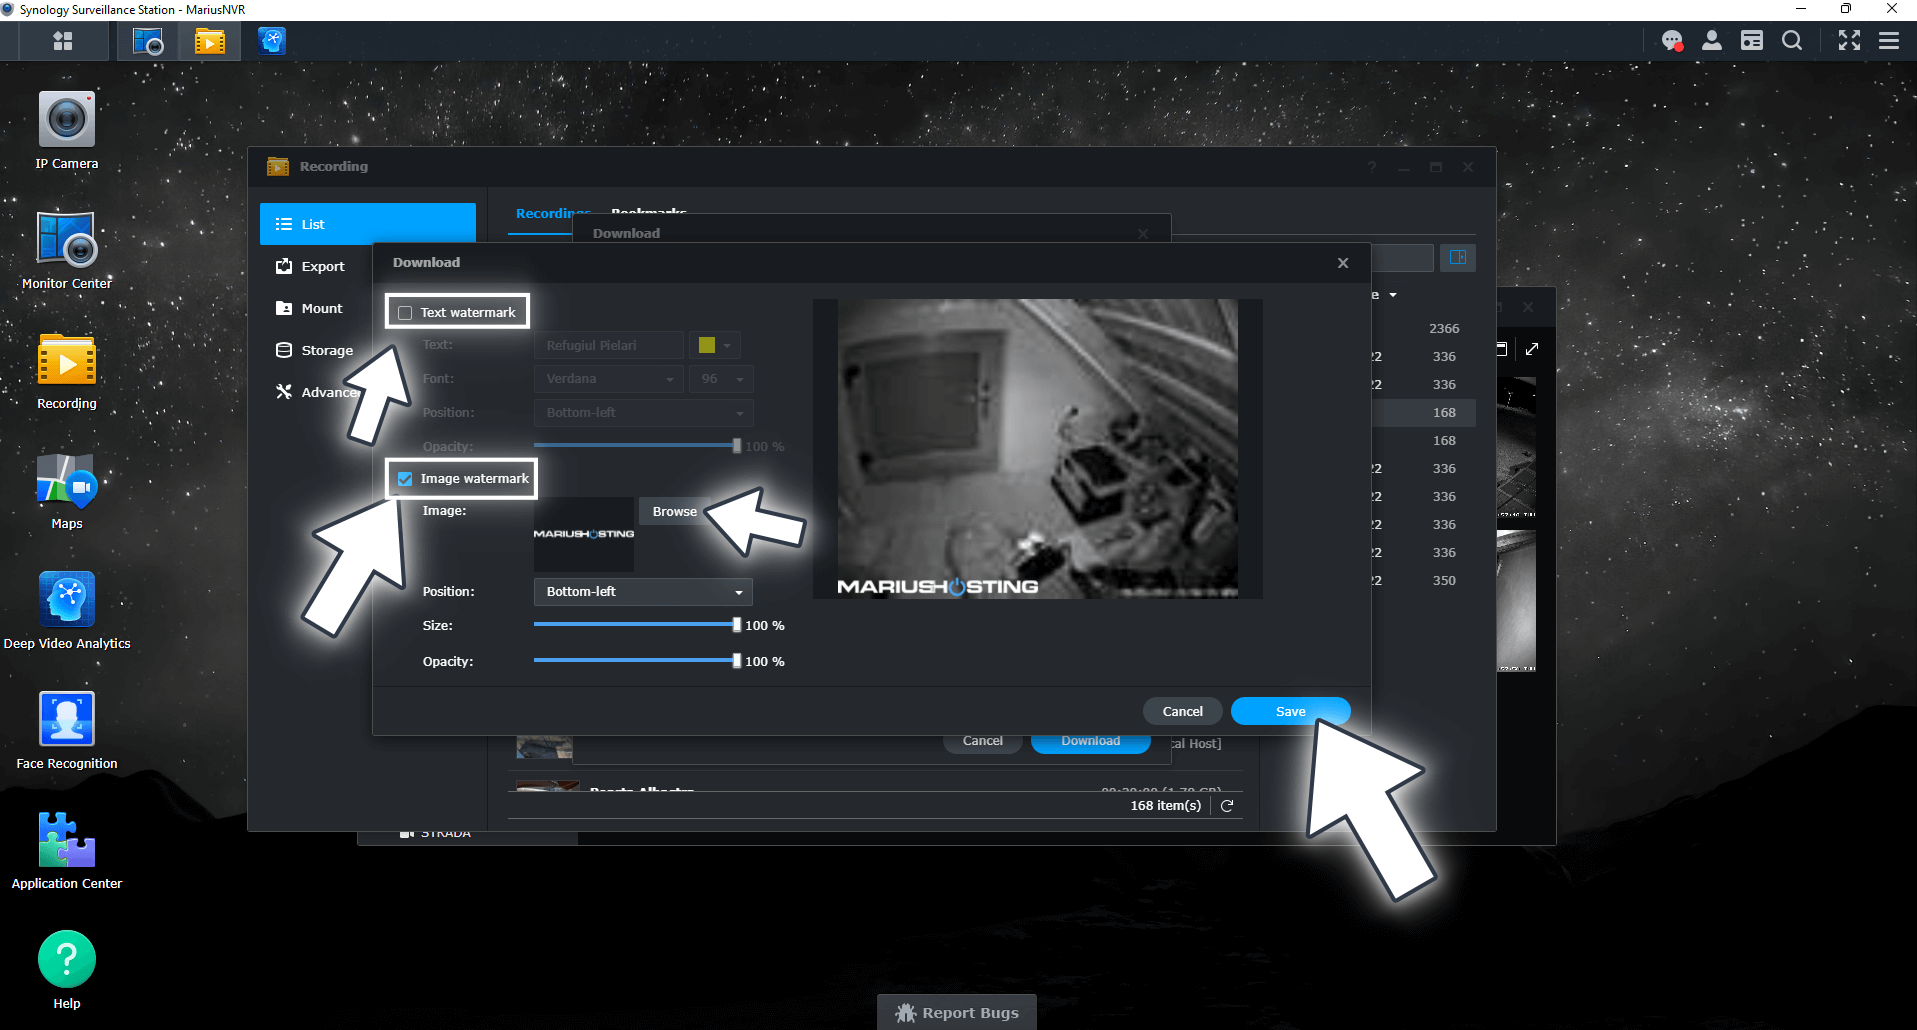
After you click Edit on STEP 3 a new window will open. You can check Text watermark to add a text watermark to your video. You have multiple options to personalize your text watermark like choosing the color of your text, font, position and size. You can also add your own Image watermark or, as I call it, logo. Adding your own logo is really easy. Check Image watermark and click the “Browse” button to upload your own logo from your computer, then select the position, size and opacity of the logo. Click Save to save the settings.

Note: You can see how watermarks work in the video that I have posted in my article on Night Vision With Reolink Cameras.
Note: My Surveillance Station Posts.
This post was updated on Wednesday / August 10th, 2022 at 10:20 PM
