Synology DSM 7 does not support external USB devices and their drivers. USB devices (Wi-Fi dongle, Bluetooth dongle, 3G/4G dongle, USB DAC/speaker, and DTV dongle) are no longer supported in DSM 7.0. If your Synology NAS is currently connected via a wireless dongle, it will be disconnected after the update. Many of you have asked me to create a simple guide to solve the problem with Home Assistant and USB CC2531 Dongle Zigbee Support. If all the steps below are performed successfully, everything will work fine. In this step by step guide I will show you how to add USB Support on DSM 7.
STEP 1
Please Support My work by Making a Donation.
STEP 2
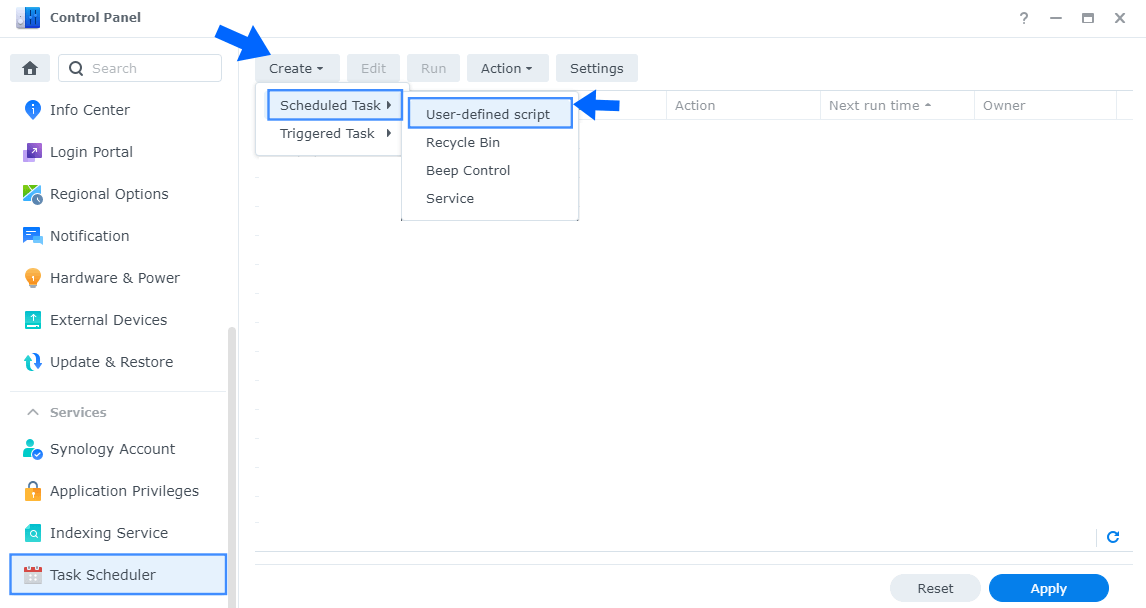
Go to Control Panel / Task Scheduler / Create / Scheduled Task / User-defined script. Follow the instructions in the image below.
STEP 3
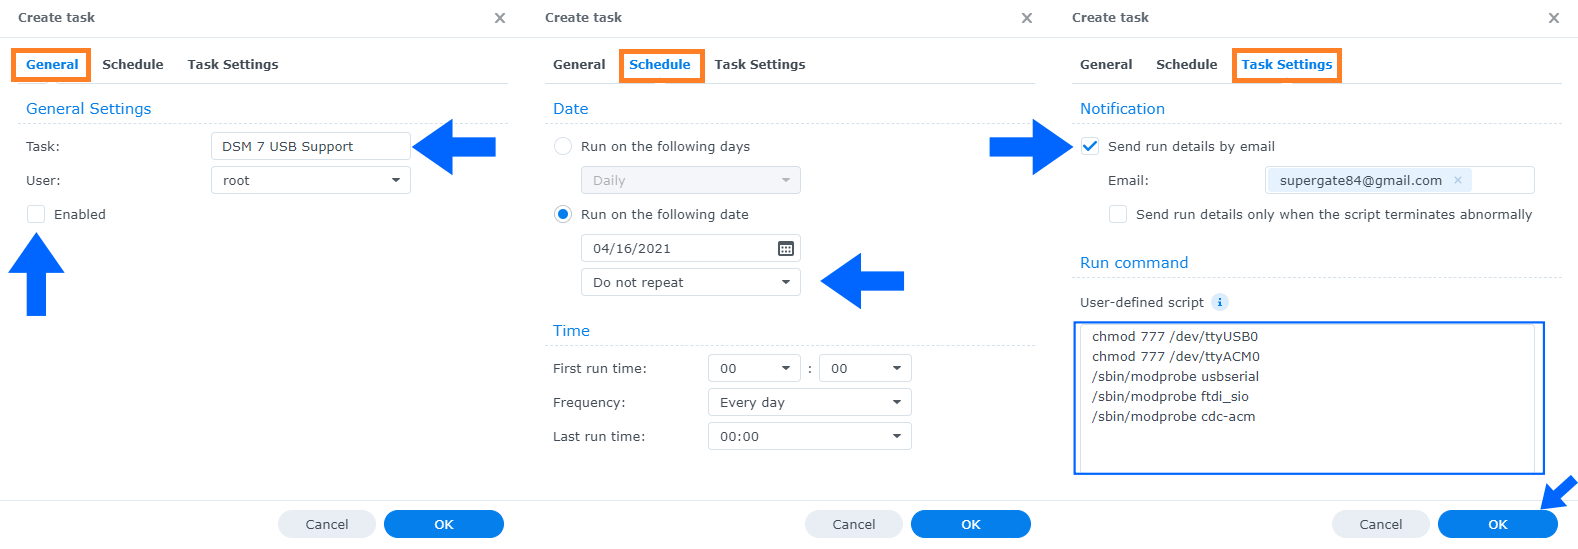
Once you click on User-defined script, a new window will open. Follow the instructions below:
- General: In the Task field type in DSM 7 USB Support. Uncheck the “Enabled” option. Select root User.
- Schedule: Select Run on the following date then select “Do not repeat“.
- Task Settings: Check “Send run details by email“, add your email then copy paste the code below in the Run command area. After that click OK.
/sbin/modprobe usbserial
/sbin/modprobe ftdi_sio
/sbin/modprobe cdc-acm
chmod 777 /dev/ttyUSB0
chmod 777 /dev/ttyACM0
STEP 4
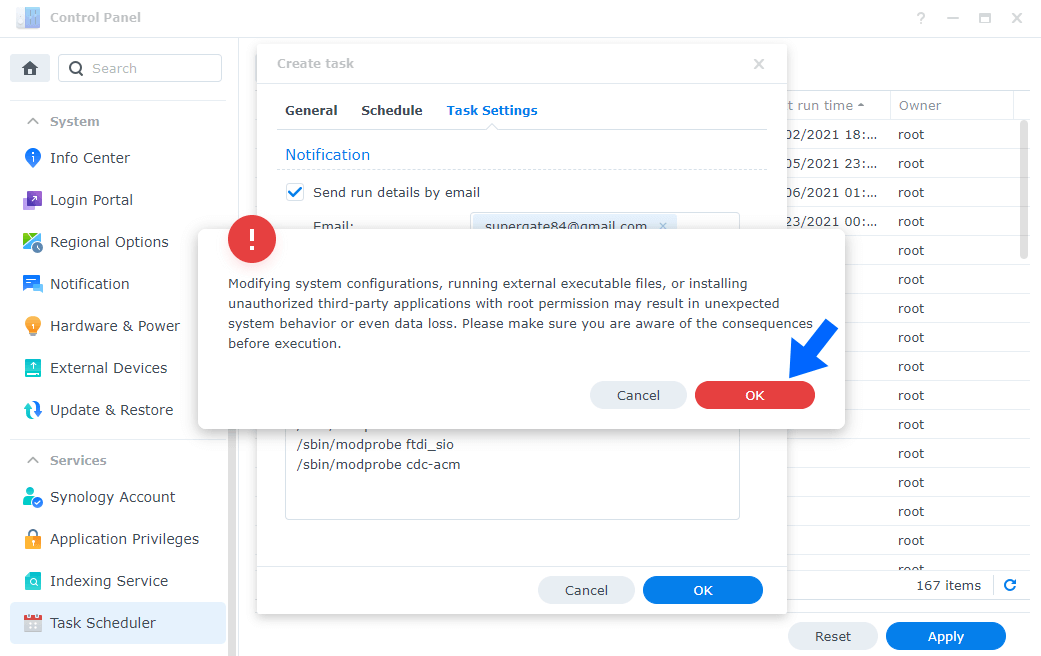
After you click OK on STEP 3 a new warning pop up window will open. Click OK.
STEP 5
After you click OK on STEP 4 select your “DSM 7 USB Support” Task then click the “Run” tab. You will be asked to run DSM 7 USB Support – click Yes. Follow the instructions in the image below.

STEP 6
Remove your USB stick/key and insert it back in.
STEP 7
Force the installation of the USB drivers directly into the kernel. Add Community Packages (SynoCommunity) to Package Center by following my guide.
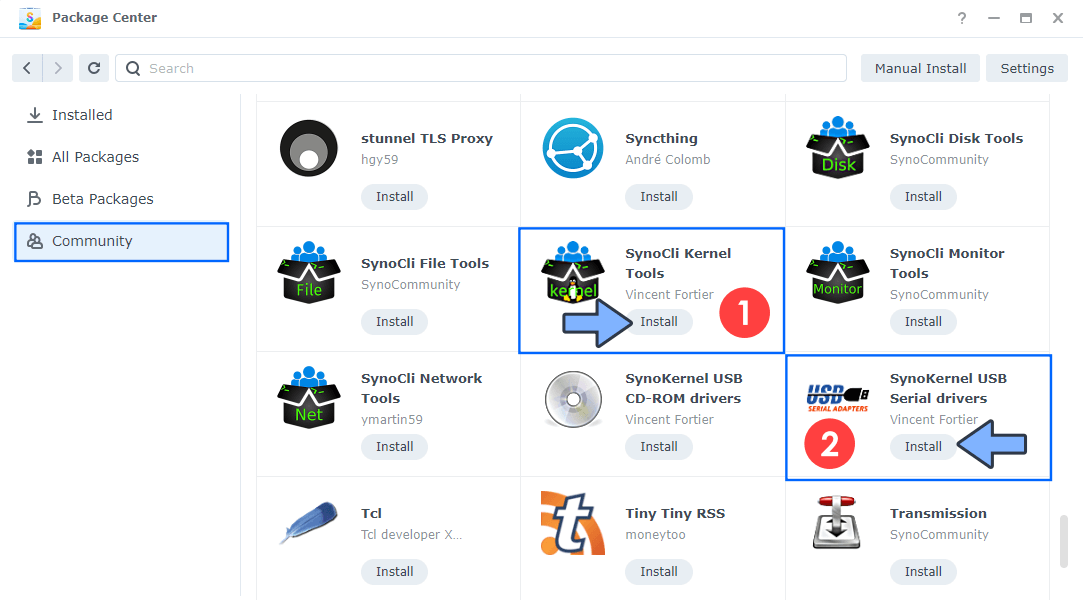
STEP 8
Open Package Center. On the left sidebar click Community. Install SynolCli Kernel Tools then SynoKernel USB Serial drivers. Remember to follow this exact order of installation. Follow the instructions in the image below.
- CC2531 Dongle Zigbee Supported on DSM 7.
- CC2652RB Supported on DSM 7.
- Wireless USB ASUS NANO N10 Supported on DSM 7.
- ConBee II Zigbee Supported on DSM 7.
- ConBee III Zigbee Supported on DSM 7.
- Z-Wave Stick Supported on DSM 7.
- 3D Printers Supported on DSM 7.
- SONOFF Zigbee 3.0 USB Dongle Plus-E Supported on DSM 7.
- USB Modem USB56KEMH2 Supported on DSM 7.
Note: Contact me if you find a Supported USB stick and the guide works for you so I can add your USB stick model in the Supported USB stick/key list above.
Note: If you still can’t get the USB stick working, try to Manually force the USB Driver Installation.
Note: If you restart your NAS for one reason or another, remember to follow STEP 5 and STEP 6 again. If you don’t do that, you will lose the connection with your USB key.
Note: You can also add Triggered Task instead of Scheduled Task on STEP 2, then add a Boot-up rule. I don’t recommend it because you don’t know how DSM 7 will evolve in the future and how this might affect your NAS.
Note For Conbee III Zigbee:
- – Latest Firmware for Conbee III required
- – Reset the stick to Factory Settings
Install the latest firmware on the stick, reset the stick to factory setting and use only ZHA and the stick will work.
This post was updated on Thursday / December 4th, 2025 at 8:00 PM