If you are using your Synology NAS as a surveillance device, you can back up Surveillance Station and restore it to a previous version with the Hyper Backup Package which you can download for free from the DSM Package Center.
What is Synology Surveillance Station?
Surveillance Station is a web-based application that can manage IP cameras to safeguard your home or office environment. With Surveillance Station you can watch live videos and record video, set up scheduled recording, play back recorded events via a web browser, use VisualStation or a mobile device for remote monitoring. Notifications can also be sent to you whenever important events occur.
What is Synology Hyper Backup?
Hyper Backup helps you back up data and LUNs, and retains multiple data backup versions to keep important information handy and easy to track. Hyper Backup also makes restoring data and LUNs simple and straightforward.
How can I back up Synology Surveillance Station? Follow the step by step guide below.
STEP 1
Please Support My work by Making a Donation.
STEP 2
Log into your NAS / go to Package Center / Search and Download the Hyper Backup application then open it. Follow the instructions in the image below.

STEP 3
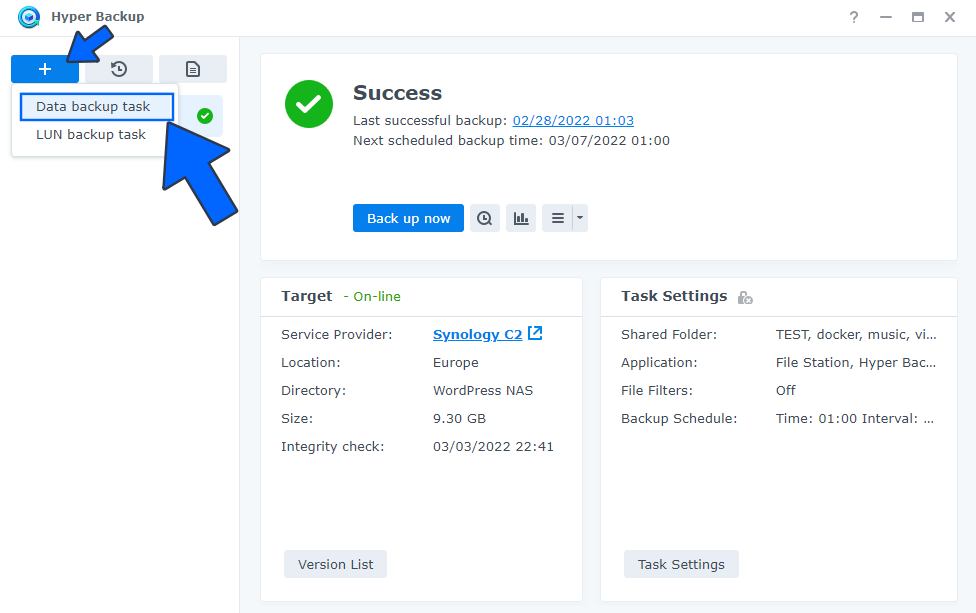
Click on the “Plus” icon then on Data backup task. Follow the instructions in the image below.
STEP 4
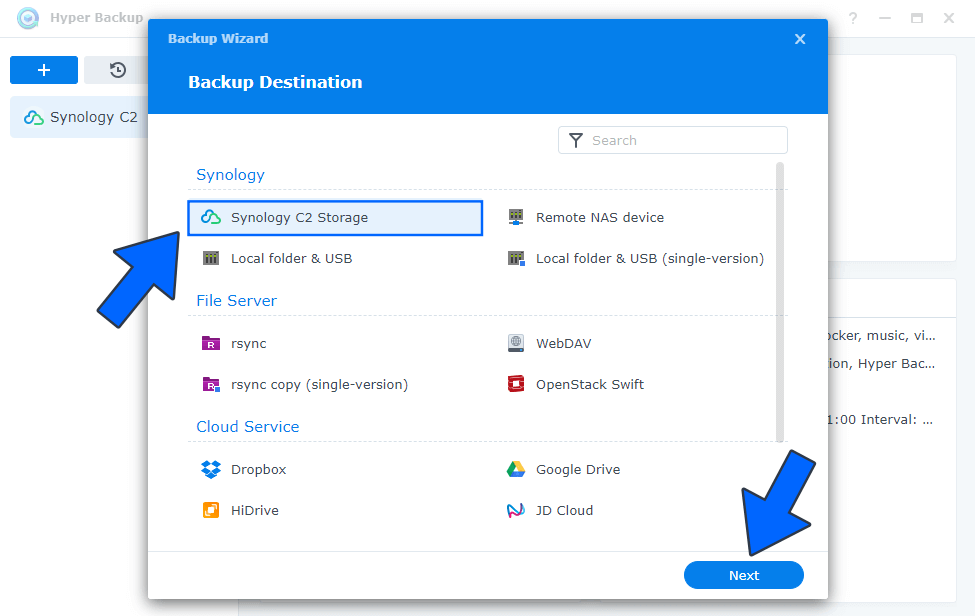
Choose the Backup Destination according to your preference, then click Next. Personally I use Synology C2 Storage (a cloud service), but you can also back up your data to another NAS, or a USB key or disk. Follow the instructions in the image below.
STEP 5
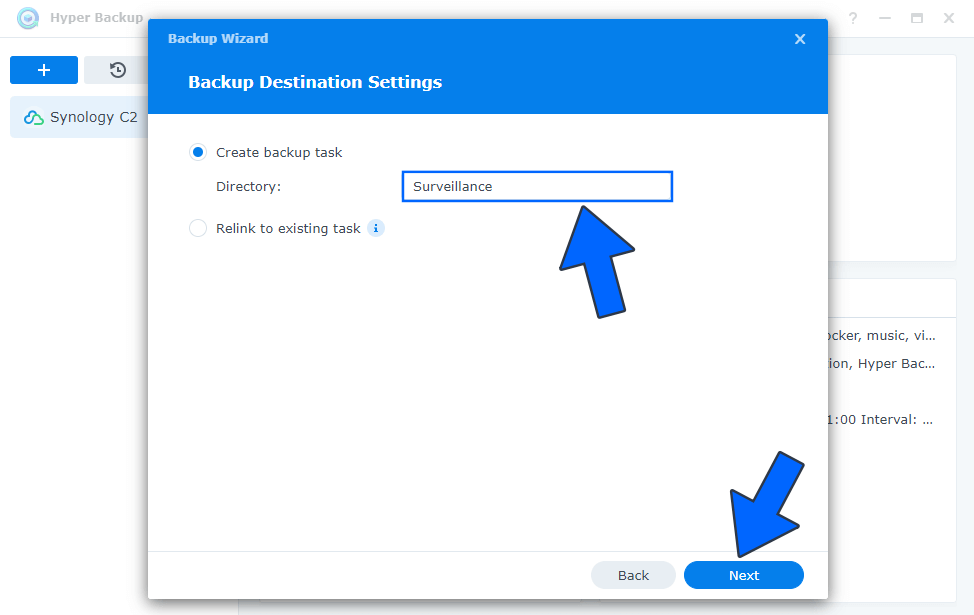
Create the backup task Directory name. For example, I chose “Surveillance“. Click Next. Follow the instructions in the image below.
STEP 6
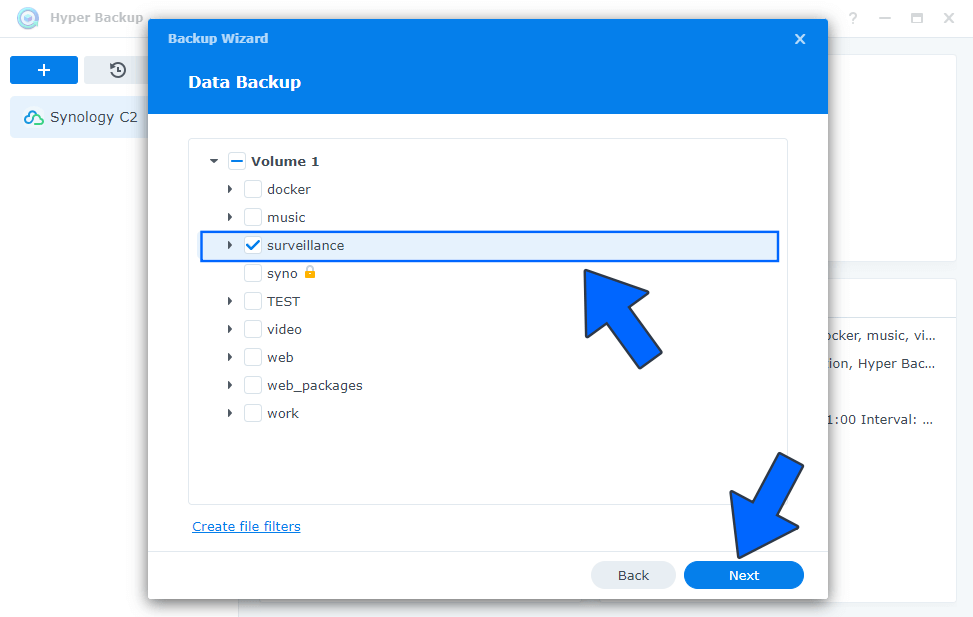
Check the surveillance folder in Volume 1 and then click Next. Follow the instructions in the image below.
STEP 7
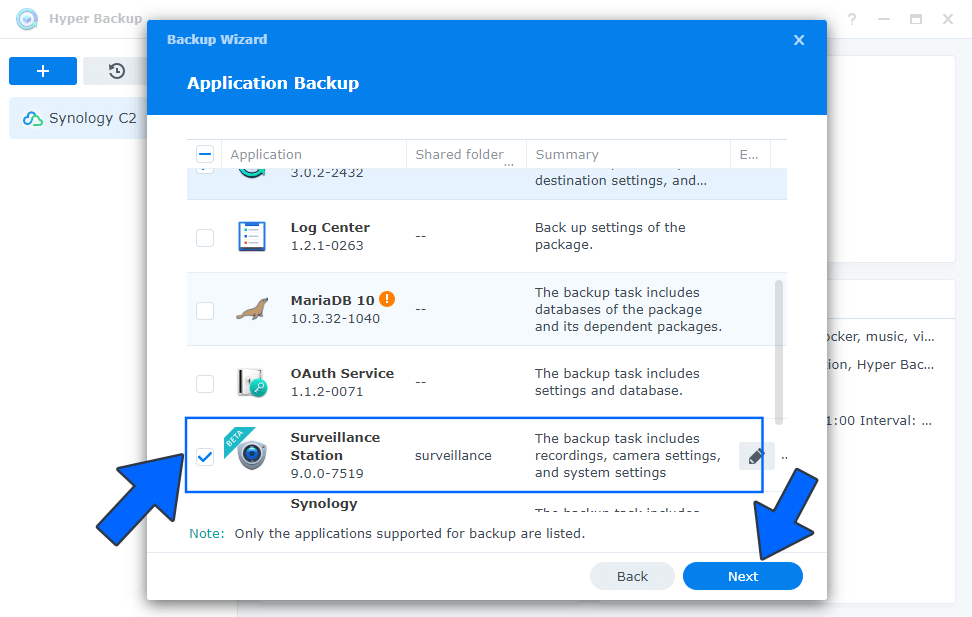
From the Application Backup check the Surveillance Station app and the Hyper Backup app then click Next. Follow the instructions in the image below.
STEP 8
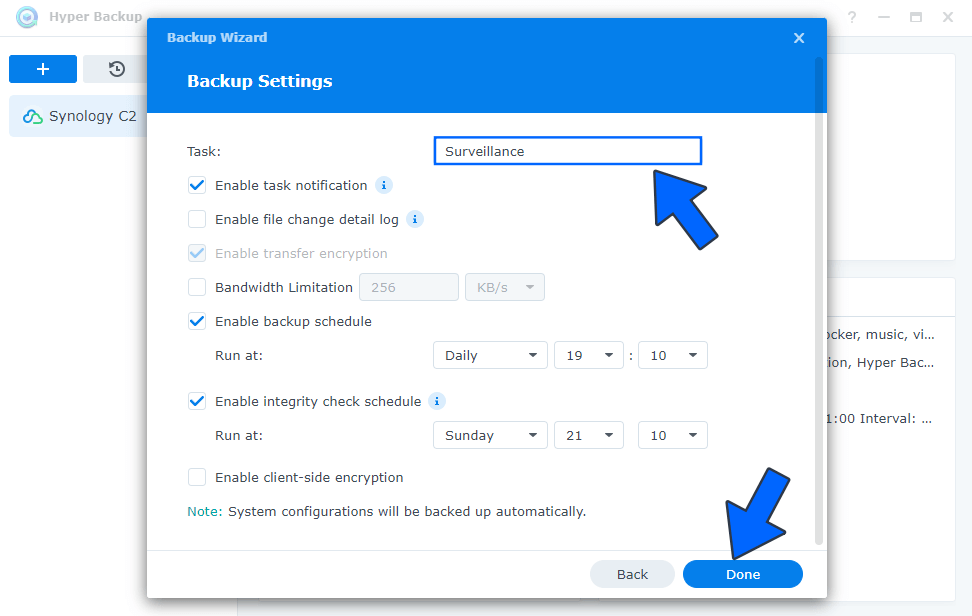
Give a name to the task. In my case, it’s “Surveillance“. Enable the backup schedule (and set it up according to your preferences), then click Done.
STEP 9
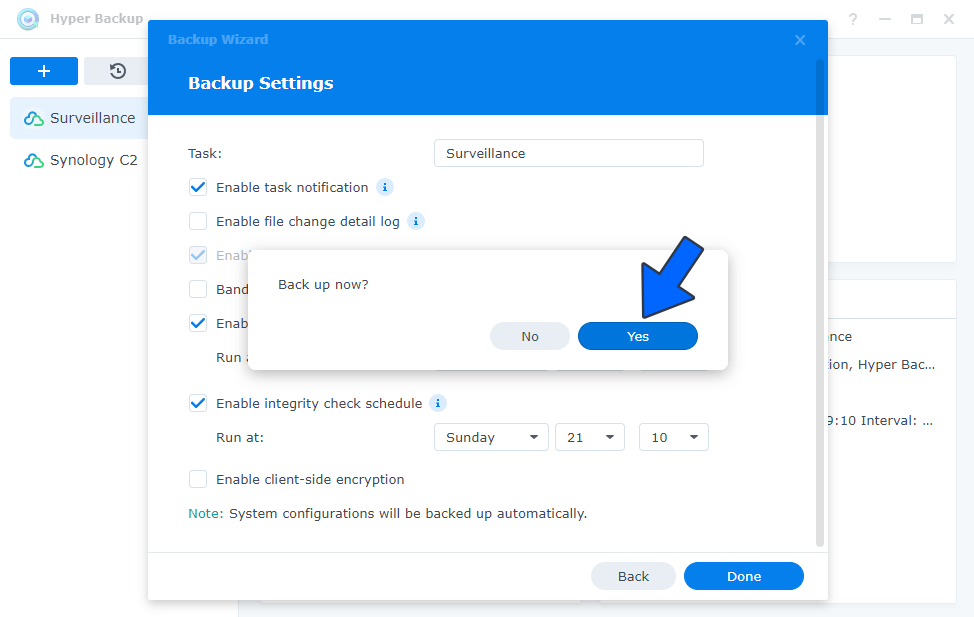
After you click Done, a new pop up window will open. Click Yes to make your first Surveillance Station backup. Follow the instructions in the image below.
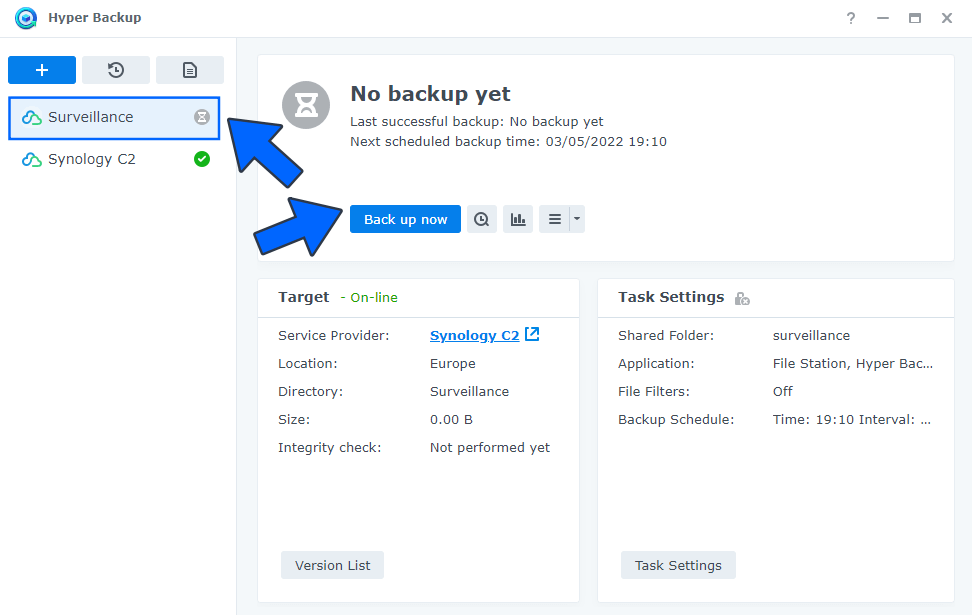
STEP 10
If you choose to click No at STEP 9, you can do the first backup whenever you want, or let the backup schedule follow through according to the schedule you set on STEP 8. Follow the instructions in the image below.
The following Surveillance Station configurations will be backed up:
- Surveillance device settings.
- CMS settings.
- Recorded events.
- Layout in Live View.
- Notification settings.
- E-map settings.
- License key.
- Log.
- VisualStation settings.
- Joystick settings.
- Snapshots.
- Action Rule settings.
- Axis Door Controller settings.
- IP Speaker settings.
Note: You can’t restore any Surveillance Station backups from before version 6.0
Note: Choose Synology C2 as Backup Destination if you want peace of mind.
Note: To restore the desired backup task, go to Hyper Backup. After the restoration is complete, your current settings and data of Surveillance Station will be overwritten.
This post was updated on Wednesday / August 10th, 2022 at 9:55 PM