
QTS is the operating system for entry- and mid-level QNAP NAS devices. Currently up to version 5, QTS has brought major improvements that all QNAP NAS users can benefit from. A note from the manufacturer mentions the following:
QTS 5.0 builds upon its solid foundations with an updated system kernel and optimized user interface – followed by enhanced security measures to protect your digital assets, improved system performance to streamline your applications, and integrated AI machine learning to strengthen image recognition and drive failure prediction. Providing cutting-edge features to meet the challenge of rapid technological changes, QTS 5.0 brings you data security, power, and intelligence.
Below I will guide you through the installation of the QTS operating system on your QNAP NAS.
STEP 1
Once you have connected your QNAP NAS to the power grid and the LAN cables to your router or switch, type the following link for the first-time QTS Operating System installation in your browser:
You can also use Qfinder Pro or the Cloud Key to search your NAS on your local area network. I prefer to use Qfinder Pro.
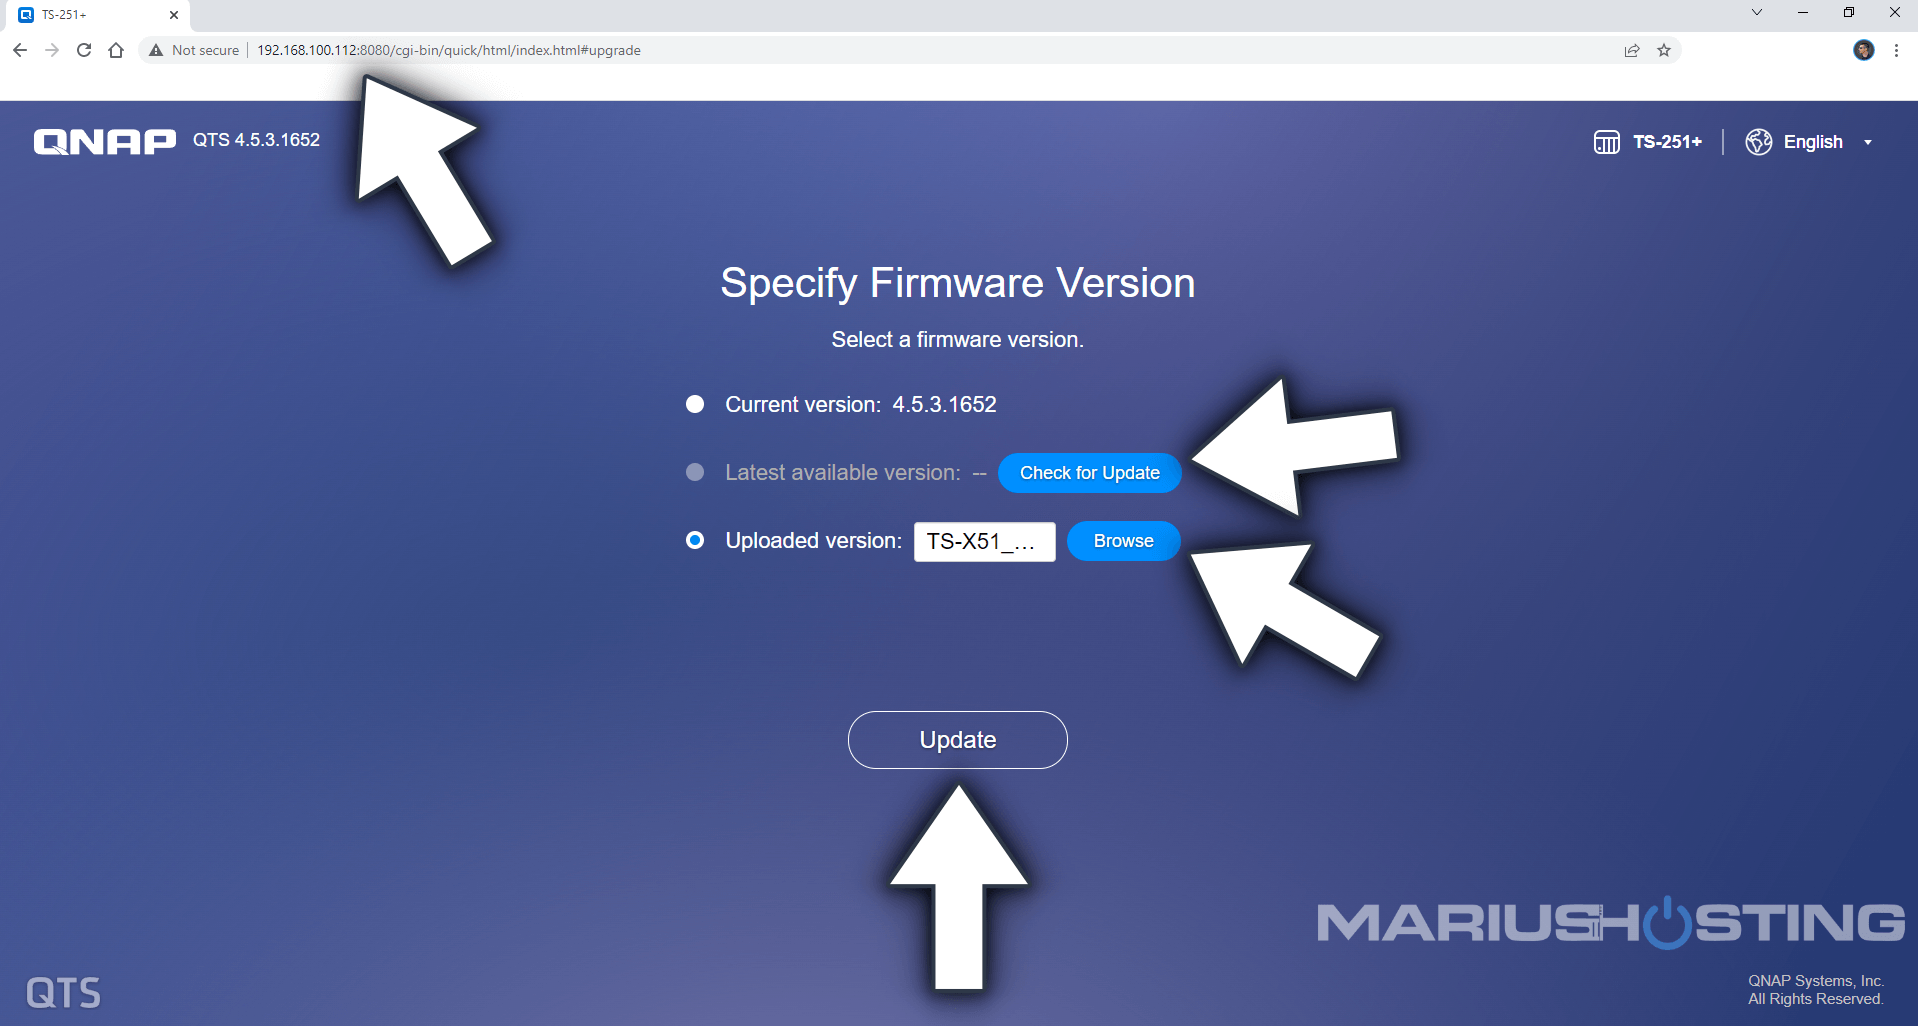
STEP 2
Type in your QNAP NAS address you have previously found with the help of the Qfinder Pro. Check for a real-time update or upload the latest QTS version from the official QNAP website. You need to select your NAS model, then download the QTS operating system. Click Update. Follow the instructions in the image below.
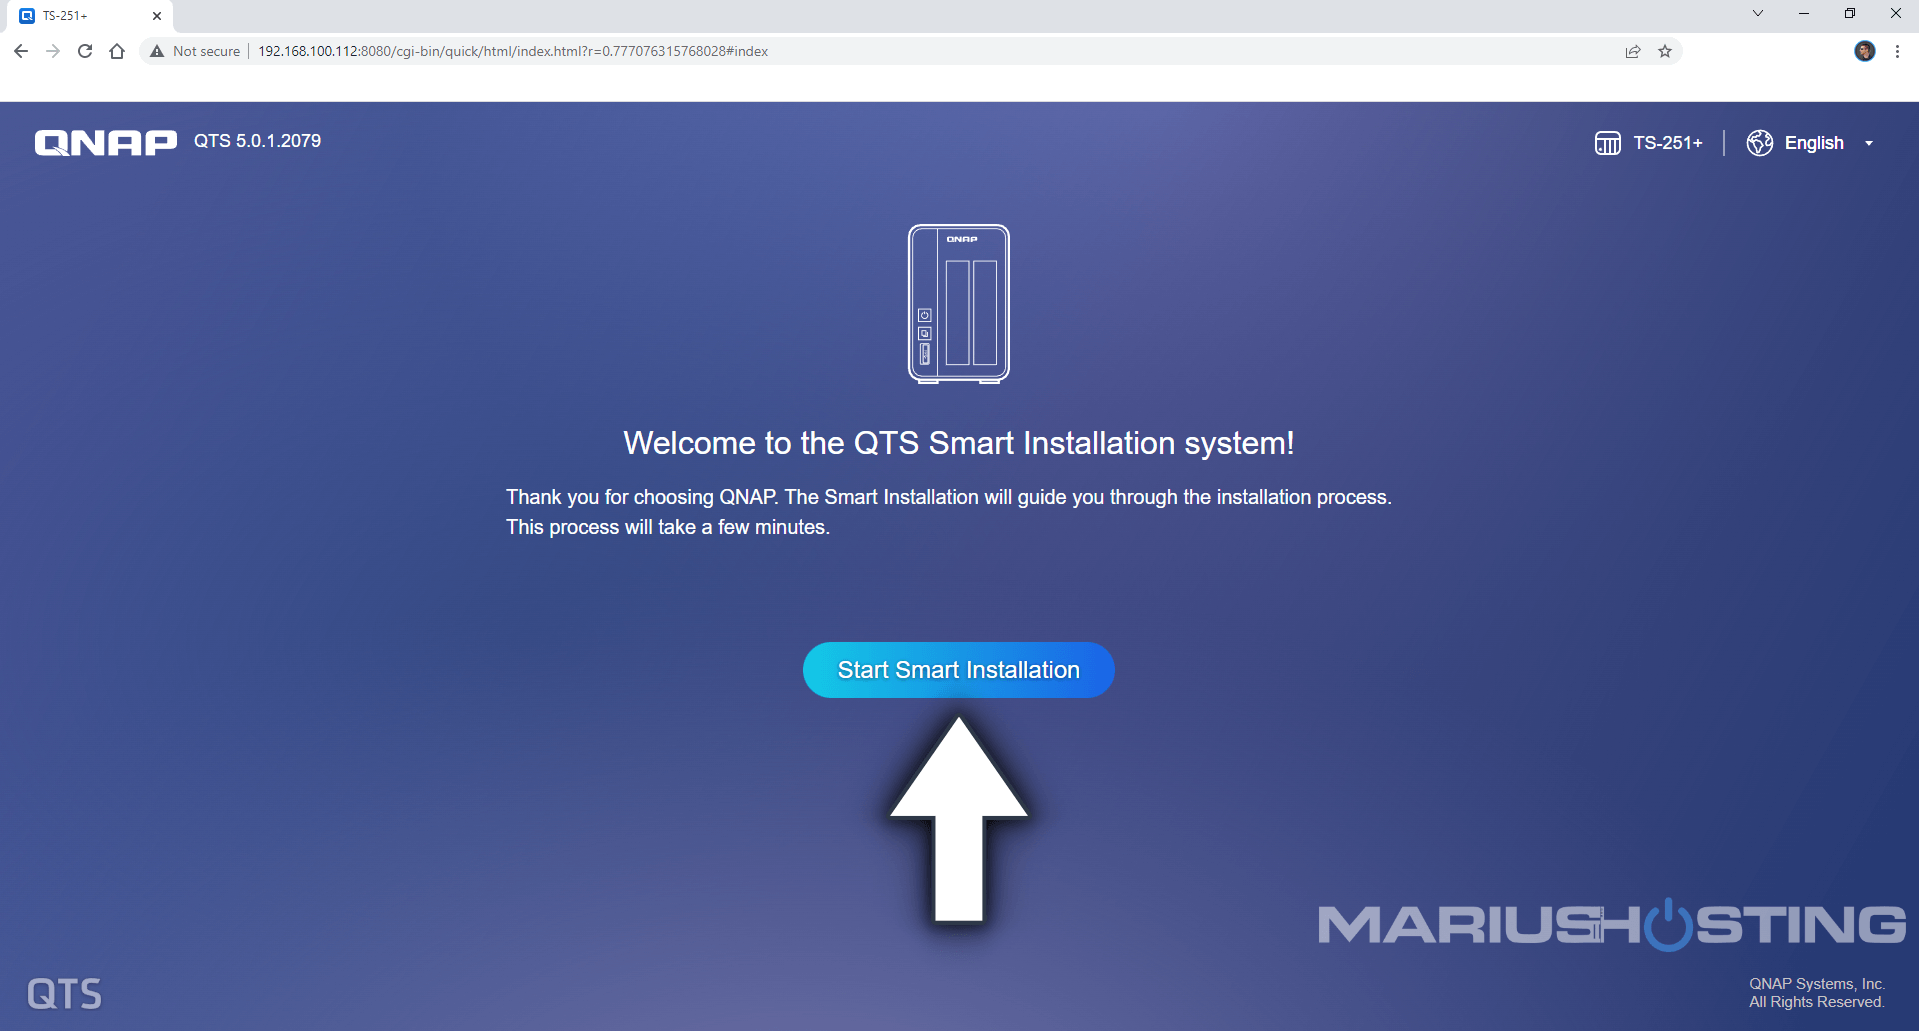
STEP 3
Click Start Smart Installation. Follow the instructions in the image below.
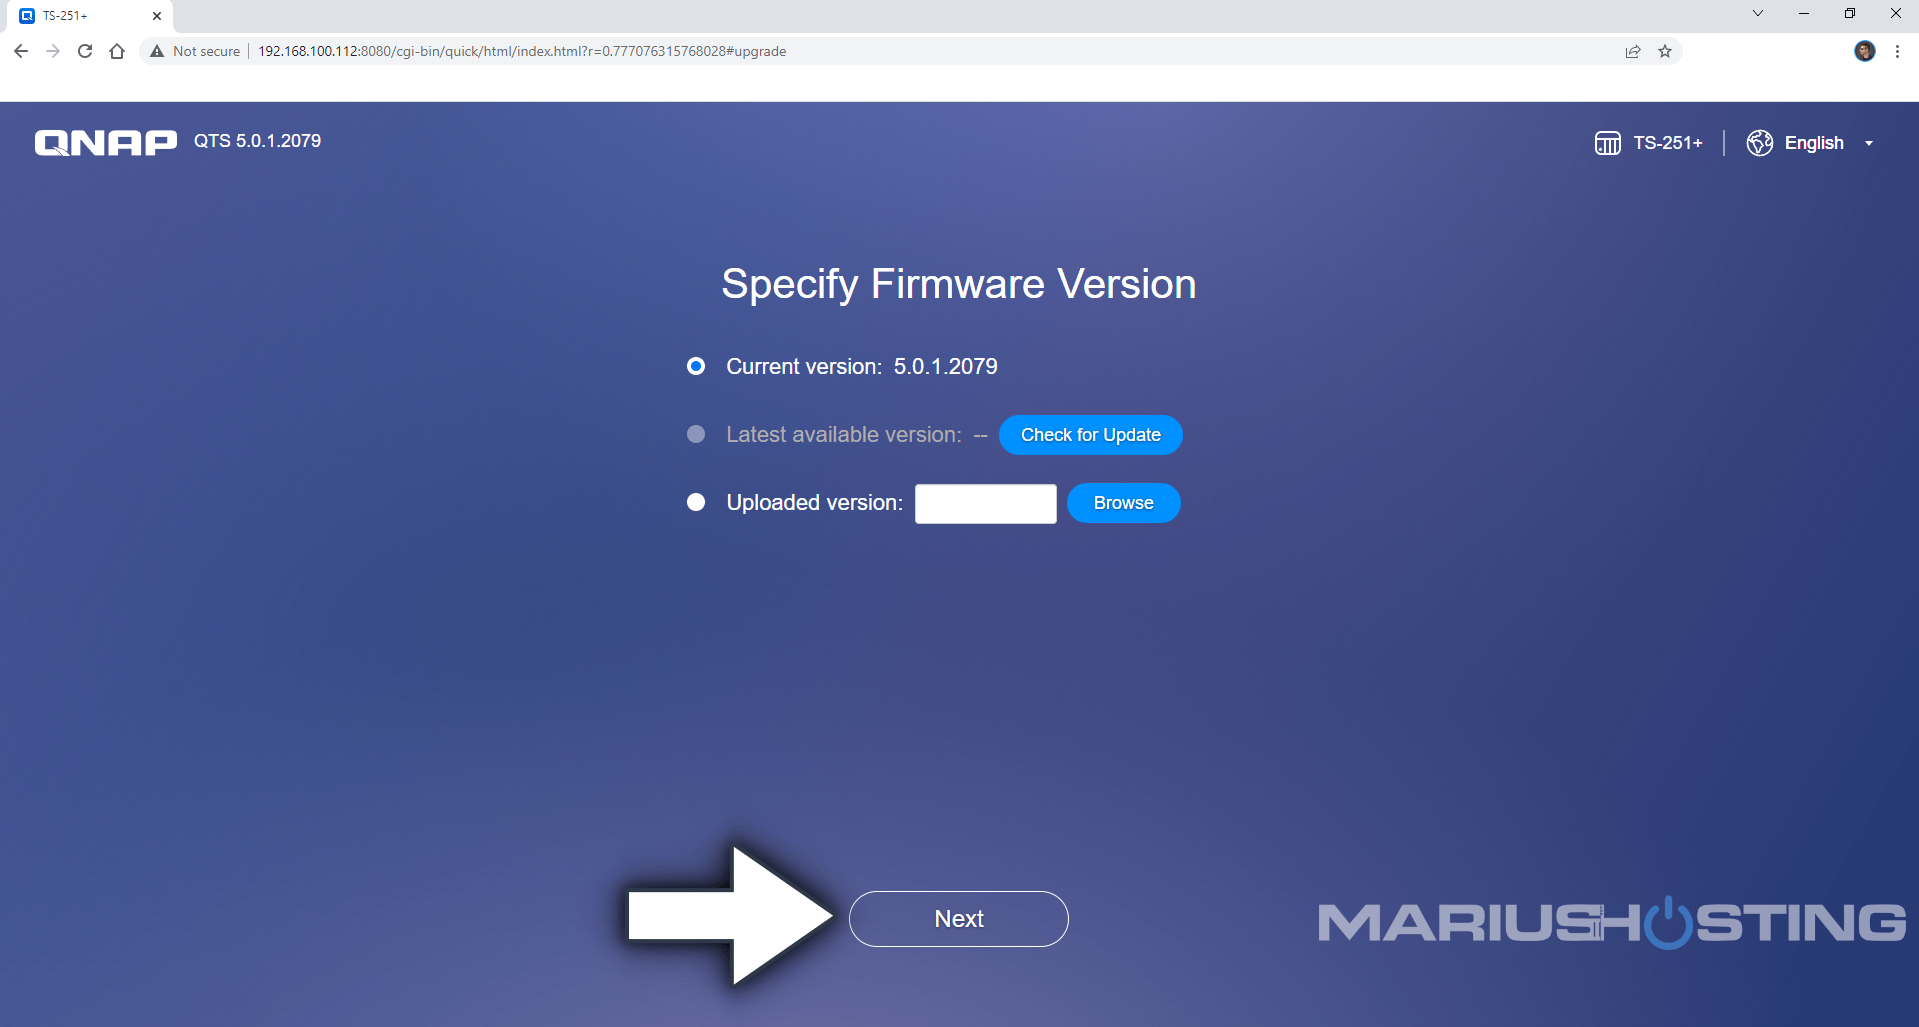
STEP 4
You will be asked again which Firmware to install (just like at STEP 2). Since you have previously already selected the new firmware, this time select Current version, then click Next. Follow the instructions in the image below.
STEP 5
Give your NAS a name. Type in a username or pseudonym of your choice. Type in a password of your choice and confirm it. Click Next. Follow the instructions in the image below.

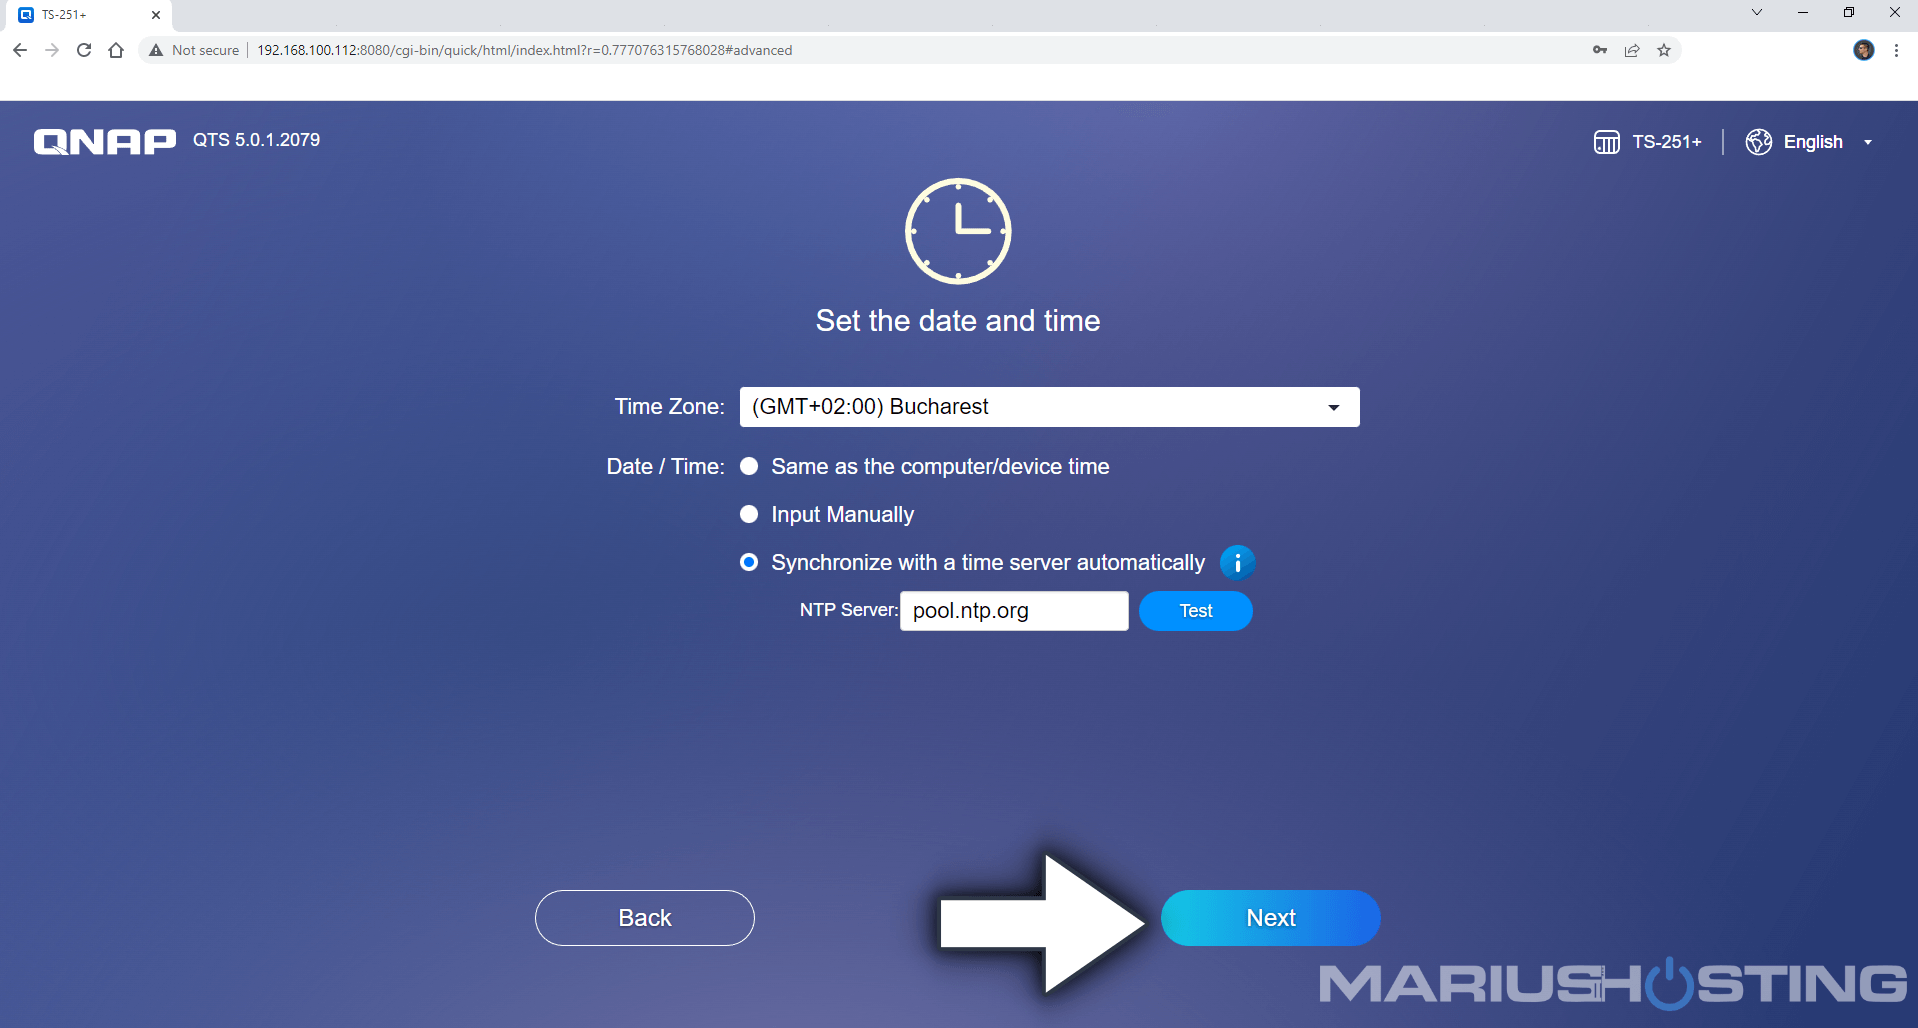
STEP 6
Select your Time Zone and the date/time synchronization, then click Next. Follow the instructions in the image below.
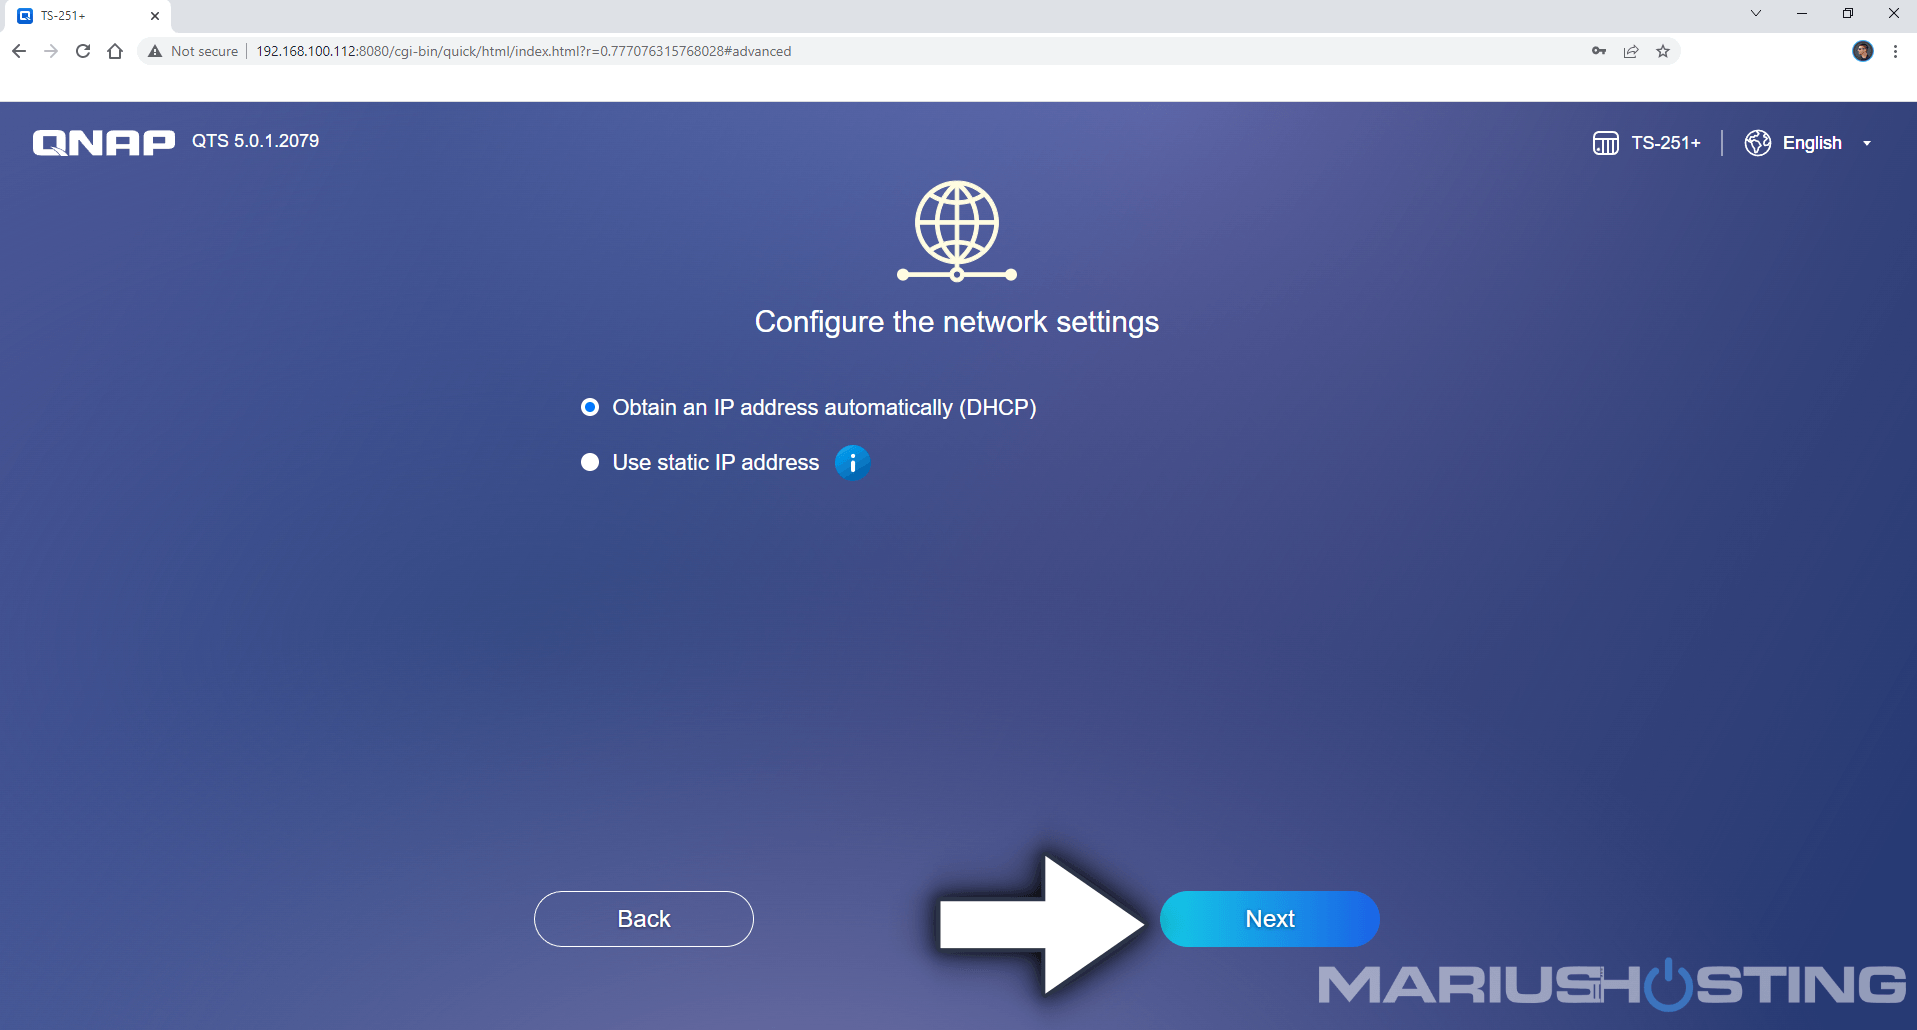
STEP 7
Select the option to obtain an IP address from DHCP (router), or manually add a static IP that you will use to connect to your NAS via browser. Click Next. Follow the instructions in the image below.
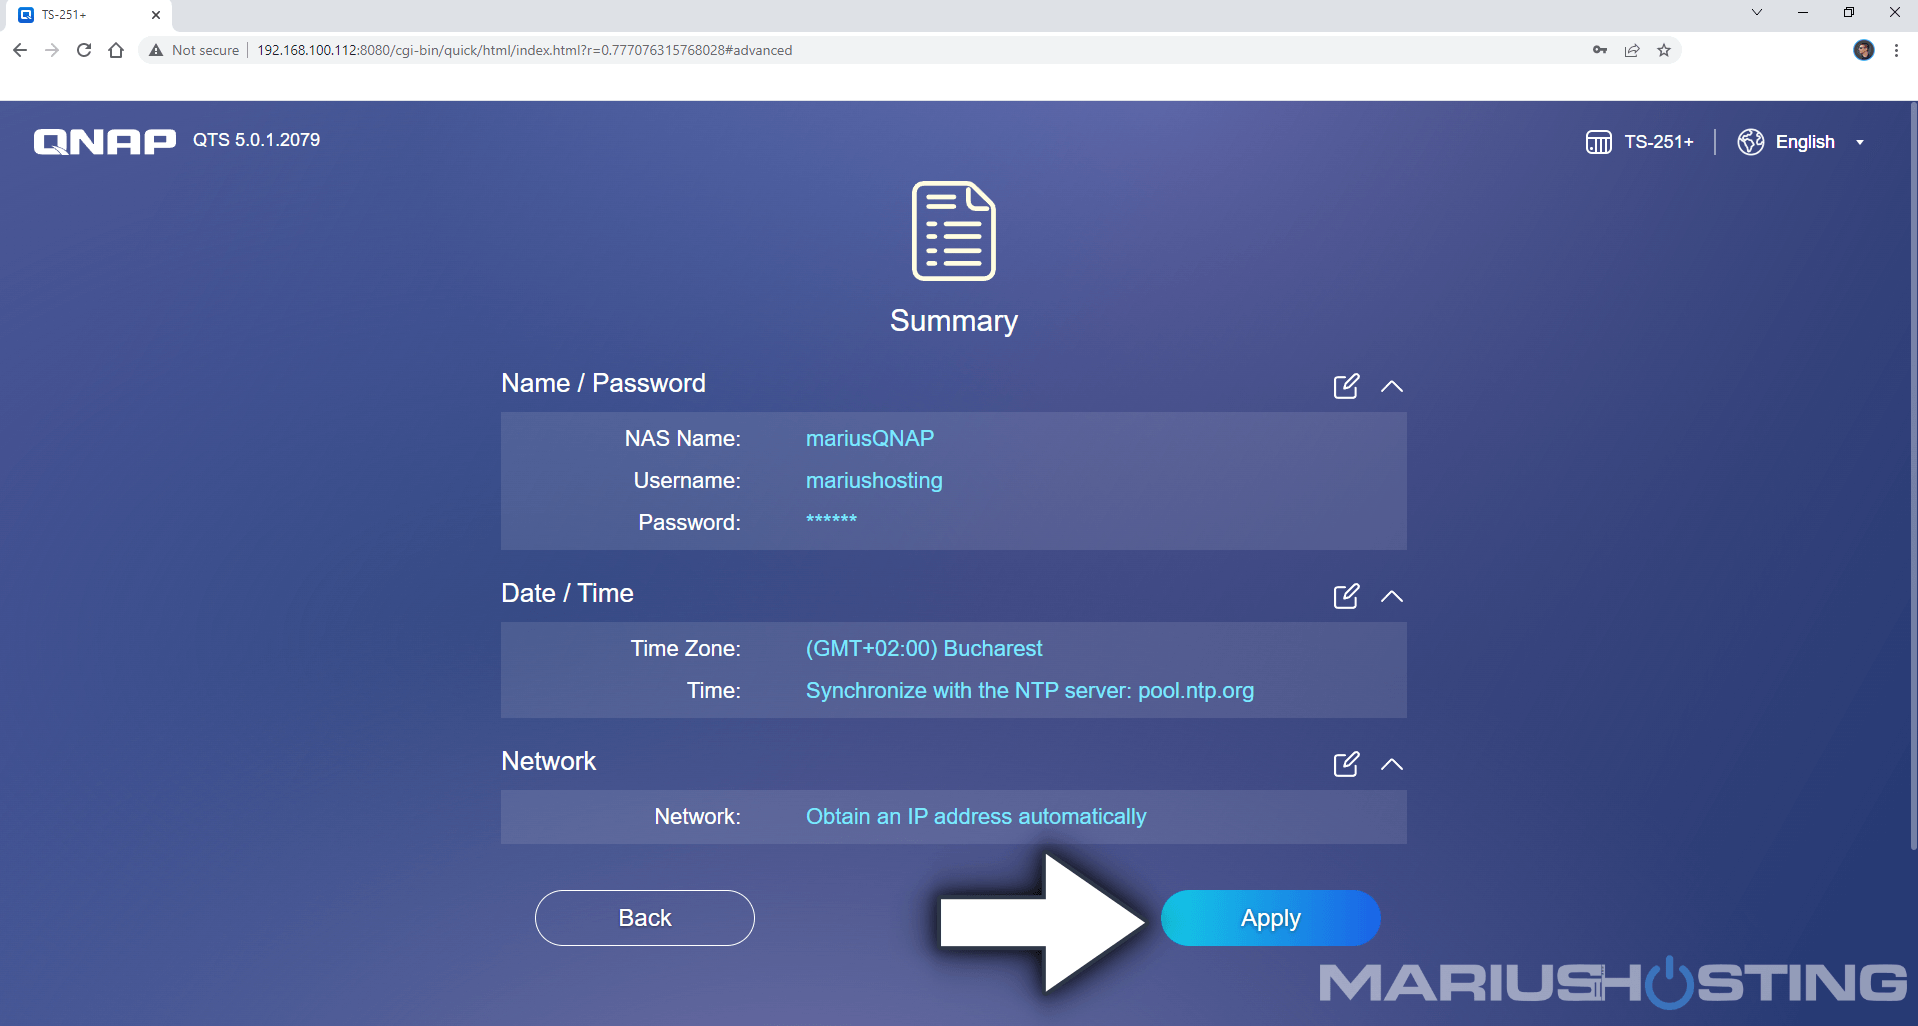
STEP 8
Summary of your credentials and options. Click Apply to start the installation of the QTS operating system. Follow the instructions in the image below.
STEP 9
A new pop-up window will open. The pop-up will inform you that all the data on your disks will be cleared. Click Initialize. Follow the instructions in the image below.

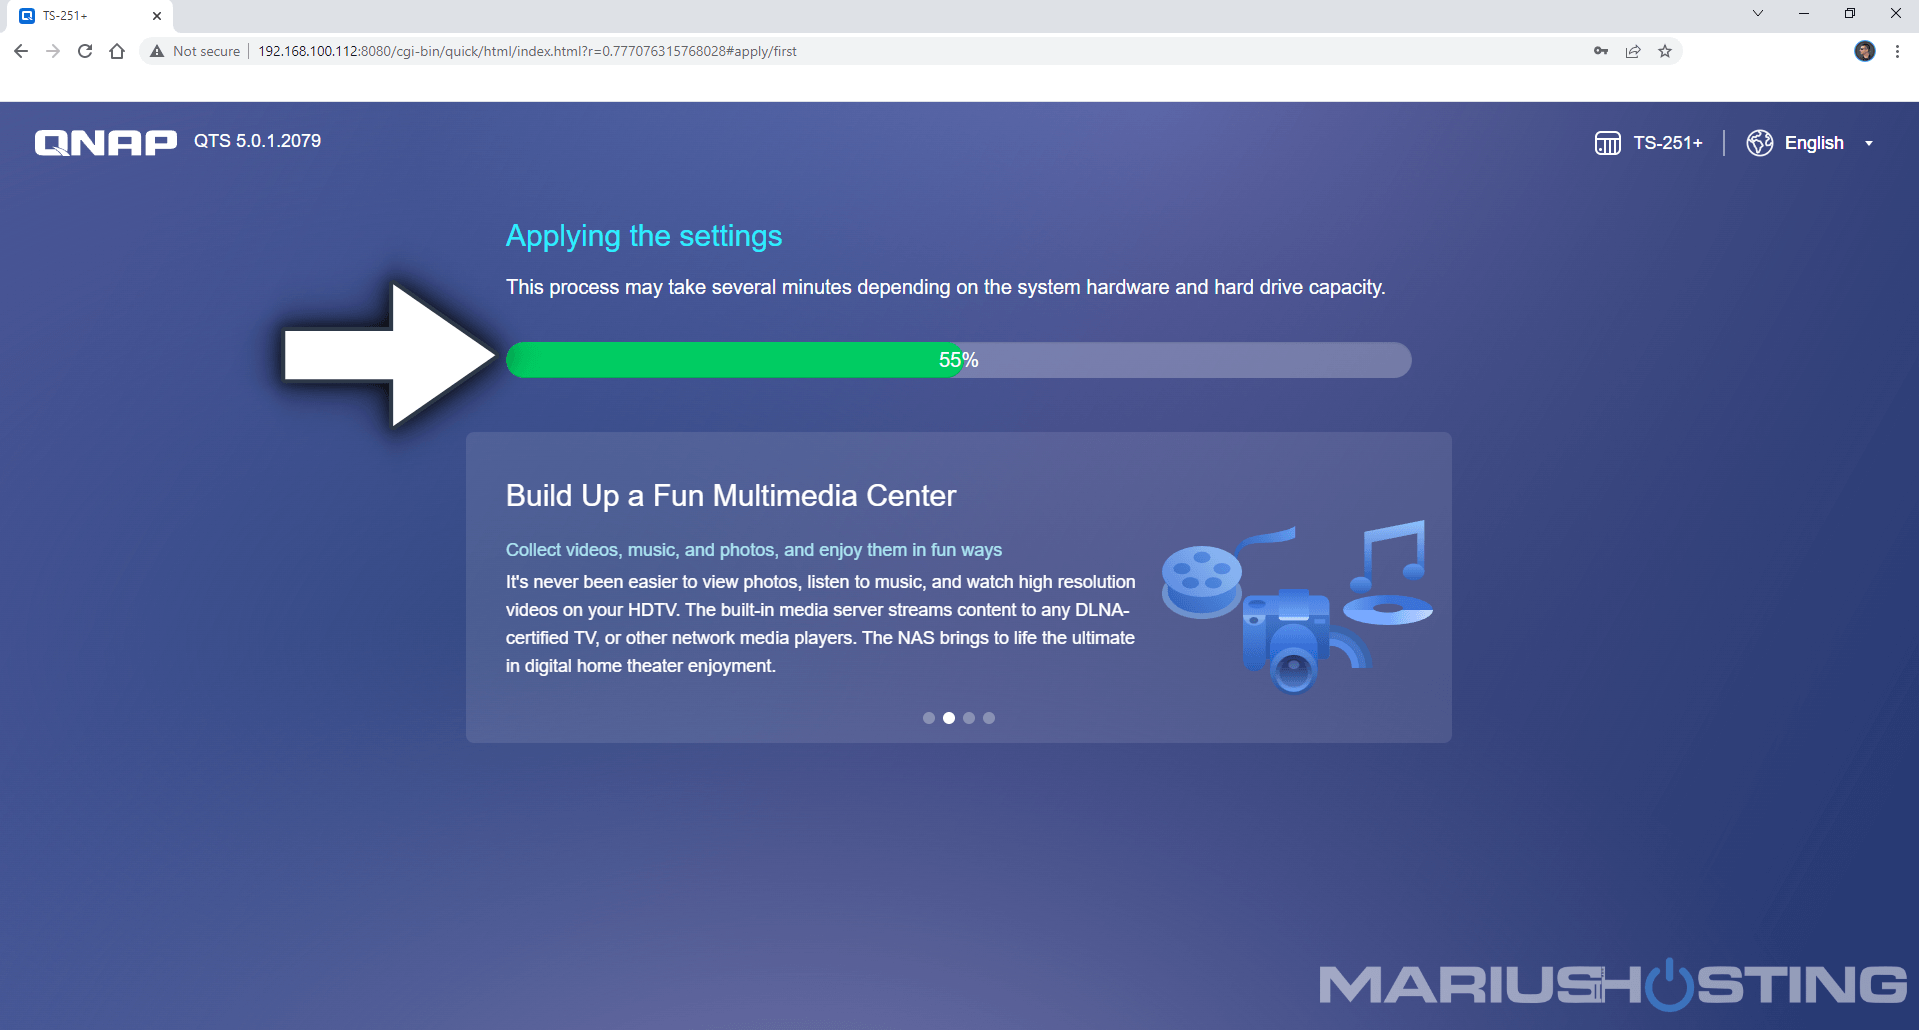
STEP 10
The QTS installation will take up to 10 minutes to complete. In the meantime, you can get yourself a cup of coffee to help you wait 🙂
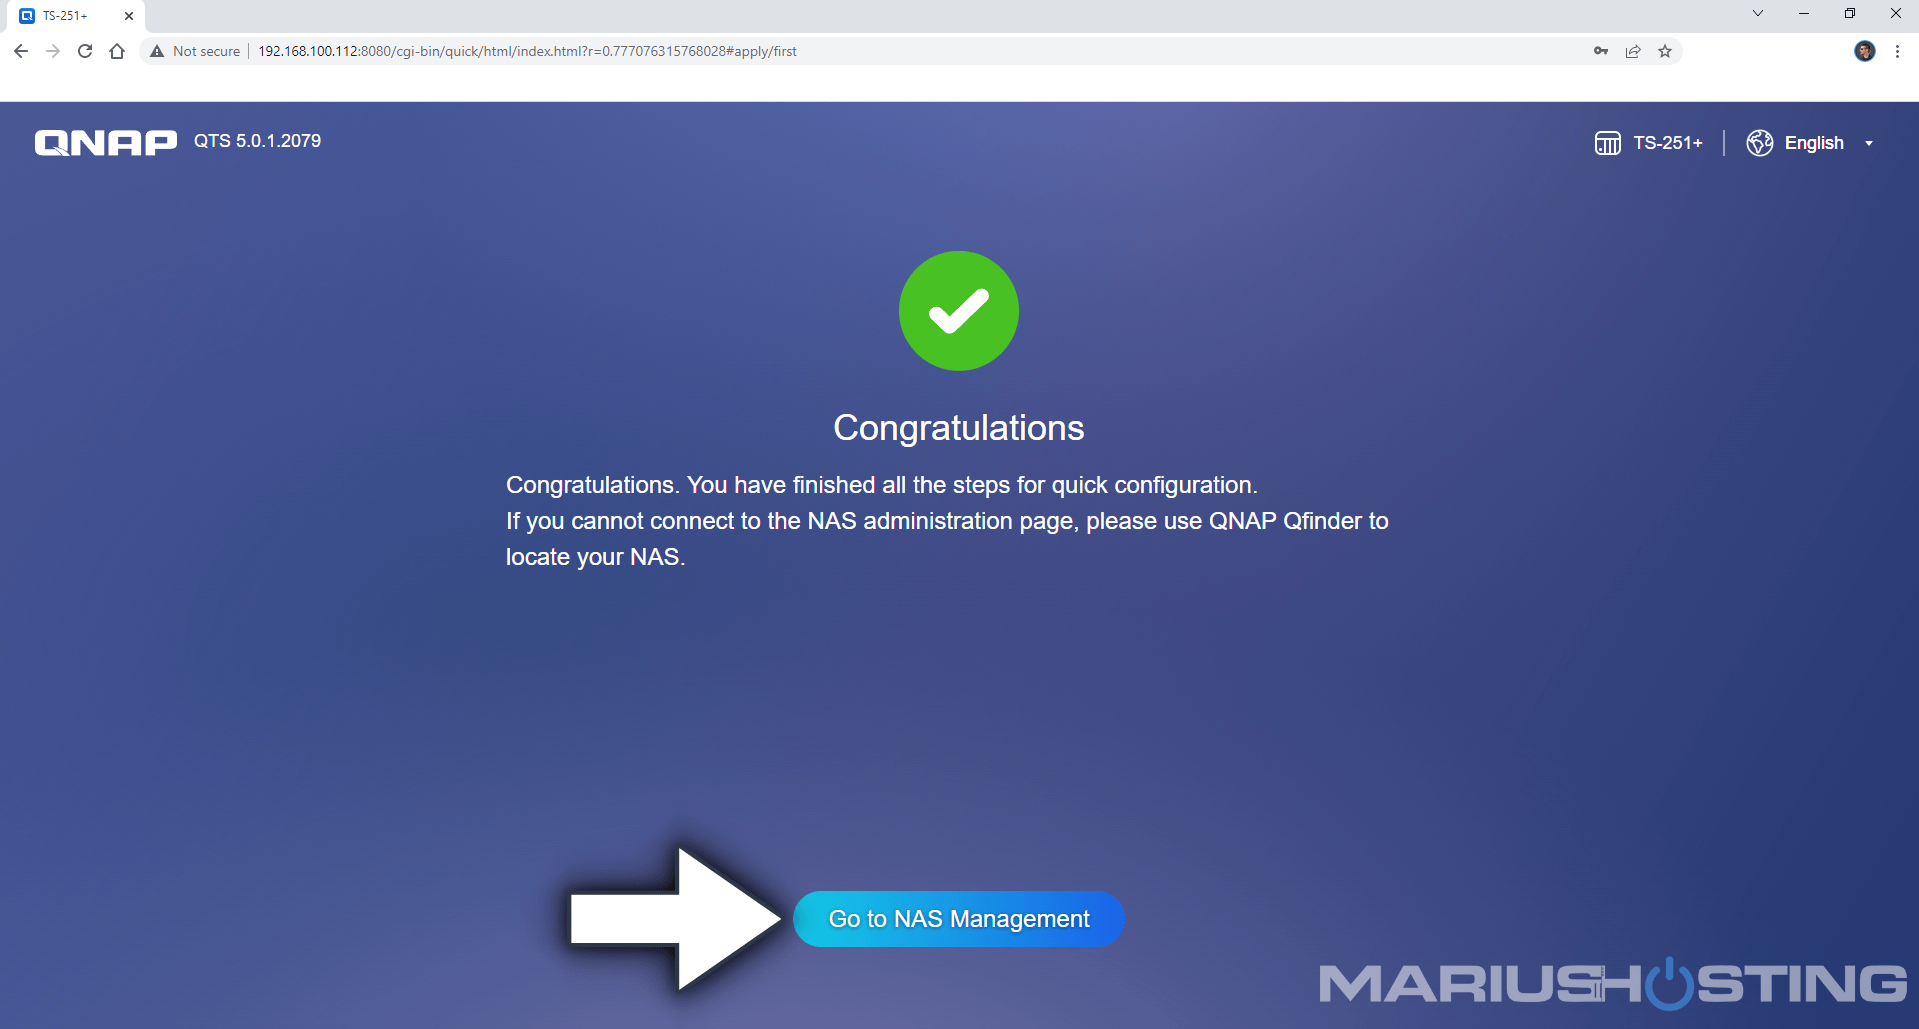
STEP 11
Congratulations! Click Go to NAS Management to connect to your NAS for the first time. Follow the instructions in the image below.
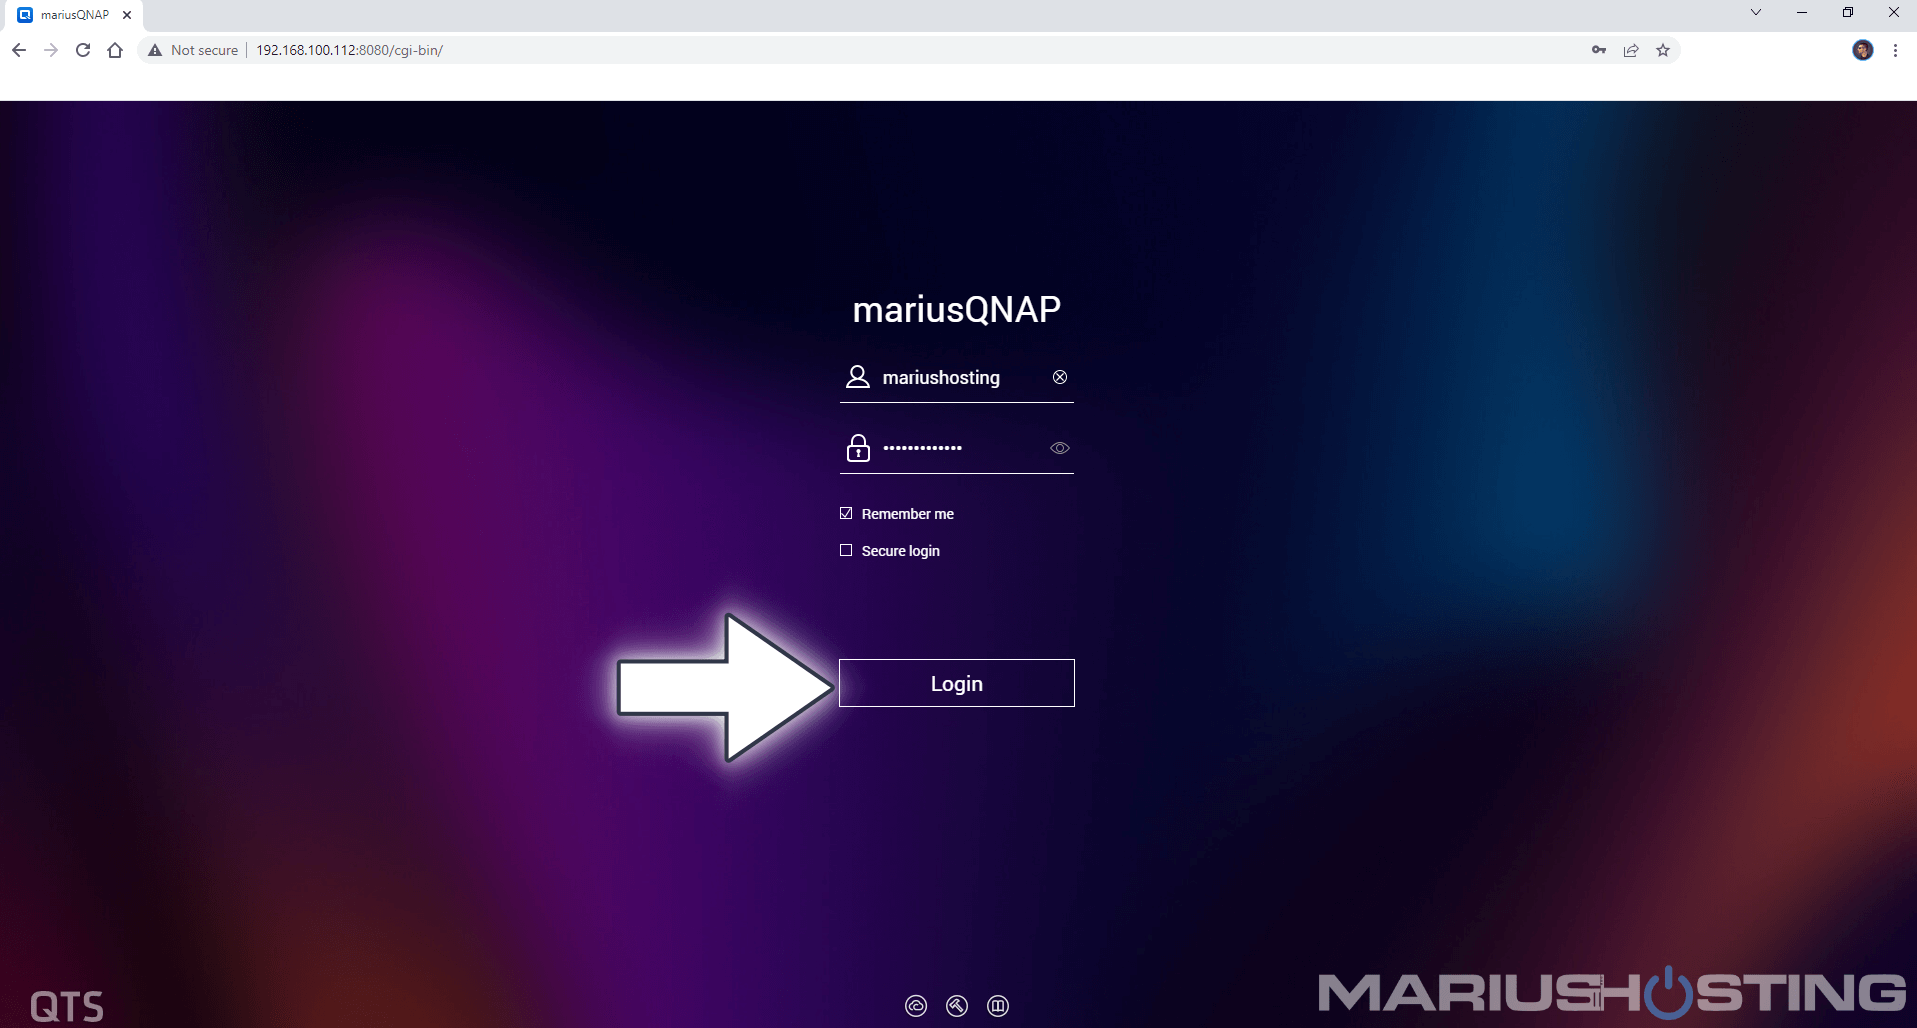
STEP 12
Add your own credentials you have previously chosen at STEP 5. Click Login. Follow the instructions in the image below.
STEP 13
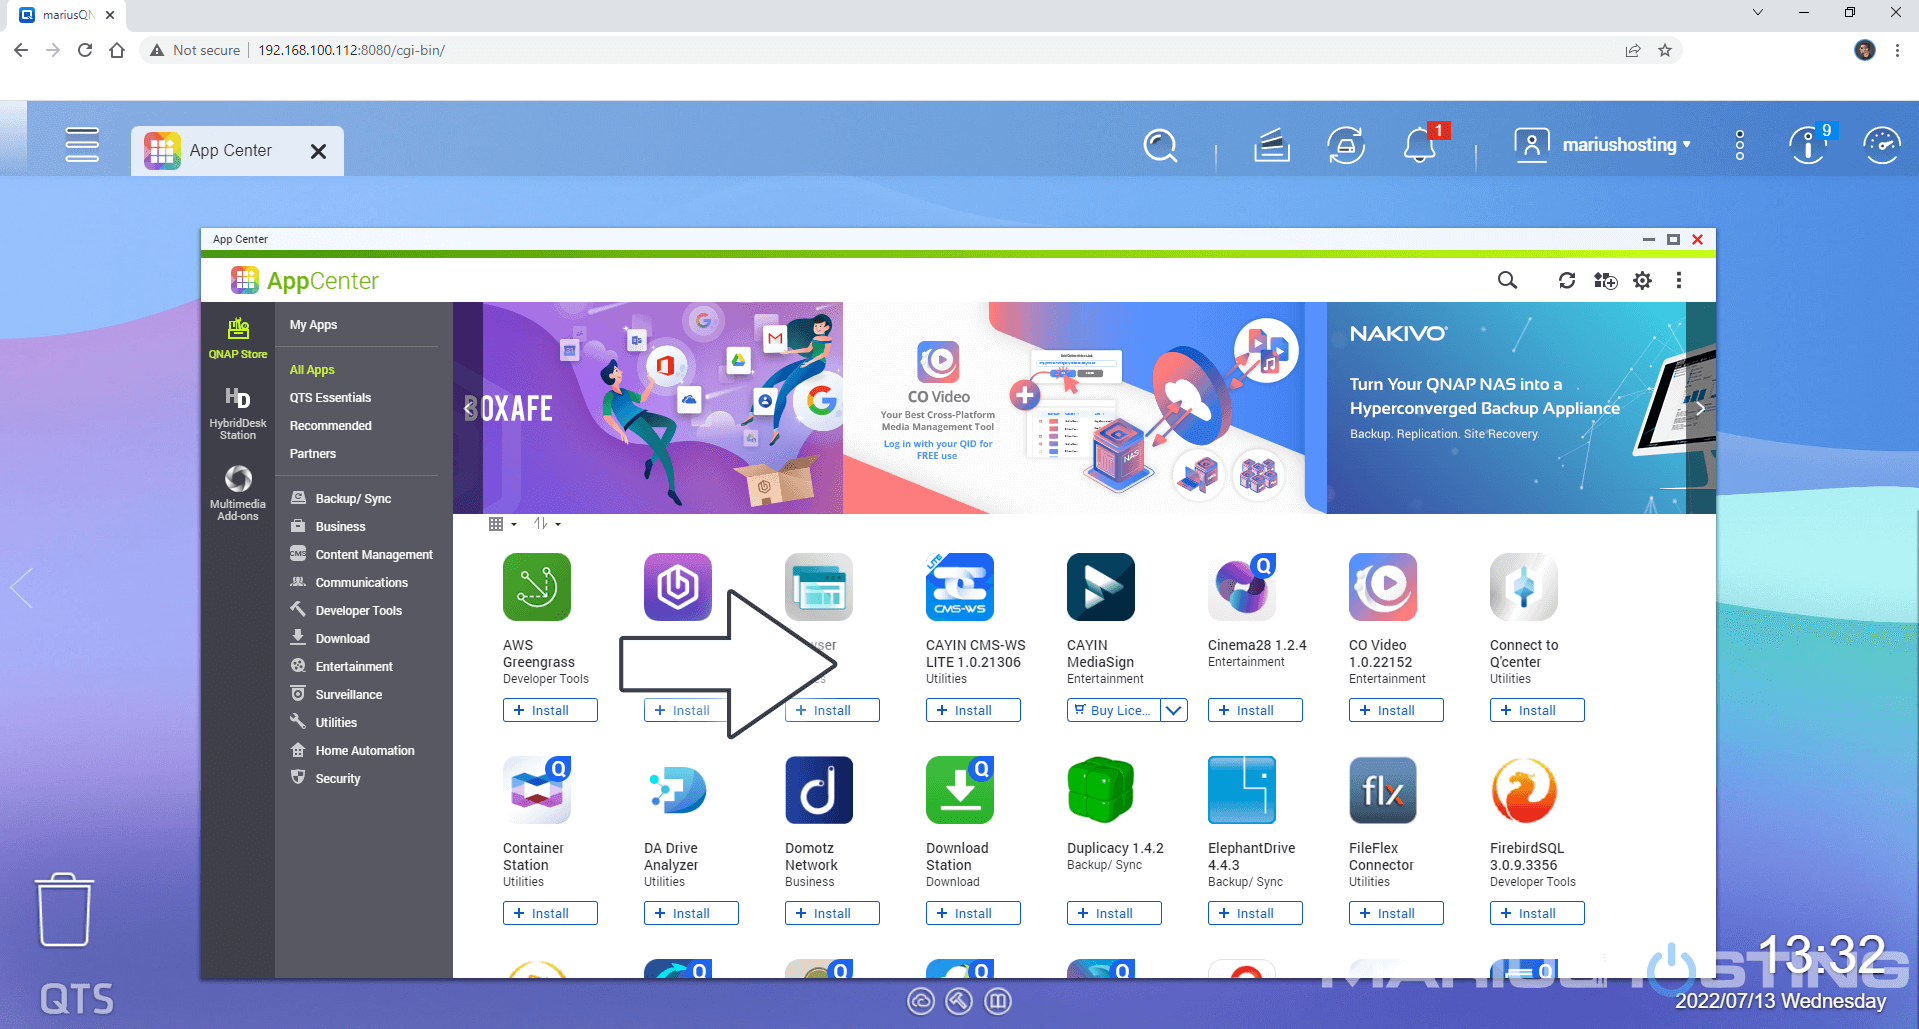
Create your first volume on your disks, then enjoy your new QTS operating system installed on your QNAP NAS!
This post was updated on Tuesday / August 16th, 2022 at 2:52 AM