Have you ever accidentally created a database and, after some time, decided to delete it to clean up your phpMyAdmin? Well, in this article I will teach you how to permanently delete a database in MariaDB 10 through the graphical interface of phpMyAdmin.
STEP 1
Please Support My work by Making a Donation.
STEP 2
Launch the phpMyAdmin application.
STEP 3
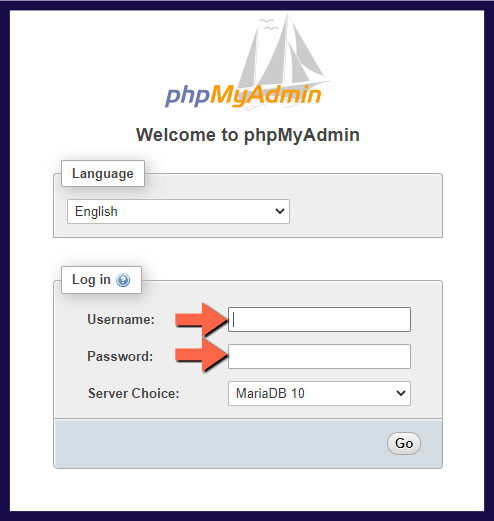
Log into phpMyAdmin with your Administrator credentials. Follow the instructions in the image below.
STEP 4
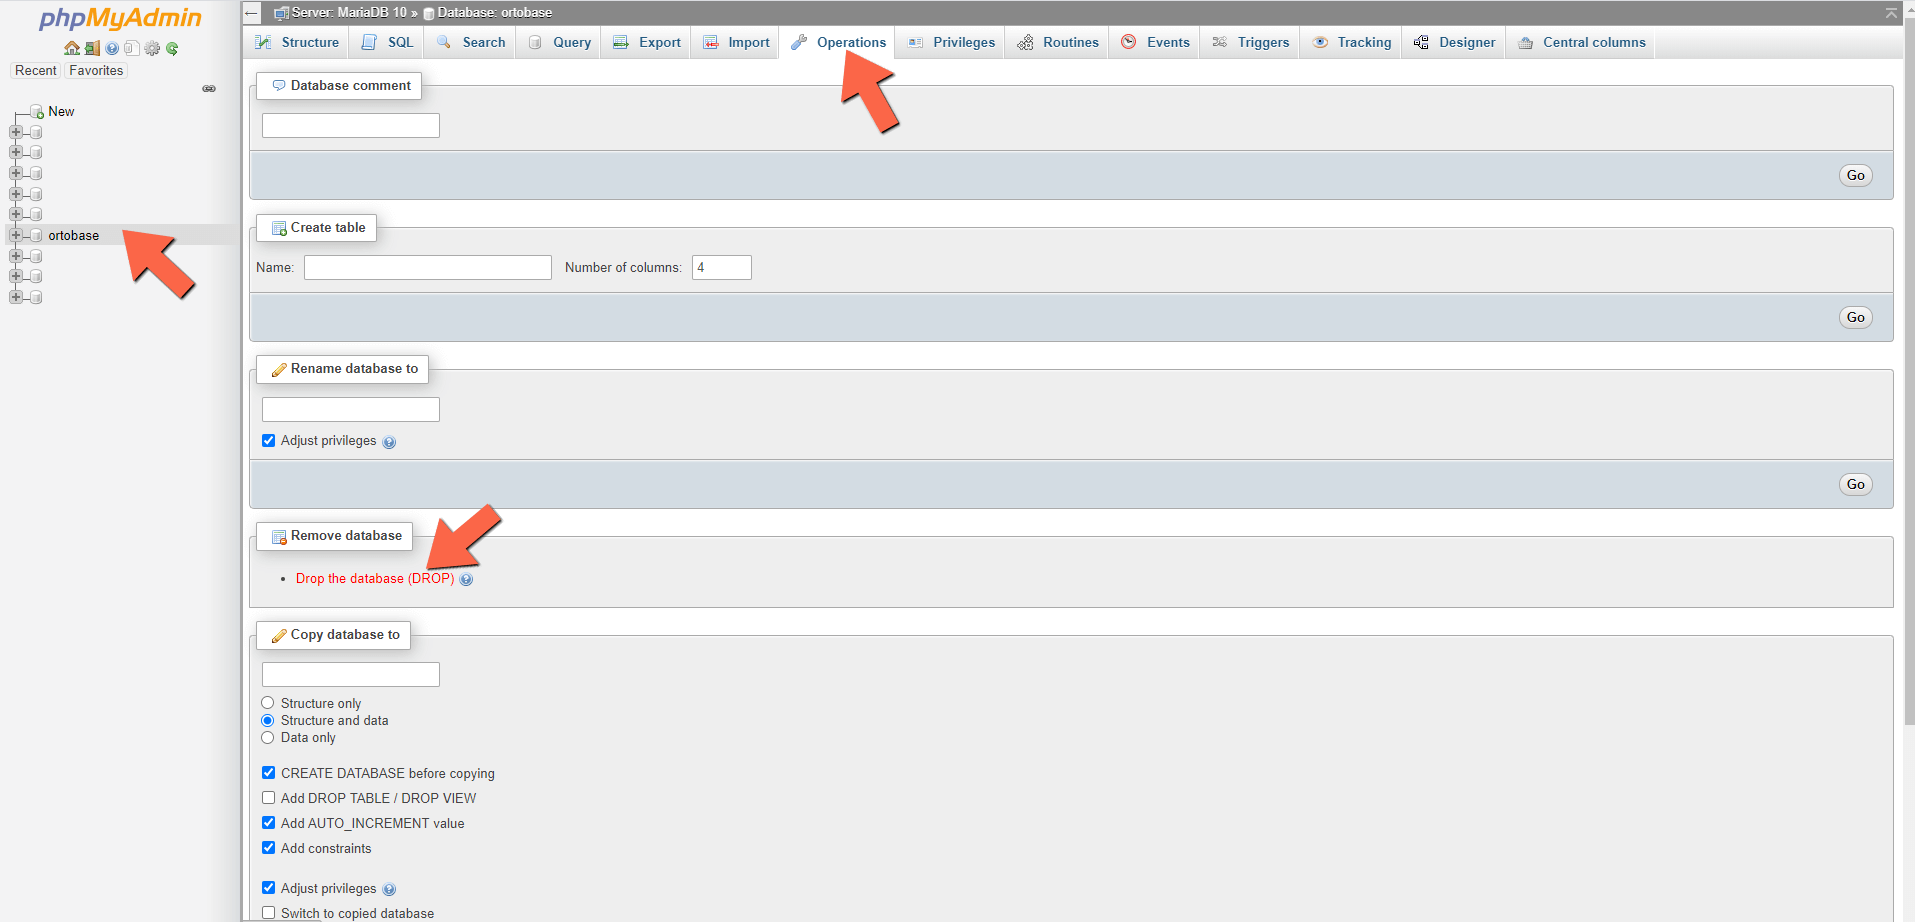
On the left sidebar select the database you want to delete. In my case, I have a database named “ortobase” that I want to delete. After you click on the database, at the top of the page click on the Operations tab. Now scroll down a little bit until you get to the “Remove database” option, then click on the red text Drop the database (DROP).
STEP 5
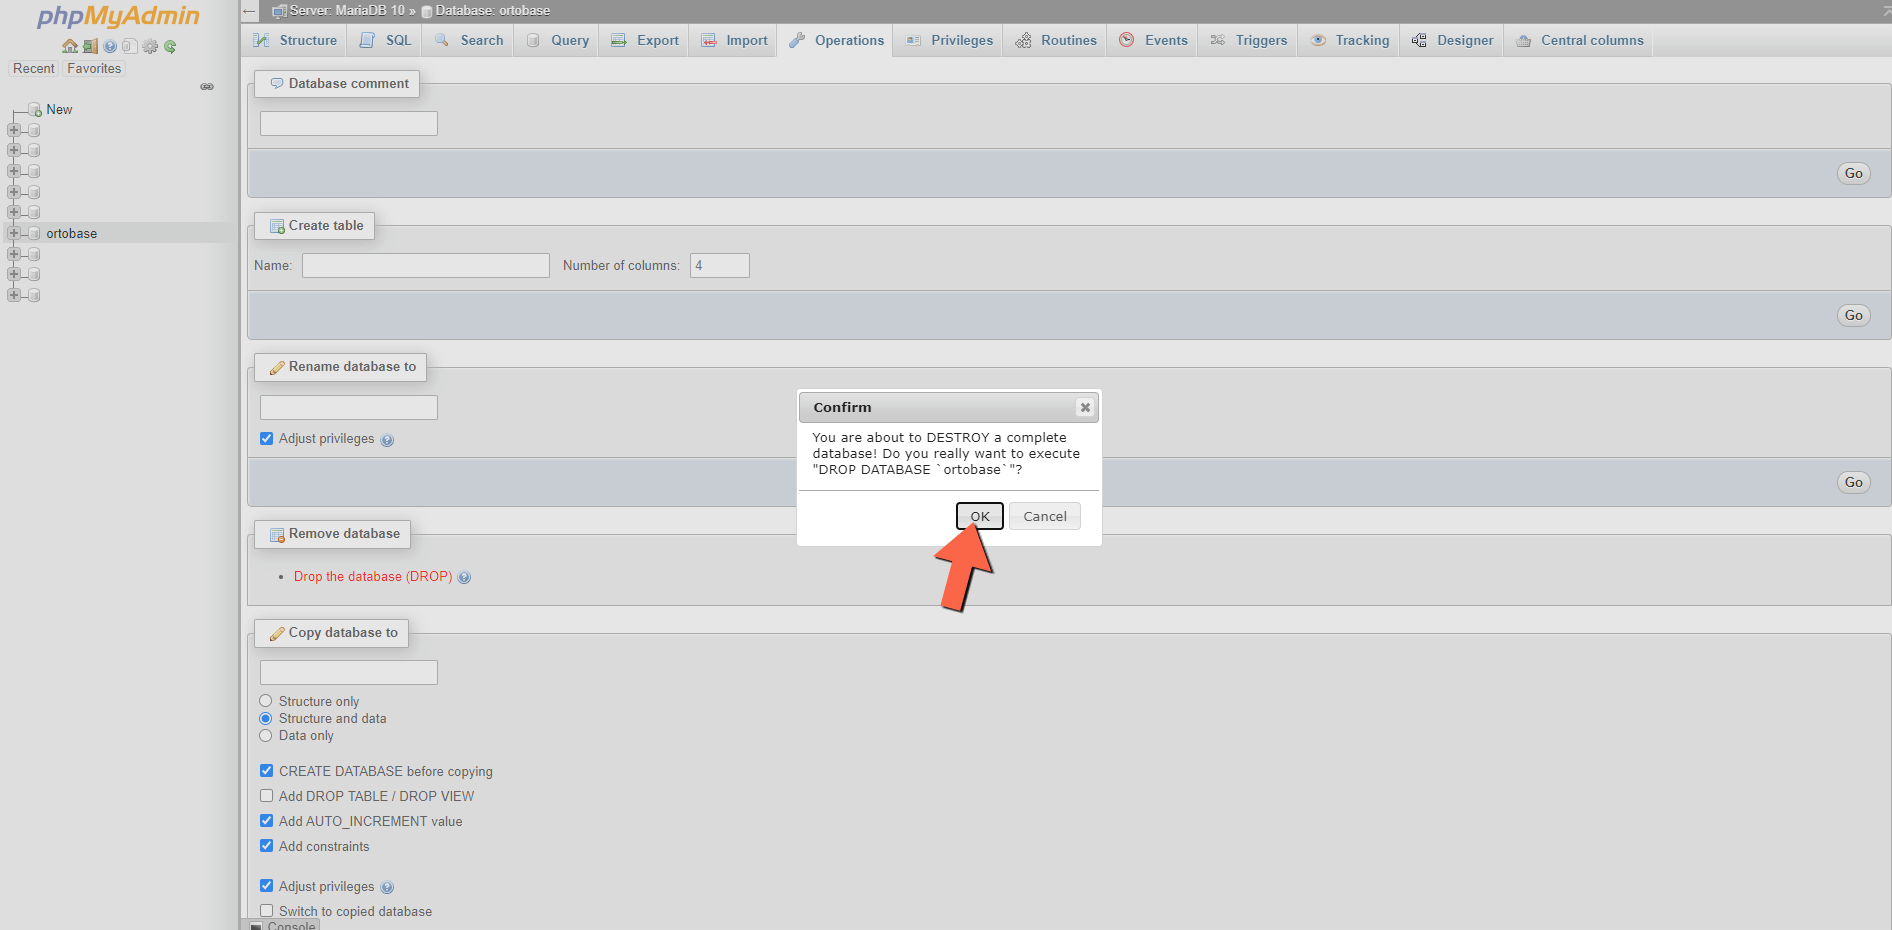
Once you click on Drop the database (DROP), a confirmation pop-up will appear which informs you of the following: You are about to DESTROY a complete database! Do you really want to execute “Drop DATABASE ‘yourdatabasename’ “? Click OK.
After you click the OK button, the database will be completely deleted from your MariaDB 10.
Note: Before you delete any database in your Synology NAS, make a Backup of MariaDB 10 using the Hyper Backup package just in case something might go wrong.
Note: phpMyadmin is the graphical interface for MariaDB 10.
This post was updated on Tuesday / August 4th, 2020 at 1:20 PM