
Tududi is a task and project management web application that allows users to efficiently manage their tasks and projects, categorize them into different areas, and track due dates. It is designed to be intuitive and easy to use, providing a seamless experience for personal productivity. In this step by step guide I will show you how to install Tududi on your UGREEN NAS using Docker & Portainer.
This guide works perfectly with the latest Tududi v0.88.5 release.
STEP 1
Please Support My work by Making a Donation.
STEP 2
Install Portainer using my step by step guide. If you already have Portainer installed on your UGREEN NAS, skip this STEP. Attention: Make sure you have installed the latest Portainer version.
STEP 3
⚠️Mandatory Add Read & Write Permissions to the Docker Folder. If you have already added the Read and Write Permissions to the Docker Folder, skip this STEP.
STEP 4
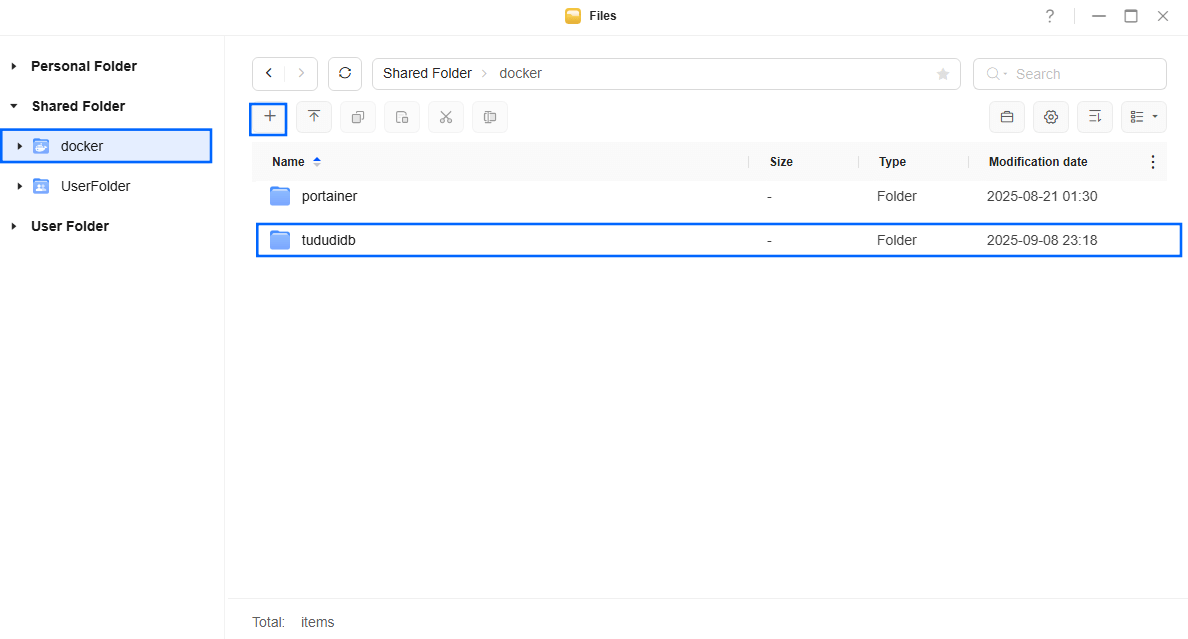
Go to Files and open the docker folder. Inside the docker folder, create one new folder and name it tududidb. Follow the instructions in the image below.
Note: Be careful to enter only lowercase, not uppercase letters.
STEP 5
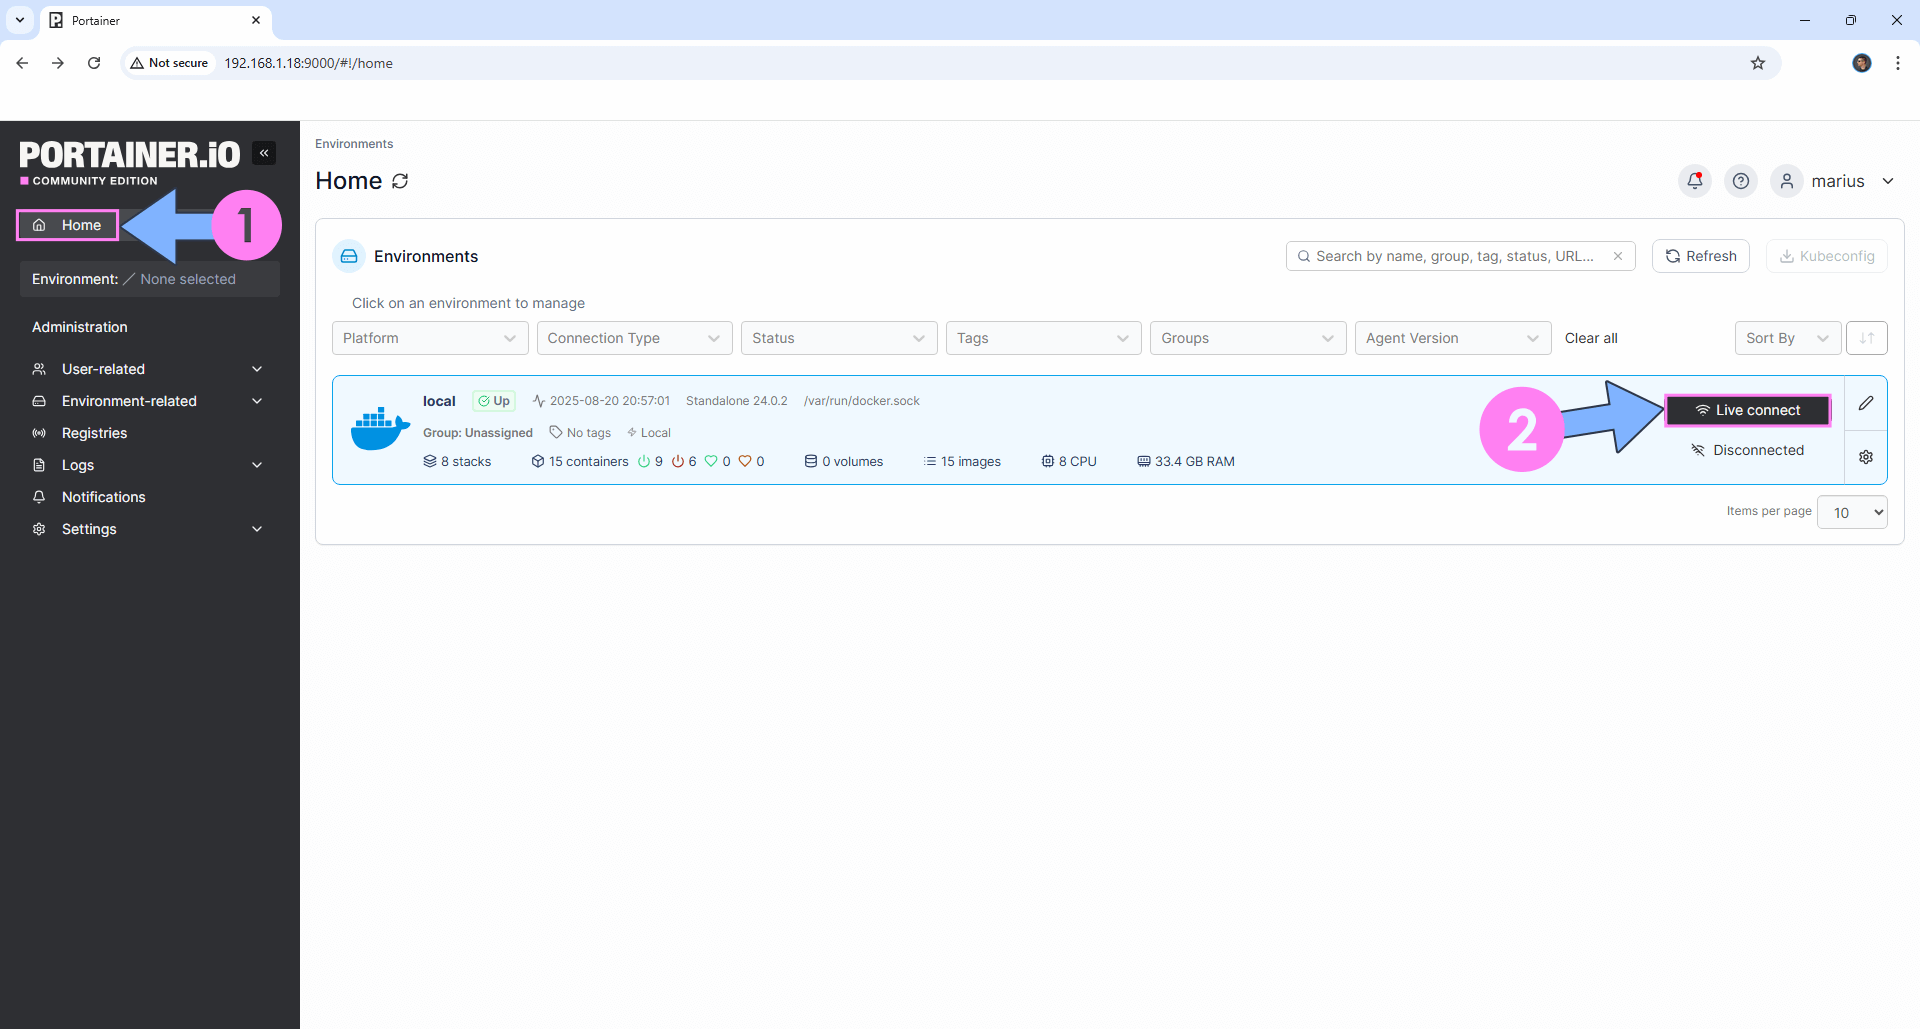
Log into Portainer using your username and password. On the left sidebar in Portainer, click on Home then Live connect. Follow the instructions in the image below.
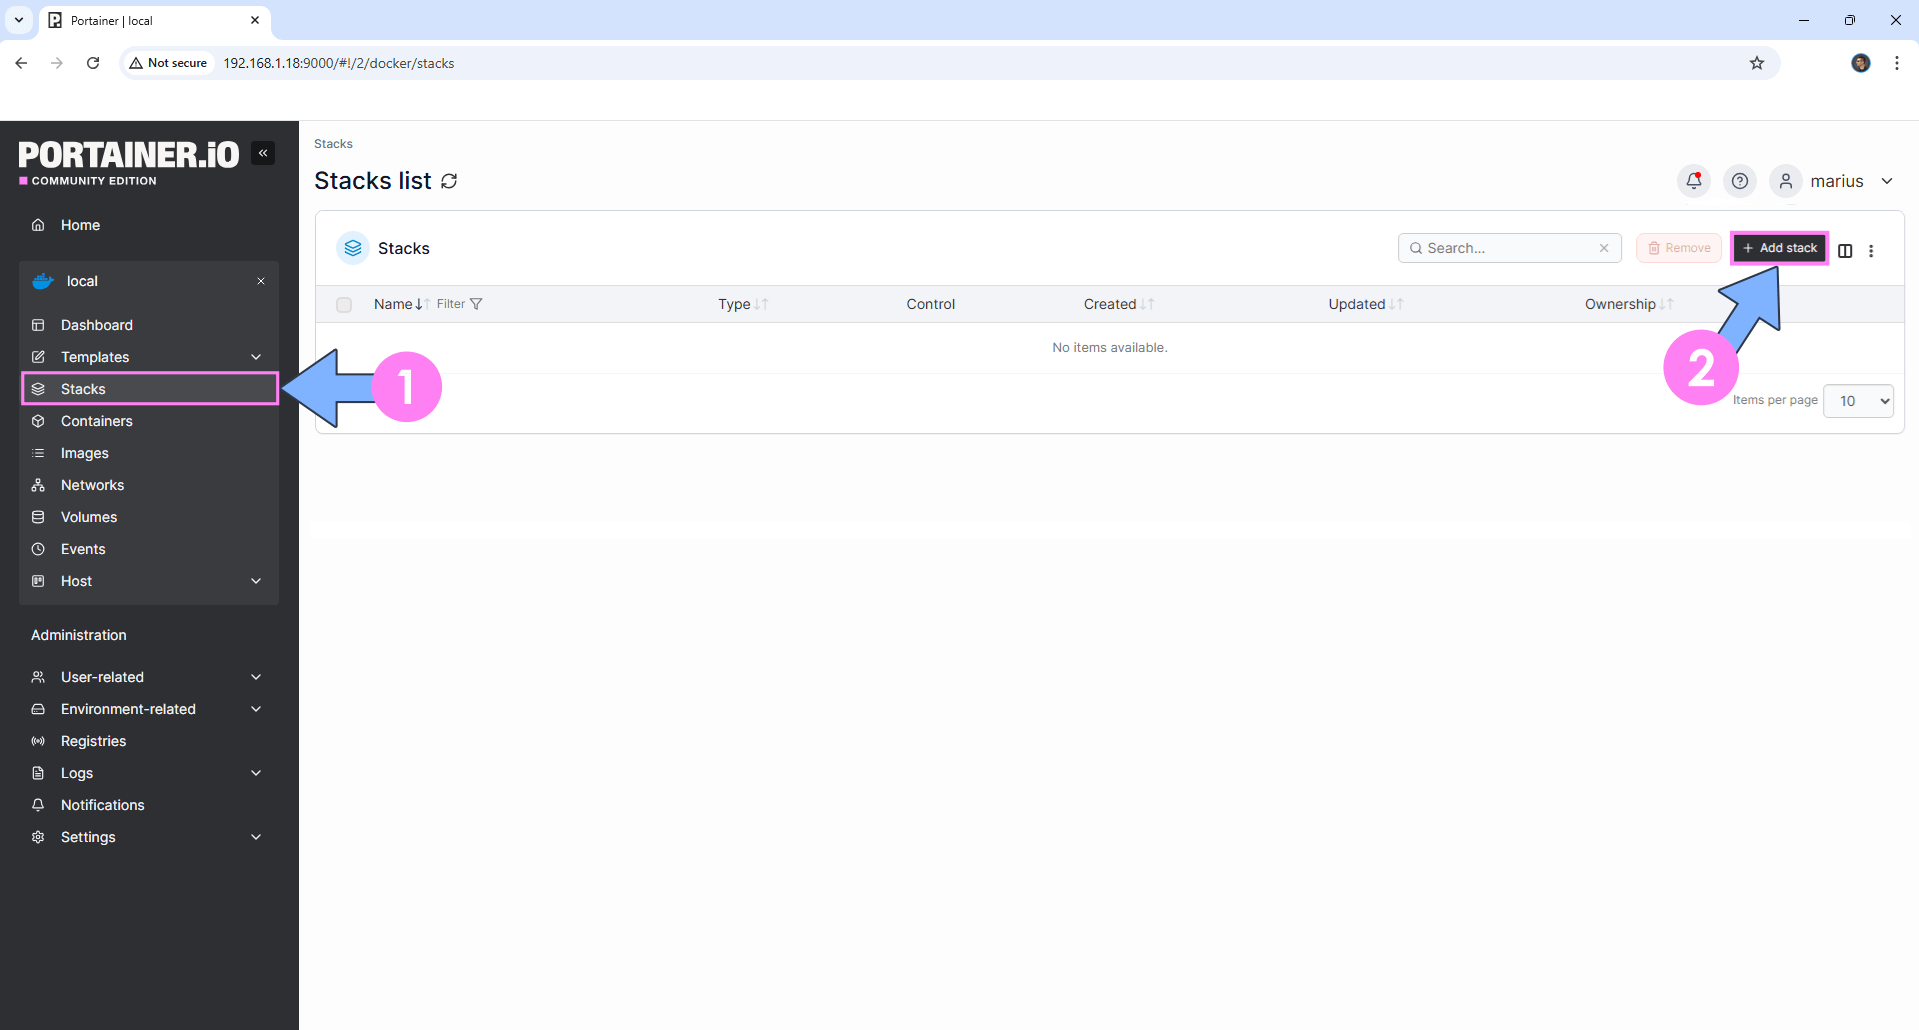
On the left sidebar in Portainer, click on Stacks then + Add stack. Follow the instructions in the image below.
STEP 6
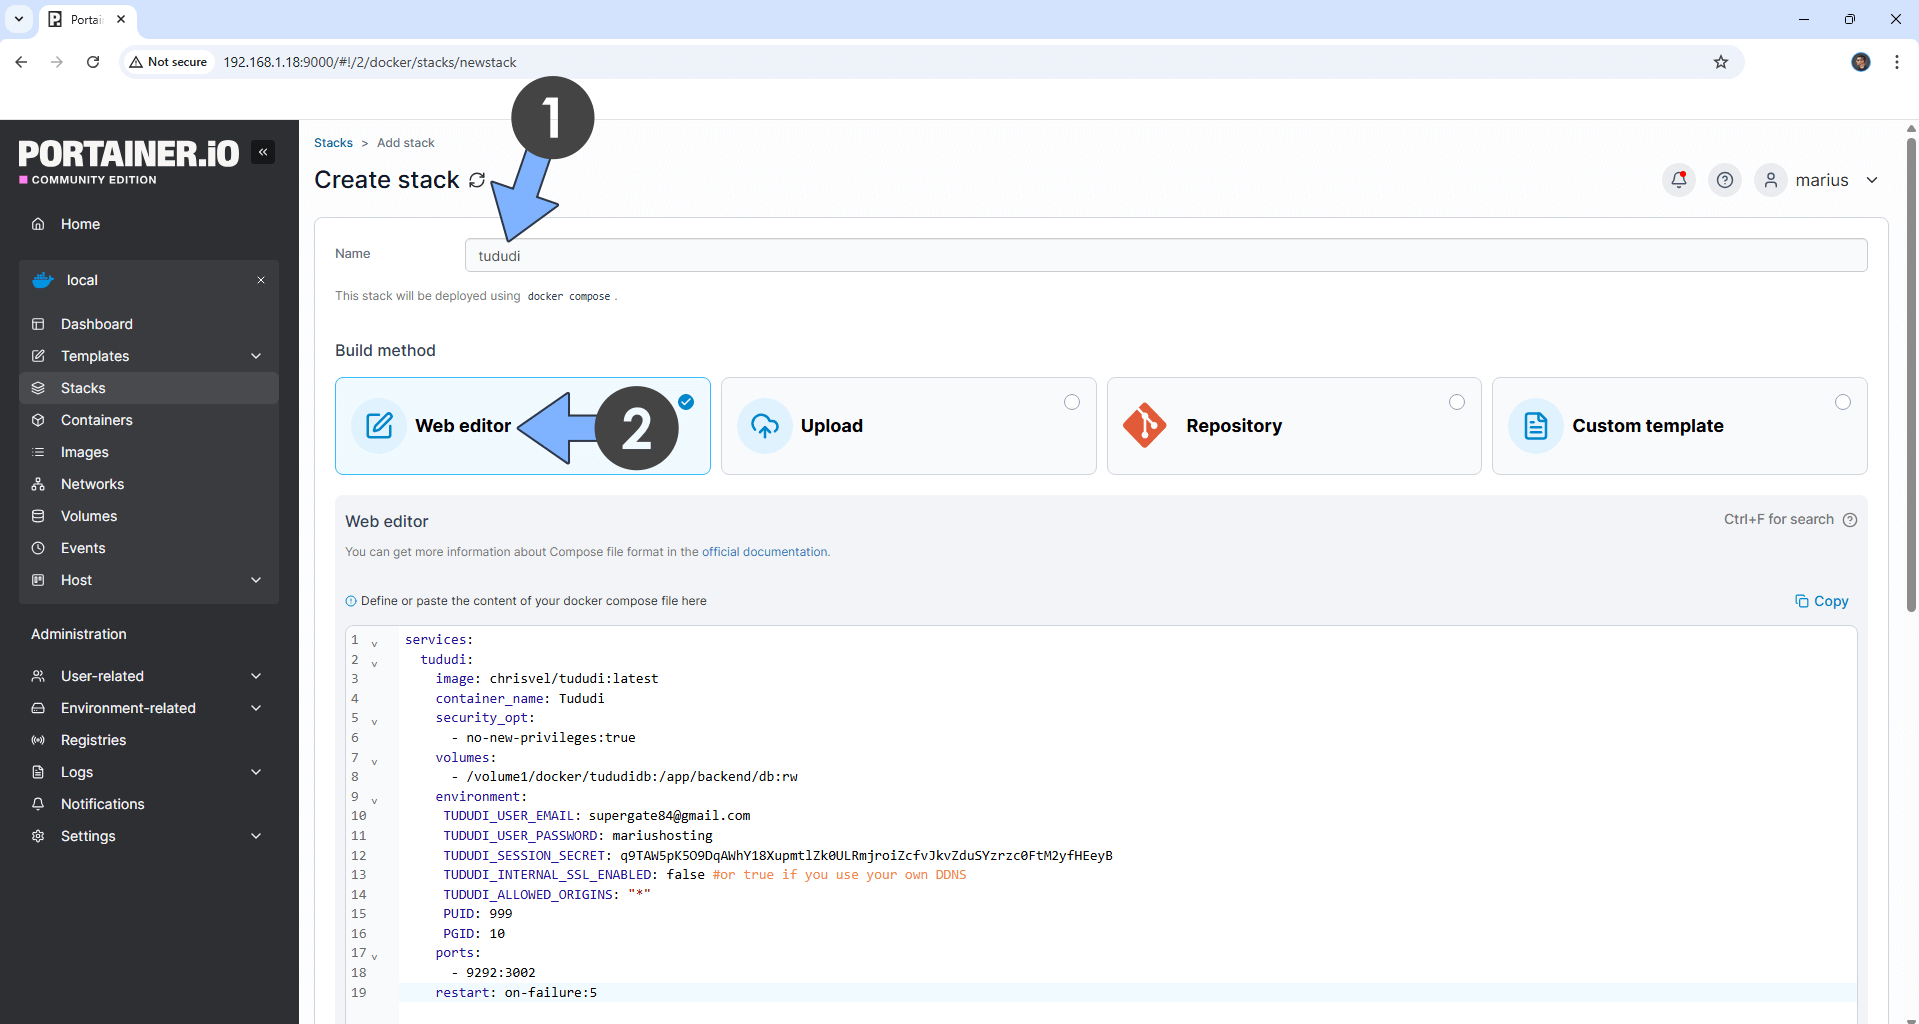
In the Name field type in tududi. Follow the instructions in the image below.
services:
  tududi:
    image: chrisvel/tududi:latest
    container_name: Tududi
    security_opt:
      - no-new-privileges:true
    volumes:
      - /volume1/docker/tududidb:/app/backend/db:rw
    environment:
     TUDUDI_USER_EMAIL: yourown@email
     TUDUDI_USER_PASSWORD: mariushosting
     TUDUDI_SESSION_SECRET: q9TAW5pK5O9DqAWhY18XupmtlZk0ULRmjroiZcfvJkvZduSYzrzc0FtM2yfHEeyB
     TUDUDI_INTERNAL_SSL_ENABLED: false #or true if you use your own DDNS
     TUDUDI_ALLOWED_ORIGINS: "*"
     PUID: 999
     PGID: 10
    ports:
      - 9292:3002
    restart: on-failure:5
Note: Before you paste the code above in the Run command area below, change the value for TUDUDI_USER_EMAIL. Add your own email address.
Note: Before you paste the code above in the Run command area below, change the value for TUDUDI_USER_PASSWORD. Add your own password. mariushosting is an example for a password. You should use your own password.
Note: Before you paste the code above in the Web editor area below, change the value for TUDUDI_SESSION_SECRET. (Generate your own 64 length TUDUDI_SESSION_SECRET.)
Note: Before you paste the code above in the Web editor area below, change the value numbers for PUID and PGID with your own values. (Follow my step by step guide on how to do this.)
STEP 7
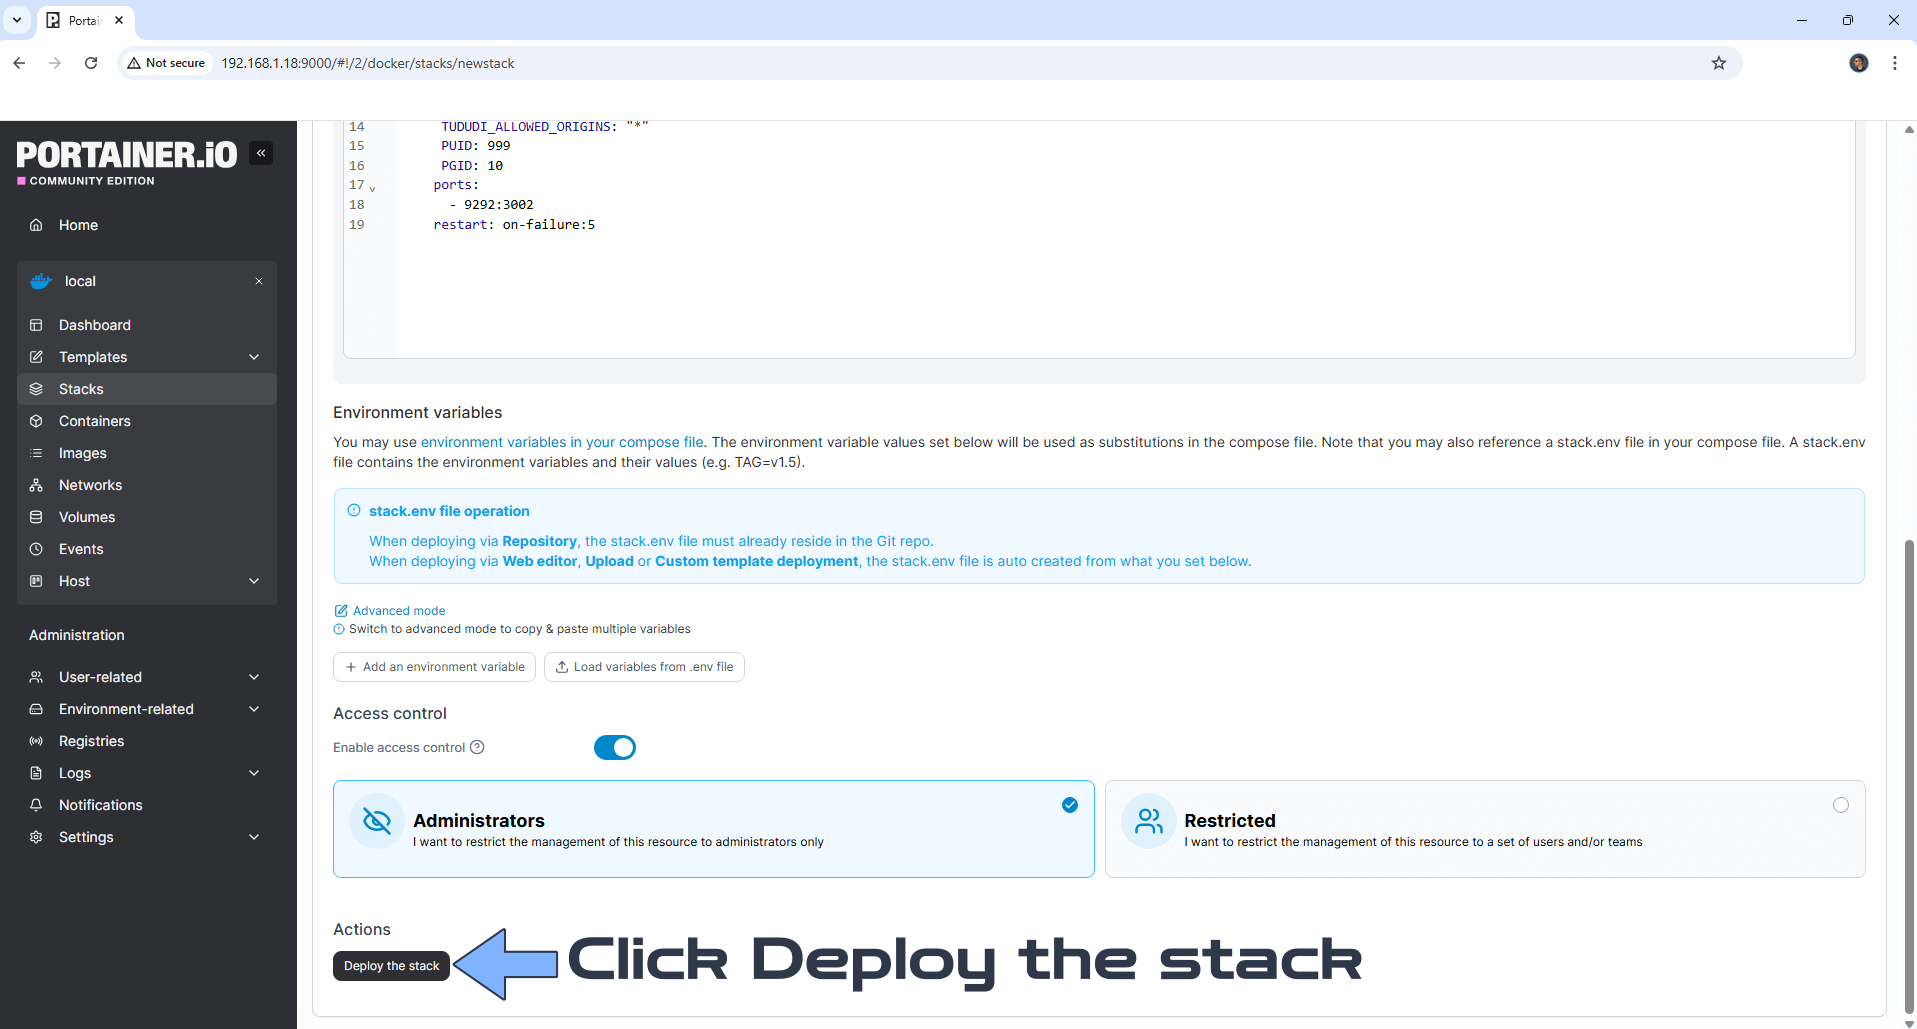
Scroll down on the page until you see a button named Deploy the stack. Click on it. Follow the instructions in the image below. The installation process can take up to a few minutes. It will depend on your Internet speed connection.
STEP 8
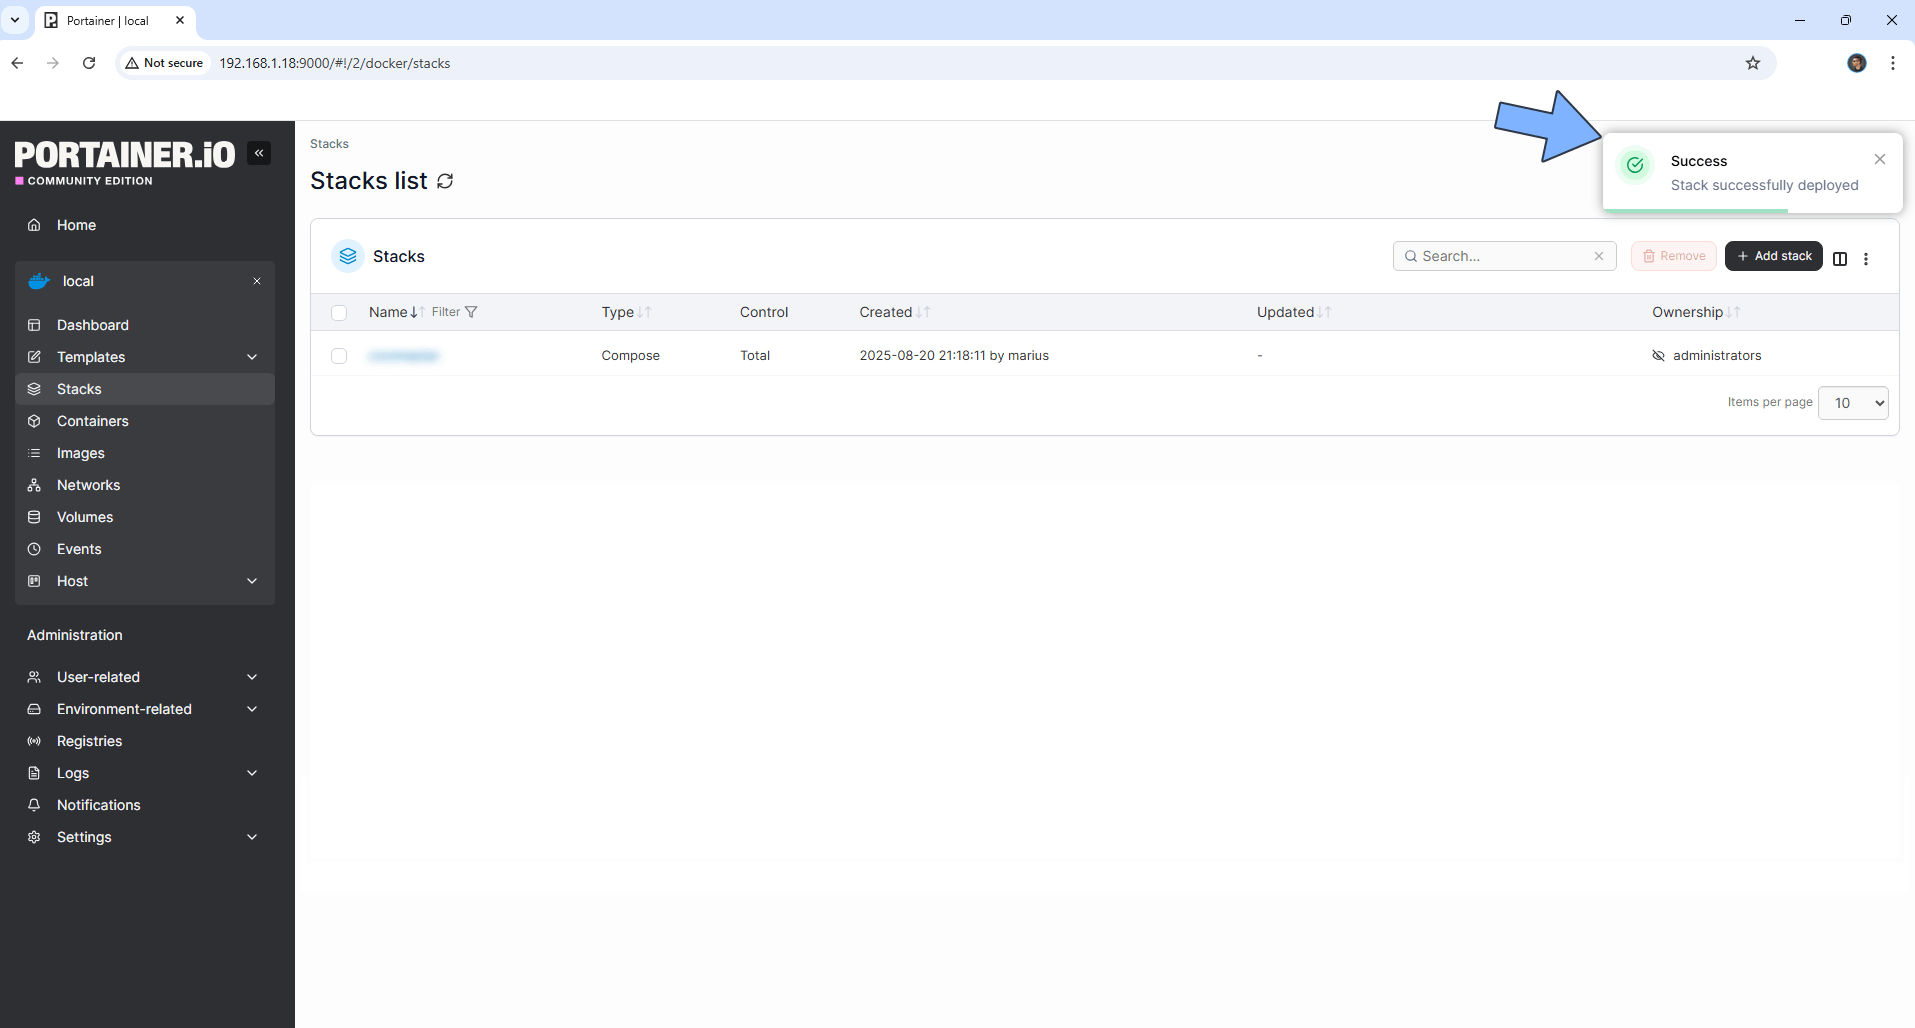
If everything goes right, you will see the following message at the top right of your screen: “Success Stack successfully deployed“.
STEP 9
🟢Please Support My work by Making a Donation. Almost 99,9% of the people that install something using my guides forget to support my work, or just ignore STEP 1. I’ve been very honest about this aspect of my work since the beginning: I don’t run any ADS, I don’t require subscriptions, paid or otherwise, I don’t collect IPs, emails, and I don’t have any referral links from Amazon or other merchants. I also don’t have any POP-UPs or COOKIES. I have repeatedly been told over the years how much I have contributed to the community. It’s something I love doing and have been honest about my passion since the beginning. But I also Need The Community to Support me Back to be able to continue doing this work.
STEP 10
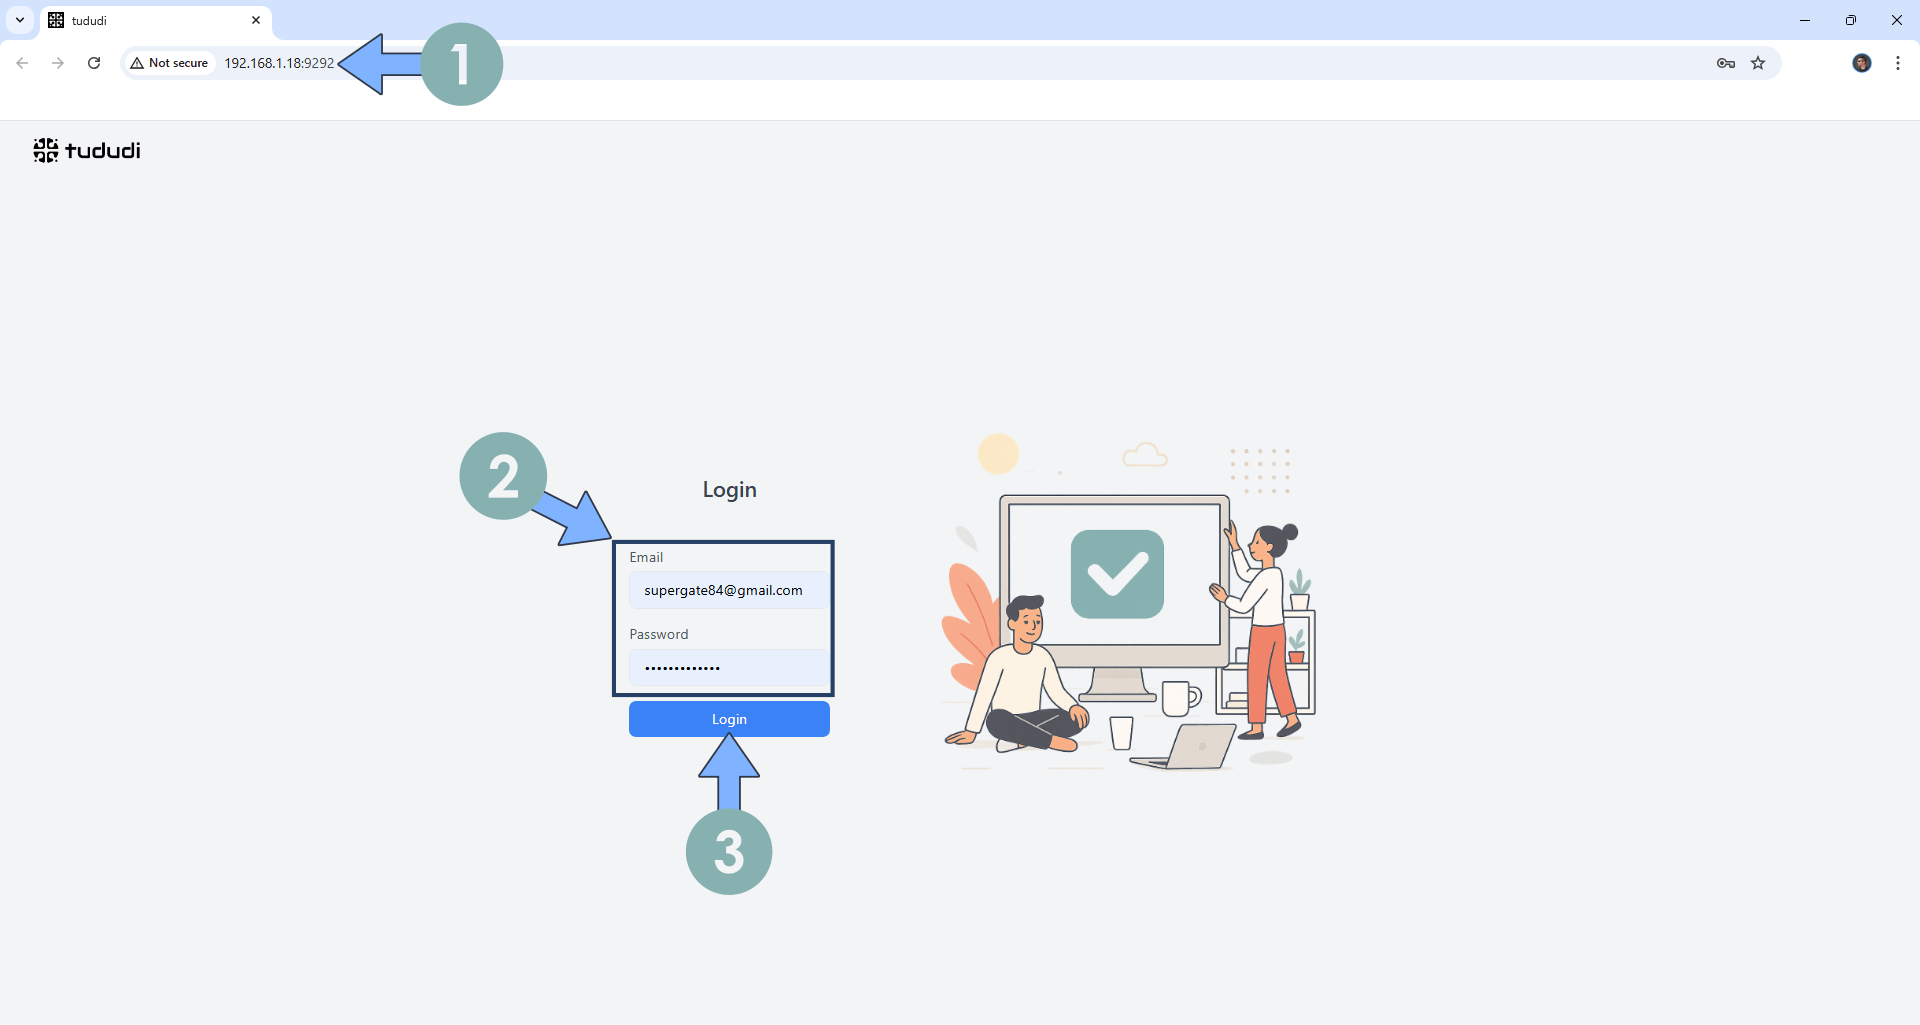
The installation process can take up to a few seconds/minutes. It will depend on your Internet speed connection. Now open your browser and type in http://ugreen-ip-address:9292 Type in your own Email (TUDUDI_USER_EMAIL) and Password (TUDUDI_USER_PASSWORD) that you have previously added at STEP 6, then click Login. Follow the instructions in the image below.
STEP 11
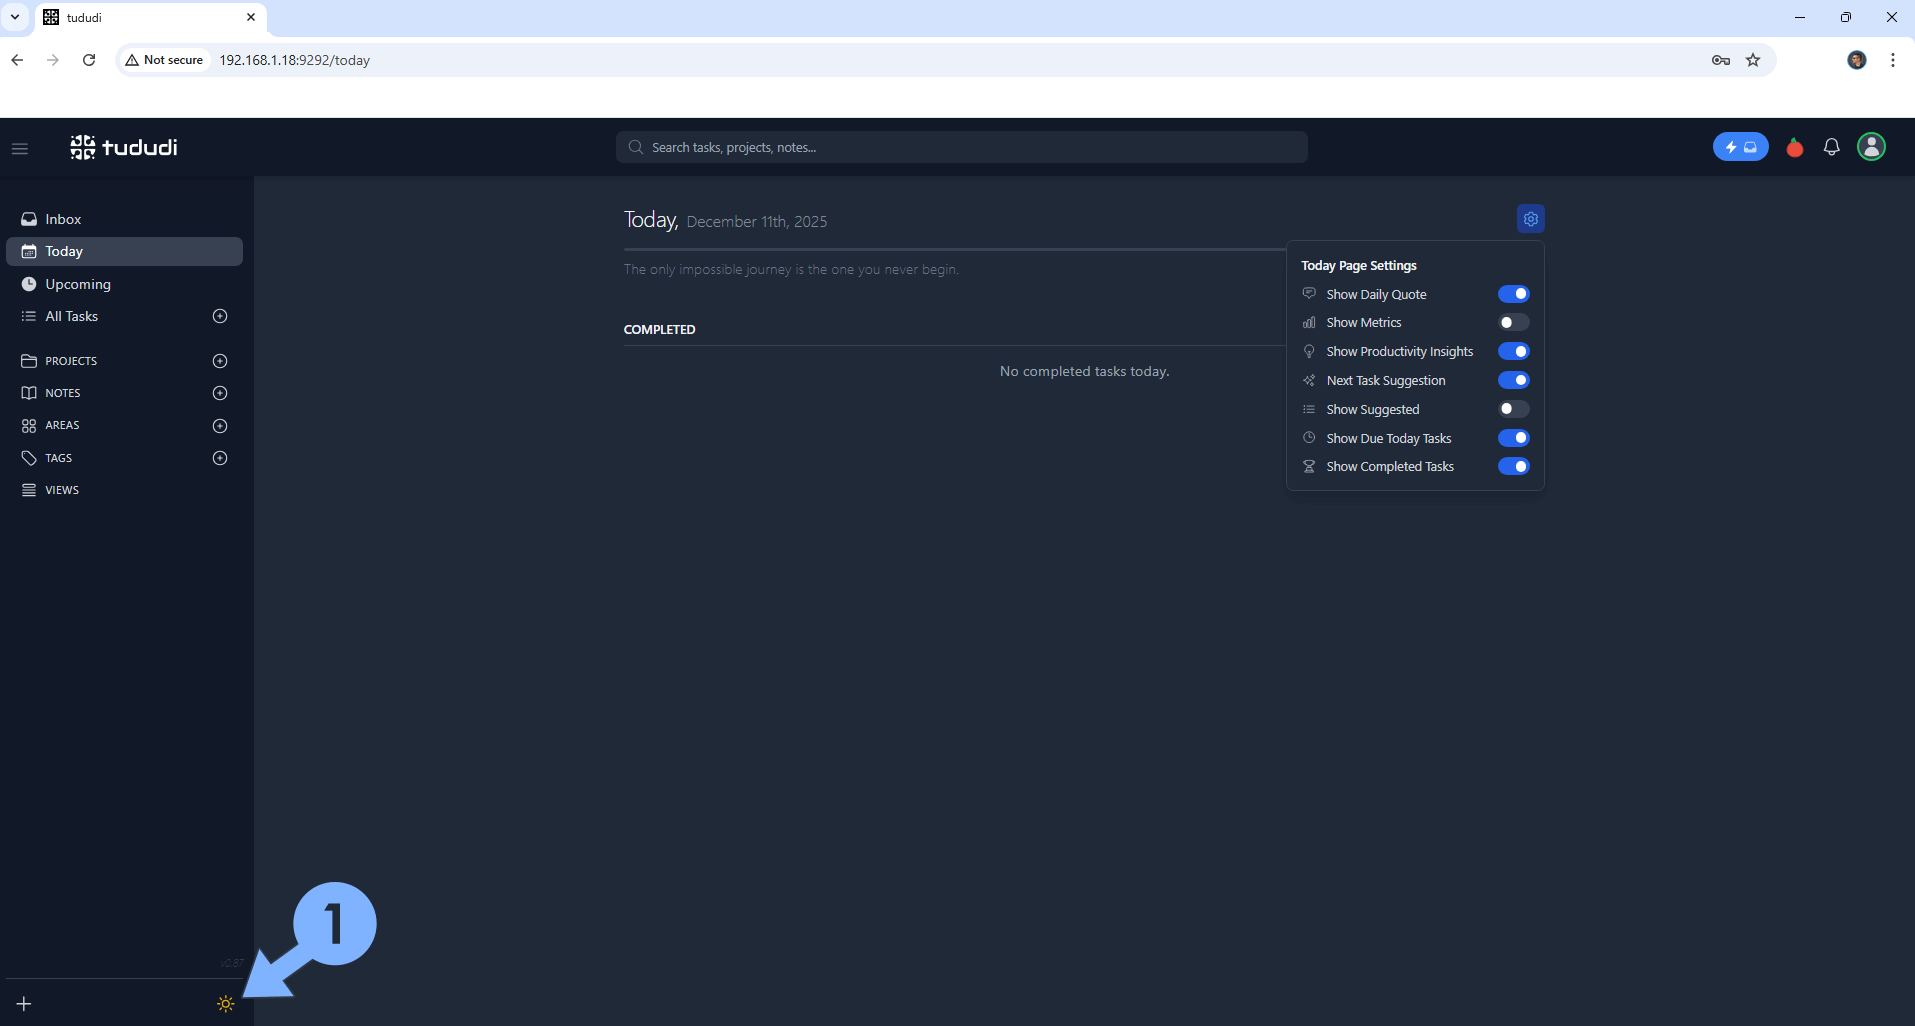
Your Tududi dashboard at a glance! On the left sidebar, you can switch the theme to Dark.
Enjoy Tududi!
Note: If you want to run the Tududi container over HTTPS, check out How to Run Docker Containers Over HTTPS on Your UGREEN NAS. Also, remember to change the following environment variable at STEP 6, TUDUDI_INTERNAL_SSL_ENABLED: false with TUDUDI_INTERNAL_SSL_ENABLED: true then update your stack.
🆙Note/Update/Container: How to Update Your Docker Containers on UGREEN NAS Using Portainer.
🐳Note: How to Create Docker Shortcuts on Desktop.
🆕Note: How to Update Portainer to the latest version.
🆕Note: How to Clean Docker.
This post was updated on Sunday / February 15th, 2026 at 1:22 AM
