
Monline is a self-hosted application for tracking subscriptions, recurring payments, and budgets. It pairs a React frontend with a Node.js server and embedded SQLite storage, offering subscription management with automatic logos and flexible billing, a payment calendar, budget overviews, payment insights, bank statement imports from services like Enpara, DenizBank, and Garanti BBVA, multi-language support, themes, and secure private accounts with optional two-factor authentication and reminders. After months of juggling spreadsheet tabs and forgotten renewal dates, I finally set up Monline on my Synology NAS and it quickly became the single place I check every morning for upcoming charges. The clean calendar view and automatic logos made my subscriptions feel manageable instead of scattered, and the bank statement import from Enpara saved me from manually entering months of history. In this step by step guide I will show you how to install Monline on your Asustor NAS using Docker & Dockhand.
💡Note:
This guide works perfectly with the latest Monline v1.9.0 release.
💡Note: Check out my guide on how to Install Monline on Your Synology NAS.
STEP 1
Please Support My work by Making a Donation.
STEP 2
Install Dockhand using my step by step guide. If you already have Dockhand installed on your Asustor NAS, skip this STEP. ⚠️Attention: Make sure you have installed the latest Dockhand version.
STEP 3
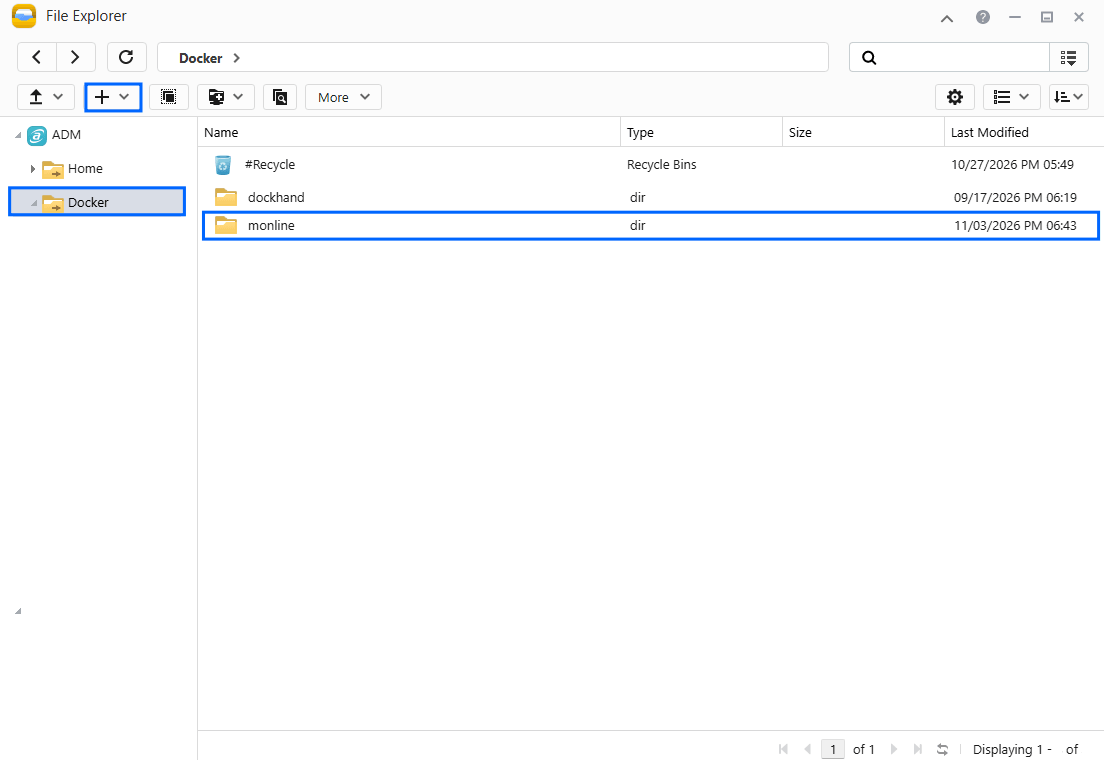
Go to File Explorer and open the Docker folder. Inside the Docker folder, create one new folder and name it monline. Follow the instructions in the image below.
Note: Be careful to enter only lowercase, not uppercase letters.
STEP 4
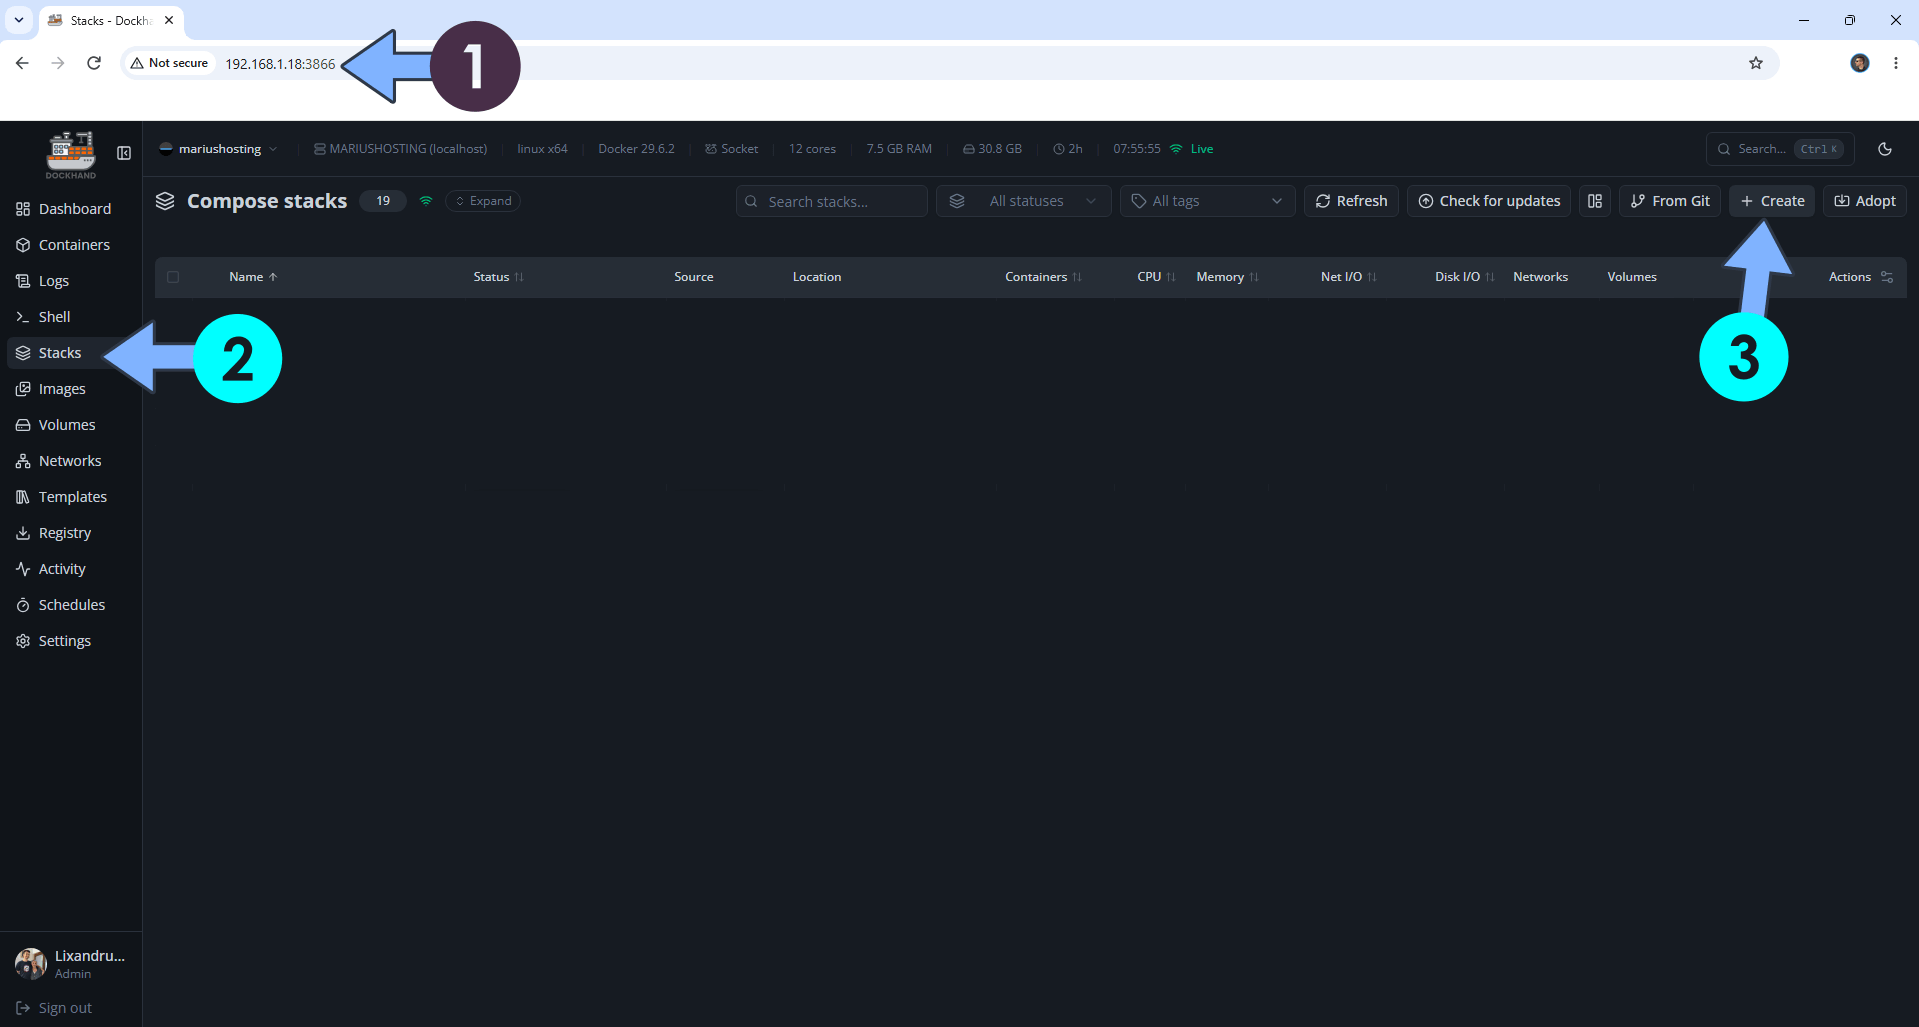
Open your browser and type in http://asustor-ip-address:3866 to connect to your Dockhand container. On the left sidebar, click Stacks then + Create. Follow the instructions in the image below.
STEP 5
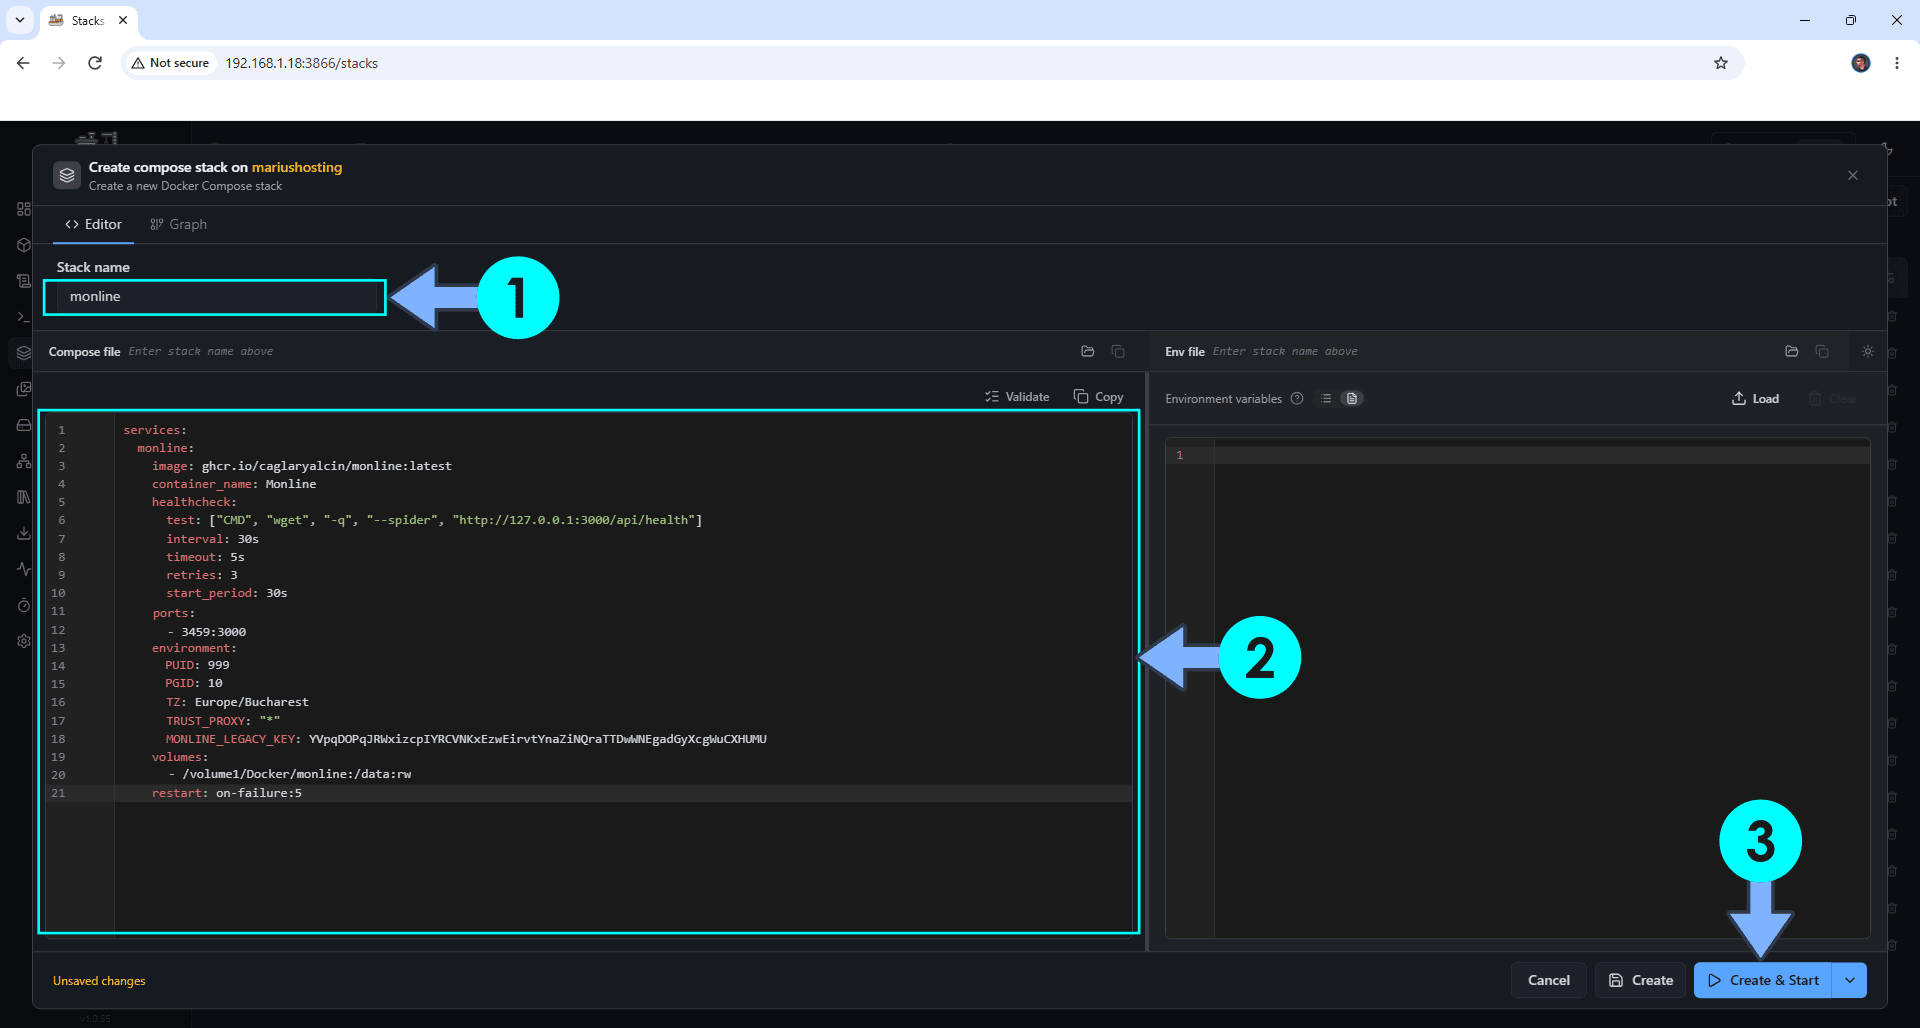
In the Stack name field, type in monline. ⚠️Warning: Type in the name in lowercase letters. The installation process can take up to a few seconds/minutes. It will depend on your Internet speed connection. Follow the instructions in the image below.
Note: Copy Paste the code below in the Dockhand Compose Stack then click Create & Start.
services:
  monline:
    image: ghcr.io/caglaryalcin/monline:latest
    container_name: Monline
    healthcheck:
      test: ["CMD", "wget", "-q", "--spider", "http://127.0.0.1:3000/api/health"]
      interval: 30s
      timeout: 5s
      retries: 3
      start_period: 30s
    ports:
      - 3459:3000
    environment:
      PUID: 1026
      PGID: 100
      TZ: Europe/Bucharest
      TRUST_PROXY: "*"
      MONLINE_LEGACY_KEY: YVpqDOPqJRWxizcpIYRCVNKxEzwEirvtYnaZiNQraTTDwWNEgadGyXcgWuCXHUMU
    volumes:
      - /volume1/Docker/monline:/data:rw
    restart: on-failure:5
Note: Before you paste the code above in the Stack editor area below, change the value numbers for PUID and PGID with your own values. (Follow my step by step guide on how to do this.)
Note: Before you paste the code above in the Stack editor area below, change the value for TZ. (Select your current Time Zone from this list.)
Note: Before you paste the code above in the Stack editor area below, change the value for MONLINE_LEGACY_KEY. (Generate your own Random 64 length MONLINE_LEGACY_KEY.)
STEP 6
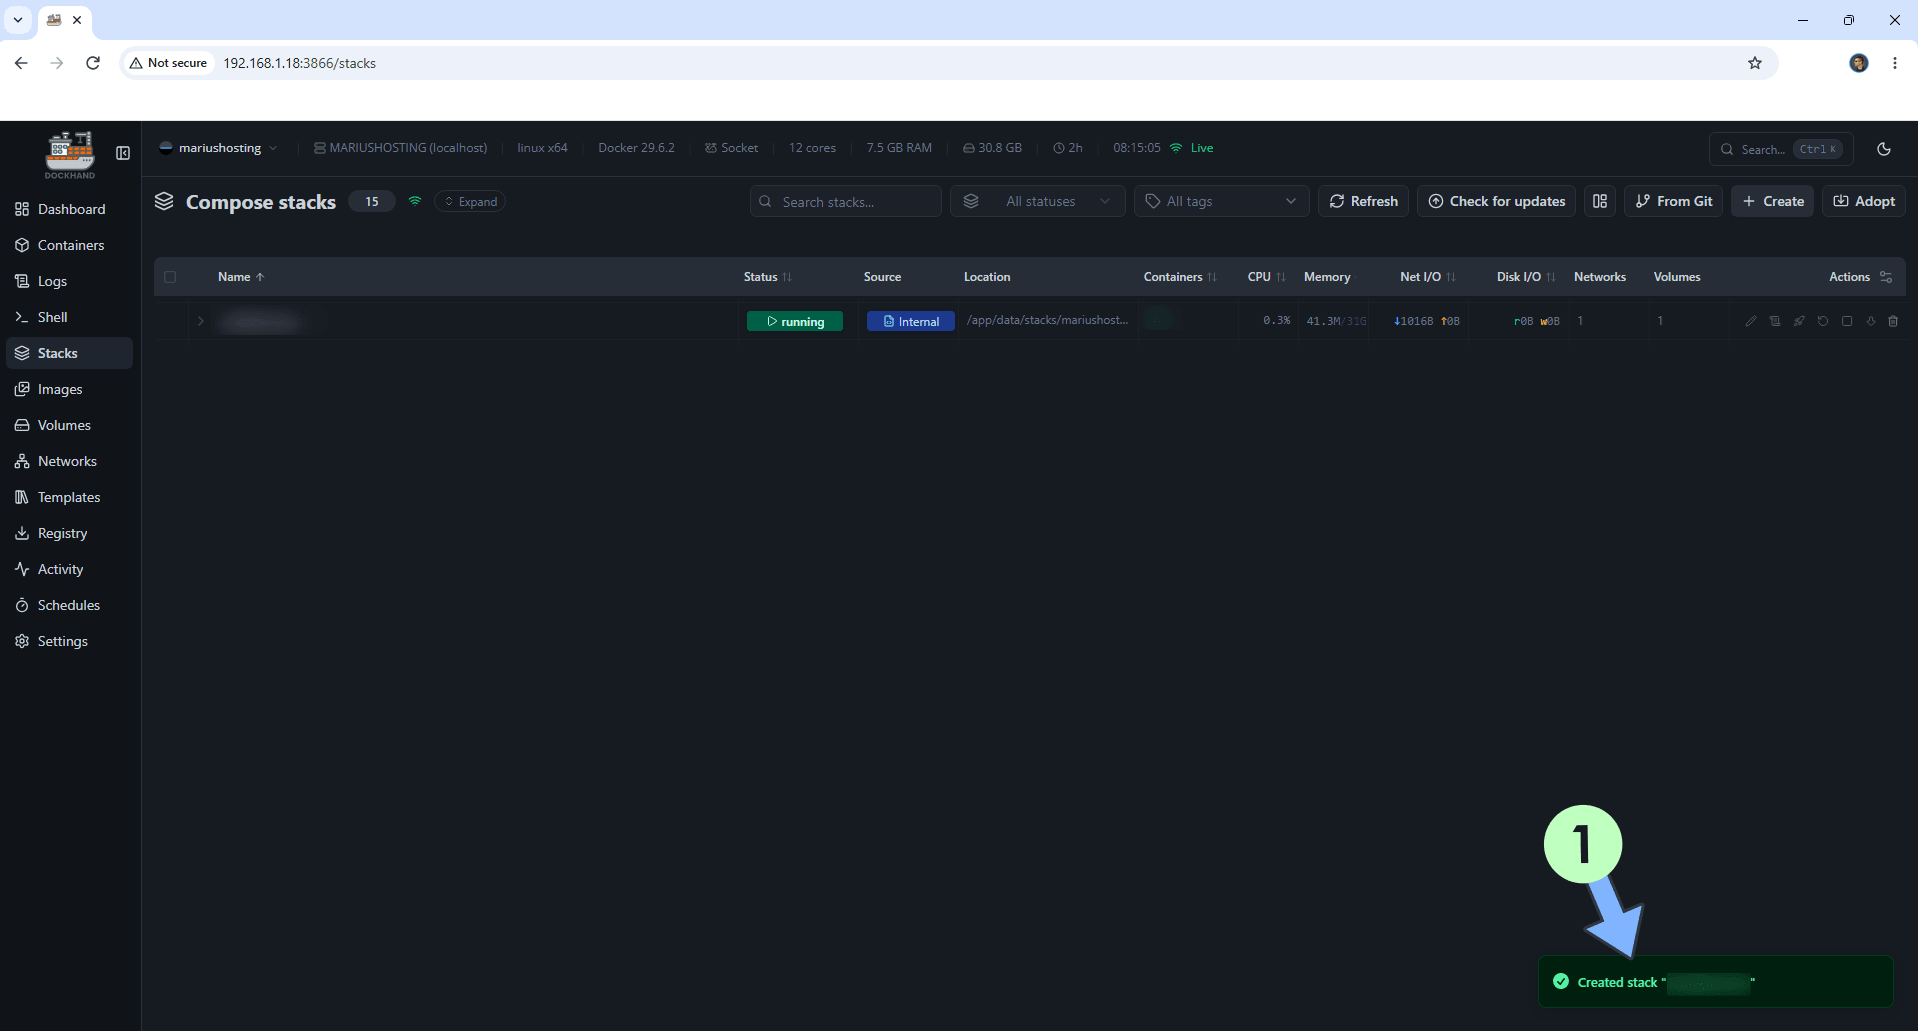
If everything goes right, you will see the following message at the bottom right of your screen: “Created stack “monline”“.
STEP 7
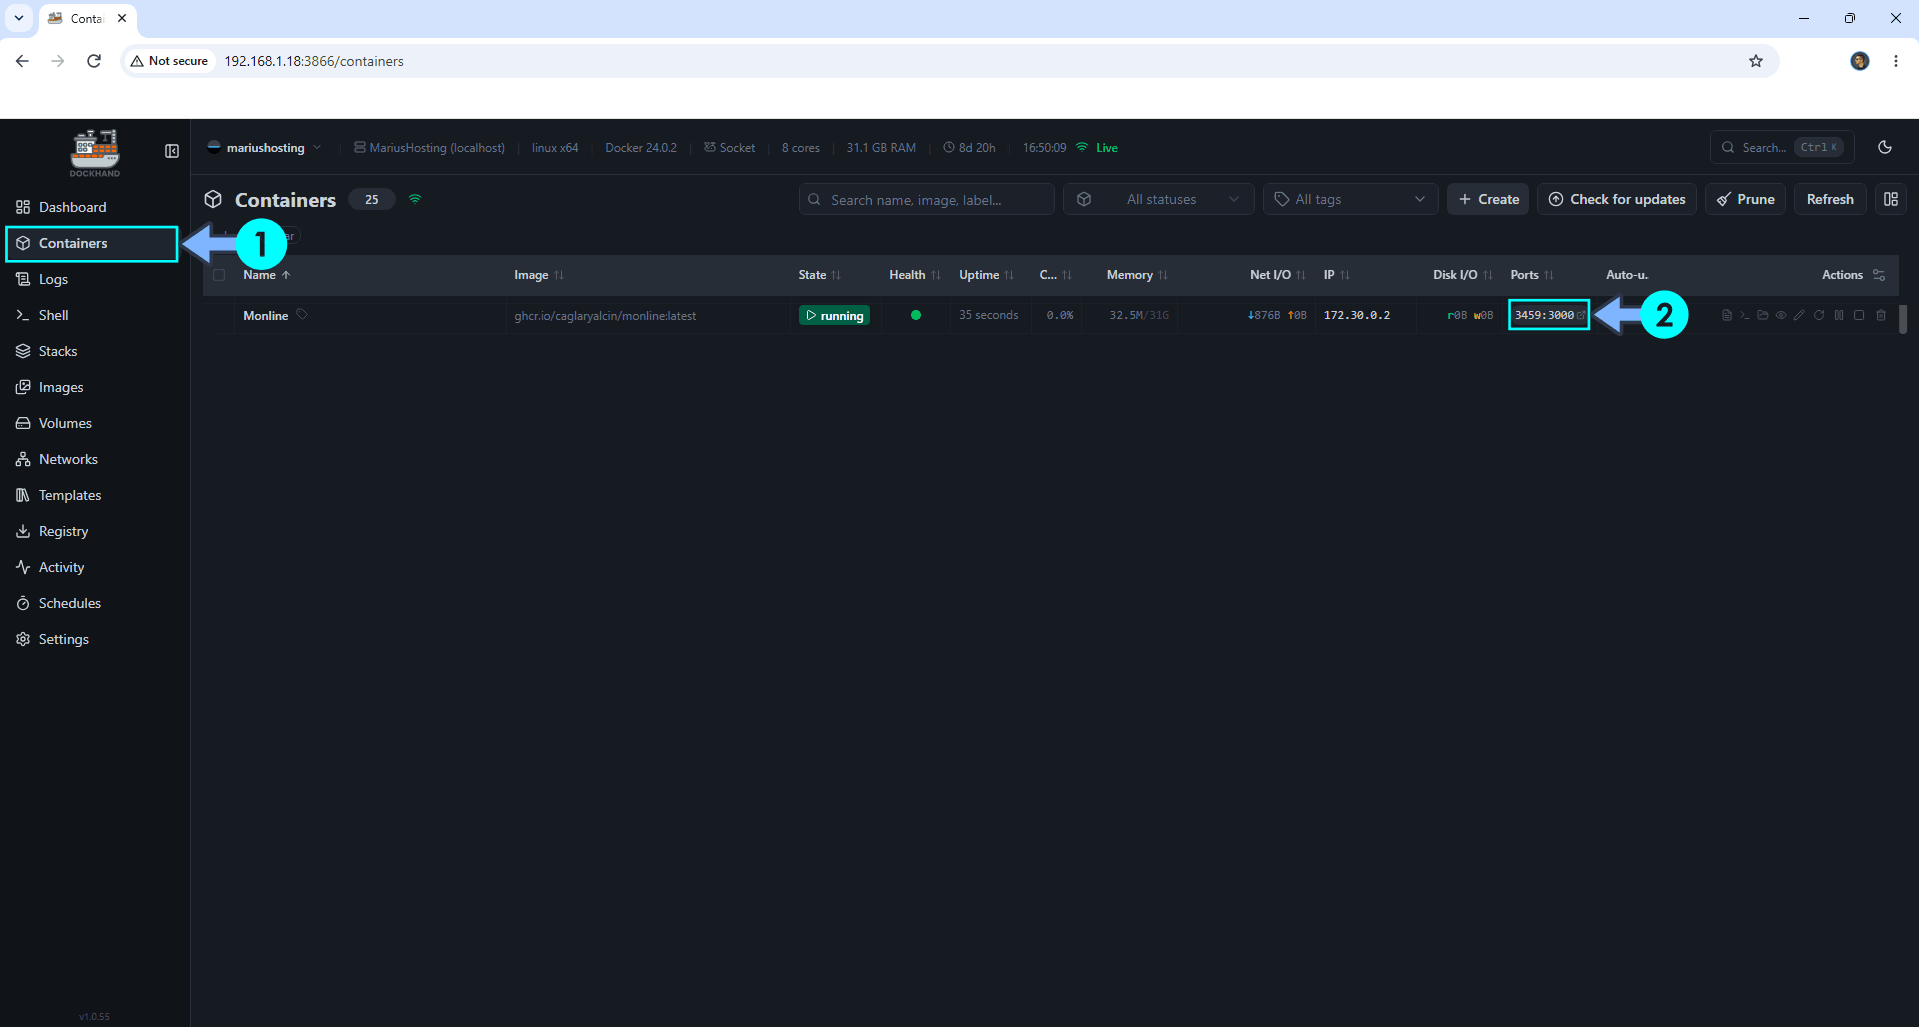
On the left sidebar, click Containers. Identify your Monline container then click on ports 3459:3000. Follow the instructions in the image below.
STEP 8
🟢Please Support My work by Making a Donation. Almost 99,9% of the people that install something using my guides forget to support my work, or just ignore STEP 1. I’ve been very honest about this aspect of my work since the beginning: I don’t run any ADS, I don’t require subscriptions, paid or otherwise, I don’t collect IPs, emails, and I don’t have any referral links from Amazon or other merchants. I also don’t have any POP-UPs or COOKIES. I have repeatedly been told over the years how much I have contributed to the community. It’s something I love doing and have been honest about my passion since the beginning. But I also Need The Community to Support me Back to be able to continue doing this work.
STEP 9
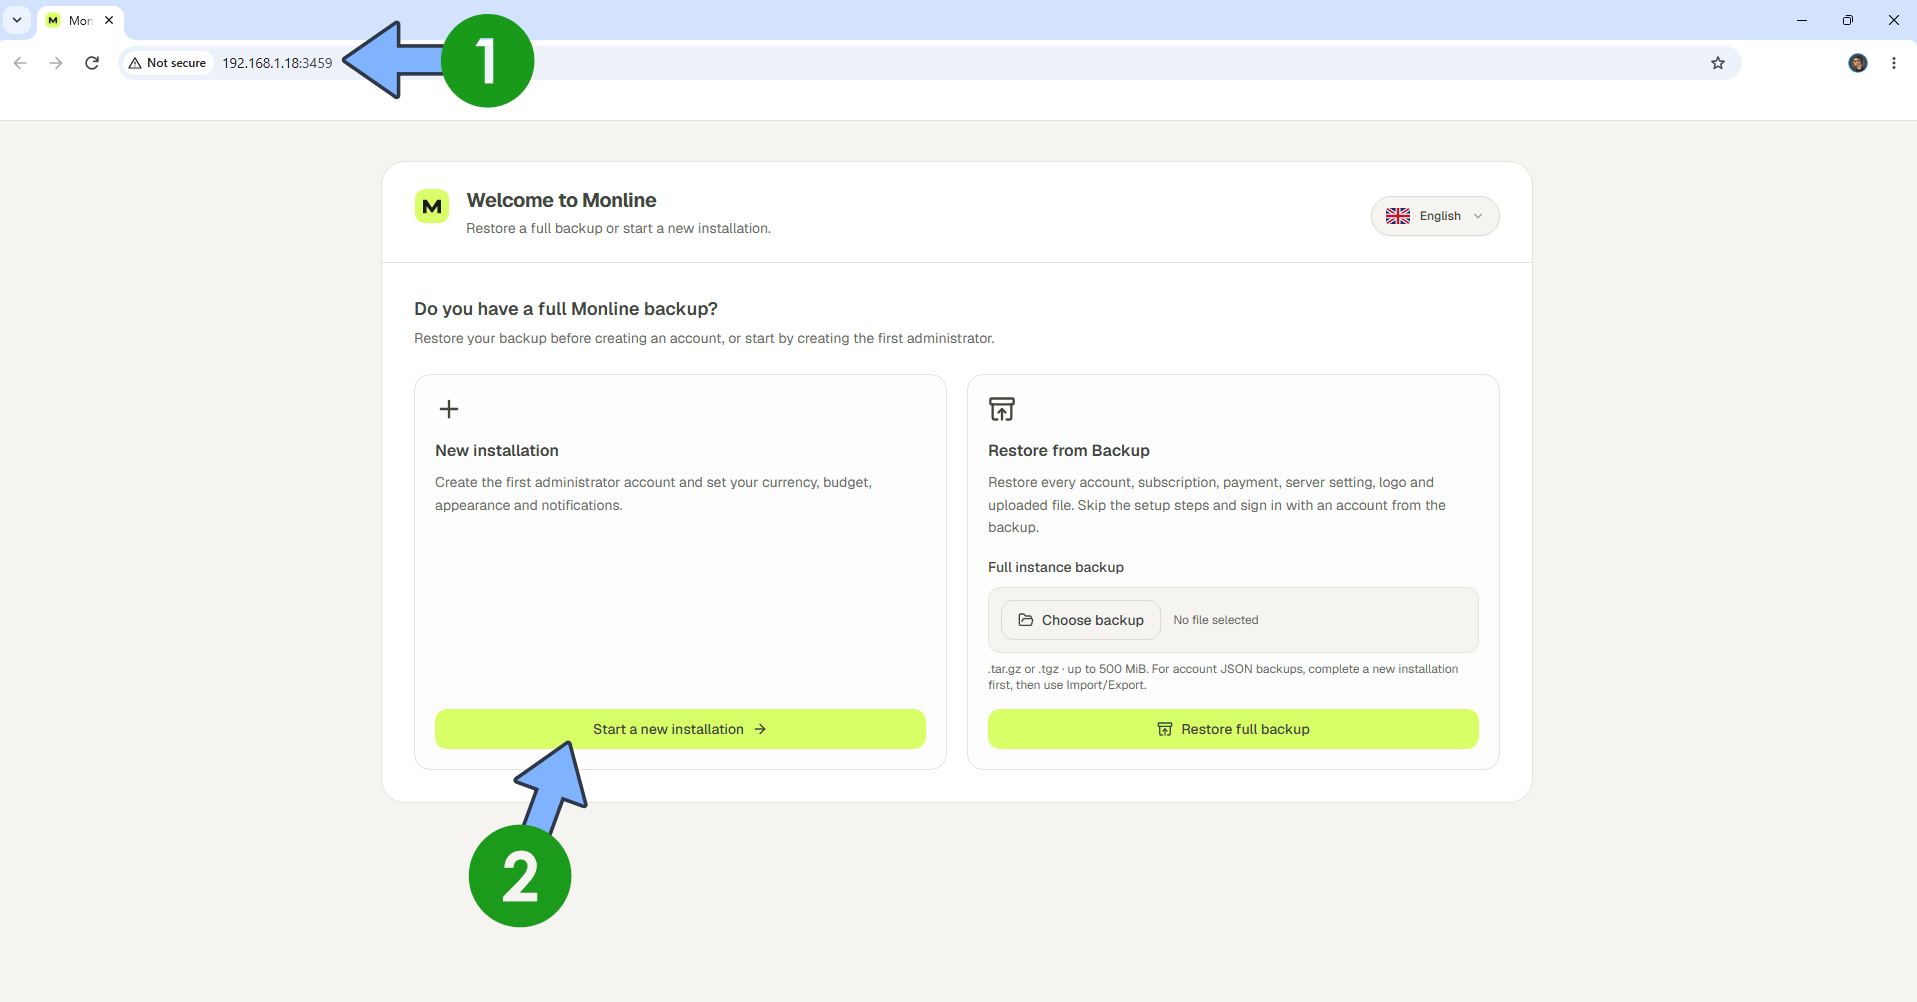
The installation process can take up to a few seconds/minutes. It will depend on your Internet speed connection. Now open your browser and type in http://asustor-ip-address:3459 Click Start a new installation. Follow the instructions in the image below.
STEP 10
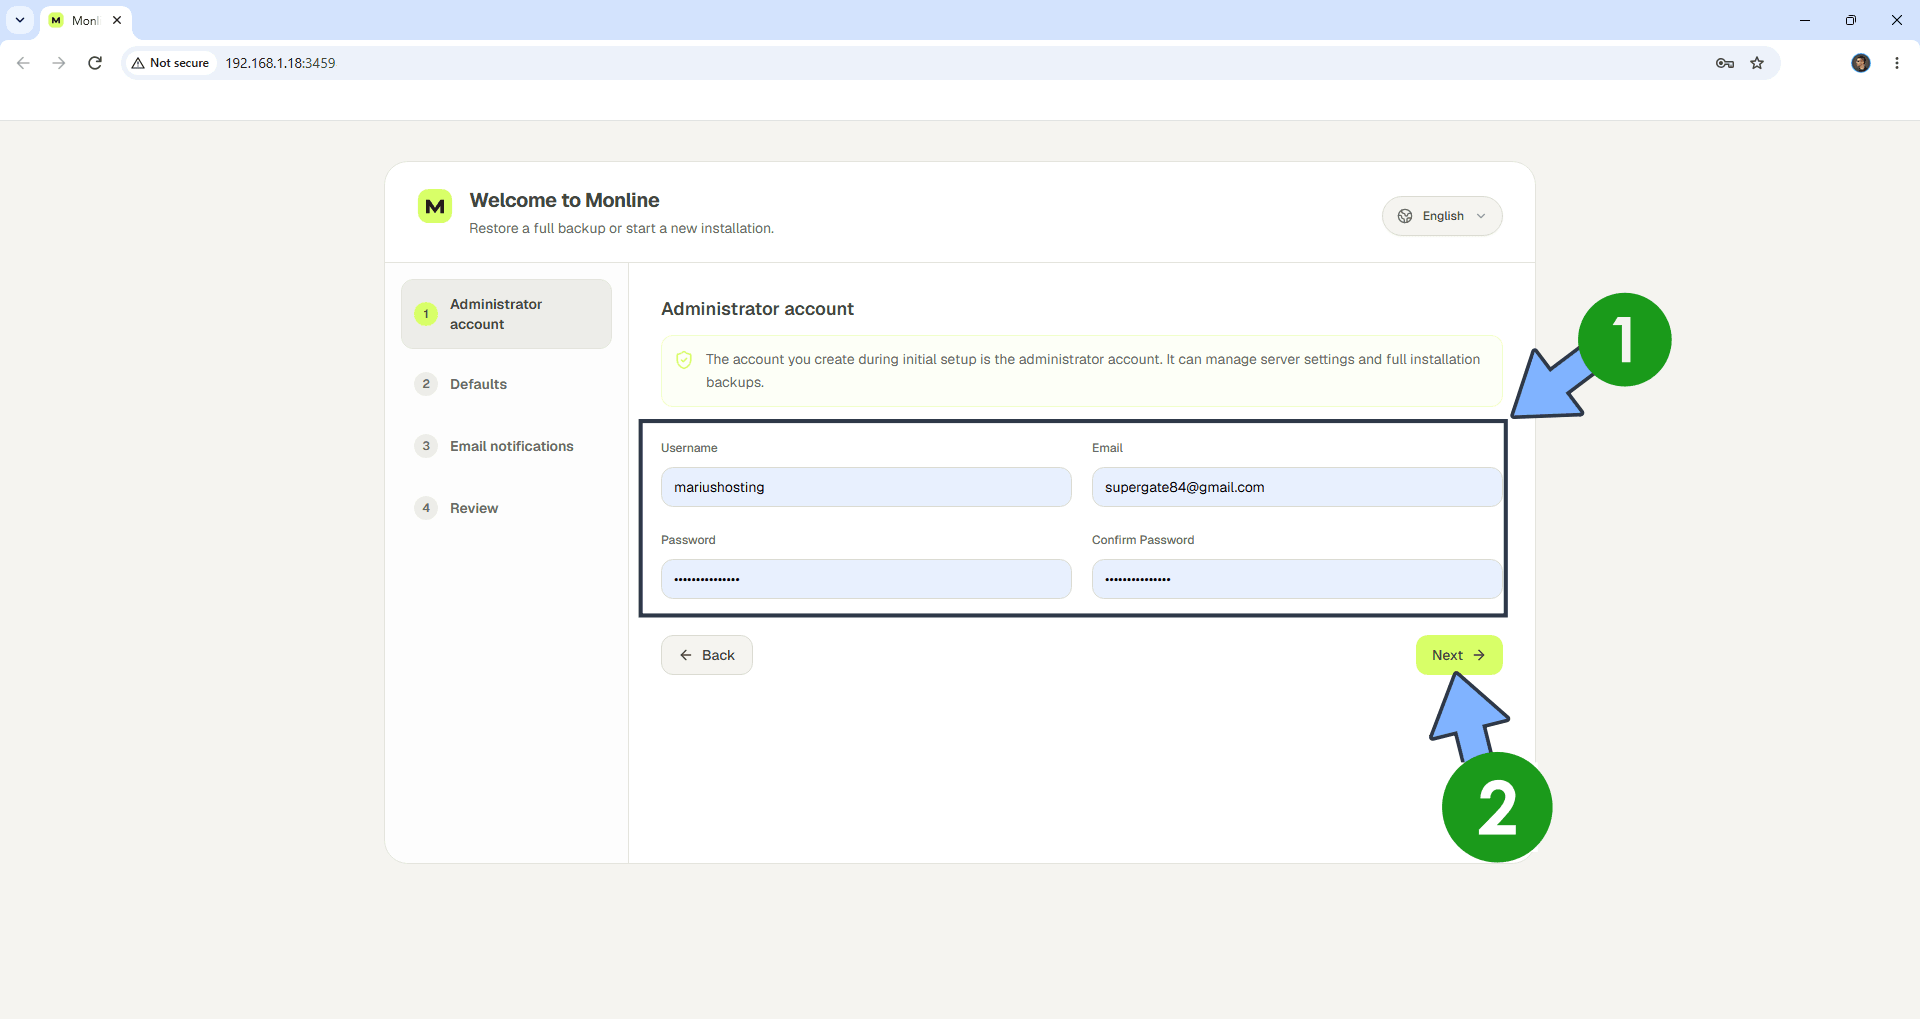
Create your administrator account then click Next. Follow the instructions in the image below.
STEP 11
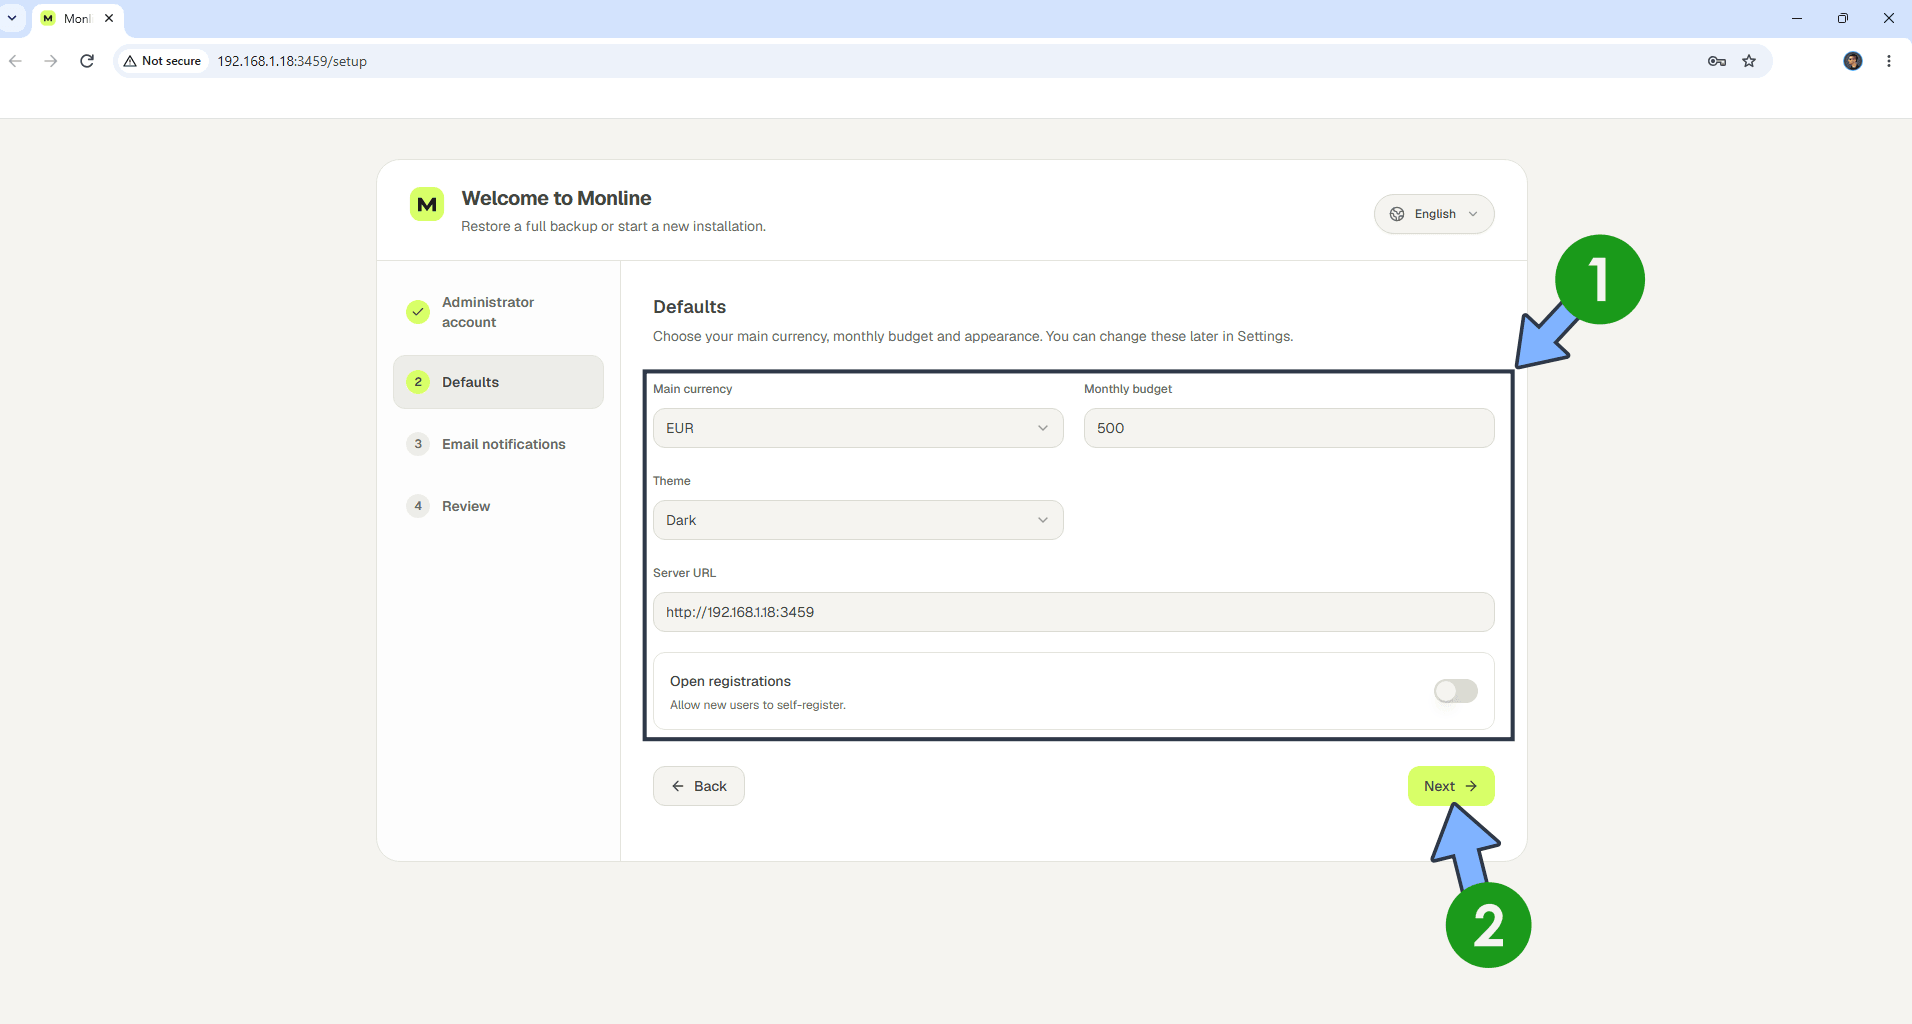
Choose your Main currency, Monthly budget, Server URL, and Theme. Keep registrations disabled. Click Next. Follow the instructions in the image below.
STEP 12
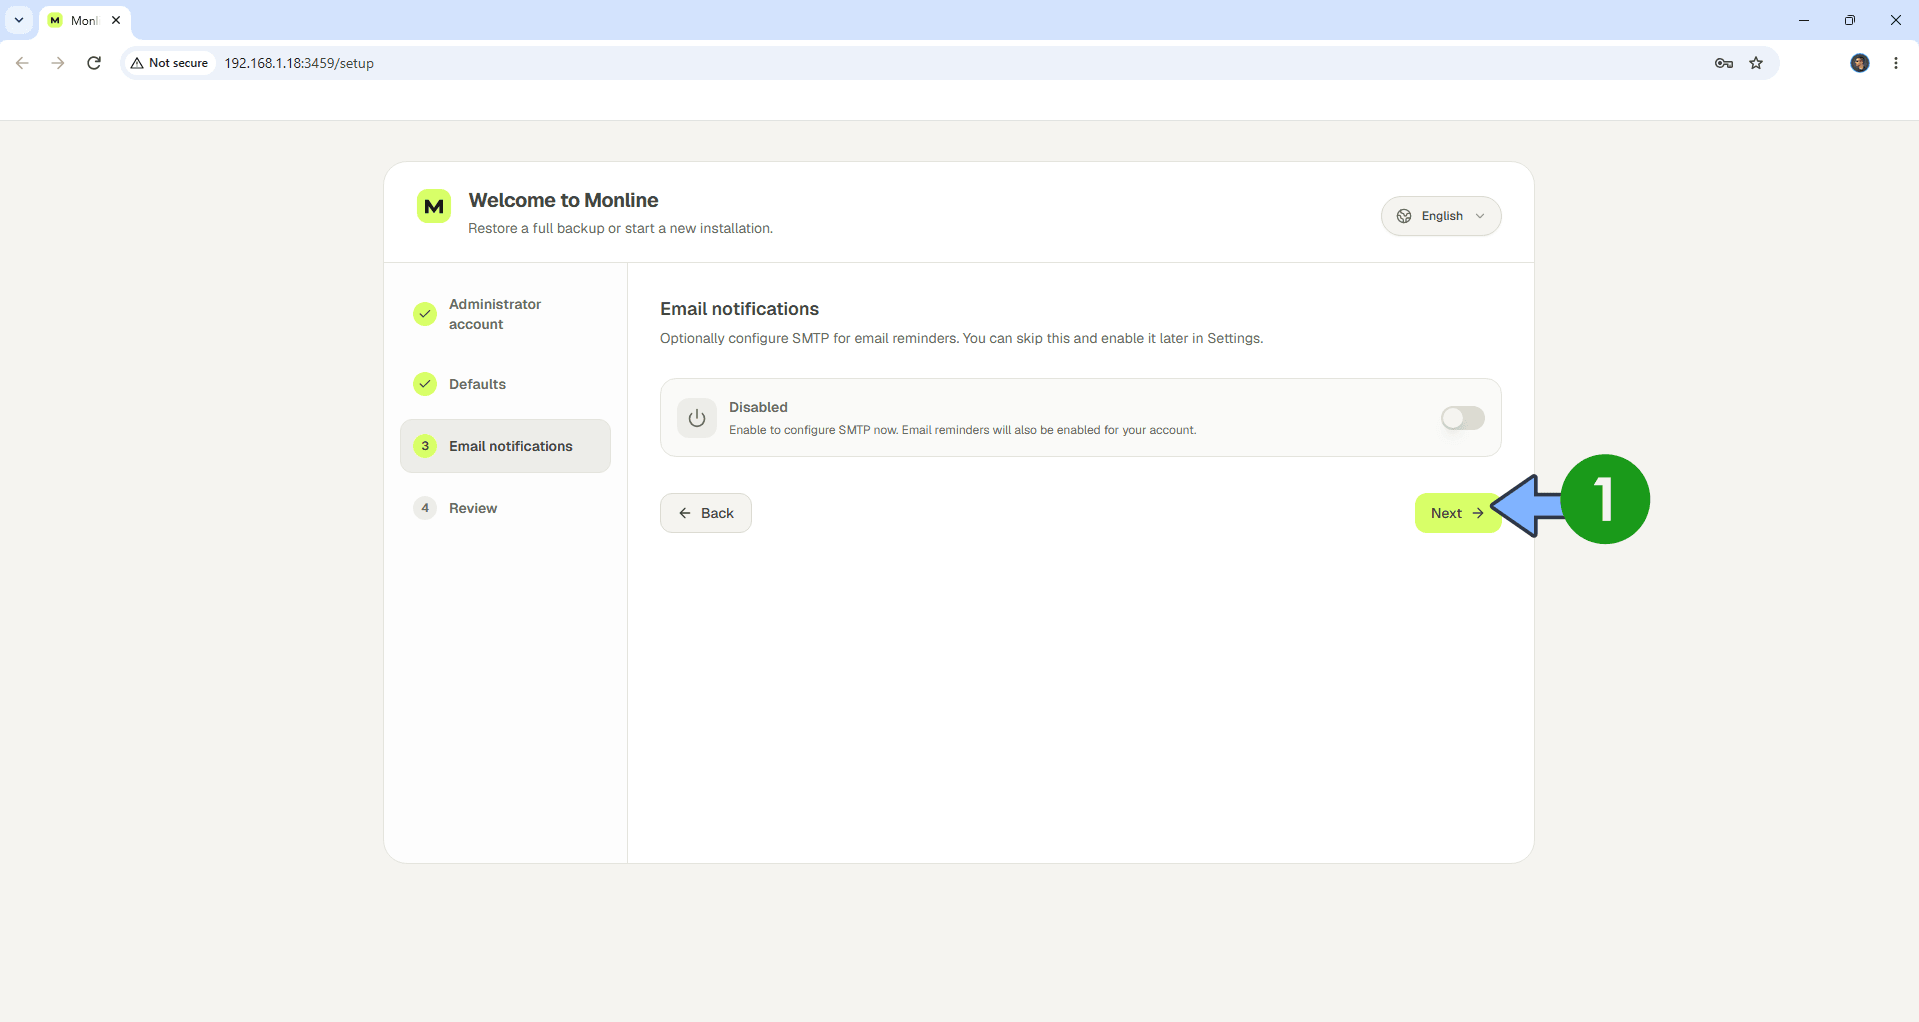
Click Next. Follow the instructions in the image below.
STEP 13
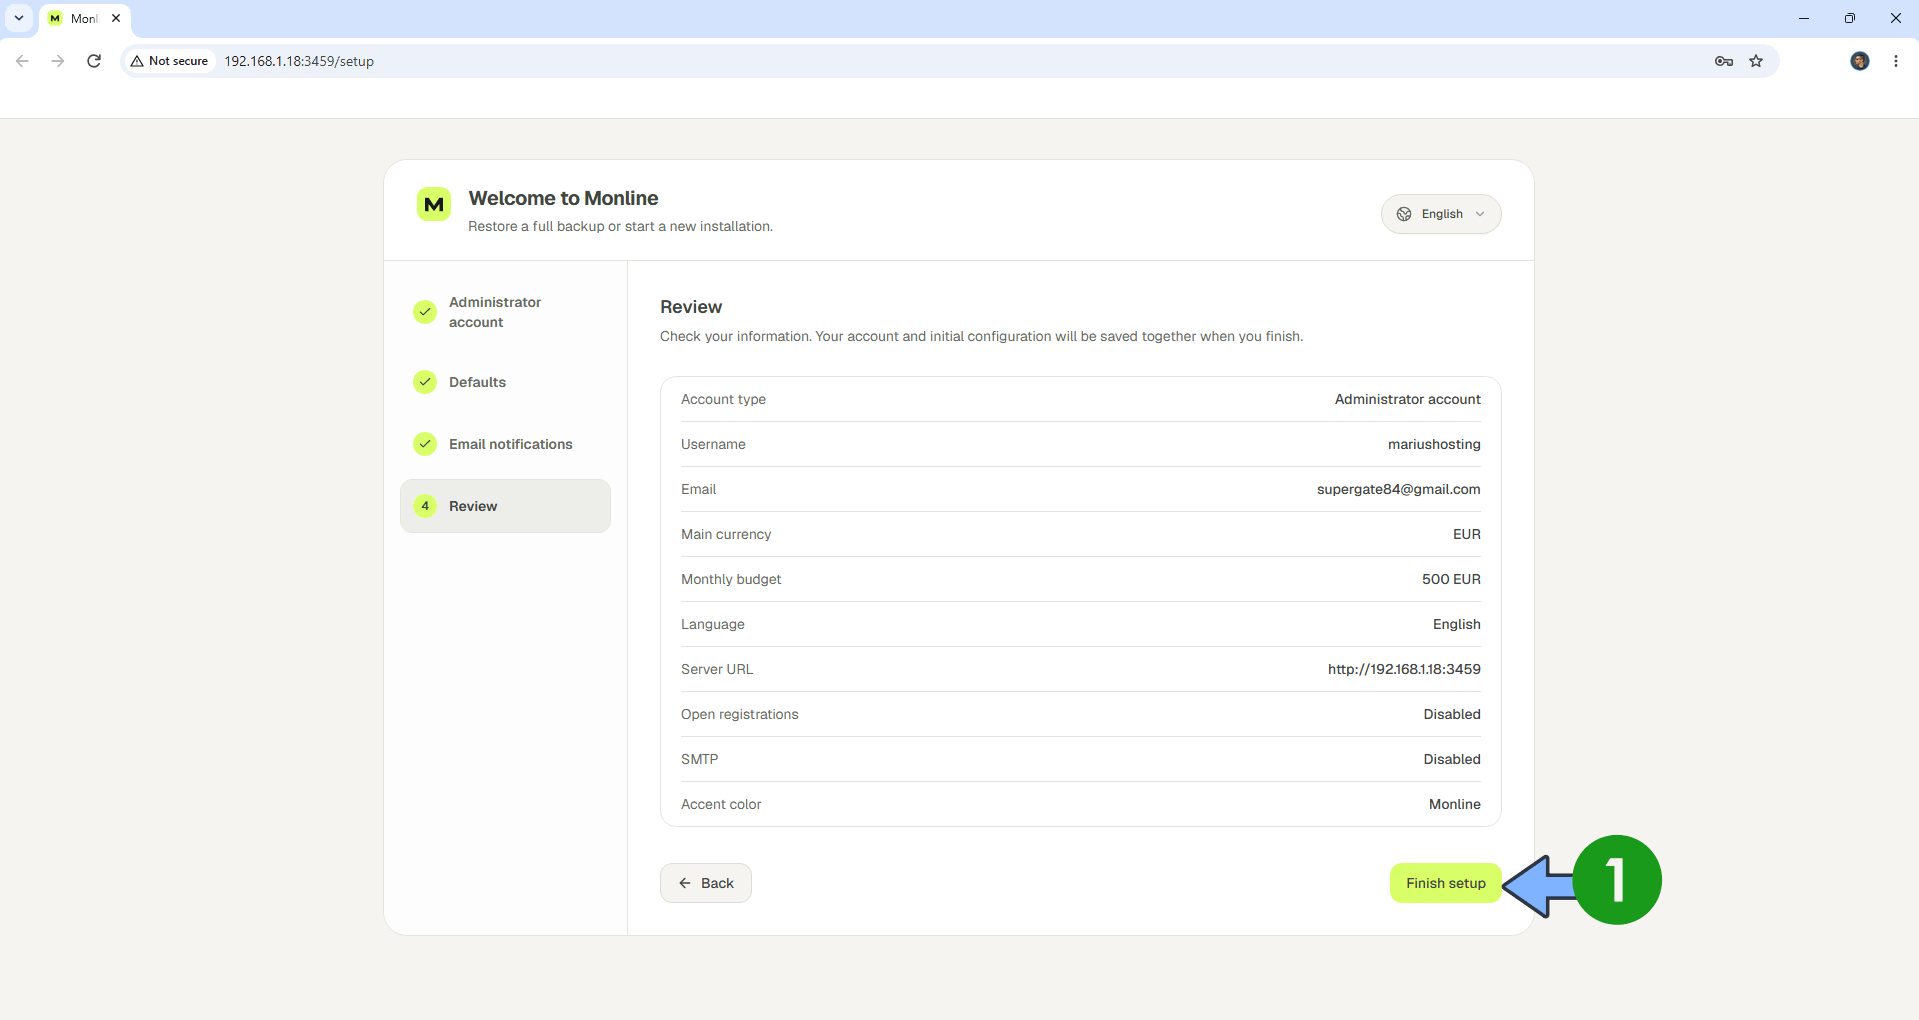
Click Finish Setup. Follow the instructions in the image below.
STEP 14
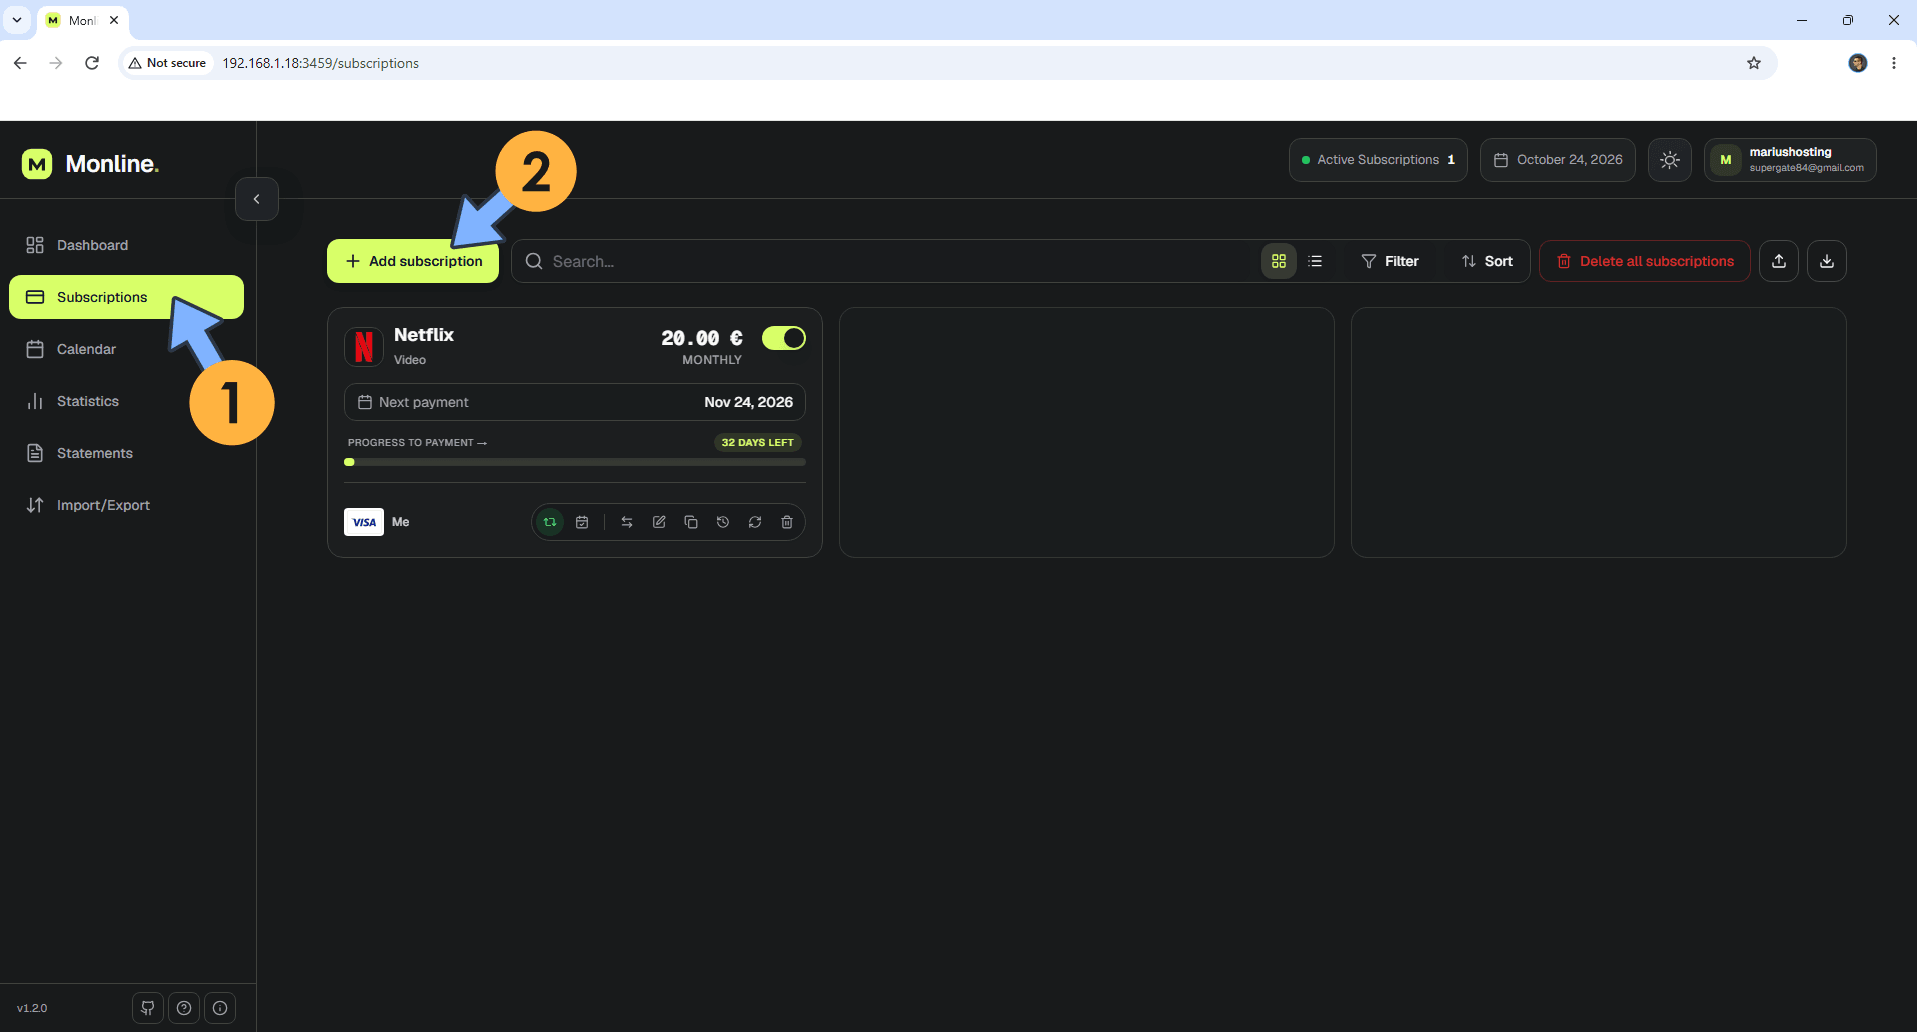
Add your first Subscription. On the left sidebar, click Subscriptions. Click + Add subscription. Follow the instructions in the image below.
STEP 15
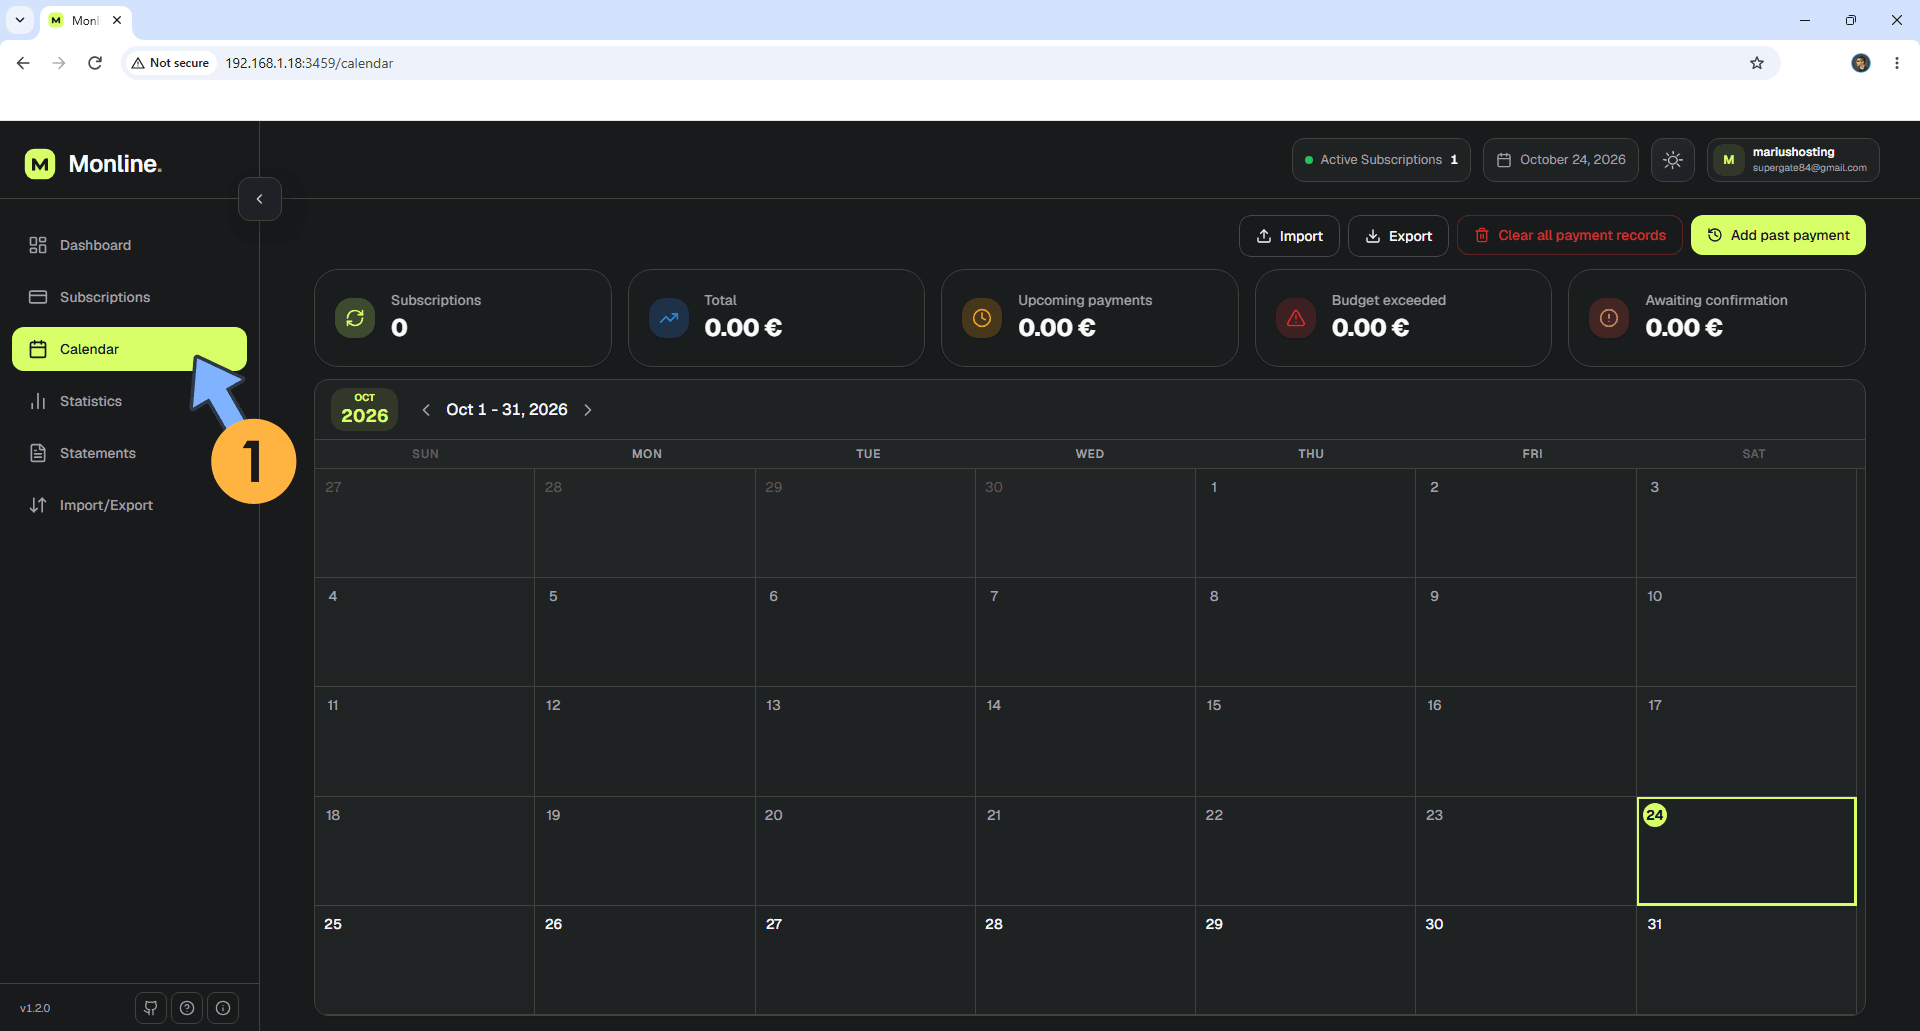
On the left sidebar, click Calendar to check your Subscriptions Calendar. Follow the instructions in the image below.
STEP 16
Your Monline dashboard at a glance!
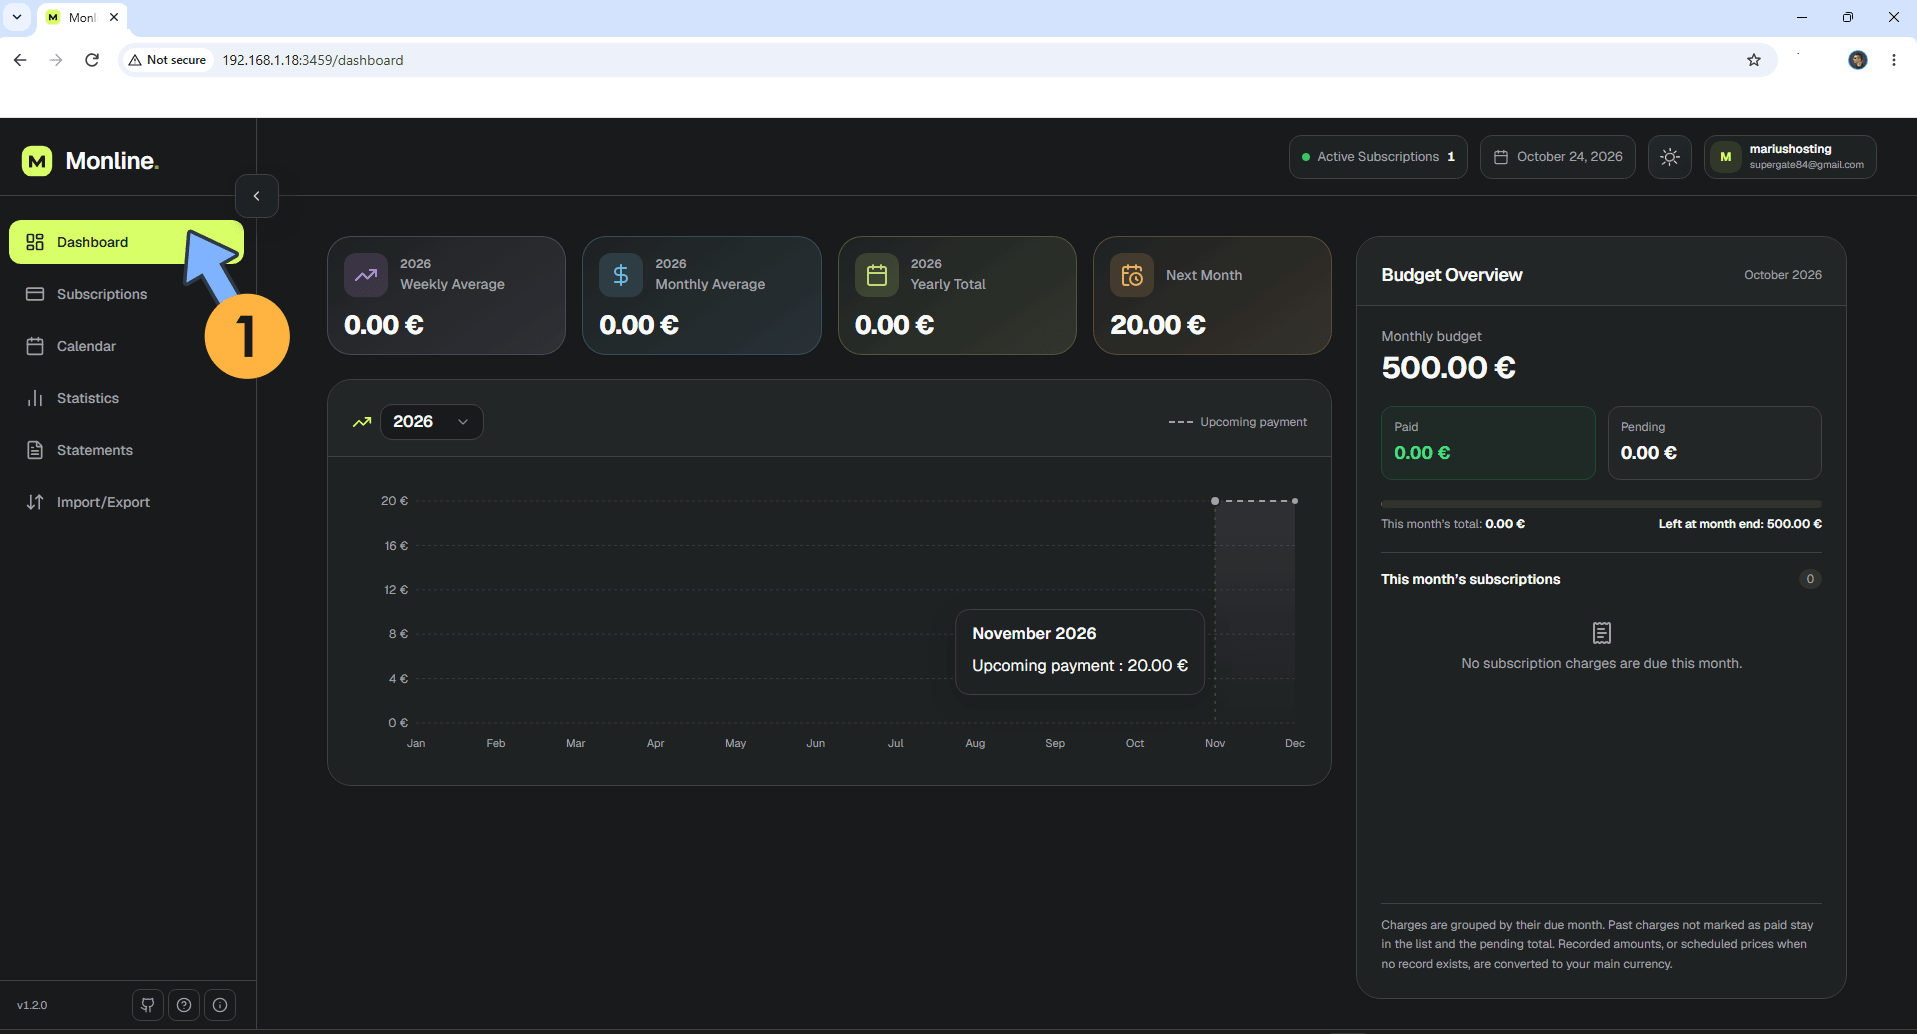
Enjoy Monline on your Asustor NAS!
This post was updated on Tuesday / November 3rd, 2026 at 9:58 PM