

Bambuddy is a self-hosted print archive and management system for Bambu Lab 3D printers. It automatically archives prints with metadata and 3D previews, monitors printers in real-time with live camera streaming, manages queues, scheduling, spool inventory and notifications, supports remote printing via proxy mode and keeps all data local with full ownership and no cloud dependency. In this step by step guide I will show you how to install Bambuddy on your Asustor NAS using Docker and Dockhand.
💡Note: This guide works perfectly with the latest Bambuddy v1.2.5.7 release.
💡Note: Check out my guide on how to Install Bambuddy on Your UGREEN NAS.
💡Note: Check out my guide on how to Install Bambuddy on Your Synology NAS.
STEP 1
Please Support My work by Making a Donation.
STEP 2
Install Dockhand using my step by step guide. If you already have Dockhand installed on your Asustor NAS, skip this STEP. ⚠️Attention: Make sure you have installed the latest Dockhand version.
STEP 3
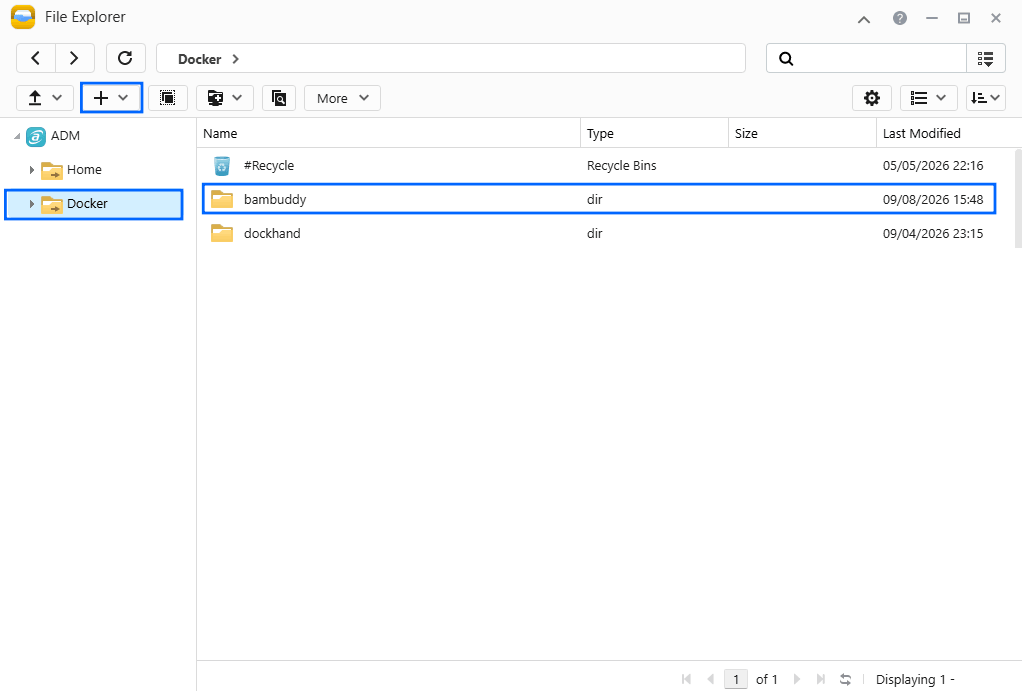
Go to File Explorer and open the Docker folder. Inside the Docker folder, create one new folder and name it bambuddy. Follow the instructions in the image below.
Note: Be careful to enter only lowercase, not uppercase letters.
STEP 4
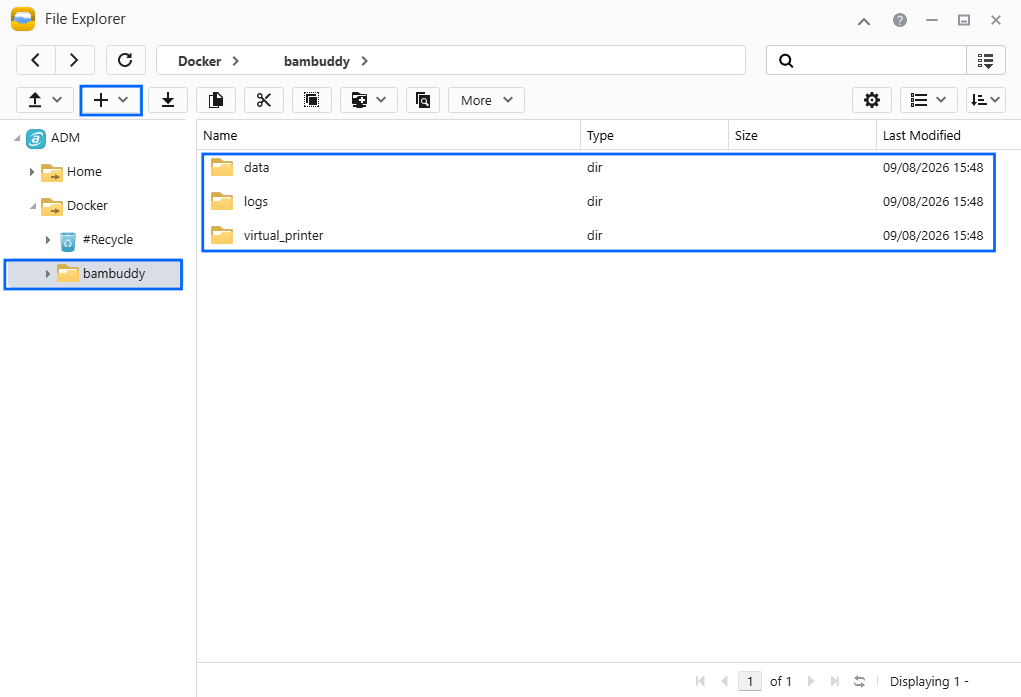
Now create three new folders inside the bambuddy folder that you have previously created at STEP 3 and name them data, logs, virtual_printer. Follow the instructions in the image below.
Note: Be careful to enter only lowercase, not uppercase letters.
STEP 5
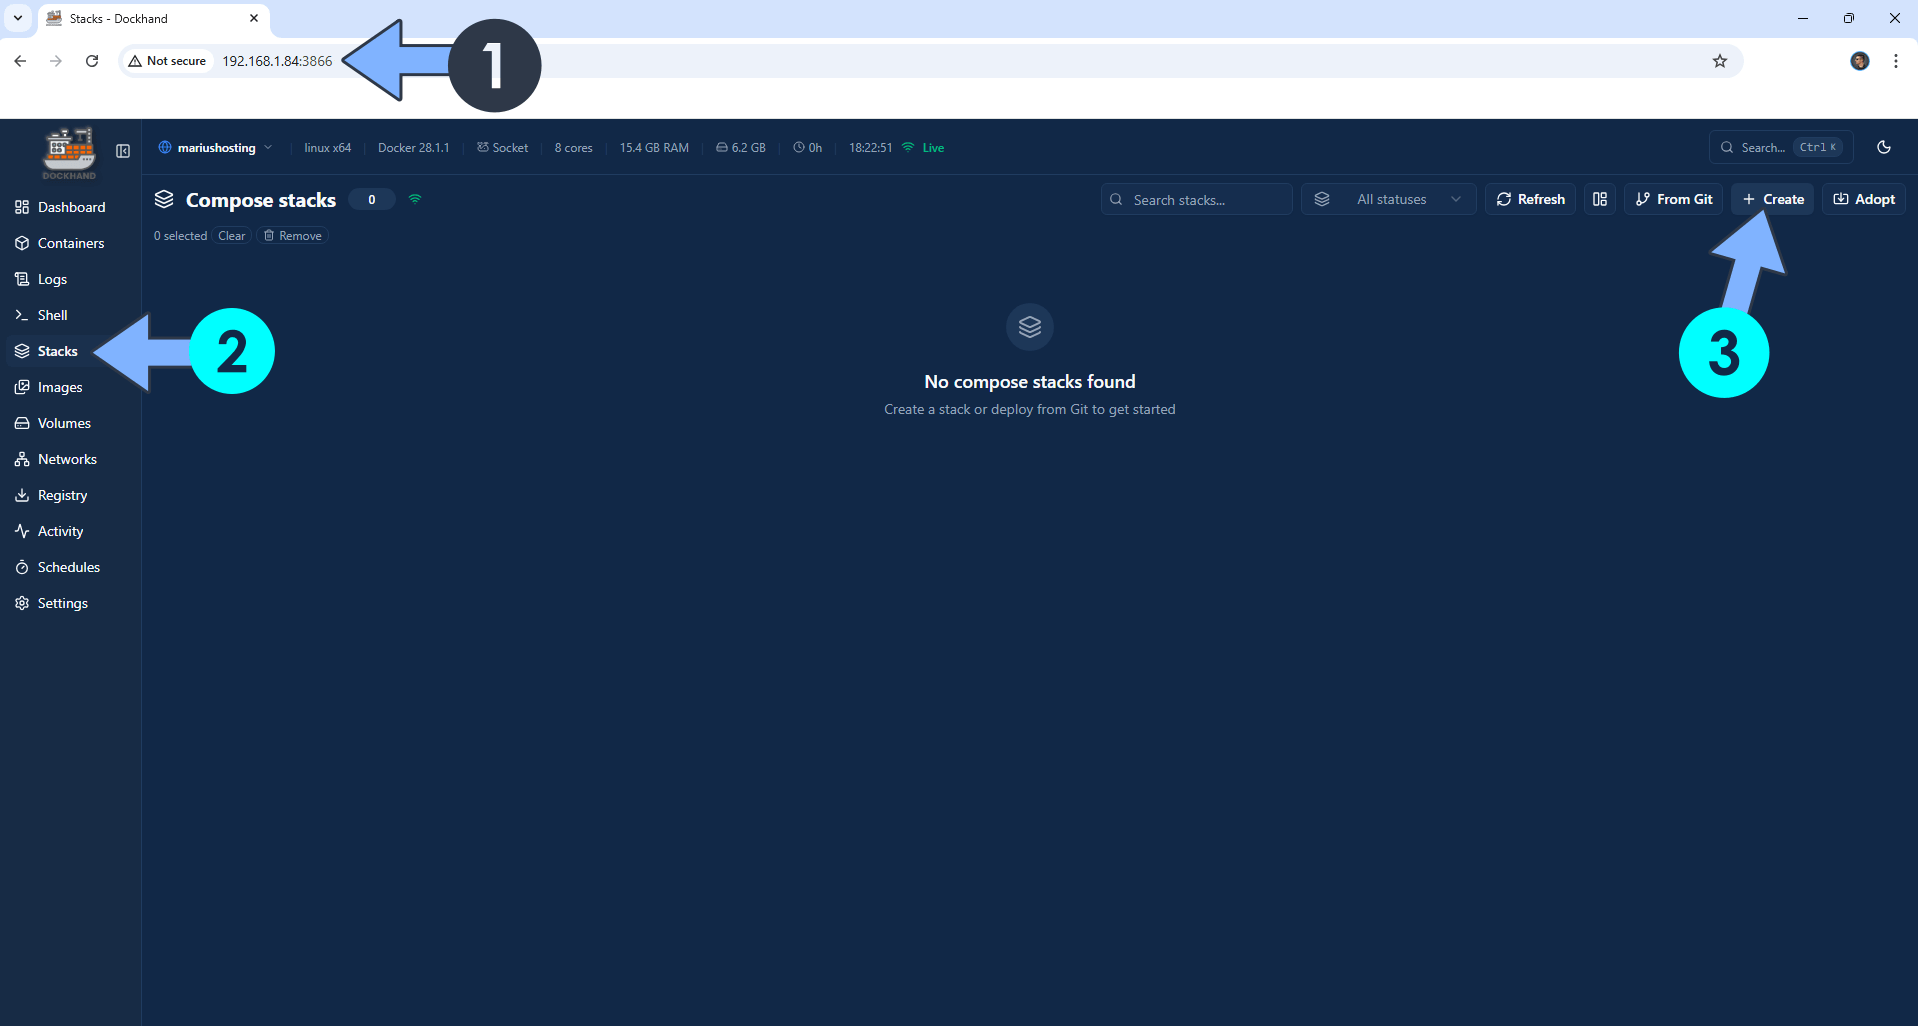
Open your browser and type in http://asustor-ip-address:3866 to connect to your Dockhand container. On the left sidebar, click Stacks then + Create. Follow the instructions in the image below.
STEP 6
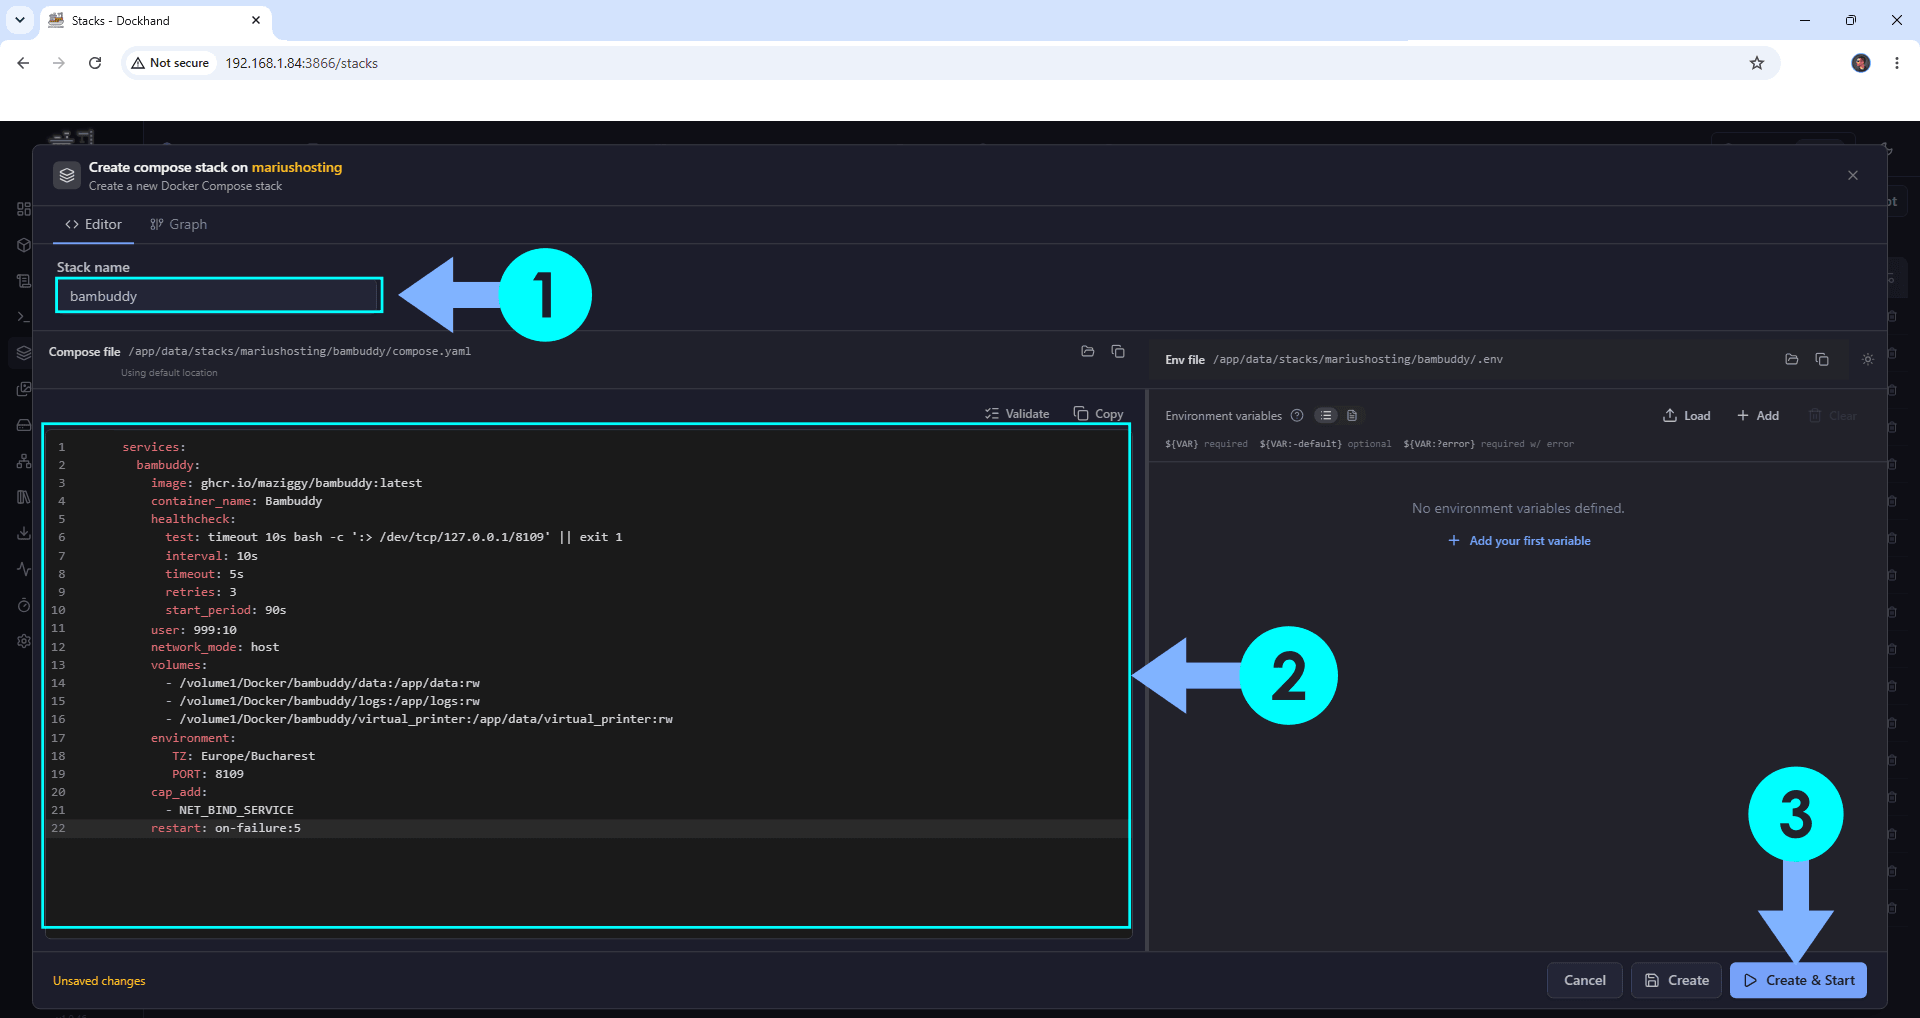
In the Stack name field, type in bambuddy. ⚠️Warning: Type in the name in lowercase letters. The installation process can take up to a few seconds/minutes. It will depend on your Internet speed connection. Follow the instructions in the image below.
Note: Copy Paste the code below in the Dockhand Compose Stack then click Create & Start.
services:
  bambuddy:
    image: ghcr.io/maziggy/bambuddy:latest
    container_name: Bambuddy
    healthcheck:
      test: timeout 10s bash -c ':> /dev/tcp/127.0.0.1/8109' || exit 1
      interval: 10s
      timeout: 5s
      retries: 3
      start_period: 90s
    user: 999:10
    network_mode: host
    volumes:
      - /volume1/Docker/bambuddy/data:/app/data:rw
      - /volume1/Docker/bambuddy/logs:/app/logs:rw
      - /volume1/Docker/bambuddy/virtual_printer:/app/data/virtual_printer:rw
    environment:
       TZ: Europe/Bucharest
       PORT: 8109
    cap_add:
      - NET_BIND_SERVICE
    restart: on-failure:5
Note: Before you paste the code above in the Stack editor area below, change the value numbers for user with your own UID and GID values. (Follow my step by step guide on how to do this.)
Note: Before you paste the code above in the Stack editor area below, change the value for TZ. (Select your current Time Zone from this list.)
STEP 7
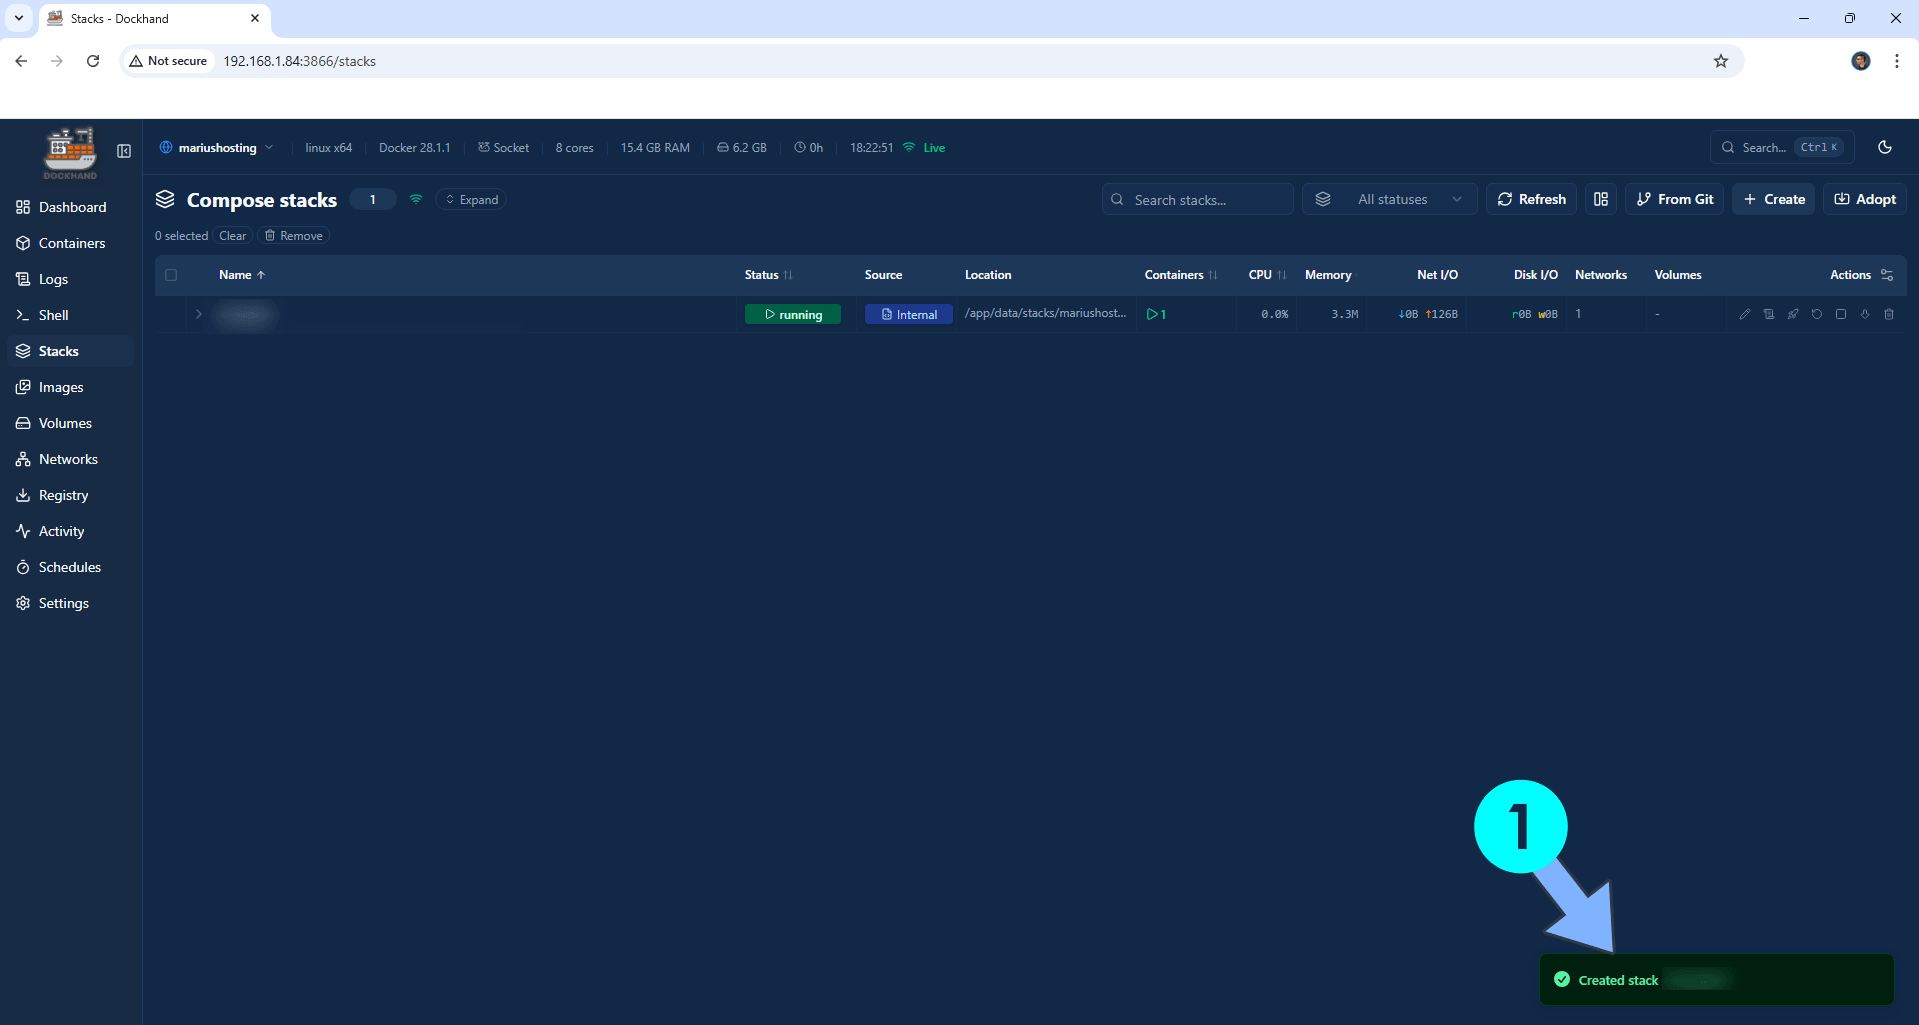
If everything goes right, you will see the following message at the bottom right of your screen: “Created stack “bambuddy”“.
STEP 8
🟢Please Support My work by Making a Donation. Almost 99,9% of the people that install something using my guides forget to support my work, or just ignore STEP 1. I’ve been very honest about this aspect of my work since the beginning: I don’t run any ADS, I don’t require subscriptions, paid or otherwise, I don’t collect IPs, emails, and I don’t have any referral links from Amazon or other merchants. I also don’t have any POP-UPs or COOKIES. I have repeatedly been told over the years how much I have contributed to the community. It’s something I love doing and have been honest about my passion since the beginning. But I also Need The Community to Support me Back to be able to continue doing this work.
STEP 9
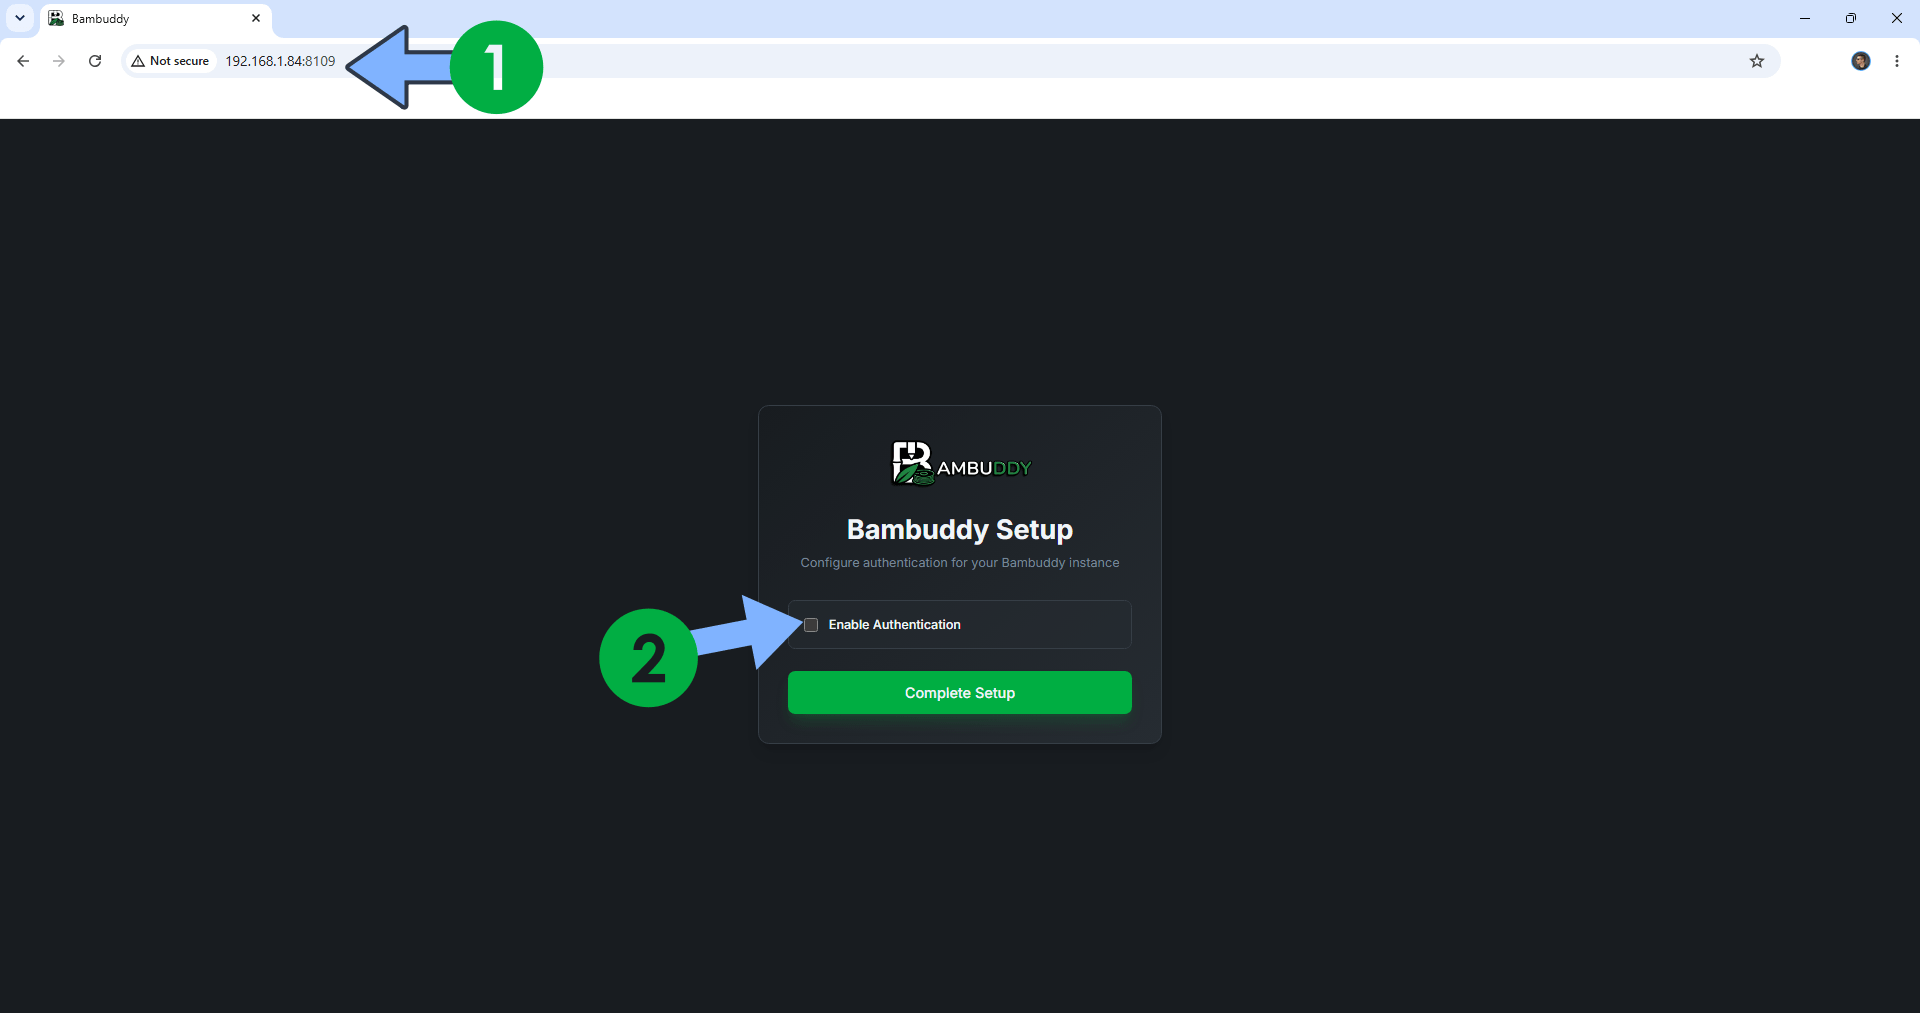
The installation process can take up to a few seconds/minutes. It will depend on your Internet speed connection. Now open your browser and type in http://asustor-ip-address:8109 Click Enable Authentication. Follow the instructions in the image below.
STEP 10
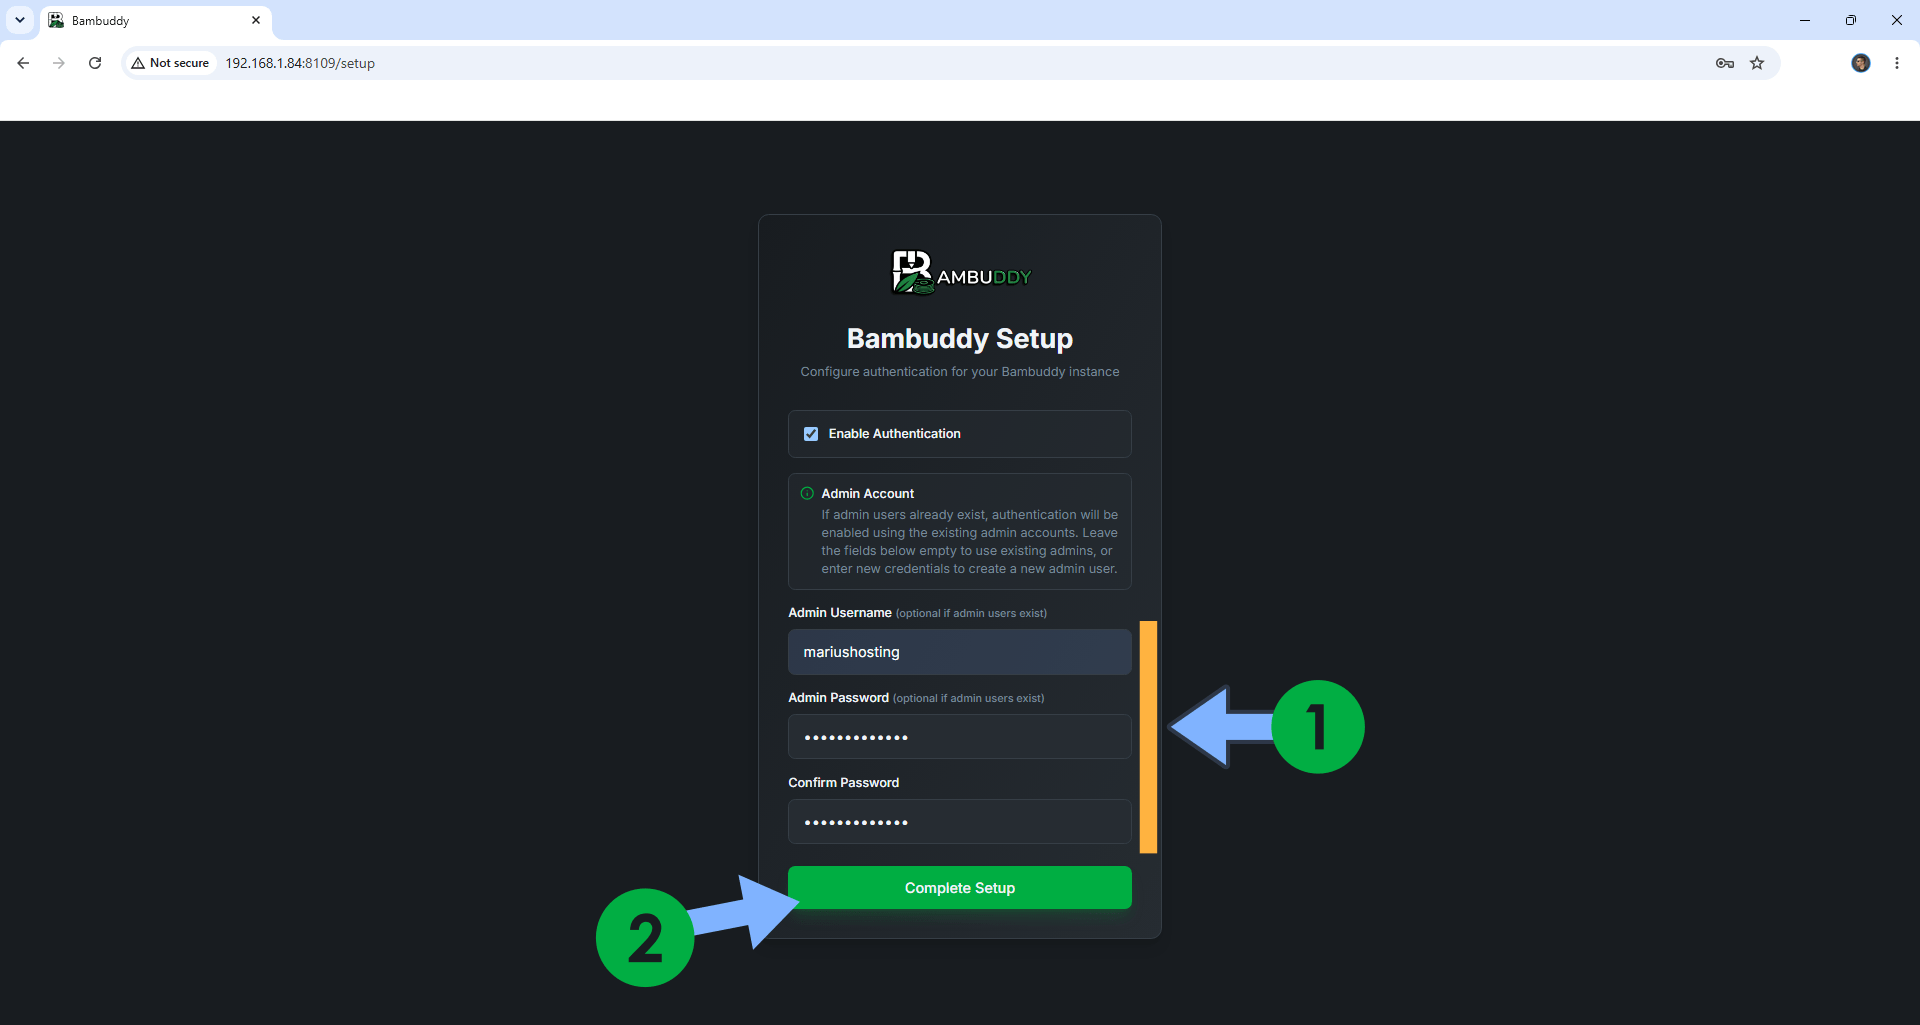
Type in your own Admin Username and Password. Click Complete Setup. Follow the instructions in the image below.
STEP 11
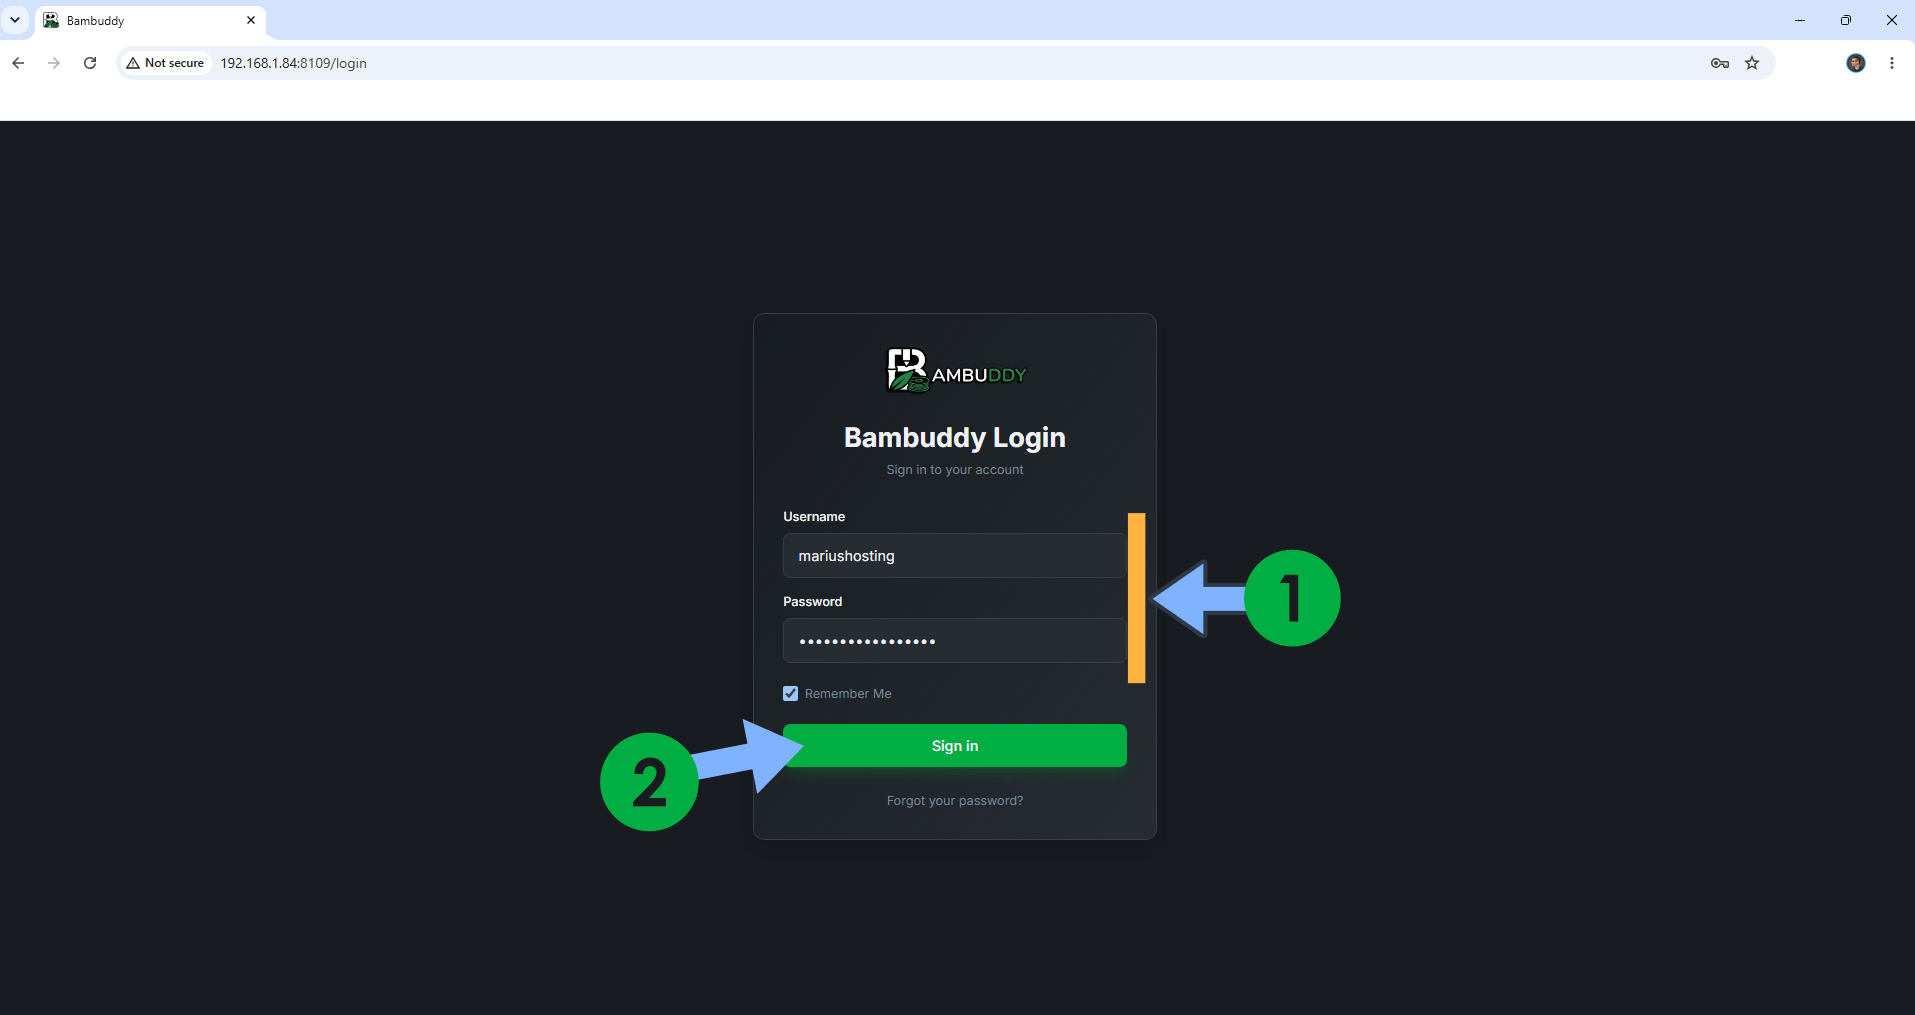
Type in your own Username and Password that you have previously added at STEP 10. Click Sign in. Follow the instructions in the image below.
STEP 12
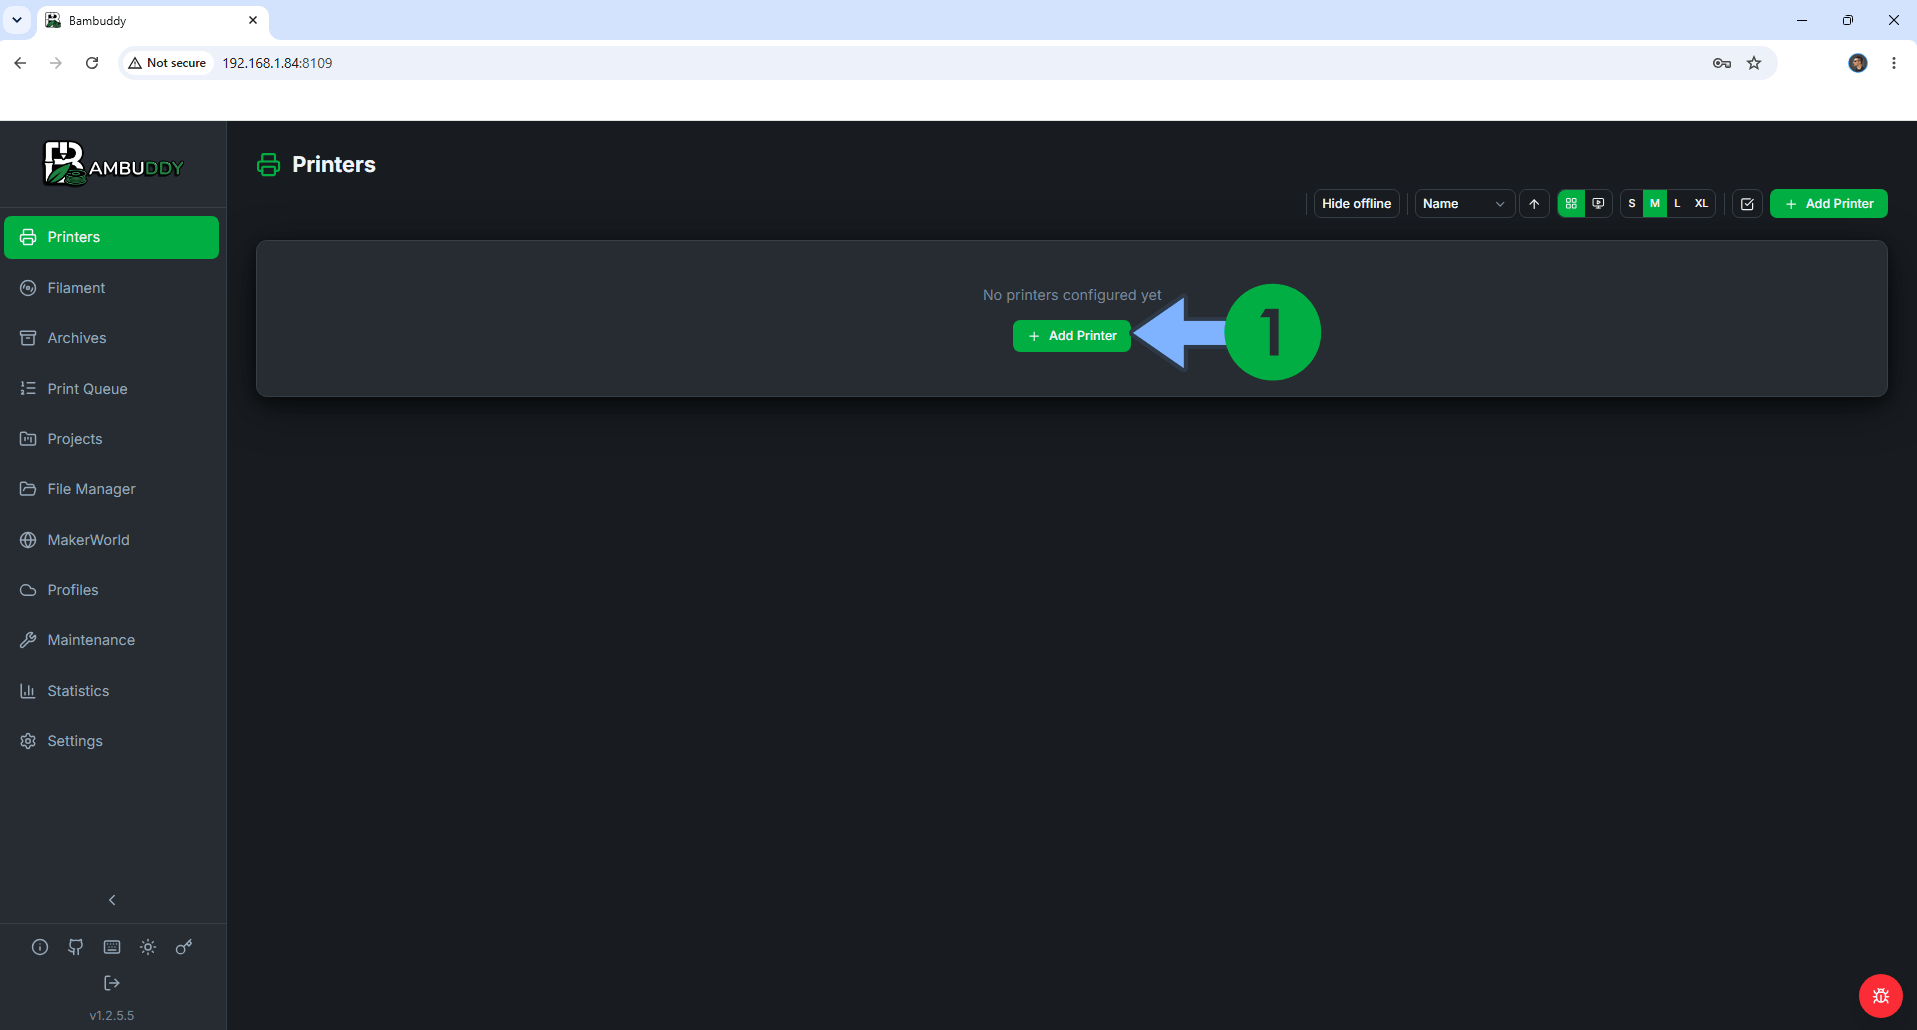
Click Add Printer to add your first Printer. Click Settings to access Bambuddy Settings. Follow the instructions in the image below.
STEP 13
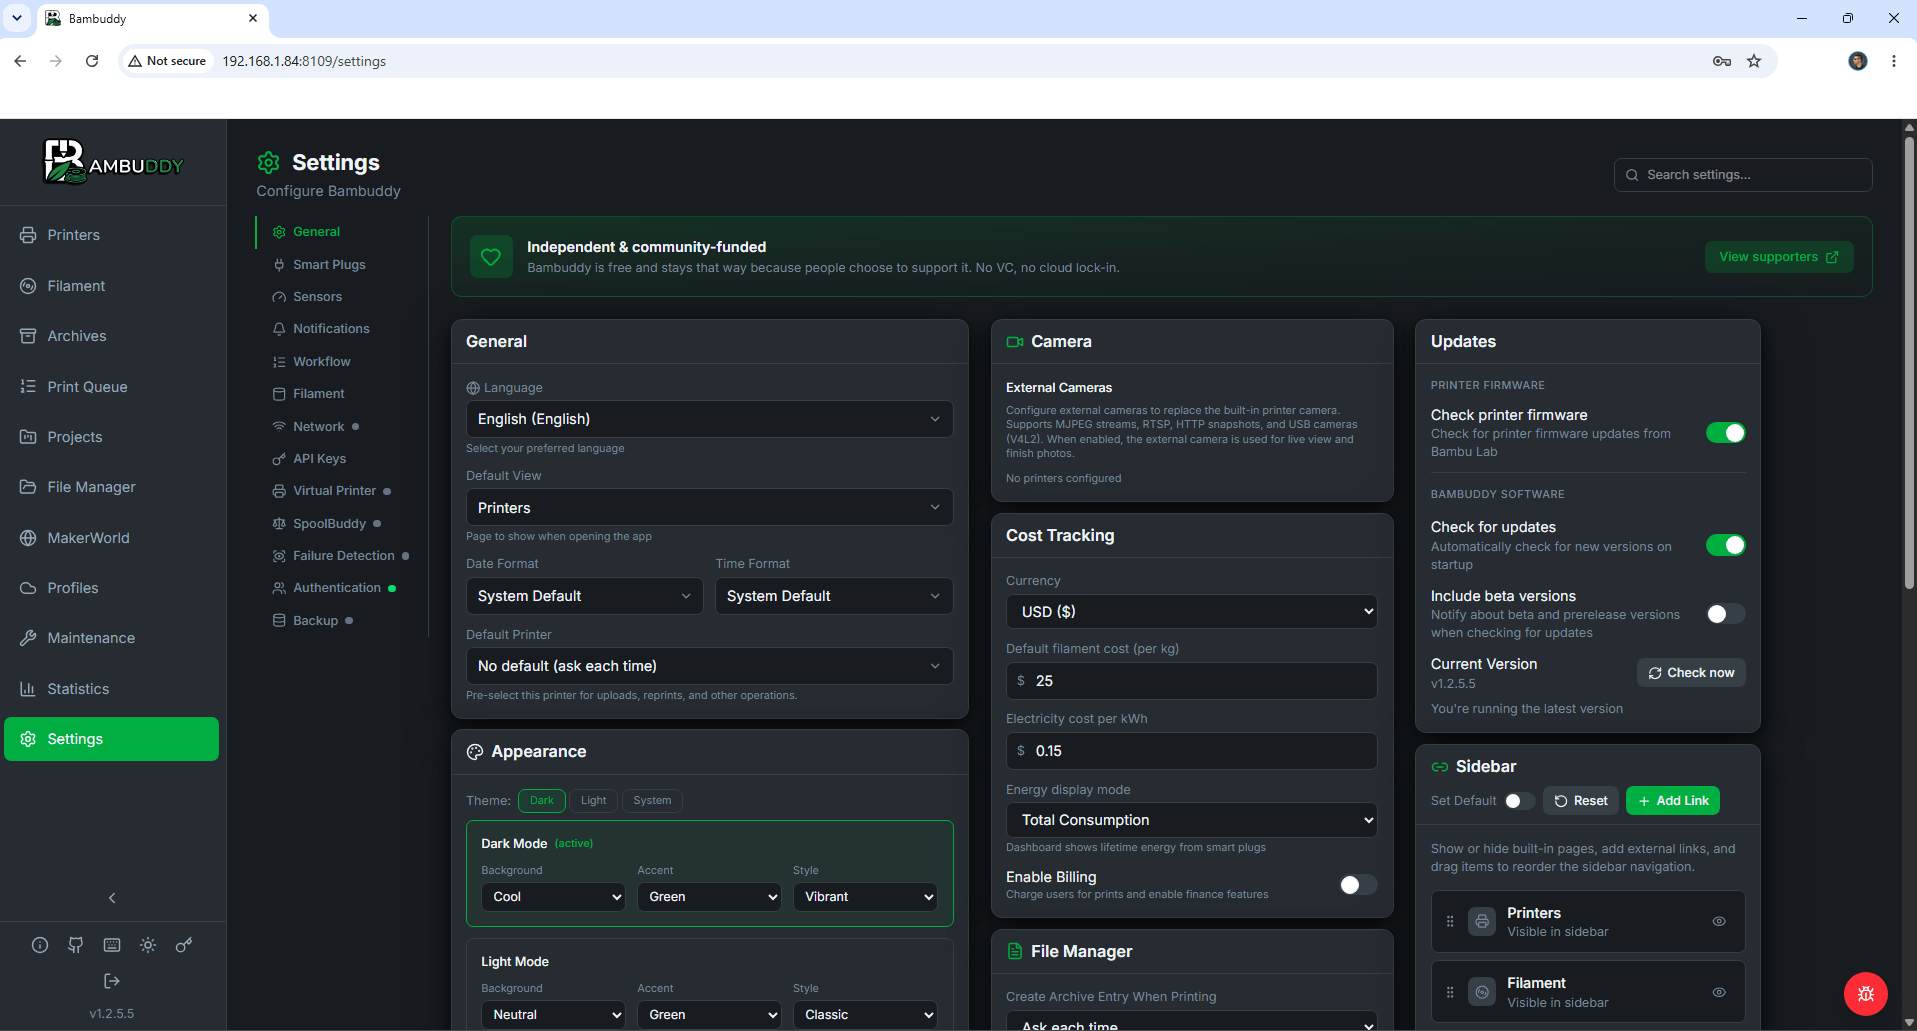
Your Bambuddy Settings page at a glance!
Enjoy Bambuddy on your Asustor NAS!
This post was updated on Sunday / October 18th, 2026 at 11:50 AM