
Odoo is a suite of open source business apps that cover all your company needs: CRM, eCommerce, accounting, inventory, point of sale, project management etc. In this step by step guide I will show you how to install Odoo on your UGREEN NAS using Docker & Portainer.
STEP 1
Please Support My work by Making a Donation.
STEP 2
Install Portainer using my step by step guide. If you already have Portainer installed on your UGREEN NAS, skip this STEP. Attention: Make sure you have installed the latest Portainer version.
STEP 3
⚠️Mandatory: Enable HTTPS on your UGREEN NAS.
STEP 4
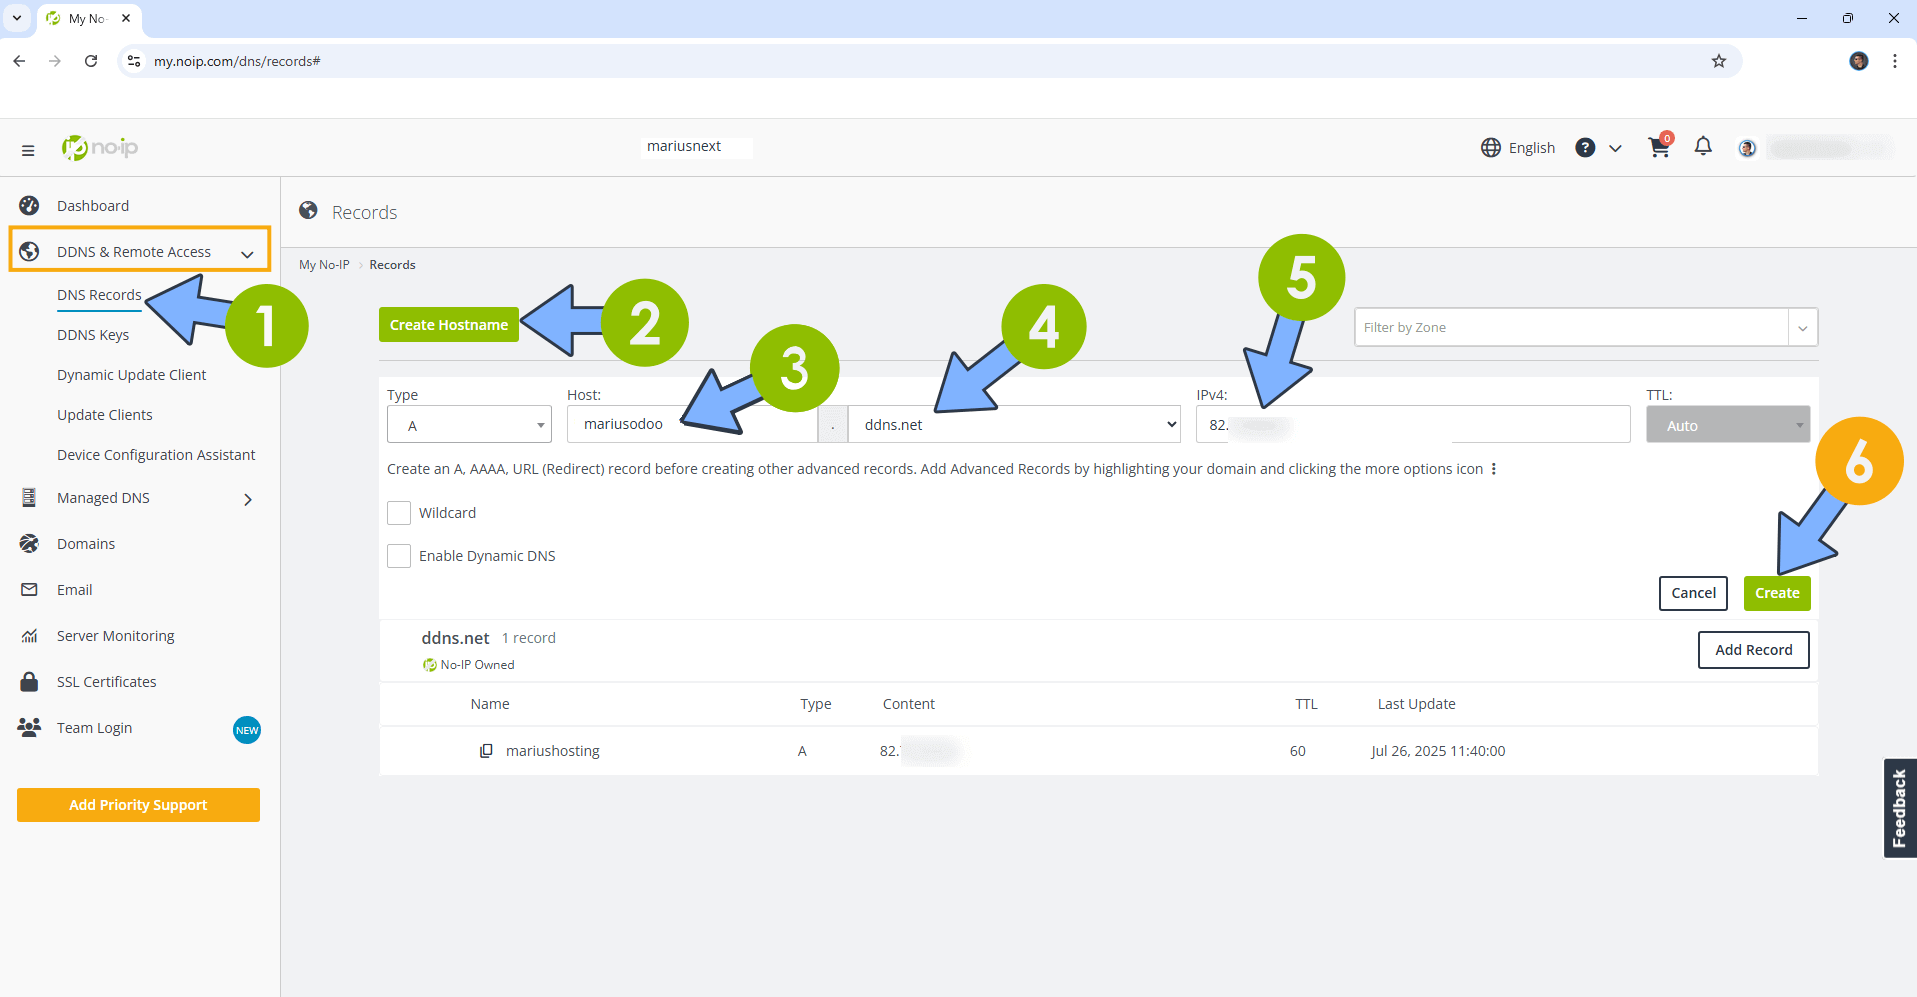
Create a new hostname on the noip website using your noip account. For example, I have created mariusodoo as Host and I use the free ddns.net domain. In the IP Address area, type in your own IPV4 IP address from your ISP, then click Create. Follow the instructions in the image below.
STEP 5
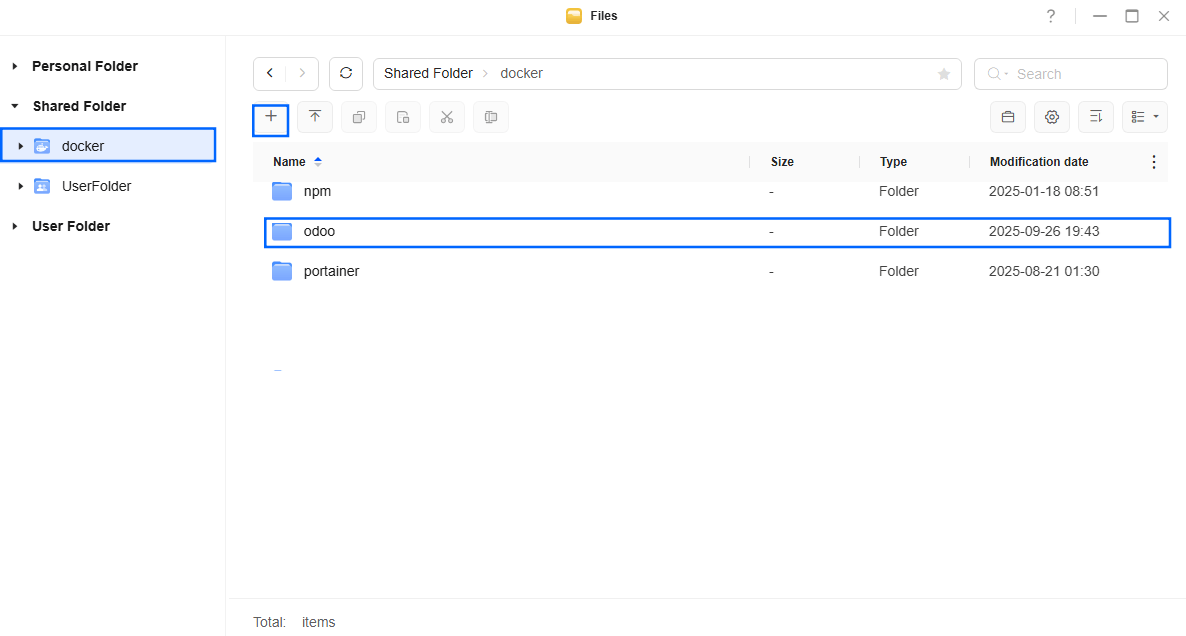
Go to Files and open the docker folder. Inside the docker folder, create one new folder and name it odoo. Follow the instructions in the image below.
Note: Be careful to enter only lowercase, not uppercase letters.
STEP 6
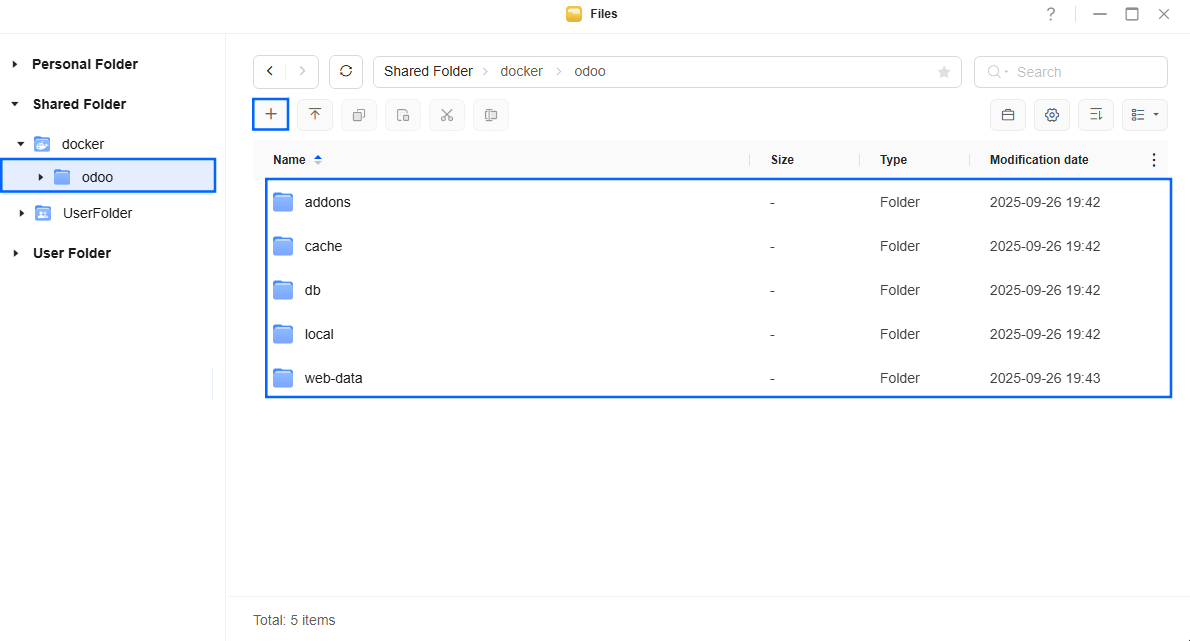
Now create five new folders inside the odoo folder that you have previously created at STEP 5 and name them addons, cache, db, local, web-data. Follow the instructions in the image below.
Note: Be careful to enter only lowercase, not uppercase letters.
STEP 7
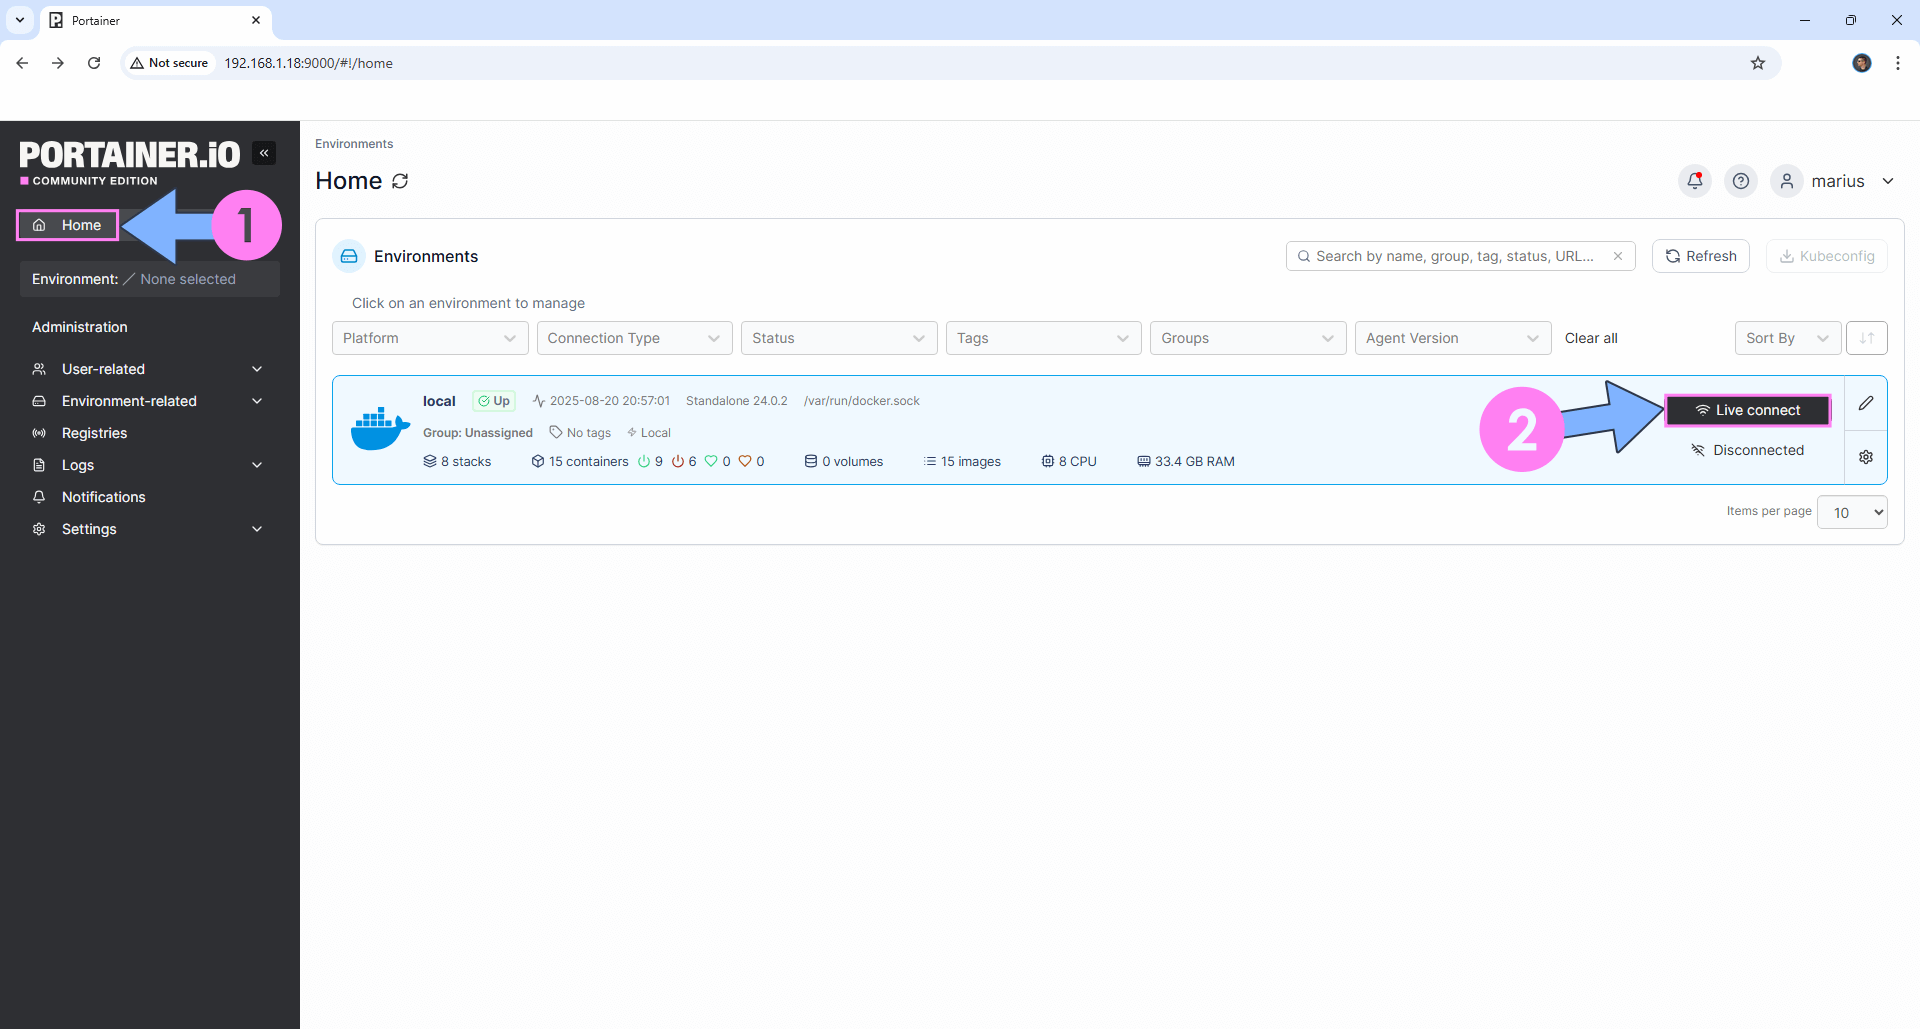
Log into Portainer using your username and password. On the left sidebar in Portainer, click on Home then Live connect. Follow the instructions in the image below.
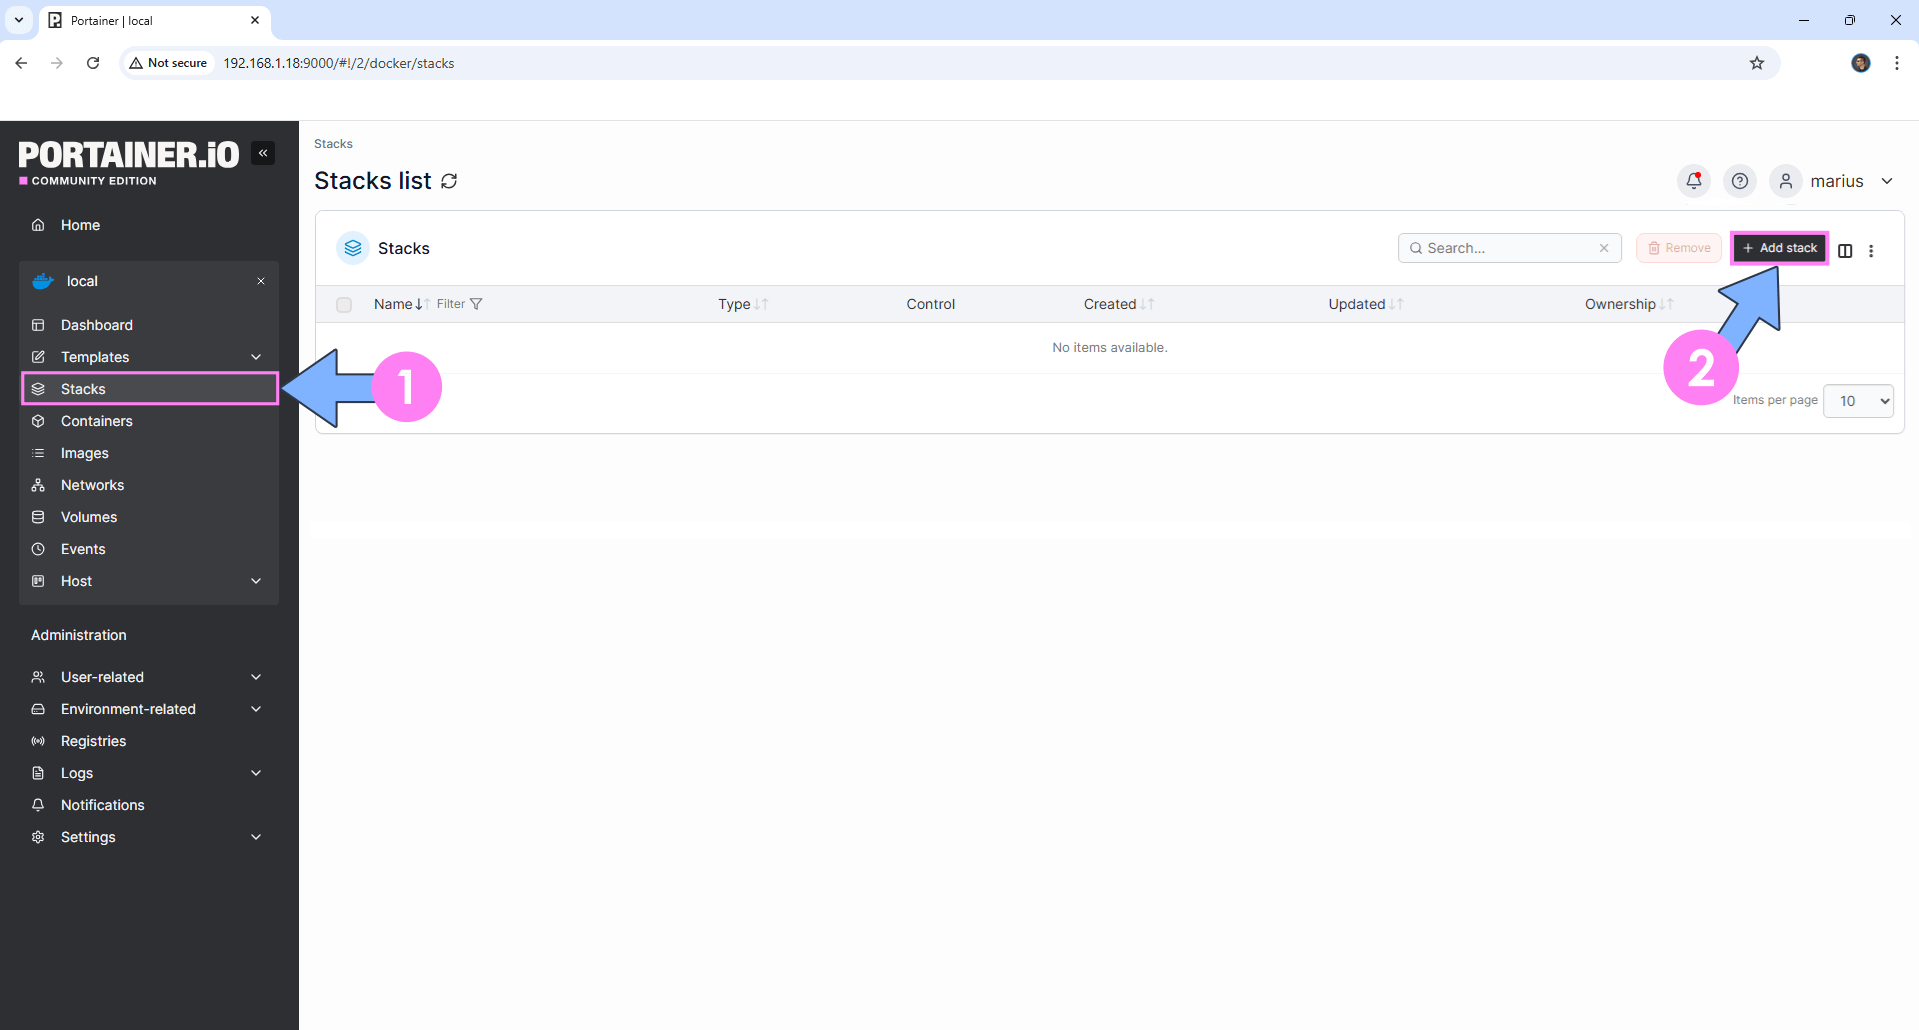
On the left sidebar in Portainer, click on Stacks then + Add stack. Follow the instructions in the image below.
STEP 8
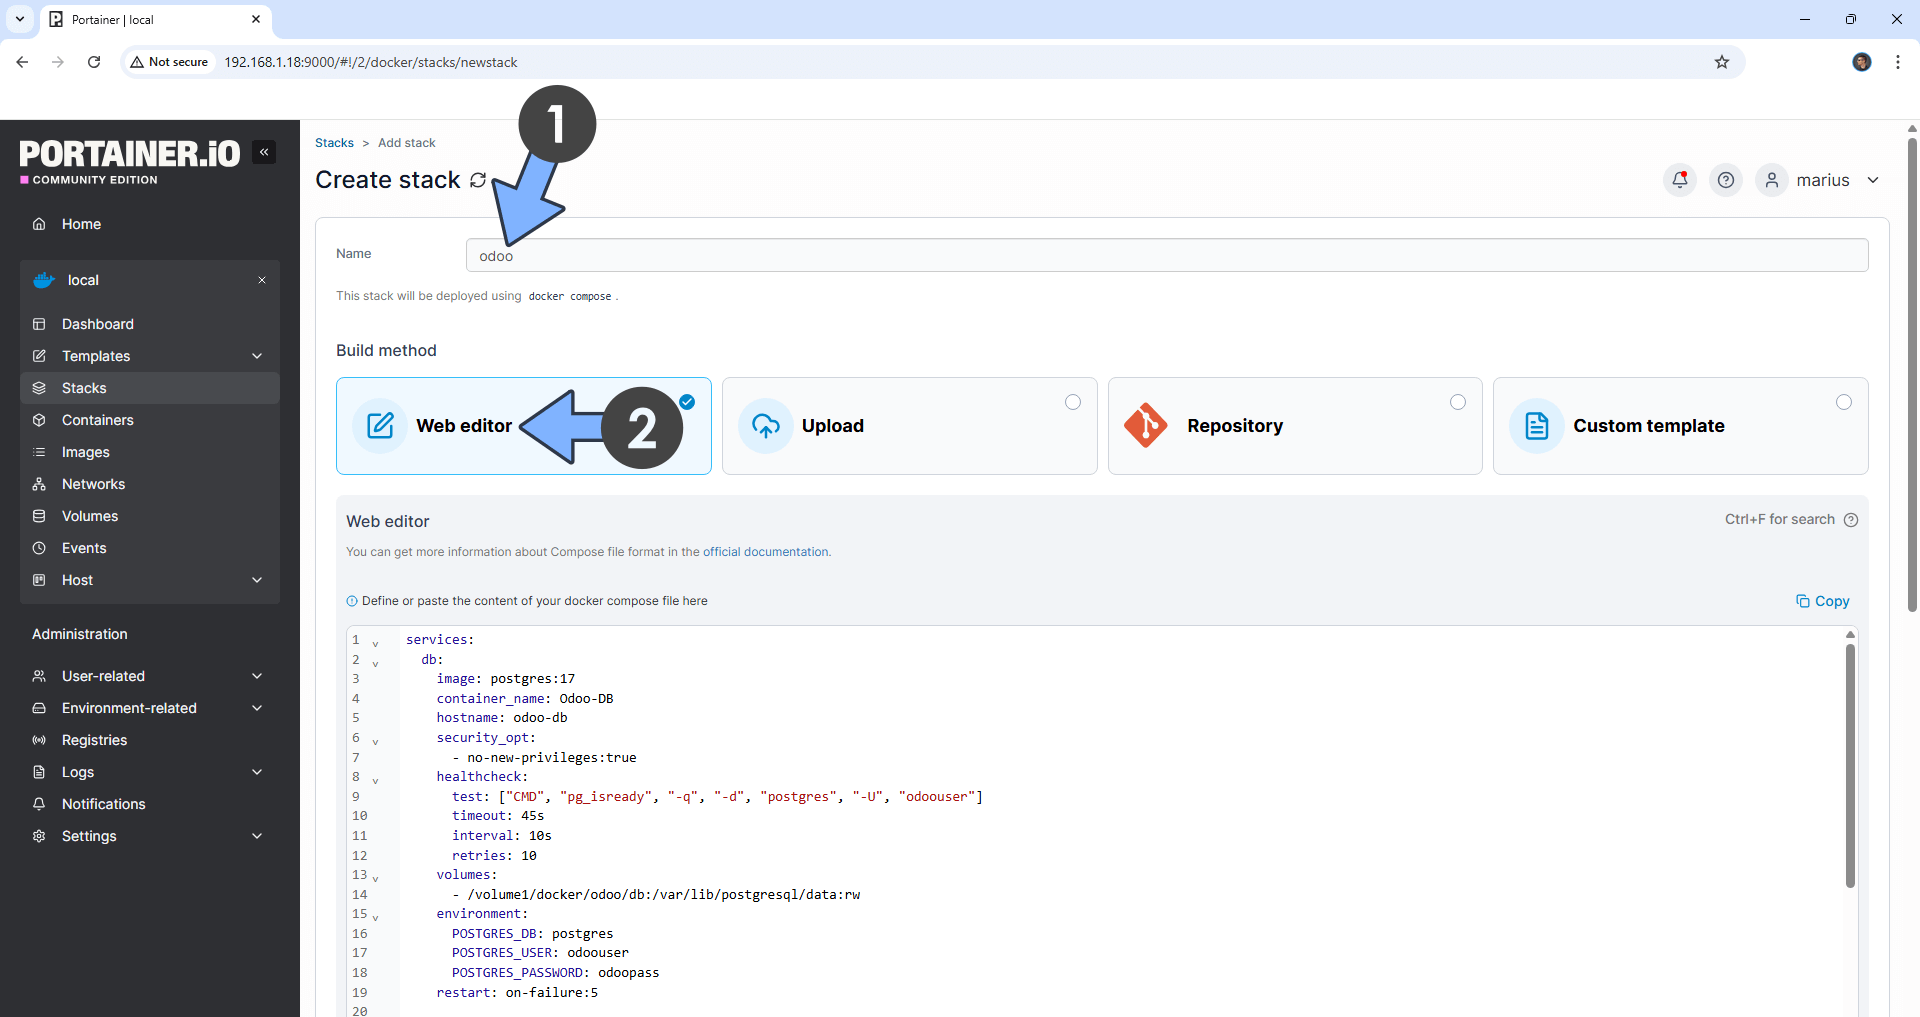
In the Name field type in odoo. Follow the instructions in the image below.
services:
  db:
    image: postgres:17
    container_name: Odoo-DB
    hostname: odoo-db
    security_opt:
      - no-new-privileges:true
    healthcheck:
      test: ["CMD", "pg_isready", "-q", "-d", "postgres", "-U", "odoouser"]
      timeout: 45s
      interval: 10s
      retries: 10
    volumes:
      - /volume1/docker/odoo/db:/var/lib/postgresql/data:rw
    environment:
      POSTGRES_DB: postgres
      POSTGRES_USER: odoouser
      POSTGRES_PASSWORD: odoopass
    restart: on-failure:5

  odoo:
    image: odoo:19
    container_name: Odoo
    hostname: odoo
    security_opt:
      - no-new-privileges:true
    user: 0:0
    healthcheck:
      test: curl -f http://localhost:8069/ || exit 1
    ports:
      - 8069:8069
    volumes:
      - /volume1/docker/odoo/web-data:/var/lib/odoo:rw
      - /volume1/docker/odoo/addons:/mnt/extra-addons:rw
      - /volume1/docker/odoo/cache:/.cache/pip:rw
      - /volume1/docker/odoo/local:/.local:rw
#     - /volume1/docker/odoo/config:/etc/odoo:rw
      # only need for special configurations
      # https://github.com/odoo/docker/blob/master/19.0/odoo.conf
    environment:
      HOST: odoo-db
      PORT: 5432
      USER: odoouser
      PASSWORD: odoopass
    depends_on:
      db:
        condition: service_healthy
    restart: on-failure:5
STEP 9
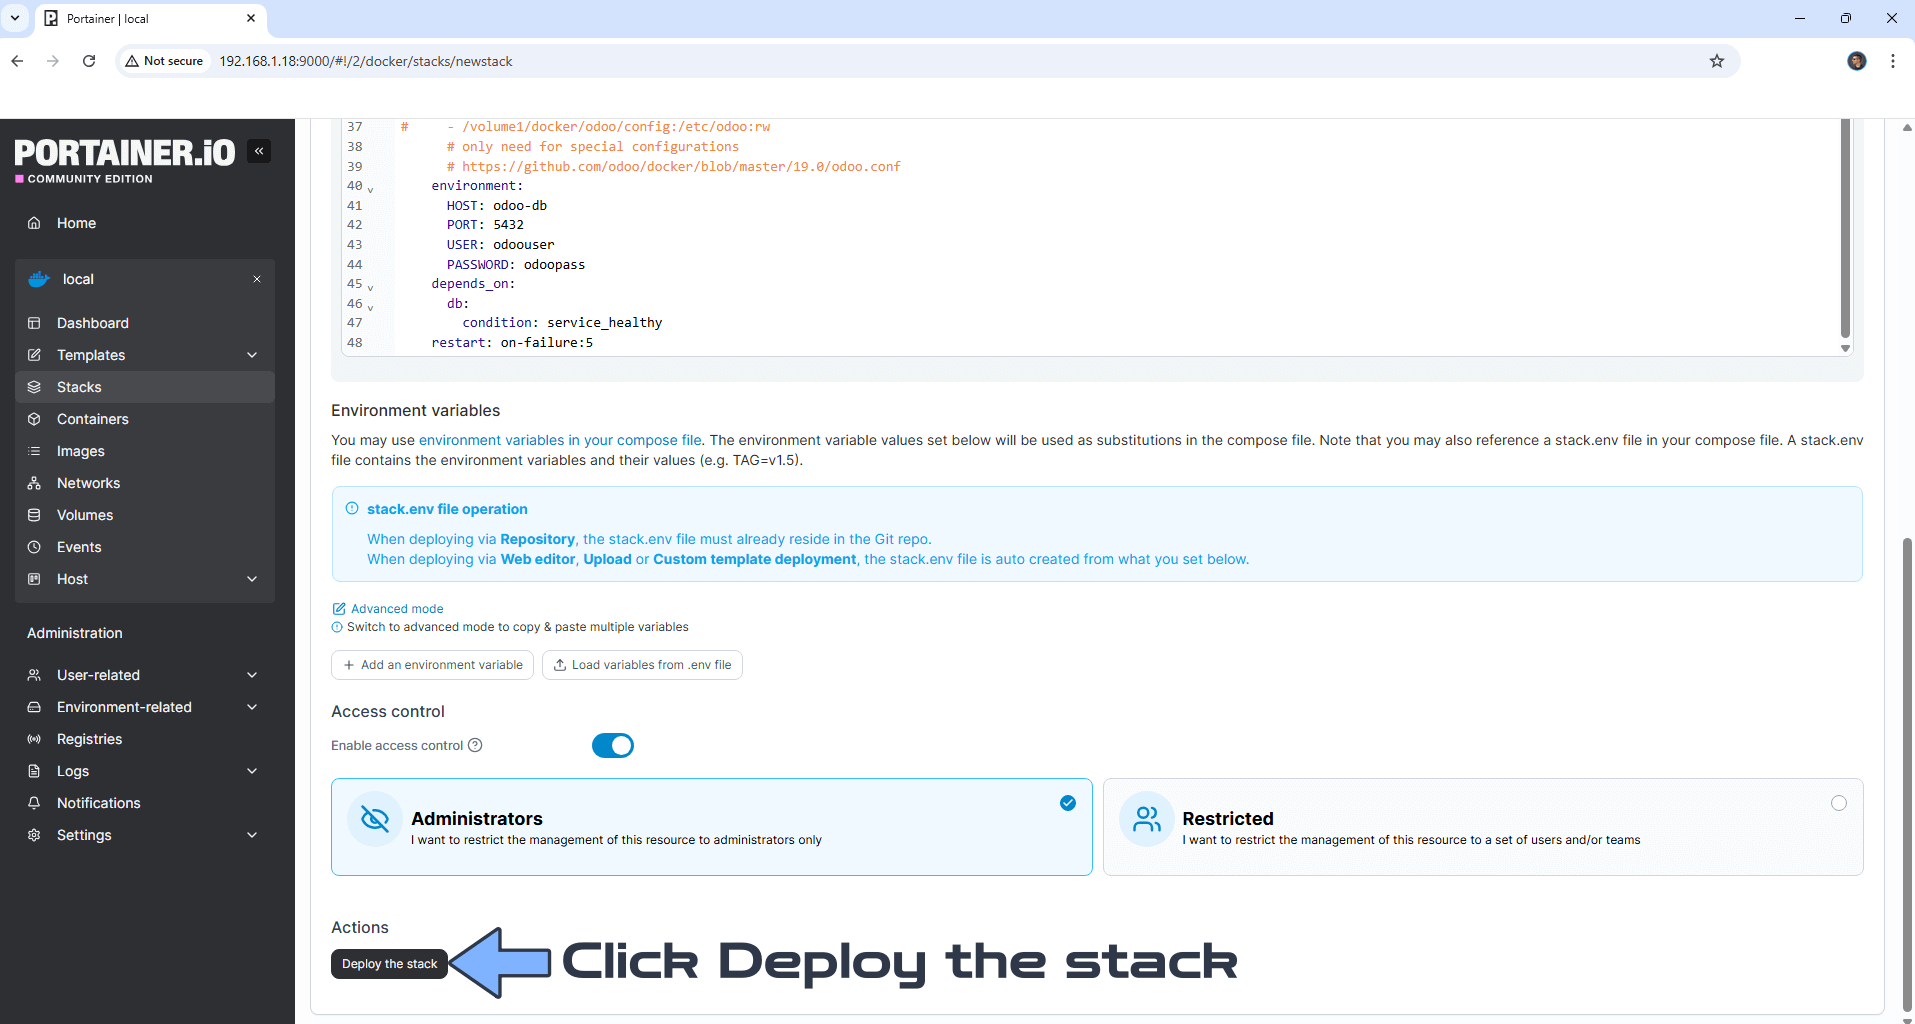
Scroll down on the page until you see a button called Deploy the stack. Click on it. Follow the instructions in the image below. The installation process can take up to a few minutes. It will depend on your Internet speed connection.
STEP 10
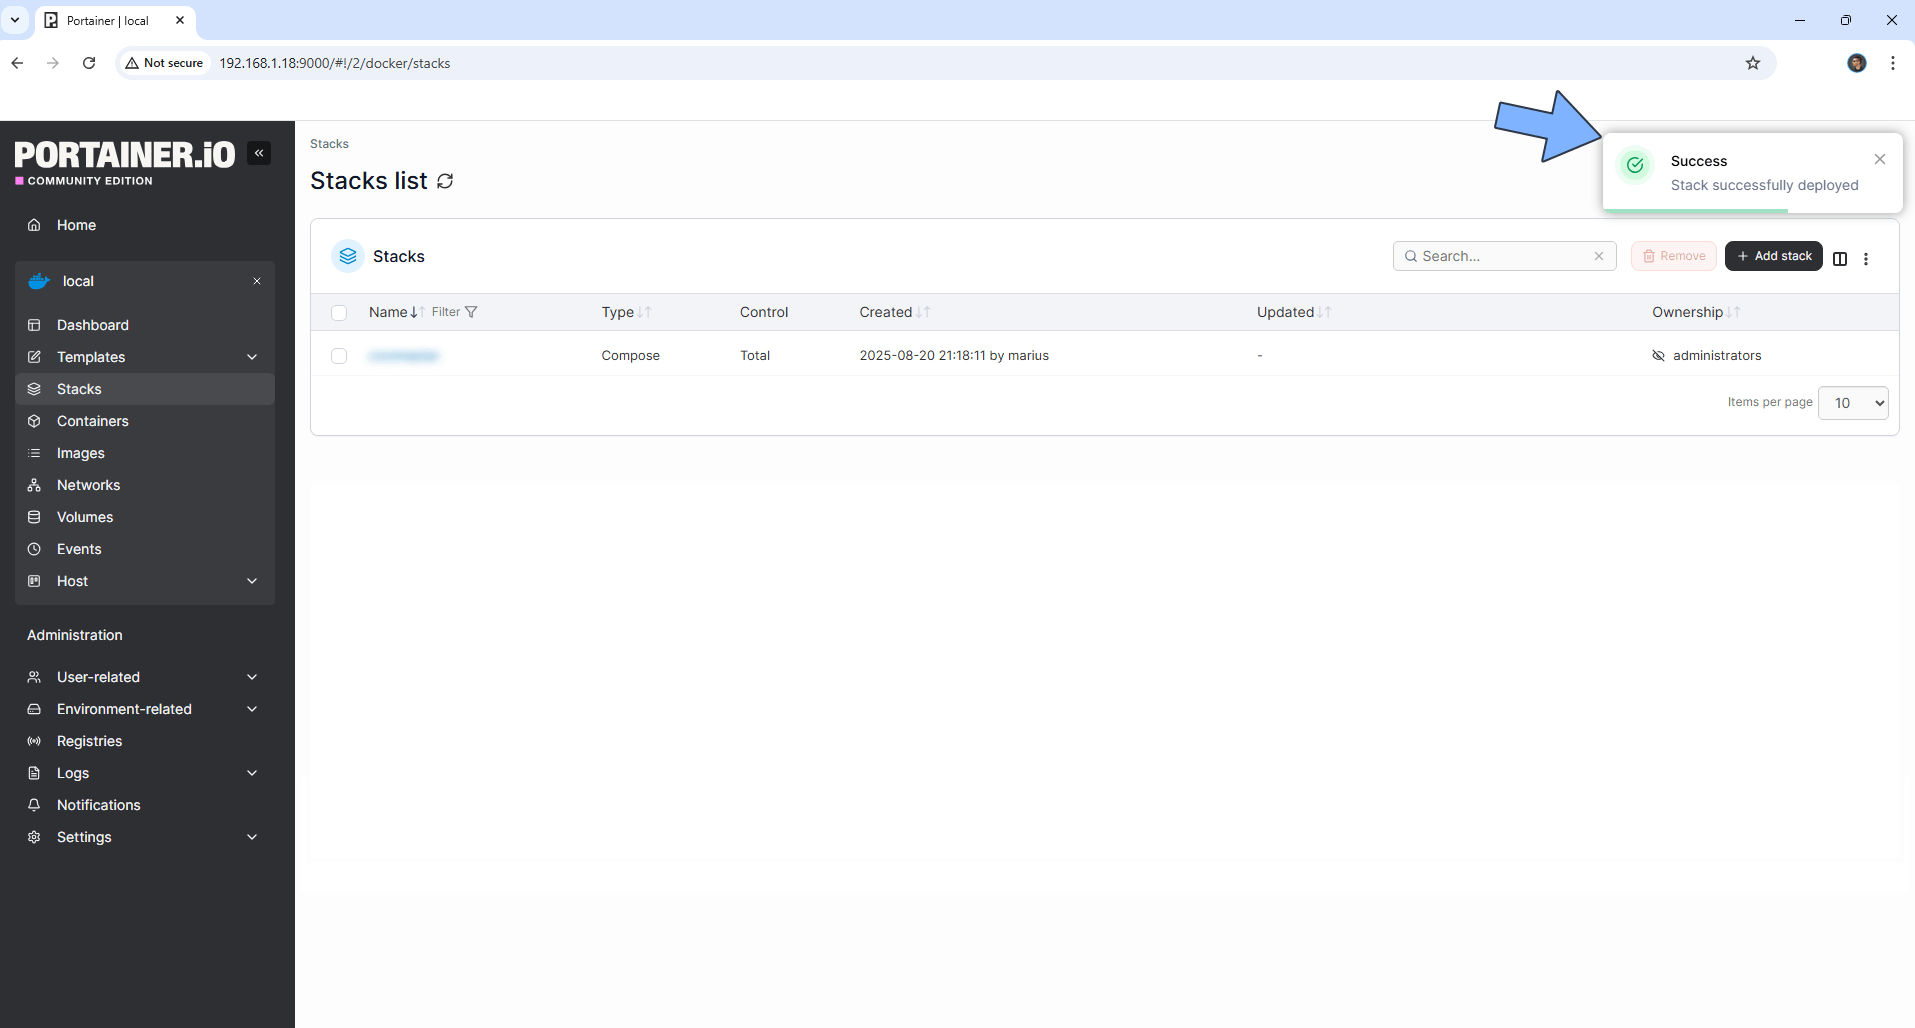
If everything goes right, you will see this message at the top right of your screen: “Success Stack successfully deployed“.
STEP 11
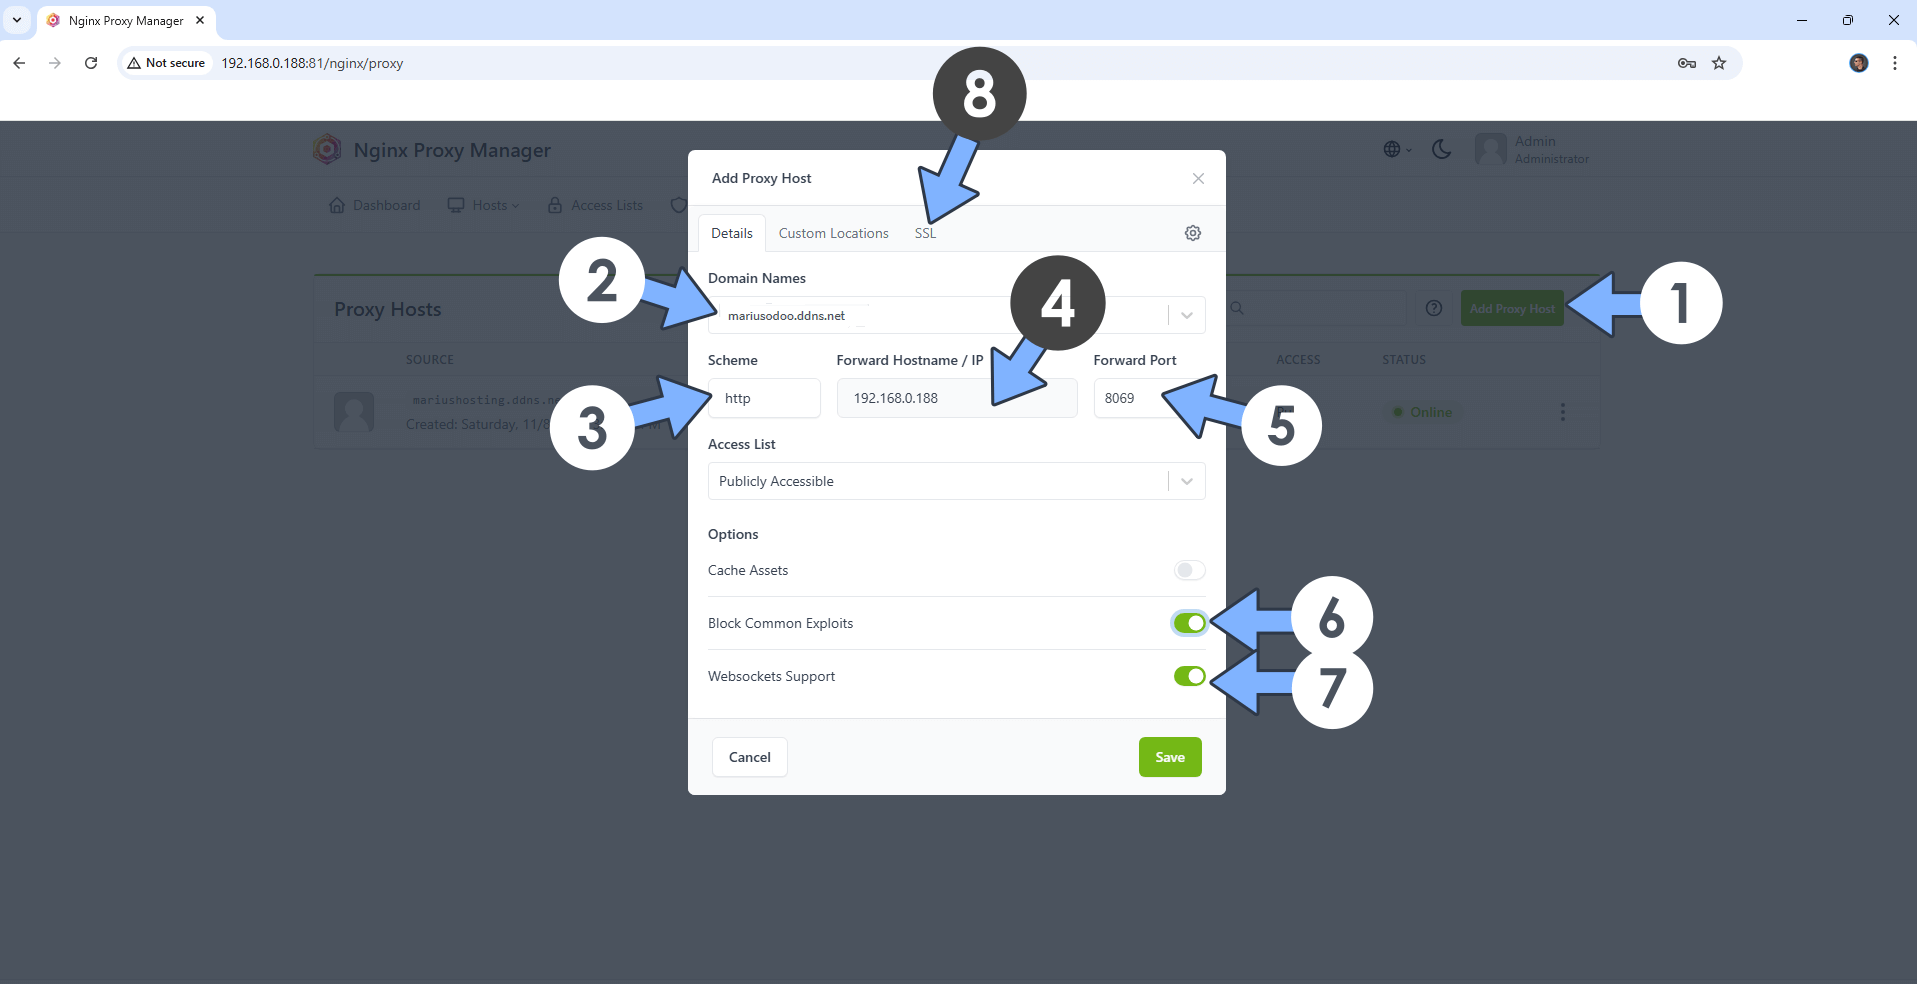
Open your Nginx Proxy Manager container that you have previously installed at STEP 3. Click Add Proxy Host. A new pop up window will open. Add the following details:
Domain Names: Type in your own noip domain name that you have previously created at STEP 4.
Scheme: http
Forward Hostname/IP: Type in the local NAS IP of your UGREEN NAS.
Forward Port: Type in the Odoo local Port that is 8069
Check Block Common Exploits
Check Websockets Support
Click the SSL tab. Follow the instructions in the image below.
STEP 12
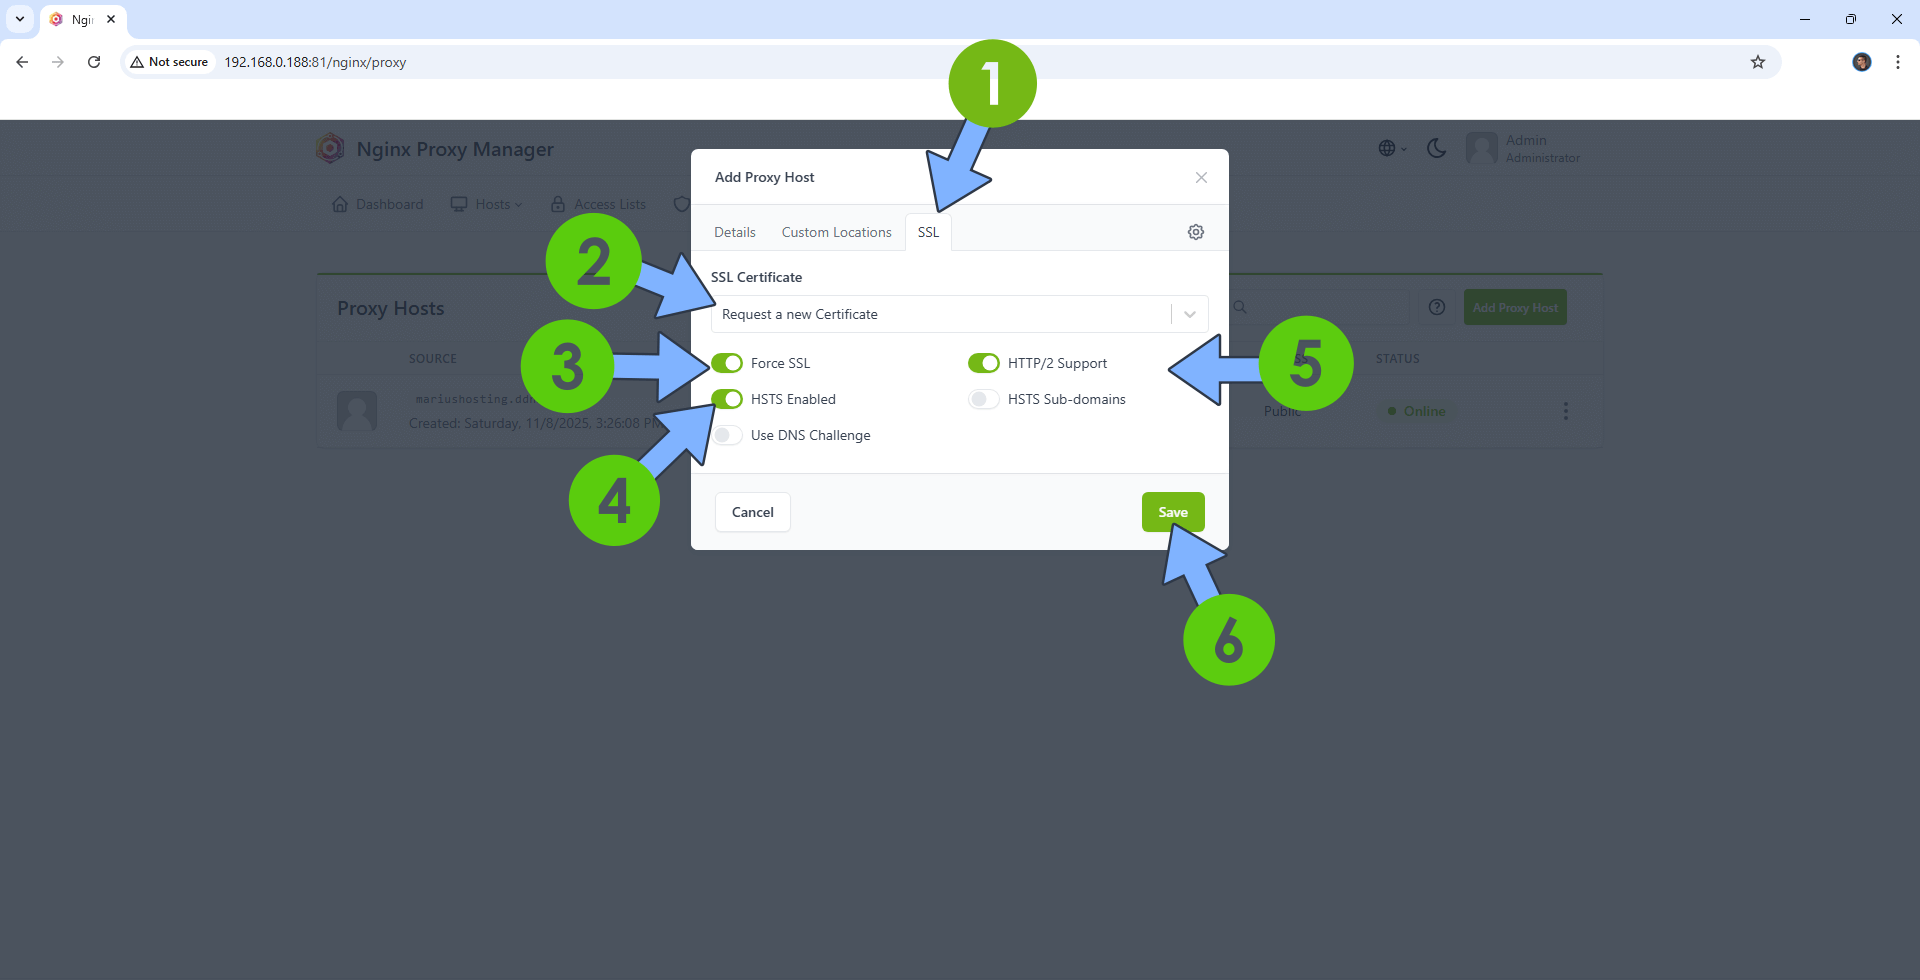
After you click the SSL tab, add the following details:
SSL Certificate: Request a new SSL Certificate
Check: Force SSL
Check: HSTS Enabled
Check: HTTP/2 Support
Click Save. Follow the instructions in the image below.
STEP 13
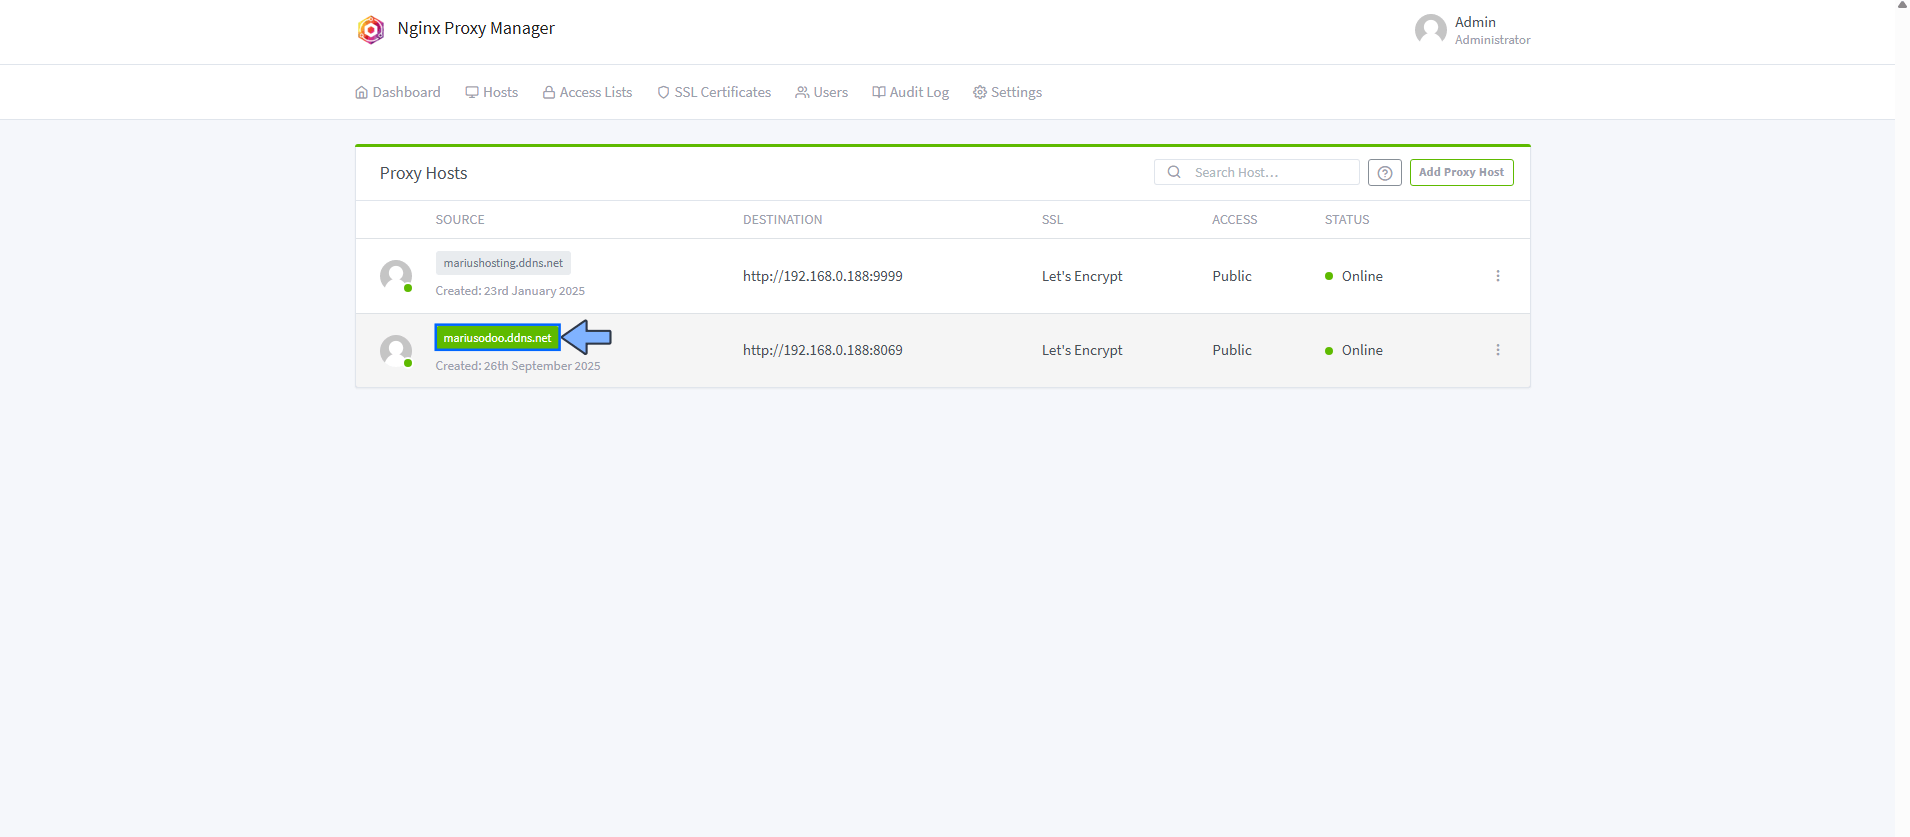
In the Proxy Hosts area, if everything goes right, you will see that your odoo hostname has been generated. Click on it. Follow the instructions in the image below.
STEP 14
🟢Please Support My work by Making a Donation. Almost 99,9% of the people that install something using my guides forget to support my work, or just ignore STEP 1. I’ve been very honest about this aspect of my work since the beginning: I don’t run any ADS, I don’t require subscriptions, paid or otherwise, I don’t collect IPs, emails, and I don’t have any referral links from Amazon or other merchants. I also don’t have any POP-UPs or COOKIES. I have repeatedly been told over the years how much I have contributed to the community. It’s something I love doing and have been honest about my passion since the beginning. But I also Need The Community to Support me Back to be able to continue doing this work.
STEP 15
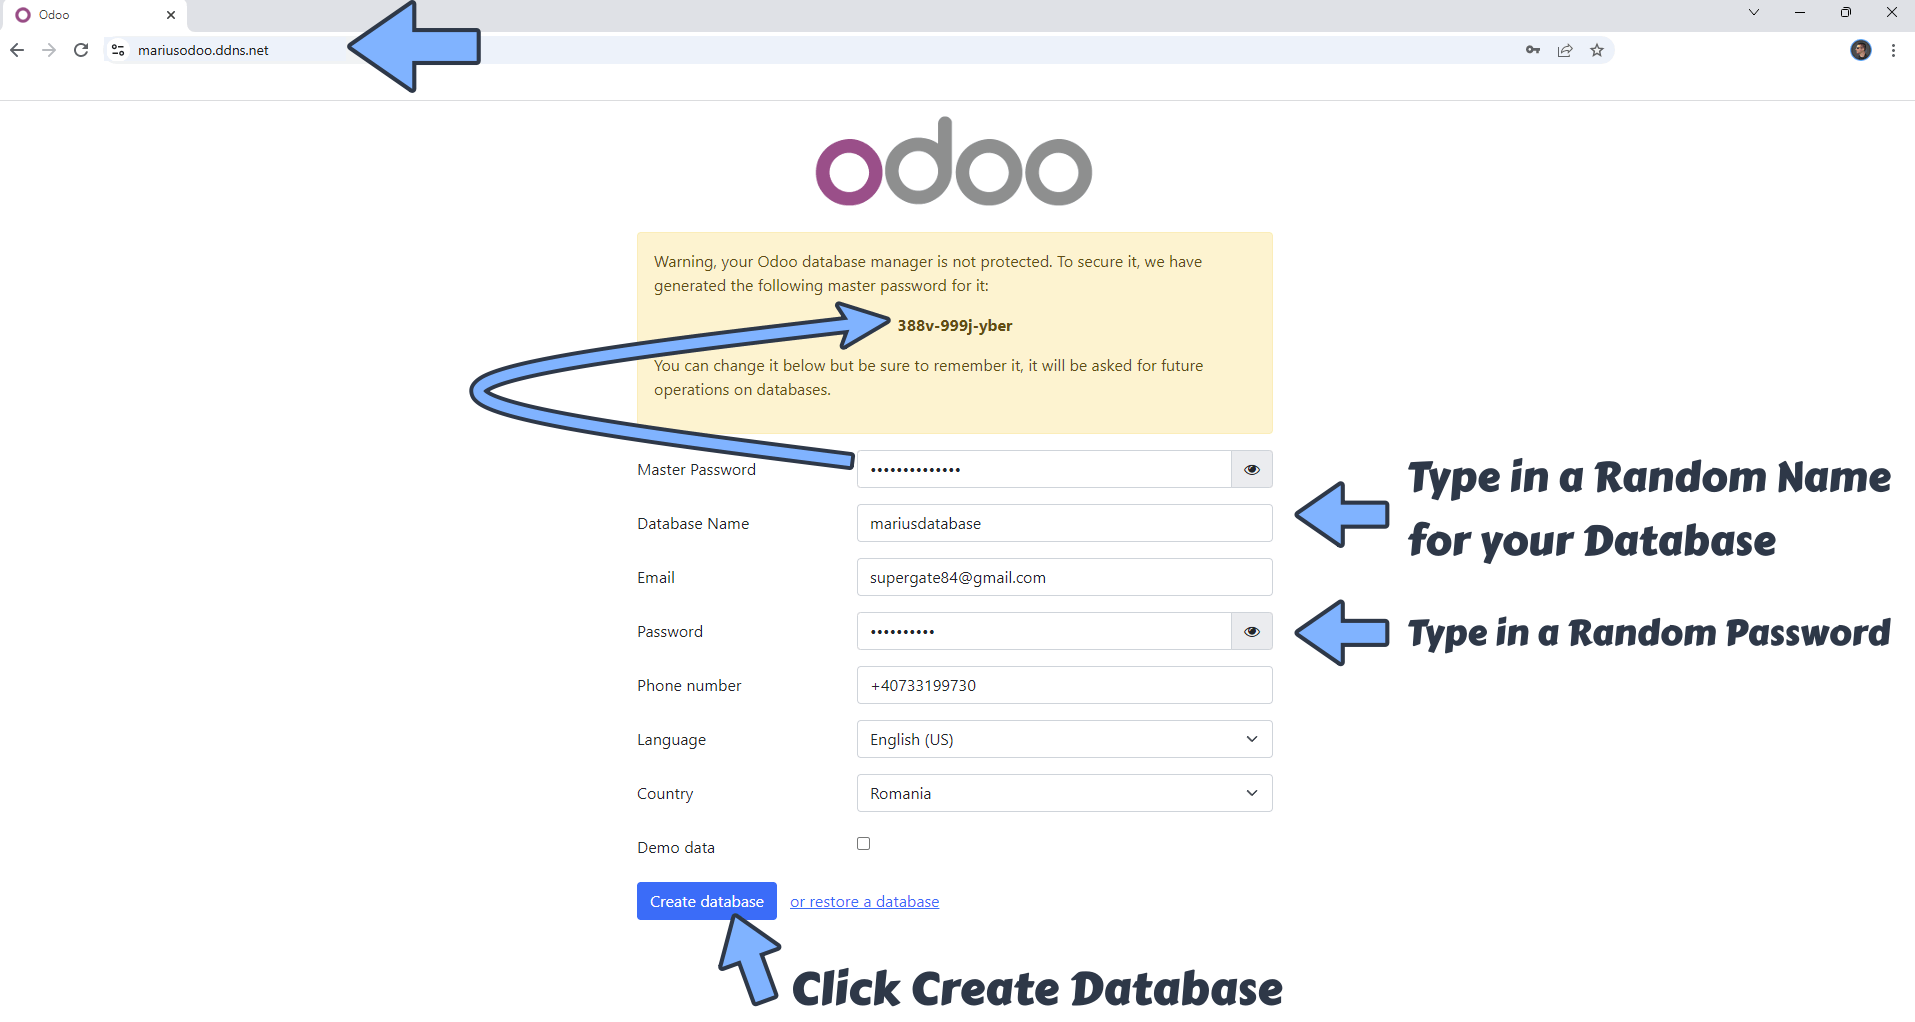
Now open your browser and type in your HTTPS/SSL certificate like this https://odoo.ddns.net In my case it’s https://mariusodoo.ddns.net then type in the following:
- Type in your automatically generated Master Password.
- Type in a random name for your database.
- Type in your Email.
- Type in a random Password.
- Type in your Phone number.
- Select your Language.
- Select your Country.
- Click Create database.
STEP 16
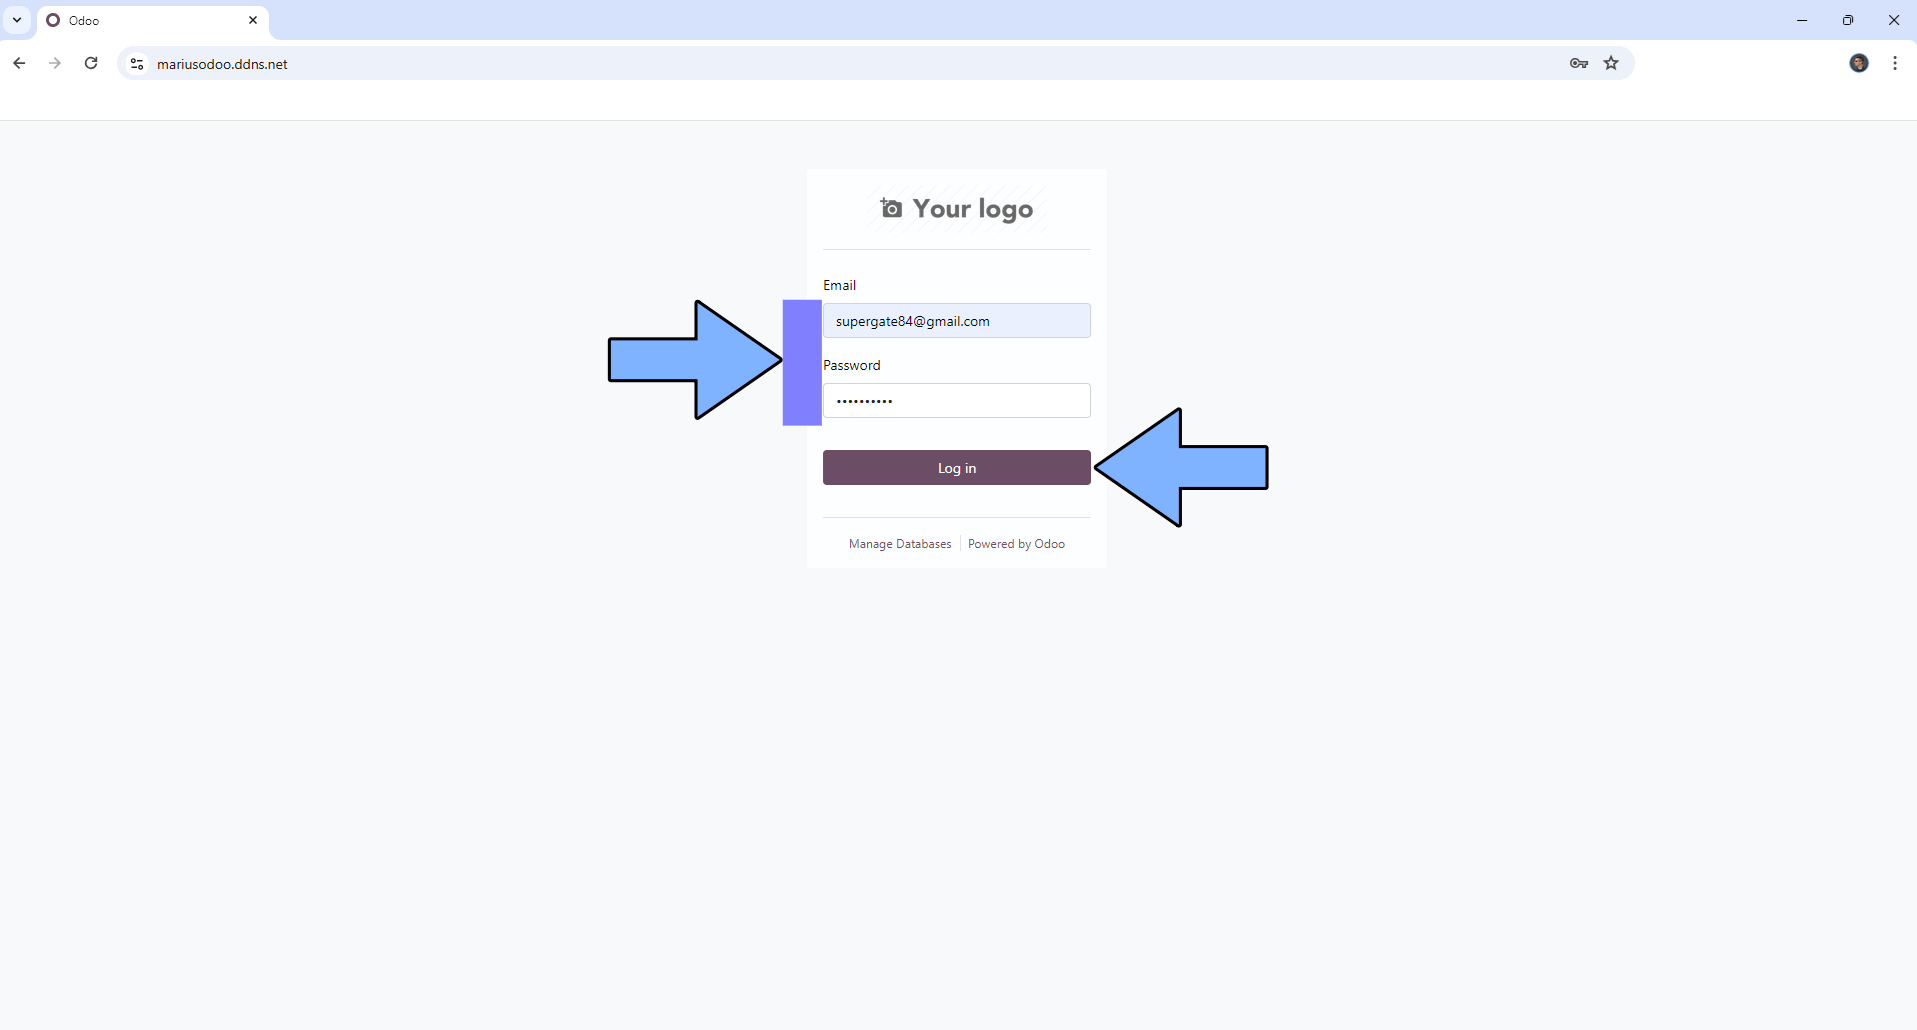
After you click Create database wait a few minutes until the database is created. After the database is created, you will be prompted to type in your own Email and Password that you have previously created at STEP 15. Click Log in. Follow the instructions in the image below.
STEP 17
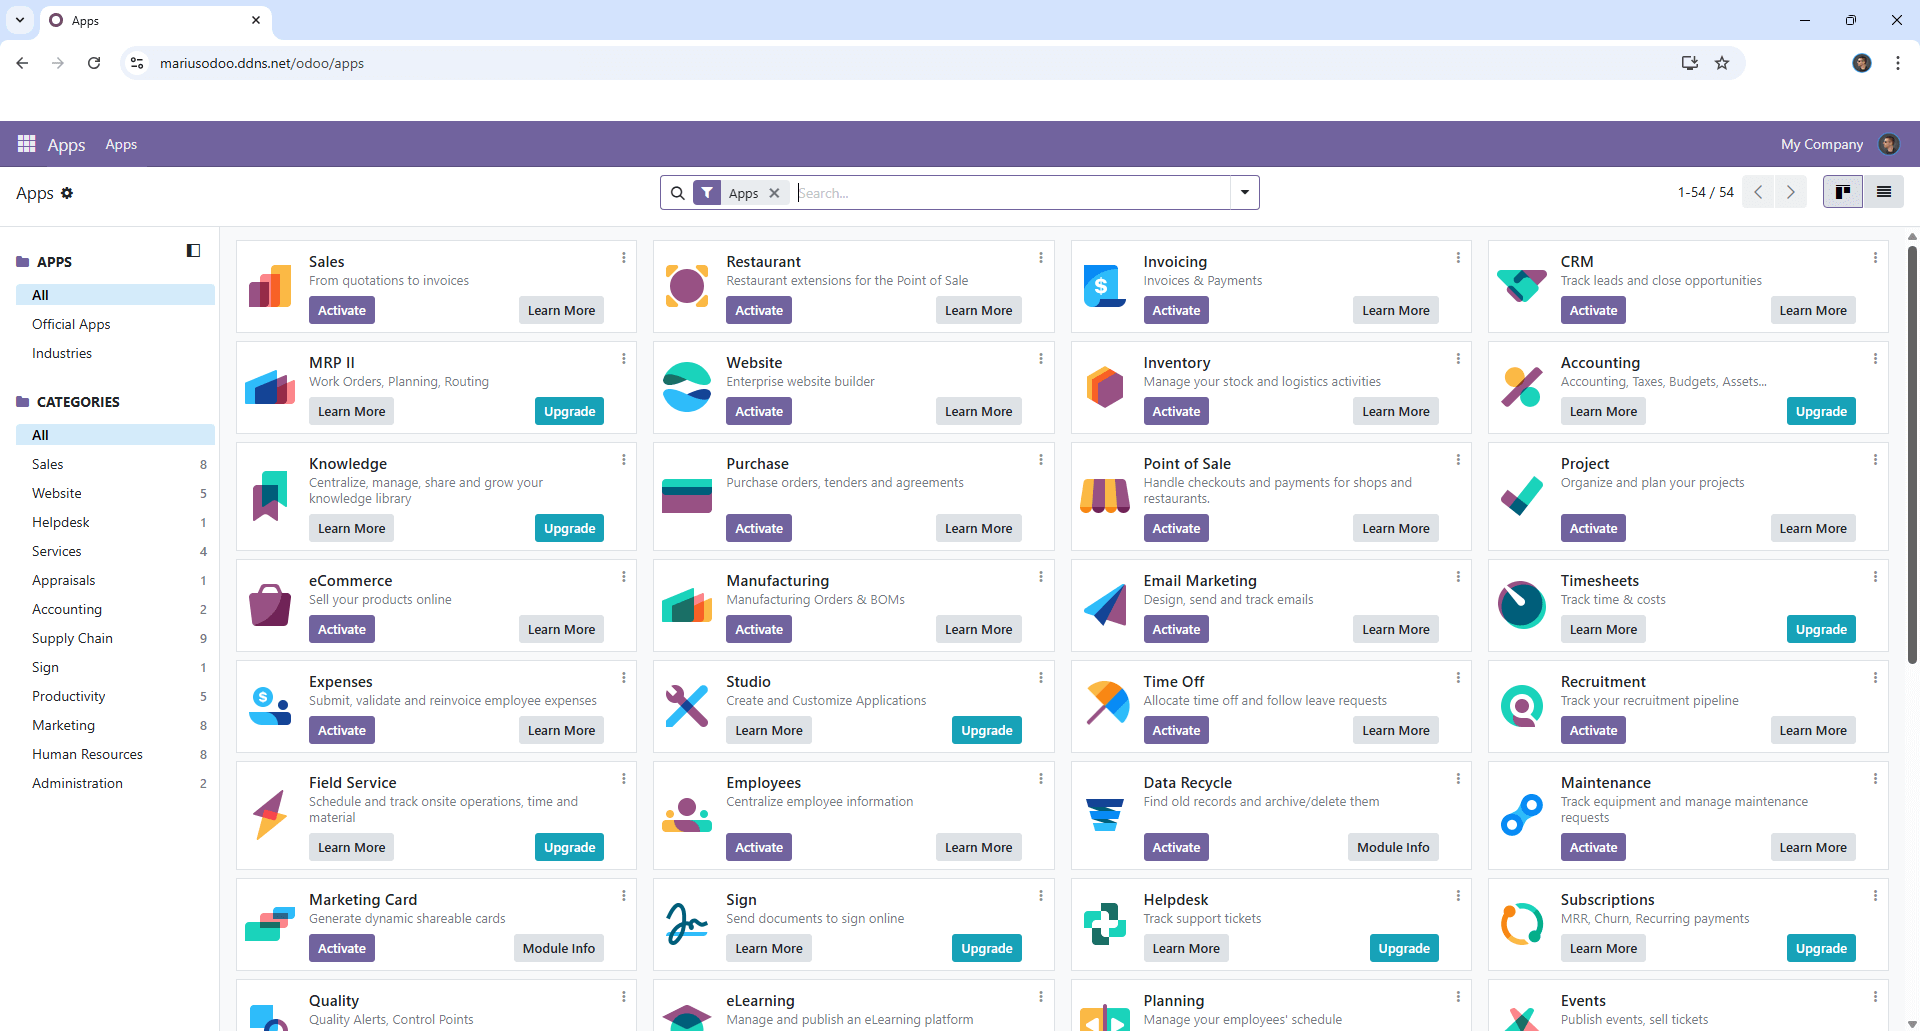
Your Odoo dashboard at a glance!
STEP 18
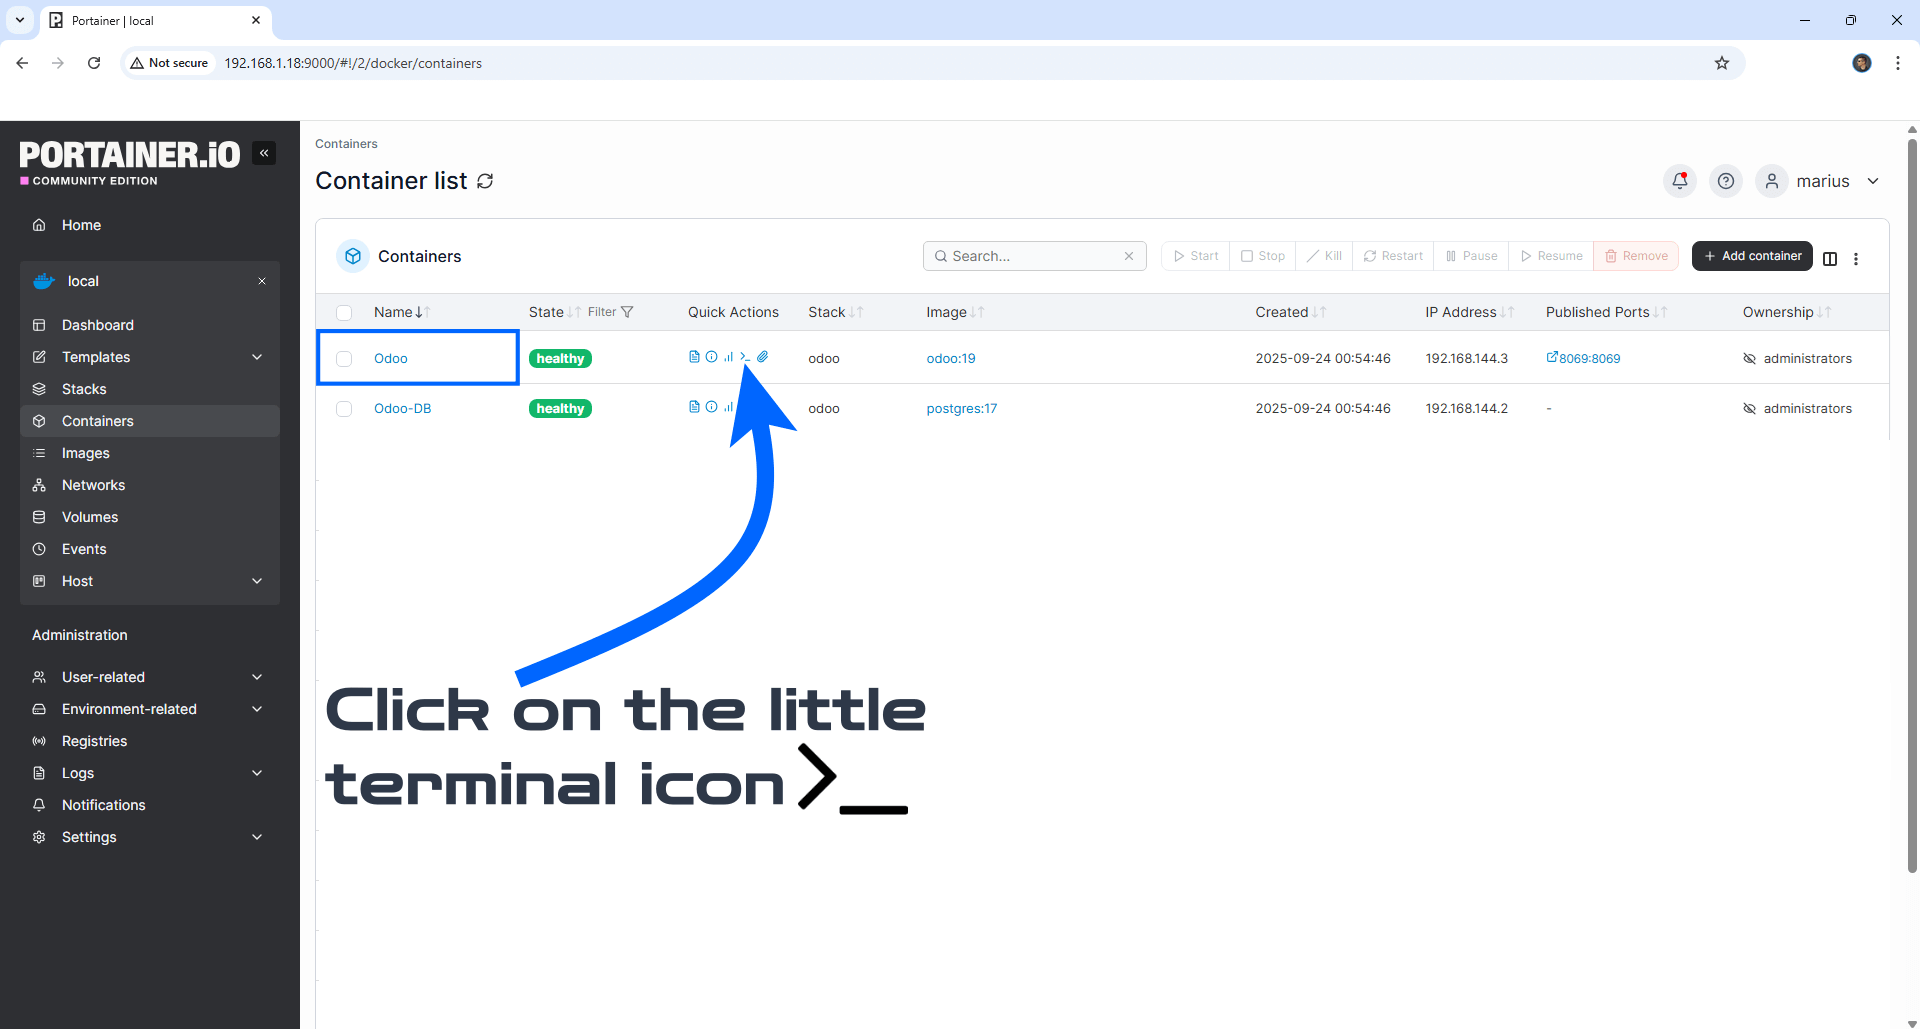
Below I will show you how to install the Python library on Odoo which is necessary for the OnlyOffice and Frepple addon. On the left sidebar in Portainer, click Containers. Identify your Odoo instance, then click on the little terminal icon. Follow the instructions in the image below.
STEP 19
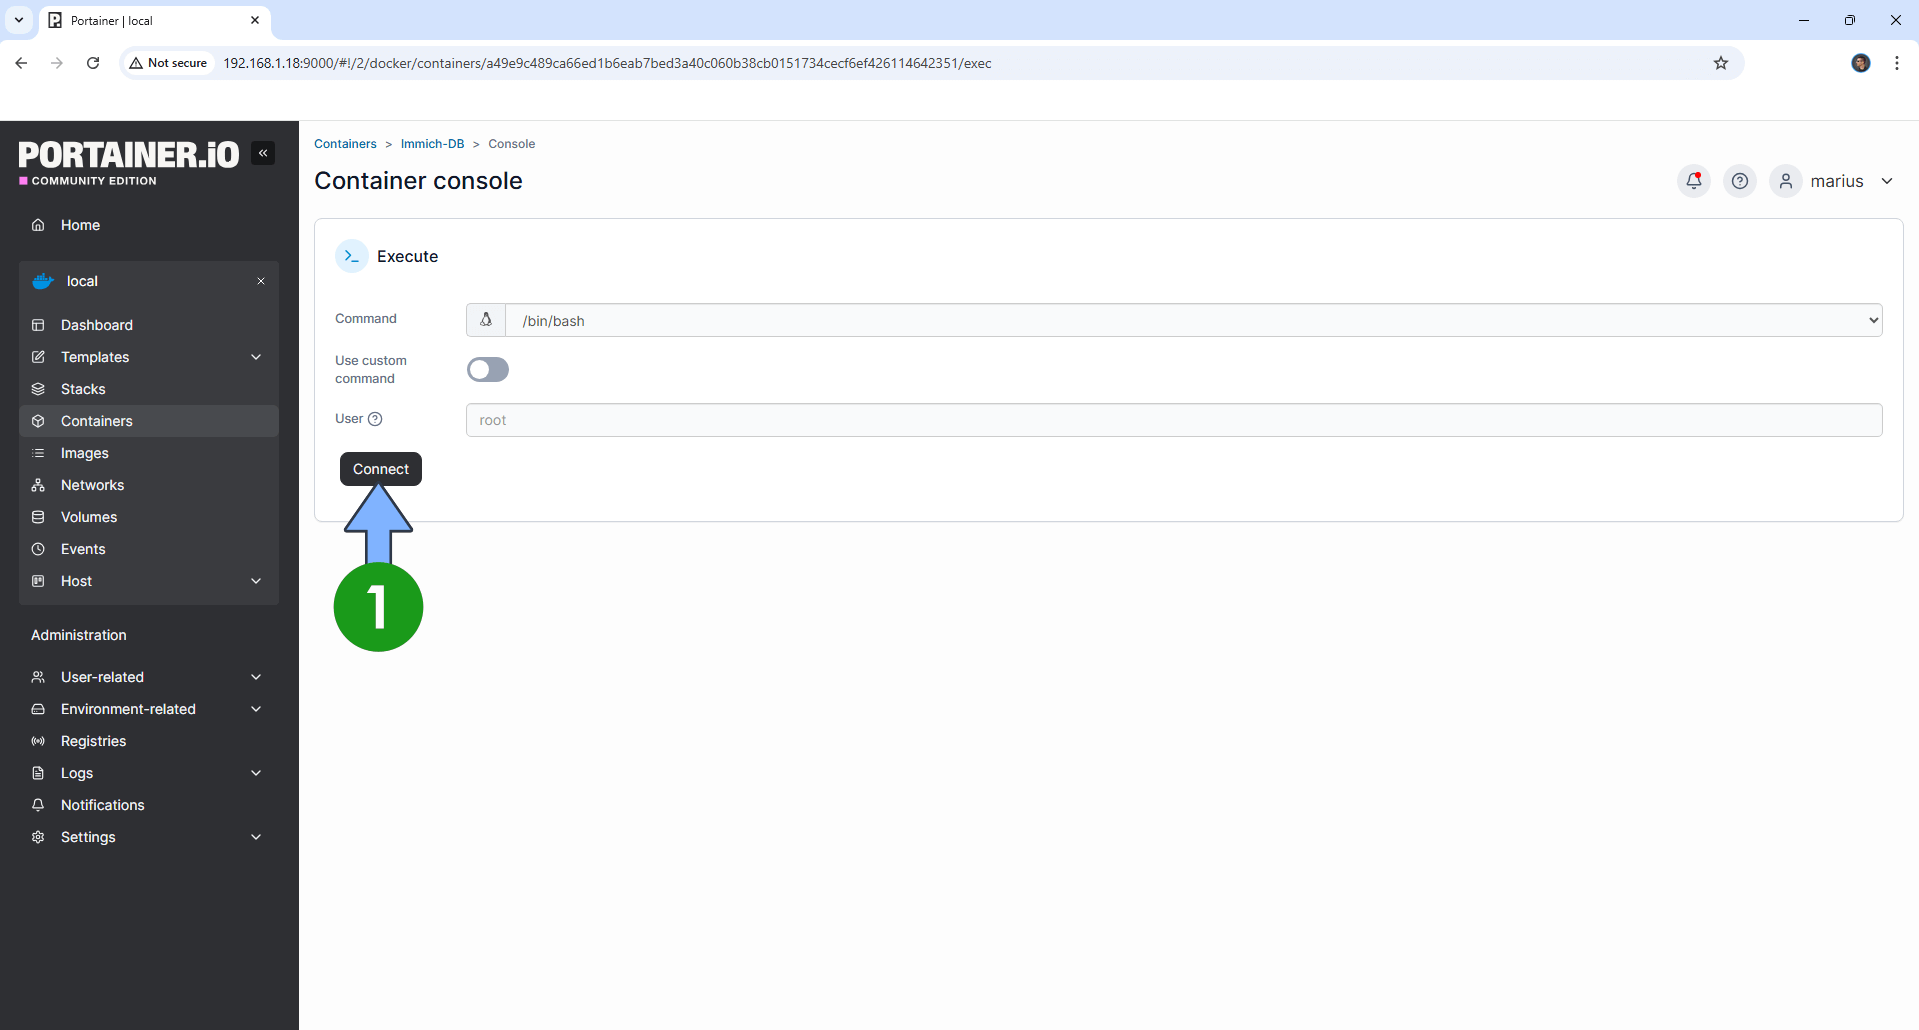
After you click on the little terminal icon at STEP 18, a new page will open. Click Connect. Follow the instructions in the image below.
STEP 20
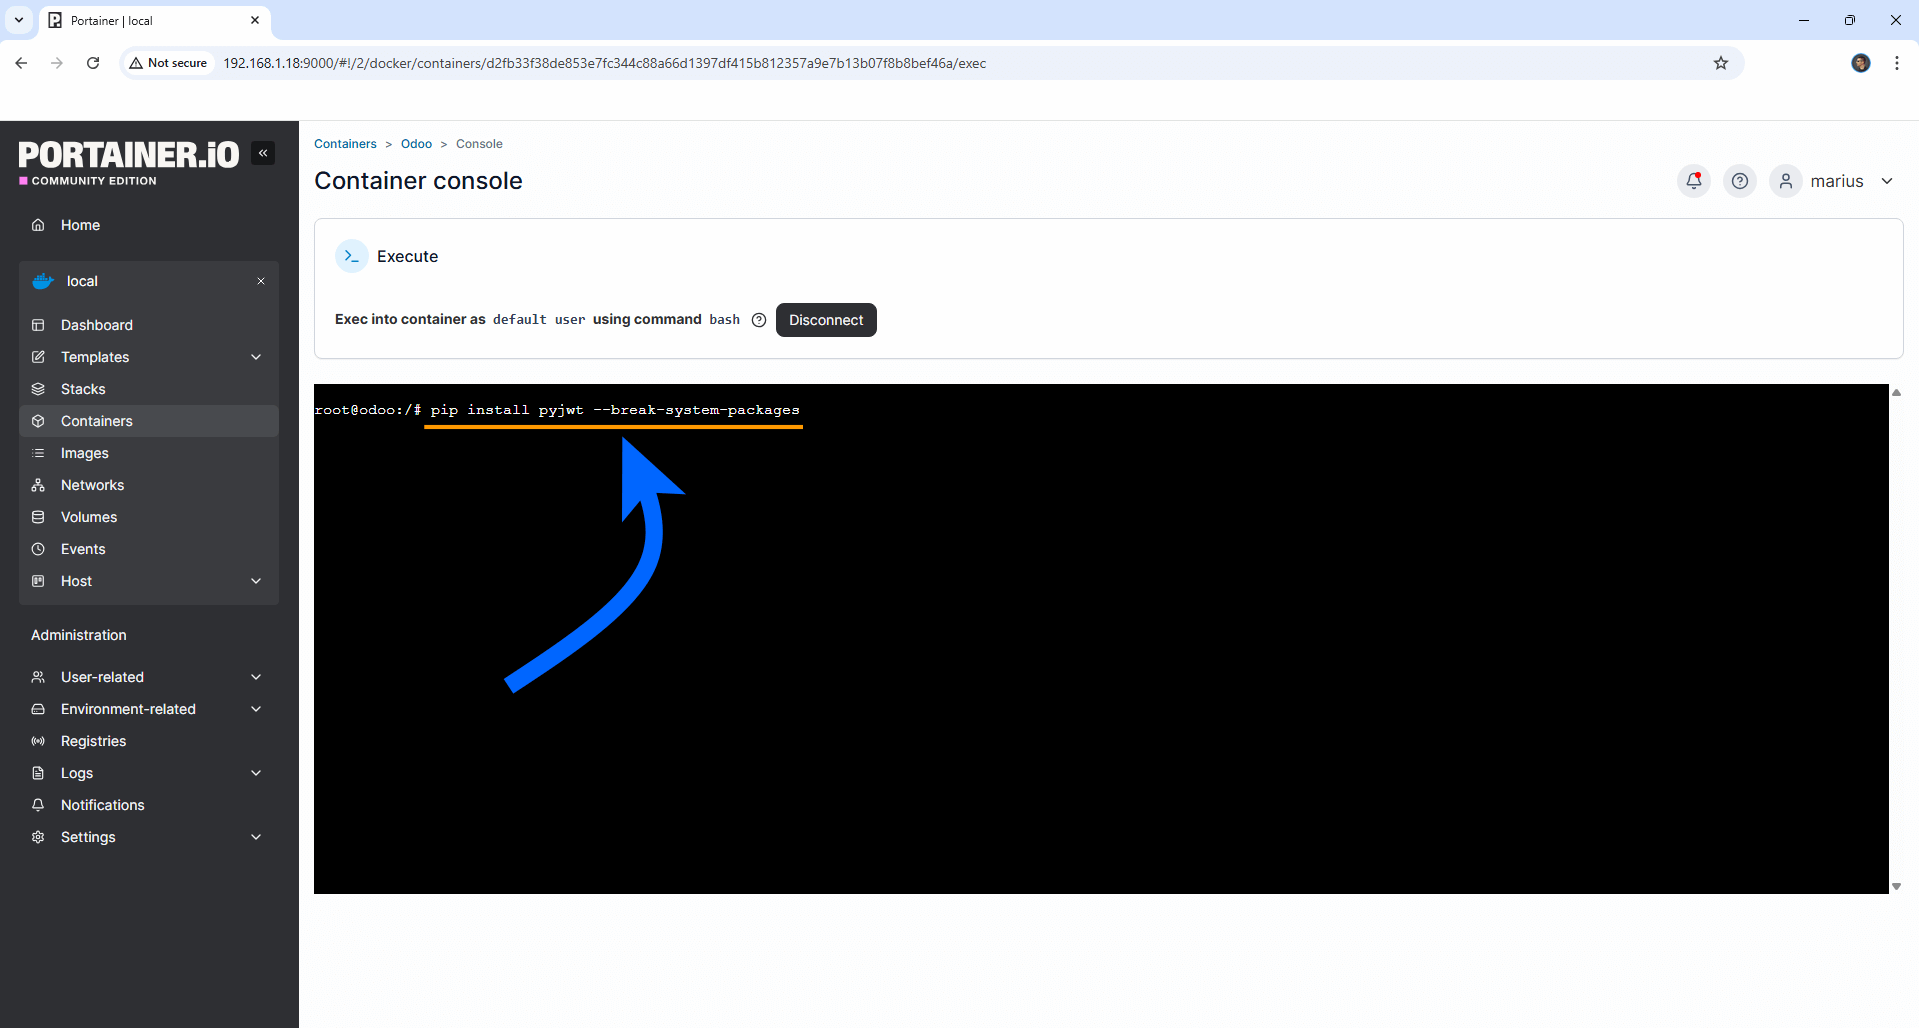
After you click Connect at STEP 19, a Console will open. Copy Paste the code below in the console.
pip install pyjwt --break-system-packages
STEP 21
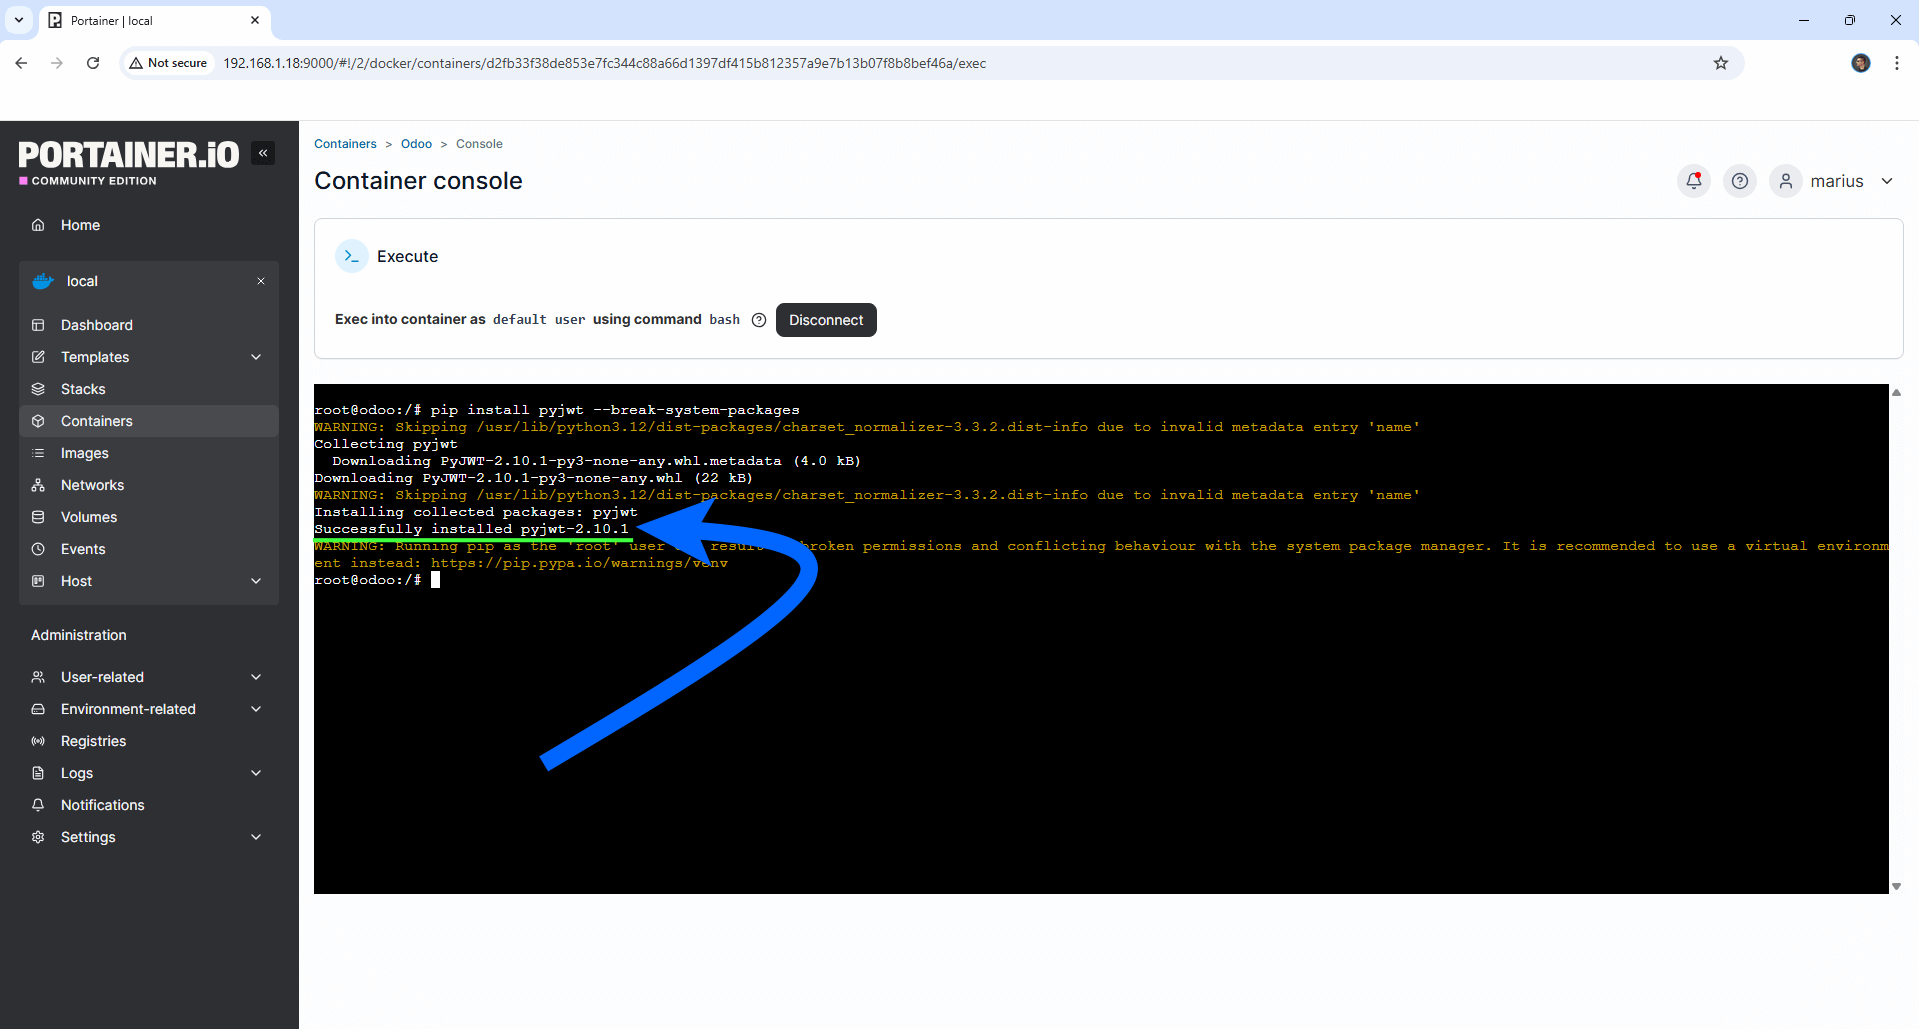
Once the code is inserted, confirm by pressing Enter on your keyboard to start the Python installation process. You will see the following message: Successfully installed pyjwt-2.10.1.
STEP 22
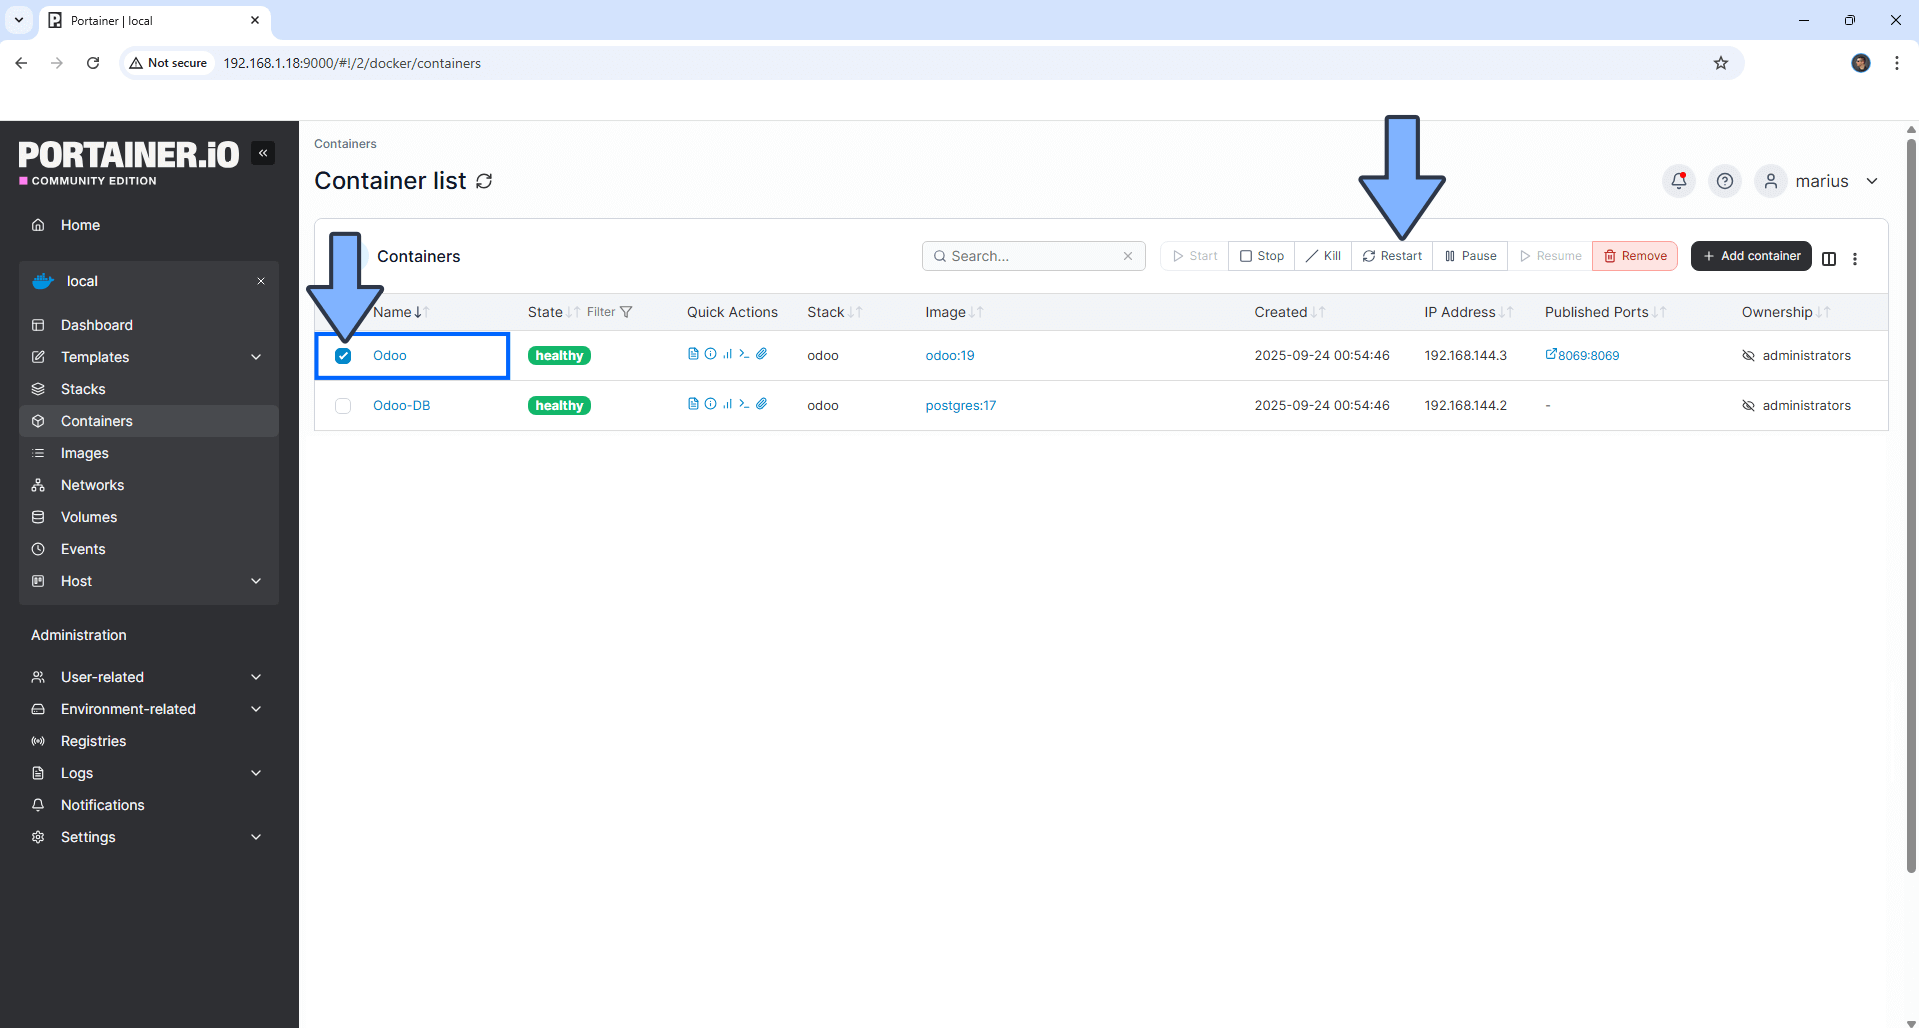
On the left sidebar in Portainer, click Containers. Identify your Odoo instance, select it then click Restart. Follow the instructions in the image below.
Enjoy Odoo!
🆙Note/Update/Container: How to Update Your Docker Containers on UGREEN NAS Using Portainer.
🐳Note: How to Create Docker Shortcuts on Desktop.
🆕Note: How to Update Portainer to the latest version.
🆕Note: How to Clean Docker.
This post was updated on Thursday / January 1st, 2026 at 6:59 PM
