Did you know that Synology allows you to run Data Scrubbing on DSM? But what exactly does it mean to perform Data Scrubbing in your Storage Pool? Data Scrubbing is the process of fixing incorrect, incomplete, duplicate or otherwise erroneous data in a data set. It involves identifying data errors and then changing, updating or removing data to correct them. Data scrubbing can be used for data maintenance. Synology recommends performing data scrubbing periodically to ensure data consistency and avoid data loss in the event of a drive failure. In this step by step guide I will show you how to run data scrubbing on your Storage Pool and how to schedule it.
Patience: Know that the Data Scrubbing procedure takes quite some time. It is not a quick operation. Patience is needed.
Note: Data scrubbing is only supported on Btrfs volumes so this will not work with Ext4 volumes.
Warning: Before you perform a Data Scrubbing procedure on your Storage Pool, make sure your Synology NAS device is connected to an UPS (Uninterruptible Power Supply) in case of a black out.
STEP 1
Please Support My work by Making a Donation.
STEP 2
Click on the Main menu. Follow the instructions in the image below.

STEP 3
Click on the Storage Manager icon. Follow the instructions in the image below.

STEP 4
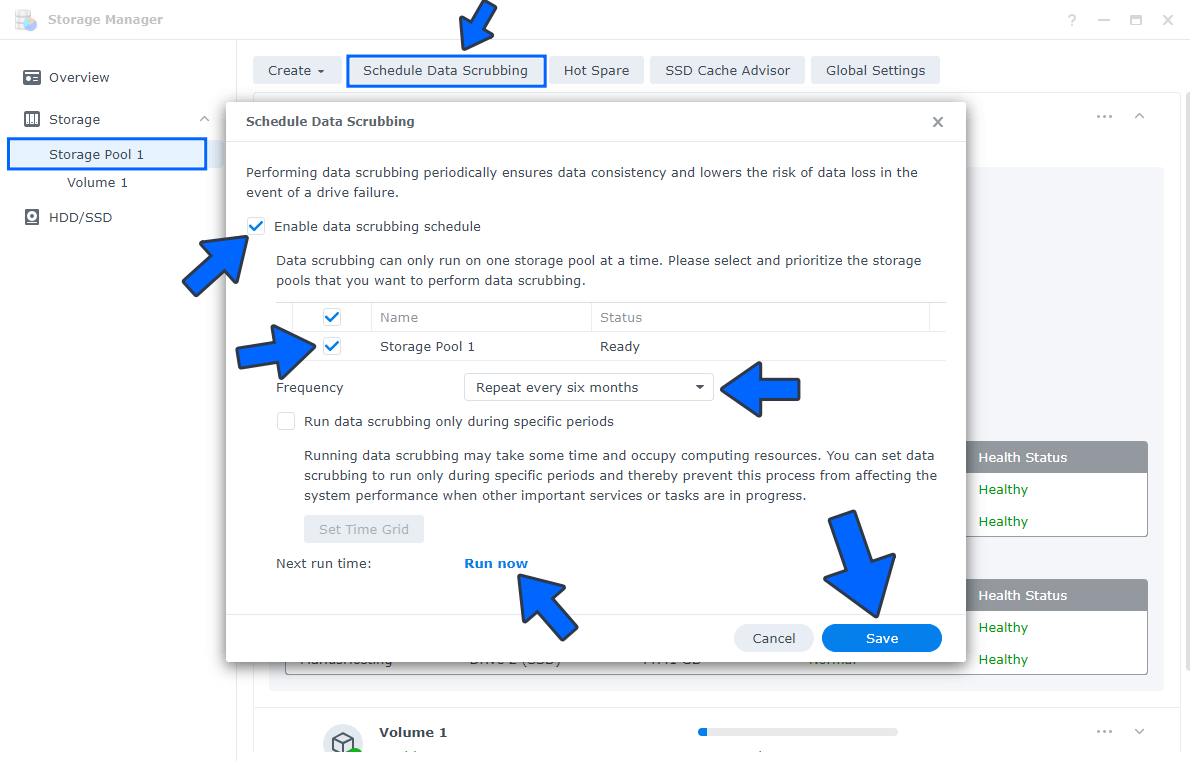
On the left menu in Storage Manager click Storage then Storage Pool 1. Click on the Schedule Data Scrubbing tab. Check Enable data scrubbing schedule. Check your Storage Pool, set a Frequency (I recommend to run it every 6 months). Click Run now to start the Data Scrubbing procedure, then click Save. Follow the instructions in the image below.

STEP 5
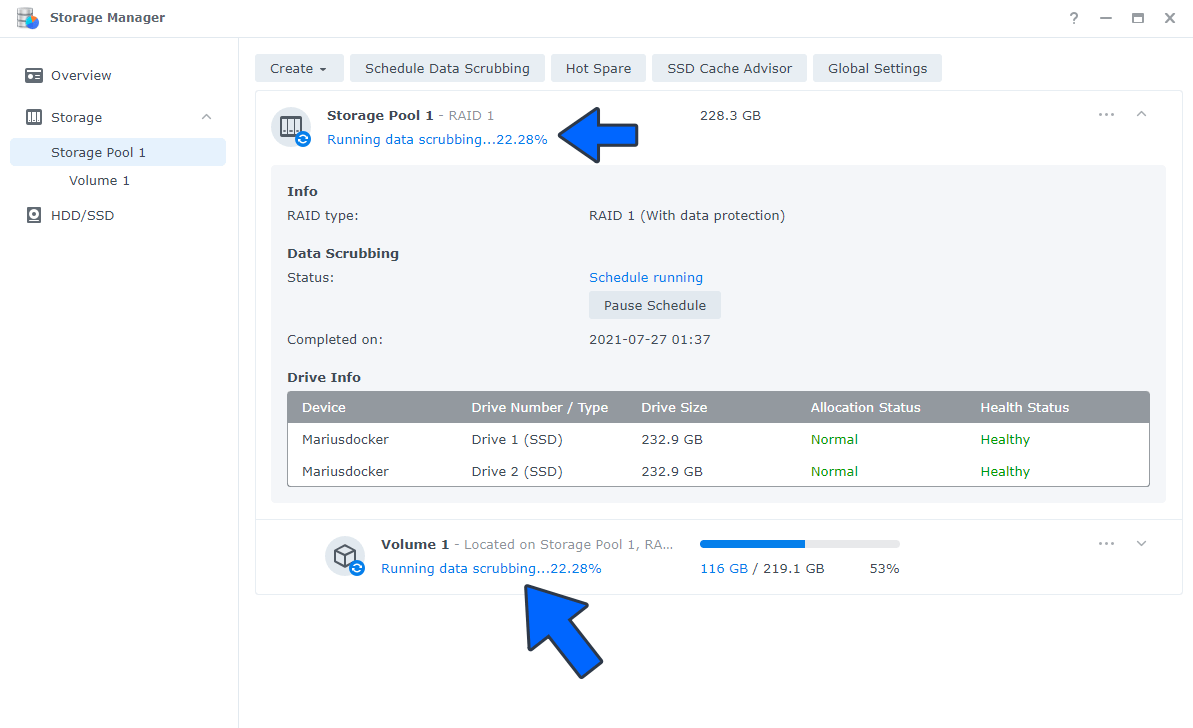
The Data Scrubbing process has started. Wait until it finishes before you start more complex work on your NAS.

Note: Full Synology Data Scrubbing Documentation.
This post was updated on Wednesday / August 24th, 2022 at 12:53 AM
