Do you remember my article on how to Clean Docker manually with Portainer? Today I want to show you how to clean Docker automatically, with just one click, whenever you need it. Here on mariushosting you can find a varied list of Docker images to install on your Synology NAS. However, if you ever decide to uninstall them for whatever reason, remember that it is a good practice to uninstall them properly so that, in the future, you do not experience any problems if you want to install them back from scratch. Note: With the code below you are going to automatically remove all stopped containers, unused volumes and container images from your Docker that you are no longer using.
STEP 1
Please Support My work by Making a Donation.
STEP 2
Activate Email Notifications. If you have already activated email notifications on your Synology NAS, skip this STEP.
STEP 3
First of all, always remember to stop all the containers you no longer need. If you don’t stop them first, you can’t delete them.
STEP 4
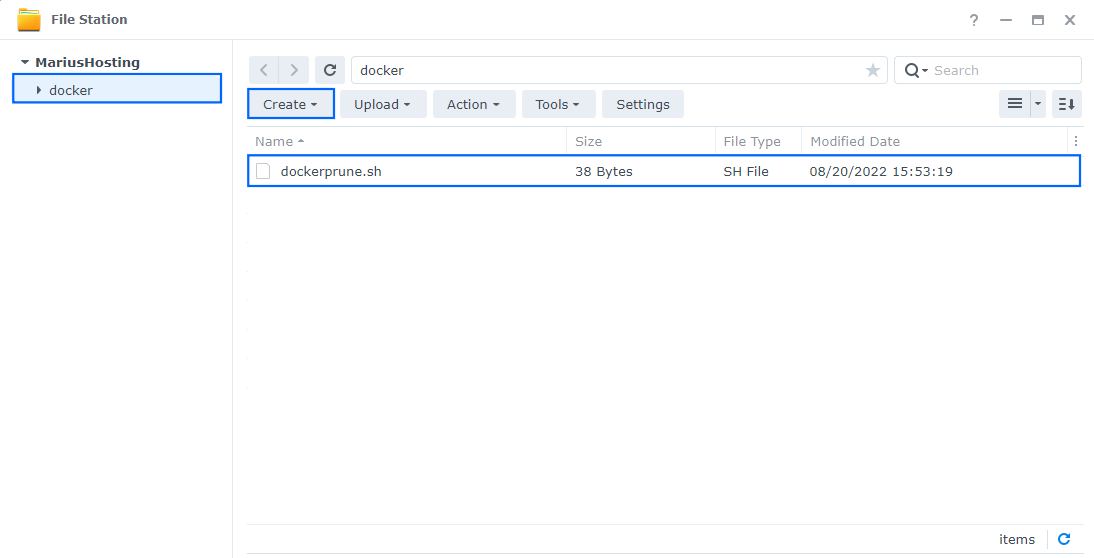
Download the dockerprune.sh file from the blue link below, then upload it in your main Docker folder. Follow the instructions in the image below. 🔒Note: Support my work to unlock the password. You can use this password to download any file on mariushosting forever!
STEP 5
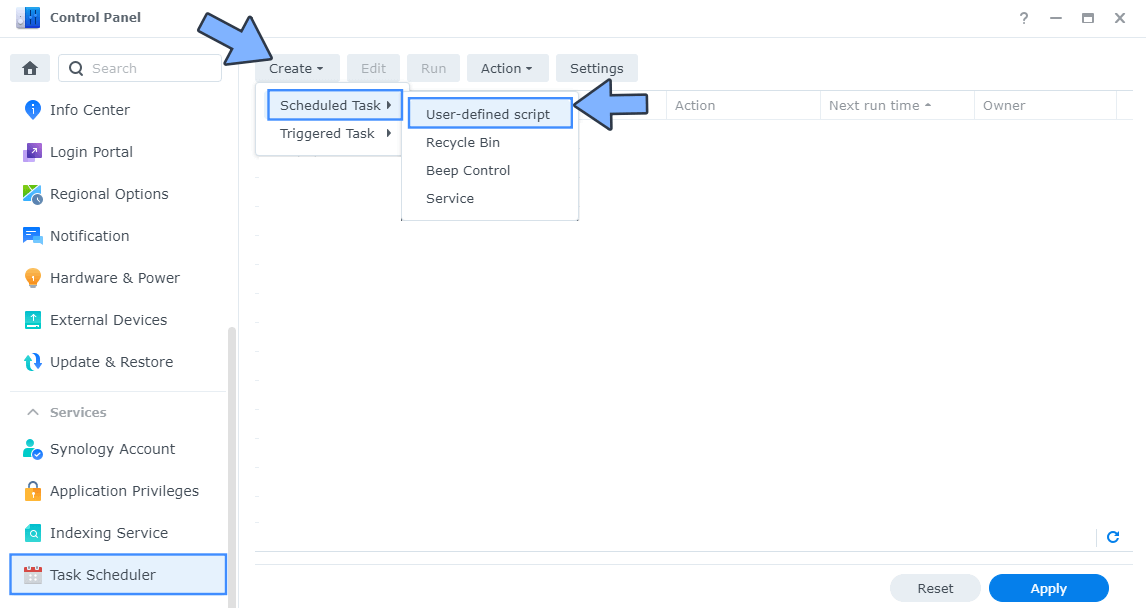
Go to Control Panel / Task Scheduler / Create / Scheduled Task / User-defined script. Follow the instructions in the image below.
STEP 6
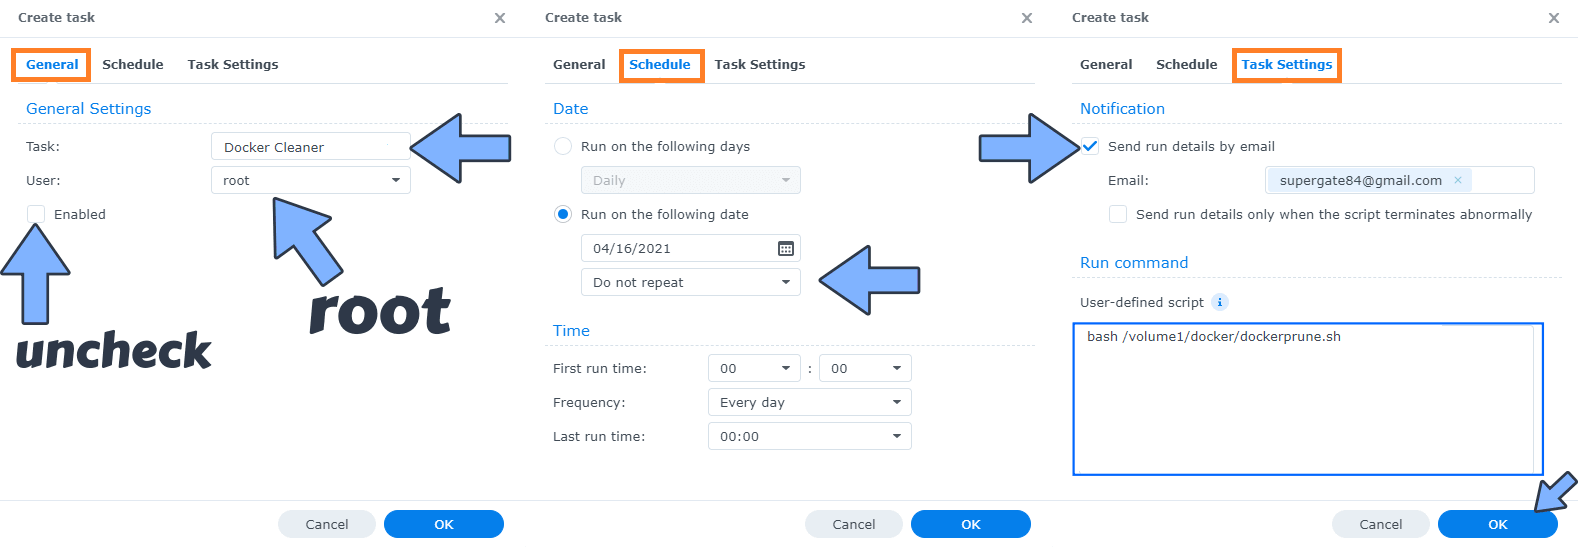
Once you click on User-defined script, a new window will open. Follow the instructions below:
- General: In the Task field type in “Docker Cleaner“. Uncheck the “Enabled” option. Select root User.
- Schedule: Select Run on the following date then select “Do not repeat“.
- Task Settings: Check “Send run details by email“, add your email then copy paste the code below in the Run command area. After that, click OK.
bash /volume1/docker/dockerprune.sh
STEP 7
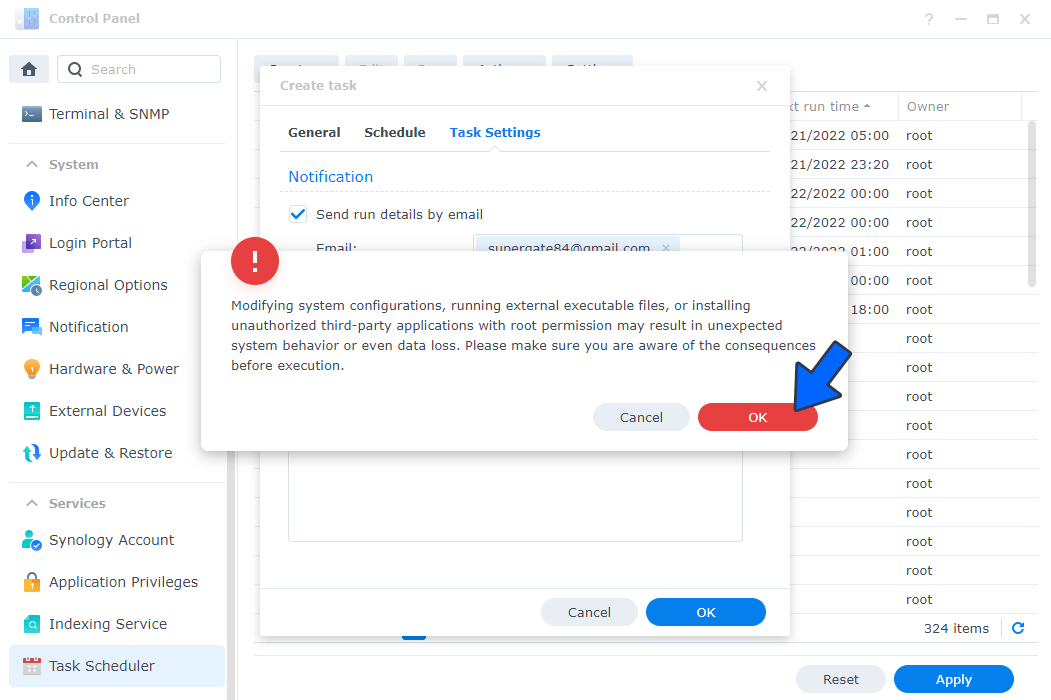
After you click OK on STEP 6 a new warning pop up window will open. Click OK.
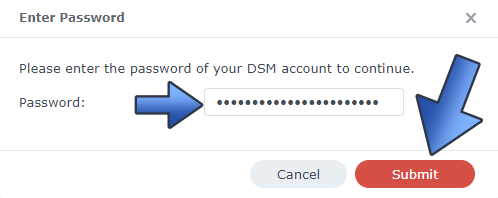
After you click OK, type in your DSM Password then click Submit. Follow the instructions in the image below.
STEP 8
After you click Submit on STEP 7, select your “Docker Cleaner” Task then click the “Run” tab. You will be asked to run Docker Cleaner – click OK. Follow the instructions in the image below.
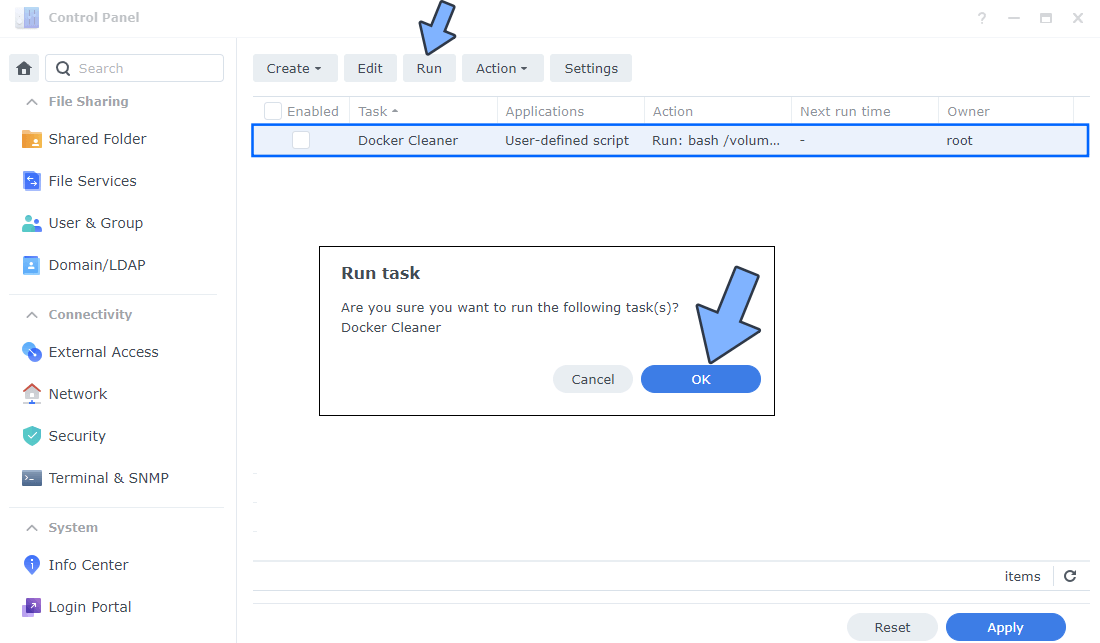
Note: With the task above you are going to automatically remove all stopped containers, unused volumes and container images from your Docker that you are no longer using.
STEP 9
🟢Please Support My work by Making a Donation. Almost 99,9% of the people that install something using my guides forget to support my work, or just ignore STEP 1. I’ve been very honest about this aspect of my work since the beginning: I don’t run any ADS, I don’t require subscriptions, paid or otherwise, I don’t collect IPs, emails, and I don’t have any referral links from Amazon or other merchants. I also don’t have any POP-UPs or COOKIES. I have repeatedly been told over the years how much I have contributed to the community. It’s something I love doing and have been honest about my passion since the beginning. But I also Need The Community to Support me Back to be able to continue doing this work.
STEP 10
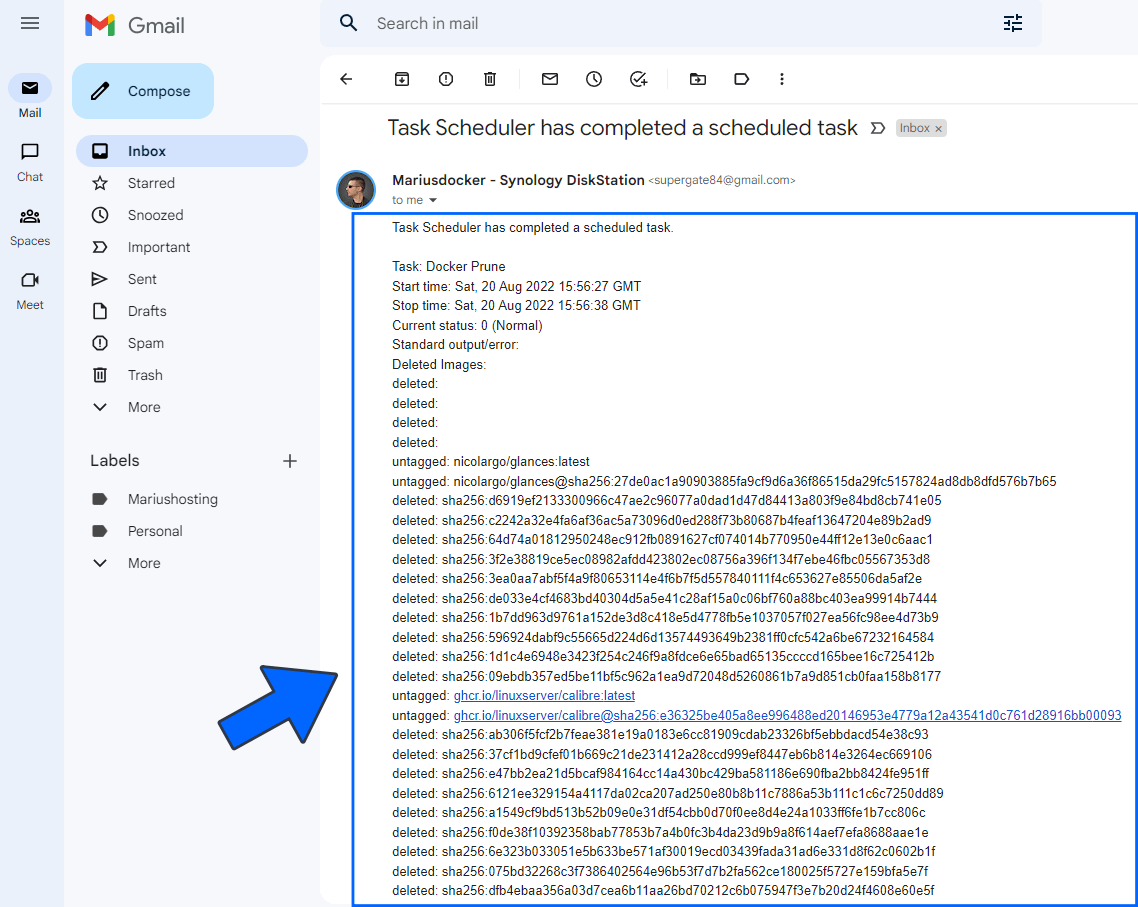
Check your Email. Your docker is now clean! One of the benefits you will also experience is less disk space usage on your Synology NAS!
STEP 11
Remove all folders in File Station that you no longer use, or have used in the past to run specific Docker images. Just delete them and recreate from scratch if you need a specific Docker image to be reinstalled again.
Note: You can run the Docker Cleaner task at STEP 8 from time to time when you need to clean your Docker, or set a schedule to run it at a time of your choice (STEP 6 point 2). This will depend on your needs.
Note: One of the main advantages of cleaning Docker is that it will free up disk space on your NAS.
Note: Prune unused Docker objects documentation.
This post was updated on Sunday / August 24th, 2025 at 3:00 PM
