If you are using WordPress on your Synology NAS, you absolutely do not need all PHP extensions to make it work properly, only some of them. It’s useless to use all of them if you don’t need them as it will increase the response time of your website. In this step by step guide I will show you which PHP 8 extension you need to activate. (The images and instructions below work for PHP 7.4 and 7.3 too, even though they are about PHP 8).
STEP 1
Please Support My work by Making a Donation.
STEP 2
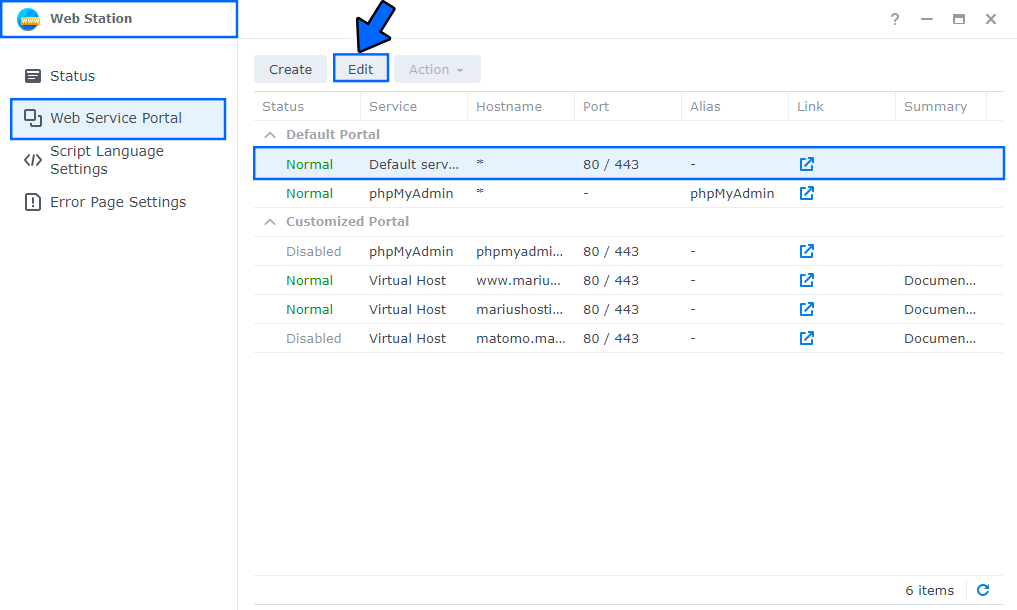
First of all, open the application called Web Station. Once opened, in the menu on the left, click on Web Service Portal / select the current Default server, then click Edit. Follow the instructions in the image below.
STEP 3
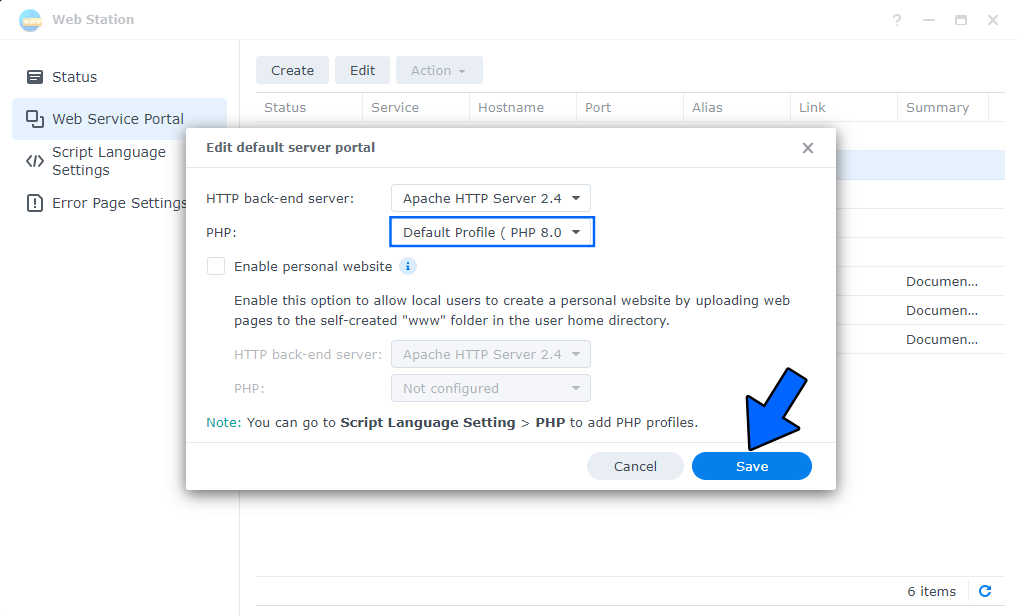
Once you click on Edit at STEP 2, the following window will open. In the dropdown menu select the PHP 8.0 Default Profile then click Save. Follow the instructions in the image below.
Note: If you can’t find PHP 8.0 in the dropdown menu, that means that you don’t have PHP 8.0 installed. In this case, go to Package Center and Install PHP 8.0
STEP 4
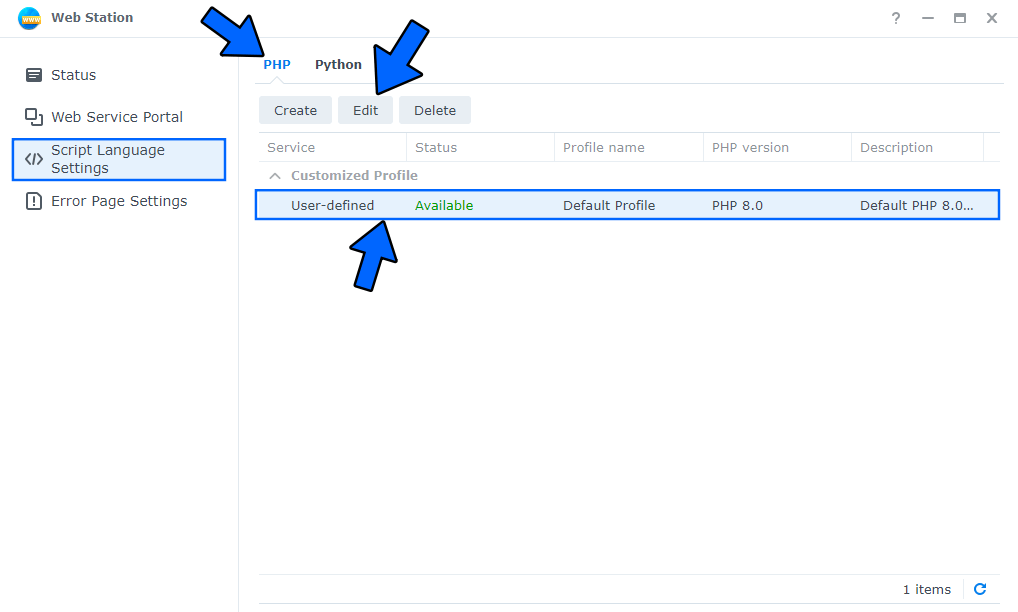
In the Web Station menu on the left click on Script Language Settings / select the current PHP 8.0 Default Profile, then click Edit. Follow the instructions in the image below.
STEP 5
Once you click on Edit at STEP 4, the following window will open. Check all the extensions I have listed in the screenshot below, then click Save. Follow the instructions in the image below.
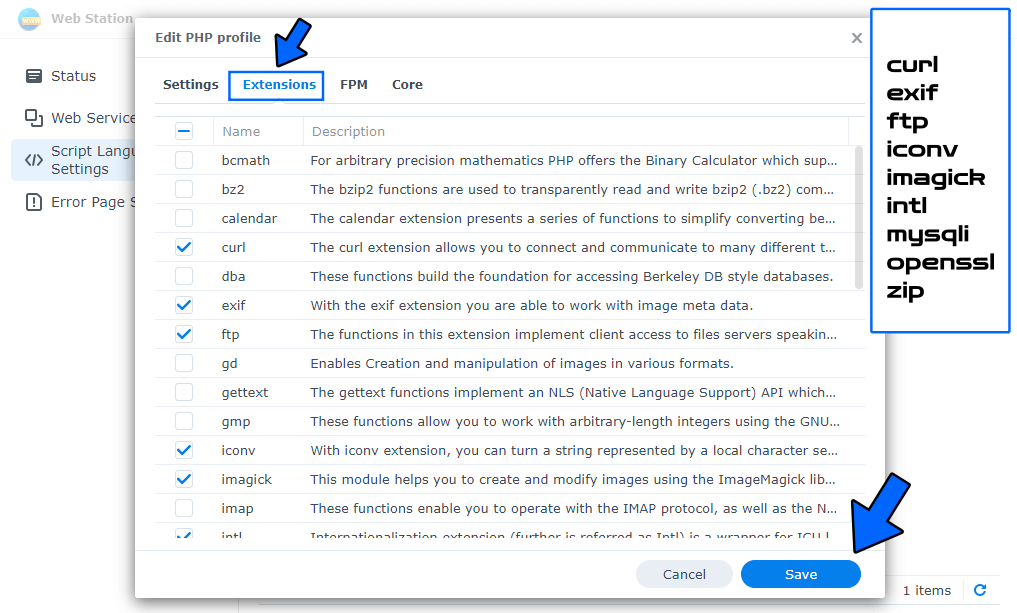
Check only these extensions to make WordPress work smoothly:
- curl
- exif
- ftp
- iconv
- imagick
- intl
- mysqli
- openssl
- zip
If you have activated other extensions than the extensions listed above, uncheck them. Keep in mind that the more useless extensions you leave activated for your WordPress, the longer the response time of your website will be.
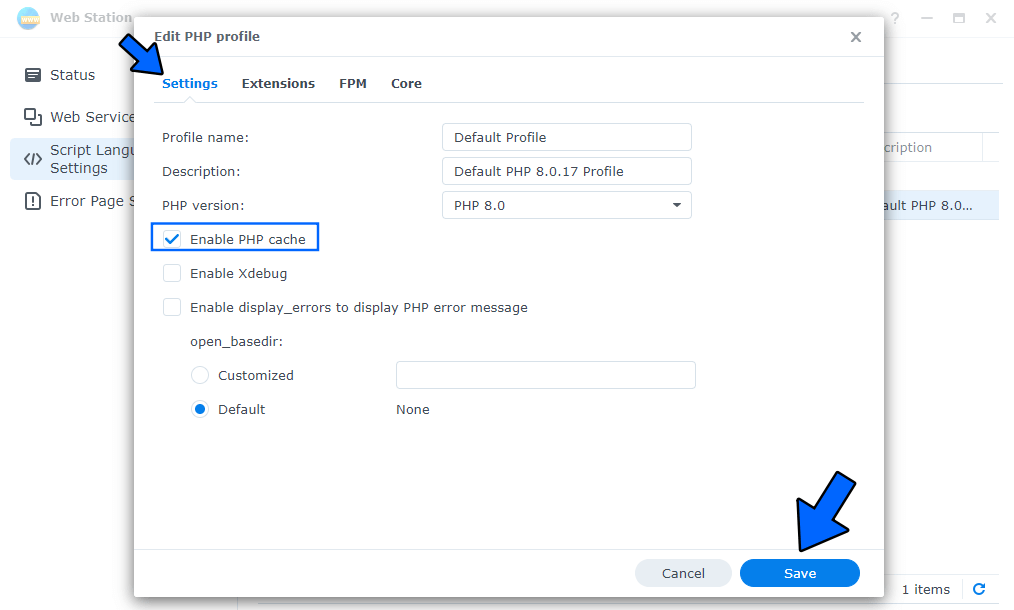
STEP 6
Now go to Settings and check Enable PHP cache then click Save. Follow the instructions in the image below.
Your WordPress Site Health will look like this:
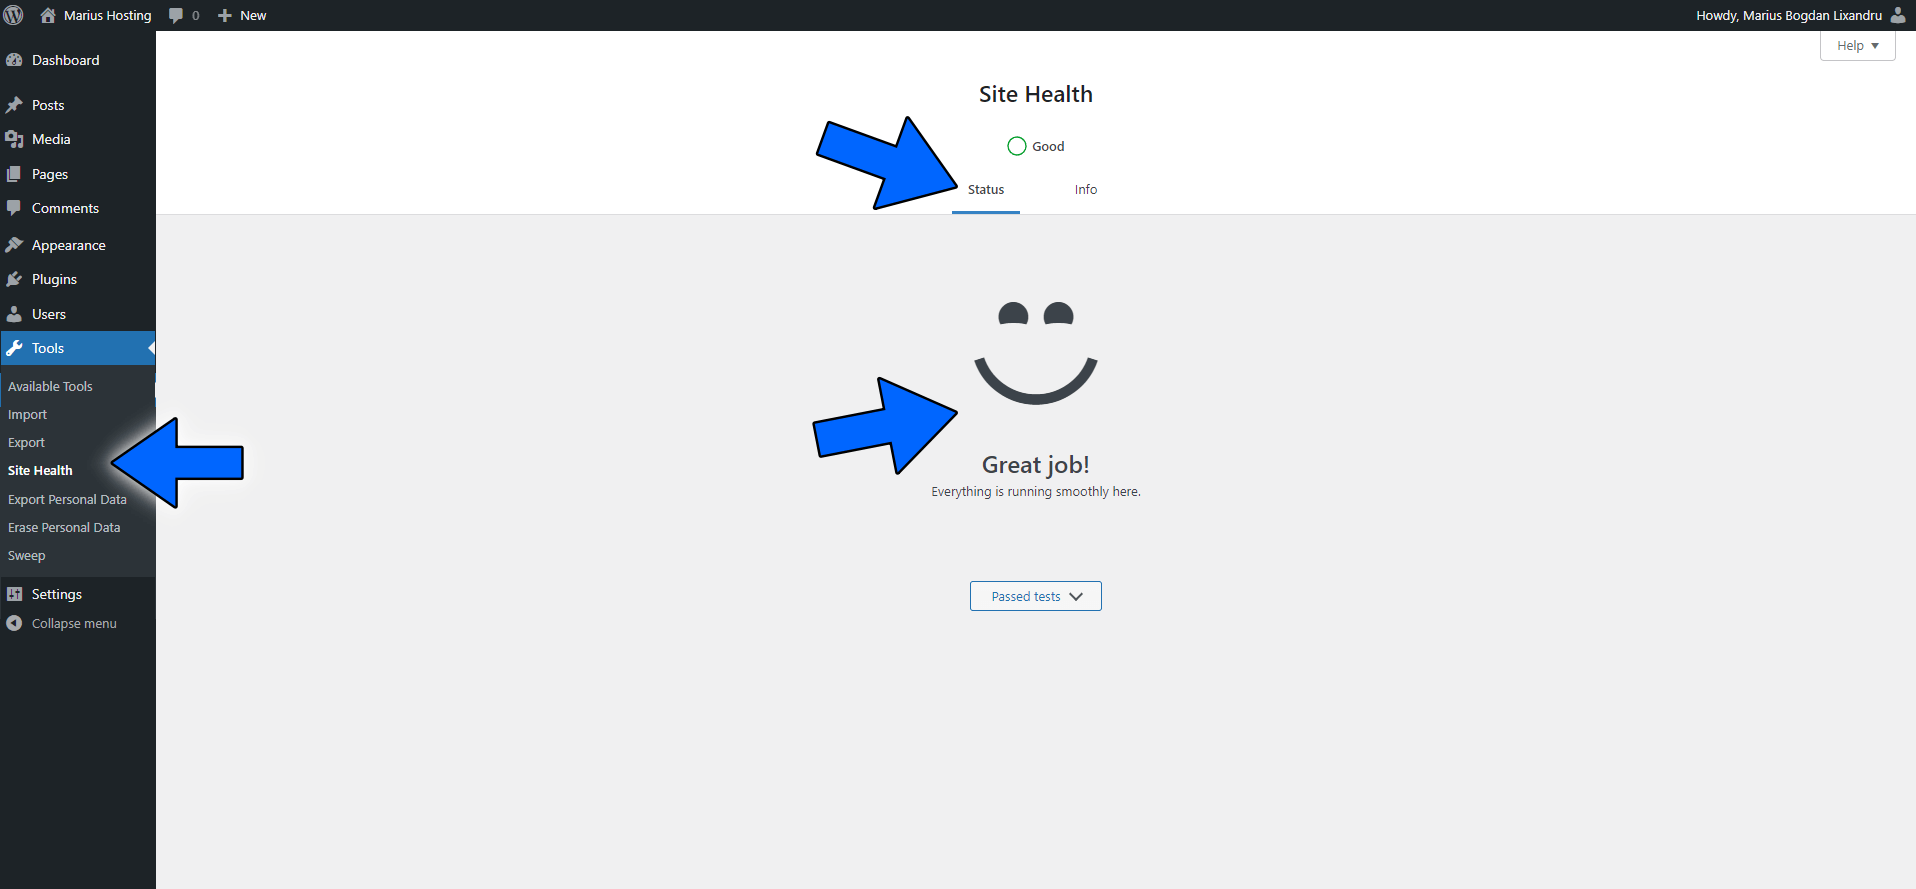
Note: Some 3rd-party plugins installed on your WordPress instance can be problematic and won’t let you have a good score (100%) on Site Health.
Note: Other core modules are always activated by default on your Synology NAS. If you want to see all PHP extensions installed on your Synology NAS, here is the output for php -m:
root@username_NAS:~# php -m
This post was updated on Thursday / October 27th, 2022 at 2:26 AM