Do you know how to activate your email notifications on your DSM operating system? Well, after yesterday’s article where I explained how to activate DSM notifications on your mobile phone, today I will teach you how to activate DSM notifications via email.
STEP 1
Please Support My work by Making a Donation.
STEP 2
If you use Gmail make sure you have 2FA (2-factor authentication active) on your account.
STEP 3
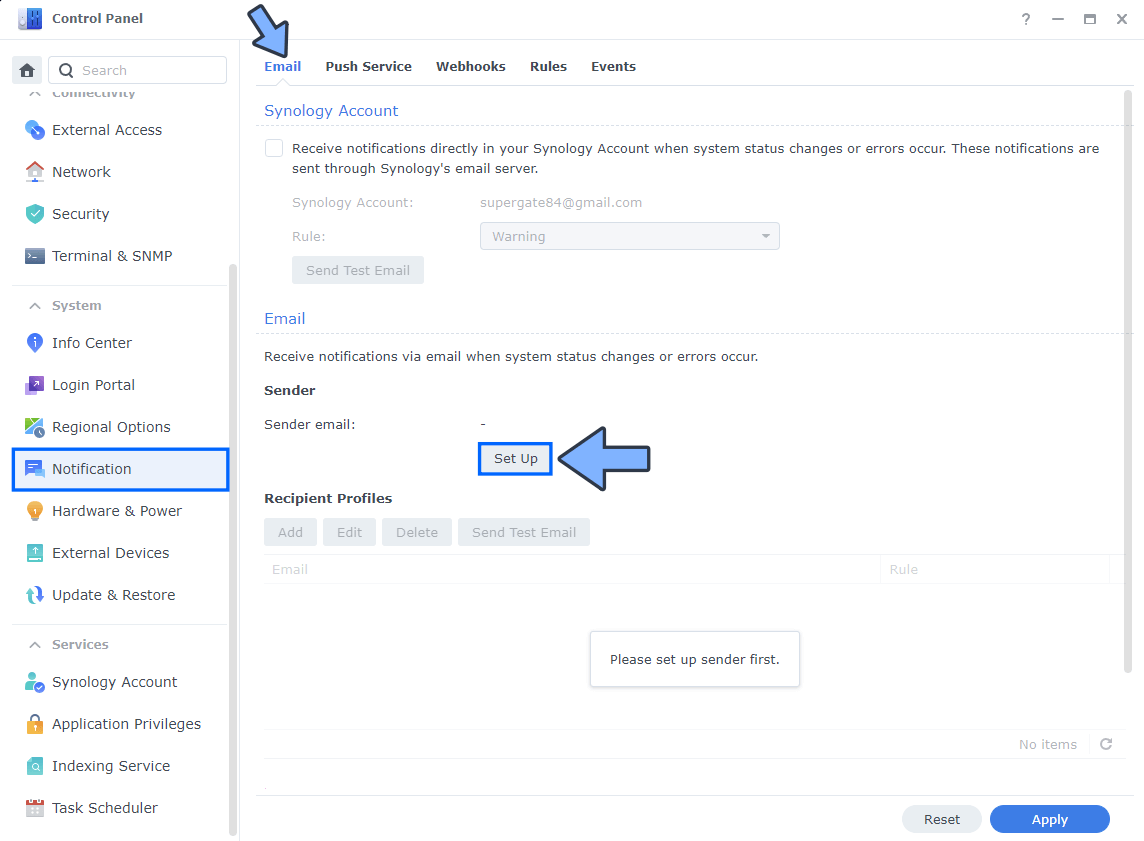
Activate Email Notifications. Go to Control Panel / Notification / Email tab/ Click Set Up. Follow the instructions in the image below.
STEP 4
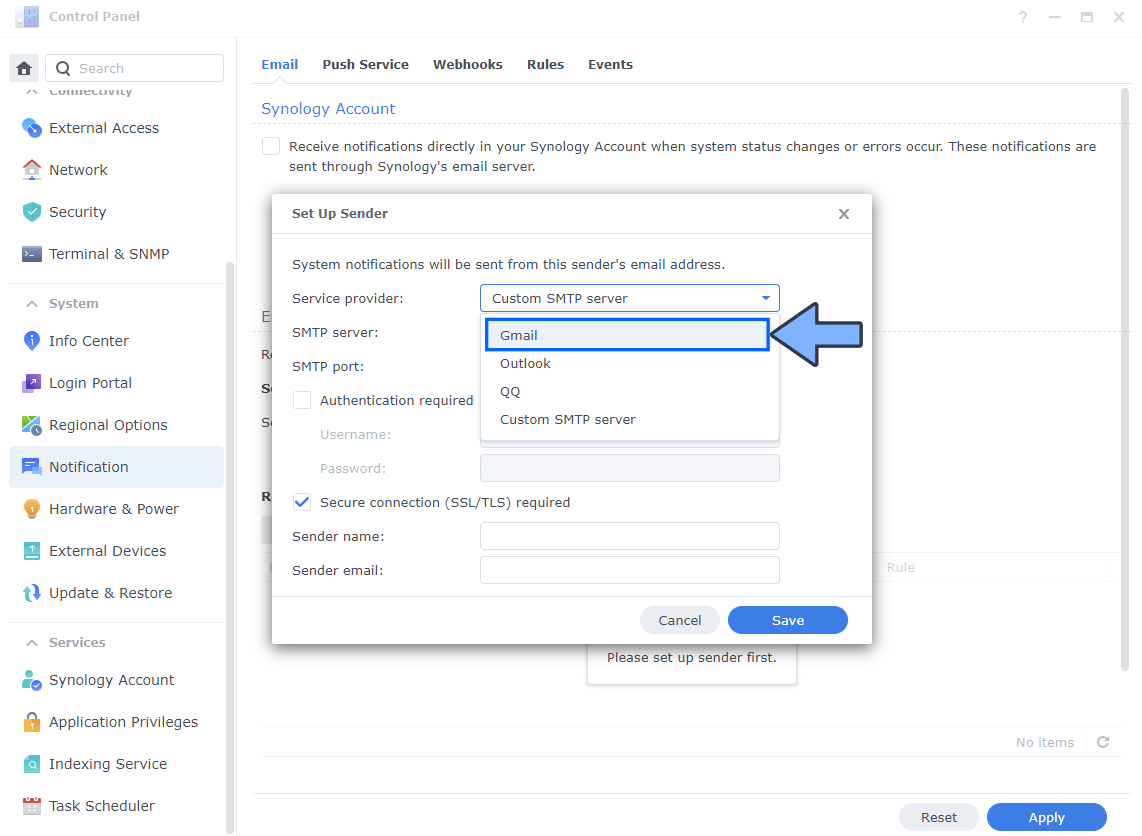
After that, select your current Service provider (in my case, it’s Gmail). Follow the instructions in the image below.
STEP 5
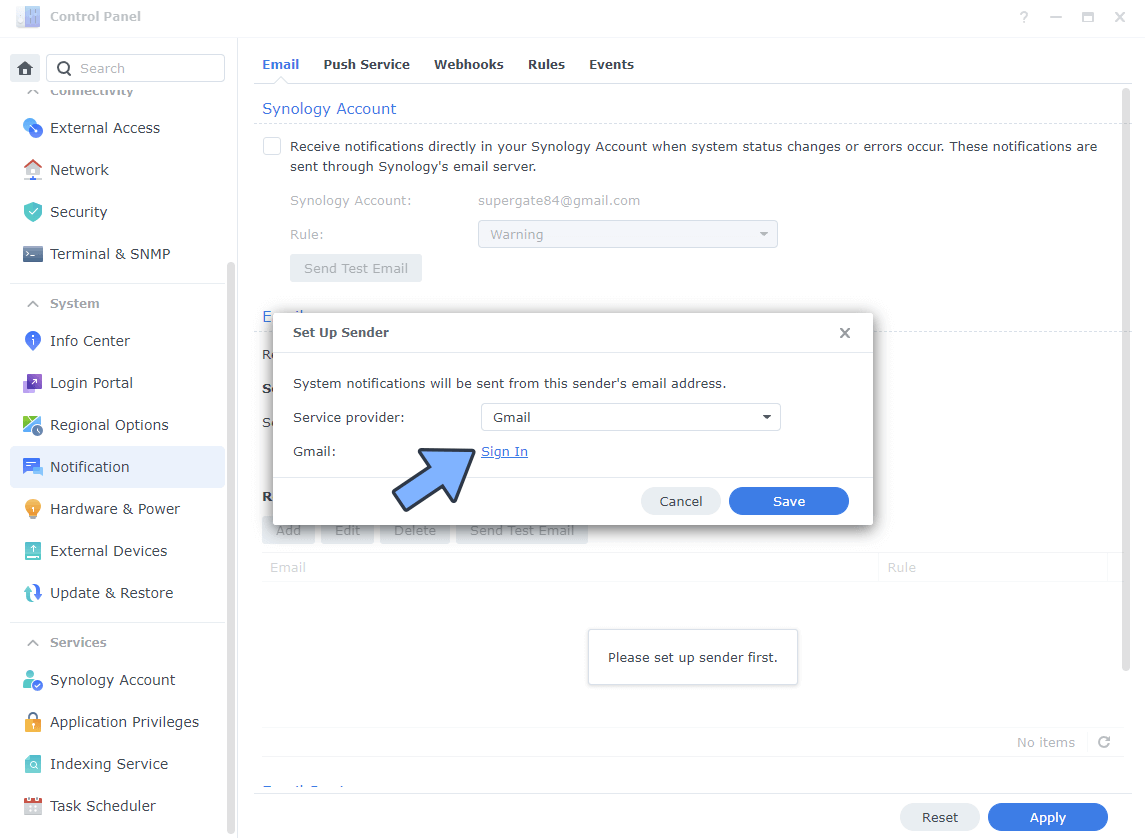
Click Sign In. Follow the instructions in the image below.
STEP 6
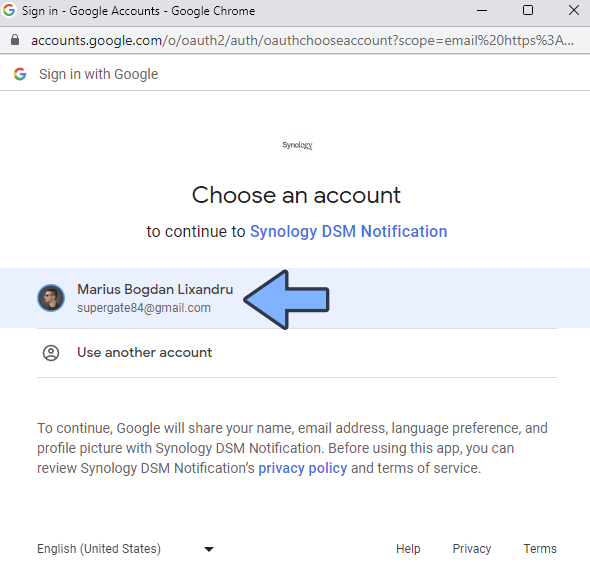
After you click Sign In, a new pop up window will open. Choose your Gmail account. Follow the instructions in the image below.
STEP 7
After you log in, hit the Allow button. Follow the instructions in the image below.

STEP 8
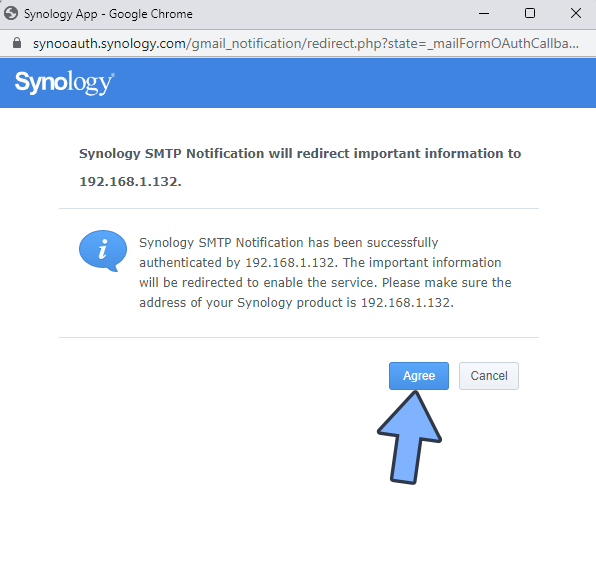
After you click Allow at STEP 7, you will be informed of the following: Synology SMTP Notification will redirect important information to “Your NAS server”. Click Agree. Follow the instructions in the image below.
STEP 9
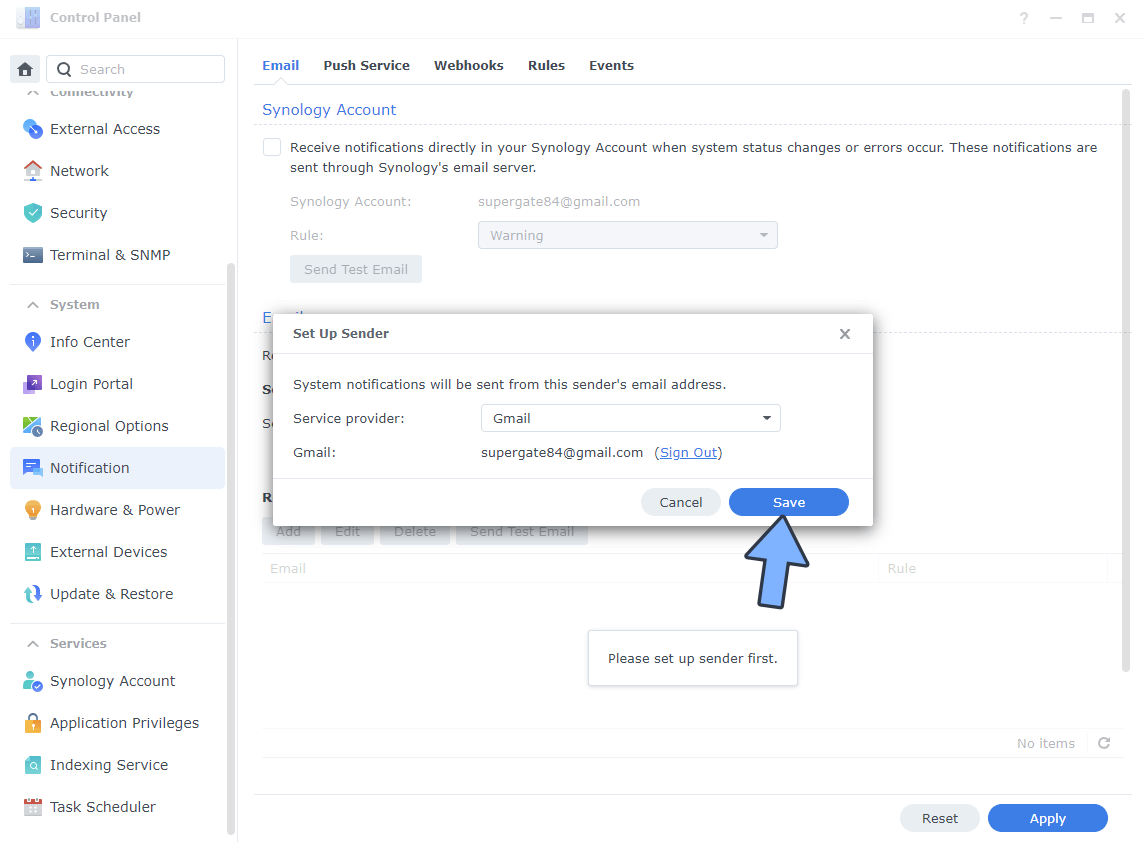
Click Save. Follow the instructions in the image below.
STEP 10
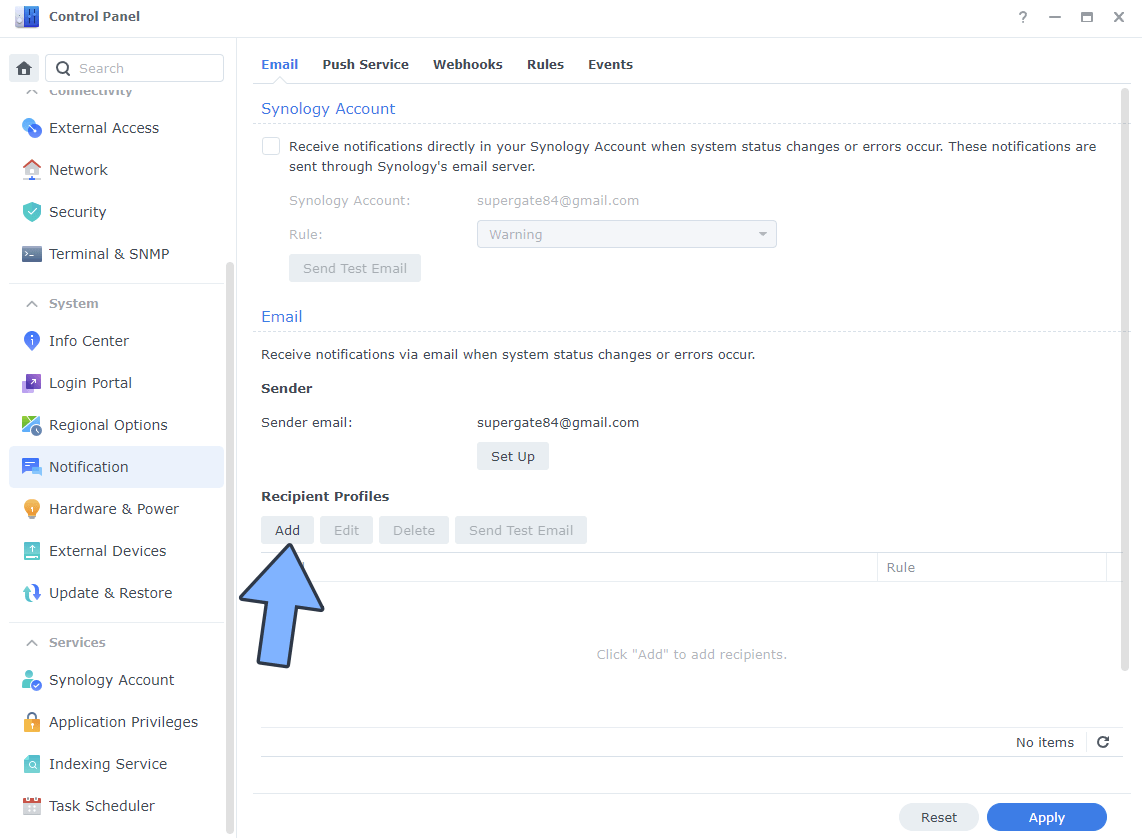
On the Recipient Profiles area click Add. Follow the instructions in the image below.
STEP 11
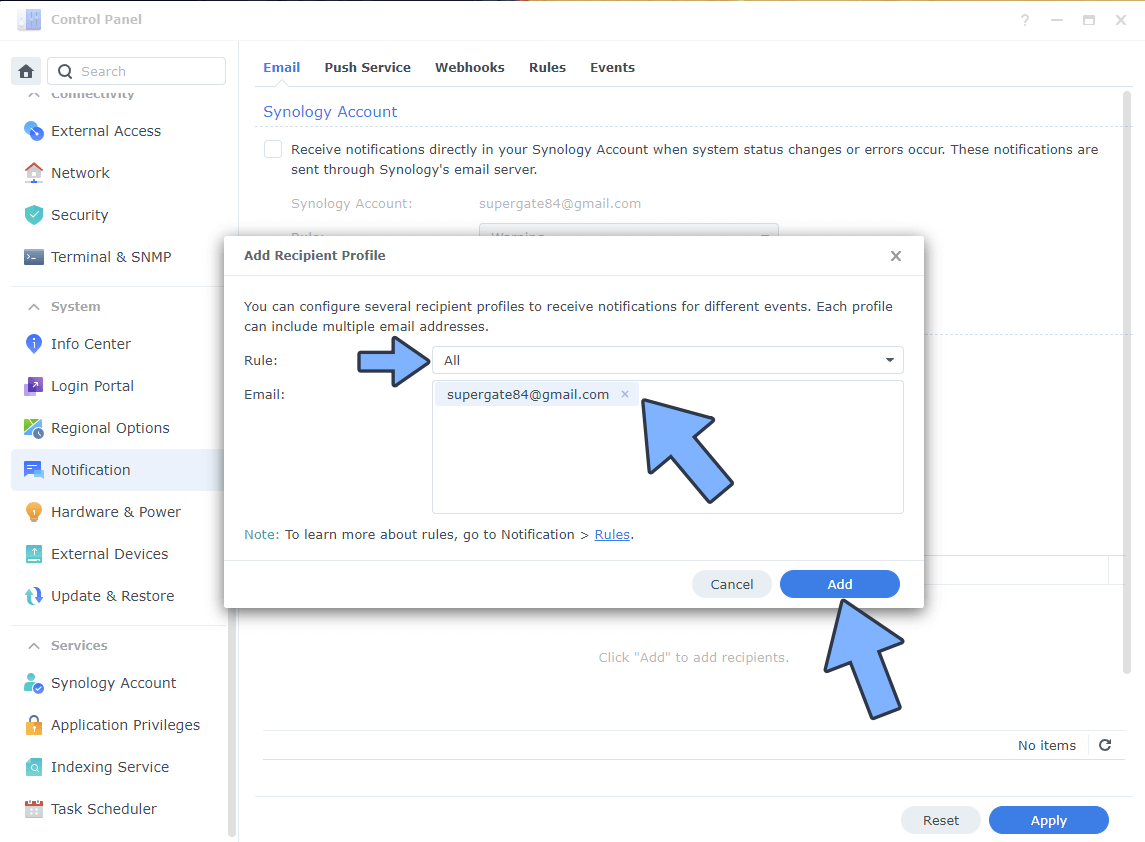
Select your favorite Rules, then add your Email. Note: You can add multiple Emails. Follow the instructions in the image below.
STEP 12
To configure the Rules for Email Notifications, go to Control Panel / Notification / Rules tab, then check which notifications you want to receive in your email. You can easily customize the notification rules for each email you have previously added at STEP 10. Follow the instructions in the image below.
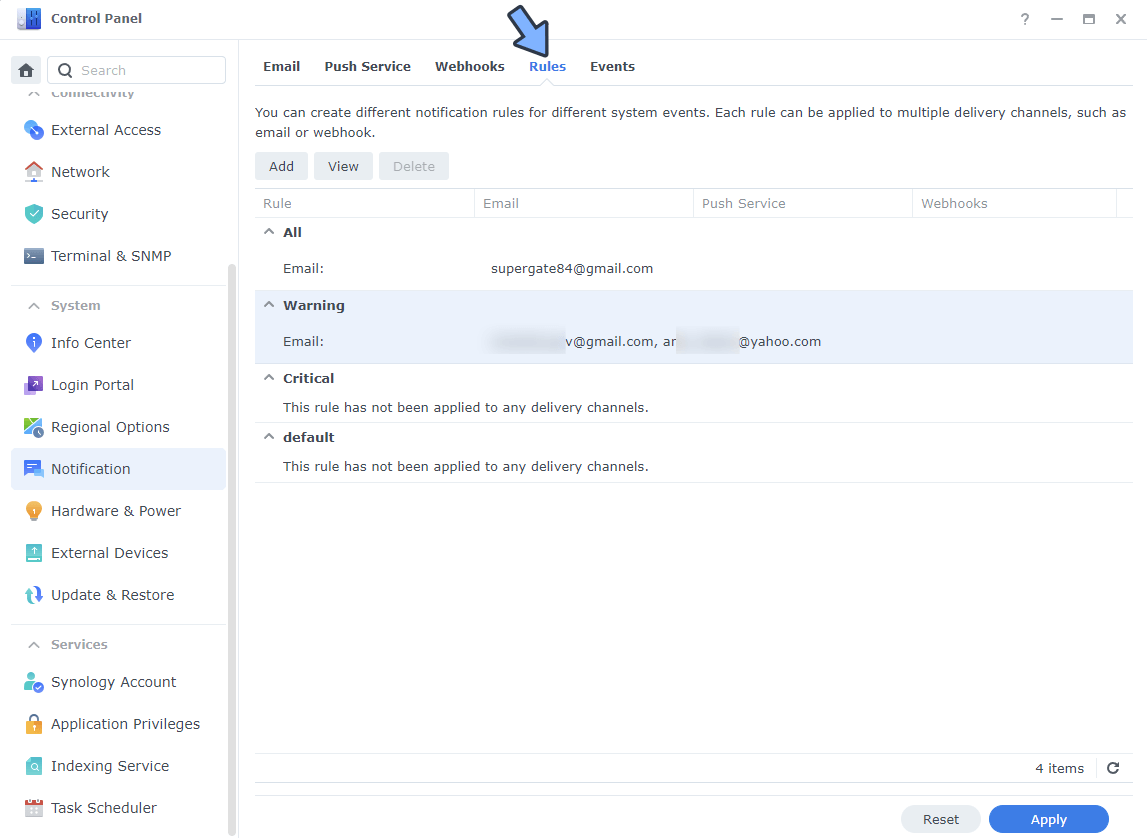
Note: You will automatically receive a notification in your email every time a new event occurs with your Synology NAS.
This post was updated on Sunday / April 27th, 2025 at 3:11 PM
