
As self-hosted setups grow, the tools we use to manage Docker containers often evolve with them. Portainer has long been a popular choice for visual container management on Synology and UGREEN NAS systems, offering a clean web interface for deploying, monitoring, and controlling containers. As you know, most of my tutorials have used Portainer. However, many users eventually look for alternatives that feel lighter, more focused, or better aligned with their workflow. Dockhand has emerged as one such option, an increasingly popular Docker management UI that emphasizes simplicity, speed, and a streamlined experience while still providing the core features most home-lab and NAS users need. Since many of you have asked me how to move containers from Portainer to Dockhand, today I’ve put together a very simple and straightforward guide on how to move your containers from Portainer to Dockhand, just the way your Internet friend Marius likes, without any technical barriers.
STEP 1
Please Support My work by Making a Donation.
STEP 2
⚠️Mandatory: Install Dockhand using my Docker Guide for Synology NAS or UGREEN NAS or Asustor NAS. If you already have Dockhand installed on your Synology NAS or UGREEN NAS or Asustor NAS, skip this STEP.
STEP 3
The first basic rule is to NOT delete any folders in File Station (on Synology) or Files (on UGREEN) or File Explorer (on Asustor). This is where your containers data are saved. After understanding this simple rule, let’s move on to the guide on how to switch containers from Portainer to Dockhand.
STEP 4
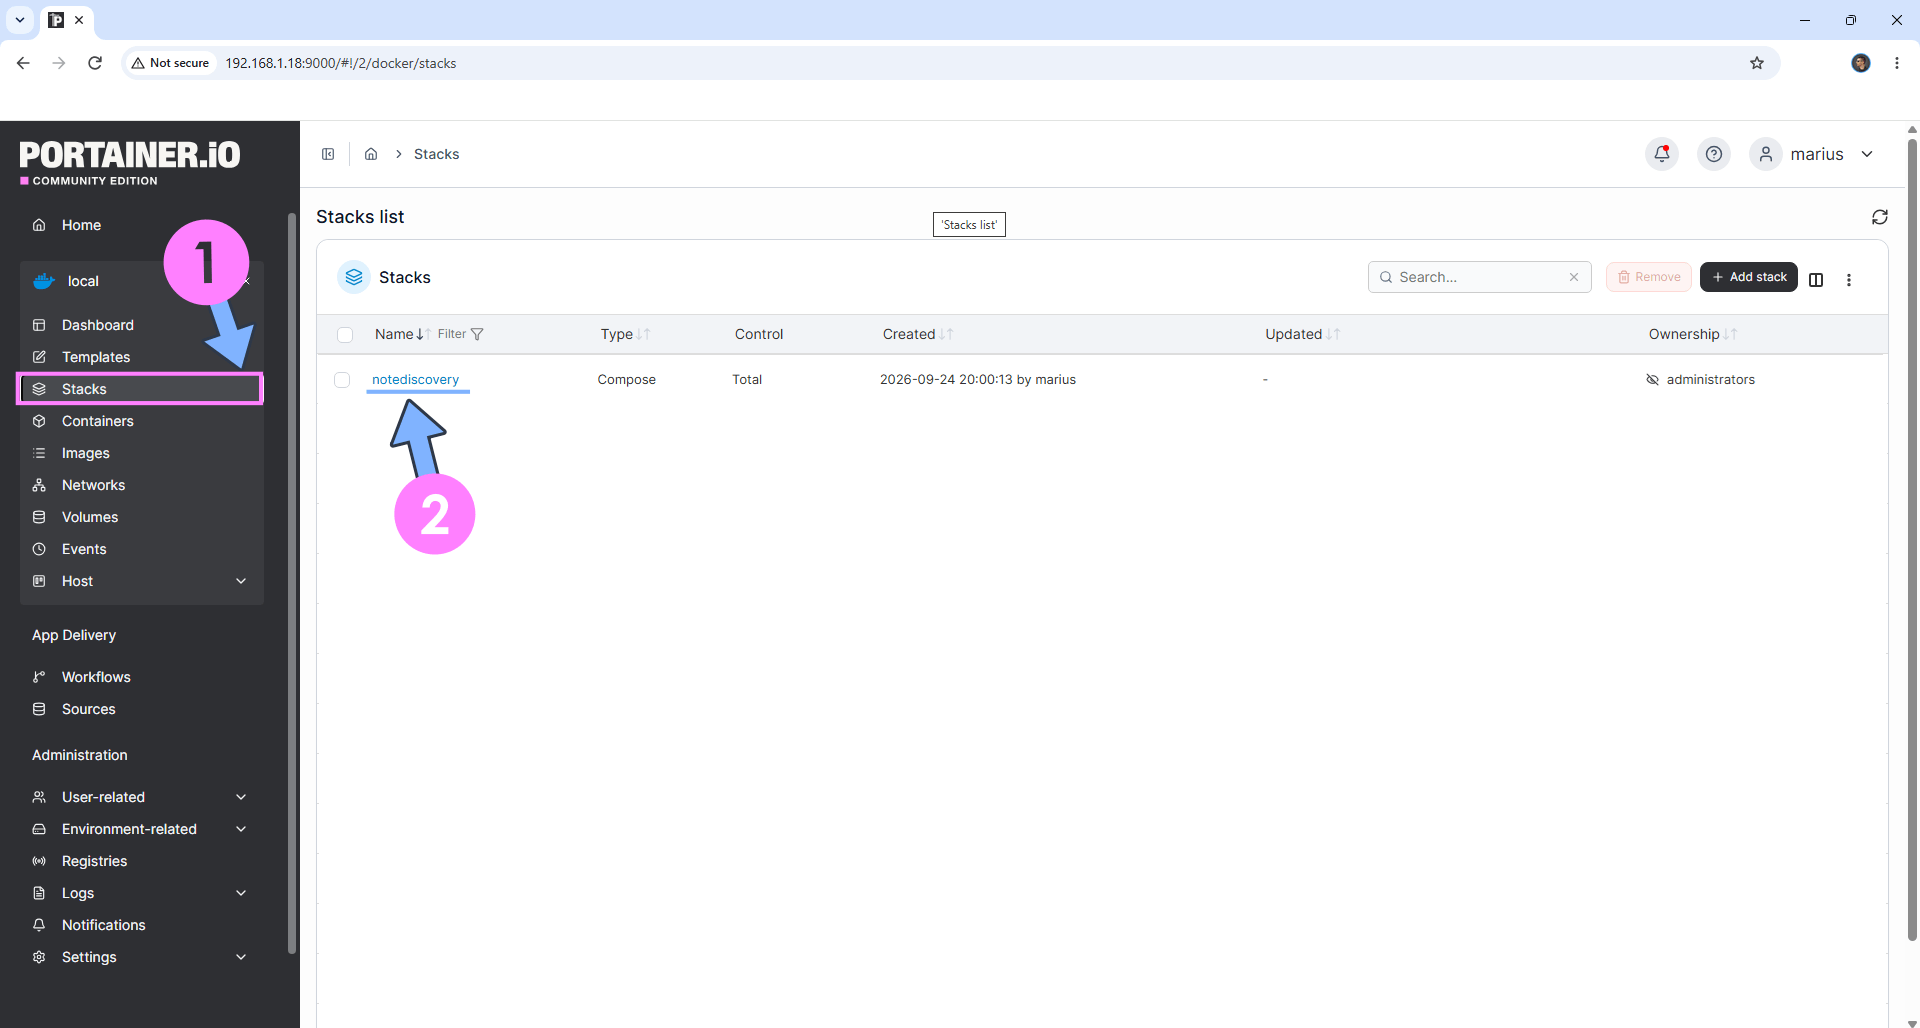
Let’s start right away with an example. Open Portainer. On the left sidebar, click Stacks. We’ll have a list of our stacks in Portainer. Click on the stack that you want to move to Dockhand. In my case, I will click on notediscovery. Click on your stack. Follow the instructions in the image below.
STEP 5
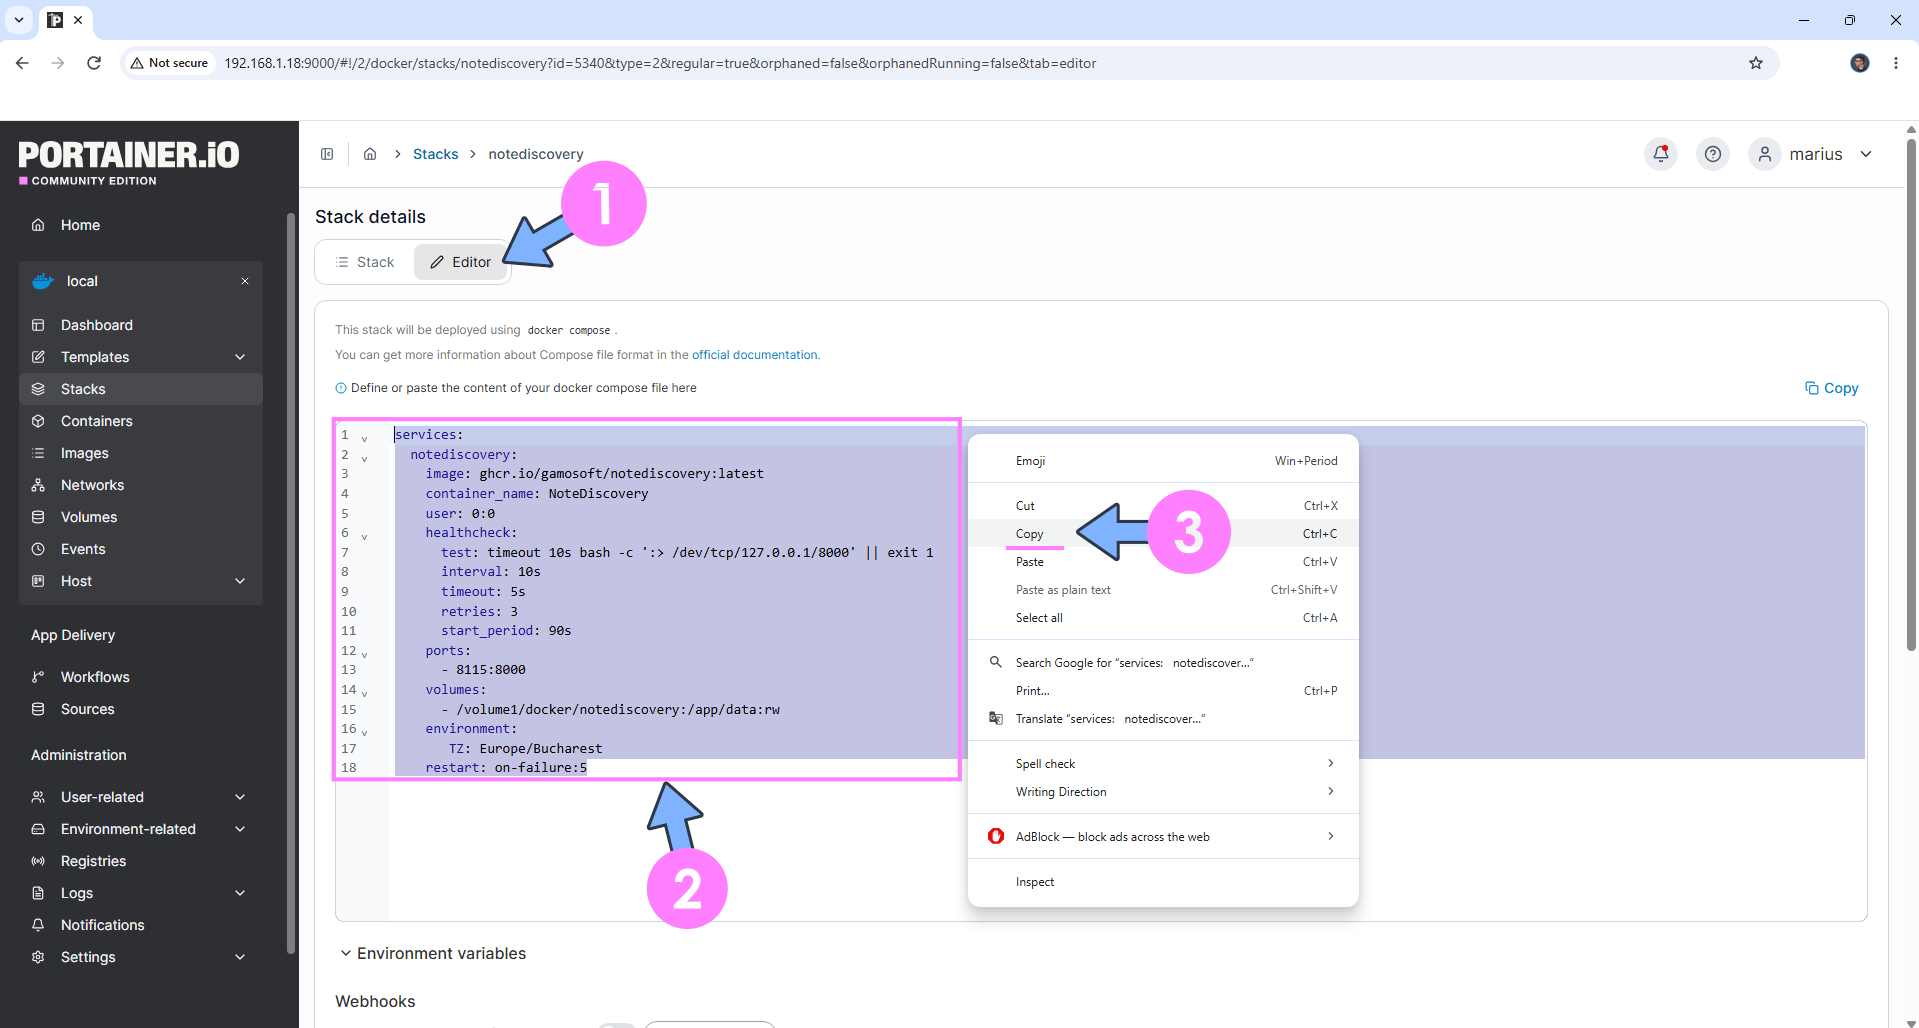
Click on the Editor tab. Right mouse click on your compose stack, then Copy it. Follow the instructions in the image below.
STEP 6
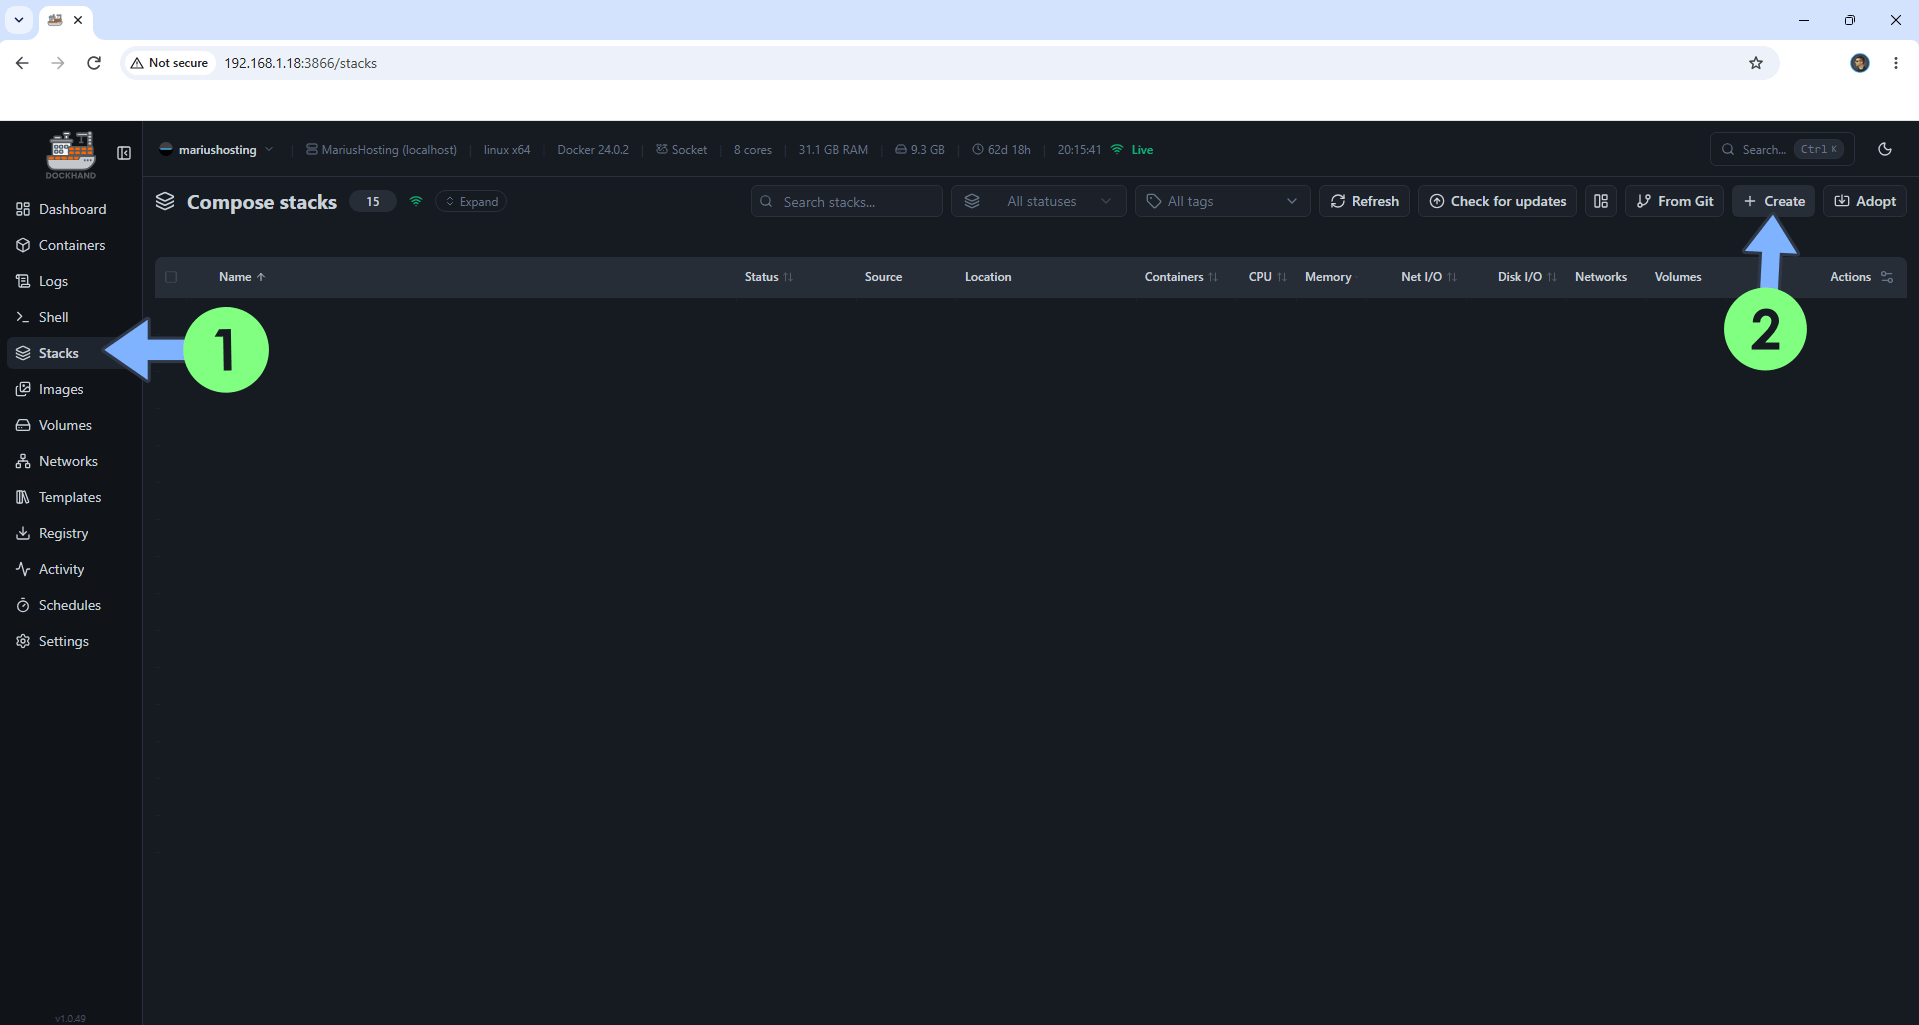
Open Dockhand. On the left sidebar, click Stacks. Click + Create. Follow the instructions in the image below.
STEP 7
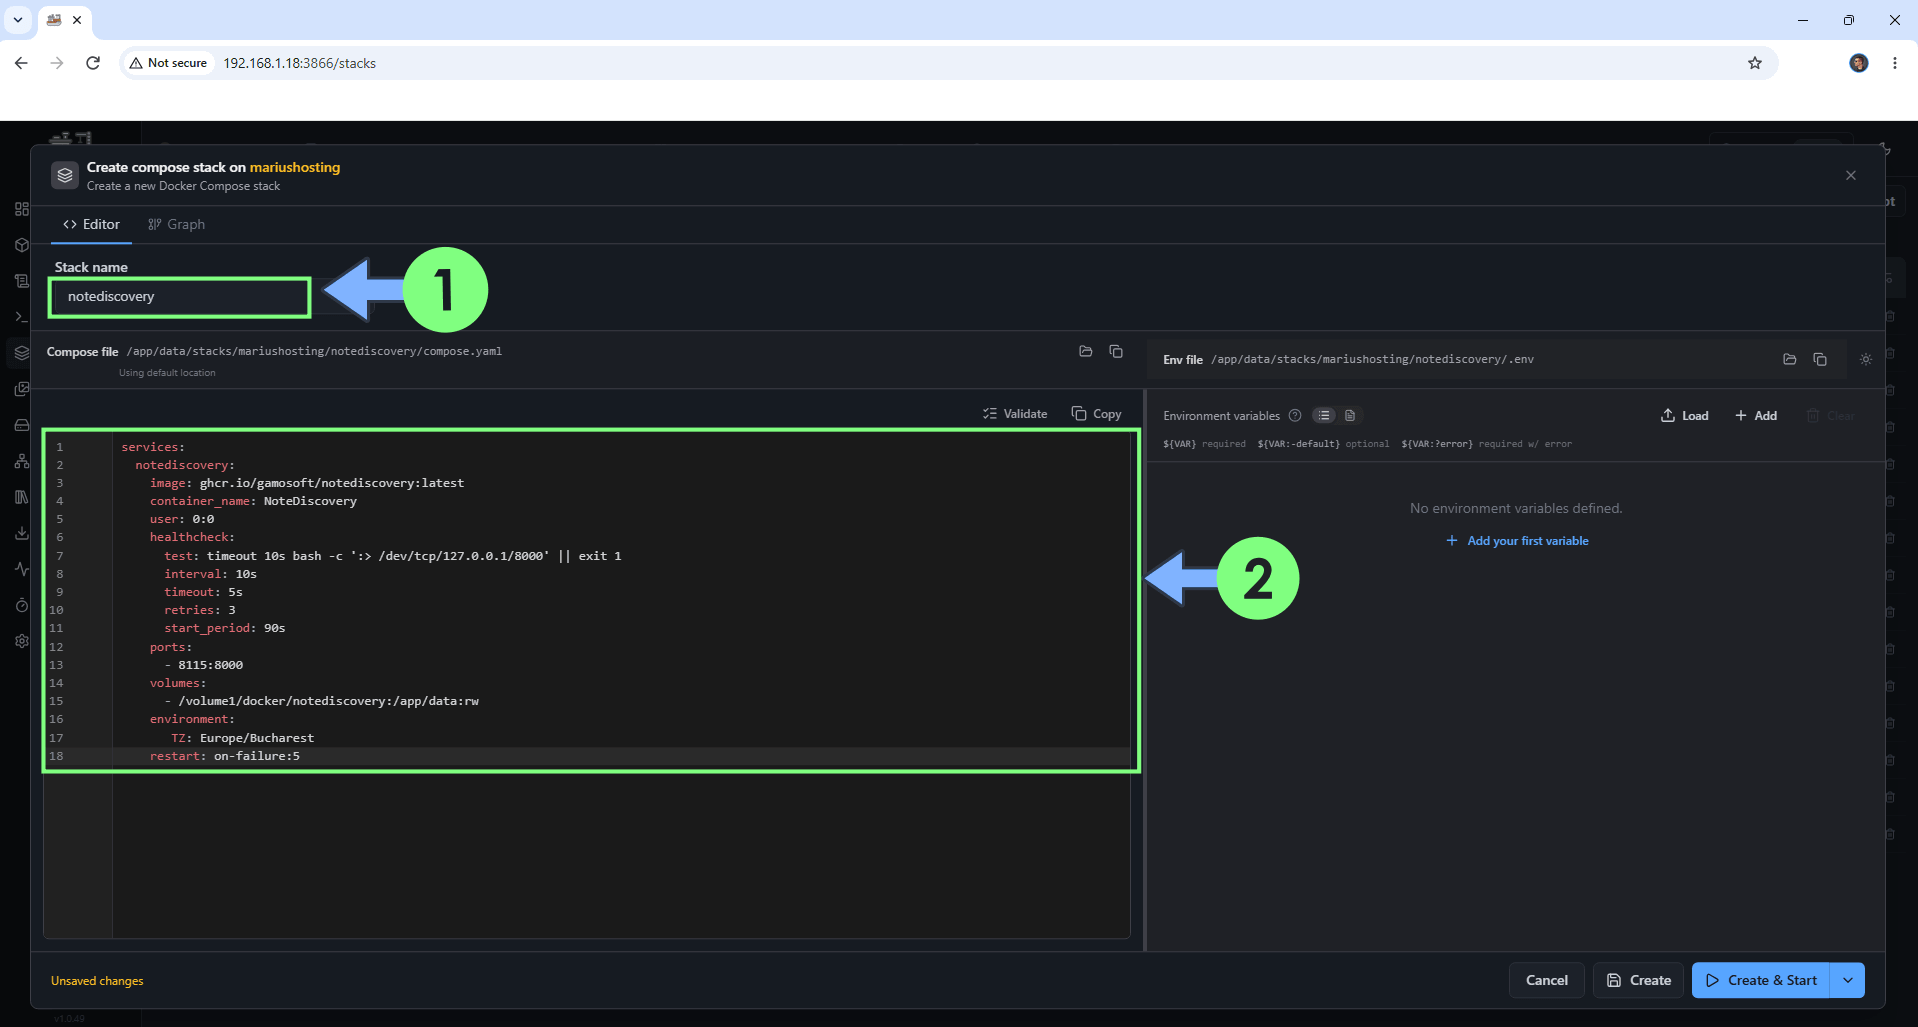
In the Stack name field, type in the name of your container (lower case letters). In my case, notediscovery. ⚠️Warning: Type in the name in lowercase letters. In the apposite stack area, paste the compose stack that you have previously copied at STEP 5. Follow the instructions in the image below. ⚠️Go straight to the next STEP without clicking anything on that page.
STEP 9
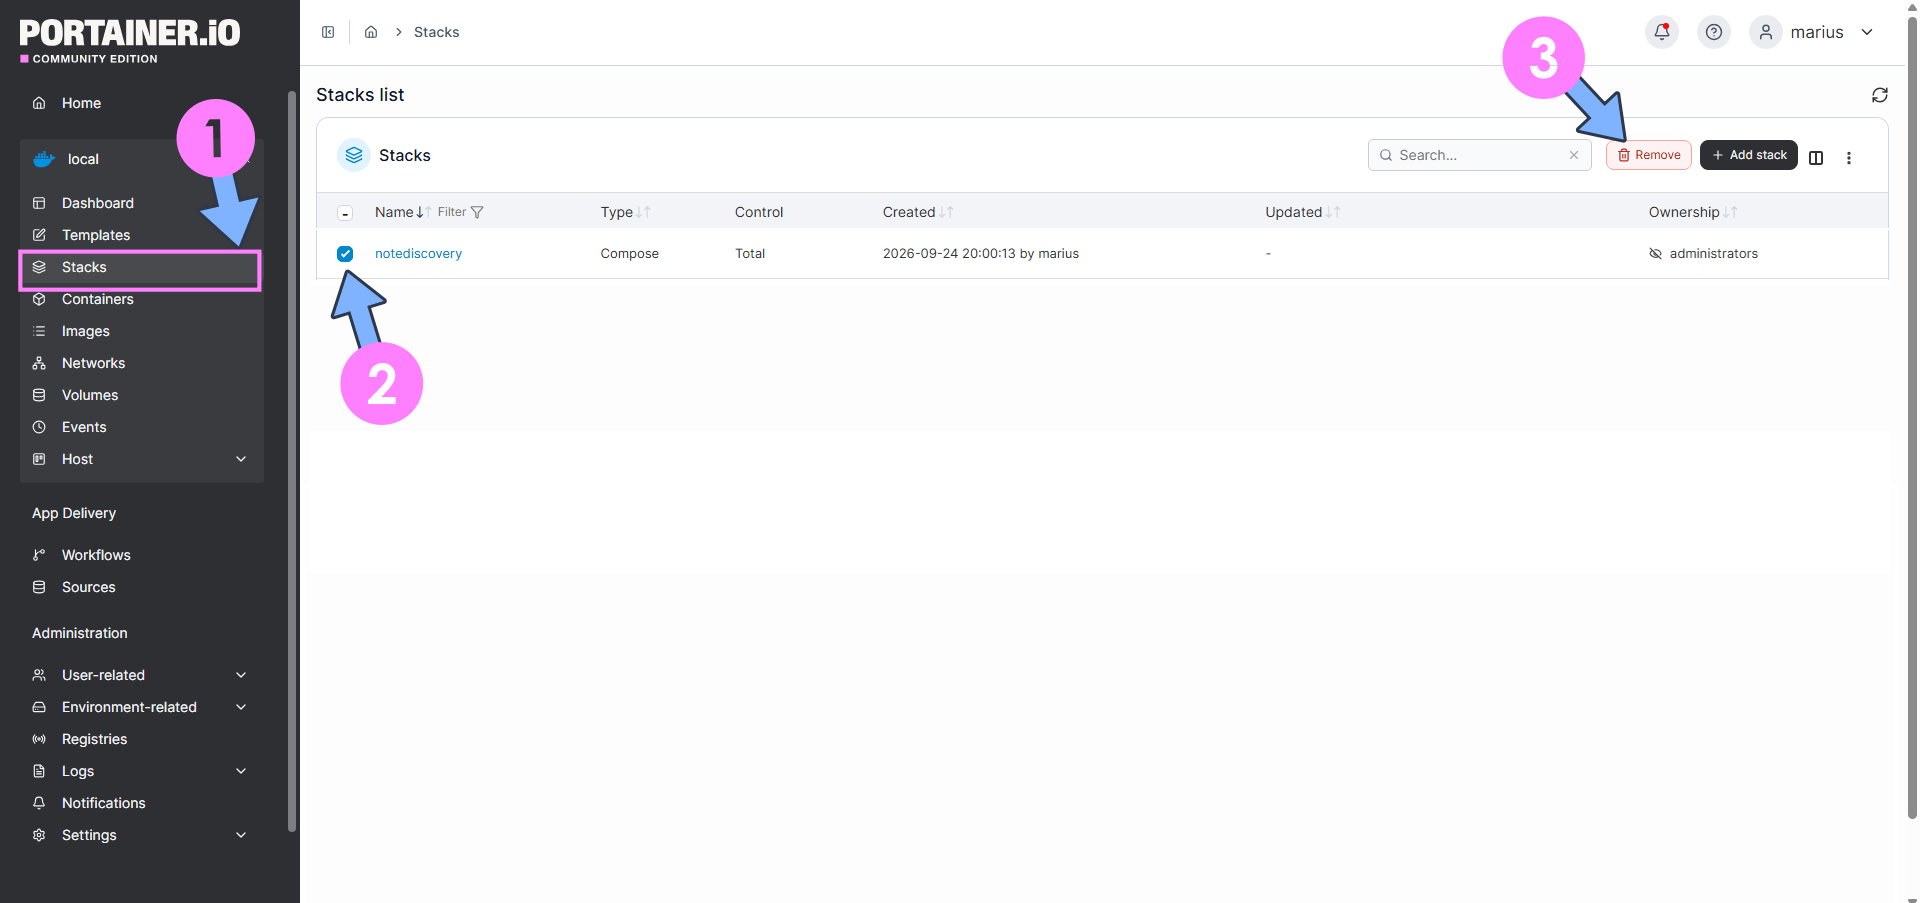
Open Portainer. On the left sidebar, click Stacks. Select the stack whose whole code you have previously copied at STEP 5. Click Remove. Follow the instructions in the image below.
STEP 10
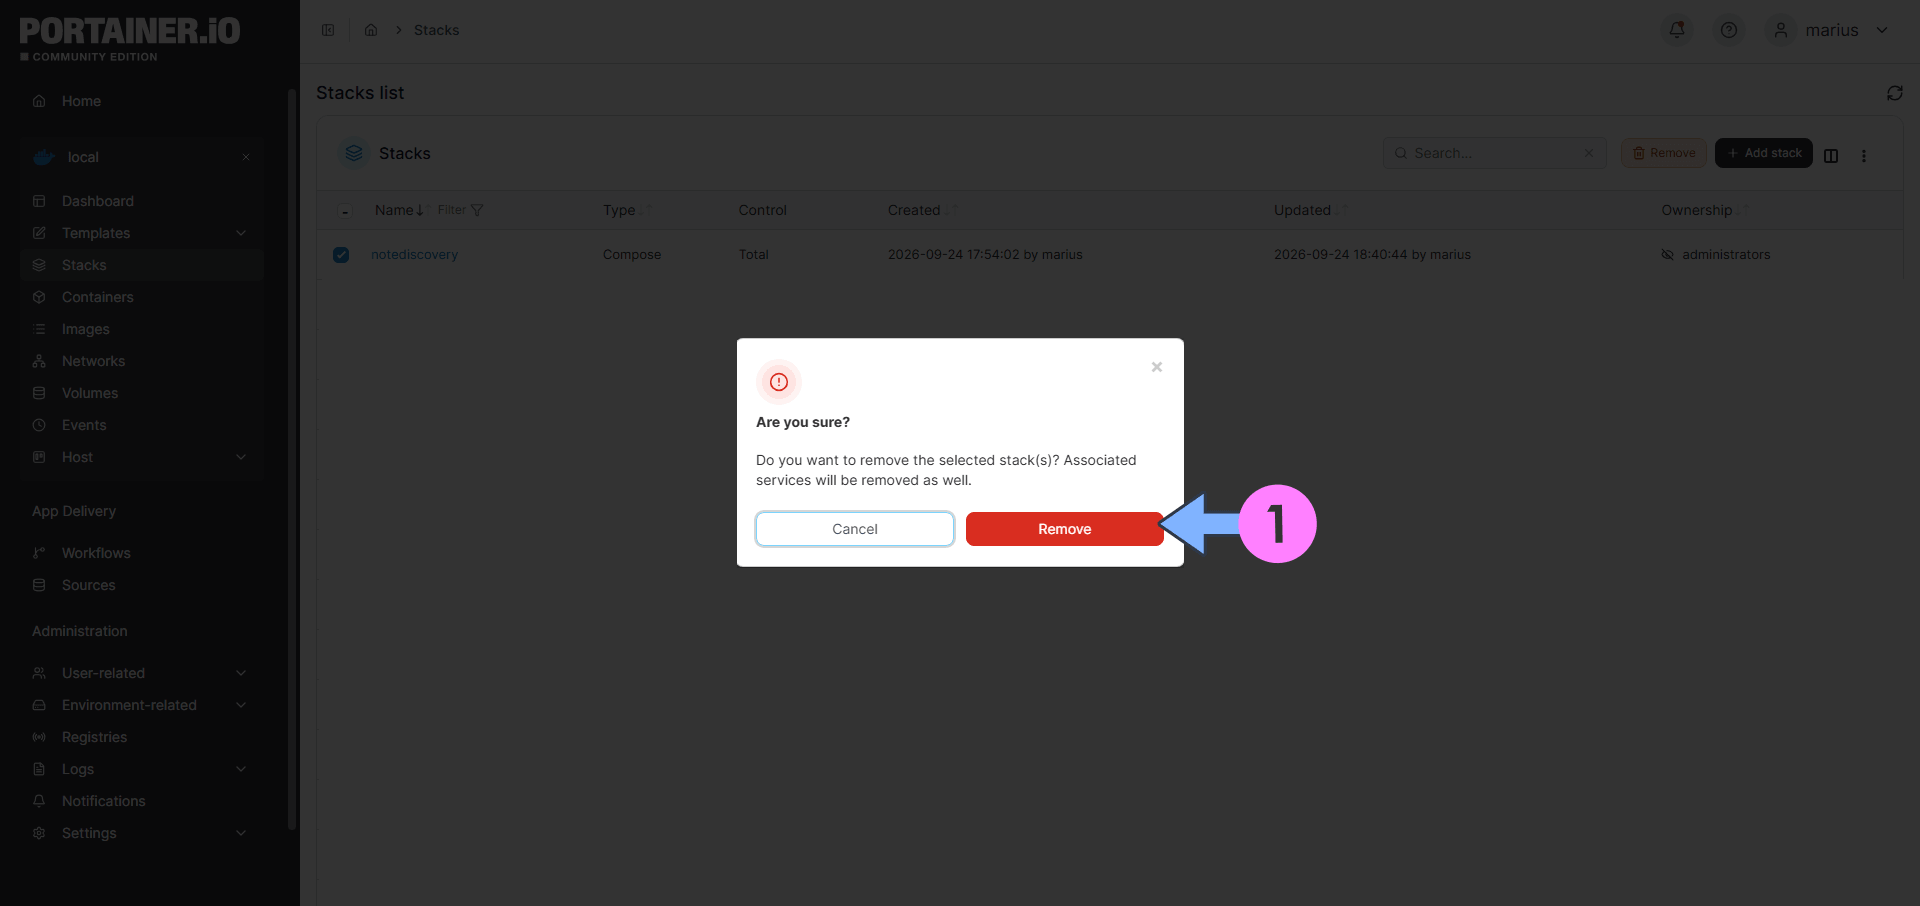
A new pop up window will open. Click Remove. Follow the instructions in the image below.
STEP 11
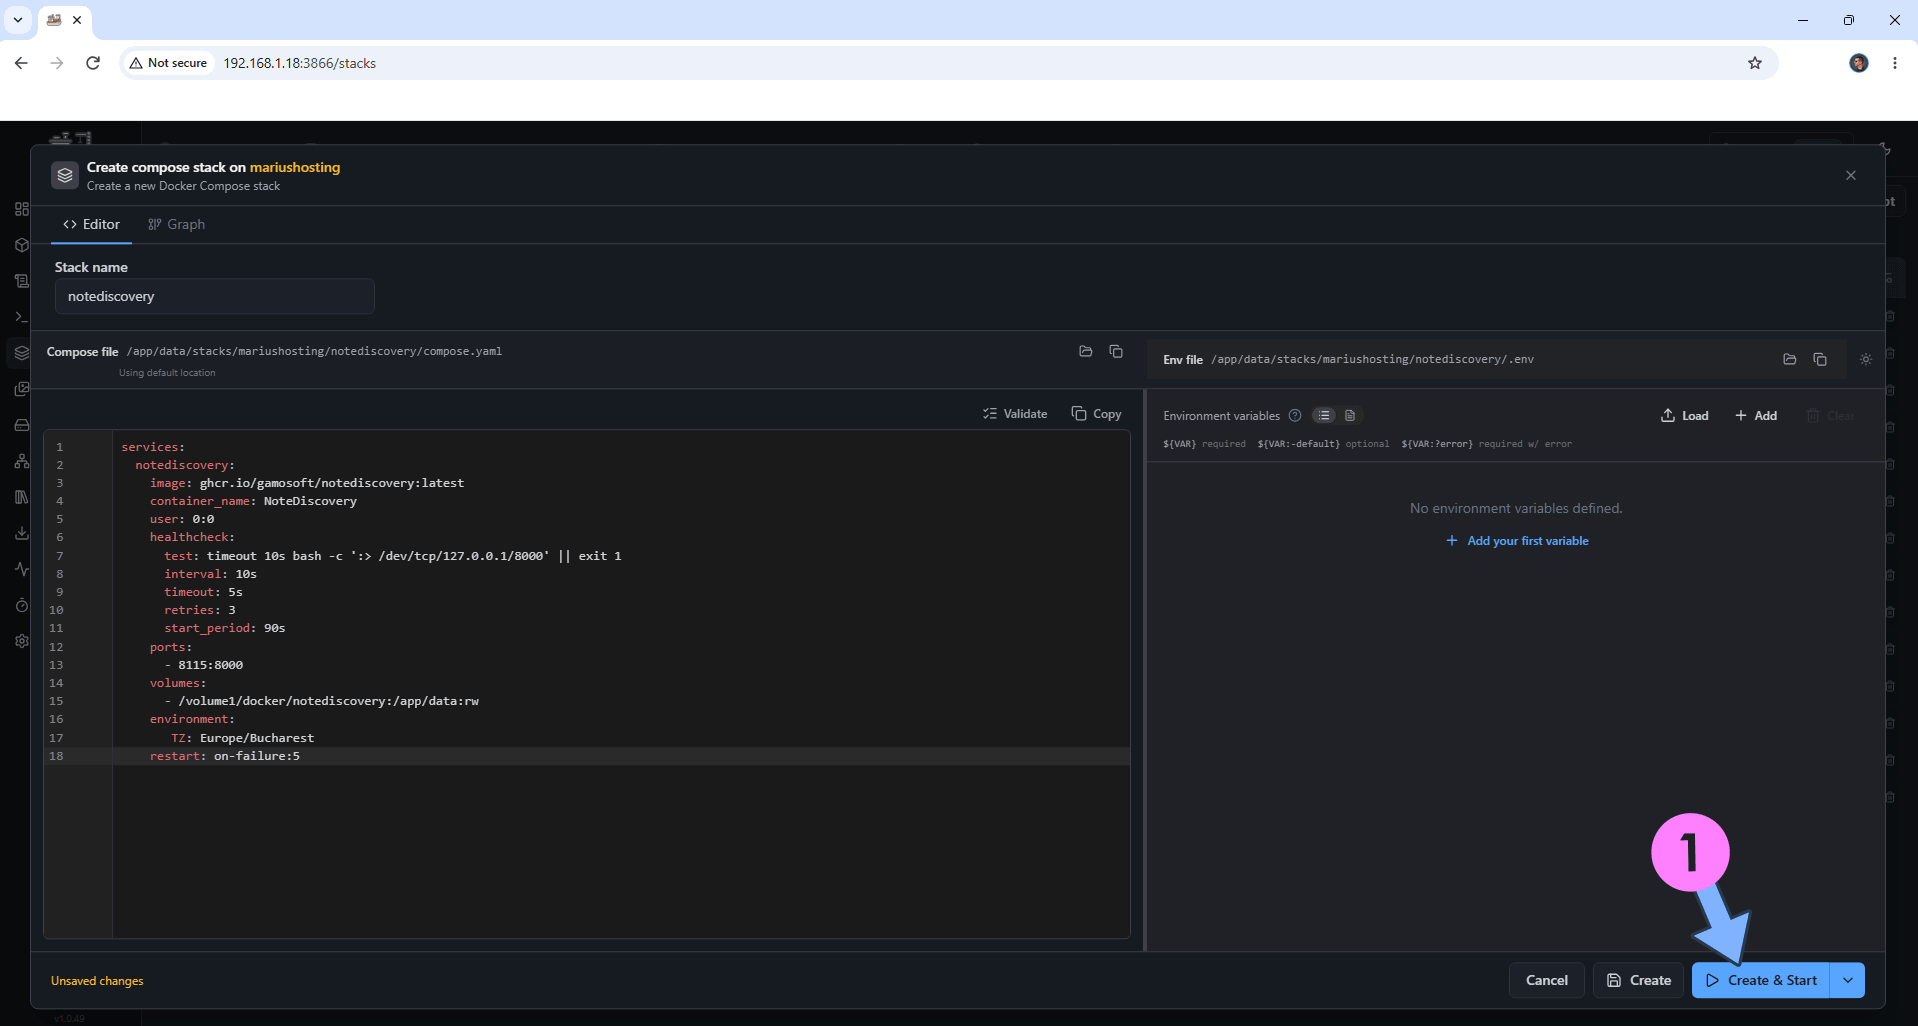
Go to the Dockhand page where you left off at STEP 7. Click Create & Start. Follow the instructions in the image below.
STEP 12
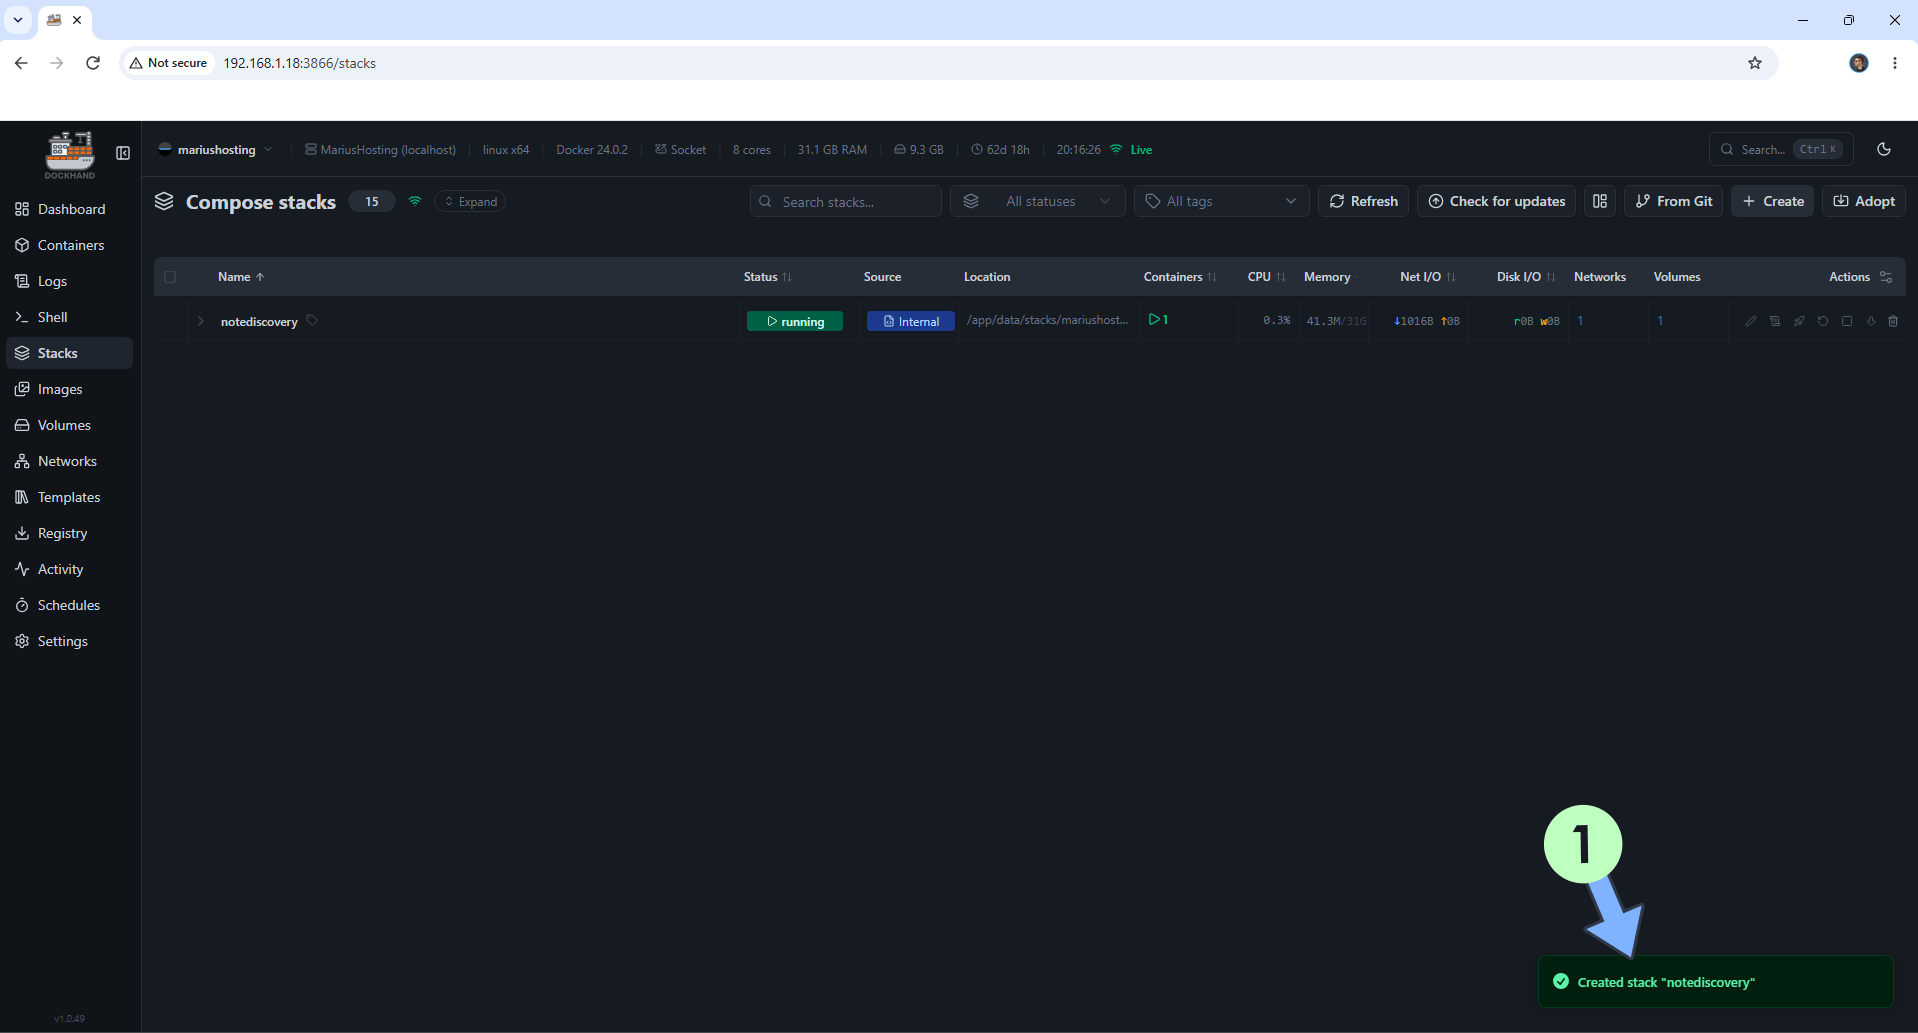
If everything goes right, you will see the following message at the bottom right of your screen: “Created stack “yourcontainername”“.
STEP 13
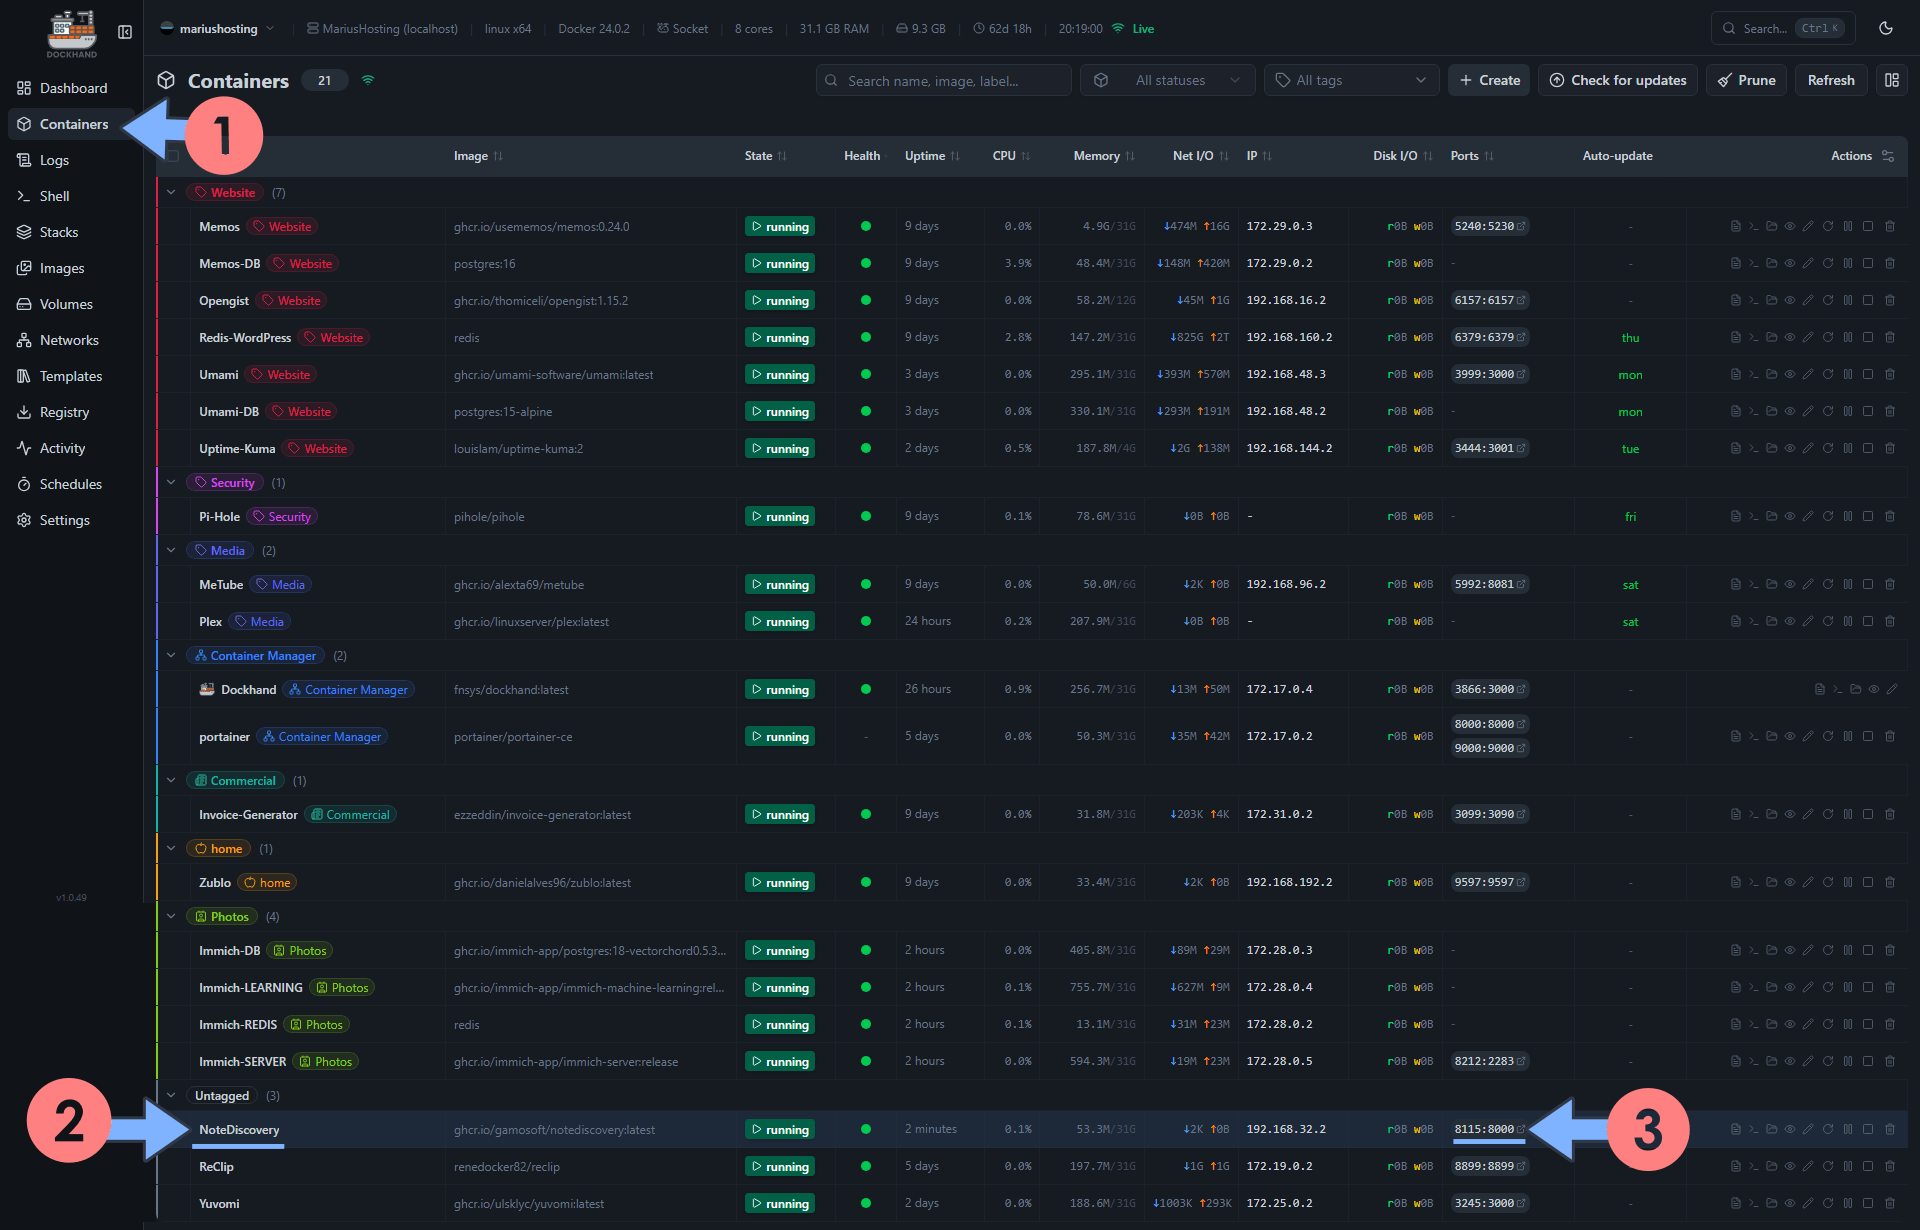
On the left sidebar, click Containers. Identify your container. In my case, it’s NoteDiscovery. Click on ports. Follow the instructions in the image below.
STEP 14
Congrats! You have successfully moved your first Container from Portainer to Dockhand. Now repeat the same identical operation for all the containers that you want to move from Portainer to Dockhand. By doing it this way, you’ll get used to doing things the simple, manual way while maintaining control over each container.
This post was updated on Friday / September 25th, 2026 at 12:15 AM