
Pi-Hole is a Linux network-level advertisement and Internet tracker blocking application which acts as a DNS sinkhole (and, optionally, a DHCP server), intended for use on a private network. What is a DNS sinkhole? A DNS sinkhole, also known as a sinkhole server, Internet sinkhole, or Blackhole DNS is a DNS server that gives out false information, to prevent the use of a domain name. It is designed for use on embedded devices with network capability, such as the Raspberry Pi, but it can be used on other machines running Linux like Asustor NAS and cloud implementations. Pi-Hole has the ability to block traditional website adverts as well as adverts in unconventional places, such as smart TVs and mobile operating system adverts. In this step by step guide I will show you how to install Pi-Hole on your Asustor NAS using Docker and Dockhand.
STEP 1
Please Support My work by Making a Donation.
STEP 2
⚠️Mandatory: Update your Asustor NAS Firmware to the latest version. Go to Settings / left sidebar ADM Maintenance / ADM Update tab. Click Update Now and update your NAS with the latest Firmware.
STEP 3
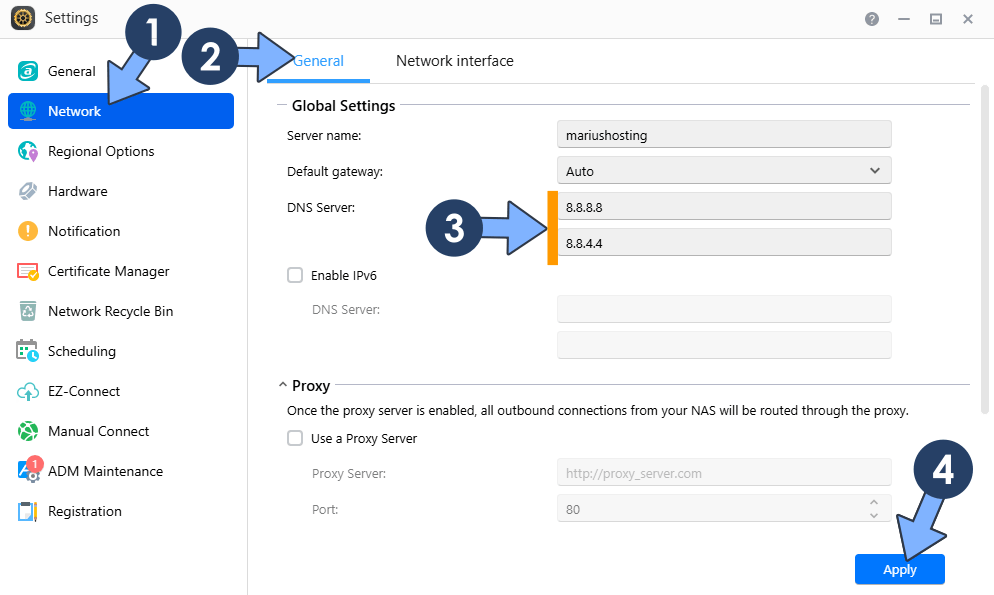
Add Google DNS. Go to Settings / Network / General tab. On the DNS server area, type in 8.8.8.8 and 8.8.4.4 Click Apply. Follow the instructions in the image below.
STEP 4
Install Dockhand using my step by step guide. If you already have Dockhand installed on your Asustor NAS, skip this STEP. ⚠️Attention: Make sure you have installed the latest Dockhand version.
STEP 5
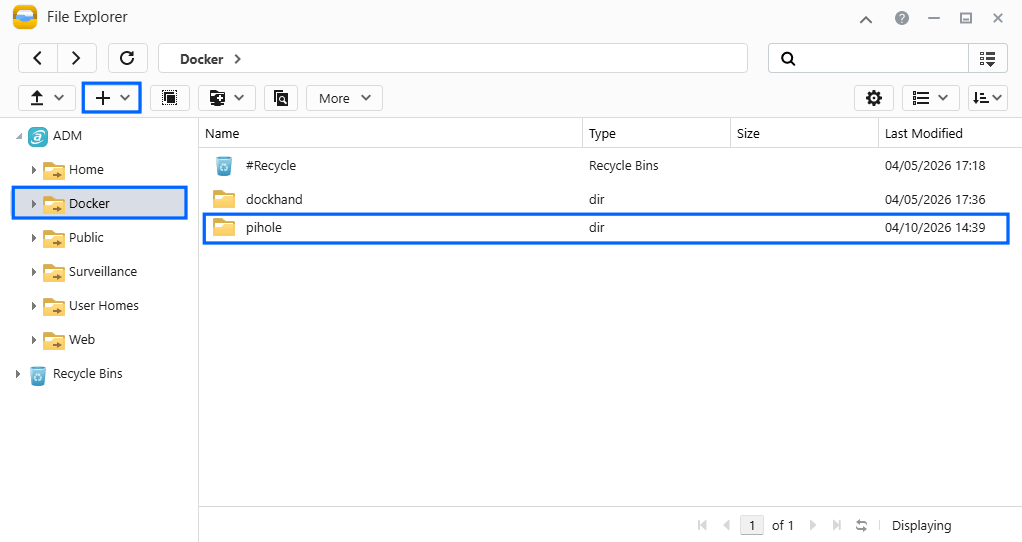
Go to File Explorer and open the Docker folder. Inside the Docker folder, create one new folder and name it pihole. Follow the instructions in the image below.
Note: Be careful to enter only lowercase, not uppercase letters.
STEP 6
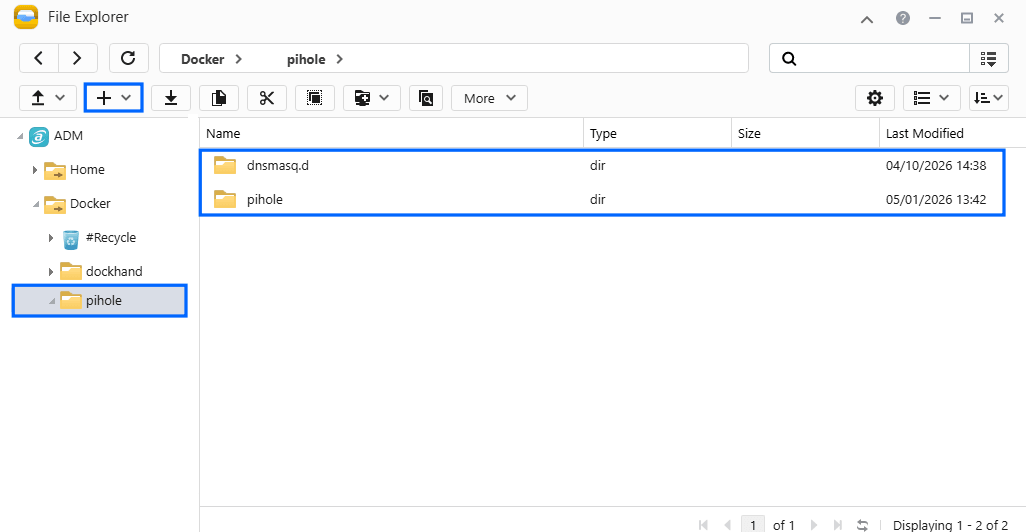
Now create two new folders inside the pihole folder that you previously created at STEP 5 and name them pihole and dnsmasq.d Follow the instructions in the image below.
Note: Be careful to enter only lowercase, not uppercase letters.
STEP 7
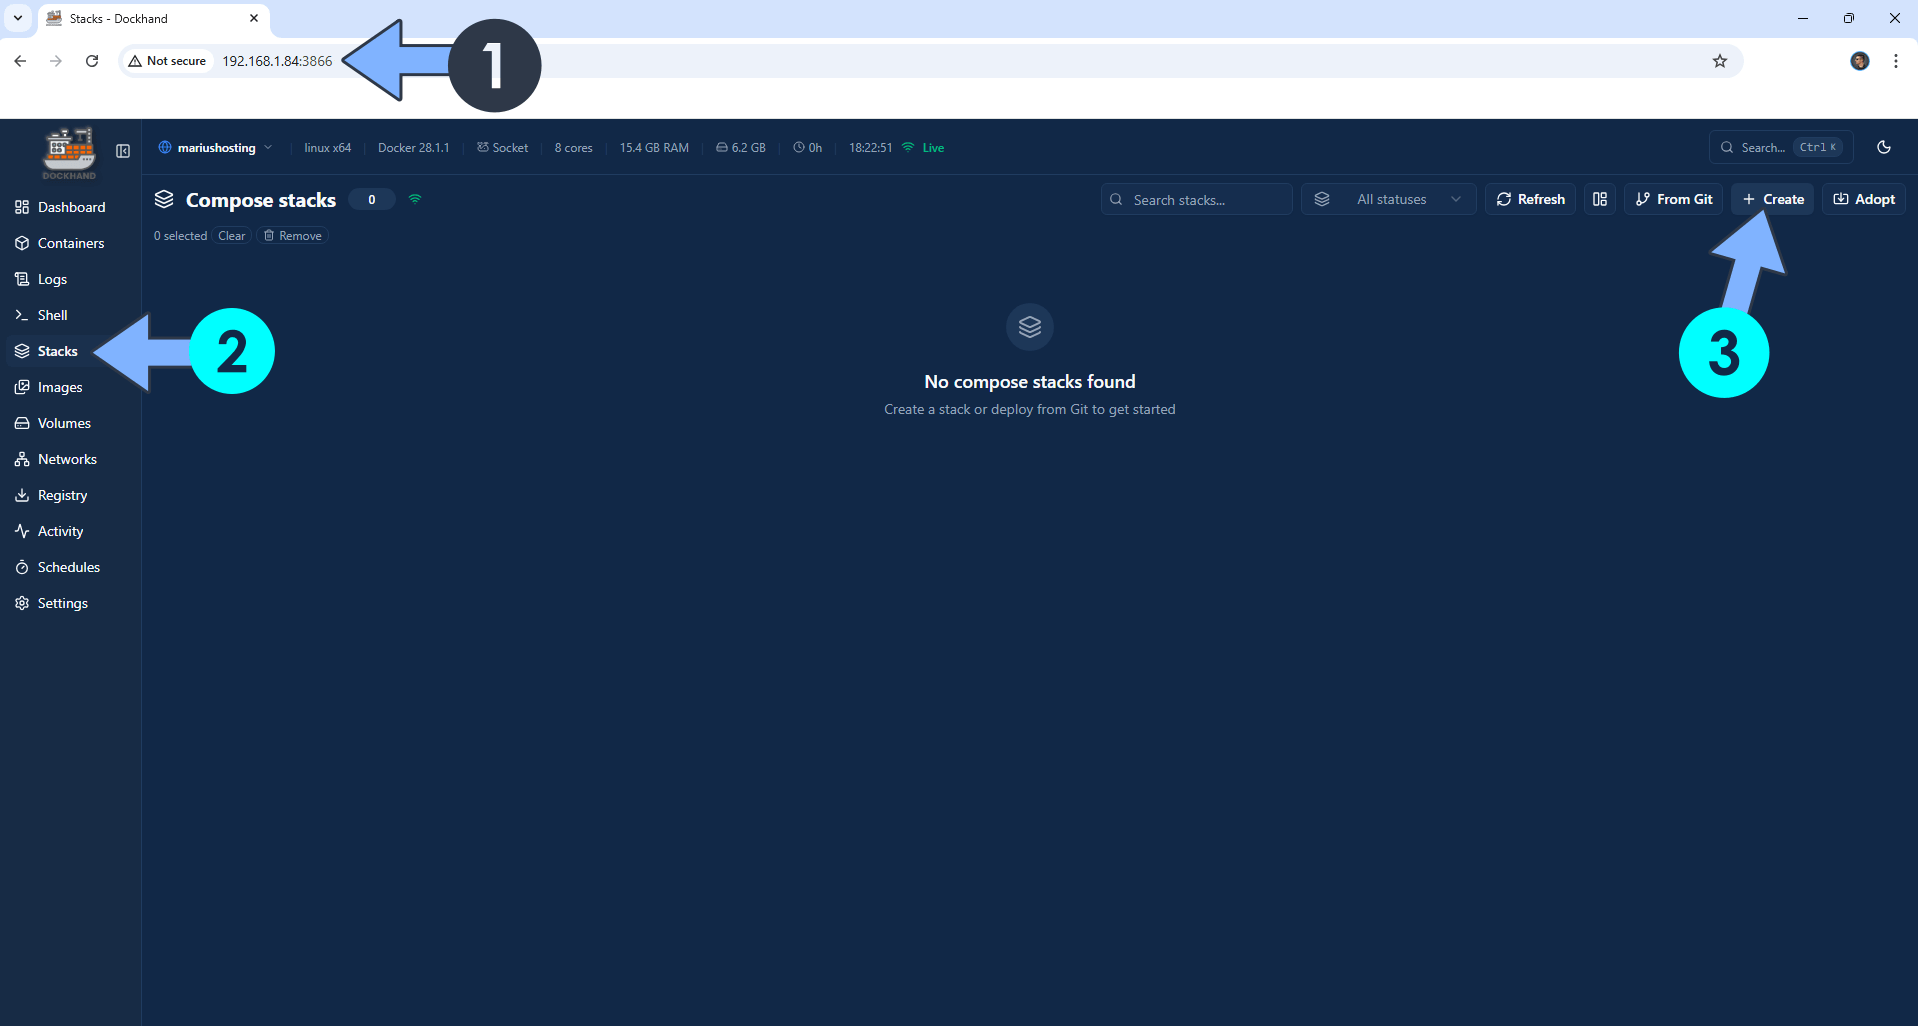
Open your browser and type in http://asustor-ip-address:3866 to connect to your Dockhand container. On the left sidebar, click Stacks then + Create. Follow the instructions in the image below.
STEP 8
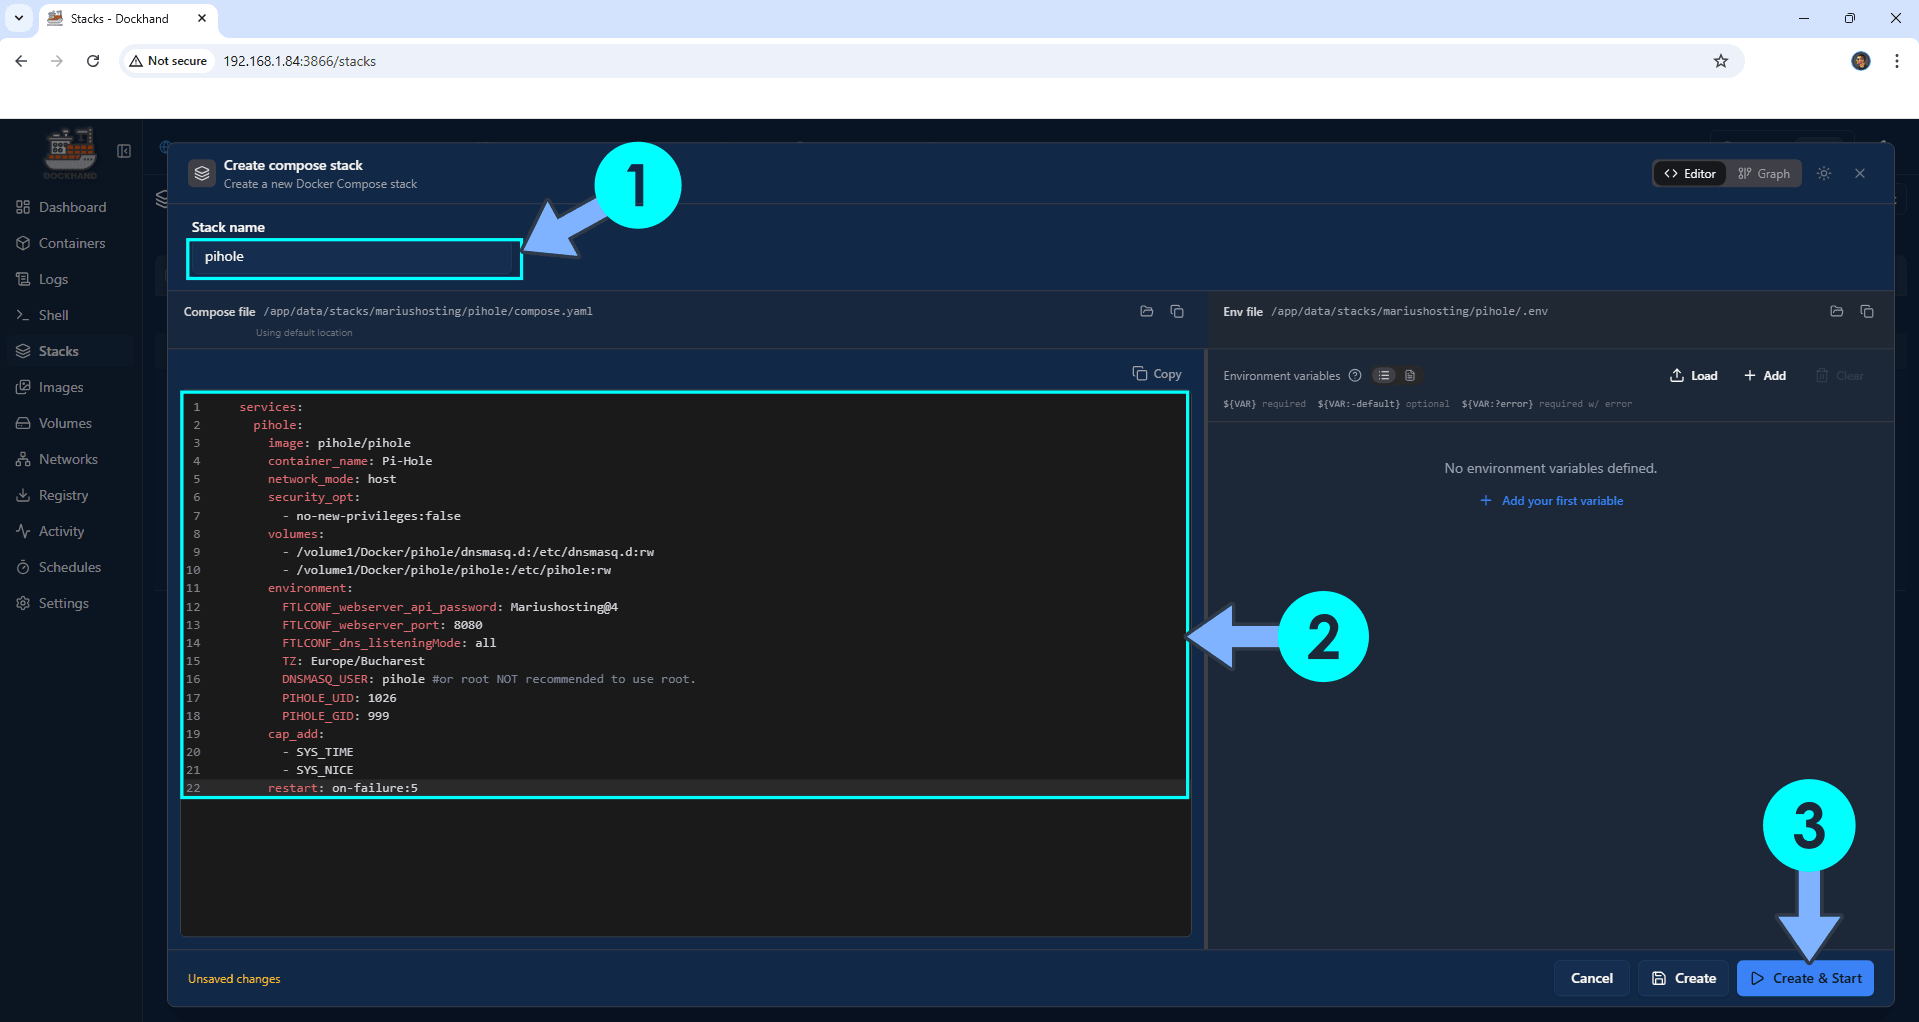
In the Stack name field, type in pihole. ⚠️Warning: Type in the name in lowercase letters. The installation process can take up to a few seconds/minutes. It will depend on your Internet speed connection. Follow the instructions in the image below.
services:
  pihole:
    image: pihole/pihole
    container_name: Pi-Hole
    network_mode: host
    security_opt:
      - no-new-privileges:false
    volumes:
      - /volume1/Docker/pihole/dnsmasq.d:/etc/dnsmasq.d:rw
      - /volume1/Docker/pihole/pihole:/etc/pihole:rw
    environment:
      FTLCONF_webserver_api_password: Mariushosting@4
      FTLCONF_webserver_port: 8080
      FTLCONF_dns_listeningMode: all
      TZ: Europe/Bucharest
      DNSMASQ_USER: pihole #or root NOT recommended to use root.
      PIHOLE_UID: 1026
      PIHOLE_GID: 999
    cap_add:
      - SYS_TIME
      - SYS_NICE
    restart: on-failure:5
Note: Before you paste the code above in the Web editor area below, change the value for FTLCONF_webserver_api_password and add your own password. Mariushosting@4 is an example for a password, you should use your own password.
Note: Before you paste the code above in the Web editor area below, change the value for TZ. (Select your current Time Zone from this list.)
Note: Before you paste the code above in the Web editor area below, change the value numbers for PIHOLE_UID and PIHOLE_GID with your own UID and GID values. (Follow my step by step guide on how to do this.)
STEP 9
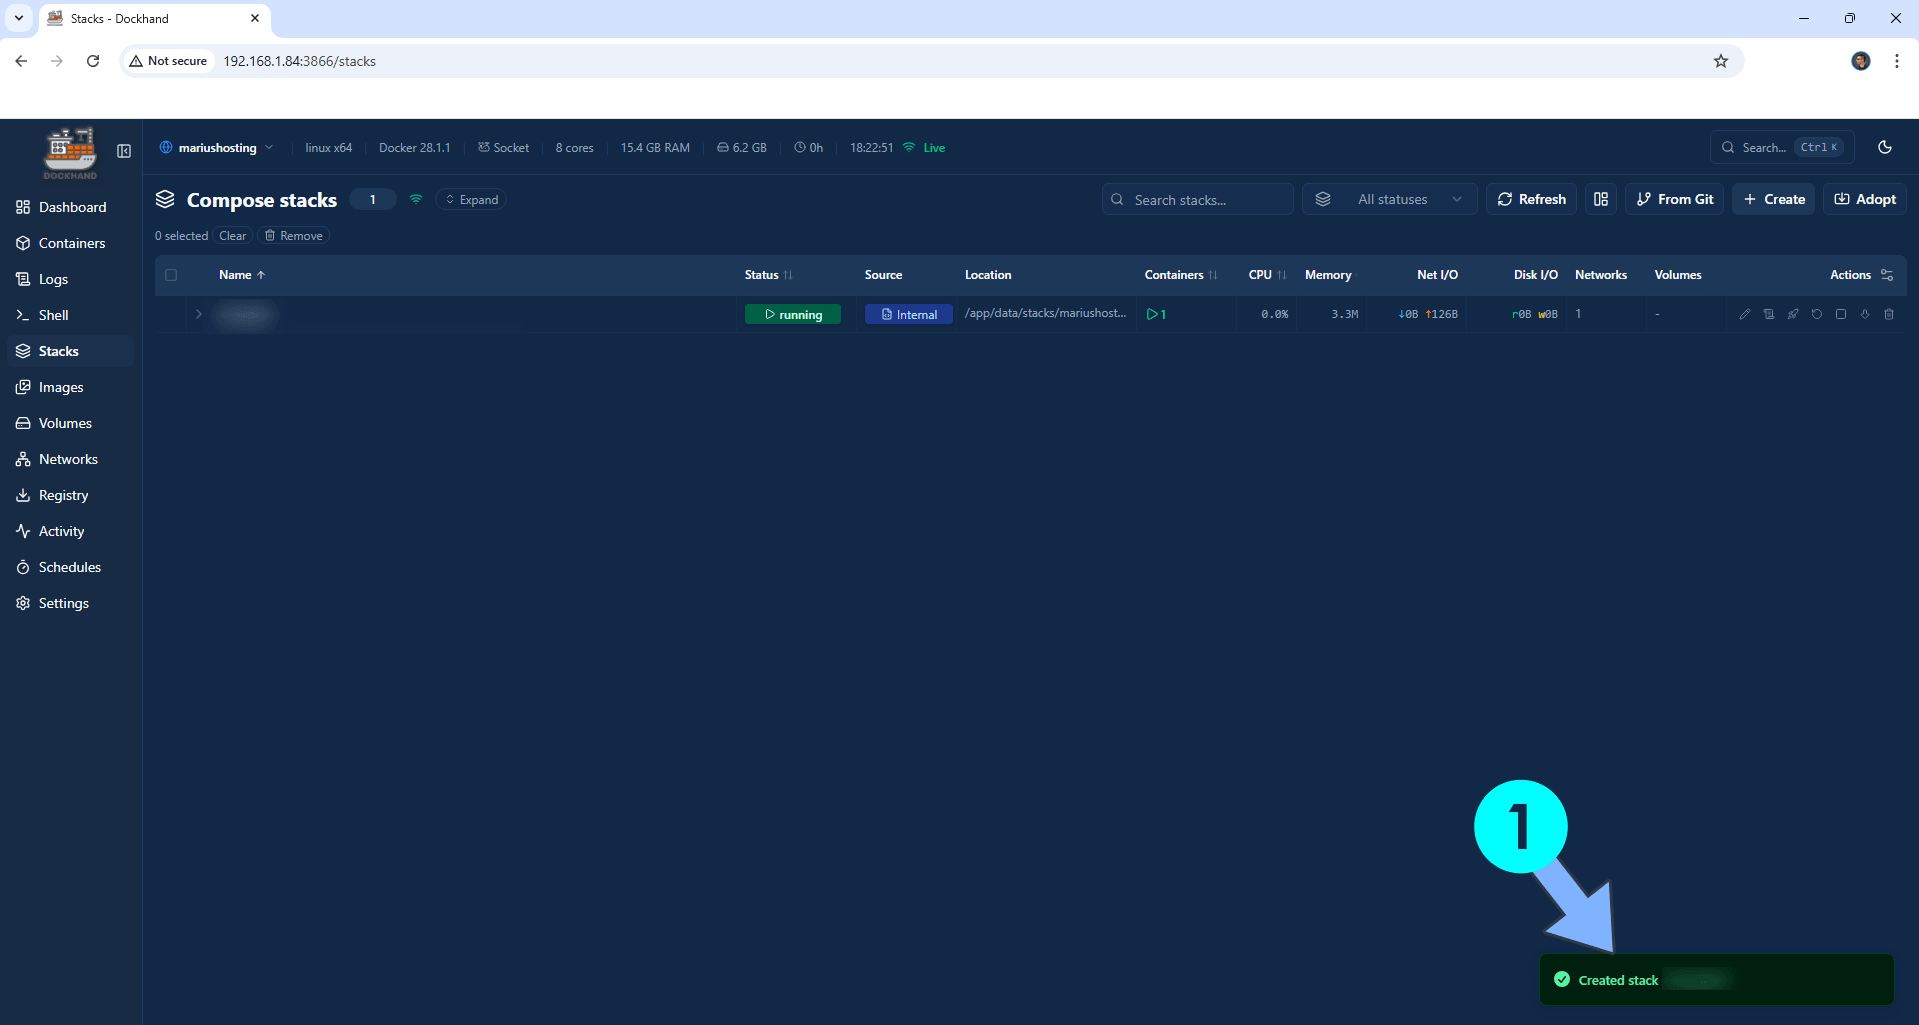
If everything goes right, you will see the following message at the bottom right of your screen: “Created stack “pihole”“.
STEP 10
🟢Please Support My work by Making a Donation. Almost 99,9% of the people that install something using my guides forget to support my work, or just ignore STEP 1. I’ve been very honest about this aspect of my work since the beginning: I don’t run any ADS, I don’t require subscriptions, paid or otherwise, I don’t collect IPs, emails, and I don’t have any referral links from Amazon or other merchants. I also don’t have any POP-UPs or COOKIES. I have repeatedly been told over the years how much I have contributed to the community. It’s something I love doing and have been honest about my passion since the beginning. But I also Need The Community to Support me Back to be able to continue doing this work.
STEP 11
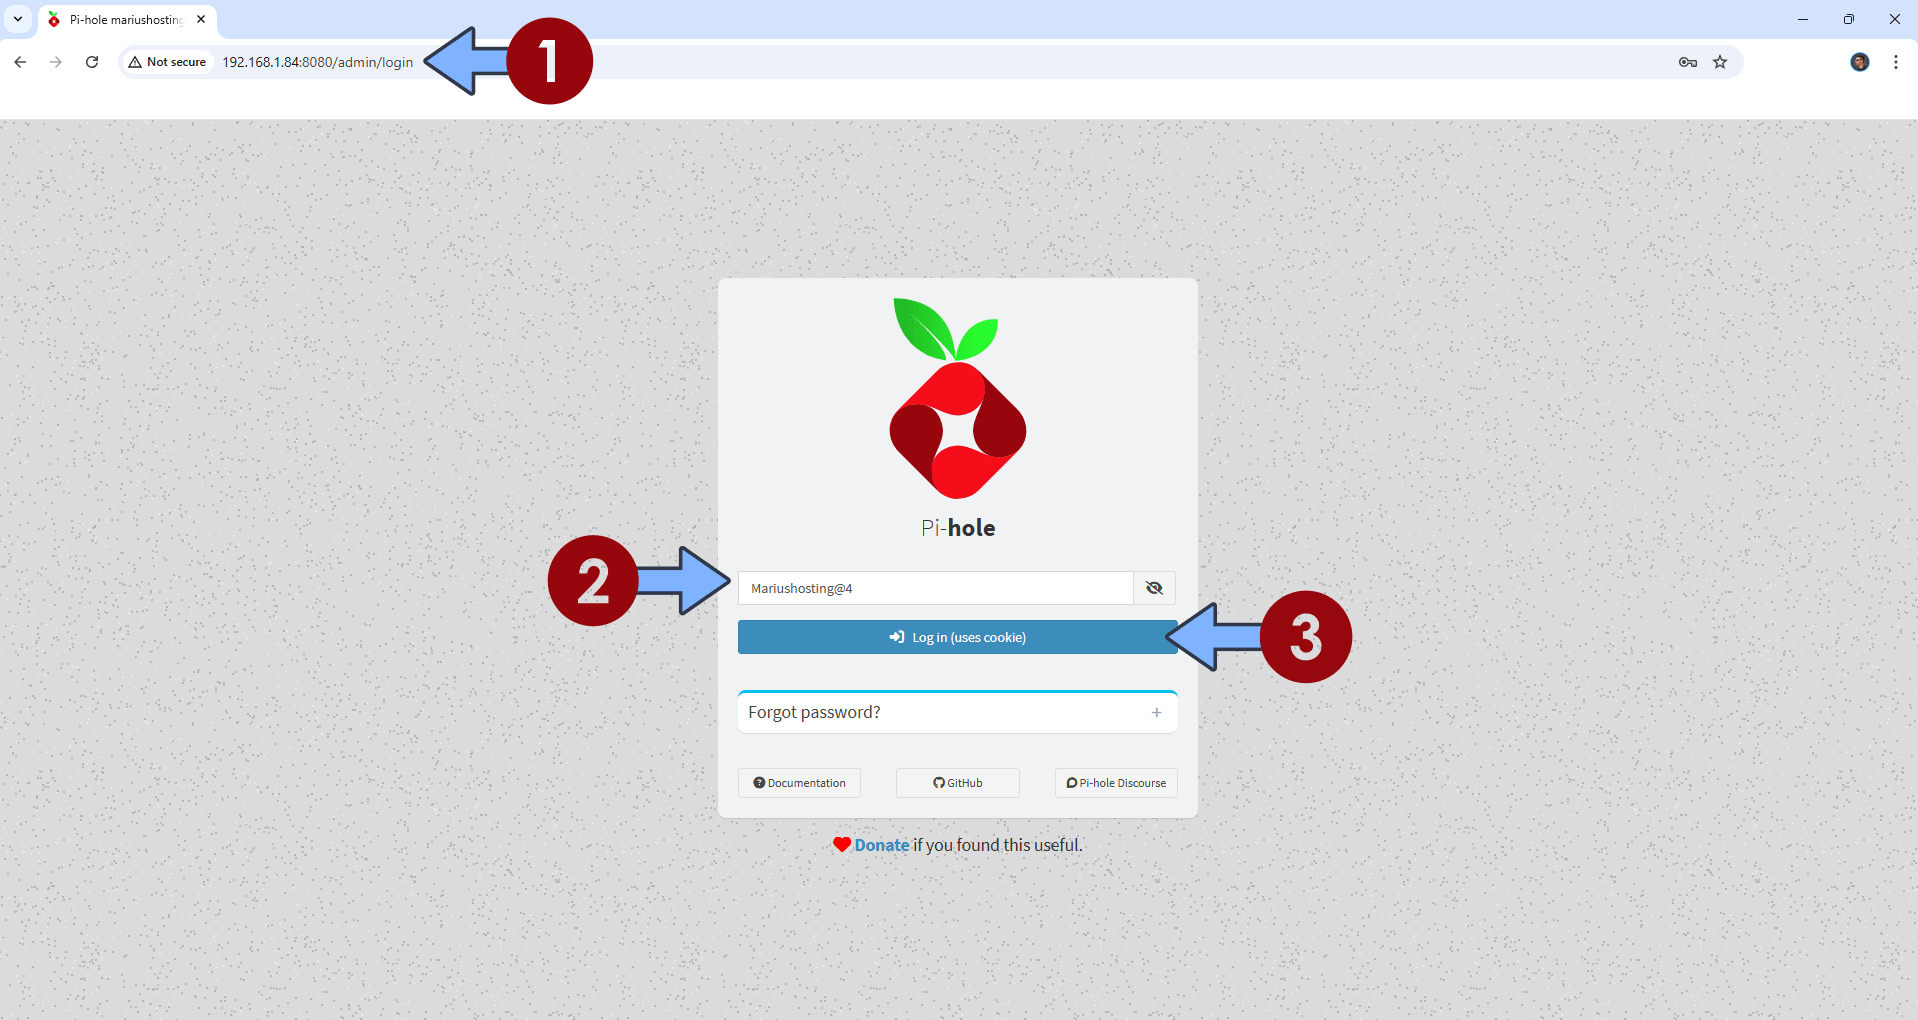
The installation process can take up to a few seconds/minutes. It will depend on your Internet speed connection. Now open your browser and type in http://asustor-ip-address:8080/admin/login Type in the Password (FTLCONF_webserver_api_password) that you have previously created at STEP 8. Click Log in. Follow the instructions in the image below.
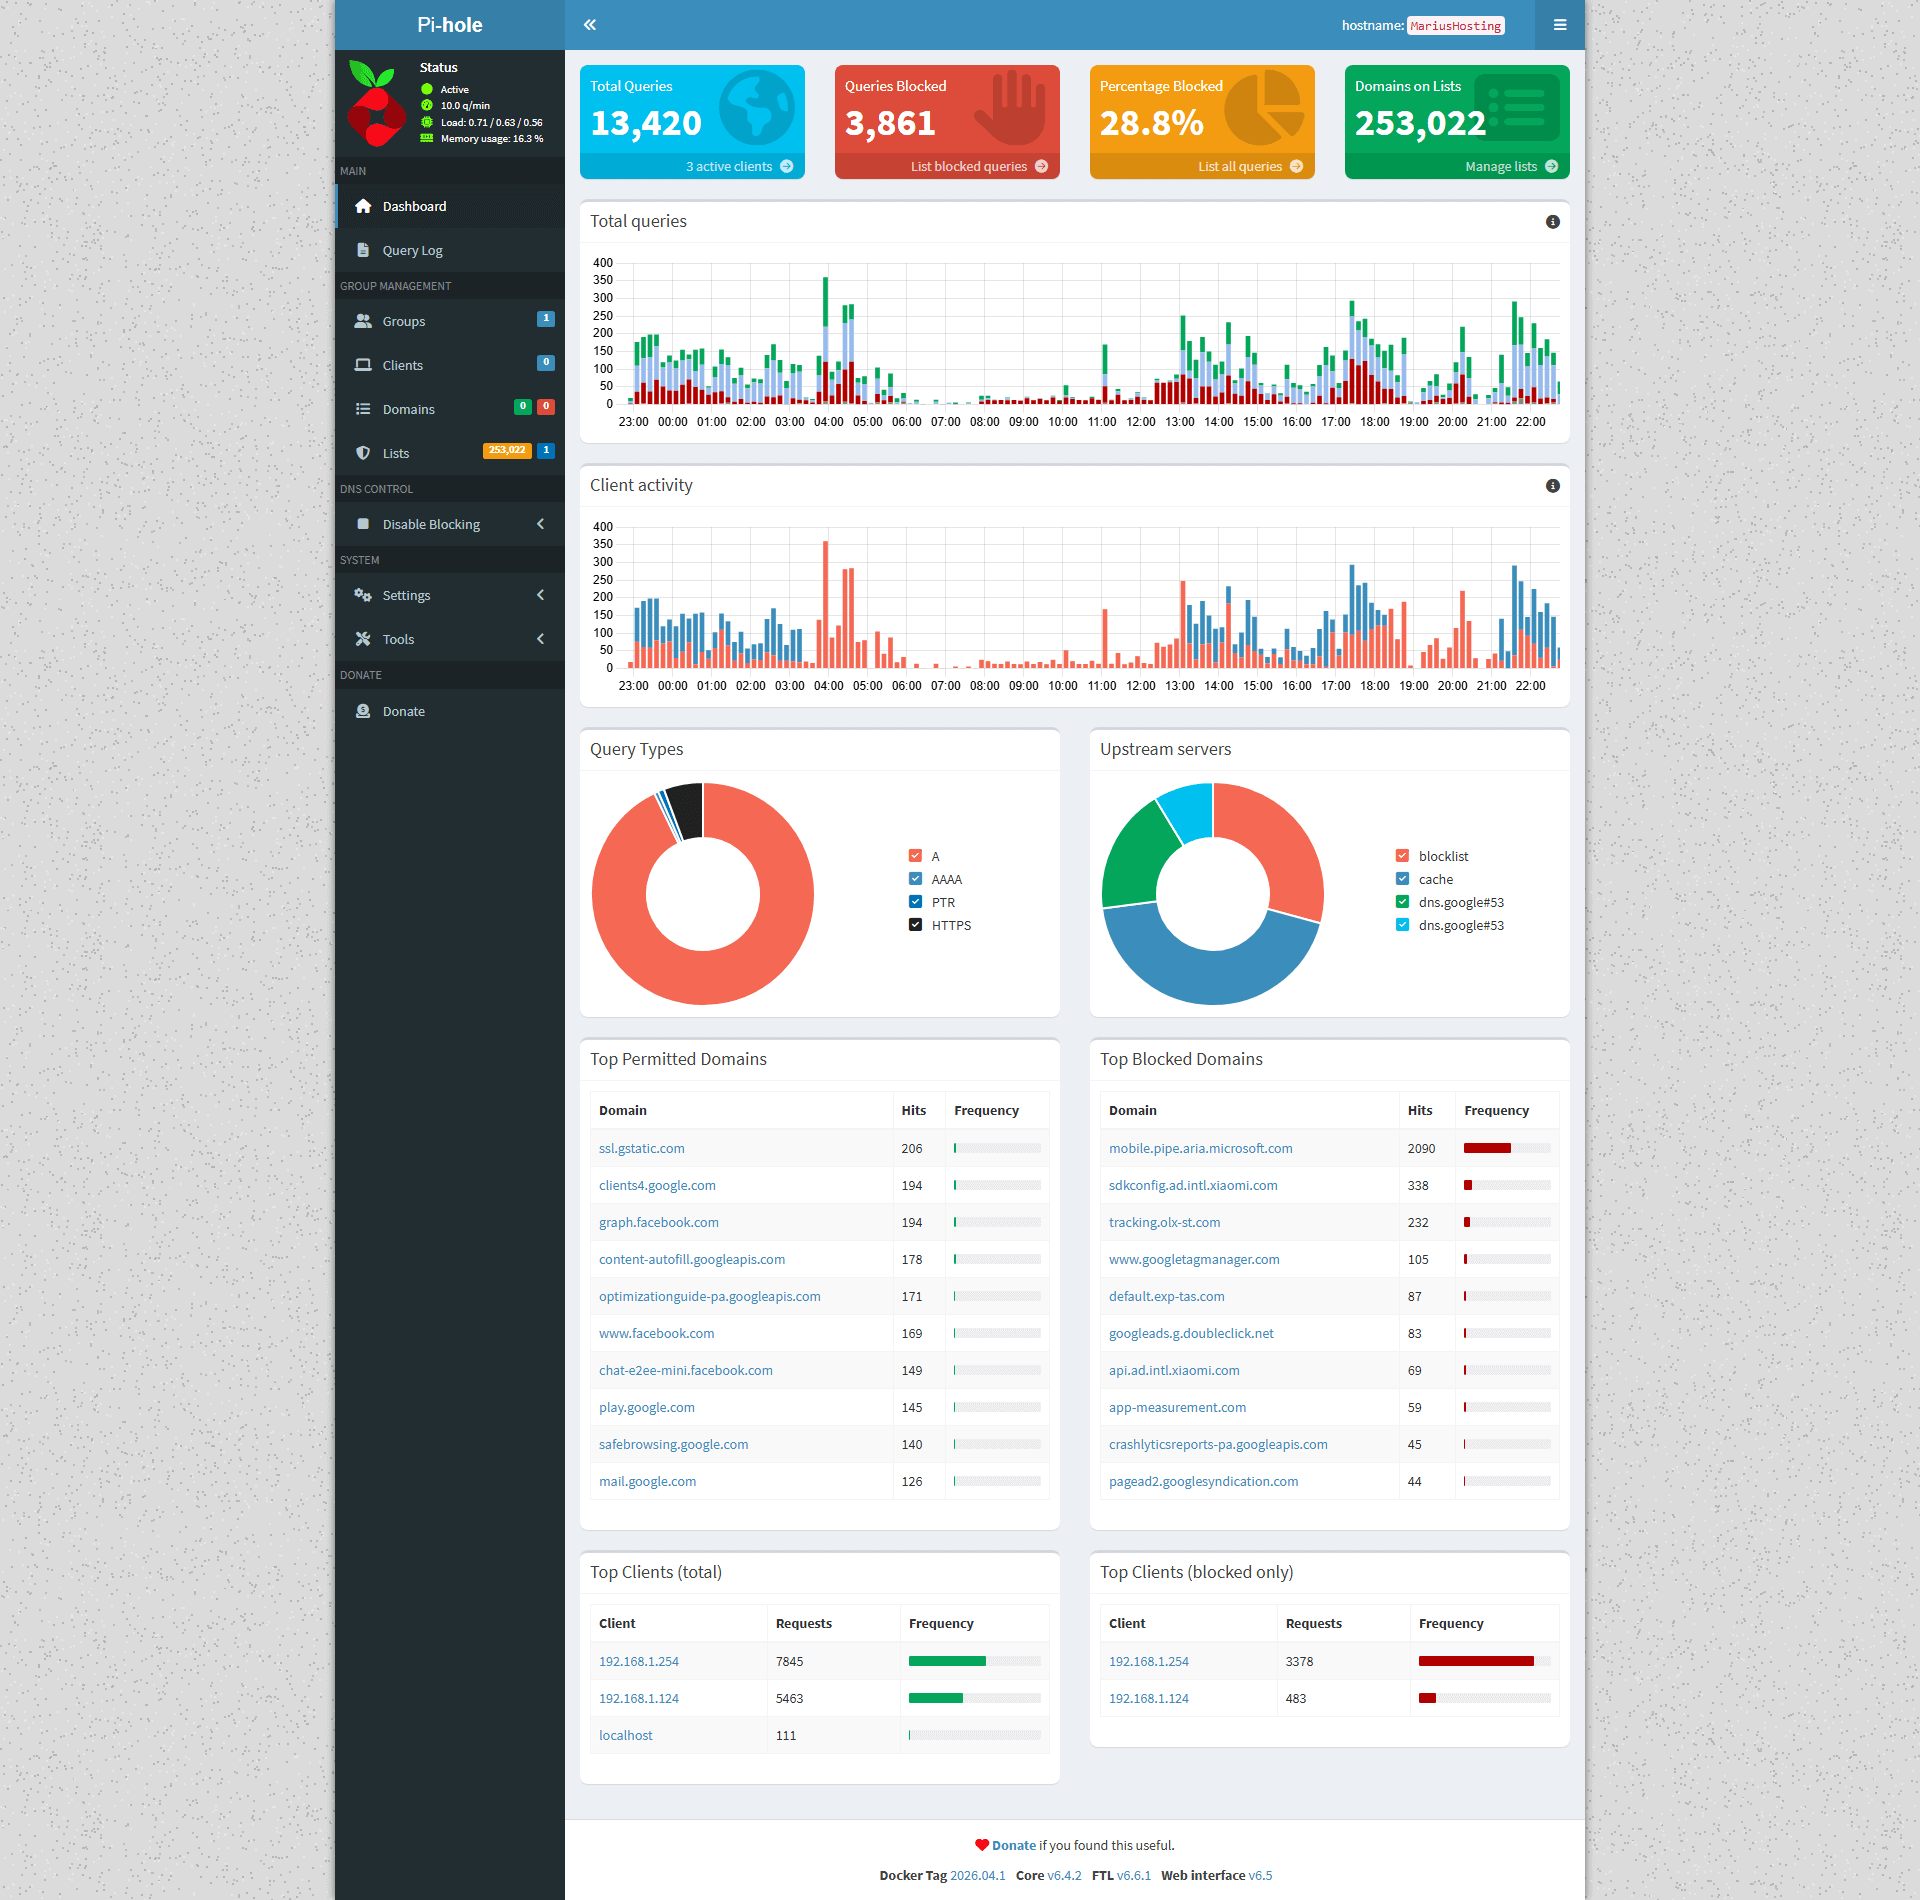
STEP 12
Your Pi-hole dashboard at a glance!
Fix: If you are experiencing the following issues:
Cannot bind to IPv4 address 0.0.0.0:123 (Address in use), IPv4 NTP server not available
Cannot bind to IPv6 address :::123 (Address in use), IPv6 NTP server not available
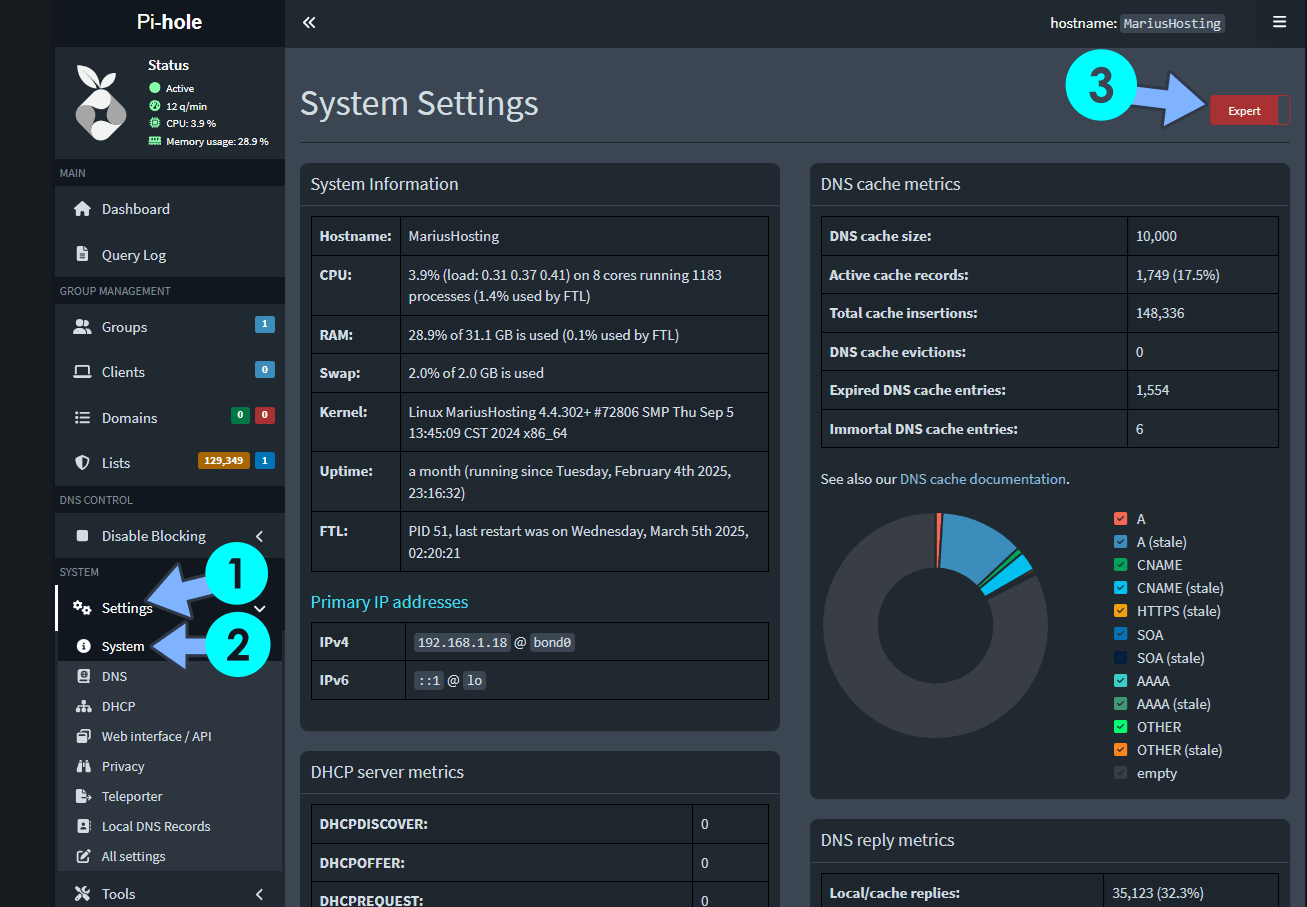
Go to Pi-Hole / Settings / System / At the top right of the page, switch from Basic to Expert. Follow the instructions in the image below.
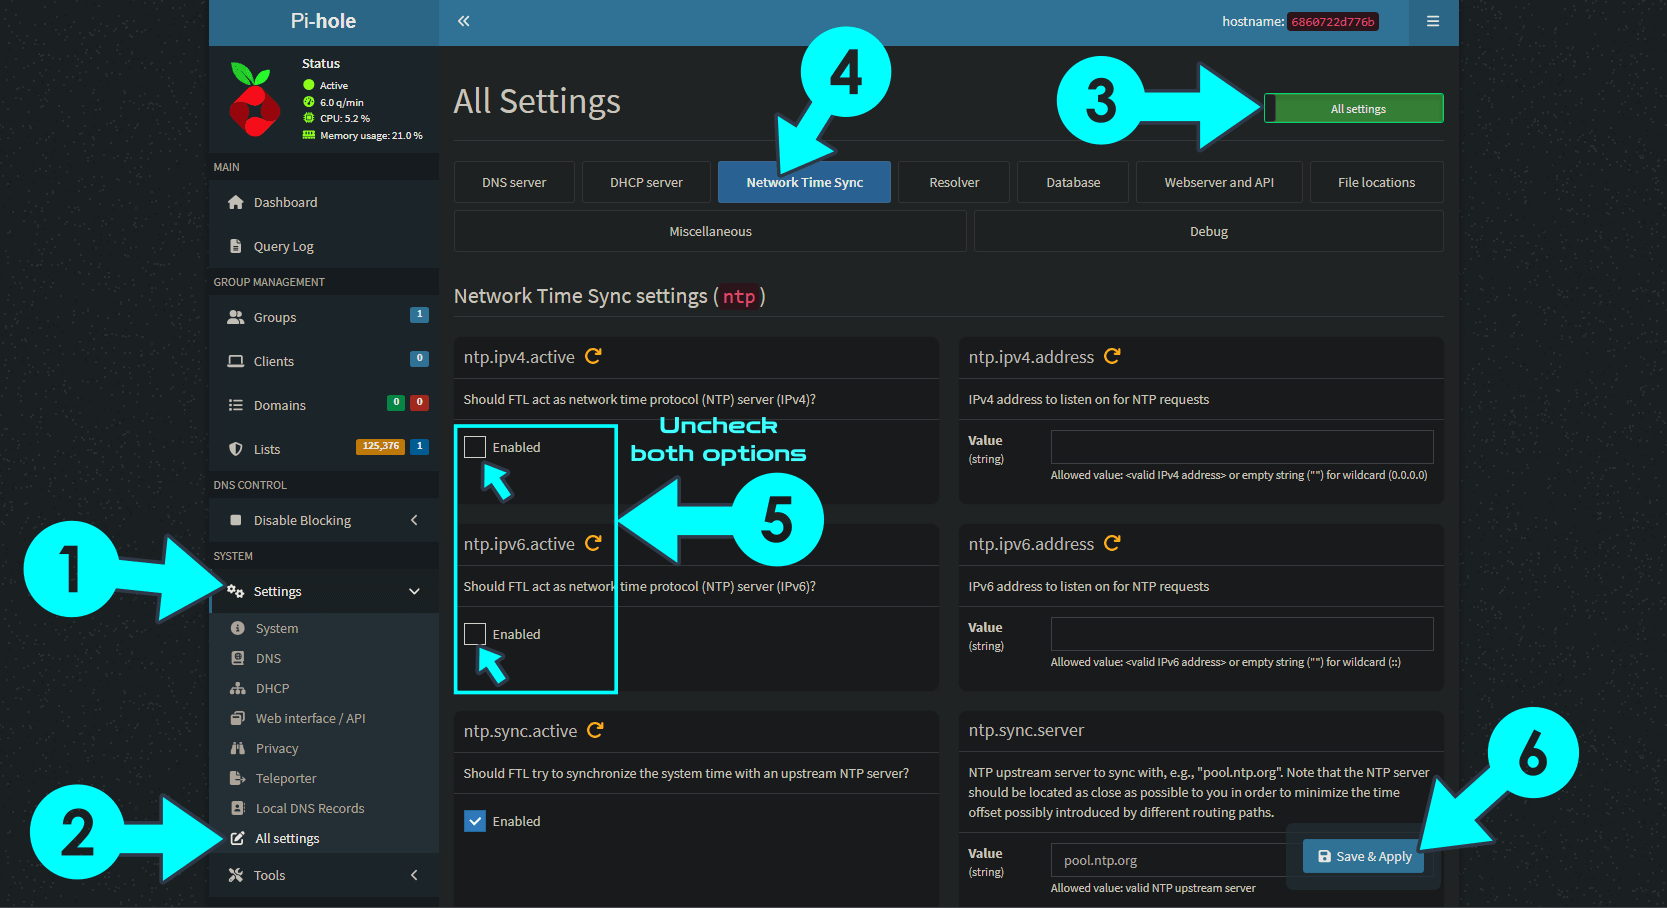
After you have activated the Expert function above, go to Pi-Hole / Settings / All Settings / Switch to All settings / Click on the Network Time Sync tab/ Uncheck the ntp.ipv4.active and ntp.ipv6.active options, then click Save & Apply. Follow the instructions in the image below.
STEP 13
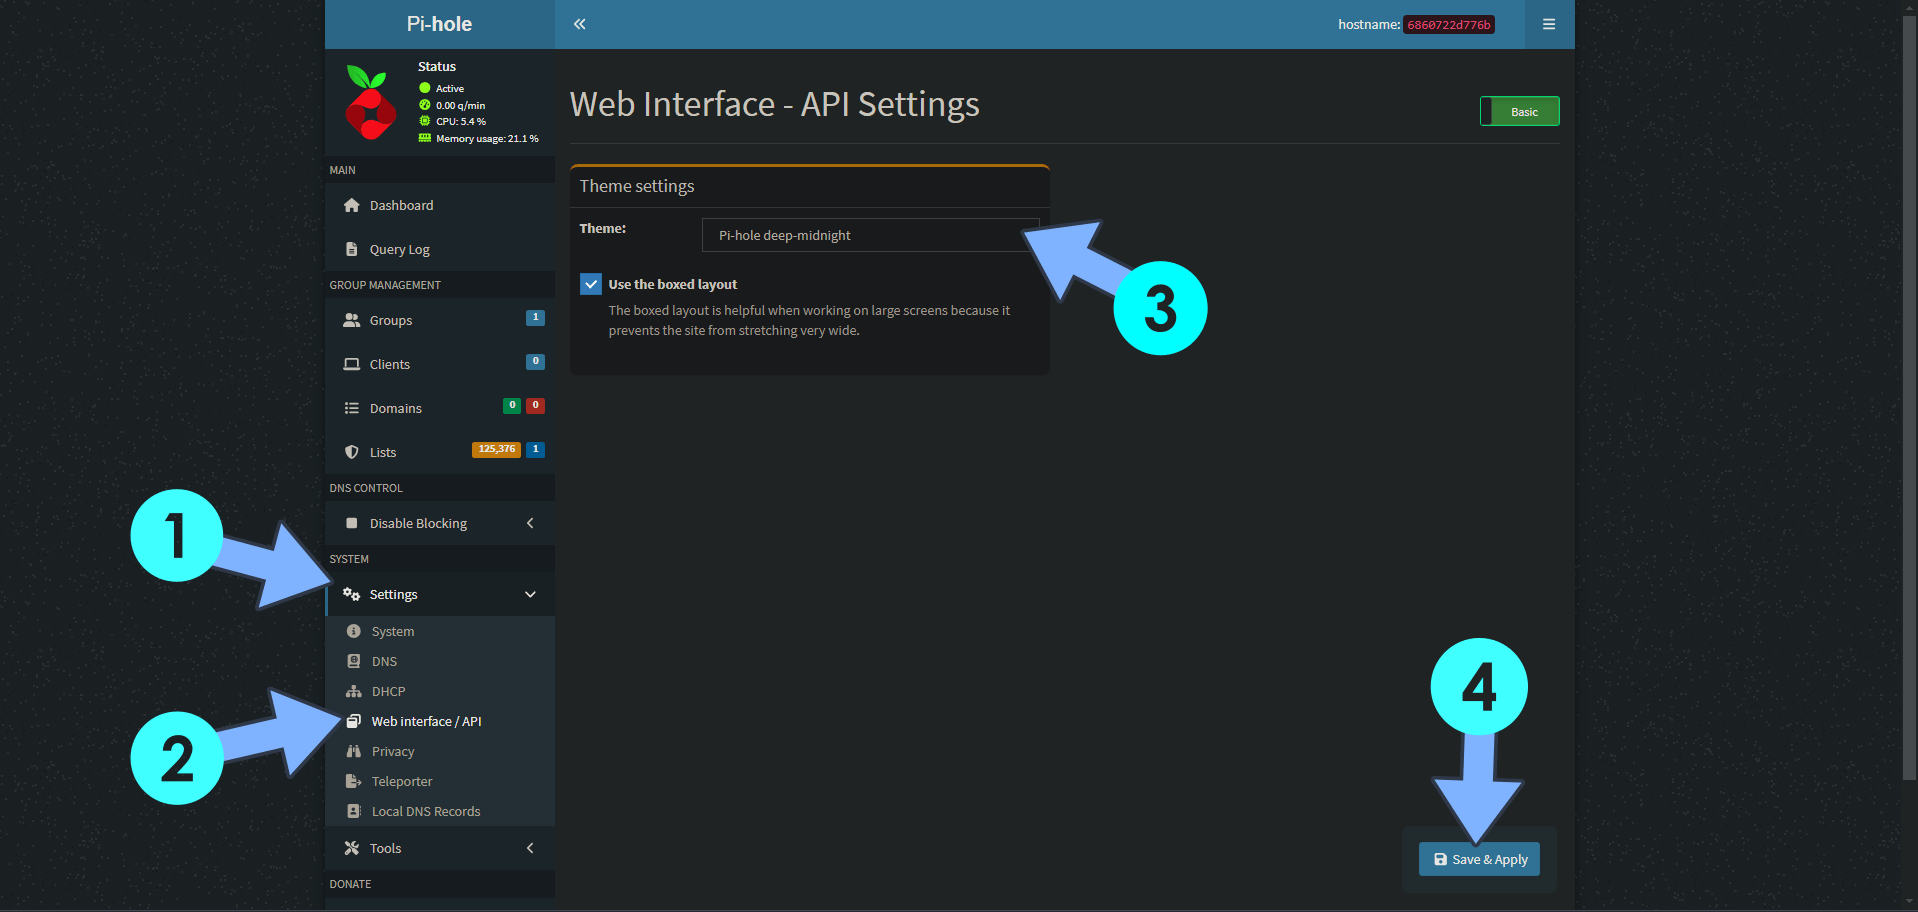
On the left sidebar in Pi-hole, click on Settings, then select the Web interface / API. After that, in the Theme settings area, select Pi-hole deep-midnight, then click Save & Apply. Follow the instructions in the image below.
STEP 14
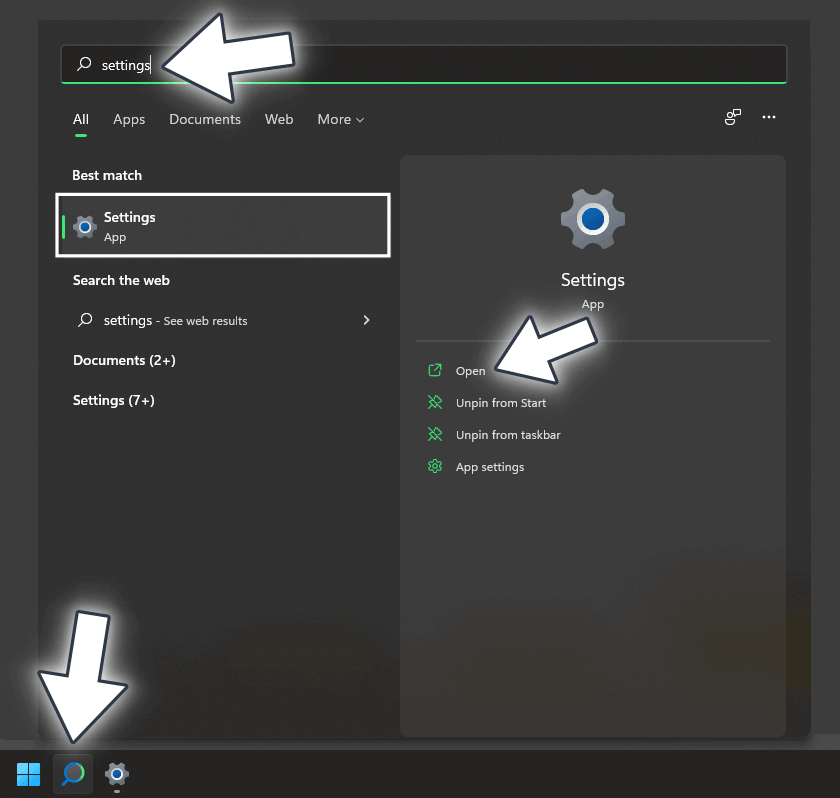
On your Windows 11 Desktop PC search for Settings. Once you find it, click Open. Follow the instructions in the image below.
STEP 15
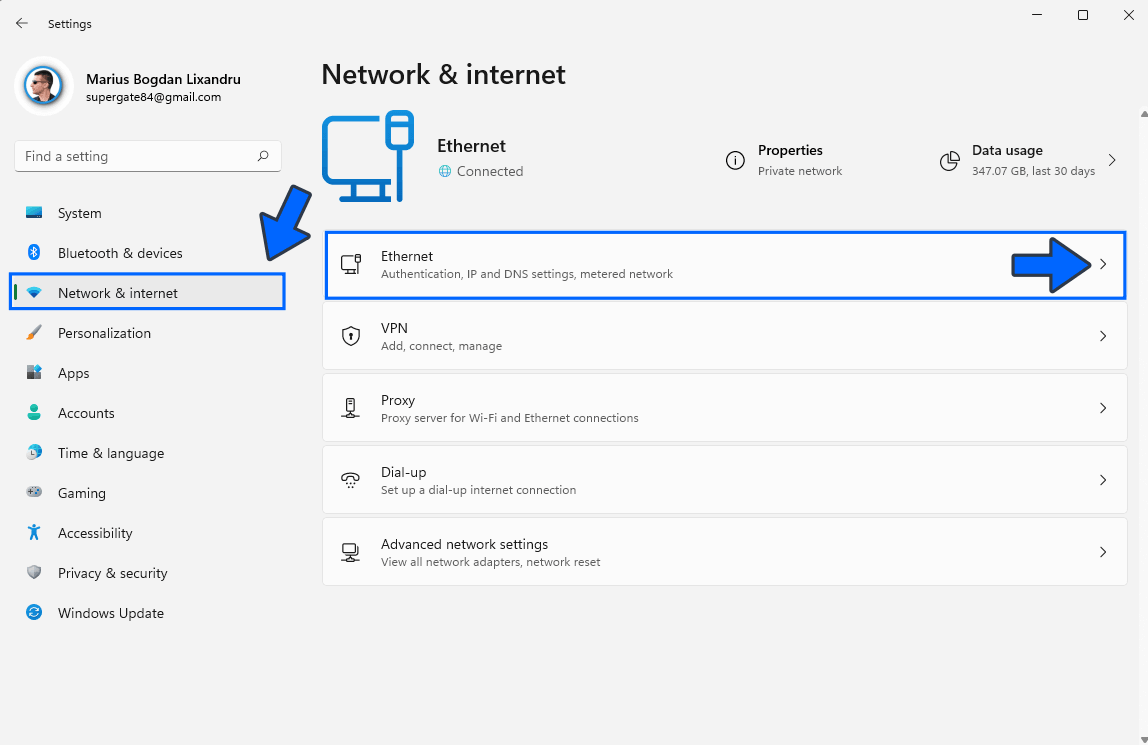
On the left sidebar click Network & Internet. Select your Ethernet connection, then click the little arrow. Follow the instructions in the image below.
STEP 16
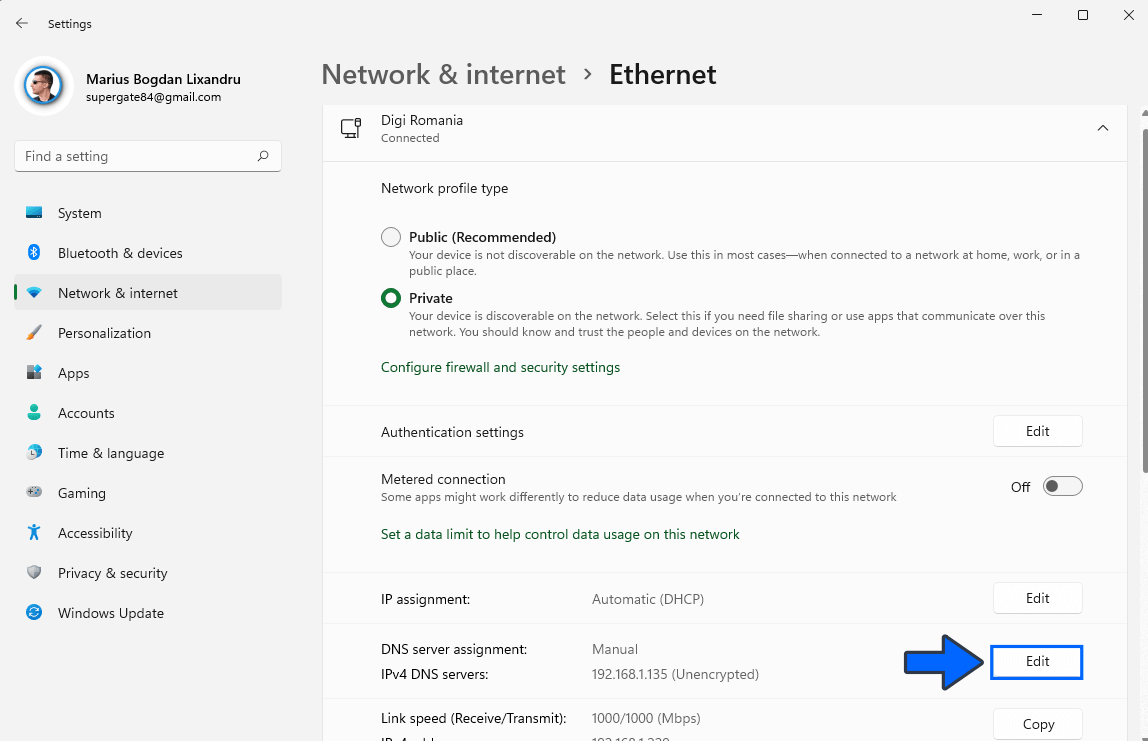
Scroll down until you find the option “DNS server assignment“. Click Edit. Follow the instructions in the image below.
STEP 17
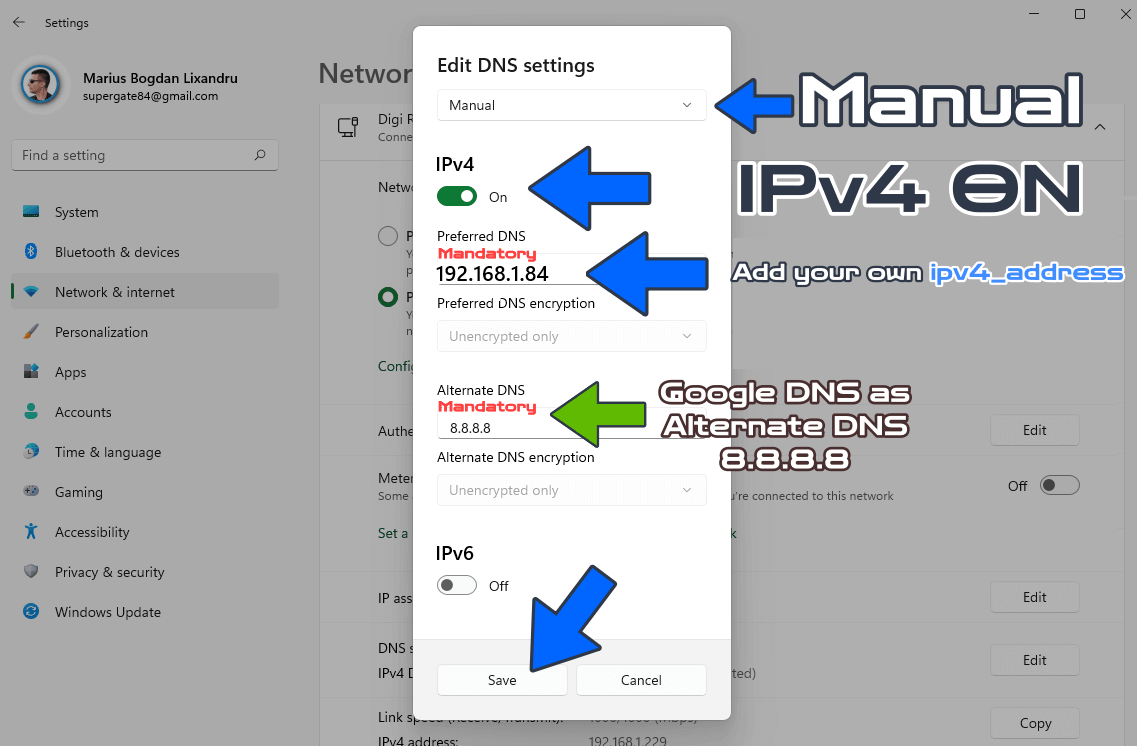
Edit DNS settings. Instead of Automatic DHCP, choose Manual. Turn ON IPv4. Add your own ipv4_address (your own Asustor NAS local IP), then click Save. Follow the instructions in the image below.
STEP 18
[Only for advanced users] Download (click on the blue link below) to download the Pi-Hole Macvlan Docker Compose. Advantages For Pi-Hole with Macvlan: Works well with NAS devices or hard port conflicts. A Macvlan network is the most advanced option since it requires more network knowledge and setup. This mode is similar to host network mode but instead of borrowing the IP of your docker host computer it grabs a new IP address off your LAN network. 🔒Note: Support my work to unlock the password. You can use this password to download any file on mariushosting forever! NOTE: To connect to the Macvlan network, remember to use the following address: http://YOURmacvlanIP/admin/login
Fix: If someone has a problem once installation is completed, and gets an error like “This site can’t be reached“, open the Pi-hole GUI and go to Settings / DNS tab and in “Interface listening behavior” change to Listen on all interfaces instead of Listen only on interface eth0.
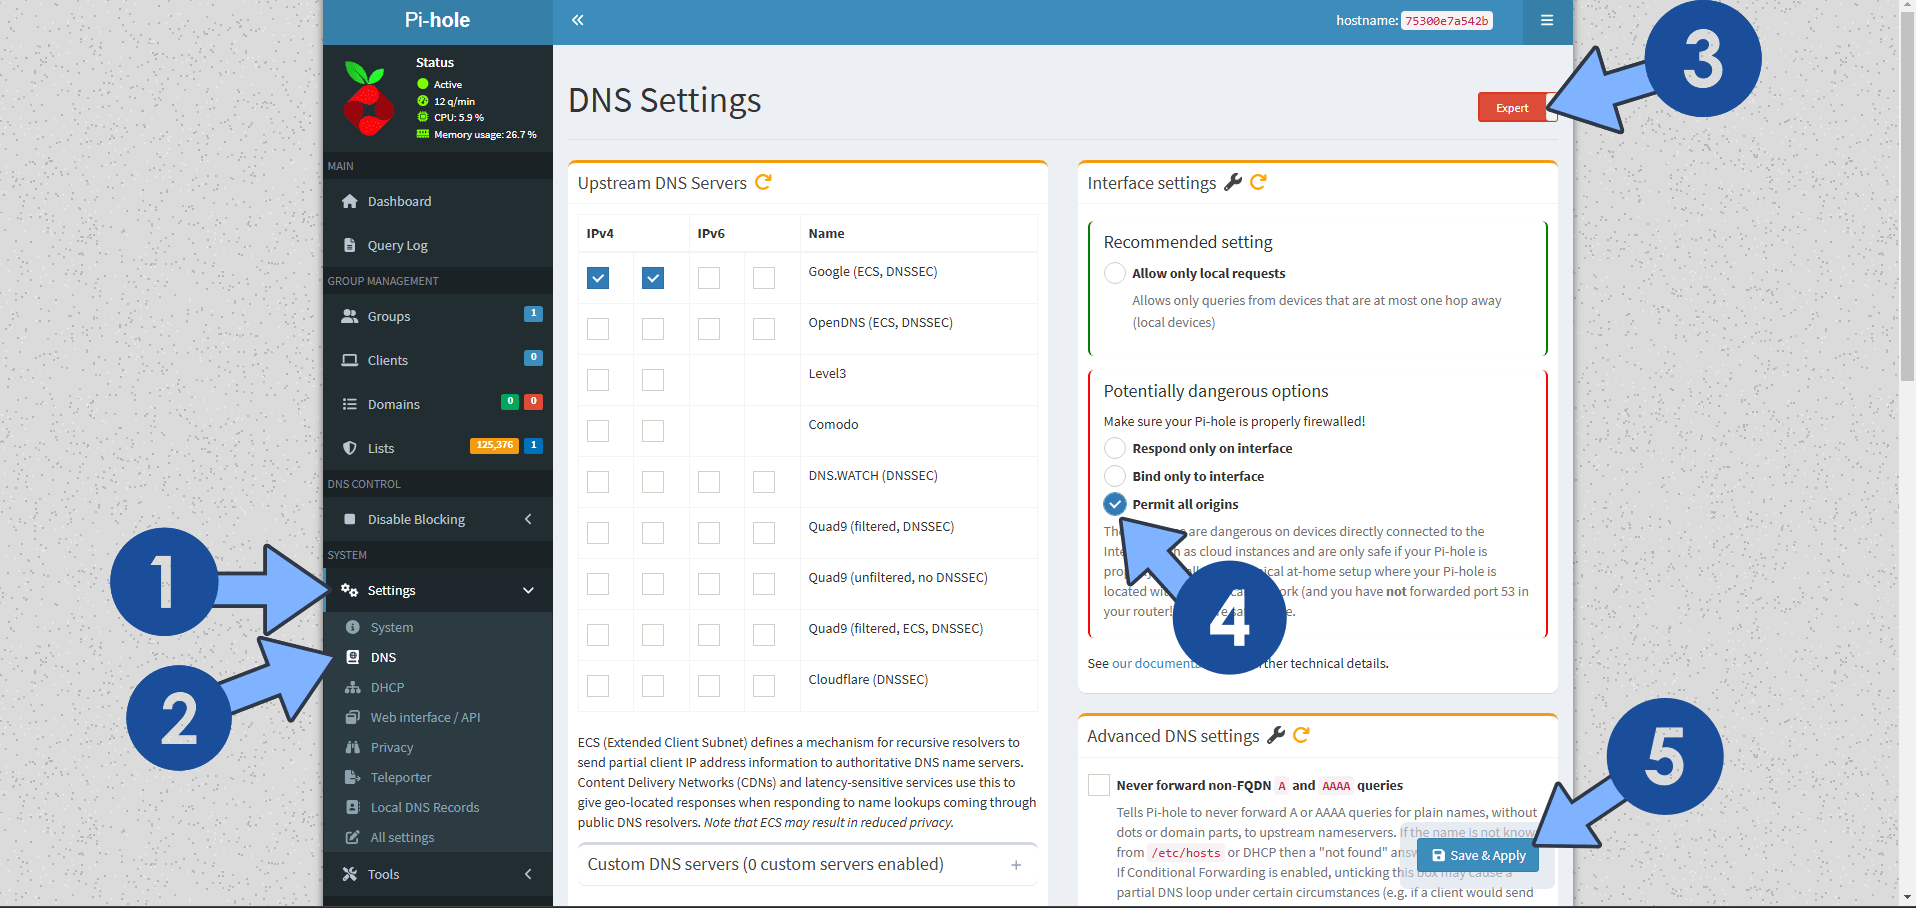
Fix: How can I make Pi-Hole work over VPN connection? Go to Pi-Hole / Settings / DNS / Switch from Basic to Expert / Interface Settings window / choose Permit all origins then click Save & Apply. Follow the instructions in the image below.
Fix: If you want to run the DHCP server on docker with pi-hole, just add the cap_add: NET_ADMIN directive in the docker compose stack at STEP 8 as per the instructions below.
services:
  pihole:
    image: pihole/pihole
    container_name: Pi-Hole
    network_mode: host
    security_opt:
      - no-new-privileges:false
    volumes:
      - /volume1/docker/pihole/dnsmasq.d:/etc/dnsmasq.d:rw
      - /volume1/docker/pihole/pihole:/etc/pihole:rw
    environment:
      FTLCONF_webserver_api_password: Mariushosting@4
      FTLCONF_webserver_port: 8080
      FTLCONF_dns_listeningMode: all
      TZ: Europe/Bucharest
      DNSMASQ_USER: pihole #or root NOT recommended to use root.
      PIHOLE_UID: 1026
      PIHOLE_GID: 999
    cap_add:
      - SYS_TIME
      - SYS_NICE
      - NET_ADMIN
    restart: on-failure:5
This post was updated on Sunday / June 21st, 2026 at 12:18 AM