For years I’ve run Docker containers on my Synology NAS and UGREEN NAS boxes and relied on Watchtower for automatic updates. It was convenient until it wasn’t. Silent image updates started breaking services, containers failed to restart properly, and I lost visibility and control over when and how changes happened. After trying several alternatives I switched to Dockhand and never looked back. In this article I explain how Dockhand now handles updates on both my NAS devices.
📝First of all, what is Dockhand? Dockhand is a modern, self-hosted Docker management platform with an intuitive web interface for homelabs, small businesses, and enterprises, and an alternative to Portainer. It simplifies container operations, stack deployments, and observability through real-time management (start/stop/restart containers, web terminals, file transfers), a visual Compose editor, GitOps auto-sync, metrics, logs, OIDC/SSO, MFA, vulnerability scans, and multi-host support via the open-source Hawser agent. You can deploy it quickly as a Docker container with no cloud dependencies or telemetry. It’s forever free for personal use.
STEP 1
Please Support My work by Making a Donation.
STEP 2
Install Dockhand on your Synology NAS or UGREEN NAS. If you have already installed Dockhand on your NAS, skip this step.
STEP 3
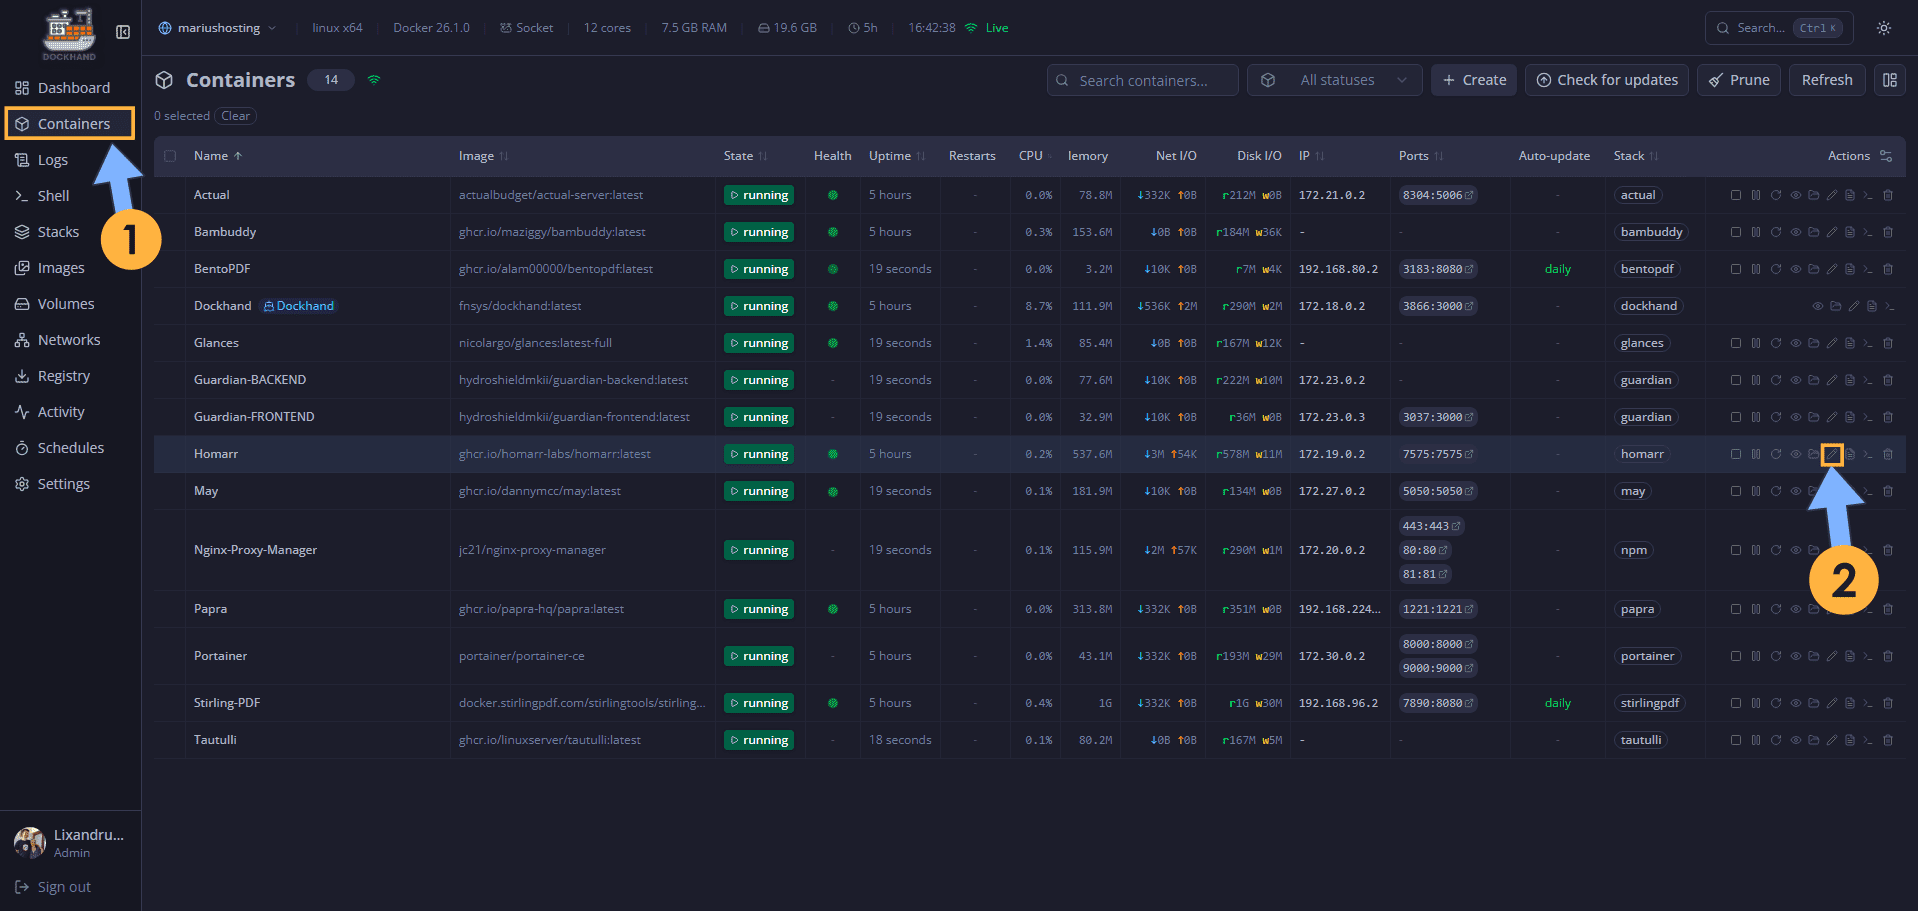
Open Dockhand. On the left sidebar, click Containers. Select a container. For example, I selected the Homarr container. On the Actions tab, click the little pencil icon to edit the container. Follow the instructions in the image below.
STEP 4
A new window will open. Scroll down until you find the Auto-update option. Switch the Enable automatic image updates from OFF to ON. Select a day or week or month to schedule your container update. Click Update container. Follow the instructions in the image below.

STEP 5
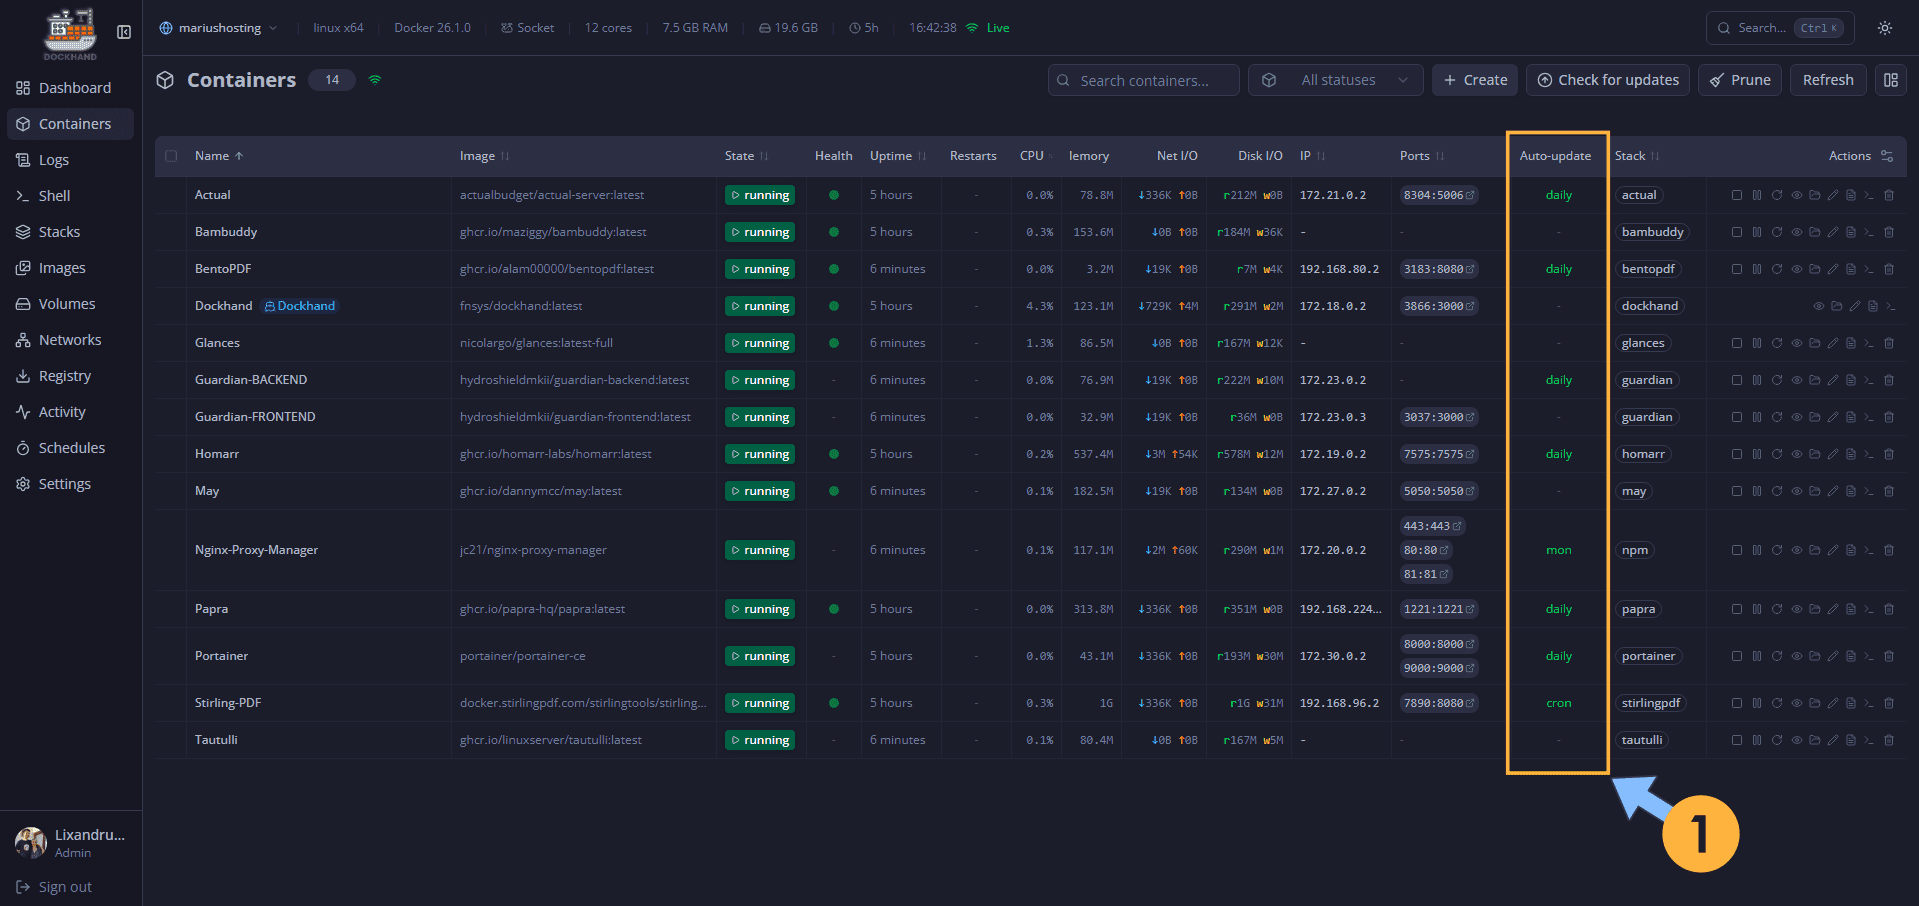
An overview of your containers with your own update rules. An Auto-update rule for every container. This is something magical in your environment! You can now uninstall Watchtower for good!
STEP 6
🟢Please Support My work by Making a Donation. Almost 99,9% of the people that install something using my guides forget to support my work, or just ignore STEP 1. I’ve been very honest about this aspect of my work since the beginning: I don’t run any ADS, I don’t require subscriptions, paid or otherwise, I don’t collect IPs, emails, and I don’t have any referral links from Amazon or other merchants. I also don’t have any POP-UPs or COOKIES. I have repeatedly been told over the years how much I have contributed to the community. It’s something I love doing and have been honest about my passion since the beginning. But I also Need The Community to Support me Back to be able to continue doing this work.
STEP 7
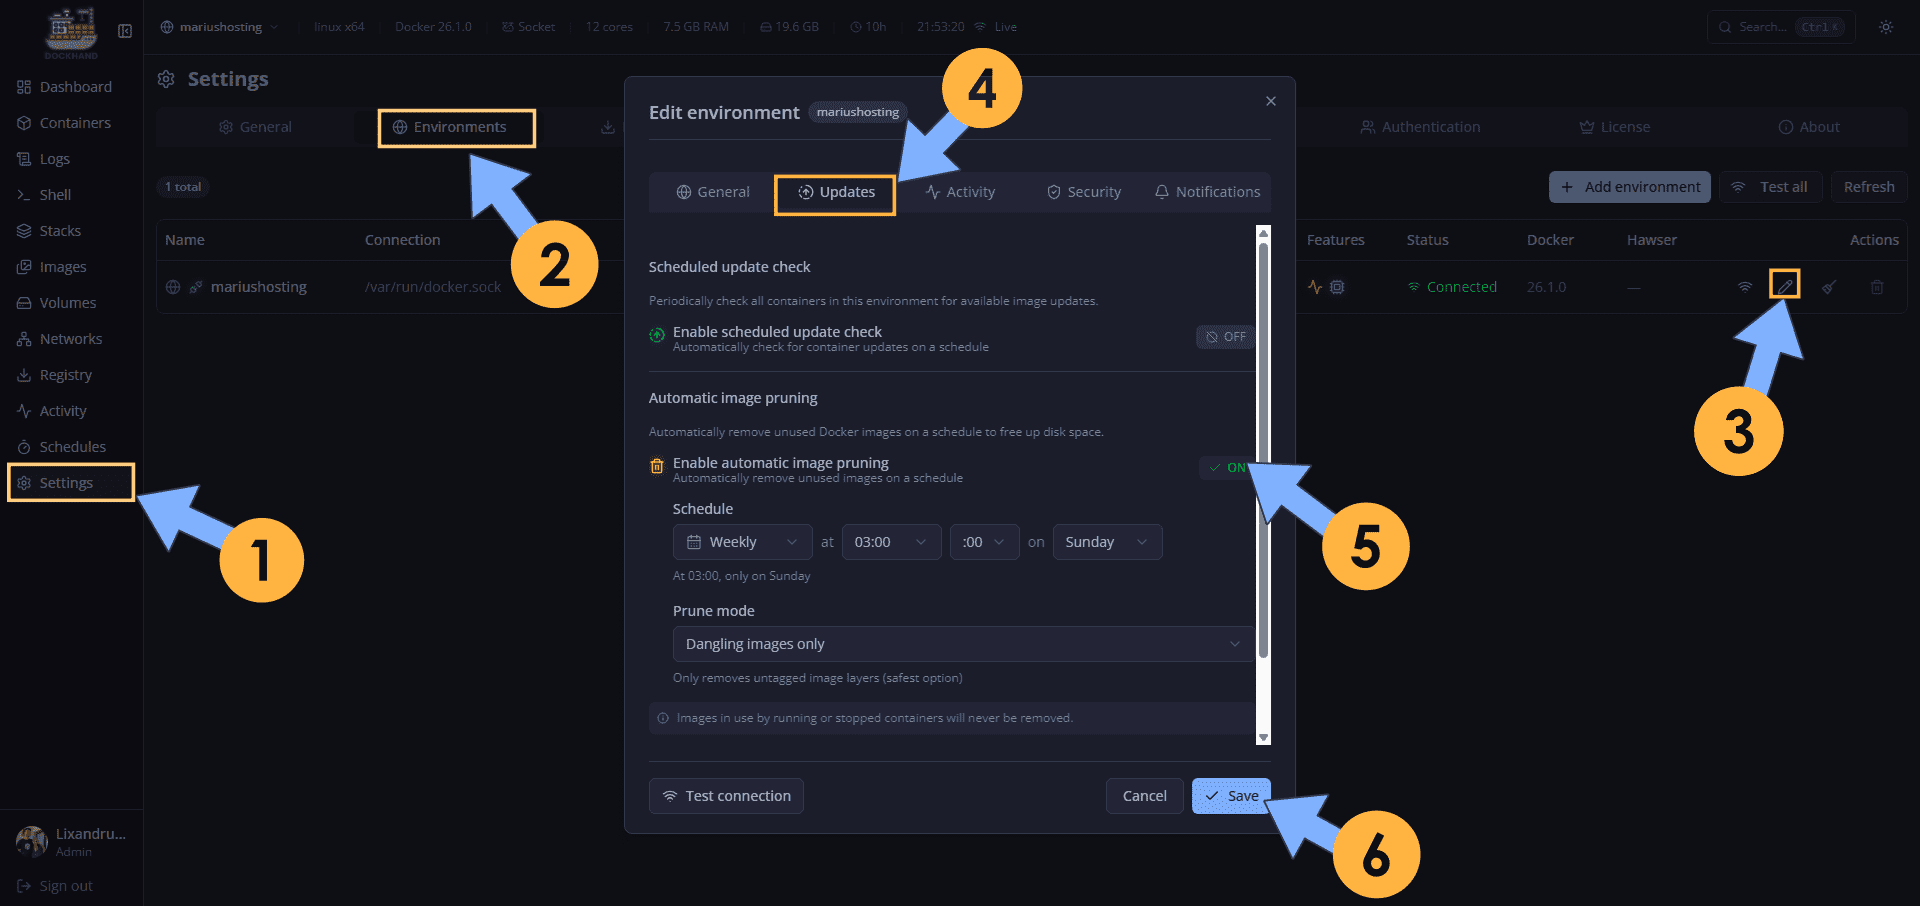
You can also delete old images on schedule. Left sidebar, click on Settings. Click on the Environments tab. Click on the little pencil icon in your environment. A new pop up window will open. Click Updates. Switch the Enable automatic image pruning from OFF to ON. Select your image pruning schedule. Click Save. Follow the instructions in the image below.
This post was updated on Saturday / March 7th, 2026 at 12:35 AM