Have you already installed Dockhand on your Synology NAS using my simple guide? Wondering how to update the Dockhand container on your Synology NAS when a new version comes out? Today I will show you how to update your Dockhand container with the latest image version if you have a Synology NAS.
⚠️The first basic rule is to NOT delete the dockhand folder in File Station. This is where your Dockhand stack etc. are saved. After understanding this simple rule, let’s move on to the guide on how to update Dockhand on your Synology NAS.
STEP 1
Please Support My work by Making a Donation.
STEP 2
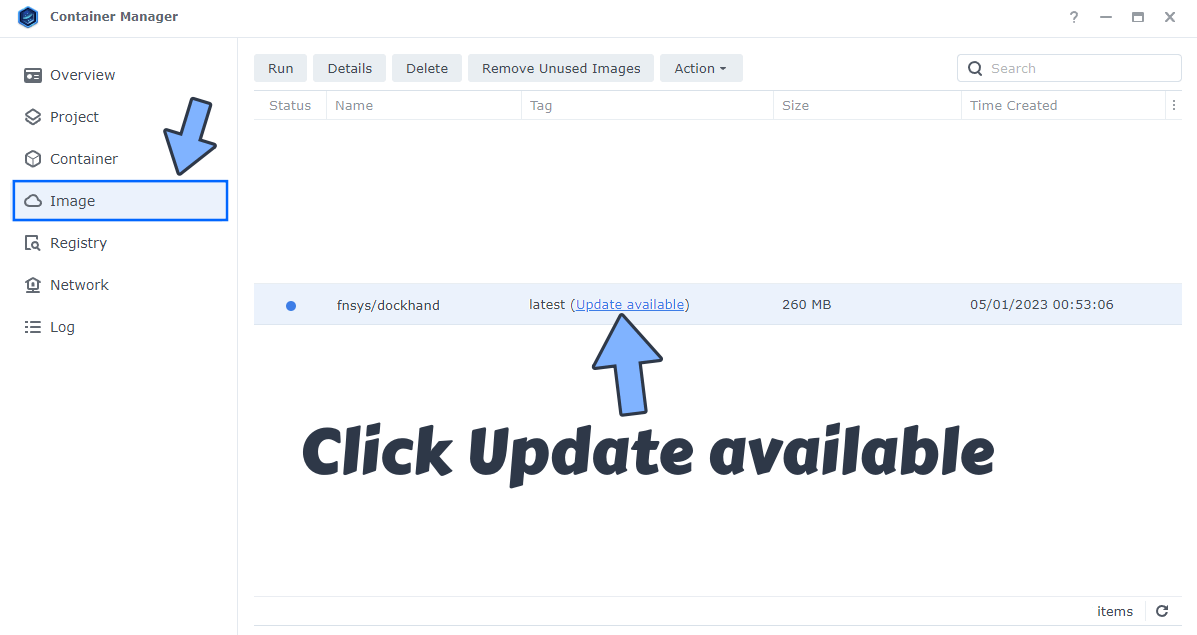
Open the Container Manager Package. On the left sidebar click on Image. Identify your Dockhand image, then click Update available. Follow the instructions in the image below.
🔥Troubleshooting: If you don’t see the Update available button, this means that you have accessed the NAS only recently. You have to wait almost 12 hours before you can see the Update available button. Container Manager, once launched, needs at least 24/48 hours to see whether or not there are new images to update.
STEP 3
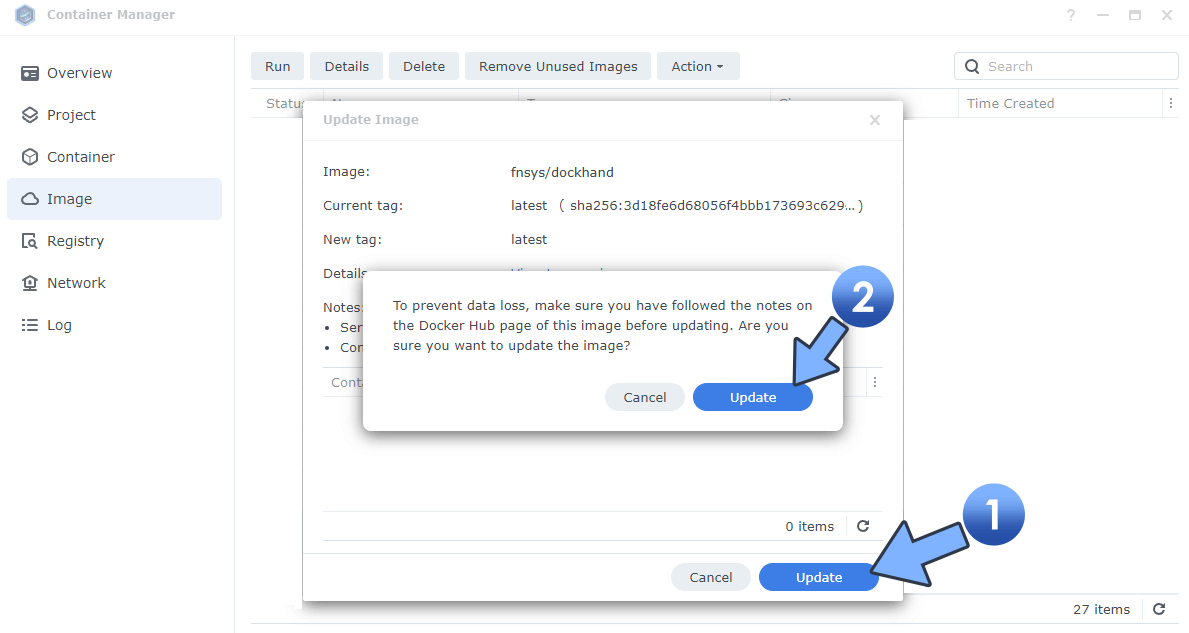
Click Update then Update. Follow the instructions in the image below.
STEP 4
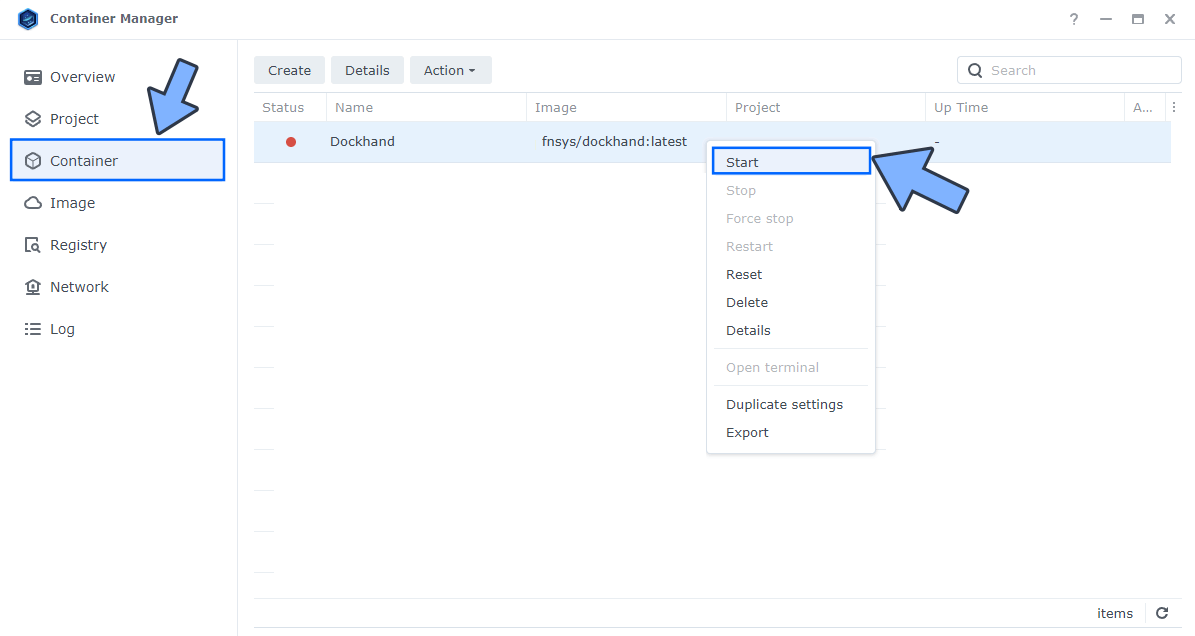
After the image is updated, click Container on the left sidebar. Right click on the Dockhand container, then click Start. Follow the instructions in the image below.
STEP 5
Open your browser and type in http://Synology-ip-address:3866 – Enjoy your updated Dockhand Container!
STEP 6
Note: If your Dockhand update button does not appear as available in Container Manager, or if you use Docker instead of Container Manager, follow the instructions below to update your Dockhand instance to the latest version:
- Open Container Manager.
- On the left sidebar in Container Manager, click Container.
- Select the Dockhand container, then click the Action tab and Stop it.
- Select the Dockhand container, then click the Action tab, then Delete.
- On the left sidebar in Container Manager, click Image.
- Select the fnsys/dockhand image, then click the delete tab to delete it.
- Go to Control Panel. Click Task Scheduler. Select and Run the “Install Dockhand” task.
- Enjoy the latest Dockhand!
- Warning: Do NOT delete the dockhand folder in File Station.
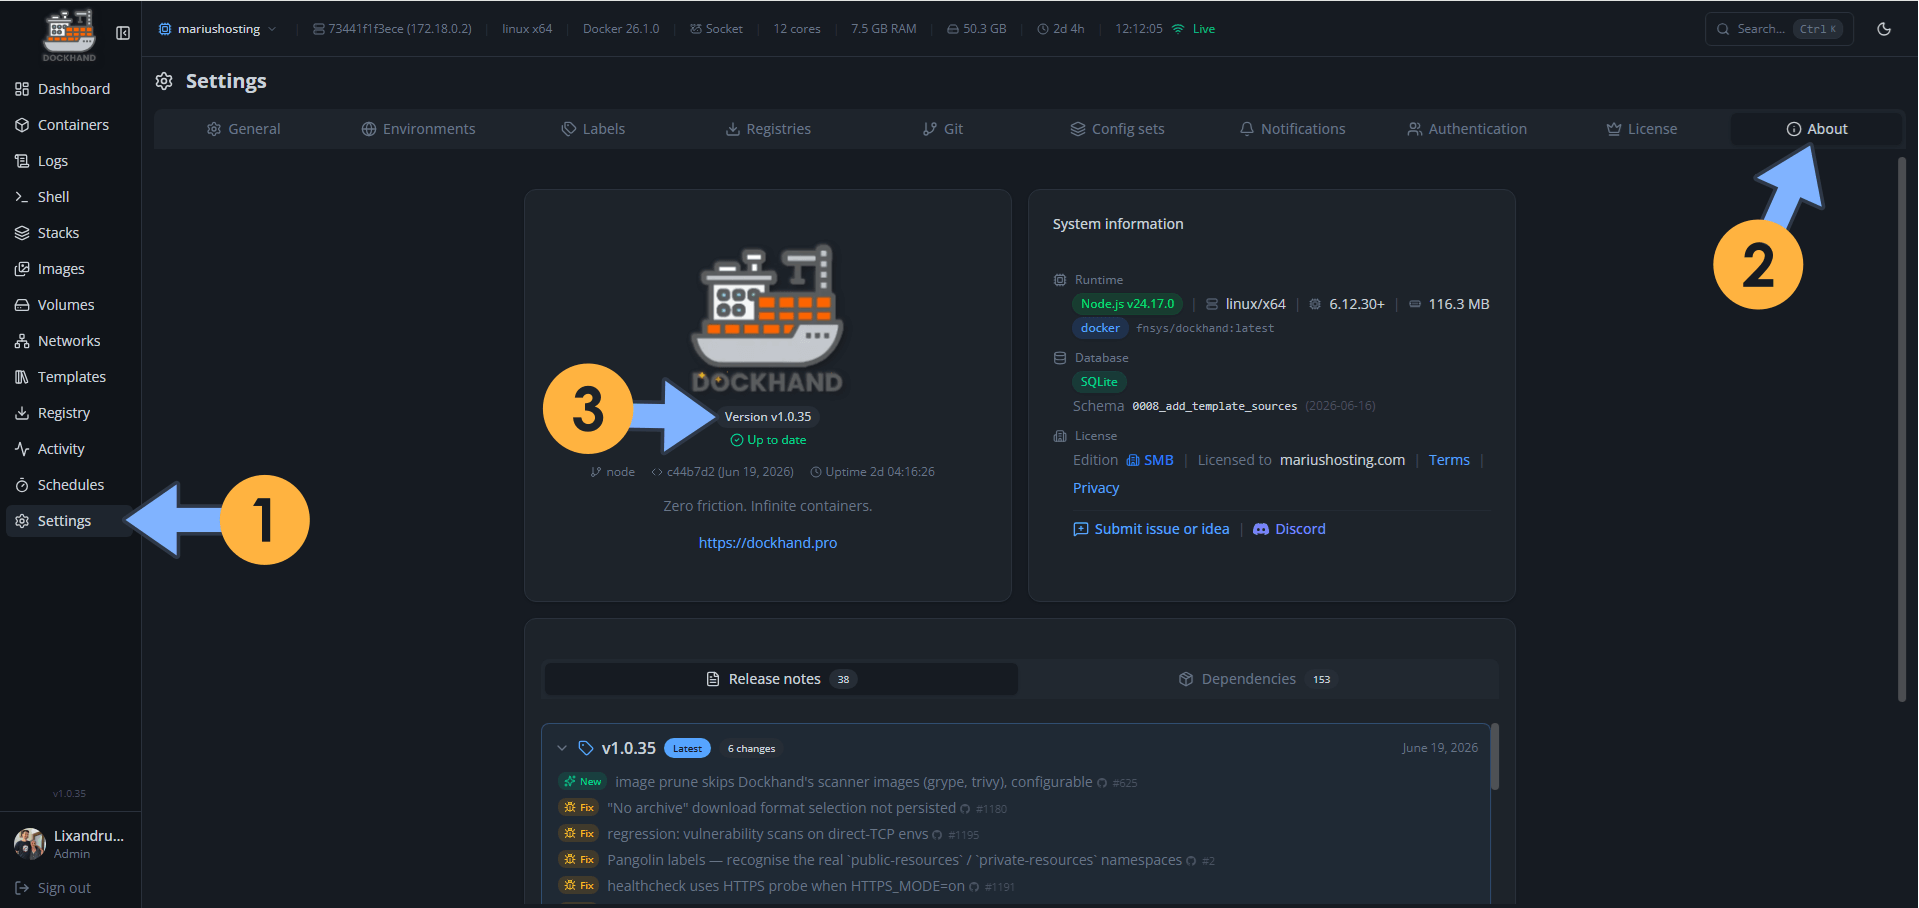
STEP 7
You can also update the Dockhand container directly from the container itself by following this simple guide.
Note: This guide will work perfectly if you have previously installed Dockhand using my guide on How to Install Dockhand on Your Synology NAS.
This post was updated on Friday / June 19th, 2026 at 12:16 PM