Jellyfin is a free Software Media System that puts you in control of managing and streaming your media. It is an alternative to the proprietary Emby and Plex, to provide media from a dedicated server to end-user devices via multiple apps. Jellyfin is the volunteer-built media solution that puts you in control of your media. Stream to any device from your own server, with no strings attached. There are no premium licenses or features, and no hidden agendas; just a team who wants to build something better and work together to achieve it. Hardware transcoding makes media streaming from your NAS faster and more efficient. In this step by step guide I will show you how to install Jellyfin with Hardware Transcoding on your UGREEN NAS using Docker & Portainer.
STEP 1
Please Support My work by Making a Donation.
STEP 2
Install Portainer using my step by step guide. If you already have Portainer installed on your UGREEN NAS, skip this STEP.
STEP 3
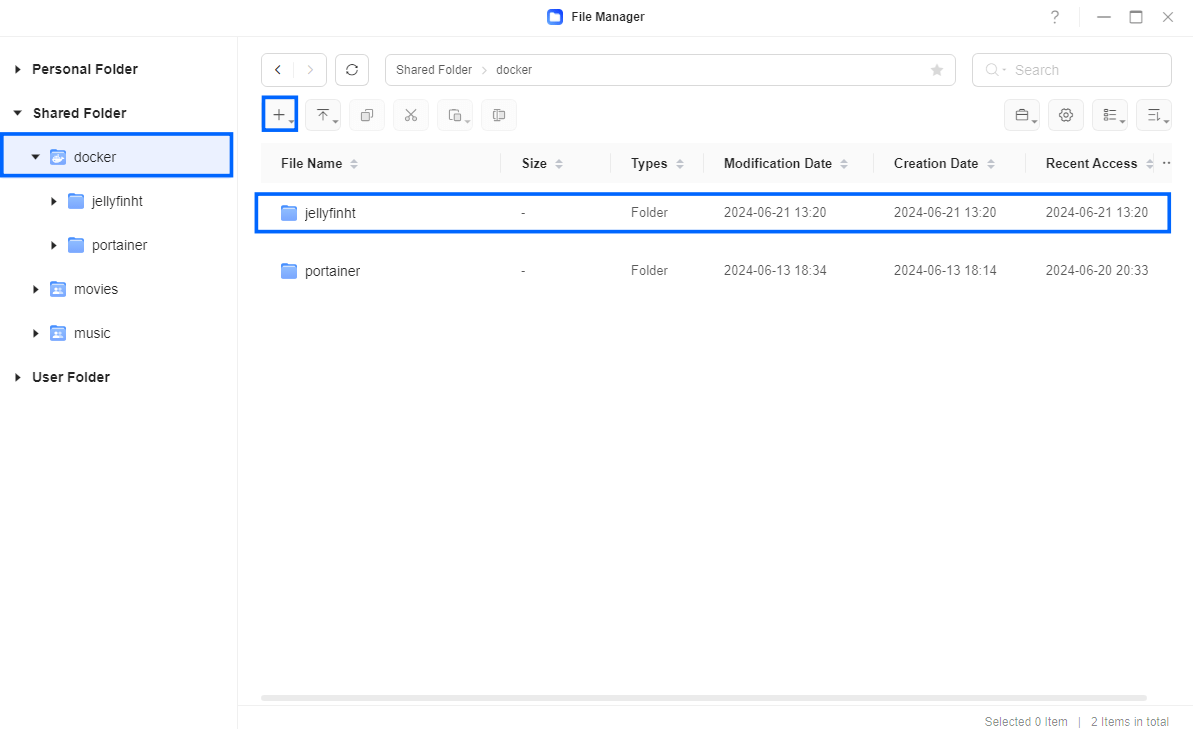
Go to File Manager and open the docker folder. Inside the docker folder, create one new folder and name it jellyfinht. Follow the instructions in the image below.
Note: Be careful to enter only lowercase, not uppercase letters.
STEP 4
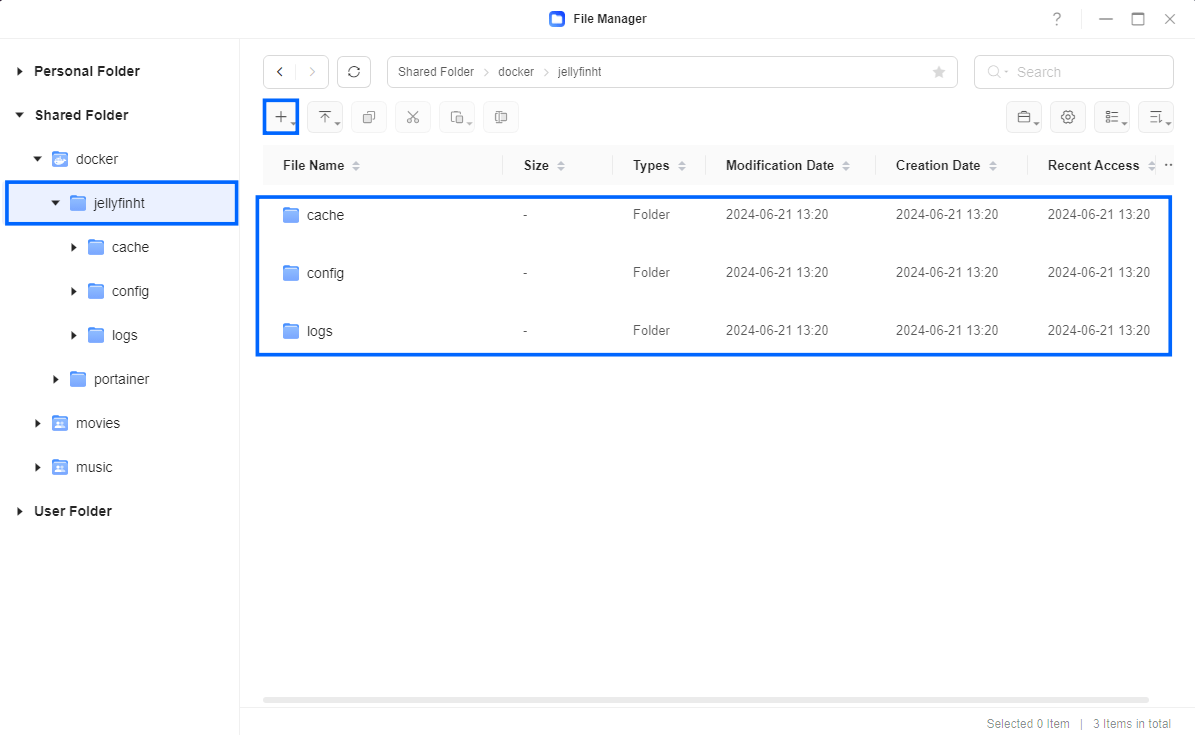
Now create three new folders inside the jellyfinht folder that you created at STEP 3 and name them cache, config and logs. Follow the instructions in the image below.
Note: Be careful to enter only lowercase, not uppercase letters.
STEP 5
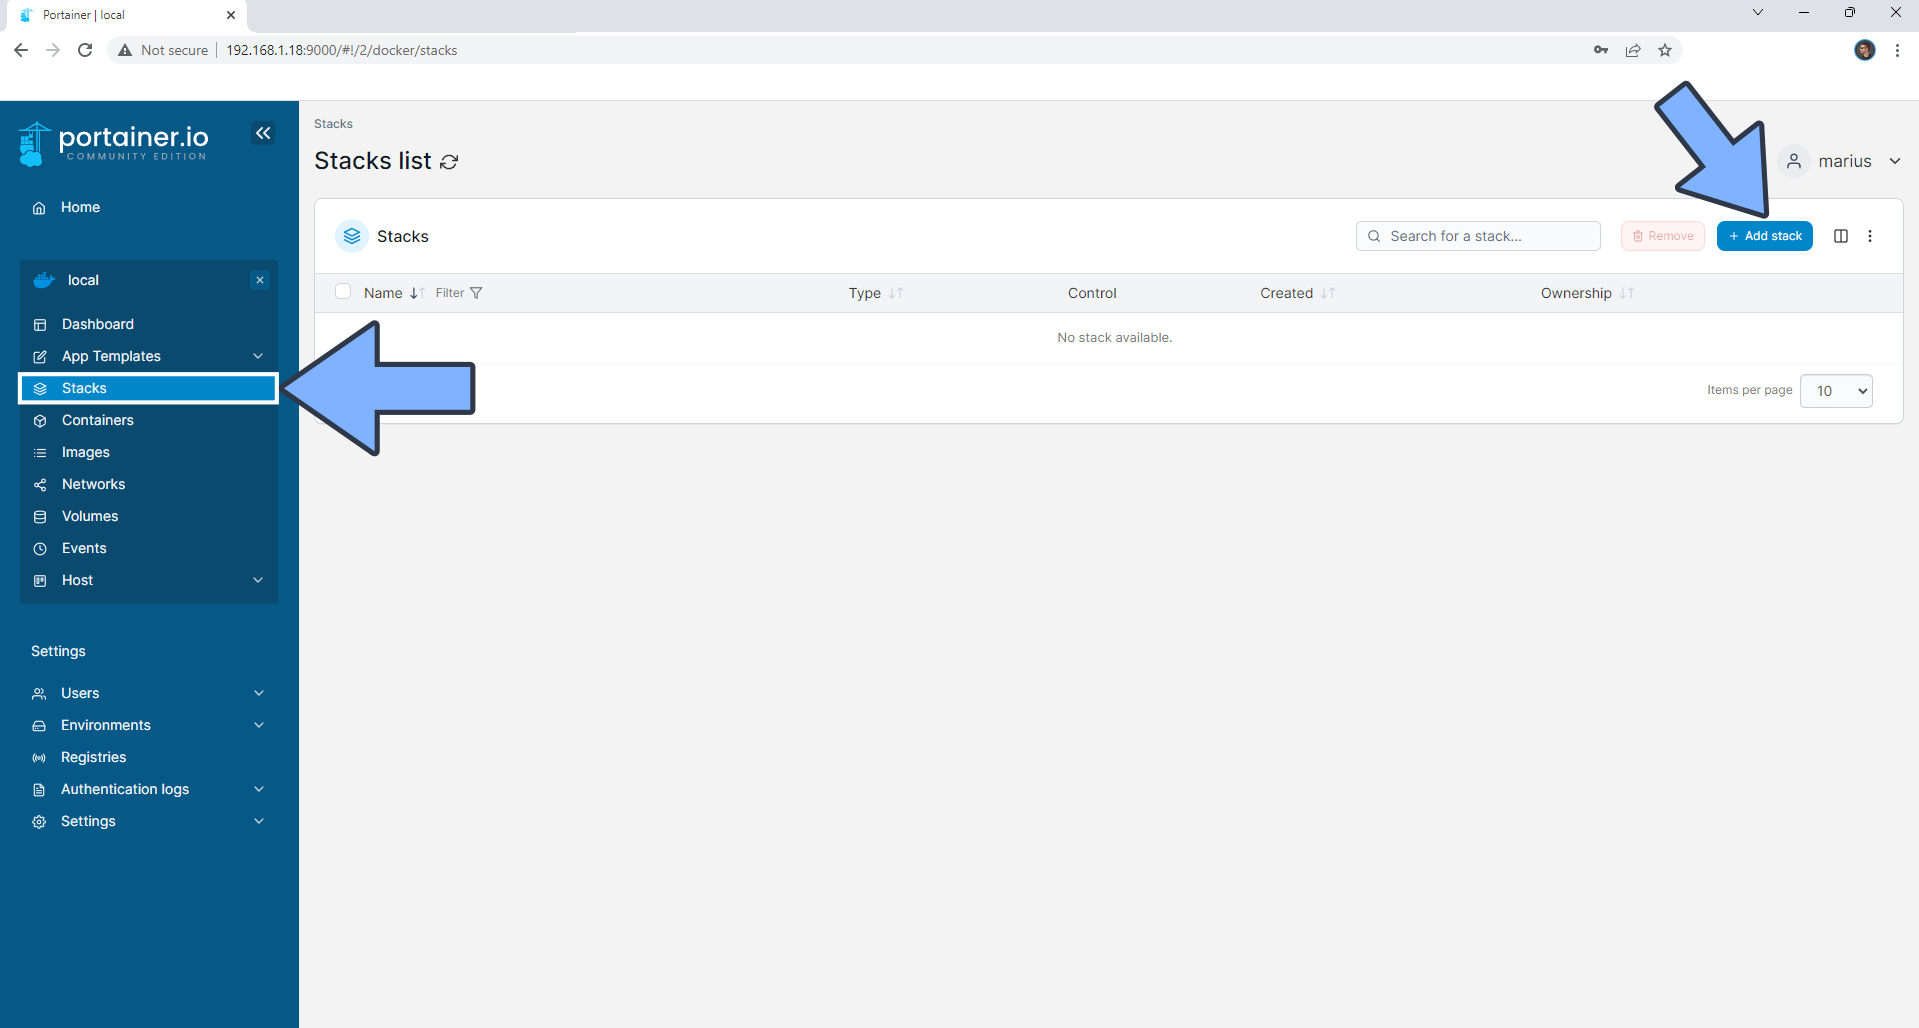
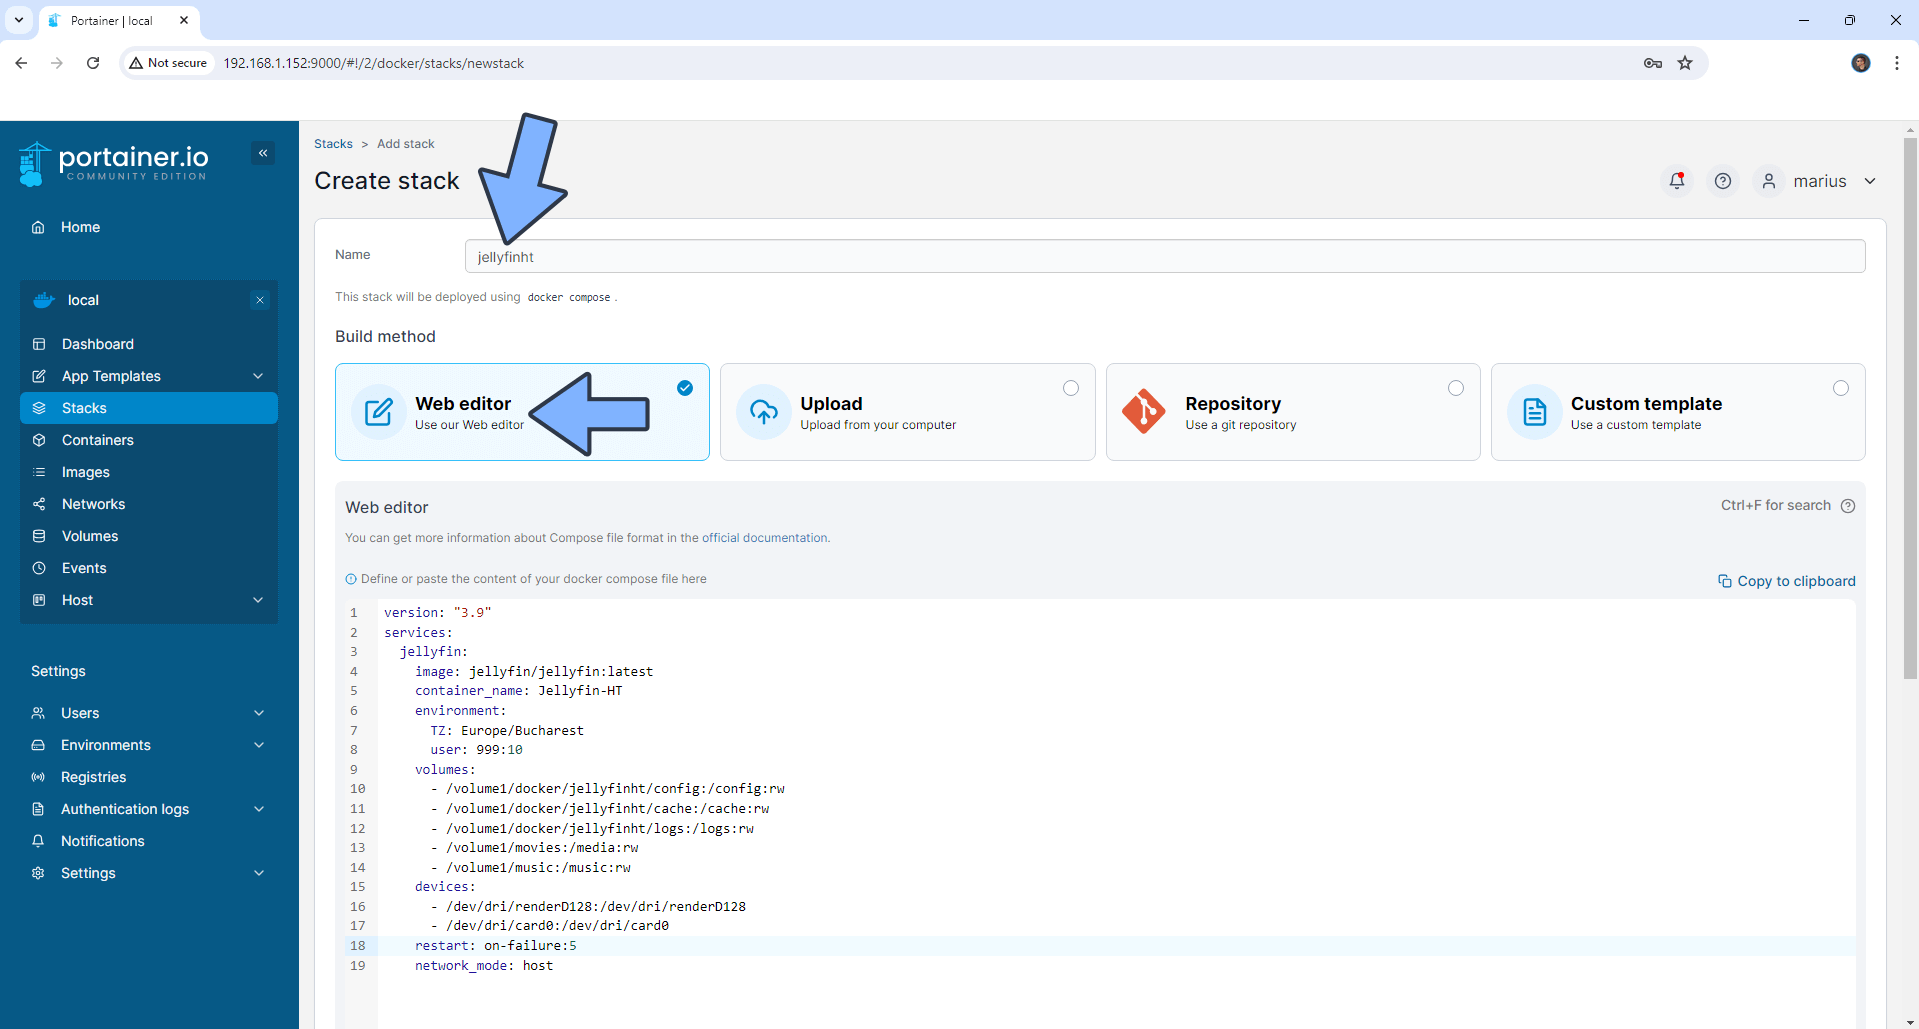
Log into Portainer using your username and password. On the left sidebar in Portainer, click on Stacks then + Add stack. Follow the instructions in the image below.
STEP 6
In the Name field type in jellyfinht. Follow the instructions in the image below.
version: "3.9"
services:
  jellyfin:
    image: jellyfin/jellyfin:latest
    container_name: Jellyfin-HT
    environment:
      TZ: Europe/Bucharest
      user: 999:10
    volumes:
      - /volume1/docker/jellyfinht/config:/config:rw
      - /volume1/docker/jellyfinht/cache:/cache:rw
      - /volume1/docker/jellyfinht/logs:/logs:rw
      - /volume1/movies:/media:rw
      - /volume1/music:/music:rw
    devices:
      - /dev/dri/renderD128:/dev/dri/renderD128
      - /dev/dri/card0:/dev/dri/card0
    restart: on-failure:5
    network_mode: host
Note: Before you paste the code above in the Web editor area below, change the value for TZ. (Select your current Time Zone from this list.)
Note: Before you paste the code above in the Web editor area below, change the value numbers for user with your own UID and GID values. (Follow my step by step guide on how to do this.) 999 is my personal UID value and 10 is my personal GID value. You have to type in your own values.
Note: Before you paste the code above in the Web editor area below, change the movies and music path folders with your own movies and music path folders. For example: my movies folder, where my media is, is in the Shared Folder /volume1/movies and my music folder, where my music is, is located in Shared Folder /volume1/music
STEP 7
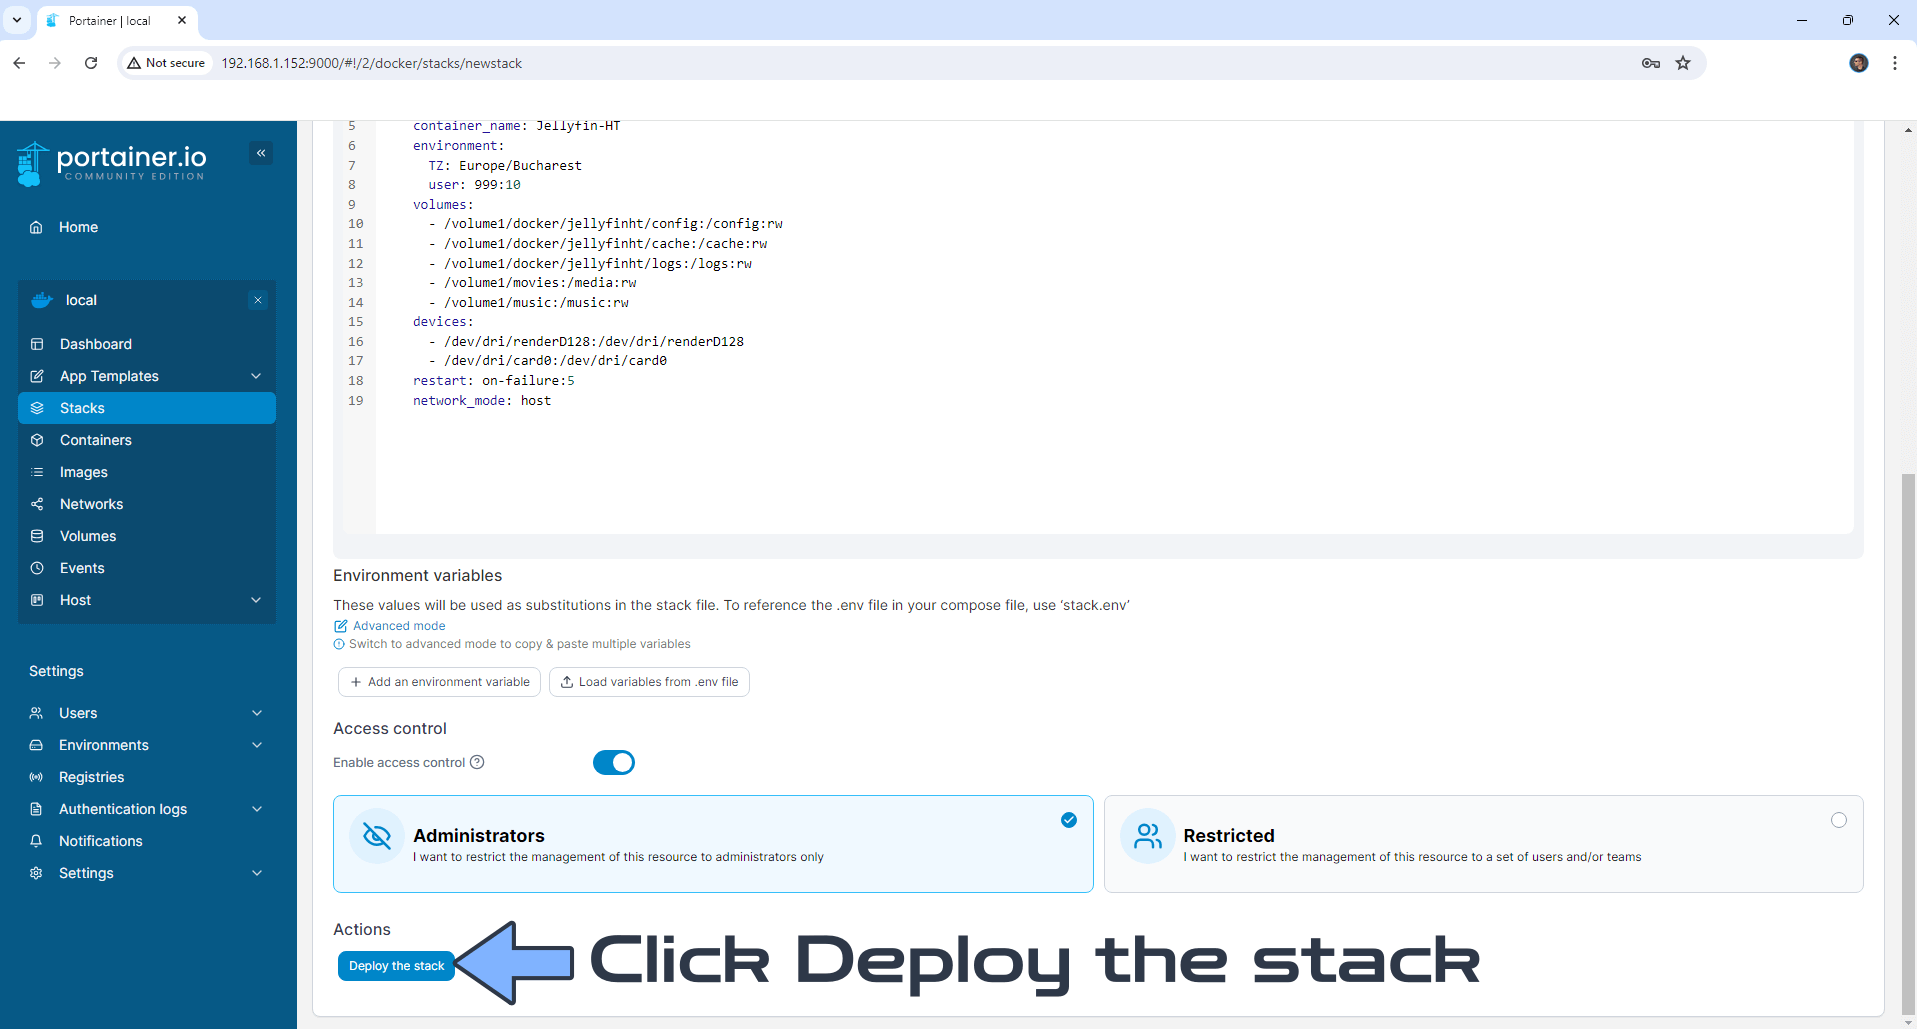
Scroll down on the page until you see a button named Deploy the stack. Click on it. Follow the instructions in the image below. The installation process can take up to a few minutes. It will depend on your Internet speed connection.
STEP 8
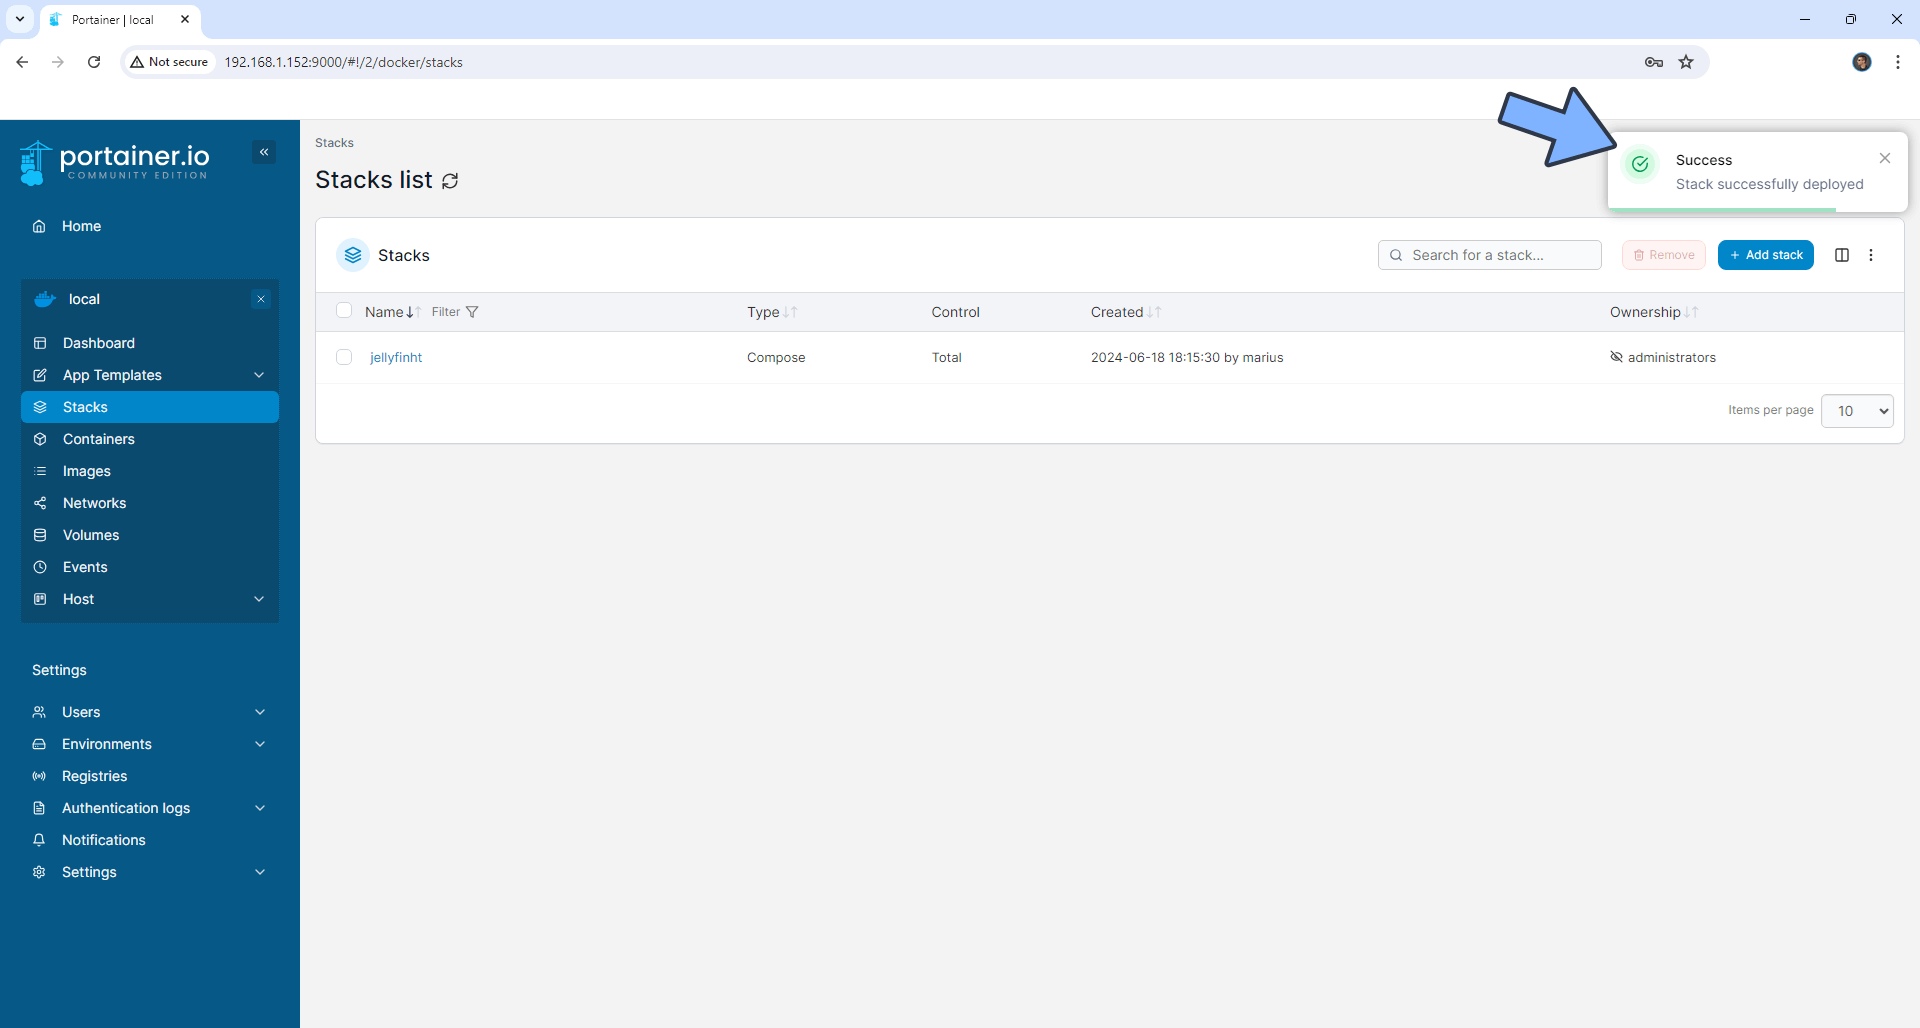
If everything goes right, you will see the following message at the top right of your screen: “Success Stack successfully deployed“.
STEP 9
Go back to STEP 1 or you will deal with karma 🙂.
STEP 10
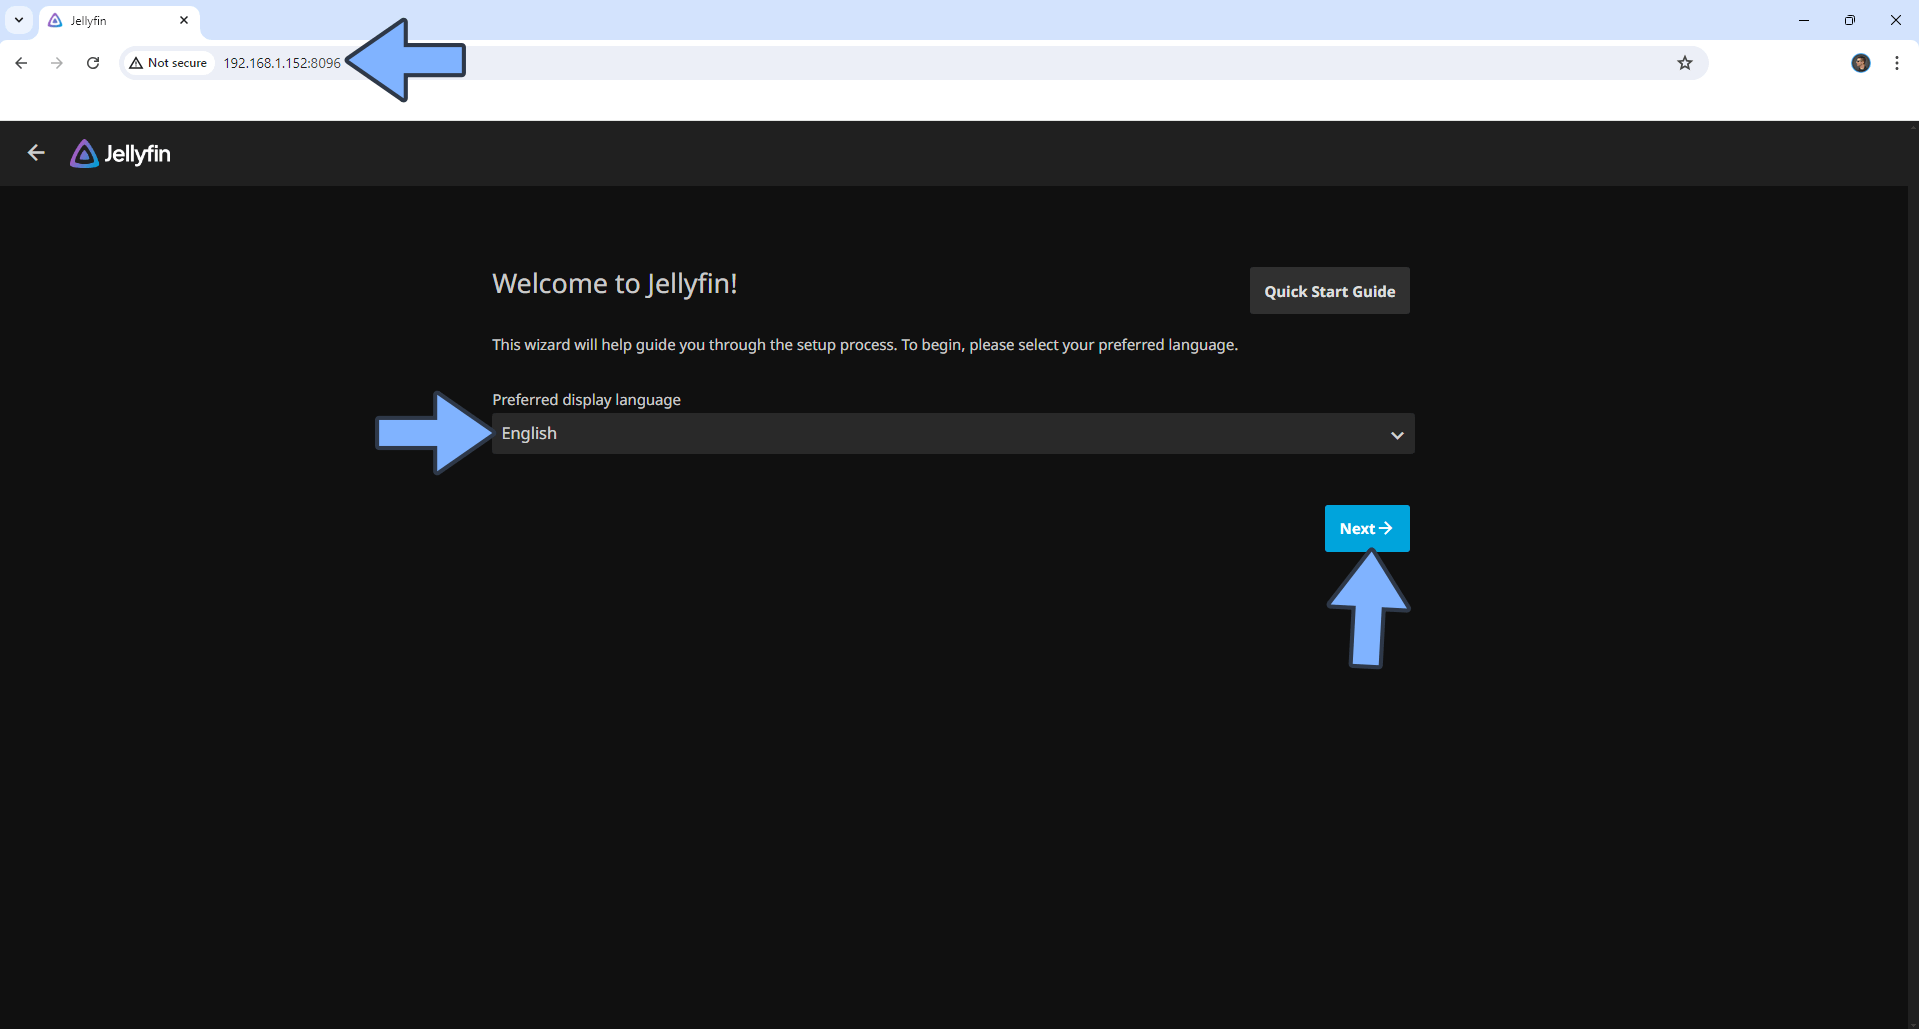
The installation process can take up to a few seconds/minutes. It will depend on your Internet speed connection. Now open your browser and type in http://ugreennas-ip-address:8096 If everything goes right, you will see the Jellyfin Setup page. Select your display language then click Next. Follow the instructions in the image below.
STEP 11
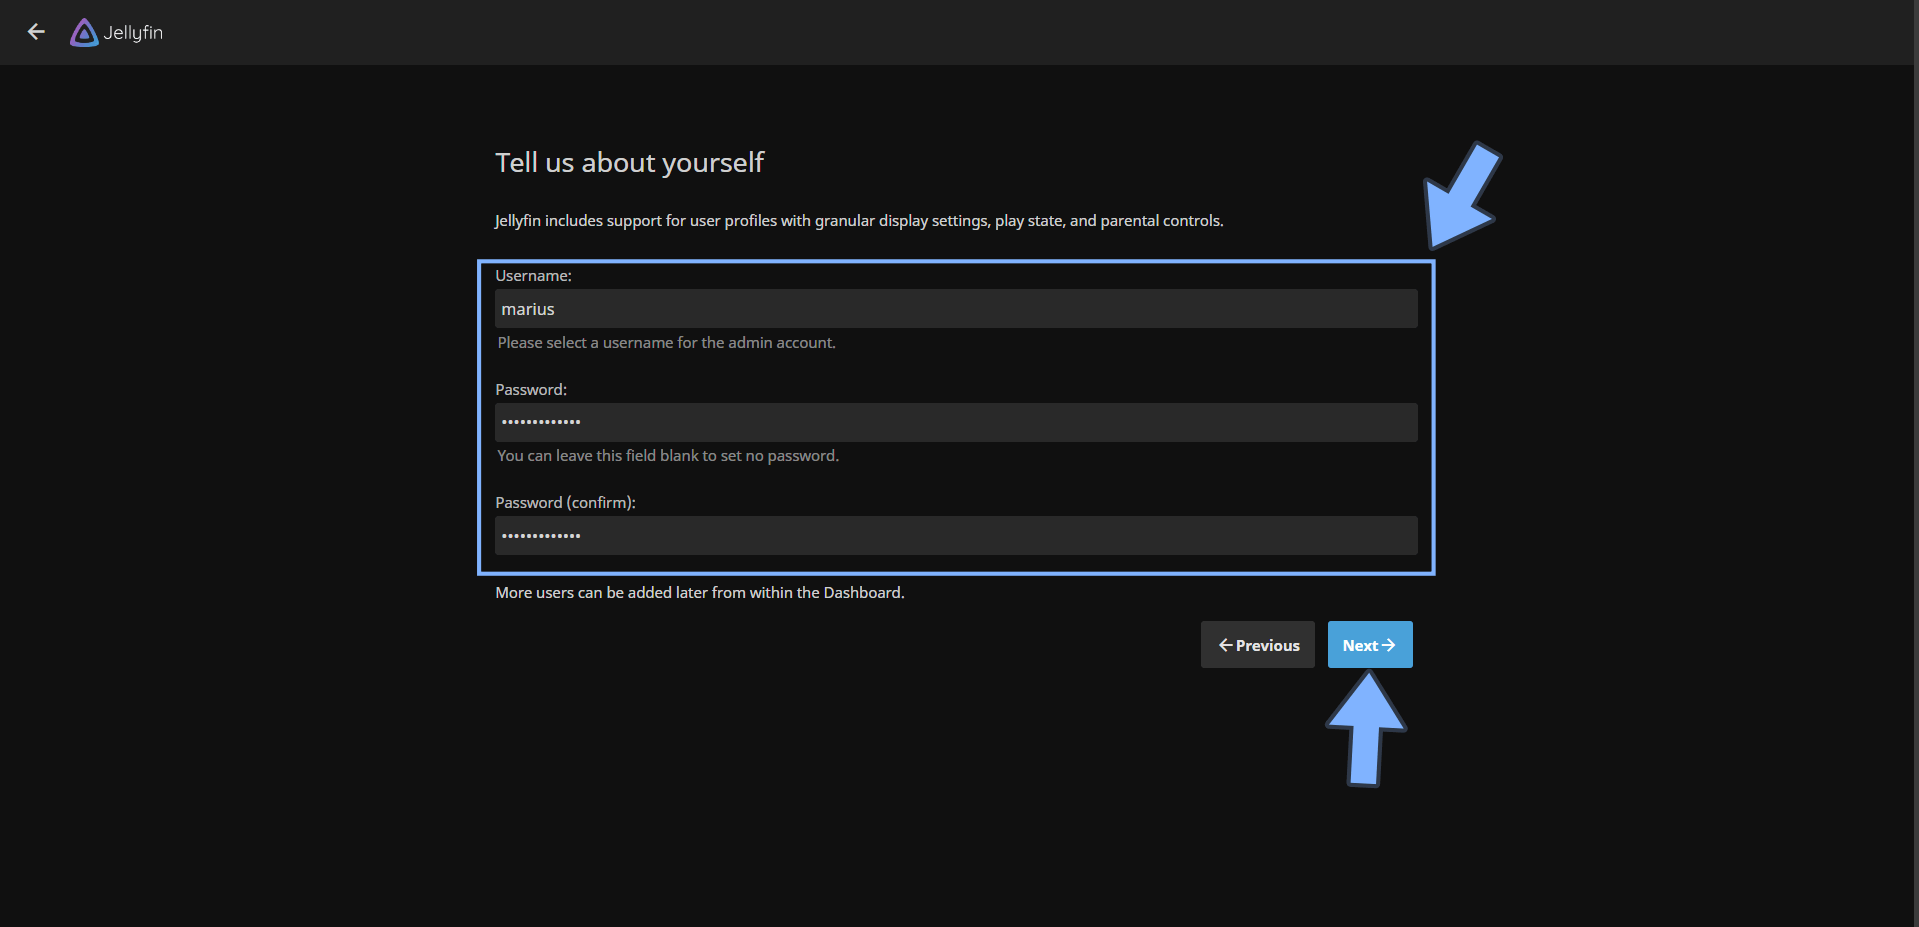
Type in your own Username and Password then click Next. Follow the instructions in the image below.
STEP 12
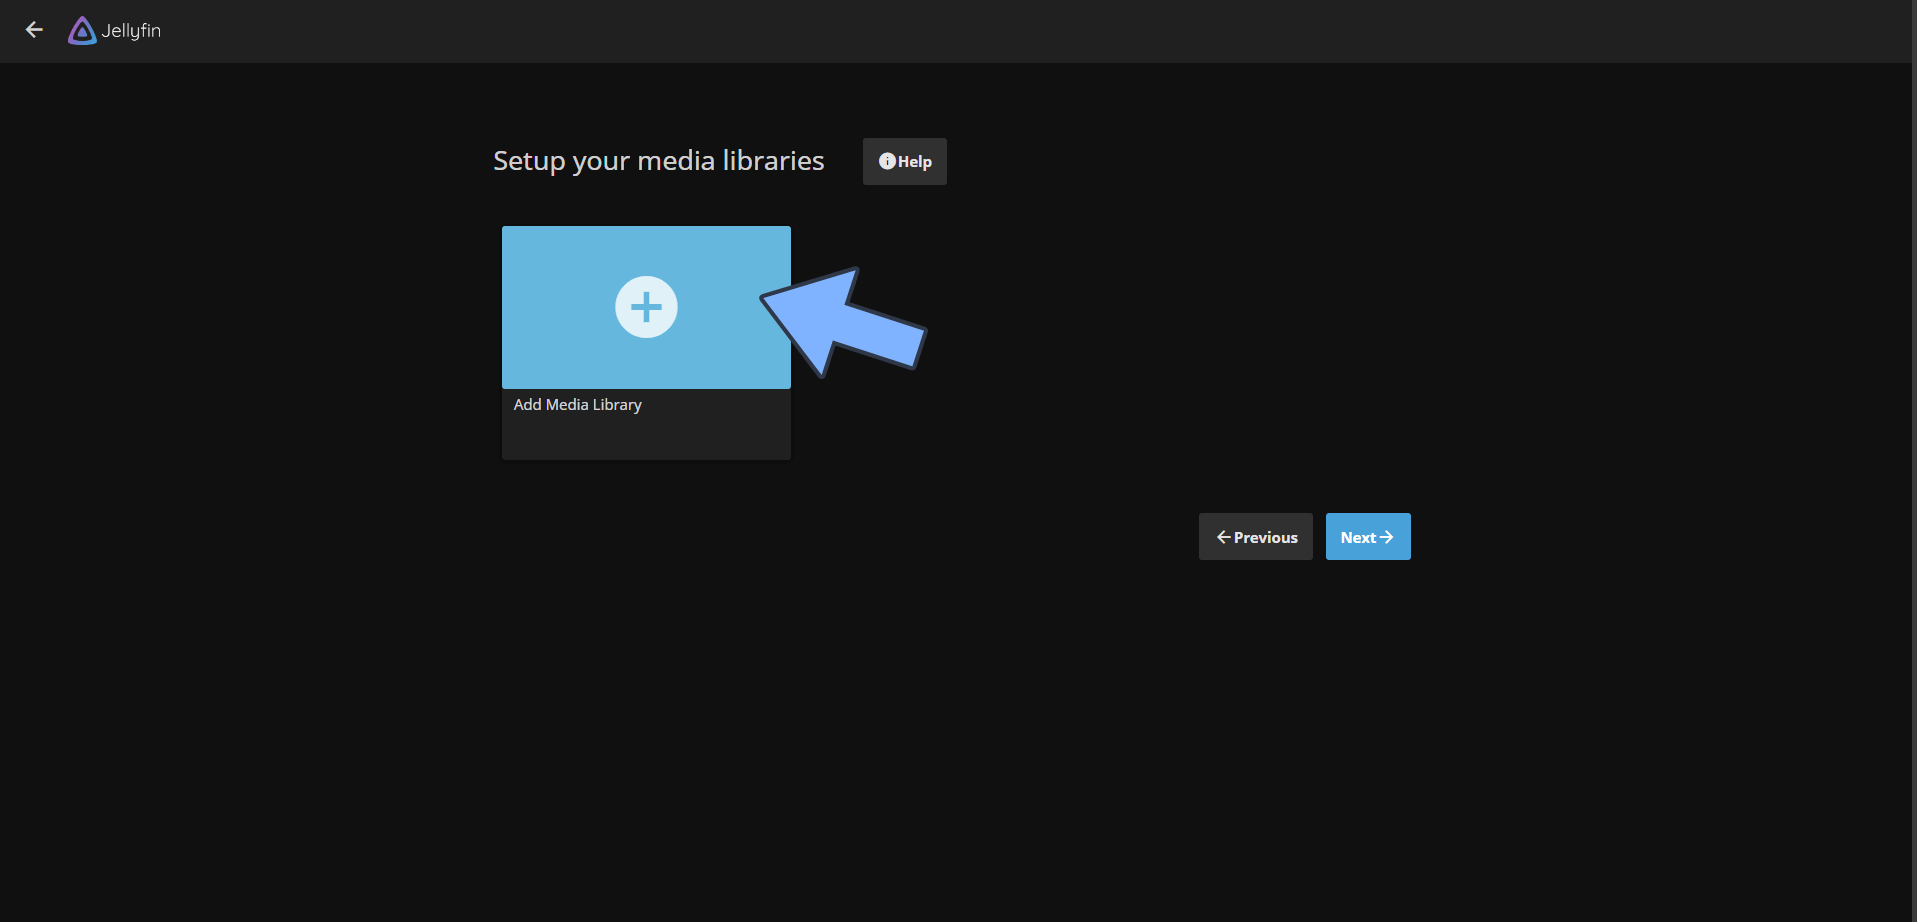
Click Add Media Library to add your first library. Follow the instructions in the image below.
STEP 13
Select Movies as Content type, then click Folders +. Follow the instructions in the image below.

STEP 14
Type in /media then click OK. Follow the instructions in the image below.

STEP 15
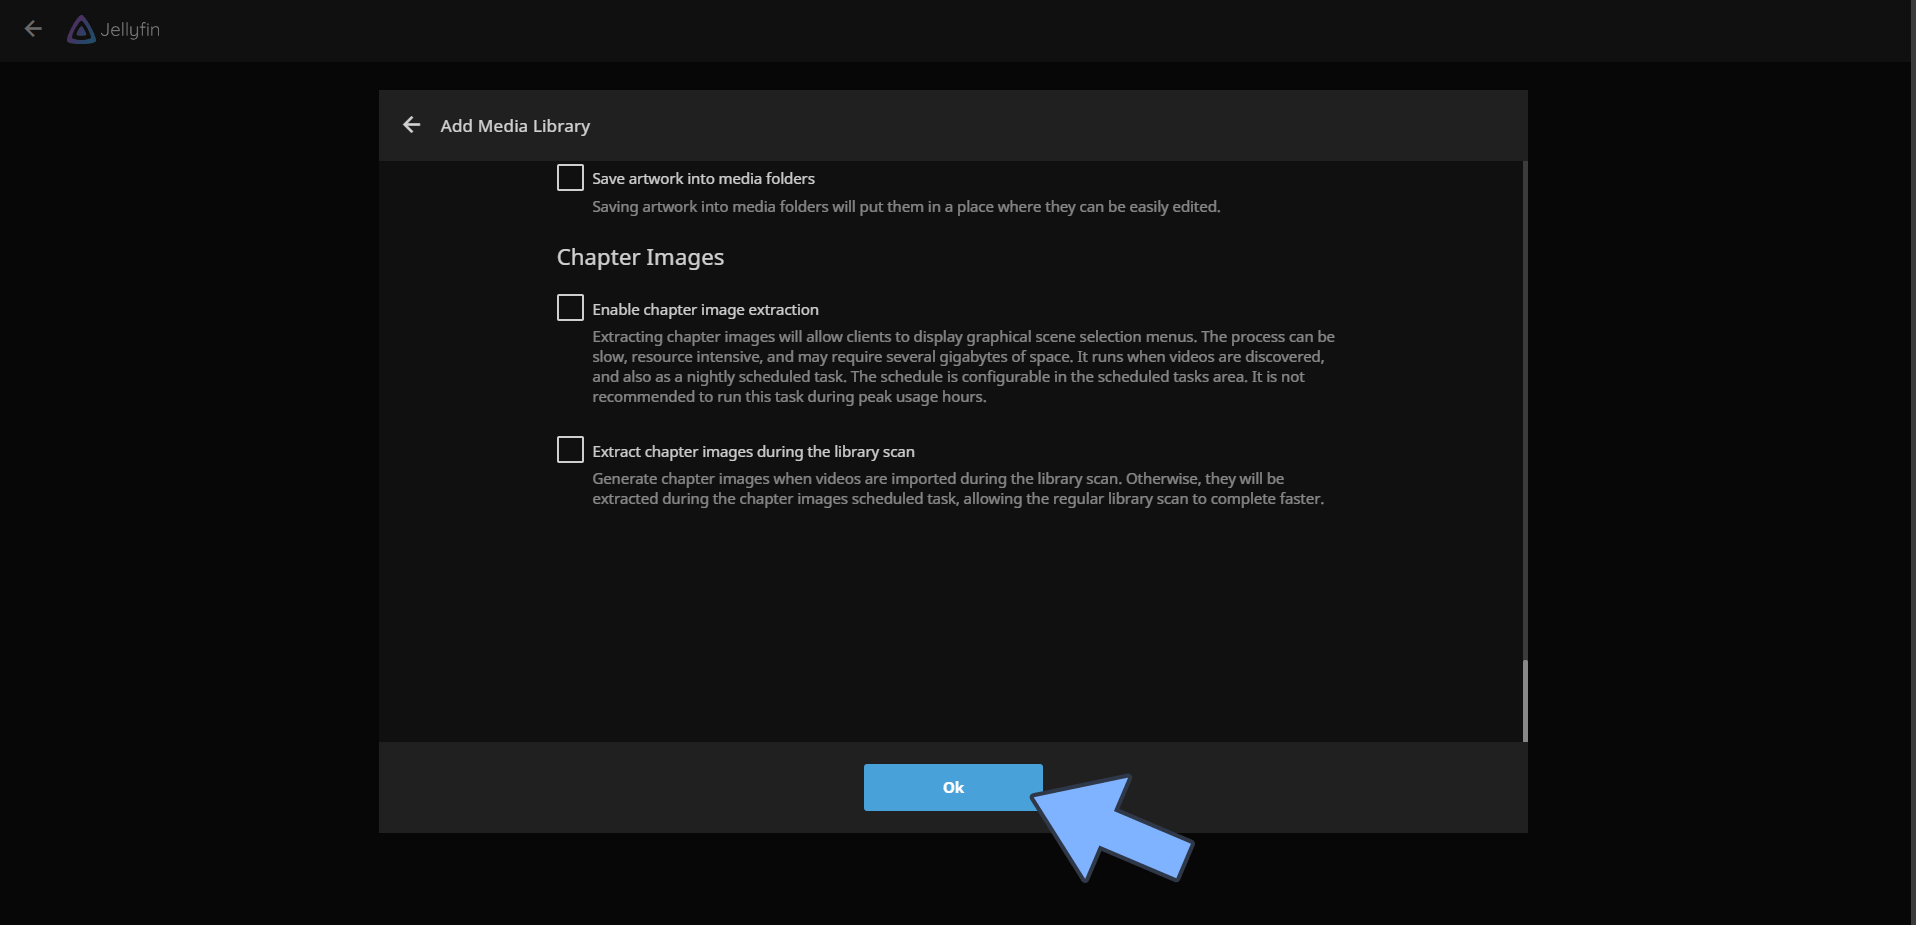
Scroll down the page until you find the OK button. Click on it. Follow the instructions in the image below.
STEP 16
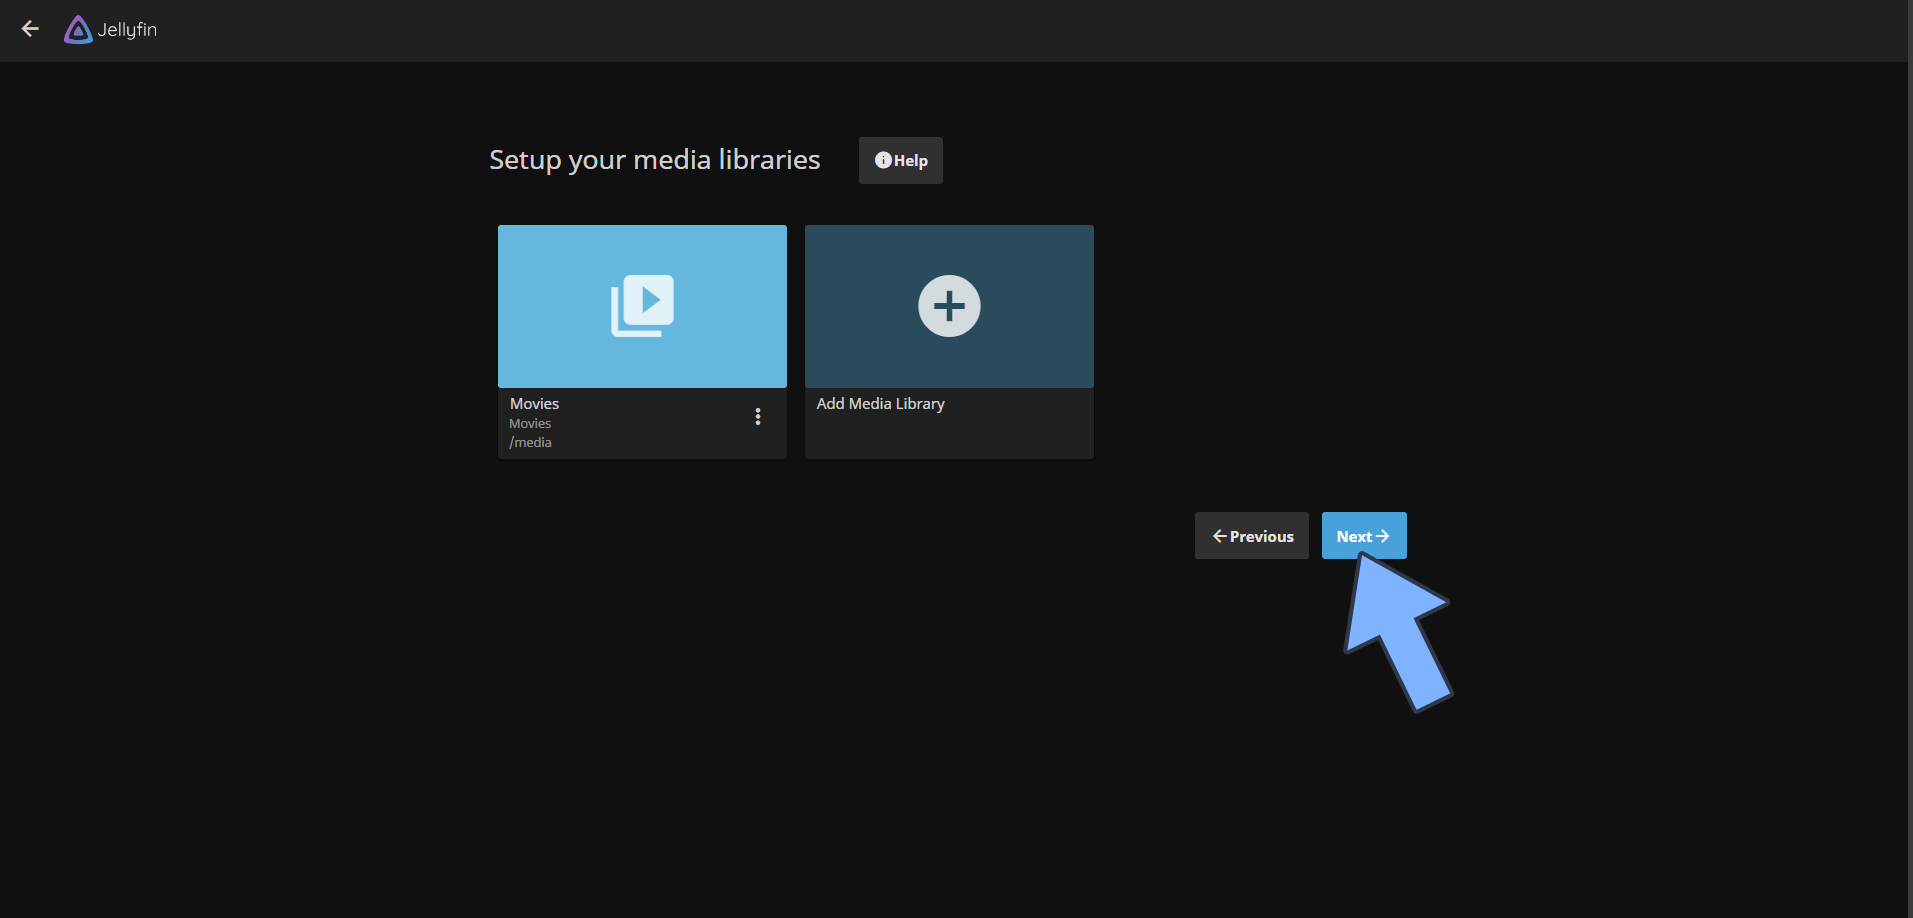
Now add the music folder if you have one or click Next if you don’t have one. Follow the instructions in the image below.
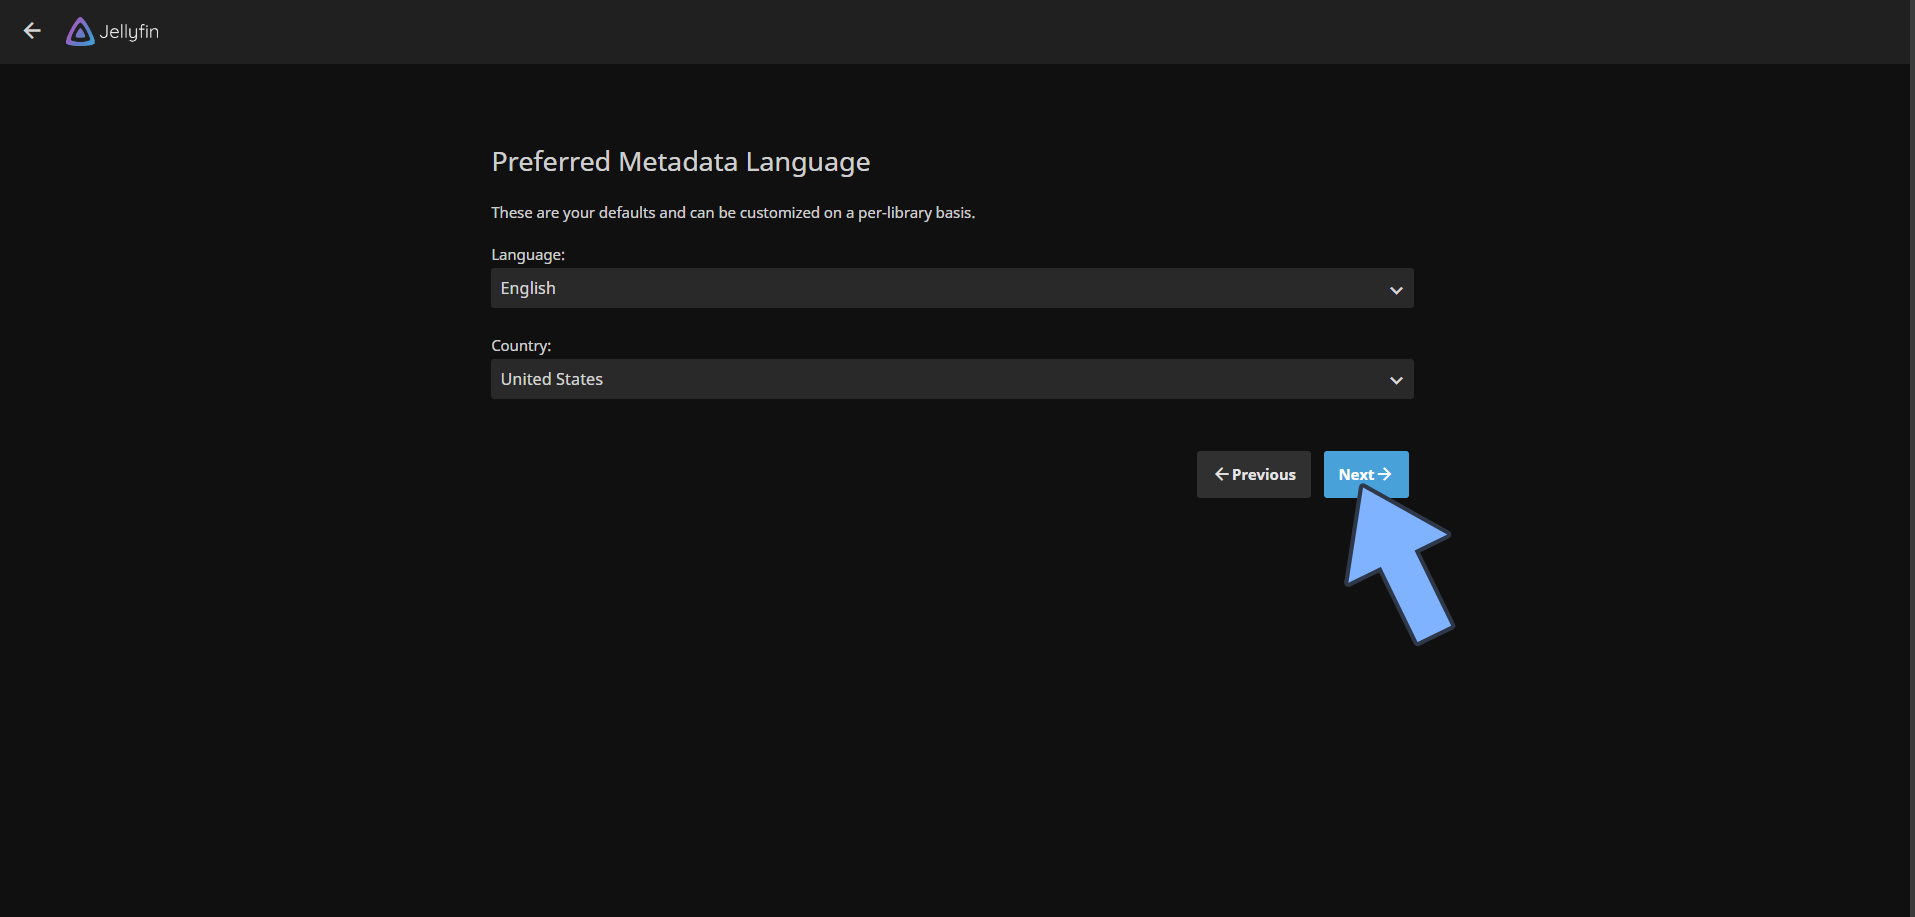
STEP 17
Choose the metadata Language and Country then click Next. Follow the instructions in the image below.
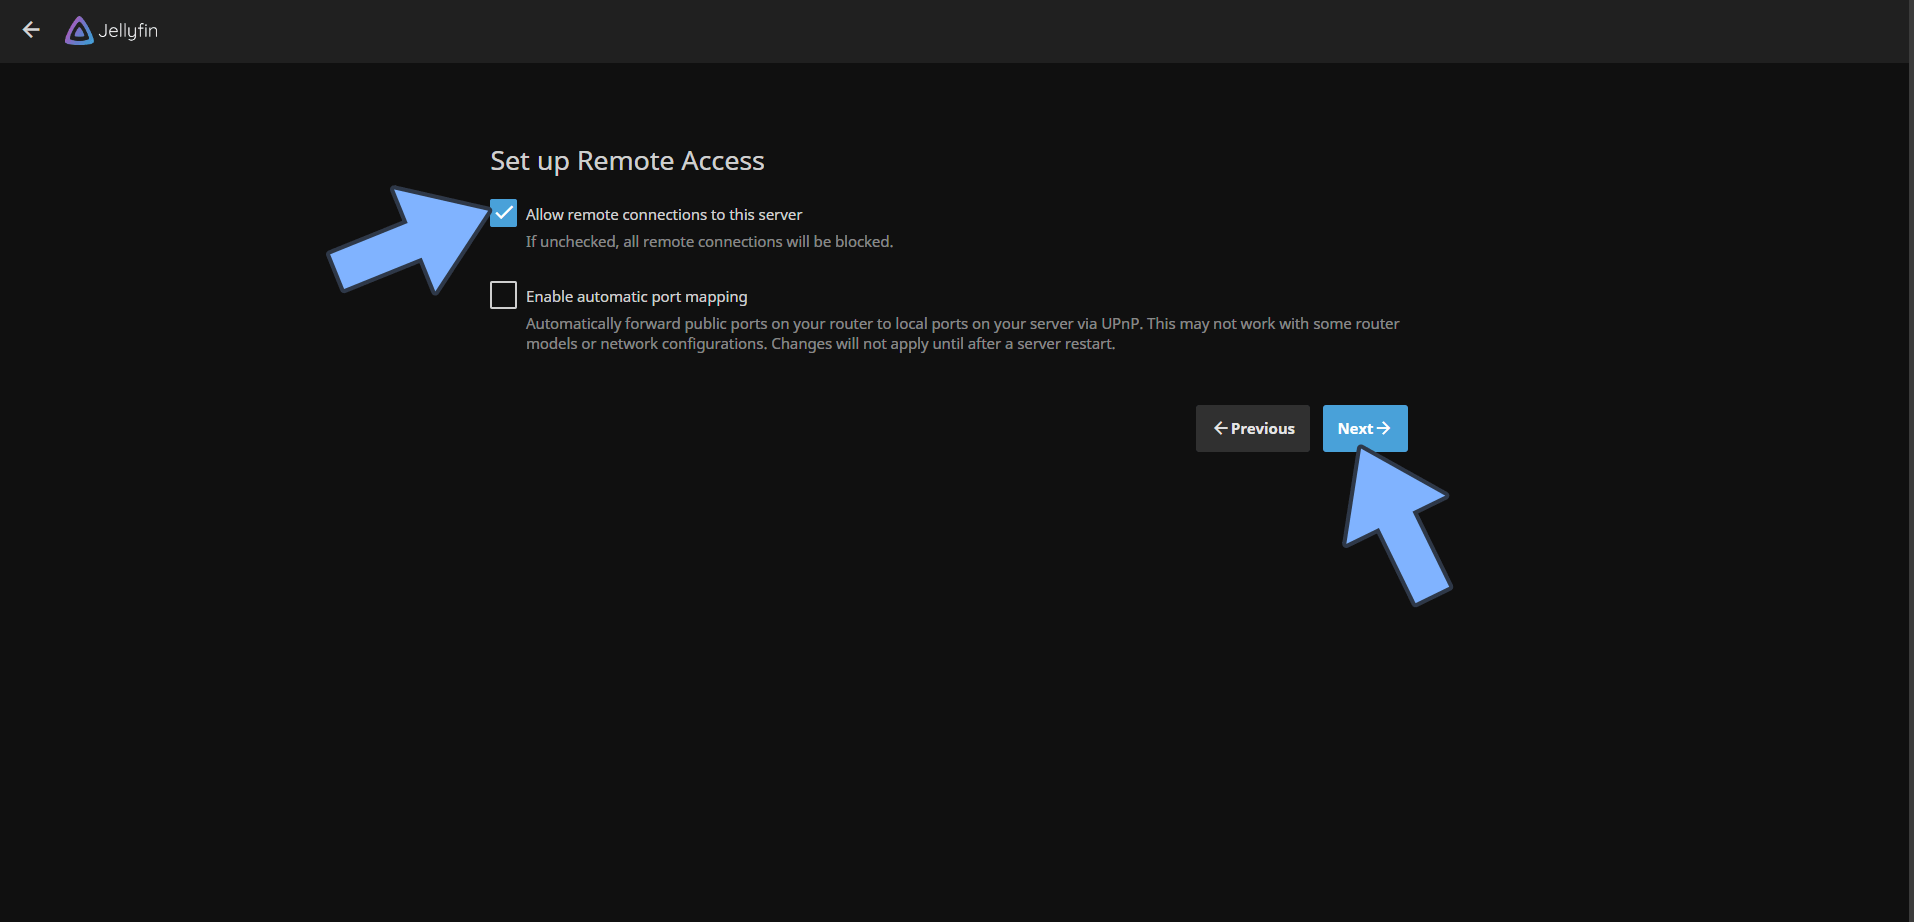
STEP 18
Check Allow remote connections to this server then click Next. Follow the instructions in the image below.
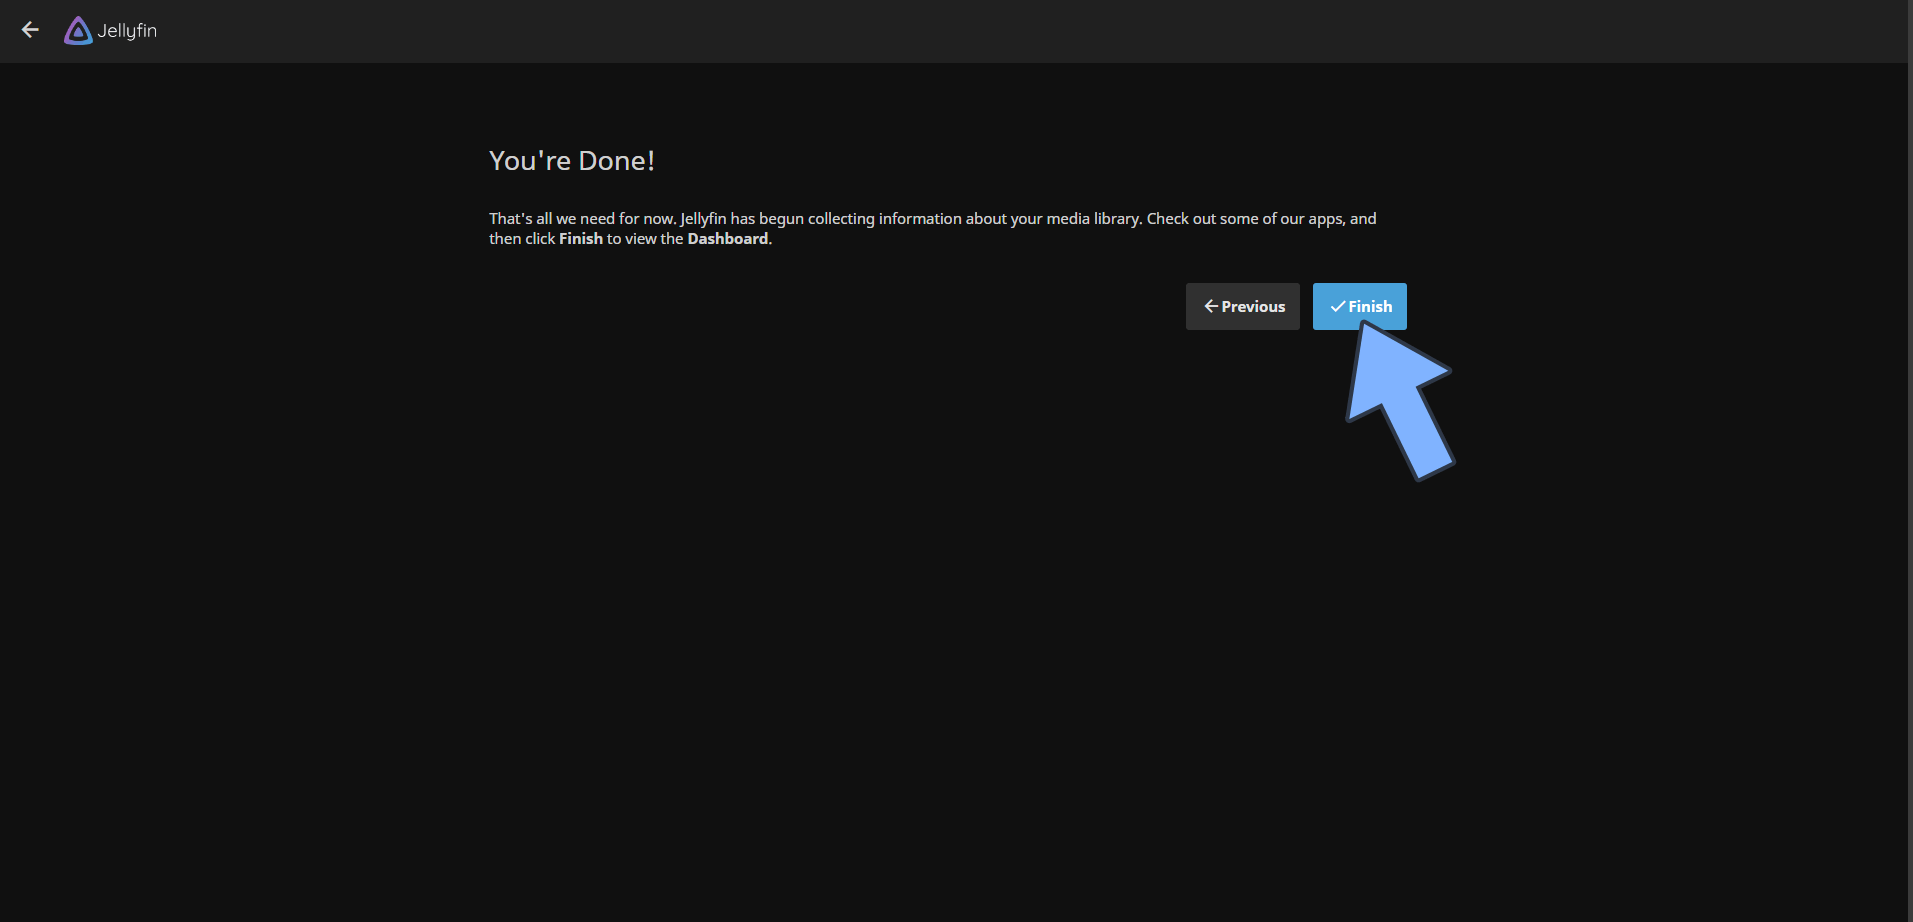
STEP 19
Click Finish. Follow the instructions in the image below.
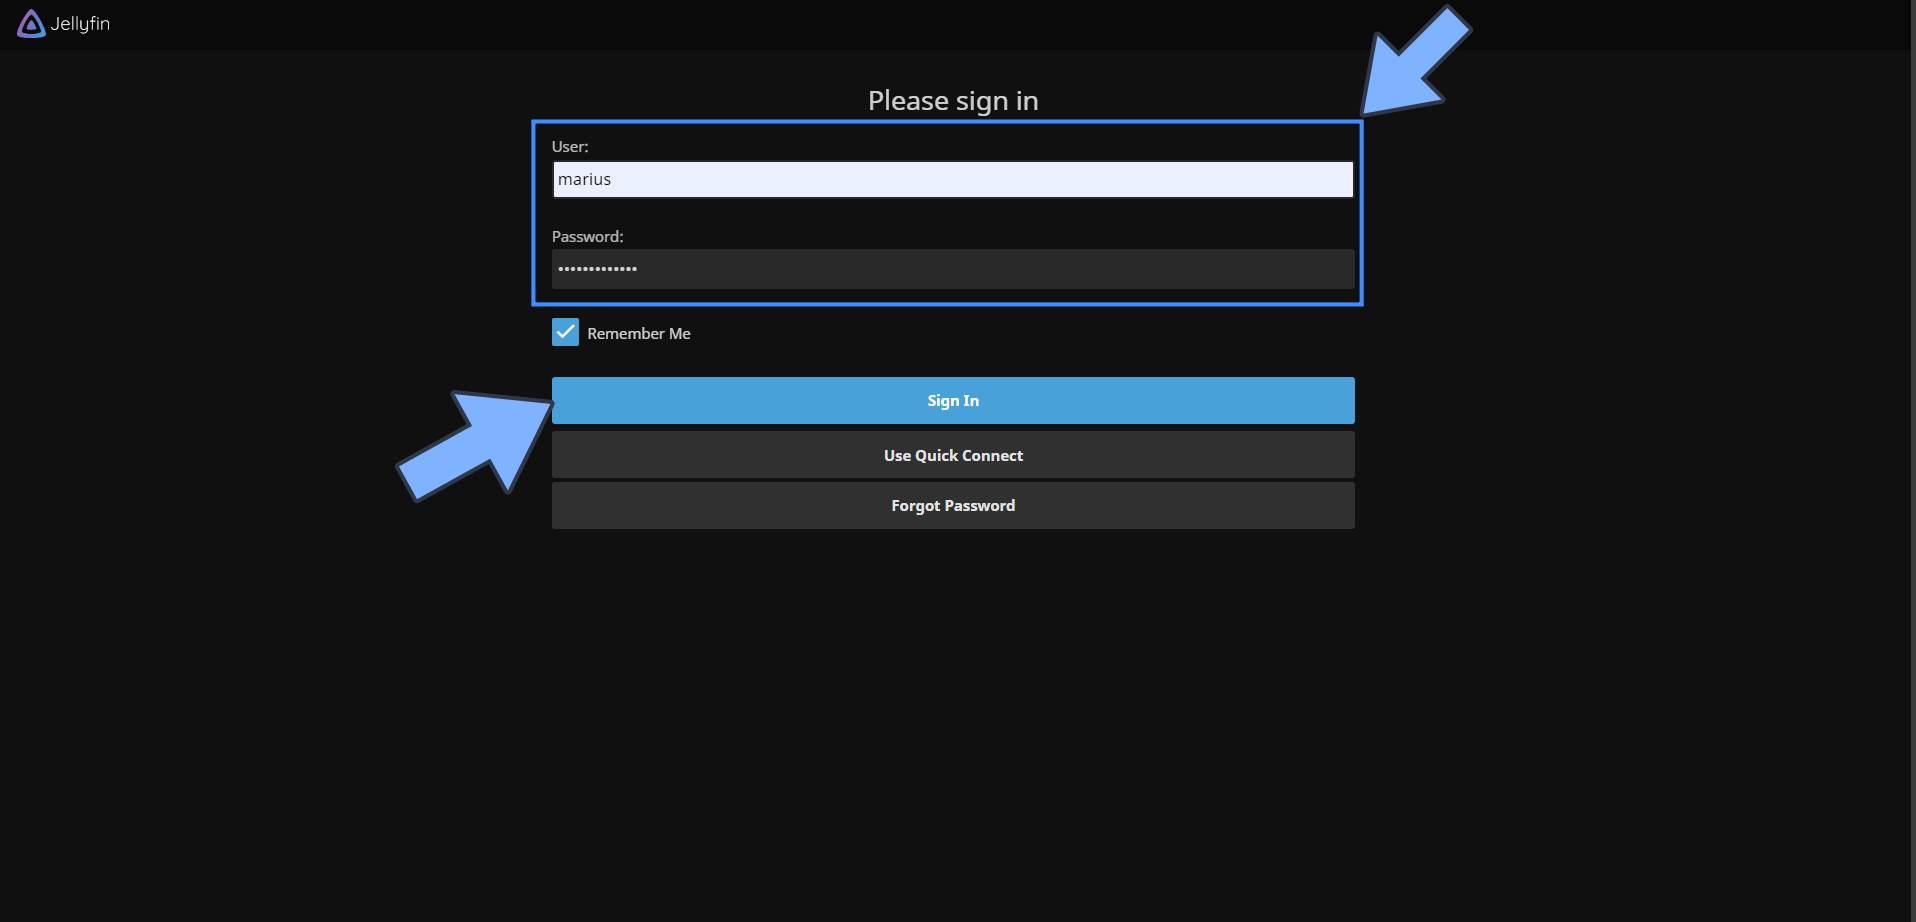
STEP 20
Sign in using your own Username and Password that you have previously created at STEP 11 then click Sign In. Follow the instructions in the image below.
STEP 21
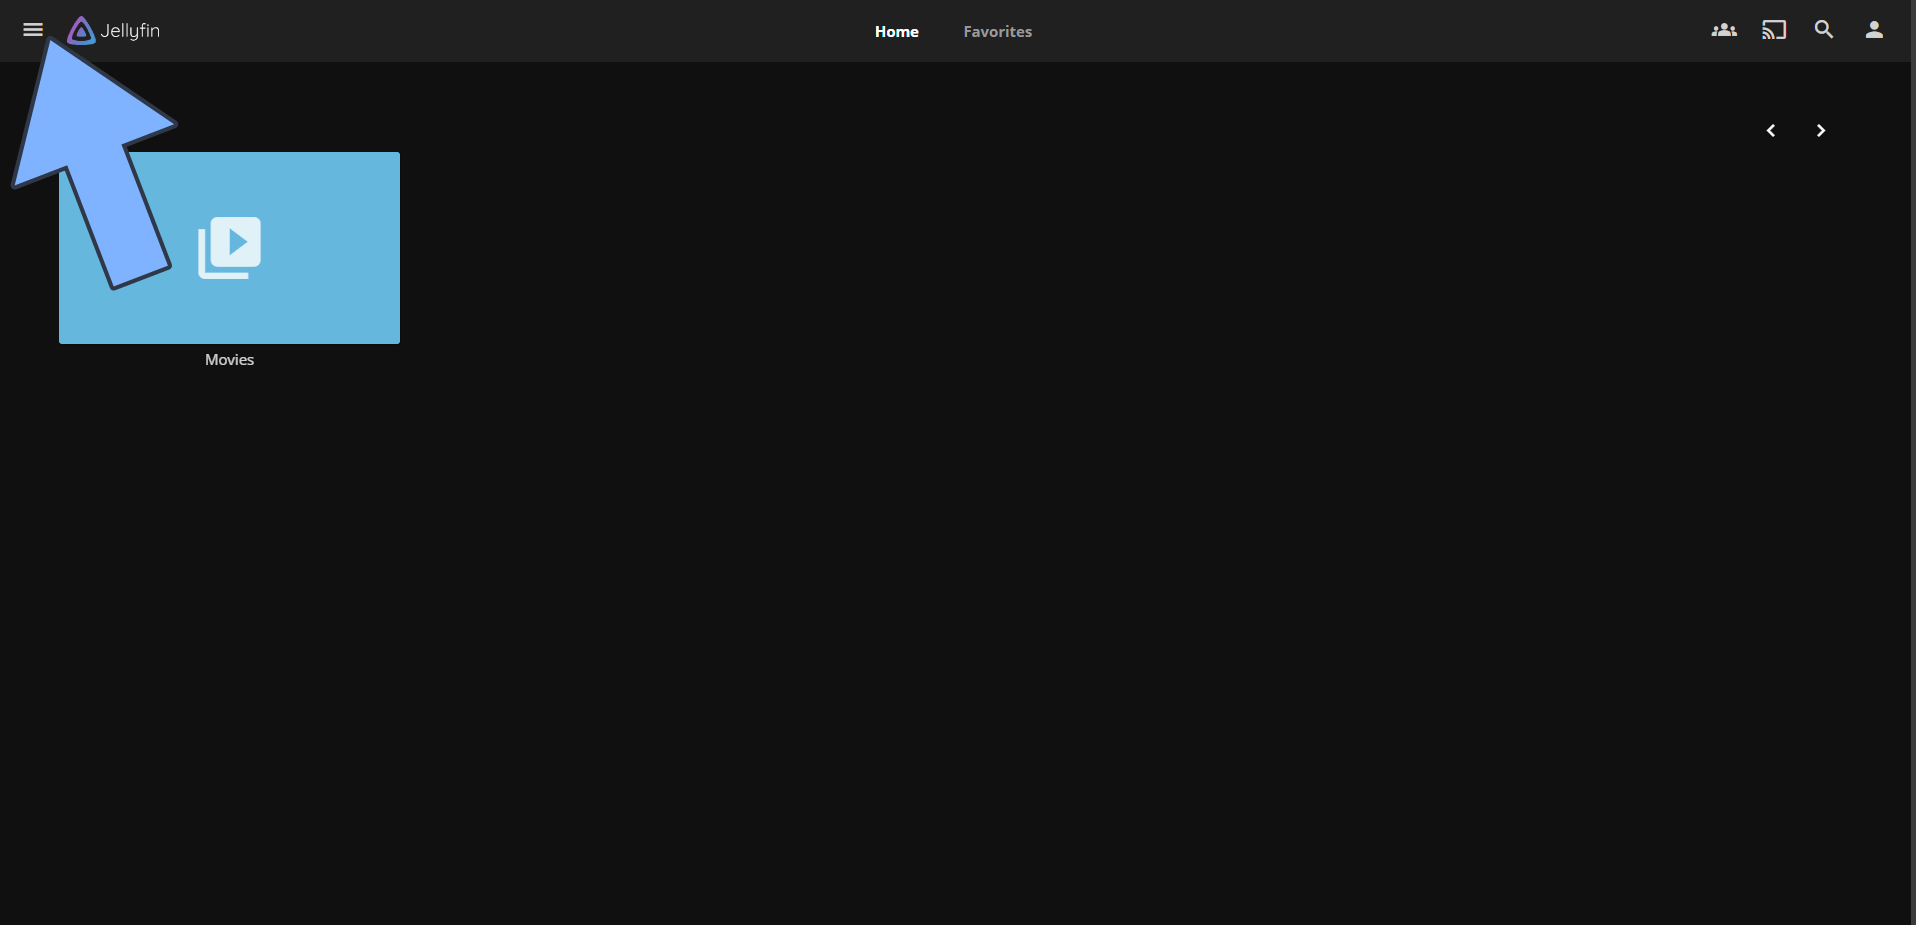
On the top left of the page click on the 3 horizontal lines. Follow the instructions in the image below.
STEP 22
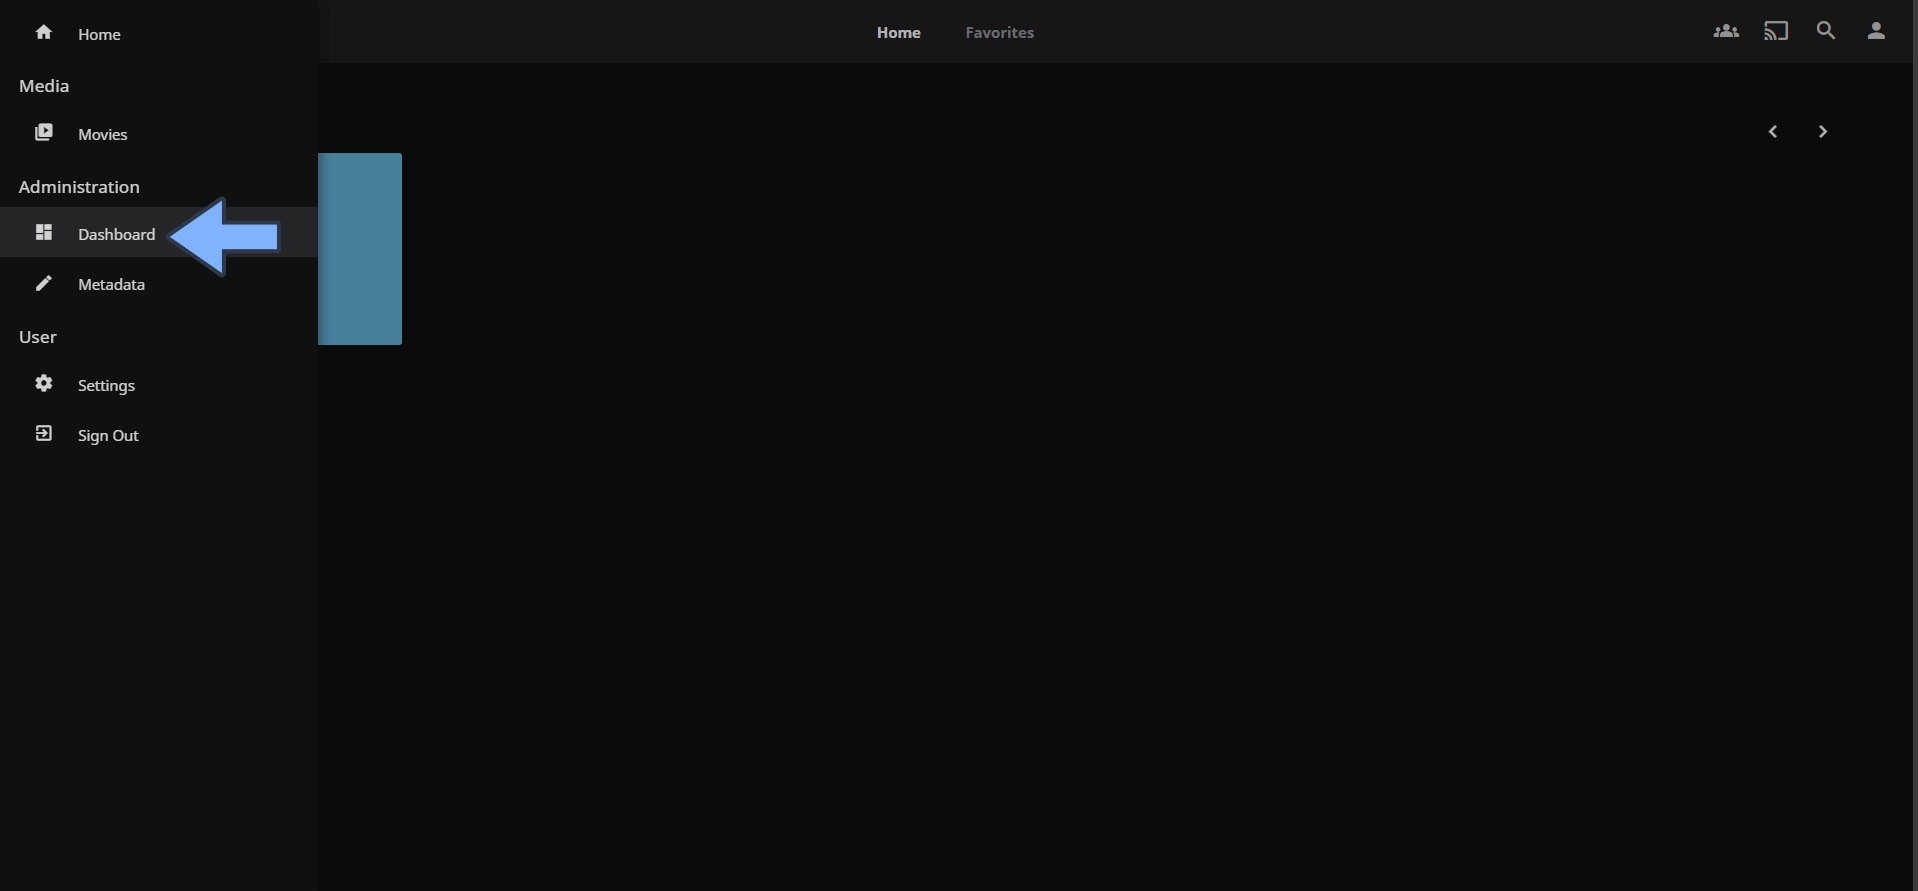
Click Dashboard. Follow the instructions in the image below.
STEP 23
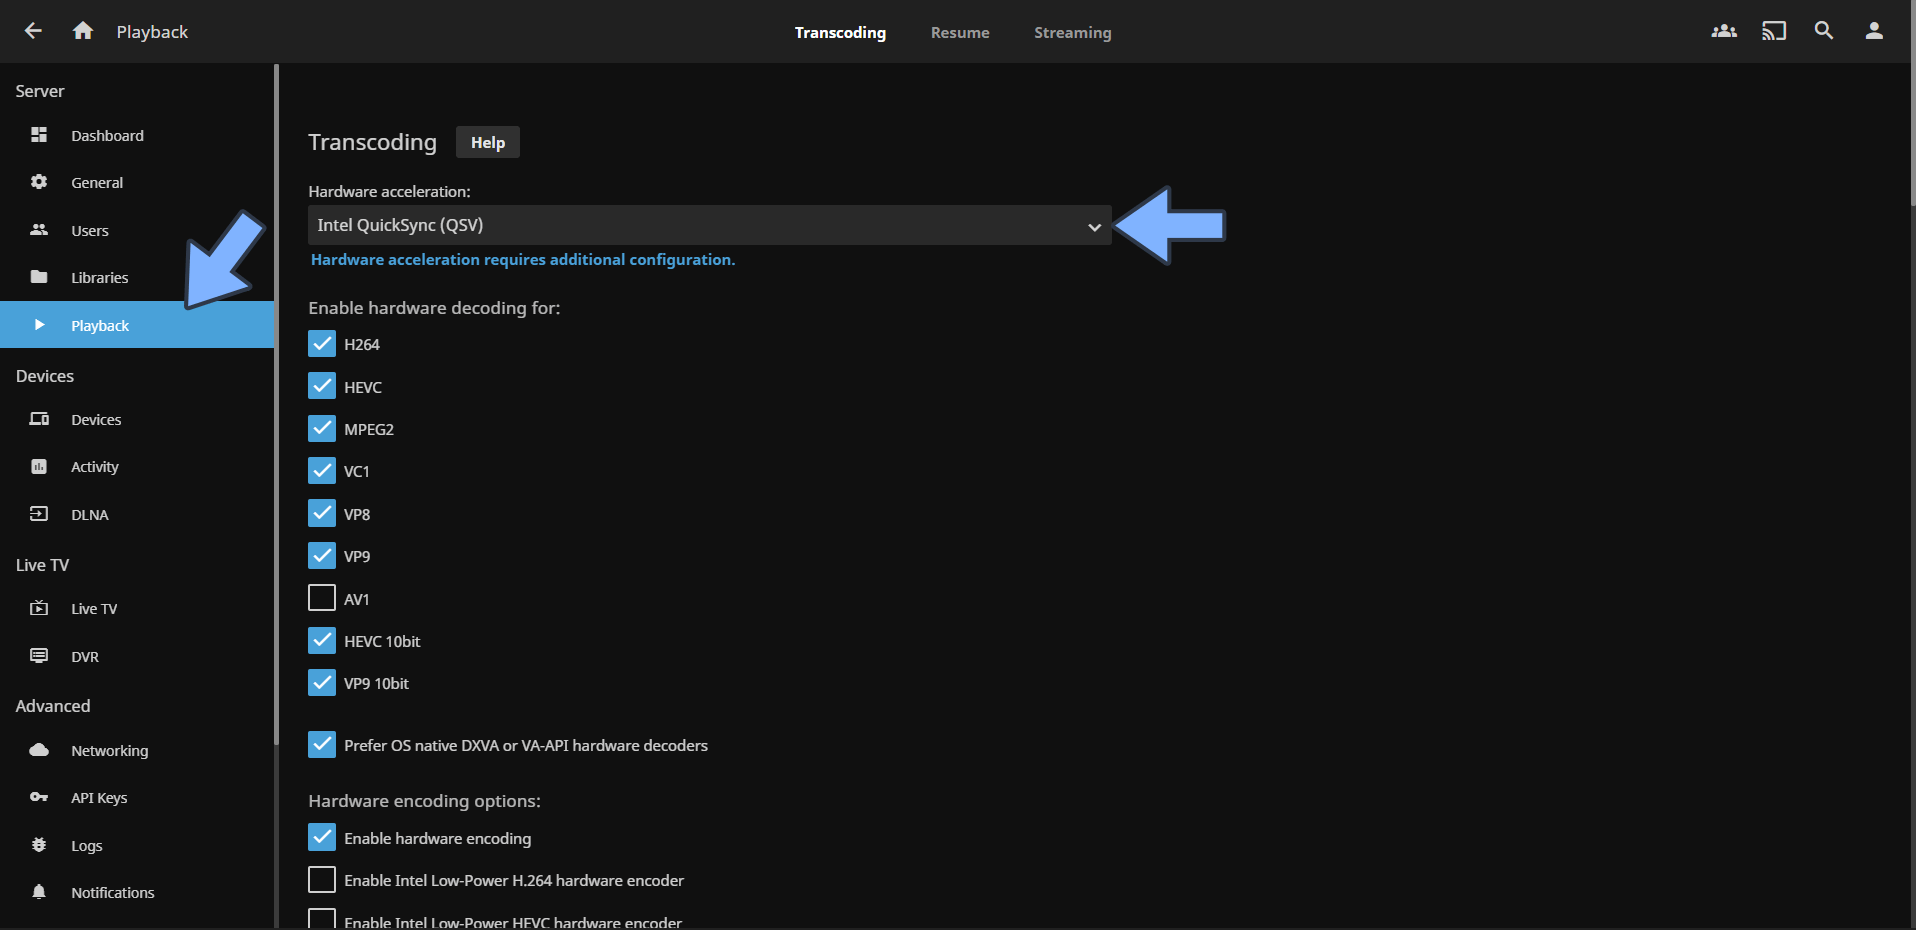
On the left sidebar click Playback. From the dropdown menu select Intel QuickSync (QSV). Follow the instructions in the image below.
STEP 24
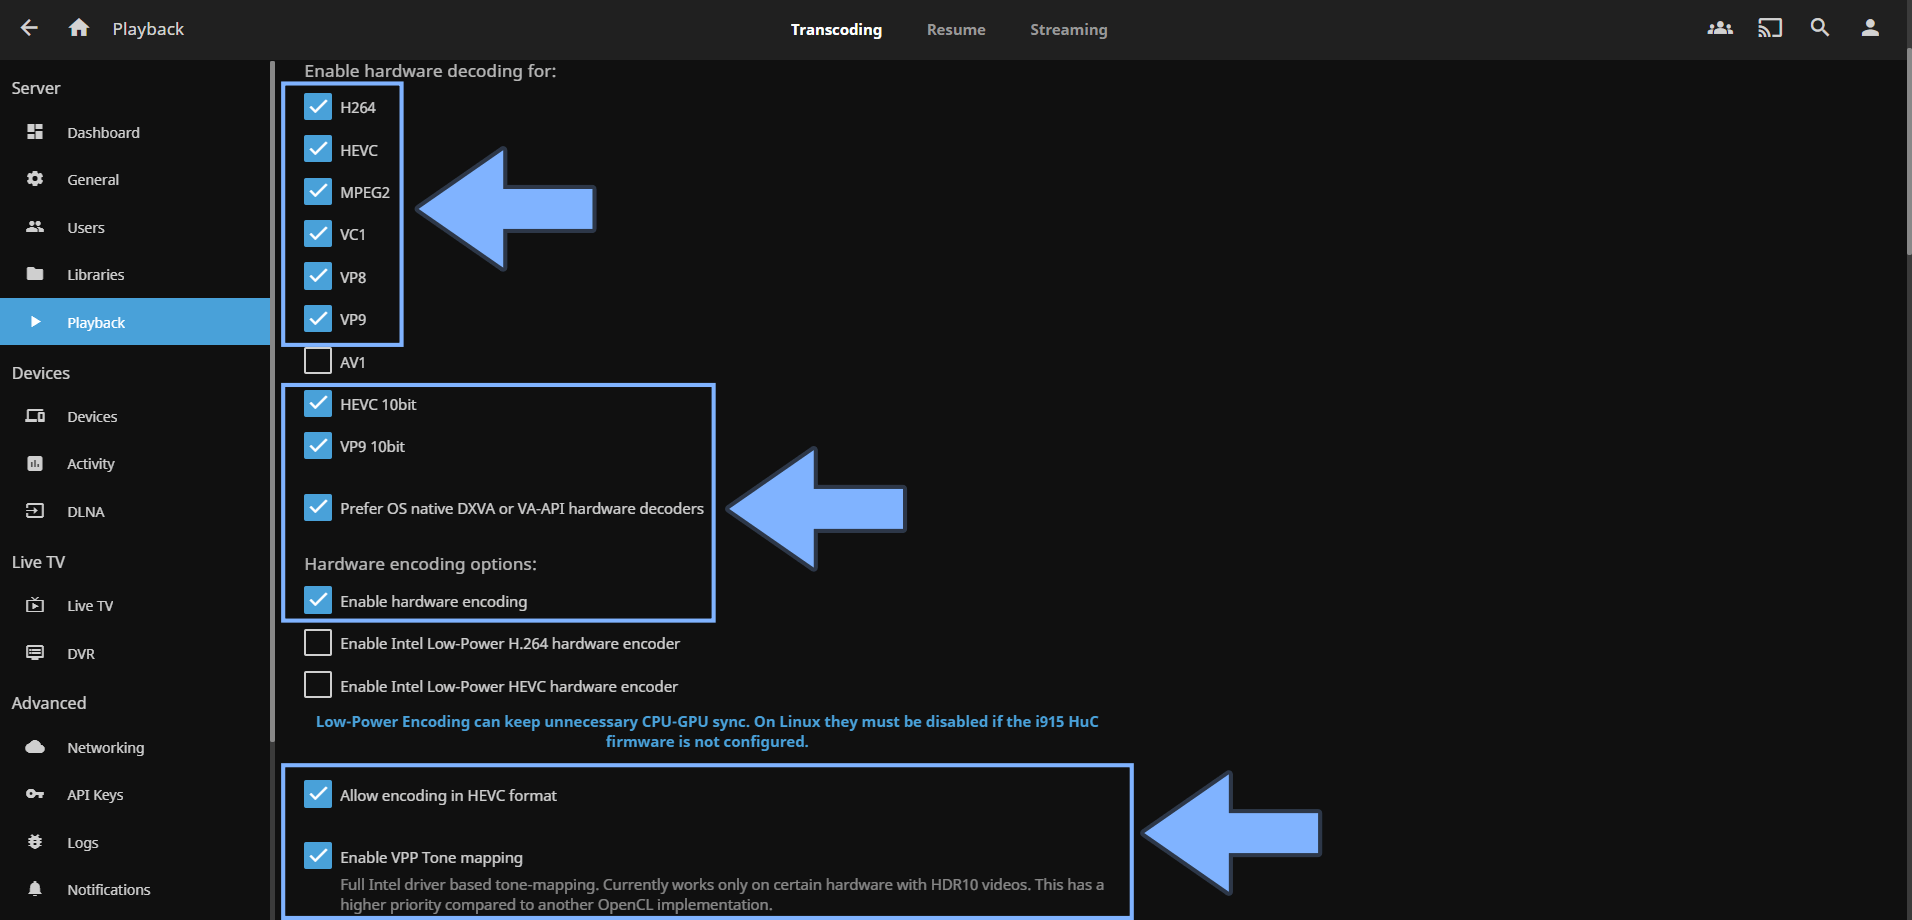
Check the following options:
- H264
- HEVC
- MPEG2
- VC1
- VP8
- VP9
- HEVC 10bit
- VP9 10bit
- Prefer OS native DXVA or VA-API hardware decoders
- Enable hardware encoding
- Allow encoding in HEVC format
- Enable VPP Tone mapping
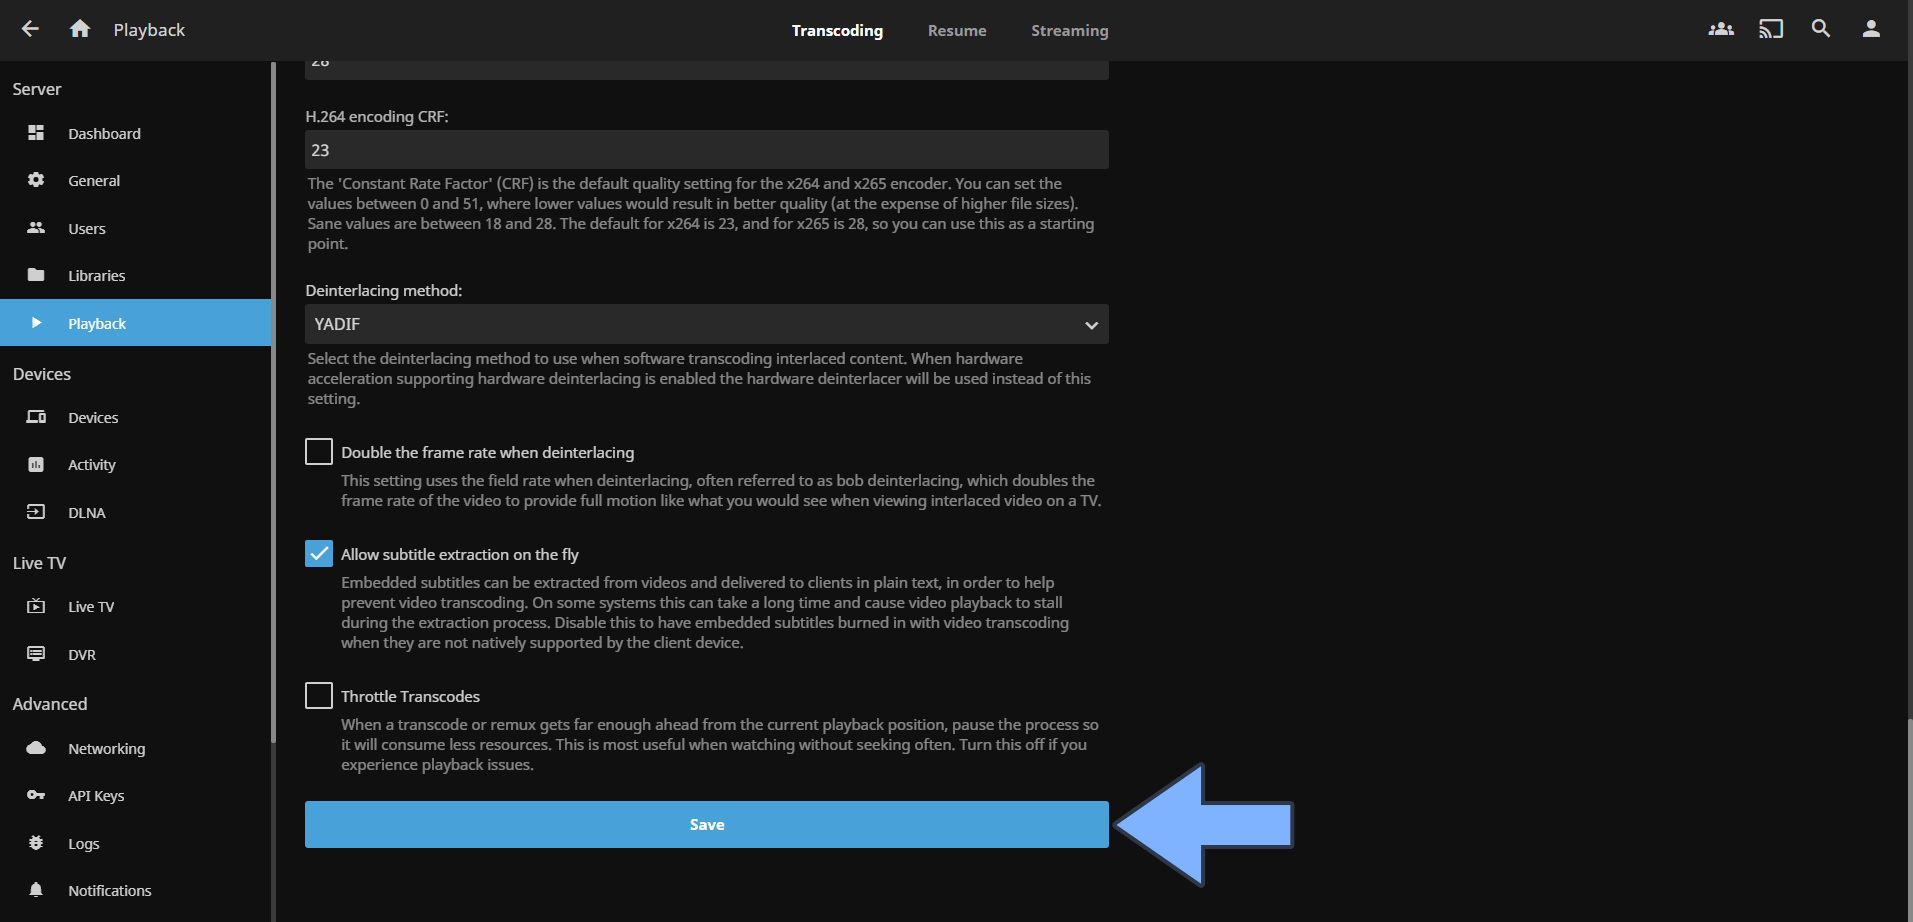
STEP 25
Scroll down the page until you find the Save button. Click on it. Follow the instructions in the image below.
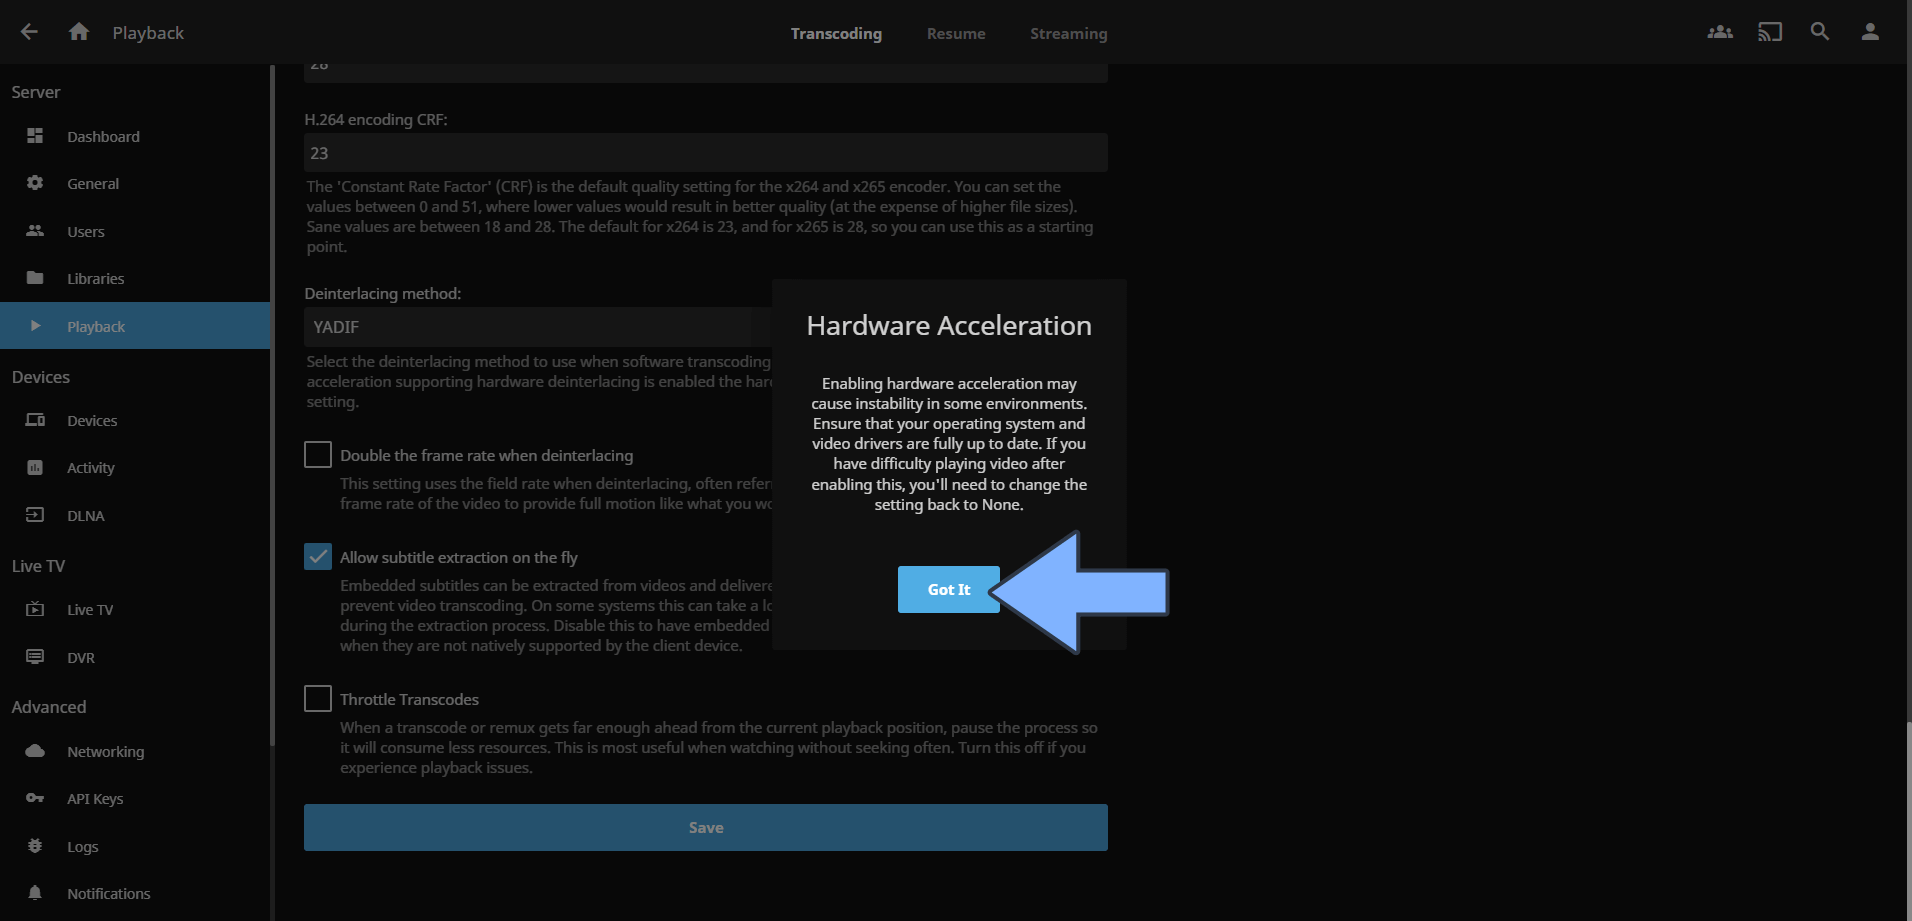
STEP 26
Click Got it. Follow the instructions in the image below.
Enjoy Jellyfin with Hardware Transcoding on your UGREEN NAS!
This post was updated on Friday / June 21st, 2024 at 3:23 PM