
Calibre is a cross-platform open-source suite of e-book software by Kovid Goyal. Calibre supports organizing existing e-books into virtual libraries, displaying, editing, creating and converting e-books, as well as syncing e-books with a variety of e-readers. Editing books is supported for EPUB and AZW3 formats. In short, Calibre is a powerful and easy to use e-book manager. Users say it’s outstanding and a must-have. It’ll allow you to do nearly everything and it takes things a step beyond normal e-book software. It’s also completely free and open source, and great for both casual users and computer experts. In this step by step guide I will show you how to install Calibre on your UGREEN NAS using Docker & Portainer.
STEP 1
Please Support My work by Making a Donation.
STEP 2
Install Portainer using my step by step guide. If you already have Portainer installed on your UGREEN NAS, skip this STEP. Attention: Make sure you have installed the latest Portainer version.
STEP 3
Add Read & Write Permissions to the Docker Folder. If you have already added the Read and Write Permissions to the Docker Folder, skip this STEP.
STEP 4
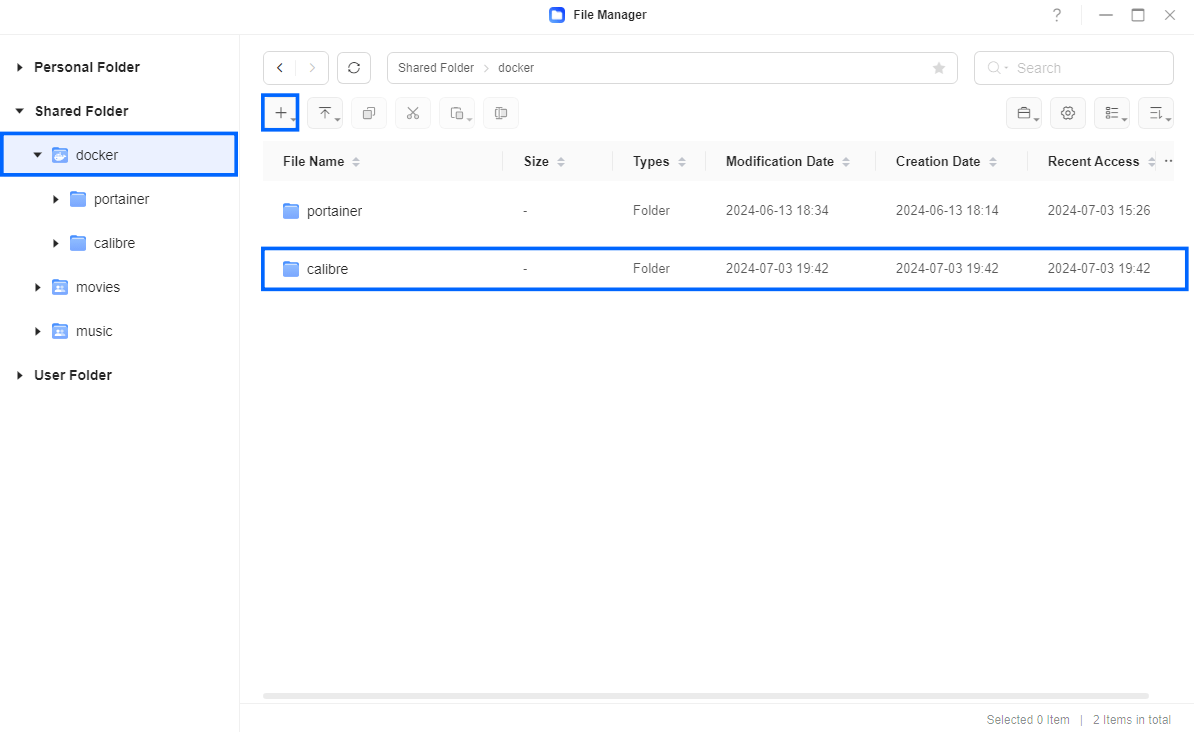
Go to File Manager and open the docker folder. Inside the docker folder, create one new folder and name it calibre. Follow the instructions in the image below.
Note: Be careful to enter only lowercase, not uppercase letters.
STEP 5
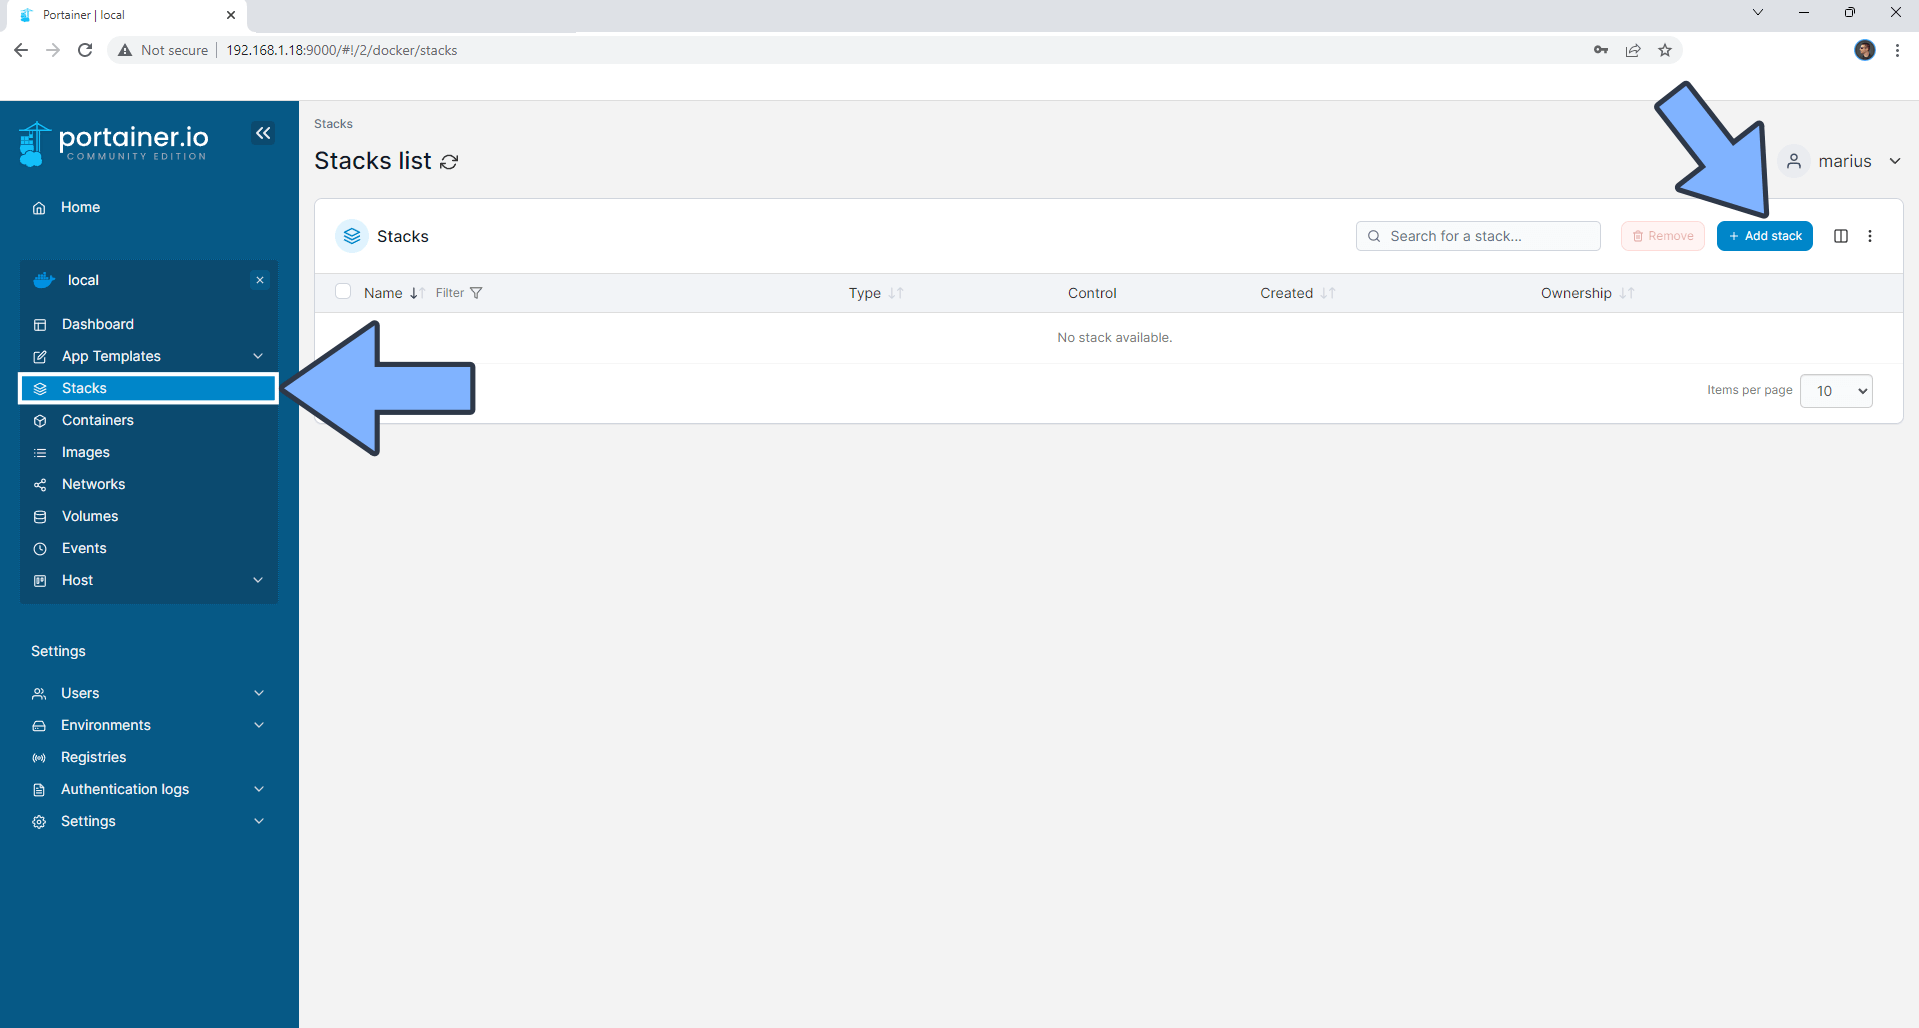
Log into Portainer using your username and password. On the left sidebar in Portainer, click on Stacks then + Add stack. Follow the instructions in the image below.
STEP 6
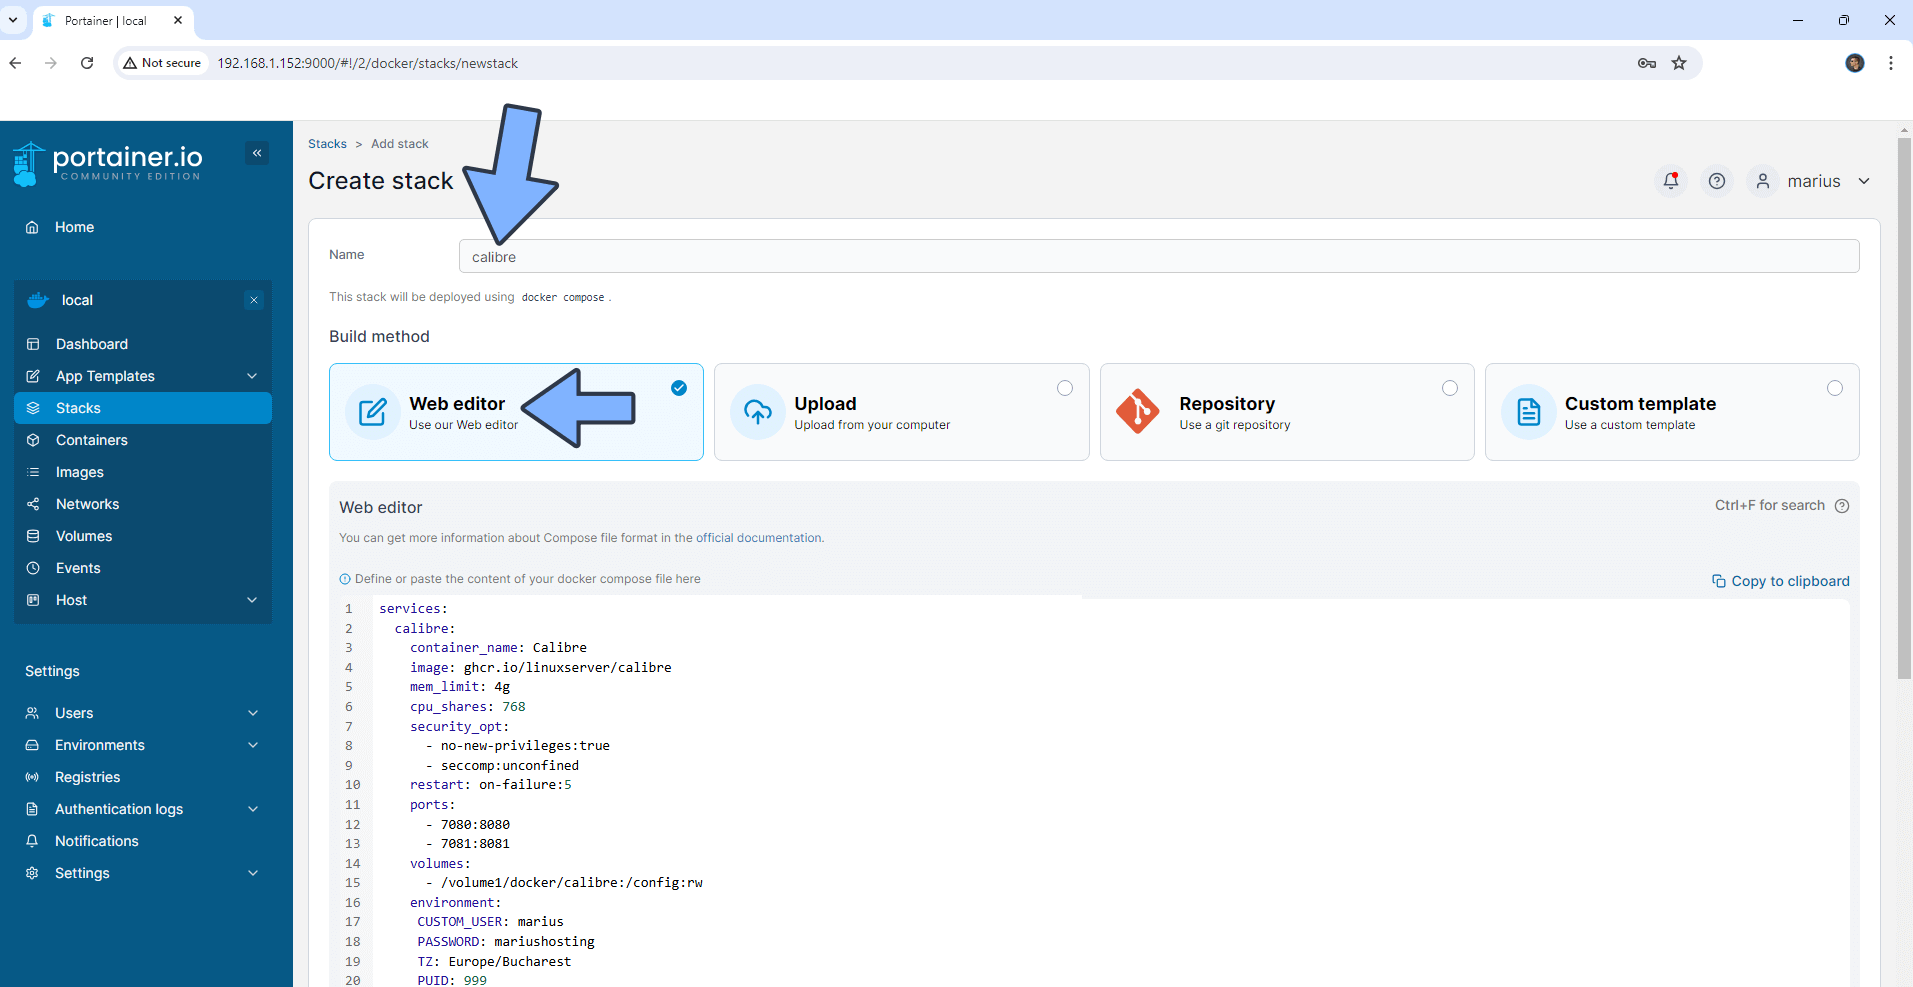
In the Name field type in calibre. Follow the instructions in the image below.
services:
  calibre:
    container_name: Calibre
    image: ghcr.io/linuxserver/calibre
    mem_limit: 4g
    cpu_shares: 768
    security_opt:
      - no-new-privileges:true
      - seccomp:unconfined
    restart: on-failure:5
    ports:
      - 7080:8080
      - 7081:8081
    volumes:
      - /volume1/docker/calibre:/config:rw
    environment:
     CUSTOM_USER: marius
     PASSWORD: mariushosting
     TZ: Europe/Bucharest
     PUID: 999
     PGID: 10
Note: Before you paste the code above in the Web editor area below, change the value for CUSTOM_USER. Type in your own username. marius is an example for a username.
Note: Before you paste the code above in the Web editor area below, change the value for PASSWORD. Type in your own password. mariushosting is an example for a password. ⚠️Warning: Do NOT use passwords with special characters.
Note: Before you paste the code above in the Web editor area below, change the value for TZ. (Select your current Time Zone from this list.)
Note: Before you paste the code above in the Web editor area below, change the value numbers for PUID and PGID with your own values. (Follow my step by step guide on how to do this.)
STEP 7
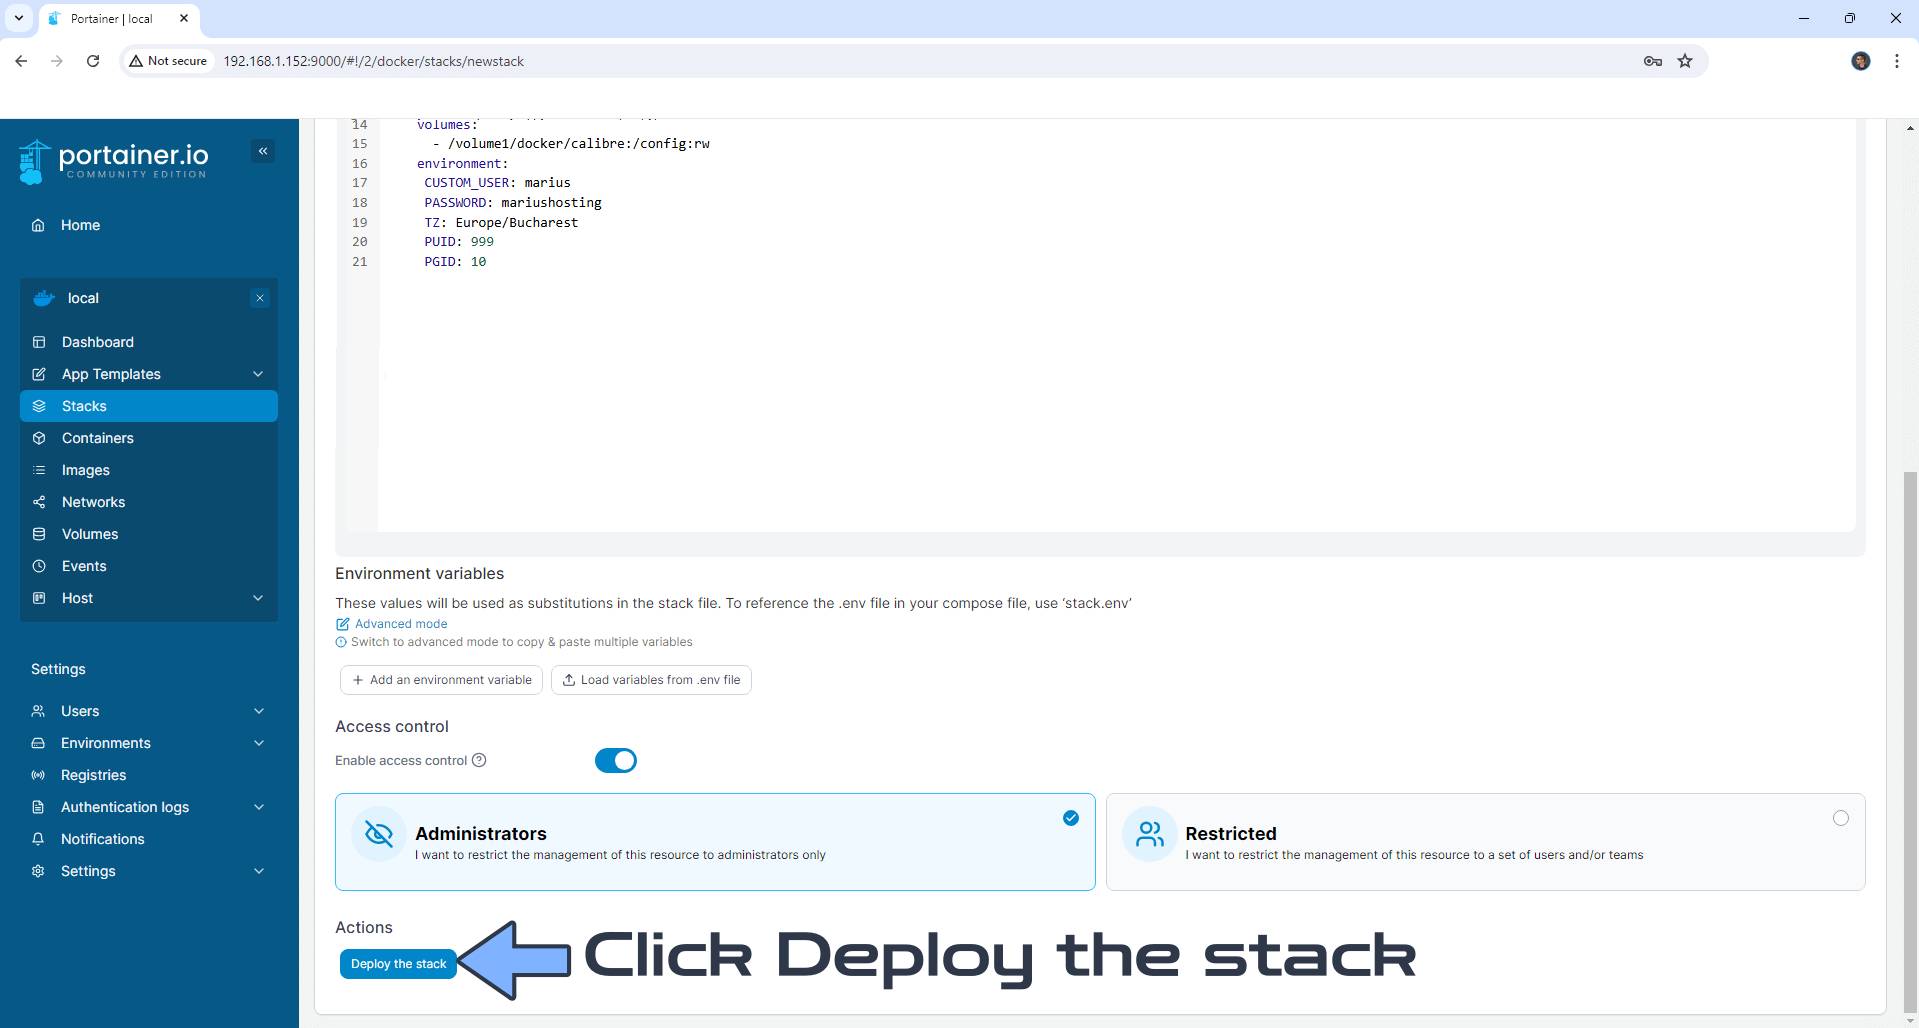
Scroll down on the page until you see a button named Deploy the stack. Click on it. Follow the instructions in the image below. The installation process can take up to a few minutes. It will depend on your Internet speed connection.
STEP 8
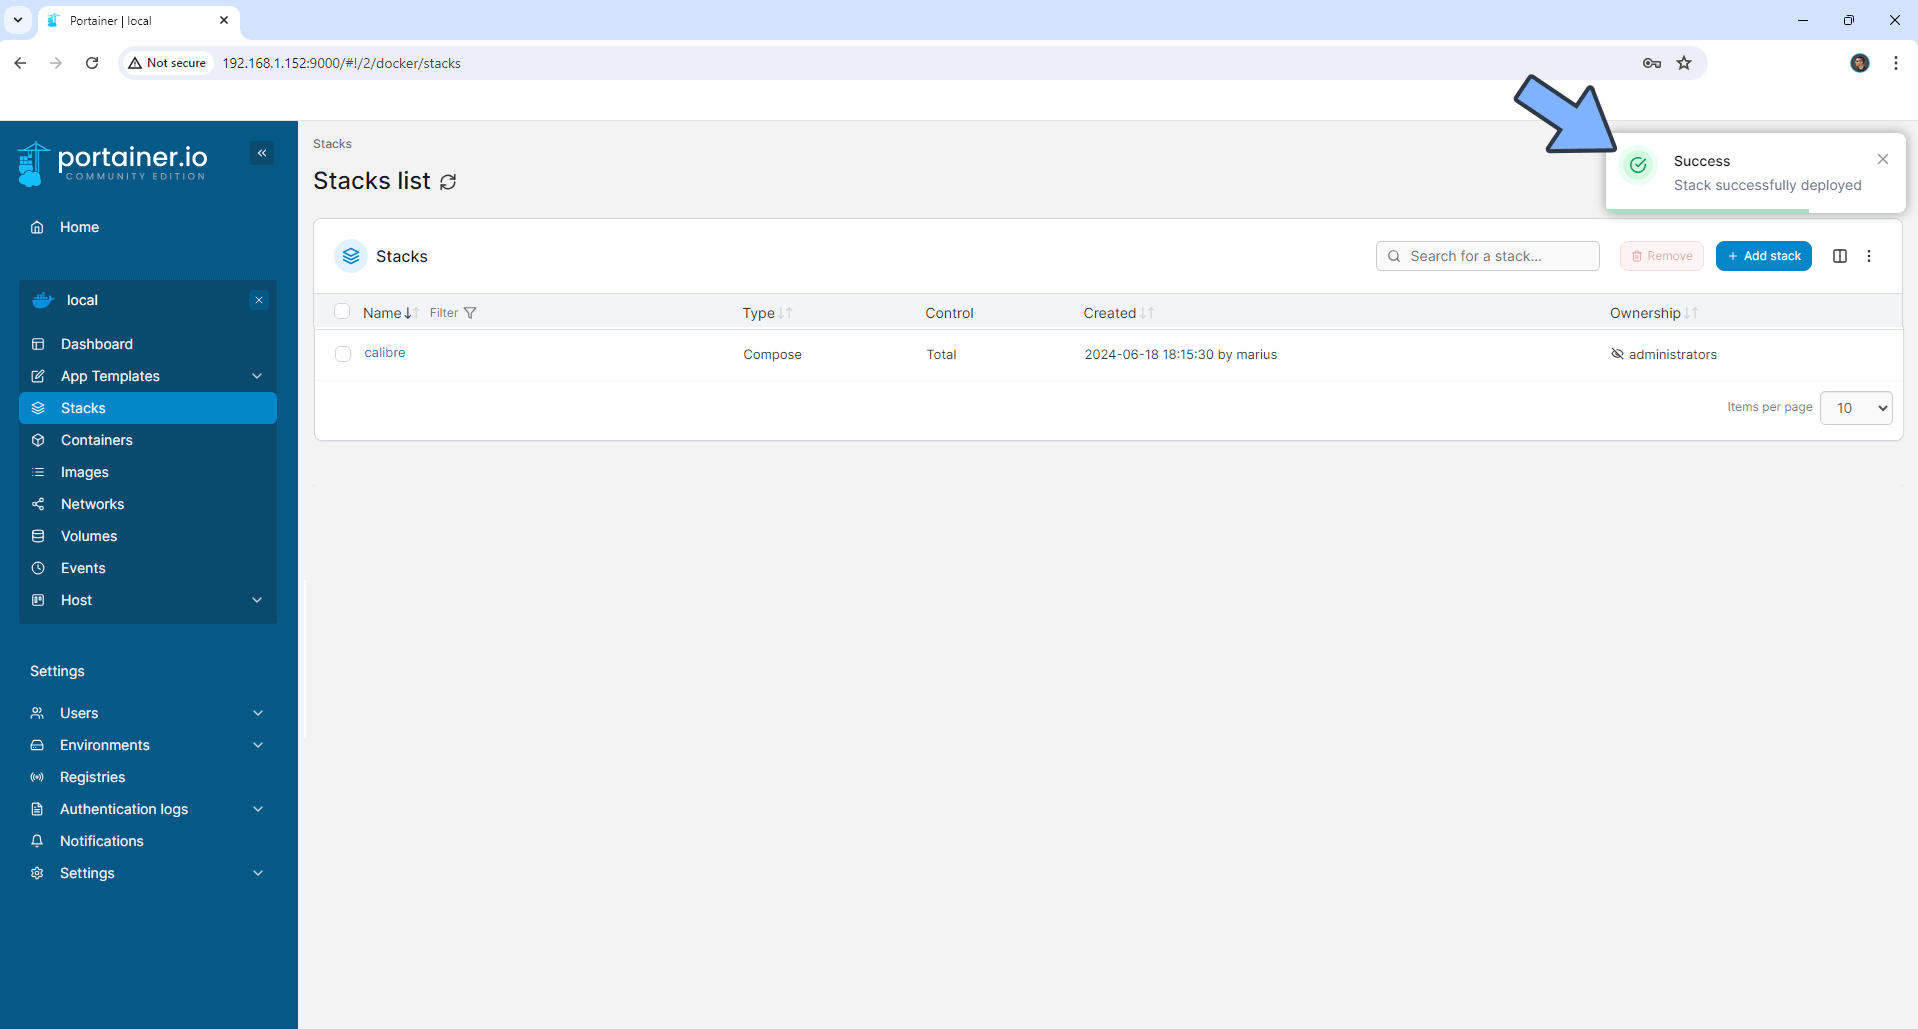
If everything goes right, you will see the following message at the top right of your screen: “Success Stack successfully deployed“.
STEP 9
🟢Please Support My work by Making a Donation. Almost 99,9% of the people that install something using my guides forget to support my work, or just ignore STEP 1. I’ve been very honest about this aspect of my work since the beginning: I don’t run any ADS, I don’t require subscriptions, paid or otherwise, I don’t collect IPs, emails, and I don’t have any referral links from Amazon or other merchants. I also don’t have any POP-UPs or COOKIES. I have repeatedly been told over the years how much I have contributed to the community. It’s something I love doing and have been honest about my passion since the beginning. But I also Need The Community to Support me Back to be able to continue doing this work.
STEP 10
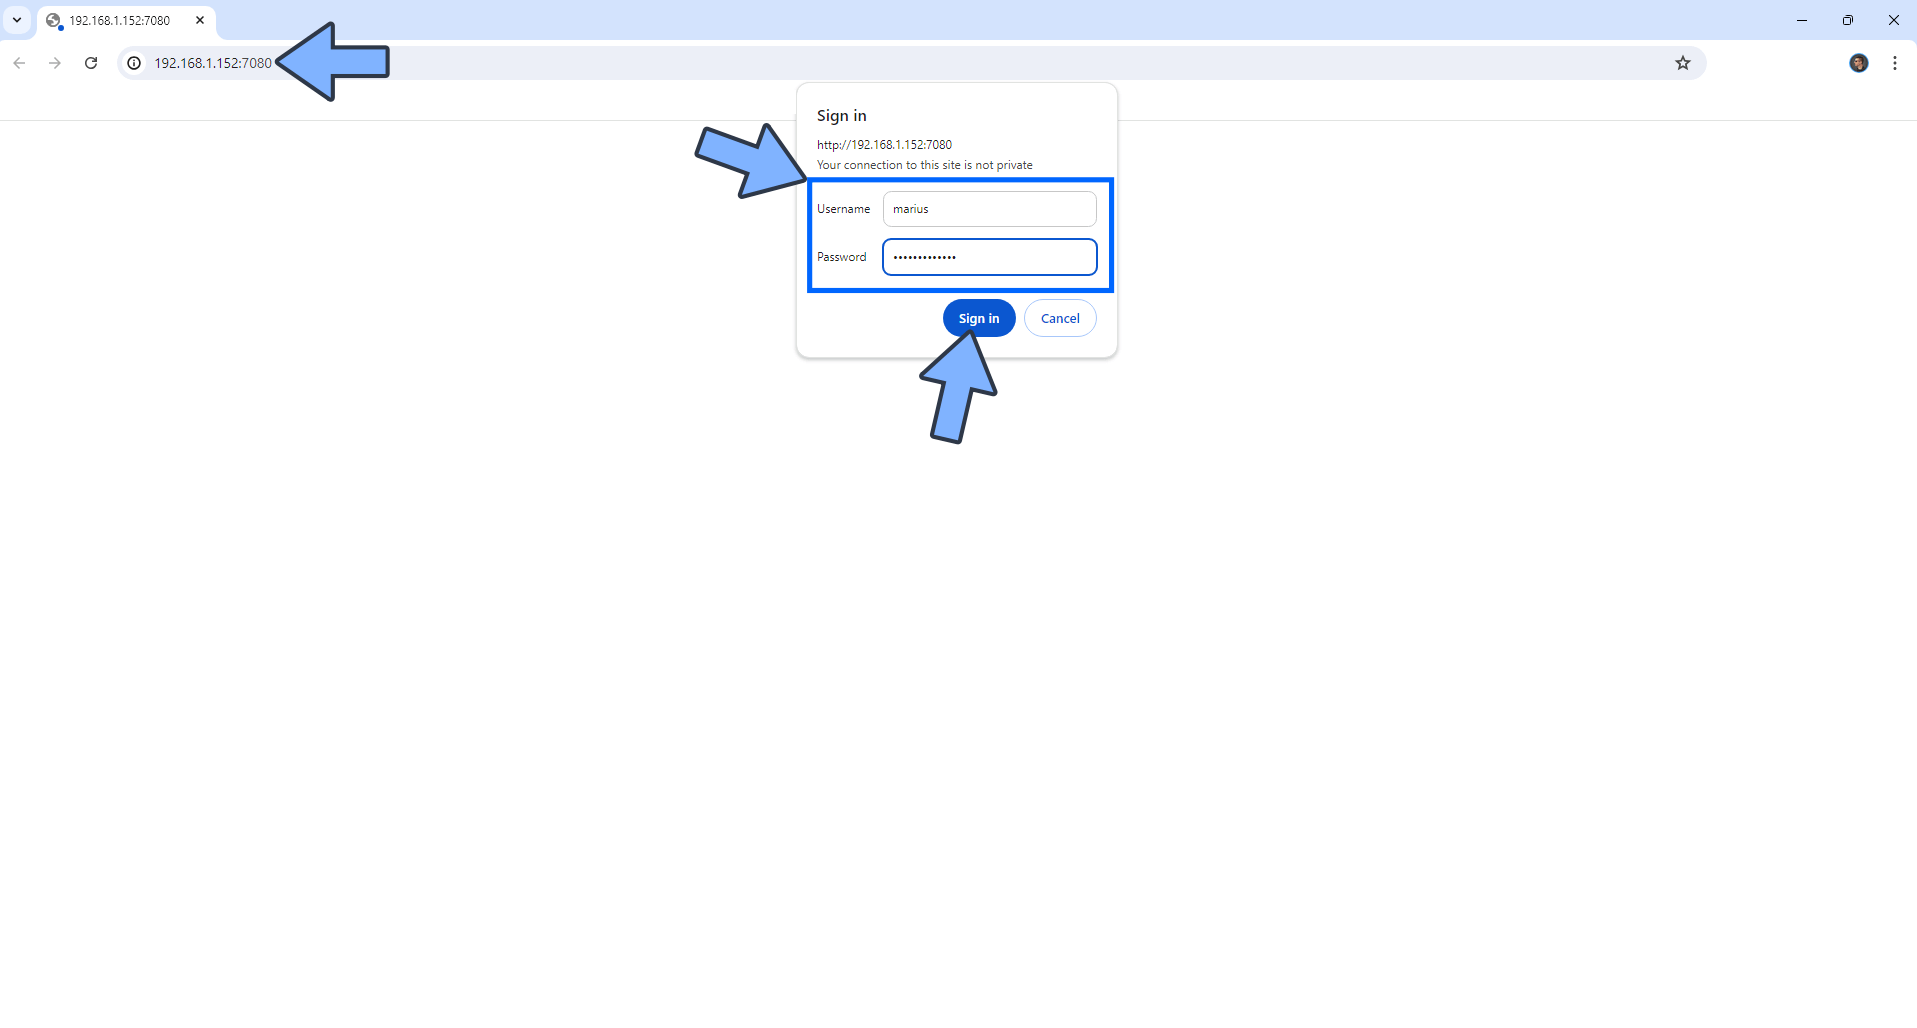
The installation process can take up to a few seconds/minutes. It will depend on your Internet speed connection. Now open your browser and type in http://ugreennas-ip-address:7080 If everything goes right, you will see the Calibre Login page. Type in your own CUSTOM_USER and PASSWORD that you have previously created at STEP 6, then click Sign In. Follow the instructions in the image below.
STEP 11
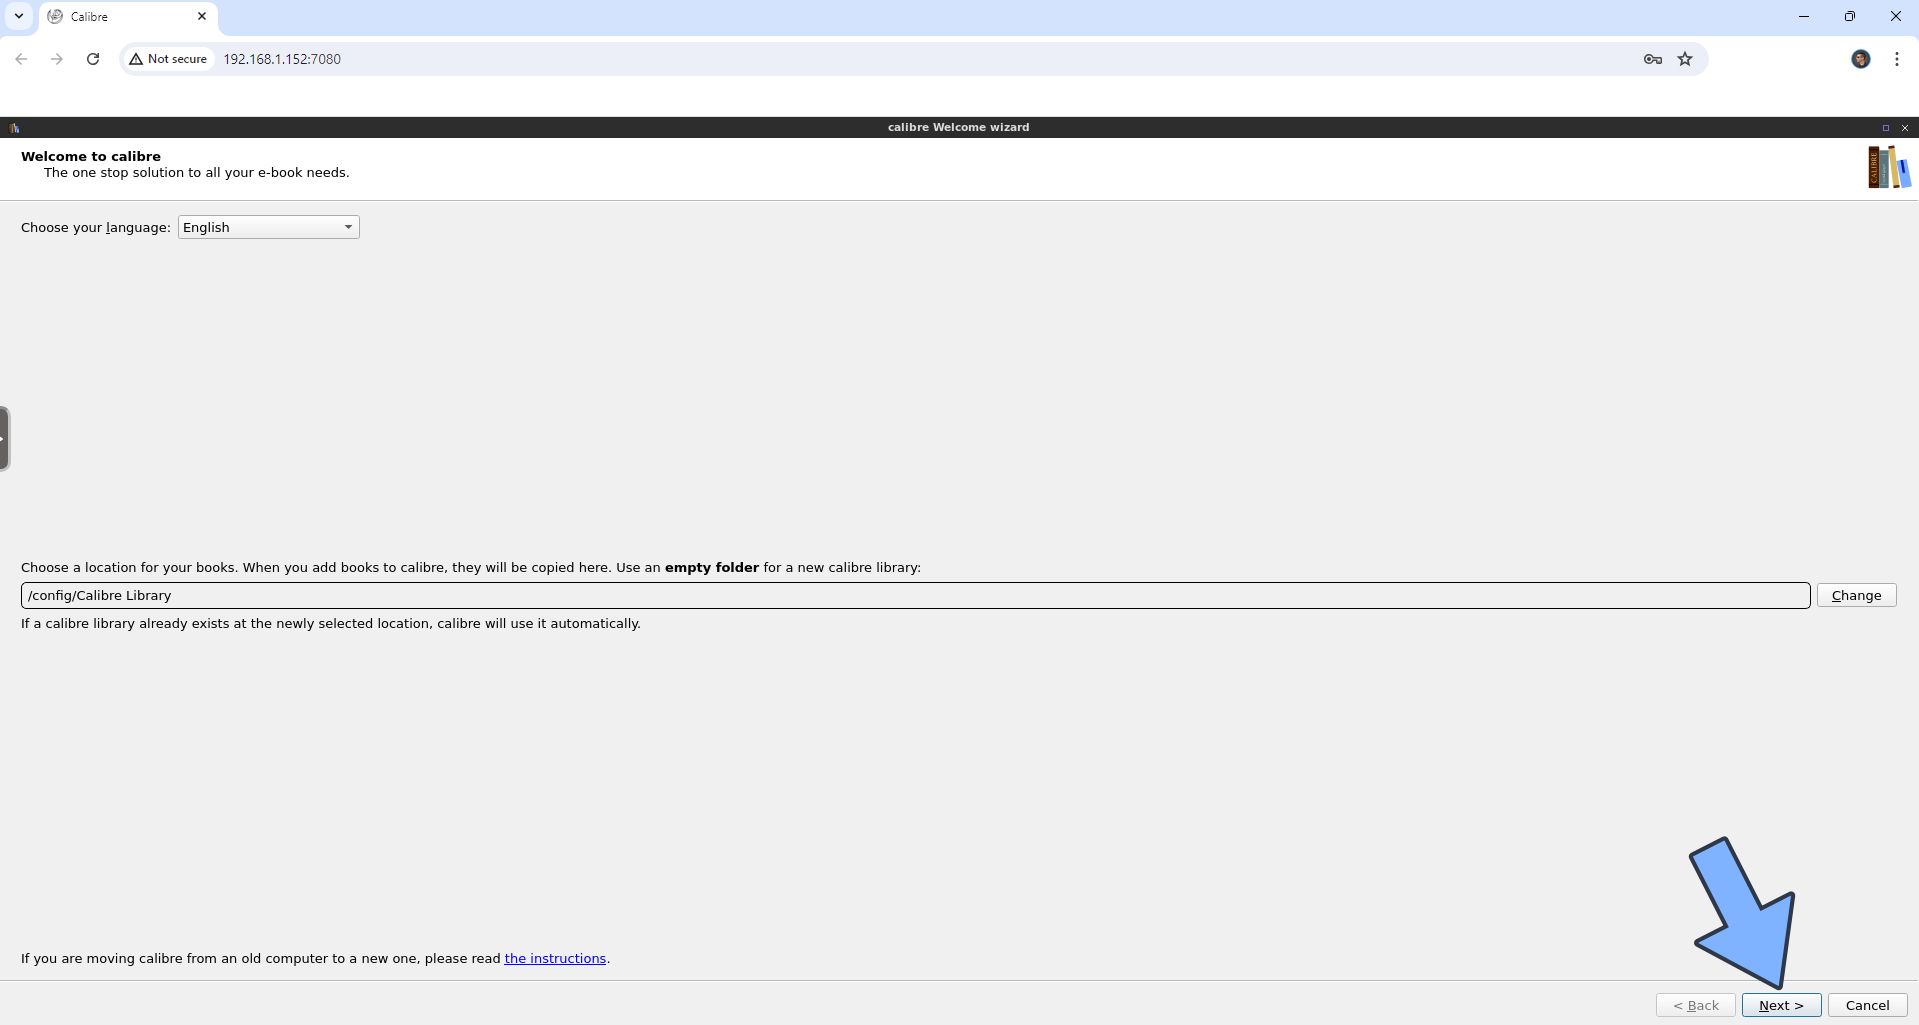
Choose your language, your calibre library, then click Next. Note: If you don’t get the welcome wizard, try to use the edge browser. If this doesn’t not work either, remember that a fresh browser page rather than a tab allows it to work at least every other time.
STEP 12
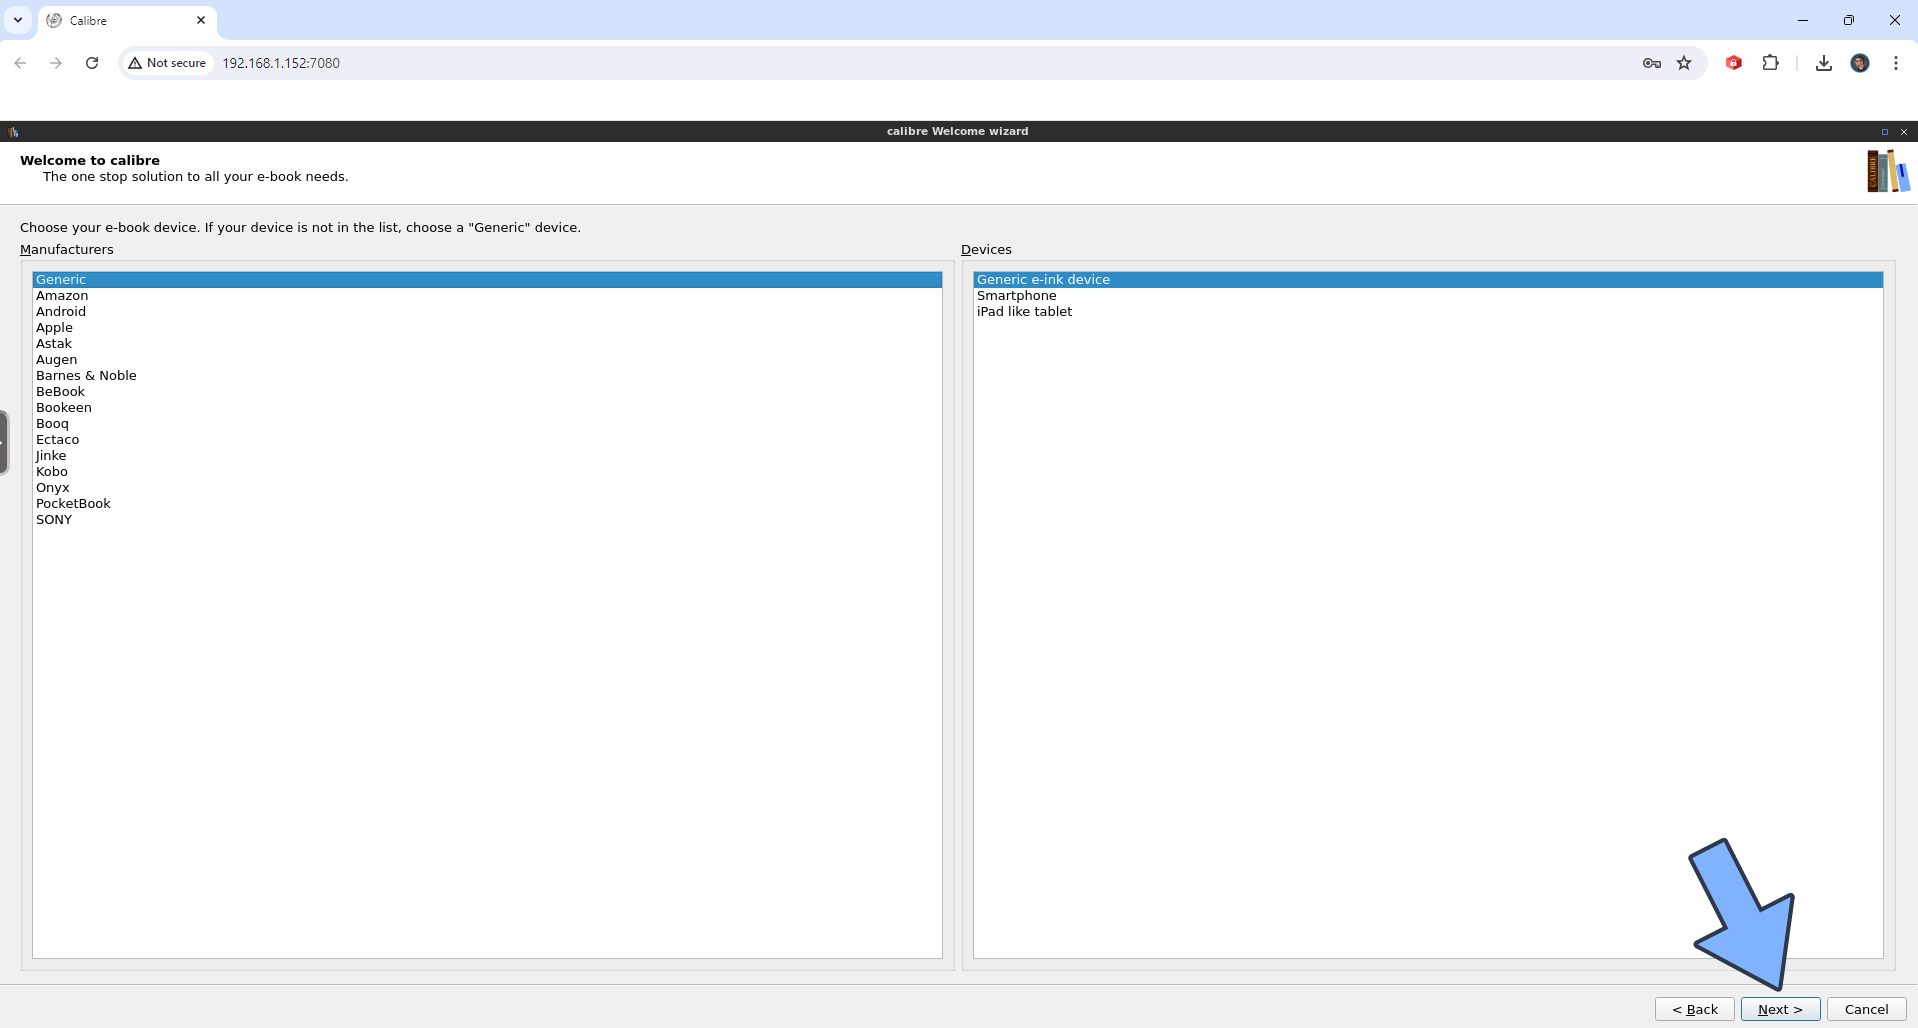
Choose your e-book device, then click Next.
STEP 13
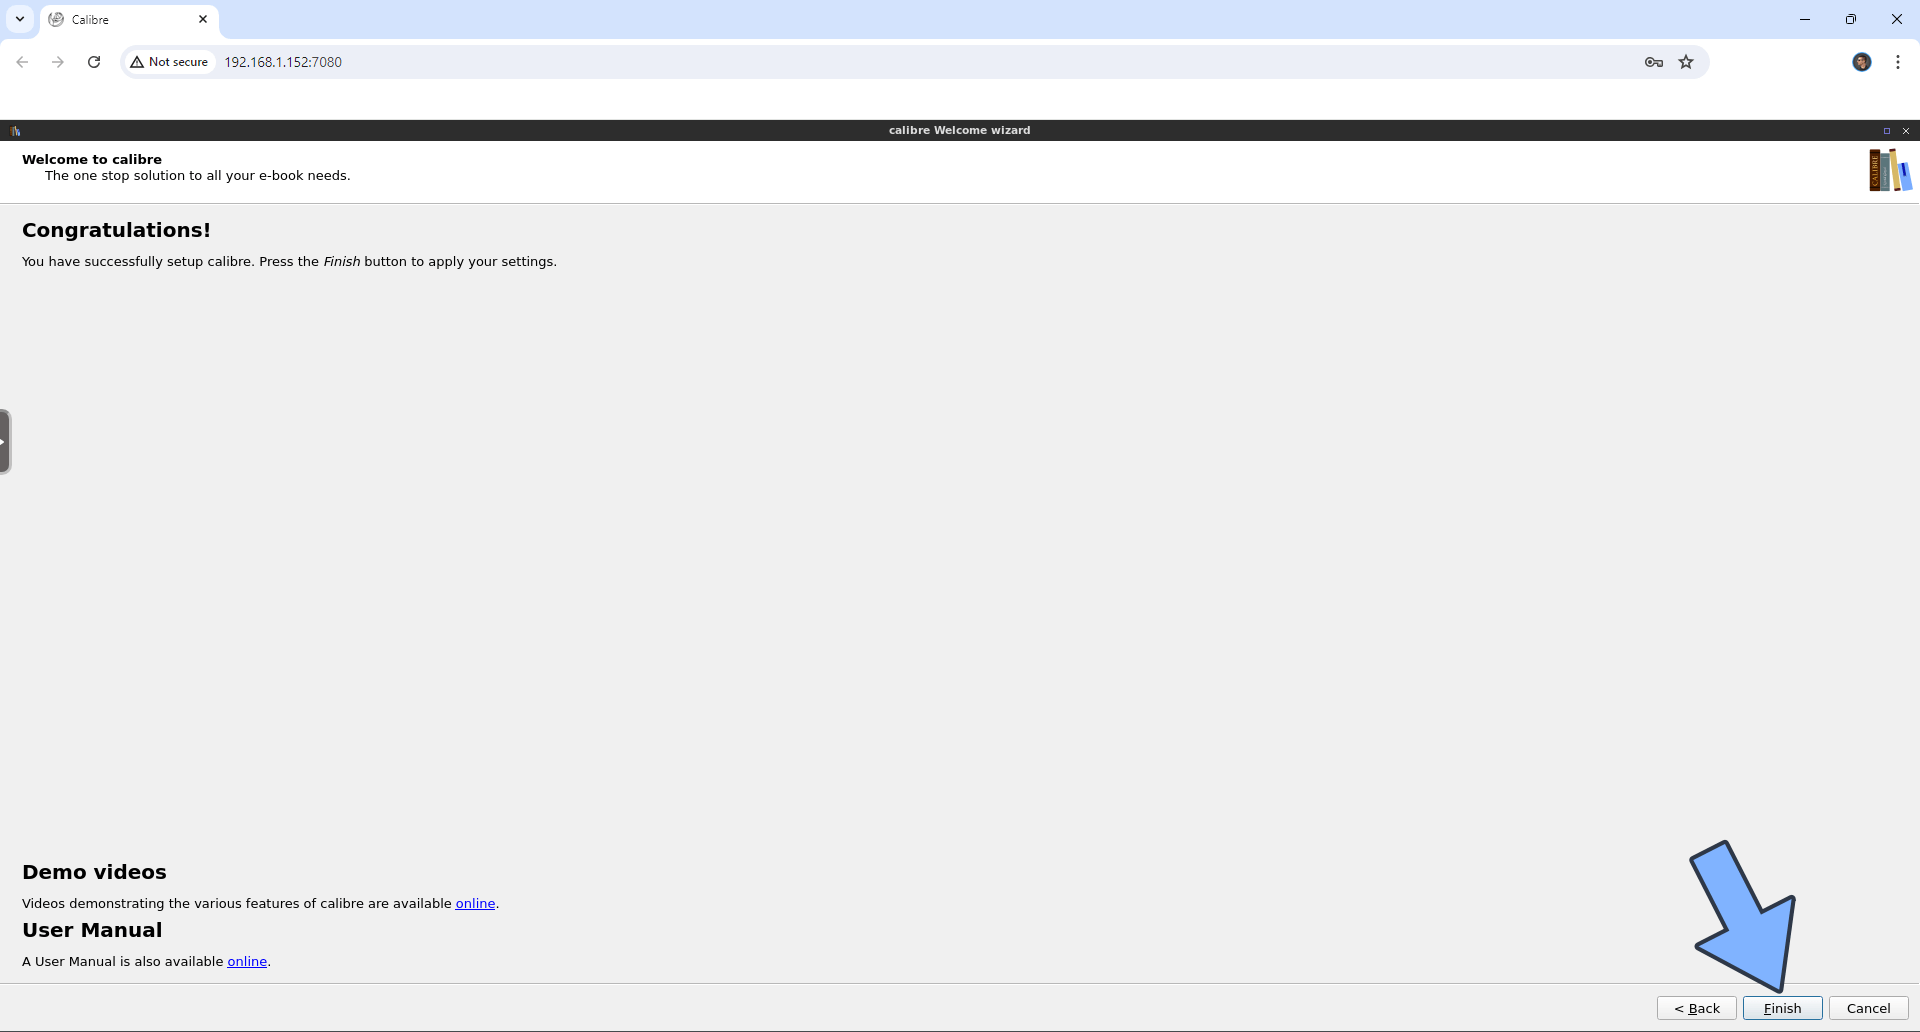
Congratulations! You have successfully set up calibre. Click Finish to apply your settings.
STEP 14
Your Calibre dashboard at a glance!
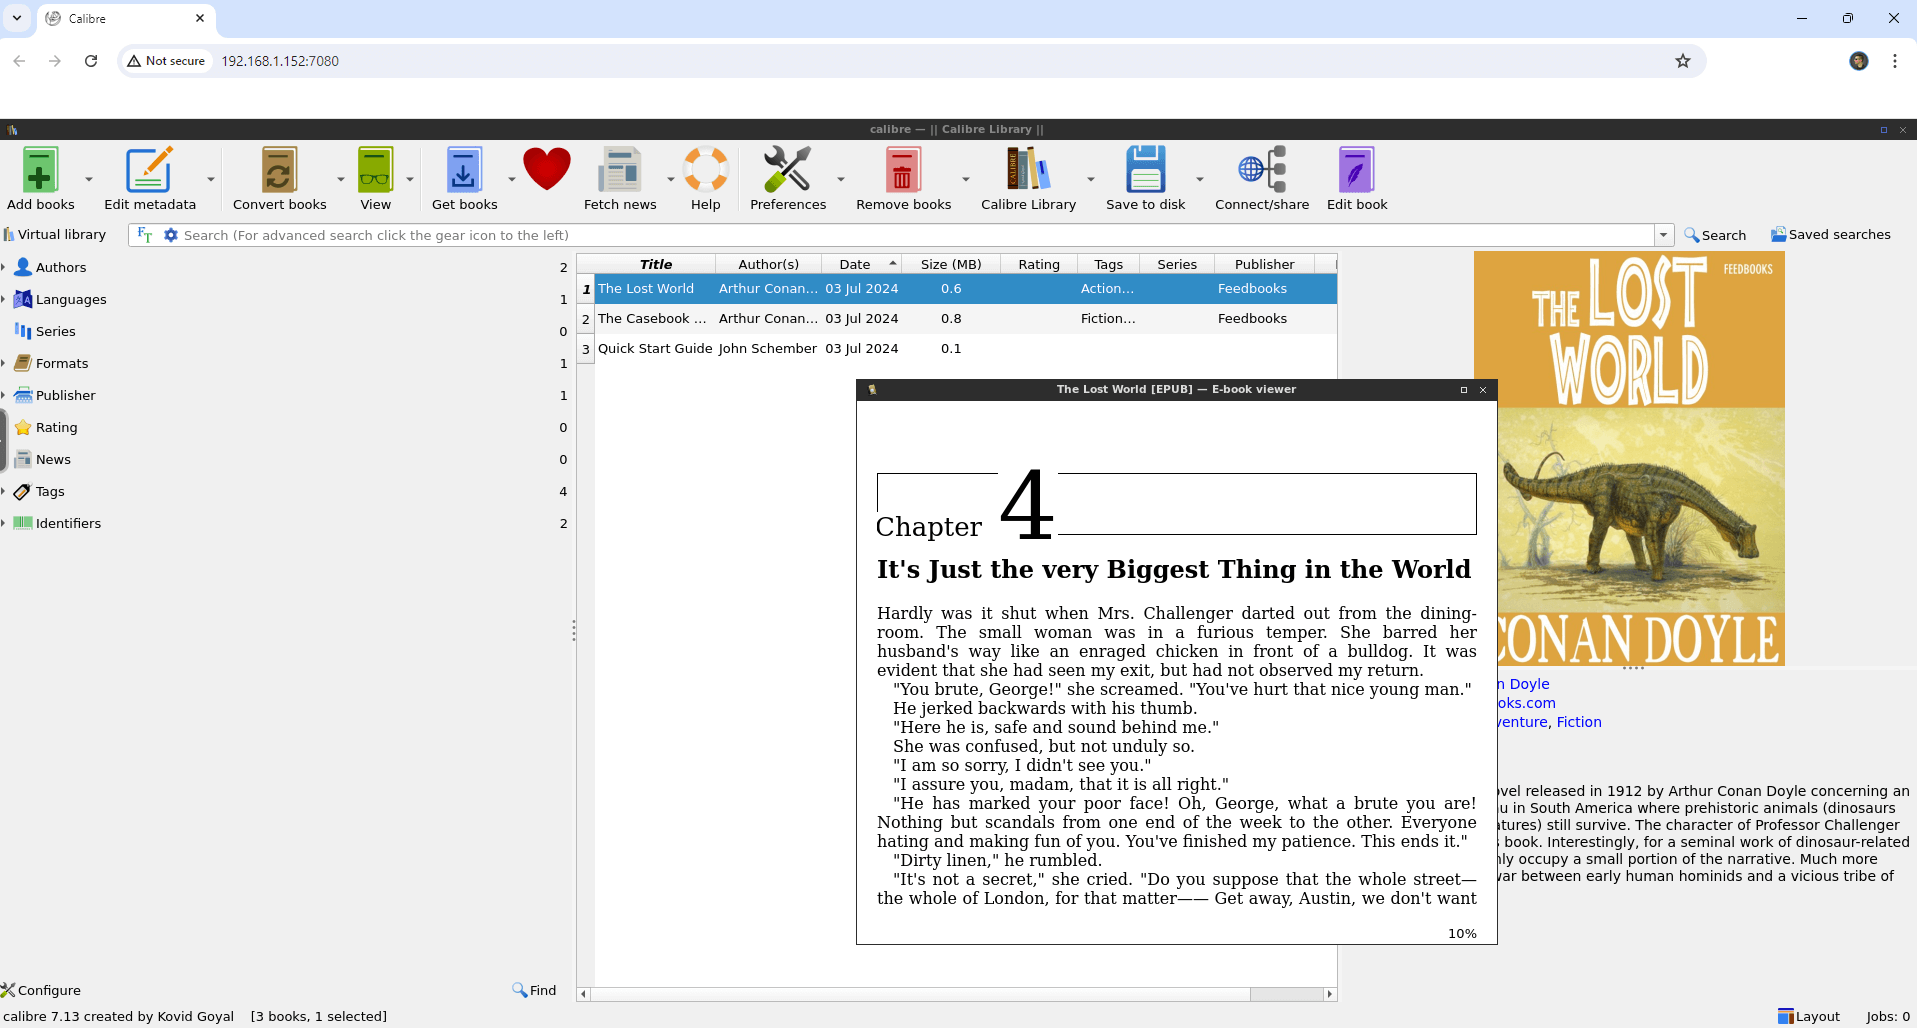
Enjoy Calibre on your UGREEN NAS!
Remember: Your ebooks should be inserted in the following path folder /volume1/docker/calibre/Calibre Library
Note: If you want to run the Calibre container over HTTPS, check out How to Run Docker Containers Over HTTPS on Your UGREEN NAS.
🆙Note/Update/Container: How to Update Your Docker Containers on UGREEN NAS Using Portainer.
This post was updated on Saturday / June 21st, 2025 at 3:34 PM
