Your Synology device likely has an Internal IP address which can only be accessed from machines (PC, tablet, mobile phone) on your internal network. If you want to access your Synology NAS from external devices, anywhere on the Internet, then you need to “map” the external IP address of your router to the Internal address of your Synology. You also need to map your own hostname (e.g. imthebest.synology.me) to that external IP address, so that users don’t have to remember an IP address.
Mapping an External IP to an Internal IP address.
This is normally referred to as ‘port forwarding’ and needs to be set up on your router. You need to set up port 80 (for http) and port 443 (for https). Also, if you want to be able to install new Themes and Plugins, and update them, once you have WordPress installed, you will need ports 21-22 for FTP/SFTP. I can’t go into all the details for every router, but on my D-Link router things were fairly obvious from the Admin – Advanced menus – Port Forwarding.
Mapping a hostname to your external IP address.
This is known as setting up a DNS record, pointing your own hostname (e.g. imthebest.synology.me, or your own personal domain) to an IP address. The first problem is that most domestic broadband connections do not keep the same external IP address forever, as your ISP can change it (at their convenience) from time to time. If this applies to you, then you have two options:
- Buy a fixed IP address (from your ISP), or if you’re like me and are trying to do everything ‘for free’ (which is why I’m trying to set up my website on my Synology, so that I don’t have to pay for hosting), then you need to set up a ‘Dynamic DNS system’ which will constantly keep track of your external IP address, and change the DNS setting as the IP address changes.
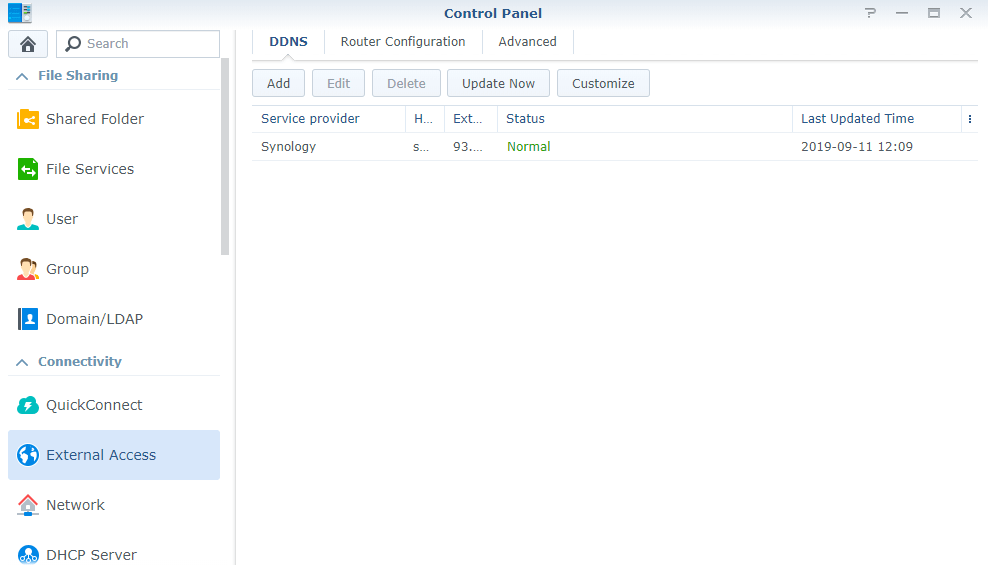
Dynamic DNS (DDNS)
There are several Free Dynamic DNS providers, and I have tried a few, such as NoIP, DtDNS, FreeDNS, synology.me etc. (my favorite is obviously synology.me). They offer slightly different services (for free), but you will also have to set up on an internal machine an automatic system which will constantly tell them what your external IP address is. You can do this on:
- Your PC or MAC,
- This will of course only work while your computer is on, so if your IP address changes overnight, that won’t be flagged up until the next morning, or if you go away for several days and switch your computer off…
- Your Synology device,
- Is ideal (see more below).
Again, setting up the dynamic DDNS on your Synology (Control Panel / External Access / DDNS) or your Router is fairly straightforward. You will need to enter your login details for the DDNS provider, and the hostname(s) you’ve chosen. Both should show you whether they are successfully working.
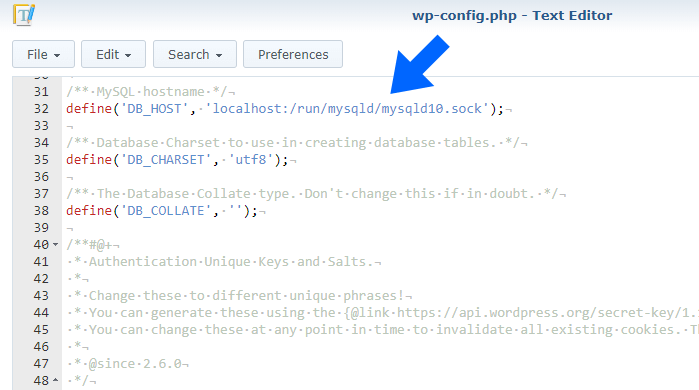
Whatever I tried, I kept on getting Server 500 errors after my WordPress installation.

Most suggestions are to try ‘localhost’ or 127.0.0.1 as the hostname of your phpmyadmin database (assuming it is on the Synology device). The only thing that worked for me using MariaDB 10, was ‘localhost:/run/mysqld/mysqld10.sock‘ so edit your WordPress wp-config.php file and set on DB_HOST ‘localhost:/run/mysqld/mysqld10.sock‘ (Follow the instructions in the image below.)
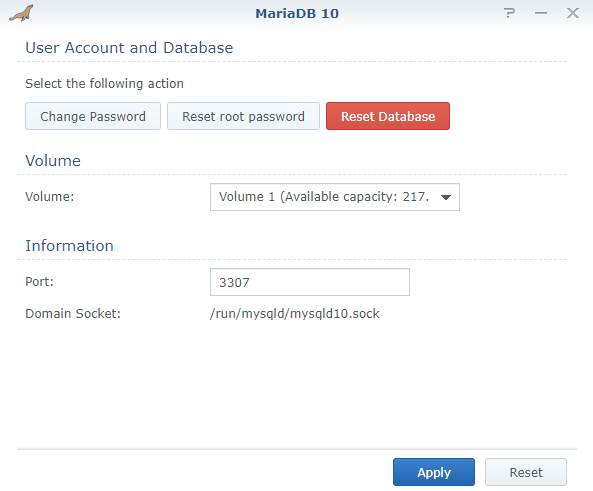
As you can see in the image below, MariaDB 10 has the exact Domain Socket you need.
WordPress itself needs direct FTP access if you ever want to install new Themes or Plugins. You will of course need to do “Port Forwarding” 80/443 for web traffic, and 21/22 for FTP/SFTP, both TCP/UDP. Read my previous article on How To Set Up FTP on Synology Nas.
This post was updated on Sunday / September 15th, 2019 at 10:12 PM